
Related Manuals for Kubota RTV1140 CPX


Summary of Contents for Kubota RTV1140 CPX
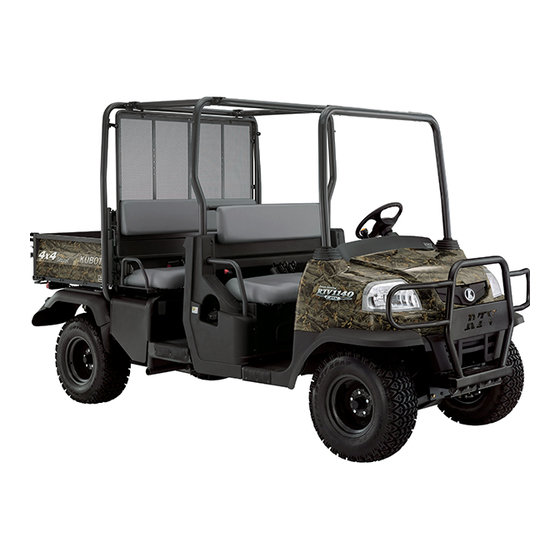
- Page 1 OPERATOR'S MANUAL UTILITY VEHICLE 1AYAACAAP0010 Code No. K7611-7121-5 READ AND SAVE THIS MANUAL PRINTED IN U.S.A. © KUBOTA Corporation 2009...
- Page 2 KUBOTA Corporation is ··· ASTM American Society for Testing and Materials, USA Deutsches Institut für Normung, GERMANY Since its inception in 1890, KUBOTA Corporation has grown to rank as one of the major firms in Japan. Feet Per Minute Hydrostatic Transmission...
-
Page 3: Control Symbols
UNIVERSAL SYMBOLS As a guide to the operation of your vehicle, various universal symbols have been utilized on the instruments and controls. The symbols are shown below with an indication of their meaning. Safety Alert Symbol Lift Cylinder-Retract Diesel Fuel Lift Cylinder-Extend Hourmeter/Elapsed Operating Hours Lift Cylinder-Float... -
Page 4: Safety First
FOREWORD You are now the proud owner of a KUBOTA Vehicle. This vehicle is a product of KUBOTA quality engineering and manufacturing. It is made of excellent materials and under a rigid quality control system. It will give you long, satisfactory service. -
Page 5: Table Of Contents
CONTENTS SAFE OPERATION .................... SERVICING OF VEHICLE................... 1 SPECIFICATIONS....................... 2 SPECIFICATION TABLE ..................2 TRAVELING SPEEDS ..................... 3 VEHICLE LIMITATIONS....................4 INSTRUMENT PANEL AND CONTROLS..............5 LOCATION OF PARTS.................... 5 PRE-OPERATION CHECK ..................9 DAILY CHECK ......................9 OPERATING THE ENGINE..................10 STARTING THE ENGINE .................. - Page 6 CONTENTS PARKING ....................... 23 Parking Brake Lever ....................... 23 ACCESSORY......................23 12V Electric Outlet ......................23 Utility Box........................23 OPERATING TECHNIQUES ................. 24 Differential Lock ......................24 Directions for Use of Power Steering................25 Unfamiliar Terrain ......................25 Driving in Reverse ......................25 Driving in "4WD"...
- Page 7 CONTENTS Checking and Refueling....................46 Checking Engine Oil Level....................47 Checking Hydraulic Tank Oil Level................. 48 Checking Transmission Fluid Level ................48 Checking Coolant Level....................49 Cleaning Radiator Screen....................49 Checking Brake Fluid Level .................... 50 Checking Brake Pedal ....................50 Checking Parking Brake ....................
- Page 8 CONTENTS EVERY 800 HOURS ....................71 Adjusting Engine Valve Clearance ................. 71 EVERY 1500 HOURS .................... 71 Checking Fuel Injection Nozzle Injection Pressure............71 EVERY 3000 HOURS .................... 71 Checking Injection Pump ....................71 EVERY 1 YEAR ..................... 71 Replacing Air Cleaner Primary Element and Secondary Element........71 EVERY 2 YEARS....................
- Page 9 Replace worn or damaged parts promptly. Check the If any structural member of the ROPS is damaged, tightness of all nuts and bolts regularly. (For further replace the entire structure at your local KUBOTA details, see "MAINTENANCE" section.) Dealer. 14. Keep your vehicle clean. Dirt, grease, and trash build up may contribute to fires and lead to personal injury.
-
Page 10: Operating The Vehicle
SAFE OPERATION 4. Avoid sudden starts. To avoid rollovers, slow down 2. OPERATING THE VEHICLE when turning, on uneven ground, and before stopping. While increasing engine speed with the engine hand throttle (if equipped), operate the speed control pedal Operator safety is a priority. Safe operation, specifically with great care to avoid sudden starts. - Page 11 SAFE OPERATION 4. Do not stop or start suddenly when going uphill or 3. Turn the headlights on. downhill. Be especially cautious when changing 4. Drive at speeds that allow you to maintain control at all direction on slopes. times. 5.
- Page 12 SAFE OPERATION 8. To avoid sparks from an accidental short circuit, always disconnect the battery's ground cable (-) first and reconnect it last. (1) Parking brake lever (1) Battery 5. TRANSPORTING 9. Do not remove radiator cap while coolant is hot. When 1.
- Page 13 17. Waste products such as used oil, fuel, hydraulic fluid, and batteries, can harm the environment, people, pets and wildlife. Please dispose properly. See your local Recycling Center or KUBOTA Dealer to learn how to recycle or get rid of waste products.
- Page 14 SAFE OPERATION 7. DANGER, WARNING AND CAUTION LABELS...
- Page 15 SAFE OPERATION...
- Page 16 SAFE OPERATION...
- Page 17 SAFE OPERATION...
- Page 18 SAFE OPERATION...
- Page 19 SAFE OPERATION...
- Page 20 SAFE OPERATION...
- Page 21 2. Clean danger, warning and caution labels with soap and water, dry with a soft cloth. 3. Replace damaged or missing danger, warning and caution labels with new labels from your local KUBOTA Dealer. 4. If a component with danger, warning and caution label(s) affixed is replaced with new part, make sure new label(s) is(are) attached in the same location(s) as the replaced component.
-
Page 23: Safe Operation
However, when in need of parts or major service, be sure to see your KUBOTA Dealer. For service, contact the KUBOTA Dealership from which you purchased your vehicle or your local KUBOTA Dealer. When in need of parts, be prepared to give your dealer both the vehicle and engine serial numbers. -
Page 24: Specifications
SPECIFICATIONS SPECIFICATIONS SPECIFICATION TABLE Model Worksite/Orange Worksite/Camo Make D1105 Type 3 cylinders, 4-cycle, diesel, OHV Displacement L (cu. in.) 1.123 (68.53) Engine Horsepower kW (HP) 18.5 (24.8) Rated revolution 3000 Low idling revolution 1300 to 1400 Fuel Capacity L (U.S.gals) 30 (7.9) Transmission Continuously variable hydro transmission (VHT) -
Page 25: Traveling Speeds
SPECIFICATIONS Model Worksite/Orange Worksite/Camo Width mm (in.) 1320 (52) Length (1 row/2 row) mm (in.) 1360 (53.5) / 860 (33.9) Depth mm (in.) 290 (11.4) Volume (1 row/2 row) m (cu.ft.) 0.53 (18.7) / 0.33 (11.7) Cargo bed Bed height mm (in.) 850 (33.5) (unloaded) -
Page 26: Vehicle Limitations
Use with implements which are not sold or approved by KUBOTA and which exceed the maximum specifications listed below, or which are otherwise unfit for use with the KUBOTA Vehicle may result in malfunctions or failures of the vehicle, damage to other property and injury to the operator or others. [Any malfunctions or failures of the vehicle resulting from use with improper implements are not covered by the warranty] Max. -
Page 27: Instrument Panel And Controls
INSTRUMENT PANEL AND CONTROLS INSTRUMENT PANEL AND CONTROLS LOCATION OF PARTS ILLUSTRATED CONTENTS (1) Work light (if equipped)........18 (2) ROPS............. -- (3) Hazard / Turn signal light (if equipped)... 16, 16 (4) Front hood............44 (5) Headlights............16 (6) Winch mount plate.......... 37 (7) Front trailer hitch bracket........ - Page 28 INSTRUMENT PANEL AND CONTROLS ILLUSTRATED CONTENTS ILLUSTRATED CONTENTS (1) Steering wheel..........-- (10) Range gear shift lever........19 (2) Cup holder............-- (11) Speedometer..........22 (3) Head light switch..........16 (12) Hourmeter............22 (4) Horn button............17 (13) Coolant temperature gauge......22 (5) Key switch............
- Page 29 INSTRUMENT PANEL AND CONTROLS ILLUSTRATED CONTENTS (1) Seat belts............15 (2) Seat (Front)............ 44 (3) Seat (Rear)............ -- (4) Differential lock pedal........24 (5) Differential lock holder........24 (6) Parking brake lever........23 (7) Hydraulic lift cylinder lever......33...
- Page 30 INSTRUMENT PANEL AND CONTROLS ILLUSTRATED CONTENTS ILLUSTRATED CONTENTS (1) Cargo bed............29 (7) Fuel tank cap............ 46 (2) Tailgate............32 (8) Hydraulic outlet for lift cylinder......33 (3) Tail lamp (Combination lamp if equipped)..16 (9) Backup beeper (if equipped)......52 (4) Muffler..............
-
Page 31: Pre-Operation Check
PRE-OPERATION CHECK PRE-OPERATION CHECK DAILY CHECK To prevent trouble from occurring, it is important to know the condition of the vehicle well. Check it before starting. To avoid personal injury: A Be sure to check and service the vehicle on a level surface with the engine shut off and the parking brake "ON"... -
Page 32: Operating The Engine
OPERATING THE ENGINE OPERATING THE ENGINE STARTING THE ENGINE To avoid personal injury: 1. Make sure the parking brake is set. A Read "SAFE OPERATION" in front of this manual. A Read the danger, warning and caution labels located on the vehicle. A To avoid danger... - Page 33 OPERATING THE ENGINE 2. Set the range gear shift lever to the 4. Push the speed control pedal down "NEUTRAL" position. about 1/2 way. (1) Range gear shift lever (L) LOW Range (1) Speed control pedal (A) "INCREASE" (H) HIGH Range (R) "REVERSE"...
-
Page 34: Cold Weather Starting
OPERATING THE ENGINE C Check Easy Checker(TM) Lamps: 1. When the key is turned "ON", lamps(2)(3) should 7. Turn the key to "START" position and come on. If trouble should occur at any location while release when the engine starts. the engine is running, the warning lamp corresponding to that location comes on. -
Page 35: Stopping The Engine
OPERATING THE ENGINE STOPPING THE ENGINE JUMP STARTING 1. After slowing the engine to idle, turn the key to "OFF". 2. Remove the key. To avoid personal injury: WARMING UP A Battery gases can explode. Keep cigarettes, sparks, and flames away from battery. A If vehicle battery is frozen, do not jump start engine. - Page 36 OPERATING THE ENGINE (1) Dead battery (2) Lay a damp rag over the vent caps (3) Jumper cables (4) Helper battery A This vehicle has a 12 volt negative (-) ground starting system. A Use only same voltage for jump starting. A Use of a higher voltage source could result in severe damage to vehicle's electrical system.
-
Page 37: Operating The Vehicle
OPERATING THE VEHICLE OPERATING THE VEHICLE OPERATING NEW VEHICLE STARTING How a new vehicle is handled and maintained determines 1. Fasten the seat belt. the life of the vehicle. A new vehicle just off the factory production line has been, of course, tested, but the various parts are not BSeat Belt accustomed to each other, so care should be taken to... -
Page 38: Head Light Switch
OPERATING THE VEHICLE 2. Selecting light switch position. BHazard Light Switch [if equipped] Press the top half of the hazard light switch, the hazard BHead Light Switch light flash along with the indicator on the instrument panel. The head light switch is operative when the key switch is Press the bottom half of the hazard light switch to turn off in the "ON"... -
Page 39: Horn Button
OPERATING THE VEHICLE BHorn Button The horn switch is operative when the key switch is in either the "ON" or "OFF" position. The horn will sound when the horn button is pressed. (1) Horn button (1) Head light (2) Hazard / Turn signal light (if equipped) (3) Tail lamp (Combination lamp if equipped) -
Page 40: Work Light (Front/Rear)
OPERATING THE VEHICLE 3. Checking the brake pedal. BWork Light (Front/Rear) [if equipped] When the key switch is turned to the "ON" position and the BBrake Pedal slide switch at the rear of each work light is slid to the "ON" position, the work light comes on. -
Page 41: Range Gear Shift Lever
OPERATING THE VEHICLE 4. Selecting the travel speed. B4WD Lever BRange Gear Shift Lever To avoid personal injury: A Do not engage the front wheel drive when To avoid personal injury: traveling at road speed. A Avoid changing range gear shift lever when A When driving on icy, wet or loose surfaces, ascending or descending a slope. -
Page 42: Parking Brake Lever
OPERATING THE VEHICLE STOPPING 5. Unlock the parking brake and start BStopping slowly. 1. Release the speed control pedal. 2. Step on the brake pedal. BParking Brake Lever 3. After the vehicle has stopped, put the range gear shift To release the parking brake, depress the brake pedal, lever in neutral, and set the parking brake. -
Page 43: Check During Driving
If the alternator is not charging the battery, the Easy Checker(TM) will come on. If this should happen during operation, check the electrical charging system or consult your local KUBOTA Dealer. ) Alarm against low brake fluid level or parking brake operation. -
Page 44: Coolant Temperature Gauge
OPERATING THE VEHICLE BCoolant Temperature Gauge BSpeedometer The speedometer indicates the traveling speed. To avoid personal injury: A Do not remove radiator cap until coolant temperature is well below its boiling point. Then loosen cap slightly to the stop to relieve any pressure before removing cap completely. -
Page 45: Parking
OPERATING THE VEHICLE PARKING ACCESSORY BParking Brake Lever B12V Electric Outlet The 12 volt receptacle is located on the front-panel. An auxiliary light or other devices may be connected to this connector. To avoid personal injury: Before dismounting vehicle C This outlet is activated when the key switch is in A Always set parking brake and lower all either the "ON"... -
Page 46: Operating Techniques
OPERATING THE VEHICLE OPERATING TECHNIQUES C Handling the retaining device for differential lock 1. Pull the differential lock holder while the differential BDifferential Lock lock pedal is depressed. 2. The differential lock is then maintained even if your foot leaves the pedal. 3. -
Page 47: Directions For Use Of Power Steering
OPERATING THE VEHICLE BDirections for Use of Power Steering BDriving in Reverse 1. Power steering is activated only while the engine is running. While the engine is stopped, the vehicle functions in the same manner as vehicle without To avoid personal injury: power steering. -
Page 48: Driving In "4Wd
OPERATING THE VEHICLE BDriving in "4WD" BTurning the Vehicle To avoid personal injury: To avoid personal injury: A Do not drive in "4WD" on paved surfaces. A Reduce vehicle speed before entering the turn and maintain an even speed through the turn. For maximum traction, shift the range gear shift lever into A Do not make sharp turns in order to avoid loss low range and use "4WD"... -
Page 49: Hills
OPERATING THE VEHICLE BTraversing Hillsides BHills To avoid personal injury: To avoid personal injury: A Do not turn sideways on a hill, or the vehicle A Reduce vehicles speed to prevent tipping or may roll over. loss of control. A Always go straight up hill or down hill. A Do not traverse hillsides that are slippery or A Slow down until you can get a clean view of the covered with rocks or obstacles which may... -
Page 50: Driving Through Water
OPERATING THE VEHICLE BDriving through Water To avoid personal injury: A Do not drive through water whenever it is possible. A Drive slowly across shallow water and choose a location to enter and exit the water where the banks are not too steep or slippery. A Check before entering for rocks, holes or other obstacles that may cause overturn, become stuck or submerged. -
Page 51: Seating And Cargo Bed
SEATING AND CARGO BED SEATING AND CARGO BED CARGO BED BGeneral Caution To avoid personal injury: A Never carry passengers in the cargo bed. They can be tossed about or even thrown off causing serious injury or death. A Driving with the cargo bed tilted may be hazardous. Always lower the bed and lock the hydraulic lift cylinder lever before driving. -
Page 52: Changing Seating And Cargo Bed
SEATING AND CARGO BED CHANGING SEATING AND CARGO BED 3. Unhook the seat latches and flip up the rear seat forward. To avoid personal injury: A Be sure to lower the cargo bed, stop the engine and apply the parking brake before changing seating and cargo bed. - Page 53 SEATING AND CARGO BED 4. Push rear seat forward until seat latches hook up 6. Pull out the pins on both sides of the front panel and securely. front cargo bed and hold on the notches securely. (1) Seat latch (A) "HOOK UP"...
-
Page 54: Cargo Bed Tailgate
SEATING AND CARGO BED 8. Flip up front panel and insert stoppers into the slit on both sides. BCargo Bed Tailgate To avoid personal injury: A Do not apply a load to the tailgate while the tailgate is open, or the wire loop may break. A Do not place fingers or hands between the tailgate and the arm (latch) when closing, or fingers or hands may be pinched. -
Page 55: Raising And Lowering The Cargo Bed
SEATING AND CARGO BED C Using the "FLOAT" position A TO AVOID TAILGATE DAMAGE: 1. If the cargo bed cannot be raised or lowered due to Remove the rear trailer hitch when wire loop is trouble with the engine or hydraulic system, shift the removed and cargo bed is raised. -
Page 56: Tires And Wheels
A Always maintain the correct tire pressure. Do not inflate tires above the recommended pressure shown in the operator's manual. A Do not use tires other than those approved by KUBOTA. BInflation Pressure C Turf tire Though the tire pressure is factory-set to the prescribed level, it naturally drops slowly in the course of time. -
Page 57: Wheels
TIRES AND WHEELS WHEELS To avoid personal injury: A Support vehicle securely on stands before removing a wheel. A Never operate vehicle with loose wheel bolts. A When re-fitting a wheel, tighten the bolts to the following torques then recheck after driving the vehicle 200 m (200 yards) and thereafter according to service interval. -
Page 58: Towing And Transporting
TOWING AND TRANSPORTING TOWING AND TRANSPORTING TOWING AND TRANSPORTING BFront Trailer Hitch BRear Trailer Hitch [if equipped] [if equipped] To avoid personal injury: To avoid personal injury: A Do not tow this vehicle unless all the functions A Always tow a load slowly enough to maintain of the vehicle are properly working, since the control and avoid tipping. -
Page 59: Winch Mount Plate
TOWING AND TRANSPORTING BWinch Mount Plate BTransport the Vehicle Safely Mounting the optional winch always requires reading the Pay attention to the points below when transporting the instruction manual attached to the winch thoroughly vehicle. before using it. 1. Use a suitable truck or trailer. 2. -
Page 60: Maintenance
*5 When the battery is used for less than 100 hours per year, check the battery condition by reading the indicator annually. A The items listed below (@marked) are registered as emission related critical parts by KUBOTA in the U.S.EPA non road emission regulation. - Page 61 MAINTENANCE Indication of Hour Meter After Ref. Items 700 hrs Page VHT pressure every Check release 100 hrs every Toe-in Adjust 100 hrs every Check 100 hrs Fuel filter element every Replace 500 hrs every Check 100 hrs Fuel line every Replace 2 years...
- Page 62 MAINTENANCE Indication of Hour Meter After Ref. Items 700 hrs Page every Knuckle case oil Change 400 hrs Engine valve every Adjust clearance 800 hrs Fuel injection every nozzle Injection Check 1500 hrs pressure every Injection pump Check 3000 hrs Brake Master every cylinder (inner...
-
Page 63: Lubricants, Fuel And Coolant
Until grease overflows (NLGI Grade No.2) Range gear shift lever pivot 4WD lever pivot moderate amount Rear drive shaft VHT pressure release pivot Throttle cable Antirust silicone grease *KUBOTA UDT or SUPER UDT fluid --- KUBOTA original transmission hydraulic fluid... - Page 64 Do not mix different brands together. C Brake fluid: Always use KUBOTA DOT3 GENUINE BRAKE FLUID from a sealed container. If it is not available, you should use only DOT3 fluid as a temporary replacement from a sealed container. However, the use of any non-KUBOTA brake fluid can cause corrosion and decrease the life of the system.
- Page 65 Do not mix different brands together. C Brake fluid: Always use KUBOTA DOT3 GENUINE BRAKE FLUID from a sealed container. If it is not available, you should use only DOT3 fluid as a temporary replacement from a sealed container. However, the use of any non-KUBOTA brake fluid can cause corrosion and decrease the life of the system.
-
Page 66: Periodic Service
PERIODIC SERVICE PERIODIC SERVICE To avoid personal injury: A Do not work under any hydraulically supported devices. They can settle, suddenly leak down, or be accidentally lowered. If necessary to work under vehicle or any vehicle elements for servicing or adjustment, securely support them with stands or suitable blocking beforehand. -
Page 67: How To Raise The Cargo Bed
PERIODIC SERVICE HOW TO RAISE THE CARGO BED To avoid personal injury: A When servicing under raised bed, make sure safety support is properly mounted. A Do not touch muffler or exhaust pipes while they are hot; Severe burns could result. BRaising and Lowering the Cargo Bed C To raise the cargo bed 1. -
Page 68: Jack-Up Point
PERIODIC SERVICE JACK-UP POINT DAILY CHECK For your own safety and maximum service life of the vehicle, make a thorough daily inspection before operating the vehicle to start the engine. To avoid personal injury, death or vehicle damage: A Do not work under the vehicle unless it is secured by safe stands or suitable blocking. -
Page 69: Checking Engine Oil Level
PERIODIC SERVICE A Do not permit dirt or trash to get into the fuel system. BChecking Engine Oil Level A Be careful not to let the fuel tank become empty, otherwise air will enter the fuel system, necessitating bleeding before next engine start. A Be careful not to spill during refueling. -
Page 70: Checking Hydraulic Tank Oil Level
PERIODIC SERVICE BChecking Hydraulic Tank Oil Level BChecking Transmission Fluid Level 1. Park the vehicle on a flat surface. 1. Park the vehicle on a flat surface, raise the cargo bed, 2. Stop the engine and remove the key. mount the safety support and shut off engine. 3. -
Page 71: Checking Coolant Level
A If the radiator cap has to be removed, follow the caution above and securely retighten the cap. A Use clean, fresh water and anti-freeze to fill the recovery tank. A If water should leak, consult your local KUBOTA Dealer. -
Page 72: Checking Brake Fluid Level
A Stop the engine and chock the wheels before below the "MIN" mark. checking brake pedal. A Use only KUBOTA DOT3 GENUINE BRAKE 1. Inspect the brake pedals for free travel, and smooth FLUID from a sealed container. Using other operation. -
Page 73: Checking Parking Brake
2. If the boots are cut, cracked or shows signs of Pull the parking brake lever to apply the brakes. With the deterioration, consult your local KUBOTA Dealer. key switch at "ON" position, the parking brake indicator on the instrument panel lights up. To release the brakes, push in the button at the tip of the parking brake lever and tilt down the lever. -
Page 74: Checking Tire Inflation Pressure
5. Shift the range gear shift lever to the "REVERSE" 25 x 10 - 12 HDWS, position. Front & Rear 6. If the backup beeper does not beep, consult your local KUBOTA Dealer. 25 x 12 - 12 Turf, Front & Rear 170 kPa (1.7 kgf/cm , 24 psi) -
Page 75: Every 50 Hours
PERIODIC SERVICE EVERY 50 HOURS BGreasing Apply a small amount of multi-purpose grease to the following points every 50 hours: If you operated the vehicle in extremely wet and muddy conditions, lubricate grease fittings more often. (1) VHT link (Grease fitting) (1) Parking brake pivot (spray type grease) (1) Range gear shift lever pivot (spray type grease) (2) 4WD lever pivot (spray type grease) -
Page 76: Oiling
PERIODIC SERVICE BOiling (1) Rear drive shaft (Grease fitting) (1) Accelerator wire (2) Fuel pump (1) Rear drive shaft (Grease fitting) (1) VHT pressure release pivot (Grease fitting) -
Page 77: Checking Engine Start System
7. Repeat the step 2 to 6 with the range gear shift lever they are hot; severe burns could result. at "M", "L" and "R" each position. 8. If it cranks, consult your local KUBOTA Dealer for 1. Park the vehicle on a level ground and set the parking service. -
Page 78: Checking Wheel Bolt Torque
PERIODIC SERVICE BCleaning Air Cleaner Primary Element 1. Remove the air cleaner cover and primary element. 2. Clean the primary element: (1) When dry dust adheres to the element, blow compressed air from the inside, turning the element. Pressure of compressed air must be under 205 kPa (2.1 kgf/cm , 30 psi). -
Page 79: Adjusting Alternator Belt Tension
PERIODIC SERVICE C Evacuator Valve Open the evacuator valve once a week under ordinary BChecking Fuel Line and Fuel Filter conditions - or daily when used in a dusty place - to get rid of large particles of dust and dirt. To avoid personal injury: A Be sure to stop the engine and remove the key BAdjusting Alternator Belt Tension... -
Page 80: Checking Battery Condition
PERIODIC SERVICE BChecking Battery Condition To avoid the possibility of battery explosion: refillable type battery, follow instructions below. A Do not use or charge the refillable type battery if the fluid level is below the LOWER (lower limit level) mark. Otherwise, the battery component parts may prematurely deteriorate, which may shorten the battery's service life or cause an explosion. -
Page 81: Adjusting Toe-In
PERIODIC SERVICE BAdjusting Toe-in Proper toe-in 0 to 20 mm (0 to 0.79 in.) 1. Park vehicle on a flat place. 2. Turn steering wheel so front wheels are in the straight ahead position. 3. Lock the park brake and stop the engine. 4. -
Page 82: Cleaning Muffler
Standard 5100-1c, "Spark Arresters Internal (2) Bolt Combustion Engines" for the RTV1140 CPX. (3) Spark arrester (4) Gasket Maintenance & cleanout procedure: The screen type spark arrester should be removed, cleaned, and inspected after every 100 hours of use. 1. The spark arrester is located inside of the exhaust pipe, and is fastened with two bolts. -
Page 83: Every 200 Hours
PERIODIC SERVICE EVERY 200 HOURS BChanging Engine Oil To avoid personal injury: A Be sure to stop the engine before changing the oil. A Allow engine to cool down sufficiently, oil can be hot and can burn. 1. Park the vehicle on a flat surface and raise the cargo bed. -
Page 84: Replacing Engine Oil Filter
(1) Engine oil filter (1) Transmission oil filter (HST) (Yellow color) A To prevent serious damage to the engine, use only a KUBOTA genuine filter. A To prevent serious damage to the transmission, use only a KUBOTA genuine filter. -
Page 85: Replacing Transmission Oil Filter [Suction]
4. Put a film of clean transmission oil on the rubber seal 6. Install the under guard. of the new filter. 7. Fill with new KUBOTA SUPER UDT fluid up to the 5. Quickly tighten the filter until it contacts the mounting upper notch on the dipstick. -
Page 86: Checking Brake Pedal
(1) Filling plug with dipstick (A) Oil level is acceptable within 3. If brake pedal stroke is outside of the specifications, this range contact your local KUBOTA Dealer for adjusting the brake. (1) Brake pedal (A) "FREE TRAVEL" (B) "PEDAL STROKE"... -
Page 87: Checking Brake Hose And Pipe
2. Check the brake case for brake fluid leak. 2. Check the brake hose and pipe joints for oil leaks. 3. If there is brake fluid leak, consult your local KUBOTA 3. If there is any abnormality, consult your local KUBOTA Dealer for this service. -
Page 88: Checking Brake Light Switch
PERIODIC SERVICE BChecking Brake Light Switch 1. Park the vehicle on a flat surface and raise the cargo bed. 2. Turn the key switch to the "ON" position. 3. Step on the brake pedal to check if the brake light comes on. -
Page 89: Checking Power Steering Line
PERIODIC SERVICE BChecking Power Steering Line BChecking Intake Air Line 1. Check to see that all lines and hose clamps are tight 1. Check to see if the hoses and hose clamps are tight and not damaged. and not damaged. 2. -
Page 90: Every 300 Hours
PERIODIC SERVICE EVERY 300 HOURS EVERY 400 HOURS BChecking Tire BChanging Knuckle Case Oil 1. Check to see if tires are not damaged. 1. Park the vehicle on a firm, flat and level surface. 2. If the tires are cracked, bulged, or cut, or they are worn 2. -
Page 91: Changing Transmission Fluid
(1) Drain plug 3. After draining, reinstall the drain plug. 4. Fill with the new KUBOTA SUPER UDT fluid up to the upper notch on the dipstick. A Do not operate the vehicle immediately after changing (See "LUBRICANTS, FUEL AND COOLANT"... -
Page 92: Replacing Hydraulic Tank Oil Filter
Oil capacity 0.6 L (0.6 U.S.qts.) 4. Put a film of clean KUBOTA SUPER UDT OIL on the rubber seal of the new filter. 5. Quickly tighten the filter until it contacts the mounting surface, then, with a filter wrench, tighten it an additional 1 turn only. -
Page 93: Every 500 Hours
EVERY 500 HOURS EVERY 2 YEARS BReplacing Fuel Filter BChanging Brake Fluid Consult your local KUBOTA Dealer for this service. Consult your local KUBOTA Dealer for this service. (See "Checking Brake Fluid Level" in "DAILY CHECK" in EVERY 800 HOURS "PERIODIC SERVICE"... -
Page 94: Antifreeze
A Also, observe the relevant environmental 7. Kubota's genuine long-life coolant has a service life of protection regulations when disposing of 2 years. Be sure to change the coolant every 2 years. -
Page 95: Replacing Radiator Hose (Water Pipes)
50%. In case of leakage, add antifreeze and water in BReplacing Brake Hose the specified mixing ratio before filling into the radiator. Consult your local KUBOTA Dealer for this service. SERVICE AS REQUIRED BReplacing Radiator Hose (Water pipes) BBleeding Fuel System Replace the hoses and clamps. -
Page 96: Replacing Fuse
A Before replacing a blown fuse, determine why the fuse blew and make any necessary repairs. Failure to follow this procedure may result in serious damage to the vehicle electrical system. Consult your local KUBOTA Dealer for specific information dealing with electrical problems. (1) Fuse puller (2) Fuse C Replacement procedure 1. -
Page 97: Replacing Slow-Blow Fuses
If any of them have blown out, be sure to pinpoint 2. Make sure that the water is not mixed with the oil. the cause. Never use any substitute, use only a KUBOTA 3. When the suction strainer is dirty, wash it with the light genuine part. -
Page 98: Storage
STORAGE STORAGE REMOVING THE VEHICLE FROM STORAGE To avoid personal injury: 1. Check the tire air pressure and inflate the tires if they A Do not clean the vehicle with engine running. are low. A To avoid danger exhaust fume 2. -
Page 99: Troubleshooting
A The motor driven fan does not turn. A Check to see if the fuse is not blown. A Check the electric system. A Dirty radiator core or grille screens. A Remove all trash. A Coolant flow route corroded. A Flush cooling system. If you have any questions, contact your local KUBOTA Dealer. -
Page 100: Battery Troubleshooting
* Refillable type battery only cells. A Charging system A Consult your local trouble. KUBOTA Dealer. A If you have any questions, consult your local KUBOTA Dealer. A The factory-installed battery is non-refillable type. -
Page 101: Machine Troubleshooting
Brakes not working correctly A Air is in brake system. A Consult your KUBOTA Dealer. A Brake pads are worn. A Consult your KUBOTA Dealer. A Consult your KUBOTA Dealer. Brake noise If you have any questions, consult your local KUBOTA Dealer. -
Page 102: Options
OPTIONS OPTIONS Consult your local KUBOTA Dealer for further details. A Backup Beeper A Bed Liner A Cab Heater (cab only) A Console Kit (for cab, with FM / AM / CD unit / blower / dome light) A Front Accessory Box... -
Page 103: Index
INDEX INDEX Fuel System........... 73 12V Electric Outlet..........23 Fuse............... 74 4WD Lever .............19 Gauges, Meter and Easy Checker(TM) ..51 Air Cleaner Primary Element......56 General Caution ..........29 Air Cleaner Primary Element and Secondary Greasing ............53 Element ............71 Hazard Light Switch........16 Alternator Belt Tension........57 Head Light Switch.......... - Page 104 INDEX Slow-Blow Fuses..........75 Speed Control Pedal ........20 Speedometer..........22 Stopping ............20 Tire ..............68 Tire Inflation Pressure ........52 Tire Type and Use..........34 Toe-in .............59 Transmission Fluid .........69 Transmission Fluid Level........48 Transmission Oil Filter [HST] ......62 Transmission Oil Filter [SUCTION] ....63 Transport the Vehicle Safely ......37 Traversing Hillsides ........27 Turn Signal Light Switch.........16 Turning the Vehicle ........26...
Need help?
Do you have a question about the RTV1140 CPX and is the answer not in the manual?
Questions and answers
Where are the fuses located
The fuses on a Kubota RTV1140 CPX are located in the fuse box, which is covered by a fuse box cover. To access the fuses, remove the fuse box cover. A fuse puller is provided to remove blown fuses.
This answer is automatically generated
where are all the fuses located on a 1140 cpx
The Kubota RTV1140 CPX has two slow burn fuses—a 60 amp alternator fuse and a 50 amp key switch fuse—located near four Denso relays. There is also a regular fuse box that should be checked for additional fuses.
This answer is automatically generated