NovaStar NovaPro UHD User Manual
All-in-one controller
Hide thumbs
Also See for NovaPro UHD:
- User manual (55 pages) ,
- User manual (52 pages) ,
- Manual (11 pages)
Table of Contents
Advertisement
Quick Links
Advertisement
Table of Contents

Related Manuals for NovaStar NovaPro UHD


Summary of Contents for NovaStar NovaPro UHD
- Page 1 NovaPro UHD All-in-One Controller V1.1.0 User Manual...
-
Page 2: Table Of Contents
NovaPro UHD All-in-One Controller User Manual Contents 1 Safety Instructions ................................1 1.1 Environmental Requirements ............................. 1 1.2 Operation Requirements ............................1 1.3 Personal Safety ................................. 1 1.4 Electrical Safety Labels .............................. 2 2 Overview ..................................2 3 Appearance ..................................2 3.1 Front Panel ................................ - Page 3 NovaPro UHD All-in-One Controller User Manual 5.11 Communication Settings ............................31 5.11.1 Communication Mode ..........................31 5.11.2 Network Settings ............................31 5.12 Langugage ................................31 6 Built-in Platform Master VI .............................. 32 6.1 Home Page ................................32 6.2 Screen Configuration ............................... 33 6.2.1 Adding Cabinets .............................
- Page 4 NovaPro UHD All-in-One Controller User Manual 7.5.7 HDR Settings ..............................86 7.5.8 Low Latency ..............................86 7.5.9 Firmware Update ............................87 7.5.10 Date and Time .............................. 88 7.5.11 Factory Reset ............................... 88 7.5.12 Change Password ............................89 7.5.13 Self-Test ............................... 90 8 Specifications .................................
-
Page 5: Safety Instructions
NovaPro UHD All-in-One Controller User Manual Safety Instructions 1.1 Environmental Requirements Ensure adequate air flow in the equipment Do not place the equipment in an area room. containing explosive materials. Take measures to prevent dust, water and Do not place the equipment in a corrosive static electricity. -
Page 6: Electrical Safety Labels
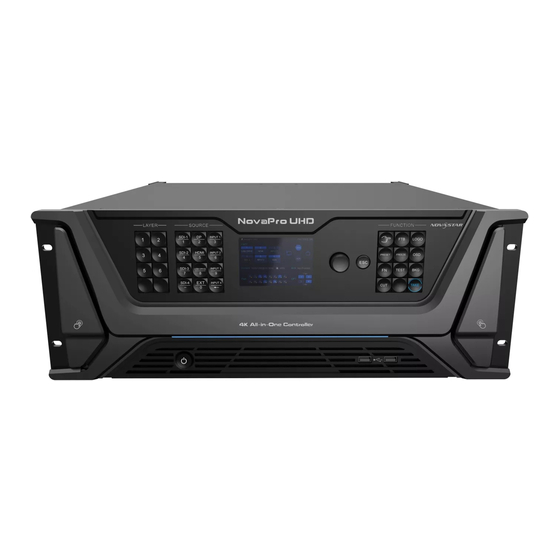
The NovaPro UHD can send the processed video to LED display through Neutrik Ethernet ports and OPT ports. Thanks to the powerful video processing and sending capabilities, this product is well suited for high- end rental applications, stage control systems and fine-pitch LED displays. - Page 7 NovaPro UHD All-in-One Controller User Manual Button Function Status LEDs: − On (blue): The layer is open, and the input source is accessed normally. − Flashing (blue): The layer is being edited, and the input source is accessed normally.
-
Page 8: Rear Panel
NovaPro UHD All-in-One Controller User Manual 3.2 Rear Panel Note: The NovaPro UHD supports the replacement of the HDMI input card (standard configuration). You can buy a DVI input card to replace the HDMI input card. Input Connector Quantity Description ... -
Page 9: Applications
NovaPro UHD All-in-One Controller User Manual OPT 3 is the copy/hot backup channel for OPT 1. OPT 4 is the copy/hot backup channel for OPT 2. HDMI 1.3 connector, used for Multiviewer to monitor input sources, PVM or PGM, or perform mixed monitoring HDMI 1.3 connector, used for connecting to an auxiliary device such as... -
Page 10: Menu Operations
NovaPro UHD All-in-One Controller User Manual Link Control The NovaPro UHD allows for linking of at most 4 device units. In link control mode, when you connect a monitor, mouse and keyboard to any of the device units, you can control each device unit independently through Master VI. -
Page 11: Home Screen
The backup port is enabled. − not flashing: The backup port is disabled. The Ethernet port of the fiber converter connected to the NovaPro UHD is connected to the LED screen. Display the OPT mode and OPT port status. -
Page 12: Screen Brightness
NovaPro UHD All-in-One Controller User Manual Area Icon Description AUX function is turned off. Display the Genlock source connection status and Genlock function Synchronization enabling status. Bottom right green: The Genlock connector is connected. White GEN text: The Genlock function is turned on. -
Page 13: Screen Settings
NovaPro UHD All-in-One Controller User Manual Step 2 Select Screen Brightness and press the knob to confirm the selection. Step 3 Rotate the knob to adjust the brightness value, and the LED screen will display the effect in real-time. Then press the knob to apply the brightness when you are satisfied with it. -
Page 14: Save To Rv Card
Note: This function is only applicable to the receiving cards that are connected to the NovaPro UHD support the mapping function. For the related receiving card information, please visit our official website www.novastar.tech. -
Page 15: Layer Settings
Figure 5-6 Loading RCFGx files Note: The NovaPro UHD does not support importing the configuration files by directly connecting to NovaLCT. LED Screen Color Adjust the color temperature and Gamma value of LED screen to make the images displayed on the screen more clear and vivid. - Page 16 NovaPro UHD All-in-One Controller User Manual Menu Description The options include 1:1, 5:4, 4:3, 3:2, 16:9, 16:10 and Custom. Keep Ratio: Keep the aspect ratio. H Width: The value ranges from 64 to 32768, and defaults to 800.
-
Page 17: Advanced
NovaPro UHD All-in-One Controller User Manual Figure 5-9 Input crop 5.4.1.2 Advanced Copy Add a new layer displaying the cloned or mirrored image. Menu Description Status Turn on or turn off the layer copying function. The options are None, Clone, Left Mirror and Right Mirror. None indicates turning off the function. - Page 18 NovaPro UHD All-in-One Controller User Manual Figure 5-11 Right mirror Figure 5-12 Left mirror Mask Mask a certain part of the layer. The area that has been masked is transparent and the layer size remains the same. The adjustment unit is pixel.
- Page 19 NovaPro UHD All-in-One Controller User Manual Figure 5-13 Mask (mask top, bottom, left and right) Opacity Set the opacity of the layer. The value ranges from 0% (transparent) to 100% (nontransparent). The default value is 100% and the adjustment stepping is 1%.
- Page 20 NovaPro UHD All-in-One Controller User Manual Figure 5-15 Layer flipping Color Adjust the layer color parameters, including brightness, contrast, saturation, hue, monochrome and inverting colors. Menu Description Brightness Adjust the brightness of the layer image. The value ranges from 0 to 100, and defaults to 50.
-
Page 21: Logo
NovaPro UHD All-in-One Controller User Manual Figure 5-16 Monochrome Figure 5-17 Invert colors Shape Set the layer shape. The options are Normal, Heart, Star, Circle, Crescent, Oval, and Diamond. Figure 5-18 Oval layer 5.4.2 LOGO Display the company Logo. Menu... -
Page 22: Osd
NovaPro UHD All-in-One Controller User Manual Menu Description Select LOGO Select a desired LOGO file. The LOGO file is sent by the built-in platform Master VI. Initial X Set the horizontal initial coordinate of the LOGO file upon the screen. -
Page 23: Bkg
NovaPro UHD All-in-One Controller User Manual Menu Description V Height: Set the vertical height of the OSD file after cropping. Initial X: Set the horizontal initial coordinate of the cropped part upon the OSD file. Initial Y: Set the vertical initial coordinate of the cropped part upon the OSD file. -
Page 24: Input Source
Dual link mode 5.5.2 Input Source The NovaPro UHD provides SDI-1, SDI-2, SDI-3, SDI-4, INPUT1, INPUT2, INPUT3, INPUT4, DP and HDMI input connectors. The input source is named after the input connector. Rotate the knob to select a desired input source and press the knob to access the input source resolution menu. -
Page 25: Input Color
NovaPro UHD All-in-One Controller User Manual Standard Resolution Select a standard resolution and frame rate. Rotate the knob to select Apply and press the knob to make the settings take effect. If you do not press the knob, the settings will not take effect. -
Page 26: Color Range
5.7 Image Mosaic When the pixel count of the LED screen is larger than the loading capacity of a single NovaPro UHD unit, the image mosaic function is required. At most 4 device units can be linked through the USB cables. - Page 27 If the pixel count of the LED screen is 7680×4320 which exceeds the loading capacity of a single NovaPro UHD unit, four NovaPro UHD units can be linked together for image mosaic. The connections are shown in the following figure.
-
Page 28: Display Control
NovaPro UHD All-in-One Controller User Manual Load Area Width 3840 Load Area Height 2160 Load Area Initial X 3840 3840 Load Area Initial Y 2160 2160 5.8 Display Control This function is used to control the display. You can set the display to go black, display a test pattern, or go back to normal display. - Page 29 NovaPro UHD All-in-One Controller User Manual Figure 5-29 System architecture Figure 5-30 HDR effect Step 2 Go to Advanced Functions > HDR > Status to turn on the HDR function. Step 3 Rotate the knob to adjust the value of each parameter to improve the image quality.
-
Page 30: Low Latency
Note: If the Ethernet cable of the NovaPro UHD or fiber converter fails, the LED screen can still work normally. Step 2 Go to Advanced Functions > OPT Mode > Hot Backup to set the OPT mode to hot backup mode. -
Page 31: Aux
NovaPro UHD All-in-One Controller User Manual Copy Step 1 Perform the hardware connections for copy mode. Figure 5-32 Connections for copy mode Step 2 Go to Advanced Functions > OPT Mode > Copy to set the OPT mode as copy mode. -
Page 32: General Settings
Turn on or turn off the synchronization function. The default option is Off. Source Select Genlock or other input sources as the sync source. 5.10.2 Hot Backup The NovaPro UHD supports two hot backup modes: Set as Primary and Set as Backup. Menu Description Set as Primary In device backup applications, when the device is set as the primary device, it cannot be used for Ethernet port backup. -
Page 33: Fn Button
NovaPro UHD All-in-One Controller User Manual Figure 5-34 Data flow for Primary and Backup modes 5.10.3 FN Button The FN button on the device front panel can be customized to a shortcut button for the functions including Synchronization, Capture, Quick Configuration and Output Color. -
Page 34: Factory Reset
NovaPro UHD All-in-One Controller User Manual USB Backup/Restore Back up the data to a USB drive or restore the data from the USB drive. Menu Description USB Backup Back up the following information to a USB drive, including the configured presets, PVW... -
Page 35: About Us
1. When communicating with the control PC, the device and control PC must be on the same LAN. 2. The IP address of current device cannot conflict with IP addresses of other devices. 5.12 Langugage The NovaPro UHD supports English and Chinese. You can freely switch to either language. www.novastar.tech... -
Page 36: Built-In Platform Master Vi
NovaPro UHD All-in-One Controller User Manual Built-in Platform Master VI The NovaPro UHD has built in a smart control platform Master VI. The platform consists of four modules, including Home, Screen, Layer and Settings, which can help you easily perform screen and layer related configurations. -
Page 37: Screen Configuration
Device Mapping the cabinets. Brightness Adjust the brightness of the LED screen. Frame Rate Set the output frame rate of the NovaPro UHD. Cabinet Management Add cabinets and set the cabinet sizes. Cabinet Connection Select the cabinet connection type. Disconnect Delete the lines between cabinets. -
Page 38: Cabinet Connection
NovaPro UHD All-in-One Controller User Manual : Add the cabinets in batches. : Add a single cabinet. Step 3 Select the cabinet and set the cabinet size. Step 4 Move the mouse to the editing area and click to add cabinets. - Page 39 NovaPro UHD All-in-One Controller User Manual Customize the color gamut. Enable PAL or NTSC. Figure 6-5 Color properties www.novastar.tech...
- Page 40 NovaPro UHD All-in-One Controller User Manual Figure 6-6 Color gamut Table 6-1 Color gamut setting descriptions Name Description Enable the editing function. Disable the editing function. Zoom in the editing area. Toolbar Zoom out the editing area. Import the configuration files.
-
Page 41: Layer Configuration
NovaPro UHD All-in-One Controller User Manual Name Description Send the color gamut parameters to receiving card and these settings will be lost Send after power off. Send and save the color gamut parameters to receiving card and these settings Save will not be lost after power off. - Page 42 OSD: Enable or disable OSD, LOGO and BKG. Figure 6-8 Layer configuration Area Function Description Sync Synchronize the configurations of the NovaPro UHD. System Self-Test Test the image display effect of the cabinet. Input Adjust the input resolution and input color.
- Page 43 NovaPro UHD All-in-One Controller User Manual Icon Description Clear the editing area. Zoom in the editing area. Zoom out the editing area. Make the editing area auto fit the screen. Arrange all the layers, OSD and LOGO in PVW area by priorities.
-
Page 44: System
NovaPro UHD All-in-One Controller User Manual 6.3.1 System Sync Click Sync to obtain all the device data, such as the layer data and preset data. Self-Test Test whether the currently-connected LED screen can display the images normally through the test pattern. - Page 45 NovaPro UHD All-in-One Controller User Manual Figure 6-11 Input − DVI Input Mode: Single Link: 4 × Single link DVI connectors, each with up to 1920×1080@60Hz input resolution Dual Link: 2 × Dual link DVI connectors (2 & 4), each with up to 3840×1080@60Hz input resolution −...
- Page 46 NovaPro UHD All-in-One Controller User Manual Figure 6-12 Input color Select an input connector from the drop-down list of Source. Adjust the brightness, contrast, hue, saturation and Gamma. Step 2 Click Apply to send the parameters to the devices. Step 3 Click OK to complete the input settings.
- Page 47 NovaPro UHD All-in-One Controller User Manual Figure 6-13 Output color The NovaPro UHD supports one AUX. You can output any input source, PVW or PGM to a specified display device through the AUX connector. Select Enable to enable the AUX function. When selected, the following functions will be available.
- Page 48 HDR function can greatly enhance the display image quality, allowing for a more clear and vivid image when the device is used together with NovaStar A8s/A10s Plus receiving cards. Select Enable to enable the HDR function. The HDR parameters are described as followings.
-
Page 49: Osd
NovaPro UHD All-in-One Controller User Manual 6.3.3 OSD On the Layer screen, OSD, LOGO and BKG files can be added to the software for easy and direct use in future. At most 8 OSD files can be added. You can select image or text as the OSD. - Page 50 NovaPro UHD All-in-One Controller User Manual Note: The OSD text is read from Master VI and cannot be edited. Applying OSD files a. Select a desired OSD file and click the file to add it to PVW. b. In the PVW area, click to select an OSD file. Then go to the property setting area on the right to configure the related parameters of the OSD file.
-
Page 51: Adding Layers
NovaPro UHD All-in-One Controller User Manual Parameter Description Description Height 100%: Nontransparent Opacity Set the opacity of the LOGO file. 0%: Transparent At most 16 BKG files can be added. Adding BKG files a. Click + in BKG area to enter the BKG settings page. - Page 52 NovaPro UHD All-in-One Controller User Manual Bring Forward/Send Backward: Move the layer forward or backward. Lock Layer/Unlock Layer: Lock or unlock the layer. Close Current Layer: Close the selected layer. Close All Layers: Close all the layers.
-
Page 53: Preset Settings
NovaPro UHD All-in-One Controller User Manual Parameter Description For example, if the original color is red (RGB: 255,0,0), the inverted color is cyan (RGB: 0, 255, 255). Advanced Under the Advanced tab, you can set the layer shape, layer flipping and copying. -
Page 54: Image Mosaic
6.3.6 Image Mosaic When you need to drive a large screen which exceeds the loading capacity of a single NovaPro UHD unit, the image mosaic function offers you a good choice. You can link two or more device units to meet your requirements. - Page 55 NovaPro UHD All-in-One Controller User Manual Figure 6-18 Image mosaic Step 4 In the PVW area, click and drag NovaPro UHD-1 or NovaPro UHD-2 to change the mosaic layout. Step 5 Click the Source tab on the left to shown the signal sources. ...
-
Page 56: Settings
Network Settings: Select DHCP or Static and set the device IP address, subnet mask and gateway of the device. Diagnostics: Diagnose the device when the device fails and send the result to the technical support of NovaStar to solve the problems as soon as possible. Date and Time: Set the device date and time. ... -
Page 57: Web Operations
Web Operations 7.1 Overview The NovaPro UHD allows for the controlling on a PC. You can set the device related parameters through a web browser. The settings are the same as that of the device front panel. The supported web browsers include: ... -
Page 58: Web
NovaPro UHD All-in-One Controller User Manual Using a router Connect the Ethernet ports of the device and PC to the LAN ports of the router. 7.1.2 Web Page Login Step 1 Open the suggested web browser on your computer, and enter “http://the device IP address” into the address bar. -
Page 59: Web Ui Introduction
NovaPro UHD All-in-One Controller User Manual 7.1.3 Web UI Introduction Configuration: Set the LED screen loaded by the NovaPro UHD. The settings include LED screen brightness, quick configuration, advanced configuration, mapping, cabinet configuration file applying and LED screen color. -
Page 60: Screen Configuration
NovaPro UHD All-in-One Controller User Manual 7.2 Screen Configuration 7.2.1 Screen Brightness Step 1 Click Configuration to enter the screen configuration page. Step 2 In the text box below Screen Brightness, enter a brightness value directly. The brightness value will be sent to the device in real time, and the LED brightness will be changed accordingly. - Page 61 NovaPro UHD All-in-One Controller User Manual Operating Procedure Step 1 Click Configuration to enter the screen configuration page. Step 2 In the Screen Configuration area, select Quick. Figure 7-2 Quick configuration Step 3 Fill the numbers in the Rows and Columns text boxes according to the actual row and column quantities of the cabinets of the LED screen.
-
Page 62: Advanced Configuration
NovaPro UHD All-in-One Controller User Manual 7.2.2.2 Advanced Configuration You can set the quantities of the rows and columns of the cabinets loaded by each Ethernet port, the cabinet connection, as well as the offset of the area loaded by each Ethernet port, so as to complete the whole LED screen configuration. -
Page 63: Led Screen Color
NovaPro UHD All-in-One Controller User Manual Click Reset to clear all the settings. 7.2.3 LED Screen Color Gamma Set the Gamma value to adjust the output image quality. Figure 7-4 LED screen color adjustment The Gamma value ranges from 1.0 to 4.0, and defaults to 2.8. -
Page 64: Programming
NovaPro UHD All-in-One Controller User Manual 7.3 Programming Click Programming to enter the programming page where you can add, delete and edit layers, BKG, OSD and LOGO files. Figure 7-6 Programming Table 7-1 Programming page descriptions Description All the function tabs Shortcut keys ... -
Page 65: Input Settings
NovaPro UHD All-in-One Controller User Manual Description Set the transition-related settings. SWAP: When selected, click TAKE or CUT to interchange the PVW and PGM display. When deselected, the PVW and PGM displays are the same. Cut: Set the PVW to PGM transition effect. - Page 66 NovaPro UHD All-in-One Controller User Manual Figure 7-7 Input settings Step 3 Set the input resolution. The DP and HDMI connectors support custom and standard resolution settings. Standard resolution a. Select Standard. Figure 7-8 Standard resolution b. Select an input resolution from the drop-down list next to Resolution.
- Page 67 NovaPro UHD All-in-One Controller User Manual Figure 7-9 Custom resolution b. Enter a value in the Width text box. c. Enter a value in the Height text box. d. Select a frame rate from the drop-down list next to Frame Rate.
-
Page 68: Adding Layers
NovaPro UHD All-in-One Controller User Manual 7.3.2 Adding Layers Step 1 Select a desired input source from the Input Source list. Step 2 Click the editing area and drag the mouse to create a custom-sized layer. You can also select an input source and drag it to the editing area, and then release the mouse to create a layer. -
Page 69: Layer Properties
NovaPro UHD All-in-One Controller User Manual Figure 7-11 Layer operations Switch Source: Switch the input source for the current layer. Bring to Front/Send to Back: Bring the selected layer to front, or send the selected layer to back. -
Page 70: Input Crop
NovaPro UHD All-in-One Controller User Manual − H: Set the layer height. Note: Click next to the width and height to lock the layer aspect ratio. The icon changes to when the ratio is locked. If you change the layer width or height at this time, the other parameter changes accordingly based on the locked aspect ratio. -
Page 71: Bkg
NovaPro UHD All-in-One Controller User Manual 7.3.3 BKG 7.3.3.1 Adding BKG Add BKG images to the Web page and send those images to the NovaPro UHD. The NovaPro UHD supports BKG images and pure color BKG. BKG Images Step 1 On the Programming page, click the Gallery tab on the left and select BKG show the BKG list. - Page 72 NovaPro UHD All-in-One Controller User Manual Figure 7-16 BKG settings Crop: Crop the imported BKG image and use the cropped image as the BKG. The highlighted area is the area to be kept. Click and drag the area to change its position, and drag its edge to change its size.
- Page 73 NovaPro UHD All-in-One Controller User Manual − Initial X: Set the horizontal initial coordinate of the top-left corner of the cropped area on the original image. − Initial Y: Set the vertical initial coordinate of the top-left corner of the cropped area on the original image.
- Page 74 Capture: Capture the current frame of the selected input source and use the captured image as the BKG image. Step 4 Click Apply to save the edited BKG image to BKG list and send the BKG image to the NovaPro UHD. Pure Color BKG Move the cursor to a pure color in the BKG list and click the arrow icon that appears, and then select a color from the displayed dialog box.
-
Page 75: Bkg Operations
NovaPro UHD All-in-One Controller User Manual Figure 7-17 Pure Color BKG 7.3.3.2 BKG Operations Loading BKG Click a BKG in the BKG list to load the BKG image to the editing area. The BKG is always located at the bottom and displayed in full screen. The BKG priority and size cannot be adjusted. -
Page 76: Osd
Right click the BKG and select Read Back to display the BKG in the PVW and PGM area. 7.3.4 OSD 7.3.4.1 Adding OSD Add OSD files to the Web page and send those images to the NovaPro UHD. The NovaPro UHD supports OSD images and OSD texts. OSD Images Step 1 On the Programming page, click OSD on the left to show the OSD list. - Page 77 NovaPro UHD All-in-One Controller User Manual Figure 7-19 OSD settings Crop: Crop the imported OSD image and use the cropped image as the OSD. The highlighted area is the area to be kept. Click and drag the area to change its position, and drag its edge to change its size.
- Page 78 Replace: Select a new OSD image and replace the current one. Step 4 Click Apply to save the edited OSD image to OSD list and send the OSD image to the NovaPro UHD. OSD Text Click Text to pop up a window where you can set the OSD text properties.
-
Page 79: Osd Operations
NovaPro UHD All-in-One Controller User Manual Figure 7-20 OSD text 7.3.4.2 OSD Operations Loading OSD Click an OSD in the OSD list to load the OSD image to the editing area. The OSD priority and size can be adjusted. Click at the top-right corner of the OSD to delete it. -
Page 80: Logo
Right click the OSD and select Read Back to display the OSD in the PVW and PGM area. 7.3.5 LOGO 7.3.5.1 Adding LOGO Add LOGO images to the Web page and send those images to the NovaPro UHD. Step 1 On the Programming page, click LOGO on the left to show the LOGO list. Figure 7-21 LOGO list Step 2 Click Image to pop up a window where you can select a LOGO image. - Page 81 NovaPro UHD All-in-One Controller User Manual Figure 7-22 LOGO settings Crop: Crop the imported LOGO image and use the cropped image as the BKG. The highlighted area is the area to be kept. Click and drag the area to change its position, and drag its edge to change its size.
-
Page 82: Logo Operations
− Height: The LOGO image height after scaling Replace: Select a new BKG image and replace the current one. Step 4 Click Apply to save the edited LOGO image to LOGO list and send the LOGO image to the NovaPro UHD. 7.3.5.2 LOGO Operations Loading LOGO Click a LOGO in the LOGO list to load the LOGO image to the editing area. -
Page 83: Transition Settings
NovaPro UHD All-in-One Controller User Manual − Deleting LOGO Click next to a LOGO and select OK in the displayed dialog box to delete the selected LOGO. − Editing LOGO Click next to a LOGO to pop up the LOGO settings window to re-edit or replace the current LOGO. -
Page 84: Preset
NovaPro UHD All-in-One Controller User Manual : Set the transition duration. Enter a value directly in the text box or click +/- to adjust the value. The value ranges from 0.5s to 2.0s and defaults to 0.5s. TAKE: Send the PVW to PGM with a transition effect. -
Page 85: Loading Presets
NovaPro UHD All-in-One Controller User Manual Click at the top-right corner of the saved preset, and rename the preset in the text box. 7.4.2 Loading Presets You can load the preset by clicking the Load Preset button on the Programming page, or directly clicking a preset on the Preset page. -
Page 86: Preset Operations
NovaPro UHD All-in-One Controller User Manual 7.4.3 Preset Operations Click Clear All below the preset list to clear all the saved presets, including the preset data and names. Click Import to import the presets. After the importing, all the current saved presets will be cleared. -
Page 87: Aux Settings
NovaPro UHD All-in-One Controller User Manual 7.5.2 AUX Settings Enable: Select Enable to turn on the AUX function. It is deselected by default. Follow Preset: Set whether the AUX follows the preset during switching. − Selected: If the preset has AUX data, the AUX input source will be switched during preset switching. -
Page 88: System Mode
Step 2 Select a synchronization source from the drop-down list next to Sync Source. The NovaPro UHD allows an external Genlock source or the connected input source to be used as the sync source. If the resolution of the sync source changes or the sync source cable is re-plugged, please re- configure the sync mode. - Page 89 NovaPro UHD All-in-One Controller User Manual Copy: OPT 3 serves as the copy for OPT 1, and OPT 4 serves as the copy for OPT 2. Figure 7-26 Connections for hot backup mode Figure 7-27 Connections for copy mode...
-
Page 90: Network Settings
7.5.7 HDR Settings HDR is the acronym for High-Dynamic Range. HDR function can greatly enhance the display image quality, allowing for a more clear and vivid image when the device is used together with the NovaStar A8s/A10s Plus receiving cards. - Page 91 NovaPro UHD All-in-One Controller User Manual Note: The loading width of a single Ethernet port should be no greater than 512 pixels when low latency function is enabled. The supported Armor series receiving cards include the A8/A8s/A9s/A10s Plus.
-
Page 92: Factory Reset
NovaPro UHD All-in-One Controller User Manual Note: After the firmware update, please reset the device to factory settings. 7.5.10 Date and Time Set the device date and time. Select Set date and time automatically and the device will automatically read the date and time from the connected PC. -
Page 93: Change Password
NovaPro UHD All-in-One Controller User Manual Figure 7-31 Factory reset Select Save IP to reset all the device settings to factory settings, except for the device IP address. Note: After the firmware update, please reset the device to factory settings. -
Page 94: Self-Test
The password must contain 8 characters, including letters and numbers. If you forget your password, use the super password “NovaStar” to log in to the Web page, and then set a new password for login. The super password cannot be deleted or changed. -
Page 95: Specifications
NovaPro UHD All-in-One Controller User Manual Specifications Overall Specifications Electrical Power connector 100-240V~, 50/60Hz, 7.2A-3.5A Specifications Dual redundant power supplies Power consumption 180 W –10° C to +60° C Operating Operating temperature Environment Operating humidity 0% RH to 80% RH, non-condensing... -
Page 96: Video Source Features
NovaPro UHD All-in-One Controller User Manual Video Source Features Input Connector Bit Depth Max. Input Resolution 8-bit RGB 4:4:4 HDMI 2.0 4096×2160@60Hz DP 1.2 YCbCr 4:4:4 8192×1080@60Hz YCbCr 4:2:2 YCbCr 4:2:0 Not supported 10-bit RGB 4:4:4 4096×2160@30Hz 8192×1080@30Hz...
Need help?
Do you have a question about the NovaPro UHD and is the answer not in the manual?
Questions and answers