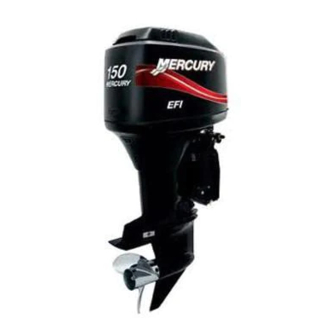
Mercury 150 EFI Service Manual

Mercury 150 EFI Service Manual

Electronic fuel injection,
Table of Contents

Advertisement

Quick Links

150/175/200
Electronic
Fuel Injection
Starting Model Year 2002
Starting Serial Number 0T409000

Advertisement

Table of Contents
loading

Summary of Contents for Mercury 150 EFI

  • Page 1 150/175/200 Electronic Fuel Injection Starting Model Year 2002 Starting Serial Number 0T409000...
  • Page 2 Mercury Marine, that they have been trained in the recommended servicing procedures of these products which in- cludes the use of mechanics’ common hand tools and the special Mercury Marine or recom- mended tools from other suppliers.
  • Page 3 It is important to note, during any maintenance procedure replacement fasteners must have the same measurements and strength as those removed. Numbers on the heads of the met- ric bolts and on the surfaces of metric nuts indicate their strength. American bolts use radial lines for this purpose, while most American nuts do not have strength markings.
  • Page 4 Service Manual Outline General Information & Specifications Section 1 - General Information & Specifications A - Specifications B - Maintenance Ignition System C - General Information D - Outboard Installation Section 2 - Electrical A - Ignition Fuel System B - Charging & Starting System C - Timing, Synchronizing &...
  • Page 5 Table of Contents Specifications ......1A-1 Mercury/Quicksilver Lubricants & Sealants . . . 1A-4 Specifications...
  • Page 6 FUEL Fuel Gasoline w/Oil Injection SYSTEM Recommended Gasoline Unleaded 87 Octane Minimum Recommended Oil Quicksilver or Mercury Precision Lubri- cants NMMA/BIA Certified TC-W3 2 Cycle Outboard Oil Gasoline/Oil Ratio 50:1 (25:1 Break-In) ECM Controlled – no premix STARTING Electric Start – All Models...
  • Page 7 0.015 in. – 0.022 in. (0.381 mm – 0.558 mm) Water Pressure @ rpm 12 psi Minimum @ 5500 rpm Recommended Oil Quicksilver or Mercury Precision Lubri- INJECTION cants NMMA/BIA Certified TC-W3 2 Cycle Outboard Oil Oil Tank Capacity 3 gal. (11.4 Liter) Approx.
  • Page 8 SPECIFICATIONS Mercury/Quicksilver Lubricants and Sealants Mercury Part Number Description Quicksilver Part Number Needle Bearing Assy. Lubricant 92-802868A1 [8 oz. (226.8 grams)] tube Dielectric Grease 92-823506-1 92-823506-1 [8 oz. (226.8 grams)] can Loctite 271 – Thread Locker 92-809819 92-809819 (10 ml) tube...
  • Page 9 SPECIFICATIONS Mercury Part Number Description Quicksilver Part Number RTV 587 Silcone Sealer 92-809825 92-809825 [3 oz. (85.05 grams)] Obtain Locally Loctite 262 Obtain Locally Premium Gear Lubricant 92-802846A1 92-802846Q1 [1 Quart (0.94 liter)] Loctite 7649 Primer 92-809824 92-809824 [4.5 oz (127.57 grams)]...
  • Page 10: Table Of Contents

    ......1B-2 Water Separating Fuel Filter – EFI Models 1B-5 Mercury/Quicksilver Lubricants and Sealants 1B-2 Corrosion Control Anode ....
  • Page 11: Special Tools

    MAINTENANCE Special Tools 1. Grease Gun 91-37299A1 2. Flushing Attachment 44357A2 Mercury/Quicksilver Lubricants and Sealants NOTE: See section 1A for lubricants and sealants chart. Page 1B-2 90-883728 JULY 2001...
  • Page 12: Inspection And Maintenance Schedule

    MAINTENANCE Inspection and Maintenance Schedule Before Each Use 1. Check that lanyard stop switch stops the engine. 2. Visually inspect the fuel system for deterioration or leaks. 3. Check outboard for tightness on transom. 4. Check steering system for binding or loose components. 5.
  • Page 13: Flushing Engine

    MAINTENANCE Flushing Engine Flushing Cooling System – Using Cowl Flush Plug Flush the internal water passages of the outboard with fresh water after each use in salt, polluted or muddy water. This will help prevent a buildup of deposits from clogging the internal water passages.
  • Page 14: Fuel System

    MAINTENANCE Fuel System WARNING Avoid serious injury or death from gasoline fire or explosion. Carefully follow all fuel system service instructions. Always stop the engine and DO NOT smoke or allow open flames or sparks in the area while servicing any part of the fuel sys- tem.
  • Page 15: Corrosion Control Anode

    MAINTENANCE Corrosion Control Anode The gear case has two corrosion control anodes (a). Another anode (b) is installed on the bottom of the transom bracket assembly. An anode helps protect the outboard against galvanic corrosion by sacrificing its metal to be slowly eroded instead of the outboard metals.
  • Page 16: Battery Inspection

    MAINTENANCE Battery Inspection The battery should be inspected at periodic intervals to ensure proper engine starting capability. IMPORTANT: Read the safety and maintenance instructions which accompany your battery. 1. Turn off the engine before servicing the battery. 2. Add water as necessary to keep the battery full. 3.
  • Page 17: Lubrication Points

    MAINTENANCE Lubrication Points Lubricate Point 1 with Quicksilver Special Lubricant 101. 1. Trim Rod Ball Ends – Turn the ball ends to work the lubricant into the ball sockets. Lubricate Point 2 with Quicksilver Anti-Corrosion Grease or 2-4-C Marine Lubricant with Teflon. 2.
  • Page 18: Checking Power Trim Fluid

    MAINTENANCE 6. Steering Cable Grease Fitting (If Equipped) – Rotate steering wheel to fully retract the steering cable end (a) into the outboard tilt tube. Lubricate through fitting (b). WARNING The end of the steering cable must be fully retracted into the outboard tilt tube before adding lubricant.
  • Page 19: Gear Case Lubrication

    MAINTENANCE Gear Case Lubrication When adding or changing gear case lubricant, visually check for the presence of water in the lubricant. If water is present, it may have settled to the bottom and will drain out prior to the lubricant, or it may be mixed with the lubricant, giving it a milky colored appearance. If water is noticed, have the gear case checked by your dealer.Water in the lubricant may result in premature bearing failure or, in freezing temperatures, will turn to ice and damage the gear case.
  • Page 20: Storage Preparation

    MAINTENANCE Storage Preparation The major consideration in preparing your outboard for storage is to protect it from rust, corrosion, and damage caused by freezing of trapped water. The following storage procedures should be followed to prepare your outboard for out of season storage or prolonged storage (two months or longer).
  • Page 21 MAINTENANCE POSITIONING OUTBOARD FOR STORAGE Store outboard in an upright (vertical) position to allow water to drain out of outboard. CAUTION If outboard is stored tilted up in freezing temperature, trapped cooling water or rain water that may have entered the propeller exhaust outlet in the gear case could freeze and cause damage to the outboard.
  • Page 22 GENERAL INFORMATION IMPORTANT INFORMATION Section 1C - General Information Table of Contents Serial Number Location ....1C-1 Model 150 XRI/175 XRI/200 XRI Powerhead Conditions Affecting Performance .
  • Page 23: Conditions Affecting Performance

    30% relative humidity, at 77 F (25 C) temperature and a barometric pressure of 29.61 inches of mercury. Summer conditions of high temperature, low barometric pressure and high humidity all combine to reduce engine power.
  • Page 24: Boat

    GENERAL INFORMATION Boat WEIGHT DISTRIBUTION 1. Proper positioning of the weight inside the boat (persons and gear) has a significant effect on the boat’s performance, for example: a. Shifting weight to the rear (stern) (1.) Generally increases top speed. (2.) If in excess, can cause the boat to porpoise. (3.) Can make the bow bounce excessively in choppy water.
  • Page 25 GENERAL INFORMATION 3. Increases clearance over submerged objects. 4. In excess, can cause porpoising and/or ventilation. 5. If trimmed out beyond the water pickup, reduced water supply can cause overheating resulting in engine damage. TRIMMING OUTBOARD “IN” (“DOWN”) CHARACTERISTICS WARNING Excessive speed at minimum trim “in”...
  • Page 26: Engine

    GENERAL INFORMATION Engine DETONATION Detonation in a 2-cycle engine resembles the “pinging” heard in an automobile engine. It can be otherwise described as a tin-like “rattling” or “plinking” sound. Detonation is an explosion of an unburned portion of the fuel/air charge after the spark plug has fired.
  • Page 27: Following Complete Submersion

    GENERAL INFORMATION Following Complete Submersion Salt Water Submersion Due to the corrosive effect of salt water on internal engine components, complete disas- sembly is necessary before any attempt is made to start the engine. Submerged While Running When an engine is submerged while running, the possibility of internal engine damage is greatly increased.
  • Page 28 GENERAL INFORMATION a. Remove remote oil hose (black without blue stripe) from pulse fitting on starboard side of engine. b. Drain any water from hose and reconnect. c. If water was present in hose, check for water in the remote oil tank. Drain tank if water is present.
  • Page 29: Model 150 Xri/175 Xri/200 Xri Powerhead Front View

    GENERAL INFORMATION Model 150 XRI/175 XRI/200 XRI Powerhead Front View 58794 Manifold Absolute Pressure (MAP) Sensor Electric Fuel Pump Harness Connector Connector 10 - Air Plenum Throttle Plate Assembly 11 - Cowl Trim Connector Vapor Separator Tank (VST) Vent Hose to 12 - Fuel Injector Harness Connector Flywheel Cover...
  • Page 30: Model 150 Xri/175 Xri/200 Xri Powerhead Starboard View

    GENERAL INFORMATION Model 150 XRI/175 XRI/200 XRI Powerhead Starboard View 58778 Starter Motor 15 - Starter Solenoid Throttle Plate Assembly 16 - 20 Ampere Fuses (3); 15 Ampere Fuse (1) Fuel Regulator Vacuum Hose 17 - Electronic Control Module (ECM) Engine Harness Connector 18 - Digital Diagnostic Connector...
  • Page 31: Model 150 Xri/175 Xri/200 Xri Powerhead Port View

    GENERAL INFORMATION Model 150 XRI/175 XRI/200 XRI Powerhead Port View 58780 Fuel Pressure Test Point 17 - Pulse Fuel Pump Fuel Out to Fuel Rail 18 - Pulse Pump Vacuum Hose Throttle Plate Assembly 19 - Idle Stop Screw Vapor Separator Vent Hose 20 - 4 psi (27 kPa) Check Valve Air Temperature Sensor...
  • Page 32: Model 150 Xri/175 Xri/200 Xri Powerhead Top View

    GENERAL INFORMATION Model 150 XRI/175 XRI/200 XRI Powerhead Top View 58771 Thermostat By-Pass Hose 10 - Manifold Air Pressure (MAP) Sensor Port Thermostat [143 F (61.7 C)] 11 - Throttle Plate Adjustment Screw (Sealed at Factory) Belt Tensioner Grease Fitting 12 - Throttle Plate Assembly Belt Tensioner...
  • Page 33: Model 150 Xri/175 Xri/200 Xri Powerhead Aft View

    GENERAL INFORMATION Model 150 XRI/175 XRI/200 XRI Powerhead Aft View 58773 Port Thermostat [143 F (61.7 C)] 13 - #3 Ignition Coil Speedometer Sensor (BLACK) 14 - #1 Ignition Coil Water Pressure Sensor 15 - #2 Ignition Coil Starboard Thermostat [143 F (61.7 C)] 16 - #4 Ignition Coil Temperature Sensor (Engine Overheat)
  • Page 34: Painting Procedures

    600 to 1000 grit sand paper should be used to smooth the surface area. It is then recommended that the entire cowl then be painted, to achieve an even luster, using normal Mercury Marine approved paint and procedures. Cleaning & Painting Aluminum Propellers & Gear Housings WARNING Avoid serious injury from flying debris.
  • Page 35 7. Allow a minimum of one hour drying time and no more than one week before top coat- ing assemblies. 8. Use Ditzler Urethane DU9000 for Mercury Black, DU34334 for Mariner Grey, and DU35466 for Force Charcoal, and DU33414M for Sea Ray White. Catalyze all four colors with Ditzler DU5 catalyst mixed 1:1 ratio.
  • Page 36: Decal Application

    GENERAL INFORMATION Decal Application Decal Removal 1. Mark decal location before removal to assure proper alignment of new decal. 2. Carefully soften decal and decal adhesive with a heat gun or heat blower while remov- ing old decal. 3. Clean decal contact area with a 1:1 mixture of isopropyl alcohol and water. 4.
  • Page 37 GENERAL INFORMATION DECAL APPLICATION 1. Mix ounce (16 ml) of dish washing liquid in one gallon (4 l) of cool water to use as wetting solution. NOTE: Leave protective masking, if present, on the face of decal until final steps of decal installation.
  • Page 38 OUTBOARD MOTOR INSTALLATION IMPORTANT INFORMATION Section 1D - Outboard Motor Installation Table of Contents Installation Specifications ....1D-1 Water Pressure Tubing Connection ..1D-8 Lifting Outboard .
  • Page 39: Installing Outboard To Boat Transom

    OUTBOARD MOTOR INSTALLATION Installing Outboard to Boat Transom Determining Recommended Outboard Mounting Height 26 in. (660mm) 25 in. (635mm) 24 in. (609mm) 23 in. Outboard (584mm) Mounting Height (See 22 in. NOTE Below) (560mm) 21 in. (533mm) 20 in. (508mm) 19 in.
  • Page 40: Installing Outboard

    OUTBOARD MOTOR INSTALLATION Installing Outboard Drilling Outboard Mounting Holes 1. Attach (tape) engine mounting template (located with the installation manual) to boat transom. IMPORTANT: If using “Transom Drilling Fixture” (91-98234A2), use drill guide holes marked “A” when drilling outboard mounting holes. Centerline of Transom Transom Drilling Fixture (91-98234A2) 2.
  • Page 41: Securing Outboard To Boat Transom

    OUTBOARD MOTOR INSTALLATION Securing Outboard To Boat Transom 1. Refer to “Determining Recommended Outboard Motor Mounting Height”, preceding and install outboard to the nearest recommended mounting height. 2. Fasten outboard with provided mounting hardware shown. 1/2 in. Diameter Bolts Flat Washers(4) Marine Sealer - Apply to Flat Washers(4) Shanks of Bolts, Not...
  • Page 42: Steering Link Rod

    OUTBOARD MOTOR INSTALLATION 2. Insert steering cable into tilt tube. 57832 3. Torque nut to 35 lb. ft. (47.5 N·m). 57833 Steering Link Rod 1. Install steering link rod per illustration. 57834 Special Bolt (10-90041) Torque to 20 lb-ft (27 N·m) Nylon Insert Locknut (11-34863) Torque to 20 lb-ft (27 N·m) Flat Washer (2) Nylon Insert Locknut (11-34863) Tighten Locknut Until it Seats, Then Back...
  • Page 43: Electrical, Hoses And Control Cables

    OUTBOARD MOTOR INSTALLATION Electrical, Hoses and Control Cables IMPORTANT: Warning Horn Requirement – The remote control or key switch as- sembly must be wired with a warning horn. This warning horn is used with the en- gine warning system. Installation Note Open the front clamp assembly.
  • Page 44: Battery Cables

    OUTBOARD MOTOR INSTALLATION Battery Cables SINGLE OUTBOARD (–) RED Sleeve (Positive) BLACK Sleeve (Negative) Starting Battery DUAL OUTBOARD Connect a common ground cable (wire size same as engine battery cables) between NEGATIVE (–) terminals on starting batteries. (–) (–) Common Ground Cable 90-883728 JULY 2001 Page 1D-7...
  • Page 45: Fuel Hose Connection

    OUTBOARD MOTOR INSTALLATION Fuel Hose Connection Fuel Hose Size – Minimum fuel line inside diameter (I.D.) is 5/16 in. (8mm), with separate fuel line/fuel tank pickup for each engine. Fasten remote fuel hose to fitting with hose clamp. Oil Hose Connections Connect the remote oil hoses to the engine hose connections as shown.
  • Page 46: Shift Cable

    OUTBOARD MOTOR INSTALLATION Shift Cable Install cables into the remote control following the instructions provided with the remote control. NOTE: Install the shift cable to the engine first. The shift cable is the first cable to move when the remote control handle is moved out of neutral. COUNTER ROTATION OUTBOARDS Counter rotating (left hand) gear cases can be identified by a “L”...
  • Page 47: Installation

    OUTBOARD MOTOR INSTALLATION Installation IMPORTANT: Step 1 must be followed for proper adjustment of the shift cable. 1. Locate the center point of the slack or lost motion that exists in the shift cable as fol- lows: a. Move the remote control handle from neutral into forward and advance the handle to full speed position.
  • Page 48 OUTBOARD MOTOR INSTALLATION 2. Position remote control and outboard into neutral. 3. Slide the shift cable retainer forward until resistance is felt, then slide cable anchor toward rear until resistance is felt. Center the anchor pin between resistance points. Shift Cable Retainer Anchor Pin 4.
  • Page 49: Throttle Cable

    OUTBOARD MOTOR INSTALLATION d. Return remote control handle to neutral. The propeller should turn freely without drag. If not, adjust barrel closer to cable end guide. Repeat steps a thru d. Throttle Cable INSTALLATION 1. Position remote control into neutral. 2.
  • Page 50: Front Clamp Reassembly

    OUTBOARD MOTOR INSTALLATION b. Return remote control to neutral. Place a thin piece of paper between idle adjust- ment screw and idle stop. Adjustment is correct when the paper can be removed without tearing, but has some drag on it. Readjust cable barrel if necessary. IMPORTANT: The idle stop screw must be touching the stop.
  • Page 51: Oil Injection Set-Up

    OUTBOARD MOTOR INSTALLATION Oil Injection Set-Up CAUTION Be careful not to get dirt or other contamination in tanks, hoses or other compo- nents of the oil injection system during installation. Installing Remote Oil Tank 1. The remote oil tank should be installed in an area in the boat where there is access for refilling.
  • Page 52: Installing Oil Hoses To Engine

    OUTBOARD MOTOR INSTALLATION Installing Oil Hoses To Engine NOTE: Oil hose with BLUE stripe contains a directional filter which is designed to trap any debris in the oil before the oil reaches the engine oil reservoir. The filter is marked with an arrow denoting direction of flow of oil and should be installed accordingly.
  • Page 53: Filling

    The Premium Plus Oil is specially formulated and tested to not only maintain a high level of performance but also increase the durability of the engine. This special blend, developed by Mercury Marine, contains more than twice the additives used in standard blends and ensures the greatest protection for your engine.
  • Page 54: Priming The Oil Pump

    OUTBOARD MOTOR INSTALLATION Priming the Oil Pump IMPORTANT: Before starting engine for the first time, prime the oil injection pump. Priming will remove any air that may be in the pump, oil supply hose, or internal passages. NOTE: If a new powerhead is being installed or oil hoses/oil pump has been removed, it is recommended all air be purged from oil pump/oil lines using gearcase leakage tester (FT-8950).
  • Page 55: Priming Procedure - Method 1

    OUTBOARD MOTOR INSTALLATION Conditions Requiring Priming the Oil Pump Condition Priming Procedure New engine Use Method 1 or 2 Rebuilt Powerhead Use Method 1 or 2 New Powerhead Use Method 1 or 2 Oil system ran out of oil Use Method 3 Oil drained from oil supply hose feeding pump Use Method 3 Oil pump removed...
  • Page 56: Purging Air From The Engine Oil Reservoir

    OUTBOARD MOTOR INSTALLATION Purging Air From the Engine Oil Reservoir 1. Loosen the fill cap on the engine oil reservoir. 2. Start the engine. Run the engine until all the air has been vented out of the reservoir and oil starts to flow out of the reservoir. Re-tighten fill cap. Fill Cap Trim In Stop Adjustment Some outboard boats, particularly some bass boats, are built with a greater than normal...
  • Page 57: Trim Tab Adjustment

    OUTBOARD MOTOR INSTALLATION Trim Tab Adjustment Propeller steering torque may cause your boat to pull in one direction. This steering torque results from your outboard not being trimmed so the propeller shaft is parallel to the water surface. The trim tab can help compensate for this steering torque and can be adjusted within limits to reduce any unequal steering effort.
  • Page 58 IGNITION ELECTRICAL Section 2A - Ignition Table of Contents Specifications ......2A-2 RPM-Limit Circuit .
  • Page 59: Specifications

    IGNITION Specifications IGNITION Type Digital Inductive SYSTEM Spark Plug Type NGK BPZ8HS-10 Spark Plug Gap 0.040 in. (1.0 mm) Ignition Coil Ohms Test 58903 BLACK METER LEAD Secondary EST Low Secondary Primary Battery + Tower PIN A PIN B Ground Pin E Pin C Pin D...
  • Page 60: Manifold Absolute Pressure (Map) Sensor Ohms Test

    IGNITION Manifold Absolute Pressure (MAP) Sensor Ohms Test 58904 BLACK METER LEAD BLK/ORG PPL/YEL PIN A PIN B PIN C BLK/ORG 95000 – 105000 3900 – 4100 PIN A RED METER RED METER 95000 – 105000 95000 – 105000 LEAD PIN B PPL/YEL 3900 –...
  • Page 61: Port And Starboard Temperature Sensors; Air Temperature Sensor

    IGNITION Port and Starboard Temperature Sensors; Air Temperature Sensor An ohms test of the temperature sensors would be as follows: Disconnect temperature sensor harness and check continuity with digital or analog ohm- meter test leads between both connector pins. With engine at temperature (F ) indicated, ohm readings should be as indicated 10%.
  • Page 62: Special Tools

    IGNITION Special Tools 1. DMT 2000 Digital Tachometer Multimeter 91-854009A1 2. Cylinder Timing Decal 91-853883-1 NOTE: Decal can be used to help troubleshoot ignition timing by determining the timing of individual cylinders. 3. Digital Diagnostic Terminal (DDT) 91-823686A2 4. Software Cartridge 91-880118--1 90-883728 JULY 2001 Page 2A-5...
  • Page 63 IGNITION 5. DDT Reference Manual 90-881204--1 6. Adaptor Harness 84-822560A5 7. Spark Gap Tester 91-850439 55117 8. Timing Light 91-99379 9. Crank Shaft Protector Cap 91-24161 Page 2A-6 90-883728 JULY 2001...
  • Page 64 IGNITION 10. Flywheel Puller 91-849154T1 55117 11. Flywheel Holder 91-52344 12. Heat Lamp 91-63209 90-883728 JULY 2001 Page 2A-7...
  • Page 65: Coil Plate Assembly

    IGNITION Coil Plate Assembly Page 2A-8 90-883728 JULY 2001...
  • Page 66 IGNITION Coil Plate Assembly TORQUE REF. QTY. DESCRIPTION lb-in lb-ft COIL PLATE BUSHING GROMMET WASHER CABLE WASHER SCREW (.312-18 x 1-1/4) WASHER SCREW (M6 x 10) IGNITION COIL SCREW (M6 x 25) 11.3 SCREW (M6 x 10) WASHER SPARK PLUG (NGK#BPZ8HS10) HI-TENSION CABLE CLIP SENSOR-BLOCK PRESSURE [0-50 psi (0-345 kPa)]...
  • Page 67: Electrical Plate Assembly

    IGNITION Electrical Plate Assembly Page 2A-10 90-883728 JULY 2001...
  • Page 68 IGNITION Electrical Plate Assembly TORQUE REF. QTY. DESCRIPTION lb-in lb-ft SOLENOID MOUNTING PLATE SCREW (M6 x 10) 11.3 CLIP RELAY DECAL-TRIM RELAY BRACKET BUSHING GROMMET SCREW (M6 x 25) BUSHING TRIM HARNESS CABLE (YELLOW/BLACK) GROUND WIRE (BLACK) BOOT (YELLOW) INSULATOR BOOT (RED) SOLENOID GROMMET BUSHING...
  • Page 69: Theory Of Operation

    IGNITION Theory of Operation When the ignition key switch is turned to the “RUN” position, battery voltage is applied to both the Electronic Control Module (ECM) through the purple wire and the main power relay through the red/purple wire. As the ECM receives the “RUN” signal, it internally com- pletes the ground circuit of the main relay, for a short period of time, energizing the fuel pump for start-up.
  • Page 70: Ignition Component Description

    IGNITION Ignition Component Description Fuses The electrical wiring circuits on the outboard are protected from overload by fuses in the wiring. If a fuse is blown, try to locate and correct the cause of the overload. If the cause is not found, the fuse may blow again. 1.
  • Page 71: Charging System Alternator

    IGNITION Charging System Alternator Battery charging system is contained within the belt driven alternator, including the regu- lator. At cranking speeds, electrical power for the engine is provided by the boat battery – minimum recommended size is 750 CCA, 1,000 MCA, cold cranking amperes or 105 (Minimum) Ampere Hours.
  • Page 72: Electronic Control Module

    IGNITION Electronic Control Module The ECM requires 8 VDC minimum to operate. If the ECM should fail, the engine will stop running. The inputs to the ECM can be monitored and tested by the Digital Diagnostic Terminal 91-823686A2 using adaptor harness 84-822560A5. The ECM performs the following functions: Calculates the precise fuel and ignition timing requirements based on engine speed, throttle position, manifold pressure and coolant temperature.
  • Page 73: Flywheel

    IGNITION Flywheel Flywheel has 54 teeth under the flywheel ring gear which the crank position sensor uses to provide engine rpm and crankshaft position information the ECM. 58775 Flywheel Crank Position Sensor Crank Position Sensor Monitors 54 teeth on flywheel thus determining crankshaft position and sends crankshaft position angle and engine speed signals to ECM.
  • Page 74: Throttle Position Sensor (Tps)

    IGNITION Throttle Position Sensor (TPS) The TPS transmits throttle angle information to the ECM which varies the injector pulse width accordingly. Should the sensor fail, the warning horn will sound. RPM will be re- duced by the ECM. TPS settings are not adjustable. TPS settings can be monitored with the Digital Diagnostic Terminal through the ECM.
  • Page 75: Cylinder Head Temperature Sensor

    IGNITION Cylinder Head Temperature Sensor Two (2) temperature sensors are used to provide temperature information to the ECM. One sensor is mounted in each cylinder head. The ECM uses this information to increase injector pulse width for cold starts and to retard timing in the event of an over-heat condition.
  • Page 76: Port And Starboard Temperature Sensors; Air Temperature Sensor

    IGNITION Port and Starboard Temperature Sensors; Air Temperature Sensor An ohms test of the temperature sensors would be as follows: Disconnect temperature sensor harness and check continuity with digital or analog ohm- meter test leads between both connector pins. With engine at temperature (F ) indicated, ohm readings should be as indicated 10%.
  • Page 77: Manifold Absolute Pressure (Map) Sensor

    IGNITION Manifold Absolute Pressure (MAP) Sensor The MAP sensor is located on top of the air plenum. The ECM regulates fuel flow, in part, based on manifold absolute pressure. The MAP sensor becomes more critical in engine running quality as the engine is operated at higher altitudes (i.e. mountain lakes). Should the MAP sensor fail, the ECM will default to a value of approximately 14.7 psi.
  • Page 78: Ignition Troubleshooting And Fault Chart

    IGNITION Ignition Troubleshooting and Fault Chart CAUTION To protect against meter and/or component damage, observe the following pre- cautions: DO NOT reverse battery cable connections. The battery negative cable is (–) ground. DO NOT “spark” battery terminals with battery cable connections to check po- larity.
  • Page 79 IGNITION Symptom Cause Action 1. Engine cranks but will 1.7 ECM not functioning Check for proper operation by not start (continued) using Inductive Timing Light 91-99379. Check battery voltage (RED/YEL Lead) @ ignition coils. Check for blown fuse (C15). Check battery voltage to fuse from main power relay (PURPLE Lead).
  • Page 80 IGNITION Symptom Cause Action 3. Engine idle is rough 3.1 Fouled spark plug Replace spark plug: if carbon bridges electrode gap or if it is completely black. If it is not firing and is wet with fuel. Note: If spark plug is grey or com- pletely black with aluminum specs, this indicates a scuffed piston.
  • Page 81 IGNITION Symptom Cause Action 7. Speed Reduction (RPM 7.1 Low battery voltage Check battery and/or alternator. reduced) ECM requires 8 volts mini- Check electrical connections. Fuel Pump requires 9 volts 7.2 Overheat condition Check water pump impeller/cooling system. 7.3 Oil pump electrical failure Check electrical connection.
  • Page 82: Ignition Coil Ohms Test

    IGNITION Ignition Coil Ohms Test 58903 BLACK METER LEAD Secondary EST Low Secondary Primary Battery + Tower PIN A PIN B Ground Pin E Pin C Pin D Secondary 850 – 1200 Tower Continuity Continuity Continuity Continuity 8500 – 29000 – 11000 –...
  • Page 83: Manifold Absolute Pressure (Map) Sensor Ohms Test

    IGNITION Manifold Absolute Pressure (MAP) Sensor Ohms Test 58904 BLACK METER LEAD BLK/ORG PPL/YEL PIN A PIN B PIN C BLK/ORG 95000 – 105000 3900 – 4100 PIN A RED METER RED METER 95000 – 105000 95000 – 105000 LEAD PIN B PPL/YEL 3900 –...
  • Page 84: Efi Detonation Control System (200 Model Only)

    IGNITION EFI Detonation Control System (200 Model only) The detonation control circuit is located in the ECM. This circuit monitors 2 detonation (knock) sensors; 1 each located in each cylinder head. When detonation is initially de- tected, timing is retarded. If detonation continues, fuel mixture is richened. Use DDT to monitor Knock Volts (Press Keys 1, 3, 1) Detonation Sensor (hidden) (1 per cylinder head) Detonation Circuit Test...
  • Page 85: Troubleshooting

    IGNITION Troubleshooting The ECM is designed such that if a sensor fails, the ECM will compensate so that the en- gine does not go into an over-rich condition. Disconnecting a sensor for troubleshooting purposes may have no noticeable effect. Troubleshooting Without Digital Diagnostic Terminal Troubleshooting without the DDT is limited to checking resistance on some of the sen- sors.
  • Page 86: Troubleshooting With The Digital Diagnostic Terminal

    Adapter Harness (84-822560A5) The Quicksilver Digital Diagnostic Terminal (DDT) has been developed specifically to help technicians diagnose and repair Mercury Marine 2 and 4 cycle engines. Attach the diagnostic cable to the ECM diagnostic connector and plug in the software car- tridge.
  • Page 87: Notes

    IGNITION Notes: Page 2A-30 90-883728 JULY 2001...
  • Page 88: Ddt Functions - Efi Models

    DINJ 1.0-1.6 ohm FINJ 1.7-1.9 ohm FAULT LIGHTS TYPICAL TPI RANGE FAULT LIGHTS SmartCraft Monitor TPI 1 0.19-1.0v IDLE 1 – Mercury Marine 3.45-4.63v WOT TGAP 0.025-.04in IGNITION 2 – Tool Setup SWITCHES PWR RLY 81-99 ohm RPM LIMIT 5850...
  • Page 89: Ignition Component Removal And Installation 2A-33

    IGNITION Ignition Component Removal and Installation Flywheel Removal 1. Remove flywheel cover off engine. 2. Remove alternator belt. 3. While holding flywheel with Flywheel Holder (91-52344), remove flywheel nut and washer. 58777 Flywheel Holder (91-52344) Flywheel 4. Install Flywheel Puller (91-849154T1) into flywheel. CAUTION Do not hammer on end of puller center bolt to remove flywheel, or damage may result to crankshaft or bearings.
  • Page 90: Flywheel Installation

    IGNITION Flywheel Installation IMPORTANT: Clean flywheel/crankshaft taper with solvent and assemble dry. 1. Reinstall flywheel on crankshaft. Secure flywheel with flat washer and locknut. While holding flywheel with Flywheel Holder (91-52344), torque flywheel nut to 120 Ib. ft. (163.0 N m). 58776 Flywheel Holder (91-52344) Torque Nut to 120 lb.
  • Page 91: Ignition Coil Installation

    IGNITION Ignition Coil Installation 1. Secure coil with 2 bolts. Torque bolts to 70 lb. in. (8 Nm). 2. Reconnect coil harness. 3. Reconnect spark plug lead to spark plug. Electronic Control Module Removal 1. Disconnect 3 Control Module harness connectors. 2.
  • Page 92: Temperature Sensor Removal

    IGNITION Temperature Sensor Removal ANALOG TEMPERATURE SENSOR 1. Remove screw and retaining plate. 2. Disconnect bullet connector and remove sensor. DIGITAL TEMPERATURE SENSOR 1. Disconnect wire harness for PORT and STARBOARD sensors. 2. Unscrew sensor from cylinder head. 58893 Bullet Connector Digital Temperature Sensor Analog Temperature...
  • Page 93: Air Temperature Sensor Removal

    IGNITION Air Temperature Sensor Removal 1. Disconnect sensor harness connector. 2. Unscrew sensor from air plenum. 58898 Air Temperature Sensor Harness Connector Air Temperature Sensor Installation 1. Install sensor into air plenum. Torque sensor to 14 lb. in. (1.6 Nm). 2.
  • Page 94: Crank Position Sensor Removal

    IGNITION Crank Position Sensor Removal 1. Disconnect sensor harness. 2. Remove screws securing sensor to engine. 58775 Crank Position Sensor Harness Connector Crank Position Sensor Installation 1. Secure sensor to engine with 2 screws. Torque screws to 45 lb. in. (5 Nm). 2.
  • Page 95 CHARGING & STARTING SYSTEM ELECTRICAL Section 2B – Charging & Starting System Table of Contents Specifications ......2B-2 Alternator Belt Tension Adjustment .
  • Page 96: Specifications

    CHARGING & STARTING SYSTEM Specifications CHARGING Alternator Output (Regulated) 35 - 41 Amperes @ 2000 RPM @ Battery SYSTEM 36 - 44 Amperes @ 2000 RPM @ Alternator Brush Length Std Exposed Length: 0.413 in. (10.5 mm) Min. Exposed Length: 0.059 in. (1.5 mm) Voltage Output 13.5 to 15.1 Volts Regulator Current Draw...
  • Page 97: Special Tools

    CHARGING & STARTING SYSTEM Special Tools 1. Volt/Ohm Meter 91-99750A1 or DMT 2000 Digital Tachometer Multimeter 91-854009A1 Volt/Ohm Meter 91-99750A1 DMT 2000 Digital Tachometer Multimeter 91-854009A1 2. Ammeter (60 Ampere minimum) (Obtain locally) 3. Flywheel Holder 91-52344 54964 4. Protector Cap 91-24161 (Used with Puller 91-73687A1) 5.
  • Page 98: Battery Cable Size

    Replacement Parts WARNING Electrical, ignition and fuel system components on your Mercury Outboard are designed and manufactured to comply with U. S. Coast Guard Rules and Regula- tions to minimize risks of fire and explosions. Use of replacement electrical, igni- tion or fuel system components, which do not comply with these rules and regu- lations, could result in a fire or explosion hazard and should be avoided.
  • Page 99: Battery

    CHARGING & STARTING SYSTEM Battery Precautions CAUTION If battery acid comes in contact with skin or eyes, wash skin immediately with a mild soap. Flush eyes with water immediately and see a doctor. When charging batteries, an explosive gas mixture forms in each cell. Part of this gas es- capes through holes in vent plugs and may form an explosive atmosphere around battery if ventilation is poor.
  • Page 100: Winter Storage Of Batteries

    CHARGING & STARTING SYSTEM 4. To check battery voltage while cranking engine with electric starting motor, place RED (+) lead of tester on POSITIVE (+) battery terminal and BLACK (–) lead of tester on NEGATIVE (–) battery terminal. If the voltage drops below 9-1/2 volts while cranking, the battery is weak and should be recharged or replaced.
  • Page 101: Flywheel Removal And Installation

    CHARGING & STARTING SYSTEM Flywheel Removal and Installation Removal 1. Remove flywheel cover from engine. WARNING Engine could possibly start when turning flywheel during removal and installa- tion; therefore, disconnect (and isolate) spark plug leads from spark plugs to pre- vent engine from starting.
  • Page 102: Installation

    CHARGING & STARTING SYSTEM Installation IMPORTANT: Clean flywheel/crankshaft taper with solvent and assemble dry. 1. Install flywheel. 2. Install flywheel washer and nut. 3. Hold flywheel with Flywheel Holder (91-52344). Torque nut to 125 lb-ft (169.5 Nm). 58776 Flywheel Holder (91-52344) Page 2B-8 90-883728 JULY 2001...
  • Page 103: Notes

    CHARGING & STARTING SYSTEM Notes: 90-883728 JULY 2001 Page 2B-9...
  • Page 104: Flywheel/Alternator

    CHARGING & STARTING SYSTEM Flywheel/Alternator 2-4-C With Teflon Page 2B-10 90-883728 JULY 2001...
  • Page 105 CHARGING & STARTING SYSTEM Flywheel/Alternator TORQUE REF. QTY. DESCRIPTION lb. in. lb. ft. ALTERNATOR SCREW (M10 x 100) SCREW (M10 x120) WASHER MOUNT BRACKET WASHER BRACKET SCREW (M10 x 55) CABLE BRACKET SCREW (5/16-18 x 1 IN.) 15.5 SPRING BELT TENSIONER ARM ASSY STUD (M10 x 85) BUSHING WASHER...
  • Page 106: System Components

    CHARGING & STARTING SYSTEM System Components The battery charging system consists of the alternator, battery, ignition switch, starter so- lenoid and the wiring which connects these components. YEL/RED 58911 Alternator Battery 20 Ampere Fuse Starter Solenoid Precautions The following precautions must be observed when working on the alternator system. Fail- ure to observe these precautions may result in serious damage to the alternator system.
  • Page 107: Alternator Description

    CHARGING & STARTING SYSTEM Alternator Description The alternator employs a rotor, which is supported in 2 end frames by ball bearings, and is driven at 2.5 times engine speed. The rotor contains a field winding enclosed between 2 multiple-finger pole pieces. The ends of the field winding are connected to 2 brushes which make continuous sliding contact with the slip rings.
  • Page 108: Alternator System Circuitry Test

    CHARGING & STARTING SYSTEM Alternator System Circuitry Test Using a 0-20 volt DC voltmeter, perform the following tests: Output Circuit 1. Connect POSITIVE (+) voltmeter lead to alternator terminal B (output terminal). Con- nect NEGATIVE (–) lead to case ground on alternator. 2.
  • Page 109: Sensing Circuit

    CHARGING & STARTING SYSTEM Sensing Circuit 1. Unplug RED and PURPLE lead connector from alternator. 2. Connect POSITIVE (+) voltmeter lead to RED lead and NEGATIVE (–) voltmeter lead to ground. 3. Voltmeter should indicate battery voltage. If correct voltage is not present, check sensing circuit (RED lead) for loose or dirty connections or damaged wiring.
  • Page 110: Voltage Output

    CHARGING & STARTING SYSTEM Voltage Output 1. Using a 0-20 volt DC voltmeter, connect POSITIVE (+) lead of voltmeter to TERMINAL B of alternator and NEGATIVE (–) lead of voltmeter to engine ground. 2. Start engine and allow to warm up. Increase engine RPM from idle to 2000. Normal voltage output should be 14.1 –...
  • Page 111: Current Output

    CHARGING & STARTING SYSTEM Current Output NOTE: Before conducting current output test, assure that all boat electrical accessories are turned OFF. 1. With engine shut off, install ammeter with clamp-on current probe (capable of reading 60+ amperes) onto alternator charging conductor (10 AWG Red Wire). 2.
  • Page 112: Current Output Troubleshooting

    CHARGING & STARTING SYSTEM Current Output Troubleshooting Current Output is Low Battery Cables are loose or corroded Defective Battery (Open Circuit) Defective Alternator Current Output is High Accessories turned on Defective Battery (Internal Short) Defective Alternator Repair Removal 1. Remove top cowling. 2.
  • Page 113 CHARGING & STARTING SYSTEM Installation 1. Secure alternator to engine block with attaching bolts. Torque top bolt to 40 lb-ft (54 Nm). Torque bottom nut to 35 lb-ft (47.5 Nm). 2. Rotate belt tensioner and install alternator belt in groove of flywheel and alternator pulley.
  • Page 114: Alternator Belt Tension Adjustment

    CHARGING & STARTING SYSTEM Alternator Belt Tension Adjustment Correct alternator belt tension is maintained by a belt tensioner assembly. 58771 Belt Tensioner Assembly Page 2B-20 90-883728 JULY 2001...
  • Page 115: Starter System

    CHARGING & STARTING SYSTEM Starter System NOTE: Early production engines will be equipped with centrifugal bendix type starter mo- tors. Later production engines will be equipped with solenoid driven bendix type starter motors. Starter Motor Amperes Draw STARTING Electric Start – All Models Centrifugal Bendix SYSTEM Starter Draw (Under Load)
  • Page 116: Starter Motor (Centrifugal Bendix)

    CHARGING & STARTING SYSTEM Starter Motor (Centrifugal Bendix) Liquid Neoprene 2-4-C With Teflon Page 2B-22 90-883728 JULY 2001...
  • Page 117 CHARGING & STARTING SYSTEM (Centrifugal Bendix) Starter Motor TORQUE REF. QTY. DESCRIPTION lb-in lb-ft STARTER MOTOR DRIVE KIT DRIVE DRIVE END PLATE THRU BOLT WASHER ARMATURE BRUSH SET BRUSH HOLDER SCREW END CAP COLLAR RUBBER STOP SCREW (1/4-20 x 5/8) WIRE ASSEMBLY (BLACK) LOCKWASHER BATTERY CABLE (POSITIVE)
  • Page 118: Troubleshooting The Starter Circuit (Centrifugal Bendix)

    CHARGING & STARTING SYSTEM Troubleshooting the Starter Circuit (Centrifugal Bendix) Before beginning the troubleshooting flow chart, verify the following conditions: 1. Battery is fully charged. 2. Control lever is in “NEUTRAL” position. 3. Check terminals for corrosion and loose connections. 4.
  • Page 119: Starter Circuit Troubleshooting Flow Chart(Centrifugal Bendix)

    CHARGING & STARTING SYSTEM Starter Circuit Troubleshooting Flow Chart (Centrifugal Bendix) Starter Motor Does Not Turn SAFETY WARNING: Disconnect YELLOW (starter motor) cable from starter solenoid test point 1 BEFORE making tests 1-thru-7 to prevent unexpected engine cranking. TEST 1 Use an ohmmeter (Rx1 scale) and connect meter leads between NEGATIVE (-) battery post and common pow- erhead ground.
  • Page 120: Flow Chart (Continued)

    CHARGING & STARTING SYSTEM Flow Chart (continued) TEST 7 a. Connect voltmeter between common engine and Test Point 1. b. Turn ignition key to “Start” position. 12 Volt Reading* No voltage reading: Defective starter solenoid Should hear solenoid click: proceed to TEST 8 TEST 8 a.
  • Page 121: Starter Removal (Centrifugal Bendix)

    CHARGING & STARTING SYSTEM Starter Removal (Centrifugal Bendix) CAUTION Disconnect battery leads from battery before removing starter. 1. Disconnect BLACK ground cable from starter. 2. Disconnect BLACK (with YELLOW sleeve) cable from starter. 3. Remove 4 bolts and upper and lower starter clamps. Lift starter from engine. 58803 BLACK ground cable Lower Mount Bolts...
  • Page 122: Starter Disassembly (Centrifugal Bendix)

    CHARGING & STARTING SYSTEM Starter Disassembly (Centrifugal Bendix) 1. Remove starter as outlined in Starter Removal. 2. Remove 2 through bolts from starter. 11646 Through Bolts Commutator End Cap 3. Tap commutator end cap to loosen and remove from frame. Do not lose brush springs. 4.
  • Page 123 CHARGING & STARTING SYSTEM 5. Remove armature (with drive end cap) from starter frame. 6. Remove locknut and remove drive assembly from armature shaft. Hold armature shaft with wrench on hex portion of drive assembly 7. Remove parts from shaft. 11658 Locknut Spacer...
  • Page 124: Starter Cleaning, Inspection And Testing

    CHARGING & STARTING SYSTEM Starter Cleaning, Inspection and Testing CLEANING AND INSPECTION 1. Clean all starter motor parts. 2. Check pinion teeth for chips, cracks or excessive wear. 3. Replace the drive clutch spring and/or collar if tension is not adequate or if wear is excessive.
  • Page 125 CHARGING & STARTING SYSTEM TESTING Armature Test for Shorts Check armature for short circuits by placing on growler and holding hack saw blade over armature core while armature is rotated. If saw blade vibrates, armature is shorted. Re- check after cleaning between commutator bars. If saw blade still vibrates, replace arma- ture.
  • Page 126 CHARGING & STARTING SYSTEM Checking Positive Brushes and Terminal Set ohmmeter to (R x 1 scale). Connect meter leads between POSITIVE brushes. Meter must indicate full continuity or zero resistance. If resistance is indicated, inspect lead to brush and lead to POSITIVE terminal solder connection. If connection cannot be repaired, brushes must be replaced.
  • Page 127: Starter Reassembly

    CHARGING & STARTING SYSTEM Starter Reassembly 1. If brushes were removed, replace as follows: a. Install POSITIVE brushes (along with POSITIVE terminal) into commutator end cap. 11660 End Cap Positive Brushes Positive Terminal Insulating Bushing Washer Split Washer Hex Nut Long Brush Lead Push Lead into Slot 90-883728 JULY 2001...
  • Page 128 CHARGING & STARTING SYSTEM b. Install NEGATIVE brushes (along with brush holder). 11656 Positive (+) Brushes Negative (–) Brushes Brush Holder Bolts (fasten negative brushes and holder) 2. If removed, reinstall parts on armature shaft. Use a new locknut and tighten securely on end of shaft.
  • Page 129 CHARGING & STARTING SYSTEM 6. To prevent damage to brushes and springs when installing commutator end cap, it is recommended that a brush retaining tool be made as shown: 18-Gauge Sheet Metal METRIC SCALE 3” = 76.2mm = 50.8mm 2” = 44.5mm 1-3/4”...
  • Page 130 CHARGING & STARTING SYSTEM 8. Place springs and brushes into brush holder and hold in place with brush retainer tool. 11661 Bushing Retainer Tool Bushing (do not over lubricate) 9. Install armature into starter frame and align match marks (a). Install commutator end cap onto starter frame and align match marks (b).
  • Page 131 CHARGING & STARTING SYSTEM STARTER SOLENOID TEST 1. Disconnect all wires from solenoid. 2. Use an ohmmeter (R x1 scale) and connect meter leads between solenoid terminals 1 and 2. 3. Connect a 12-volt power supply between solenoid terminals 3 and 4. Solenoid should click and meter should read 0 ohms (full continuity).
  • Page 132: Starter Motor (Solenoid Driven Bendix)

    CHARGING & STARTING SYSTEM Starter Motor (Solenoid Driven Bendix) 58430 Page 2B-38 90-883728 JULY 2001...
  • Page 133 CHARGING & STARTING SYSTEM Starter Motor (Solenoid Driven Bendix) TORQUE REF. QTY. DESCRIPTION lb-in lb-ft THRU BOLT 12.5 SCREWS END CAP BUSHING BRUSH PLATE ASSEMBLY ARMATURE FIELD FRAME SOLENOID SHIELD CUSHION PLANETARY GEARS PLUG DISC SHIFT FORK GEAR/CLUTCH ASSEMBLY BEARING HOUSING SCREW DRIVE GEAR...
  • Page 134: Troubleshooting The Solenoid Driven Bendix Starter Circuit

    CHARGING & STARTING SYSTEM Troubleshooting the Solenoid Driven Bendix Starter Circuit Before beginning the troubleshooting flow chart, verify the following conditions: 1. Confirm that battery is fully charged. 2. Check that control lever is in “NEUTRAL” position. 3. Check terminals for corrosion and loose connections. 4.
  • Page 135: Starter Circuit Troubleshooting Flow Chart (Solenoid Driven Bendix)

    CHARGING & STARTING SYSTEM Starter Circuit Troubleshooting Flow Chart (Solenoid Driven Bendix) Starter Motor Does Not Turn TEST 1 With ignition key in START position, check for battery volt- age at TEST POINT 1. Voltage indicated and solenoid clicks No voltage indicated Voltage indicated and solenoid does not click Go to TEST 2 Check for starter motor ground at Test Point 10...
  • Page 136 CHARGING & STARTING SYSTEM 12 Volt Reading No voltage reading: Defective starter solenoid proceed to TEST 5 TEST 5 12 Volt Reading* a. Connect voltmeter between common Neutral start switch is open or YELLOW/RED engine ground and Test Point 5. No voltage reading: wire is open between Test Points 5 and 4.
  • Page 137: Starter Removal (Solenoid Driven Bendix)

    CHARGING & STARTING SYSTEM Starter Removal (Solenoid Driven Bendix) CAUTION Disconnect battery leads from battery before removing starter. 1. Disconnect battery cables from battery. 2. Disconnect wires from starter solenoid terminals. 3. Remove starter trunion mounting bolts and remove starter from engine. 58428 Starter Solenoid Mounting Bolts...
  • Page 138 CHARGING & STARTING SYSTEM Starter Installation (Solenoid Driven Bendix) 1. Secure starter to engine with 4 bolts. Use right top bolt to attach BLACK NEGATIVE. Torque top attaching bolts to 23 lb-ft (31 Nm). Torque bottom attaching bolts to 21 lb-ft. (28.5 Nm).
  • Page 139: Disassembly (Solenoid Driven Bendix)

    CHARGING & STARTING SYSTEM Disassembly (Solenoid Driven Bendix Starter) 1. Remove brush lead from solenoid and through bolts from end frame. 58434 Brush Lead Brush Plate Screws Through Bolts End Frame Starter Solenoid 2. Remove armature and field frame from drive housing. NOTE: Permanent magnets inside field frame will be holding armature in place.
  • Page 140 CHARGING & STARTING SYSTEM 3. Remove shield and cushion from drive housing. 58432 Shield Cushion Drive Housing 4. Remove 3 screws retaining starter solenoid. Remove solenoid from drive housing. 5. Remove snap ring and gear from starter shaft. 58436 Drive Housing Snap Ring Starter Solenoid Pinion Gear...
  • Page 141 CHARGING & STARTING SYSTEM 6. Remove planetary gear and clutch assembly from drive housing. 7. Remove solenoid arm, metal disc and plug from drive housing. 58437 Planetary Gear and Metal Disc Clutch Assembly Solenoid Arm Drive Housing Plug 8. Inspect drive housing needle bearing for roughness. If bearing is worn or damaged, bearing can be removed by using an appropriate mandrel to drive/press bearing from drive housing.
  • Page 142: Cleaning And Inspection

    CHARGING & STARTING SYSTEM Cleaning and Inspection IMPORTANT: Do not use grease dissolving solvents to clean electrical compo- nents, planetary gears or drive clutch. Solvent will damage insulation and wash the lubricant out of the clutch drive and gears. Use clean rags and compressed air to clean components.
  • Page 143: Reassembly (Solenoid Driven Bendix)

    CHARGING & STARTING SYSTEM Reassembly (Solenoid Driven Bendix Starter) 1. Install solenoid arm with planetary gear and clutch assembly into drive housing. 58438 Solenoid Arm Planetary Gear and Clutch Assembly Drive Housing 2. Install metal disc and plug into drive housing. 58433 Metal Disc Plug...
  • Page 144 CHARGING & STARTING SYSTEM 3. Attach solenoid arm to starter solenoid. Install starter solenoid in drive housing and secure with 3 screws. Torque screws to 40 lb-in (4.5 N.m). 4. Install drive gear and secure with snap ring. 5. Reinstall rubber bumpers on housing. 58436 Drive Housing Drive Gear...
  • Page 145 CHARGING & STARTING SYSTEM 7. Install field frame over armature. 8. While holding brushes back, slide brush plate onto armature while aligning brush lead grommet with slot in field frame. 9. Secure end plate to brush assembly with 2 screws. Torque screws to 30 lb-in (3.4 Nm) NOTE: Prior to installing field frame assembly into drive housing, align slot in field frame with plug in drive housing.
  • Page 146 CHARGING & STARTING SYSTEM 10. Install field frame and end frame in drive housing. 11. Install through bolts and brush lead. Torque through bolts to 110 lb-in (12.5 Nm). Torque brush nut to 55 lb-in (6 Nm). 58434 End Frame Field Frame Drive Housing Through Bolts [Torque to 110 lb-in (12.5 Nm)]...
  • Page 147: Commander 2000 Key Switch Test

    CHARGING & STARTING SYSTEM Commander 2000 Key Switch Test 1. Disconnect remote control wiring harness and instrument panel connector. 2. Set ohmmeter on R x 1 scale for the following tests. 3. If meter readings are other than specified in the following tests, verify that switch and not wiring is faulty.
  • Page 148 TIMING, SYNCHRONIZING & ADJUSTING ELECTRICAL Section 2C - Timing, Synchronizing & Adjusting Table of Contents Specifications ......2C-1 Maximum Throttle Adjustment .
  • Page 149 TIMING, SYNCHRONIZING & ADJUSTING Special Tools 1. Digital Diagnostic Terminal (DDT) 91-823686A2 2. Software Cartridge 91-880118A2 3. DDT Reference Manual 90-881204-1 4. Adaptor Harness 84-822560A5 (use with DDT) Page 2C-2 90-883728 JULY 2001...
  • Page 150 TIMING, SYNCHRONIZING & ADJUSTING Adjustments IMPORTANT: All throttle linkage adjustments have been set at factory and appro- priately secured to prevent unnececessary readjustment. These factory settings enable this engine to meet federally mandated emission standards and should not be tampered with. However, should certain components fail, it may be necessary to reset throttle linkage to approximate factory settings.
  • Page 151 TIMING, SYNCHRONIZING & ADJUSTING Timing All timing adjustments are controlled by the Electronic Control Module (ECM). No external mechanical timing adjustments can be made. Actual engine timing can be monitored by using a Digital Diagnostic Terminal (DDT). Ignition timing at idle, whether in gear or in neutral, will vary. The ECM will use ignition timing to maintain an rpm of approximately 700 in neutral and 625 in forward gear.
  • Page 152 TIMING, SYNCHRONIZING & ADJUSTING Throttle Position Sensor The Throttle Position Sensor (TPS) is not adjustable. The Throttle Position Sensor func- tion can be monitored by using the DDT. All voltages should be within specifications listed. Voltage progression from idle to wide open throttle should be smooth. If voltage is out of specification or progression is erratic, TPS should be replaced.
  • Page 153 TIMING, SYNCHRONIZING & ADJUSTING Throttle Plate Screw IMPORTANT: Do not adjust throttle plate stop screw from factory setting. However, should the throttle plate require adjustment, use the throttle plate stop screw to set the total throttle plate clearance @ 0.040 in. (1.0 mm) or 0.020 in. (0.50 mm) each side.
  • Page 154 WIRING DIAGRAMS ELECTRICAL Section 2D – Wiring Diagrams Table of Contents Power Trim Wiring Diagram ....2D-2 Warning System ..... . 2D-26 Instrument Wiring Connections .
  • Page 155: Power Trim Wiring Diagram

    WIRING DIAGRAMS Power Trim Wiring Diagram Tach. Connector Trim Pump and Motor Key Switch Assembly DOWN Solenoid Trim Switch UP Solenoid Trim Sender Bottom Cowl Switch Start Solenoid 20 Ampere Fuse To Battery Engine Harness To Alternator Remote Control Harness Page 2D-2 90-883728 JULY 2001...
  • Page 156: Instrument Wiring Connections

    WIRING DIAGRAMS Instrument Wiring Connections Wire Color Where To BLACK GROUND Speedometer Tachometer TAN/WHT = TAN/WHITE OIL LIGHT TAN/BLK = TAN/BLACK TEMPERATURE LIGHT Temperature/Oil TEMPERATURE GAUGE PURPLE IGNITION 12 VOLT Volt Meter GRAY TACHOMETER BRN/WHT = BROWN/WHITE TRIM GAUGE TAN/BLU = TAN/BLUE VISUAL WARNING KIT (OPT.) 58912...
  • Page 157: Commander 3000 Classic Panel Remote Control

    WIRING DIAGRAMS Commander 3000 Classic Panel Remote Control BLK = Black BLU = Blue BRN = Brown GRY = Gray GRN = Green ORN = Orange PNK = Pink PUR = Purple RED = Red Tan = Tan WHT = White YEL = Yellow LIT = Light DRK = Dark...
  • Page 158: Commander 3000 Panel Remote Control

    WIRING DIAGRAMS Commander 3000 Panel Remote Control BLK = Black BLU = Blue BRN = Brown GRY = Gray GRN = Green ORN = Orange PNK = Pink PUR = Purple RED = Red TAN = Tan WHT = White YEL = Yellow LIT = Light DRK = Dark...
  • Page 159: 4000 Series Mechanical Panel Control

    WIRING DIAGRAMS 4000 Series Mechanical Panel Control BLK = Black BLU = Blue BRN = Brown GRY = Gray GRN = Green ORN = Orange PNK = Pink PUR = Purple RED = Red TAN = Tan WHT = White YEL = Yellow LIT = Light DRK = Dark...
  • Page 160: Instrument/Lanyard Stop Switch Wiring Diagram

    WIRING DIAGRAMS Instrument/Lanyard Stop Switch Wiring Diagram BLK=BLACK BLU=BLUE BRN=BROWN GRN=GREEN GRY=GRAY PUR=PURPLE RED=RED TAN=TAN WHT=WHITE YEL=YELLOW 52204 Ignition/Choke Switch Lanyard Stop Switch Lead Not Used on Outboard Installations Retainer Tachometer Trim Indicator Gauge (Optional) Temperature Gauge Remote Control Power Trim Harness Connector Connect Wires Together w/Screw and Nut (2 Places);...
  • Page 161: Oil Level Gauge Wiring Diagram

    WIRING DIAGRAMS Oil Level Gauge Wiring Diagram To 12 Volt Source PURPLE Wire (Connect to Trim Indicator Gauge “I” [or POSITIVE (+) 12 Volt Source that is Turned “ON” and “OFF” with Ignition Switch]) Oil Level Gauge BLACK Wire (Connects to NEGATIVE Ground) To Ground BLACK Wire (From Gauge to Oil Clip Connector) LIGHT BLUE Sender Lead to Gauge...
  • Page 162: Notes

    WIRING DIAGRAMS Notes: 90-883728 JULY 2001 Page 2D-9...
  • Page 163: Instrument/Lanyard Stop Switch Wiring Diagram (Dual Outboard)

    WIRING DIAGRAMS Instrument/Lanyard Stop Switch Wiring Diagram (Dual Outboard) BLK=BLACK BATT GND BLU=BLUE BRN=BROWN GRN=GREEN SENDER GRY=GRAY PUR=PURPLE RED=RED TAN=TAN WHT=WHITE YEL=YELLOW 52205 PORT INSTALLATION Ignition/Choke Switch Lanyard Stop Switch Lead not used on Outboard Installations Retainer Tachometer Trim Indicator Gauge Temperature Gauge Remote Control Page 2D-10...
  • Page 164 WIRING DIAGRAMS IMPORTANT: On installations where gauge options will not be used, tape back and isolate unused wiring harness leads BATT GND SENDER STARBOARD INSTALLATION 52206 Synchronizer Gauge Synchronizer Module Lanyard Switch (Isolation) Diode Y Harness Power Trim Harness Connector Connect Wires together with Screw and Nut (4 Places);...
  • Page 165: Qsi Gauge Wiring Diagrams

    WIRING DIAGRAMS QSI Gauge Wiring Diagrams Tachometer Wiring Diagram Tachometer dial on back side of case must be set to position number 4. WIRING DIAGRAM A Use this wiring diagram when using a separate light switch for instrument lighting. 51106 Connect to +12 Volt +12 Volt Light Switch Wire Position Light Bulb to the Switched Position...
  • Page 166: Water Temperature Gauge

    WIRING DIAGRAMS Water Temperature Gauge WIRING DIAGRAM A Use this wiring diagram when using a separate light switch for instrument lighting. SEND Connect to + 12 Volt +12 Volt Light Switch Wire Position Light Bulb to the Switched Position Connect to NEGATIVE (–) Ground Connect to TAN Lead located at the Tachometer Receptacle on Commander Side Mount Remote Control or TAN Lead coming from Accessory Ignition/ Choke Assembly.
  • Page 167: Oil Level Gauge Wiring

    WIRING DIAGRAMS Route TAN lead on starboard side of engine to engine/remote control harness. Connect as shown. IMPORTANT: Tape back and isolate any unused wiring harness leads. 28086 Lead from Temperature Sender Engine/Remote Control Harness Oil Level Gauge Wiring LIGHT BULB POSITION A Use this position when using a separate light switch for instrument lighting.
  • Page 168 WIRING DIAGRAMS LIGHT BULB POSITION B Use this position when instrument lighting is wired directly to the ignition key switch. (In- strument lights are on when ignition key switch is turned on.) 51112 Position Light Bulb to the Unswitched Position Sender SENDER WIRING 51108...
  • Page 169: Engine Synchronizer Wiring Diagram

    WIRING DIAGRAMS Engine Synchronizer Wiring Diagram LIGHT BULB POSITION A Use this position when using a separate light switch for instrument lighting. SEND 51105 +12 Volt Light Switch Wire Position Light Bulb to the Unswitched Position LIGHT BULB POSITION B Use this position when instrument lighting is wired directly to the ignition key switch.
  • Page 170: Maintenance

    WIRING DIAGRAMS Synchronizer wiring can be accomplished two different ways as an option to the user. Wiring Diagram – Gauge needle to point toward slow running engine GRY=GRAY WHT=WHITE BLK=BLACK PUR=PURPLE 51107 Tachometer Starboard Engine Synchronizer Gauge Tachometer Port Engine Synchronizer Module Wiring Diagram –...
  • Page 171: Warning System Signals

    WIRING DIAGRAMS Warning System Signals NOTE: The warning system signals which includes audible and visual indicator involving the horn and gauges will identify the potential problems listed in the chart Problem Horn Monitor Display Guardian Acti- Engine Speed vated Reduction Activated Power Up/System Check Single Beep...
  • Page 172: Guardian Protection System

    WIRING DIAGRAMS Guardian Protection System The guardian protection system monitors critical engine functions and will reduce engine power accordingly in an attempt to keep the engine running within safe operating parameters. IMPORTANT: The Guardian System cannot guarantee that powerhead damage will not occur when adverse operating conditions are encountered.
  • Page 173 WIRING DIAGRAMS Engine Overspeed Continuous The warning horn is activated any time engine speed exceeds the maximum allowable RPM. The system will limit the engine speed to within the allowable range. If the overspeed condition continues, the Engine Guardian System will place the engine in power reduction.
  • Page 174: Analog Gauge Panel Mount Remote Control Wiring Installation

    WIRING DIAGRAMS Analog Gauge Panel Mount Remote Control Wiring Installation BLK = Black BLU = Blue BRN = Brown GRY = Gray GRN = Green ORN = Orange PNK = Pink PUR = Purple RED = Red TAN = Tan WHT = White YEL = Yellow LIT = Light...
  • Page 175: System Monitor V2.0

    WIRING DIAGRAMS System Monitor V2.0 Basic Operation The System Monitor is an LCD multi-function display gauge. A variety of displays can be activated using the button. Pressing the button scrolls the following displays: fuel used, tachometer (RPM), fuel flow, power trim position, engine temp, water pressure, battery voltage, traveling range (if calibrated), and water depth (if equipped with transducer).
  • Page 176: Standard Information Display Screens

    WIRING DIAGRAMS NOTE: If you see the flashing message, (A) “nonE” after the Auto–detection occurs, the gauge can not find an engine. Please check wiring for correct connection. If you receive one of the following other flashing messages: (B) “Stbd”or, (C) “noSt” refer to the “Set–Up Errors Section”.
  • Page 177 WIRING DIAGRAMS FUEL FLOW SCREEN The System Monitor displays current estimated individual engine fuel consumption in Gallons per hour (Gal/hr) or Liters per hour (Ltr/hr). Gal/h TRIM POSITION SCREEN Displays trim position of the propulsion unit up to the maximum trim position, and then dis- plays trailer position.
  • Page 178: Display Of Range And Depth Information

    WIRING DIAGRAMS OIL PRESSURE SCREEN Displays engine oil pressure in Psi or Bar. BATTERY VOLTAGE SCREEN Displays voltage level (condition) of battery. Volt Display of Range and Depth Information RANGE SCREEN Displays estimated traveling range based on current fuel consumption and fuel remaining in the tank that is connected to the system.
  • Page 179: Warning System

    WIRING DIAGRAMS SHALLOW WATER ALARM FEATURE You can set an alarm to trigger whenever the boat moves into water shallower than the alarm level. Setting Shallow Water Alarm. 1. The water depth screen must be displayed. Be sure Depth is turned on in Cal2 . Refer to Cal2 Calibration Section for details.
  • Page 180: Warning Display Screens

    WIRING DIAGRAMS Warning Display Screens The engine has an “Engine Guardian System”. The ECM Engine control module monitors the critical sensors on the engine for any early indications of problems. The Guardian System will respond to a problem by reducing engine speed in order to maintain a safe operating condi- tion.
  • Page 181 WIRING DIAGRAMS If no water is coming out of the water pump indicator hole, or flow is intermittent, stop engine and check cooling water intake holes for obstruction. If no obstruction is found, this may indicate a blockage in the cooling system or a water pump problem. Have the outboard checked by your dealer.
  • Page 182 WIRING DIAGRAMS ALARM – WATER IN FUEL The Bell and Fuel Icon will appear and the warning horn will begin sounding a series of four beeps every two minutes when water in the water-separating fuel filter reaches the full level. On some engines water can be removed from the filter.
  • Page 183: Cal1 Calibration

    WIRING DIAGRAMS CAL1 Calibration Cal1 Display Calibrations: Trim Pop up Screen (On or Off) Trim Calibration English or Metric Units Selection Range Units Selection (On or Off) Depth, Trim, Engine Temperature, Oil Pressure, Oil Temperature, Water Pressure, Volts, Engine Hours, and Data Simulator pages.
  • Page 184 WIRING DIAGRAMS Calibration 10.0 – The word “Trim” and the down and up arrows should be blinking. Trim the unit out to the maximum trim (not trailer) position. Press the button to save. Press button to advance to the Calibration 25.0 setting. Trim Calibration 25.0 –...
  • Page 185: Cal2 Calibration

    Select the PSI input of the Pitot water pressure sensor on the engine. Press the button to select 1 = 100 PSI or 2 = 200 PSI. The standard PSI input on production Mercury product is 100 PSI. Certain High Performance applications may require a 200 Psi input.
  • Page 186 WIRING DIAGRAMS FUEL TANK CALIBRATION: NOTE: There are three methods to set up fuel tank level monitoring feature: First: Do nothing. Linear readout based on raw sensor values. This mode does not factor in irregular tank shapes. Second: By following the tank calibration procedure described on pages 33–35, but with- out actually adding fuel.
  • Page 187 WIRING DIAGRAMS Selecting “1” will bring up the following calibration screens. Calibration 0% – The “0 percent” display alternates between percent of tank capacity and quantity of fuel to add based on total capacity entered in Cal2. Add fuel to total quantity dis- played and push the button to save.
  • Page 188: Master Reset Command

    WIRING DIAGRAMS At this point you have completed tank 1 calibration and you will see “t2”. Change “t20” to a 1 (on). Press the button, you will see a blinking tank icon. Using the button, select which tank you want tank 2 to be, (oil, fuel or water/waste). Press the button to continue.
  • Page 189: System Tach & Speed

    The intention is to make initial setup easier. If gauge shows a warning of “No Starboard Engine” or “Multiple Starboard Engines”, engine will need to be properly selected (Port and Stbd) using a Mercury engine diagnostic tool. “Master Reset” and “Auto detect” again. (See page 45 for “Master Reset”).
  • Page 190: Speedometer Display Screens

    WIRING DIAGRAMS Speedometer Display Screens Speedometer NOTE: NOT ALL SCREENS MAY APPLY TO YOUR ENGINE TYPE. When the ignition is turned on, the speedometer will show the last screen that was dis- played before the ignition was turned off. MODE Press to change display screens.
  • Page 191: Tachometer Display Screens

    WIRING DIAGRAMS Tachometer Display Screens Tachometer VOLT 22.3 13.6 USED FUEL 22.0 3200 WATER NOTE: NOT ALL SCREENS MAY APPLY TO YOUR ENGINE TYPE. When the ignition is turned on, the tachometer will display the last screen that was dis- played before the ignition was turned off.
  • Page 192: Troll Control

    WIRING DIAGRAMS Troll Control BASIC OPERATION Speedometer Tachometer TROLL TROLL TROLL TROLL – – Actual Speed Set Speed Actual Speed Set Speed With troll control you can maintain a trolling speed of 550 to1000 rpm without using the throttle. NOTE: Troll control may not be available on all engine models. NOTE: Troll control min/max range may change depending on engine type.
  • Page 193: Warning System

    WIRING DIAGRAMS SETTING TROLL CONTROL Tachometer Speedometer TROLL TROLL TROLL – TROLL – Actual Speed Set Speed Actual Speed Set Speed 1. With the engine running, shift engine into gear. Set engine speed at idle. TROLL TROLL 2. Push in the button to bring up the troll control display screen.
  • Page 194: Alarm Messages

    WIRING DIAGRAMS Alarms Warnings – When a problem is detected, the warning horn sounds and the name of the offending alarm appears on the display. If problem can cause immediate engine damage – the horn will sound continuously and the Engine Guardian System (b) will respond to the problem by limiting engine power. Immediately reduce throttle speed to idle and refer to the warning messages on the fol- lowing pages that tell what to do.
  • Page 195 WIRING DIAGRAMS OVERHEAT The overheat alarm message appears and the warning horn begins sounding continuously. The Engine Guardian System will start limiting engine power. If the engine overheats, immediately reduce throttle speed to idle. Shift engine into neu- tral. Check for an obstruction covering the water intake holes on the engine. NOTE: The throttle will have to be returned to idle to reset the system.
  • Page 196 WIRING DIAGRAMS If the warning signals stop and a steady stream of water is coming out of the water pump indica- tor hole, return engine to normal operation. If the warning system is activated repeatedly, have the outboard checked by your dealer. OVERSPEED (a) This message is displayed and the warning horn begins sounding continuously to inform the driver that the engine speed exceeded the maximum allowable RPM.
  • Page 197 WIRING DIAGRAMS BATTERY (a) When the electrical system is not charging, or the battery charge is low, the warning message is designed to come on and the Engine Guardian System will start limiting engine power. If the message appears immediately after starting, it is possible that the engine alternator can re- charge the battery after operating awhile.
  • Page 198: Auto-Detection Engine Function

    WIRING DIAGRAMS WARNING NO STARBOARD ENGINE (a) Informs you that the Instrument does not see the starboard engine computer. Usually indicates that no data is being transferred from the engine’s computer to the gauge. (Check wiring, also make sure both terminator resistors are installed in the bus). Make sure both ECM’s are not configured for port location using a DDT or Quicksilver Diagnostic Tool.
  • Page 199: Tachometer Calibration

    WIRING DIAGRAMS Tachometer Calibration Quick Cal – This calibration for setting lighting and contrast. TROLL MODE 1. Press in the buttons for up to 2 seconds to get to Quick Cal screen. MODE 2. Press to advance through the lighting and contrast sections. Cal1 –...
  • Page 200 WIRING DIAGRAMS Choosing edit allows you to calibrate the gauge to the stan- CALIBRATION dard 0–10 unit trim and 11–25 trailer position scale. TRIM CALIBRATION [SKIP] [EDIT] TRIM FULL DOWN THEN PRESS PLUS (+) BUTTON [SAVE] [DFLT] [SKIP] TRIM FULL UP THEN PRESS PLUS (+) BUTTON [SAVE] [DFLT]...
  • Page 201 WIRING DIAGRAMS WATER PSI SCREEN? Do you want to turn on the water pressure screen? [NO] [SAVE] [YES] TRIM AND RPM SCREEN? Do you want to turn on the trim and RPM split screen? [NO] [SAVE] [YES] RPM SCREEN? Do you want to turn on the digital RPM screen? [NO] [SAVE] [YES]...
  • Page 202 WIRING DIAGRAMS TACH CALIBRATION – CAL 2 LEVEL SPEED OPTION This section lets you configure the following speed sensors. [SKIP] [EDIT] PITOT SENSOR? Select pitot transducer type. You can choose 100 or 200 PSI. (100 PSI is the most common) [SAVE] [NO] [YES]...
  • Page 203: Speedometer Calibration

    WIRING DIAGRAMS FILL TO 1/2 THEN PRESS PLUS You can choose to have tank at 1/2 and hit SAVE, or hit DFLT and BUTTON a default value will be entered based on the capacity of the tank. [DFLT] [SKIP] [SAVE] FILL TO 3/4 THEN PRESS PLUS You can choose to have tank at 3/4 and hit SAVE, or hit DFLT and BUTTON...
  • Page 204 WIRING DIAGRAMS SPEEDOMETER CALIBRATION CAL 1 LEVEL REMOTE LCD LIGHT? Enables you to set the lighting levels on all the SC1000 simulta- neously from this gauge. [YES] [NO] [SAVE] REMOTE LCD CONTRAST? Enables you to control the contrast from another System TACH/ Speed simultaneously from this gauge.
  • Page 205: Smartcraft Gauge Operation

    WIRING DIAGRAMS AIR TEMP? Are you using a air temp. sensor? [SAVE] [NO] [YES] GPS? Do you have a GPS sensor installed? [NO] [SAVE] [YES] USE GPS SPEED? Use the GPS input to drive the speed display? [SAVE] [NO] [YES] WATER TEMPERATURE ADJUST Adjust water temp.
  • Page 206: Speedometer Display Screen

    WIRING DIAGRAMS Speedometer Display Screen Speedometer When the ignition is turned on, the speedometer will show the last screen that was dis- played before the ignition was turned off. NOTE: Readings can be displayed in English or Metric. Refer to Calibration. MODE Press to change display screens.
  • Page 207: Tachometer Display Screens

    WIRING DIAGRAMS Tachometer Display Screens Tachometer When the ignition is turned on, the tachometer will display the last screen that was dis- played before the ignition was turned off. MODE Press to change display screens. You can revert back to the previous screen by MODE pressing and holding for 2 seconds.
  • Page 208: Troll Control

    WIRING DIAGRAMS Troll Control Tachometer Speedometer TROLL TROLL TROLL TROLL – – Actual Speed Set Speed Actual Speed Set Speed BASIC OPERATION With Troll control you can maintain a trolling speed of 450 to1000 rpm without using the throttle. You can set the trolling control by using either the tachometer or speedometer. Tachome- ter will set the speed in RPM and speedometer will set the speed in MPH.
  • Page 209: Warning System

    WIRING DIAGRAMS EXITING TROLL CONTROL There are three ways to turn off the troll control: MODE Press the button when in the troll display screen. Move the throttle to a different speed. Shift outboard into neutral. Warning System The SmartCraft warning system incorporates the display screens (a) the warning horn and the Guardian Protection system.
  • Page 210: Alarm Messages

    WIRING DIAGRAMS Alarm Messages These messages will appear and the horn will sound if there is a problem detected in one of the outboard systems. NOTE: The warning system will alert the operator to the potential problems listed in the chart.
  • Page 211 WIRING DIAGRAMS NOTE: If you are in a stranded situation, stopping the engine and allowing it to cool back down will usually allow some additional low speed (idle) running time before the engine starts to overheat again. The overheat problem must be corrected before you can resume normal operation. PRESSURE Water Pump Indicator Hole This alarm message is displayed and the warning horn begins sounding continuously to...
  • Page 212 WIRING DIAGRAMS RESERVE OIL LOW (a) This message will appear and the warning horn will begin sounding a series of four beeps every two minutes to inform the driver that the oil level is critically low in the engine mounted oil reservoir tank.
  • Page 213 WIRING DIAGRAMS BATTERY (a) The warning message is designed to come on and the Engine Guardian System will start limiting engine power when the electrical system is not charging or the battery charge is low. If the message appears immediately after starting, it is possible that the engine alter- nator can recharge the battery after operating awhile.
  • Page 214: Tachometer Calibration

    WIRING DIAGRAMS Tachometer Calibration NOTE: When calibrating multi tachometers (multi engines) turn ignition on for all the tachometers. Simple Calibration – This calibration for setting lighting and a few other common screens can be made while engine is running. TROLL MODE 1.
  • Page 215 WIRING DIAGRAMS Display boat speed in KN (knots), KPH (kilometers per hour), CALIBRATION MPH (miles per hour). Press + or – to select setting. Press SPEED UNITS KN - KPH - MPH MODE to save. [SAVE] [DOWN] [UP] Press MODE to skip to the next display. Press + (edit) if your CALIBRATION adding or deleting any external sensor to the SmartCraft Sys- EXTERNAL SENSORS...
  • Page 216 WIRING DIAGRAMS Add the capacity of the oil tank. Press + or – to select. Press CALIBRATION MODE to save. OIL TANK CAPACITY CAPACITY = XX.XX [DOWN] [SAVE] [UP] This calibration accurately adjusts the oil level sending unit in CALIBRATION the oil tank.
  • Page 217: Speedometer Calibration

    WIRING DIAGRAMS If the trim setting is not reading correctly, the trim sensor can CALIBRATION be re-calibrated to correct the setting. TRIM CALIBRATION Pressing DFLT (default) during edit will return to original value [SKIP] [EDIT] setting Press MODE to skip to the next display. Press + (edit) to cali- CALIBRATION brate the sensor.
  • Page 218 WIRING DIAGRAMS If the clock display is correct , press MODE to skip. CALIBRATION To set or reset the clock Press + TIME [SKIP] [EDIT] Select 12 hour or 24 hour clock set. Press – or + to select. Press MODE to save. CALIBRATION TIME FORMAT 12H –...
  • Page 219: Smartcraft Gauge Test Specifications

    WIRING DIAGRAMS SmartCraft Gauge Test Specifications Test Equipment Required: 1. Test Harness 84-875233A2 (a). 2. DMT 2000 Digital Tachometer Multimeter 91-854009A1 (b). NOTE: Connect negative DMT lead to BLACK/ORANGE lead on test harness 84-875233A2 for all tests. Use positive DMT lead on all other test harness leads to deter- mine if individual sensors are within specifications.
  • Page 220: 150/175/200 Wiring Diagram

    150/175/200 EFI Wiring Diagram 7 8 9 10 15 16 1 - Low Oil Switch 2 - Shift Switch 30 85 86 8787a A B C D E F G H A B C D E F G H J K A B C D E F G H 1 2 3 4 5 6 7 8 30 85 86 8787a...
  • Page 221 FUEL PUMP FUEL SYSTEM Section 3A - Fuel Pump Table of Contents Specifications ......3A-2 Checking Fuel Pump Lift (Vacuum) .
  • Page 222: Specifications

    4 psi (27.4 kPa) . Special Tools 1. Fuel Pressure Gauge (0–15 psi) (Obtain Locally) 57721 2. Vacuum Gauge (0 – 10 inches of vacuum mercury). Obtain Locally Page 3A-2 90-883728 JULY 2001...
  • Page 223 FUEL PUMP Notes: 90-883728 JULY 2001 Page 3A-3...
  • Page 224: Fuel Pump Assembly

    FUEL PUMP Fuel Pump Assembly Perfect Seal (92-34227-1) Page 3A-4 90-883728 JULY 2001...
  • Page 225 FUEL PUMP Fuel Pump Assembly TORQUE REF. QTY. DESCRIPTION lb-in lb-ft FUEL PUMP ASSEMBLY BODY–FUEL PUMP CHECK VALVE RETAINER SPRING SPRING DIAPHRAGM GASKET GASKET-BOOST GASKET-PULSE PLATE SCREW–FUEL PUMP (M5 x 40) SCREW–PUMP TO CRANKCASE (M6 x 50) BASE ELBOW FITTING ELBOW (45 DEGREE) STA STRAP TUBING (6 IN.)
  • Page 226: Fuel Pump Description/Operation

    FUEL PUMP Fuel Pump Description/Operation The fuel pump is a crankcase-pressure-operated, diaphragm-type pump. Crankcase pul- sating pressure (created by the up-and-down movement of piston) is transferred to fuel pump by way of a passage (hole) between crankcase and fuel pump. When piston is in an upward motion, a vacuum is created in the crankcase, thus pulling in on the fuel pump diaphragm.
  • Page 227: Checking Fuel Pump Lift (Vacuum)

    The vacuum gauge should rise to or exceed the maximum normal reading of 2.5 inches vacuum (mercury). If it fails to reach this minimum number, the pump needs servicing or there is a lack of crankcase pressure to operate the pump.
  • Page 228: Testing Fuel Pump

    Loose pulse hose. Tighten connection(s). Fuel hose internal diameter too small. Use 5/16 I.D. fuel hose. Primer bulb check valve not opening. Replace primer bulb. Excessive fuel lift required. Fuel lift exceeds 2.5 in. of vacuum (mercury) Page 3A-8 90-883728 JULY 2001...
  • Page 229: Fuel Pump Removal/Disassembly

    FUEL PUMP Fuel Pump Removal/Disassembly IMPORTANT: Fuel pump diaphragm and gaskets should not be re-used once fuel pump is disassembled. 1. Disconnect fuel hoses from fuel pump. 2. Disconnect pulse hose. 3. Remove two mounting screws. 4. Remove fuel pump from engine. 58799 Fuel Inlet Fuel hose from fuel pump to Fuel/Water Separator...
  • Page 230: Cleaning/Inspection

    FUEL PUMP Cleaning/Inspection 1. Clean fuel pump housing, check valves, pulse chamber and pump base in solvent and dry all but check valves with compressed air. 2. Inspect each check valve for splits or chips. 3. Inspect boost springs for weakness or breakage. 4.
  • Page 231 FUEL PUMP 2. Install check valves and retainers into fuel pump body. 58887 3. With retainer installed in pump body, break retainer rod from retainer by bending side- ways. 23601 Retainer Cap 4. Reinstall rod into retainer cap and, use a small hammer or hammer and punch to tap rod down into retainer until flush with top of retainer.
  • Page 232 FUEL PUMP 5. Place boost spring into pump body and place cap onto boost spring. 50161 Boost Spring Pump Body 6. Assemble remainder of components as shown and install retaining screws thru to align. 58876 Reverse View of Pump Body INSTALLATION 1.
  • Page 233 FUEL INJECTION FUEL SYSTEM Section 3B - Fuel Injection Table of Contents Specifications ......3B-2 Injector Load Test .
  • Page 234: Specifications

    FUEL INJECTION Specifications FUEL Idle RPM INJECTION – All Models Wide Open Throttle (WOT) RPM – Model 150XRI/175XRI/200XRI 5250 – 5750 Float Adjustment (Vapor Separator) Float Level Preset @ Factory Injectors – All Models (Quantity) – Injectors are Crank Angle Driven by ECM –...
  • Page 235: Special Tools

    FUEL INJECTION Special Tools 1. Fuel Pressure Gauge 91-852087A3(a) or Fuel Pressure Gauge 91-881834A1(b). 55294 58879 2. Digital Diagnostic Terminal (DDT) 91-823686T2 3. Software Cartridge 91-880118A2 4. DDT Reference Manual 90-881204-1 90-883728 JULY 2001 Page 3B-3...
  • Page 236 FUEL INJECTION 5. Adaptor Harness 84-822560A5 (use with DDT) 6. Remote Starter Switch 91-52024A1 7. DMT 2000 Digital Tachometer Multi-meter P/N 91-854009A1 8. Inductive Timing Light 91-99379 9. Spark Gap Tester 91-850439T 55117 10. Strap Wrench 91-24937A1 Page 3B-4 90-883728 JULY 2001...
  • Page 237: Notes

    FUEL INJECTION 11. Tamper Proof Torx Screw Set 91-881828 58685 Notes: 90-883728 JULY 2001 Page 3B-5...
  • Page 238: Fuel Management System

    FUEL INJECTION Fuel Management System Page 3B-6 90-883728 JULY 2001...
  • Page 239 FUEL INJECTION Fuel Management System TORQUE REF. QTY. DESCRIPTION lb-in lb-ft – FUEL MANAGEMENT ASSEMBLY ADAPTOR PLATE KIT GASKET GASKET REED BLOCK SCREW (1/4-20 x 0.88) 11.3 OIL PUMP BUSHING GROMMET SCREW (M8 x 35) WASHER AIR PLENUM KIT TEMPERATURE SENSOR O-RING SCREW (M4 x 16) Drive Tight...
  • Page 240: Vapor Separator Components

    FUEL INJECTION Vapor Separator Components Page 3B-8 90-883728 JULY 2001...
  • Page 241 FUEL INJECTION Vapor Separator Components TORQUE REF. QTY. DESCRIPTION lb. in. lb. ft. N·m – VAPOR SEPARATOR ASSEMBLY COVER KIT FITTING - STRAIGHT FITTING - STRAIGHT ELBOW FITTING - STRAIGHT O-RING VALVE PLUG SEAL GASKET PRESSURE REGULATOR KIT O-RING KIT WASHER - RUBBER SCREW SCREW...
  • Page 242: Electronic Fuel Injection (Efl) System

    FUEL INJECTION Electronic Fuel Injection (EFl) System Introduction The troubleshooting information provided here consists of preliminary checks (checks to be followed before proceeding with EFI tests), diagrams (fuel flow and electrical wiring), component description (from diagrams), flow charts (low pressure fuel delivery, high pres- sure fuel delivery, fuel delivery vs.
  • Page 243: Fuel Injection System Function

    FUEL INJECTION CAUTION Wipe up fuel spills immediately. CAUTION Depressurize fuel system prior to opening line connections or removing fuel sys- tem components. DANGER Perform the tests in this section in a well ventilated area to avoid being overcome by fuel vapors or poisonous exhaust gases. Fuel Injection System Function Fuel is delivered directly to the engine by way of fuel injectors.
  • Page 244: Electronic Fuel Injection Set Up

    FUEL INJECTION Electronic Fuel Injection Set Up IMPORTANT: Follow EFI Synchronizing/Adjustment section 2C before attempting tests on EFI system. EFI set up procedures must be followed before tests on system are performed (refer to Section 2C). Improper set up can result in poor engine performance (i.e. uncontrollable idle speeds, lean sneezing, low power during acceleration or engine will simply not run.) Failure to properly set up the EFI system can lead to misdirections in solving simple prob- lems in the EFI system.
  • Page 245: Fuel Flow Diagram

    FUEL INJECTION Fuel Flow Diagram 58901 Fuel Rail Electric Fuel Pump Reed Block Plate Assembly Vapor Separator Float Fuel Injectors (6) Needle and Seat Pulse Fuel Pump Vapor Separator to Flywheel Cover Vent Hose Fuel/Water Separator Final Filter Water Sensor Fuel Rail Pressure Port From Fuel Tank Fuel Pressure Regulator...
  • Page 246: Fuel Flow Component Description

    FUEL INJECTION Fuel Flow Component Description Pulse Fuel Pump (d) The pulse fuel pump operates through alternating crankcase pressure to deliver fuel through the water separating filter to the vapor separator. Fuel pressure @ Idle: 2 – 3 psi (13.8 – 20.7 kPa) [Minimum – 1 psi (6.9 kPa)]. Fuel Pressure @ Wide-Open-Throttle: 6 –...
  • Page 247: Efi Electrical Components

    FUEL INJECTION EFI Electrical Components ELECTRONIC CONTROL MODULE (ECM) The ECM is continually monitoring various engine conditions (engine temperature, engine detonation control (Model 200 only), engine throttle opening and climate conditions (induc- tion air temperature, barometric pressure and altitude level) needed to calculate fuel deliv- ery (pulse width length) of injectors.
  • Page 248 FUEL INJECTION ENGINE HEAD TEMPERATURE SENSOR (PORT AND STARBOARD CYLINDER HEAD) The Engine Head Temperature Sensors provide the ECM signals related to engine tem- perature to determine level of fuel enrichment during engine warm up. The ECM is receiv- ing information at all engine temperatures. Disconnecting the temperature sensors or tem- perature sensor failure will cause the ECM to revert to a default temperature source of 32 F (0 C).
  • Page 249: Efi Fuel Management (Low Pressure Fuel Route)

    FUEL INJECTION EFI Fuel Management (Low Pressure Fuel Route) Install fuel pressure gauge on to VST pres- sure port. Place ignition switch in “OFF” position 30 sec- onds before testing. Place ignition switch in “ON” position and note pressure within 30 seconds (41 to 45 psi; 283 to 310 kPa).
  • Page 250: Efi Fuel Management (High Pressure Fuel Route)

    FUEL INJECTION EFI Fuel Management (High Pressure Fuel Route) Perform low pressure checks before performing checks on high pressure route. Install fuel pressure gauge (P/N 91-852087A3) or (P/N 91-881834A1) on to manifold pressure port. Place ignition switch in “OFF” position 30 seconds before testing.
  • Page 251: Fuel Rail Electrical/Fuel Determination

    FUEL INJECTION Fuel Rail Electrical/Fuel Determination Perform all preliminary checks page 3B-11. Adequate fuel pressure (41 to 45 psi; 283 to 310 kPa) follow Low/High Fuel Route Flow Charts. Run engine @ idle and with DDT, perform cylinder load test. Results Results No RPM change on cylinder(s),...
  • Page 252: Efi System Test Procedures

    FUEL INJECTION EFI System Test Procedures NOTE: A clogged final filter located in fitting above fuel pump will cause low fuel pressure readings at the fuel pressure port. Remove fuel fitting and inspect final filter. Clean and/or replace final filter as necessary. Final Filter Fuel Gauge Connection/Pressure Test IMPORTANT: When checking fuel pressure while engine is running, fuel pressure...
  • Page 253: Vapor Separator Fuel Delivery Test

    FUEL INJECTION 2. Turn ignition key switch to “ON” position. START 3. Operate electric fuel pump (ignition key on). NOTE: Fuel pump will only operate for approximately 2-4 seconds. By turning the key switch to “OFF” and then back to “ON” the pump will operate for 2-4 seconds more. 4.
  • Page 254: Pulse Fuel Pump Delivery Test

    FUEL INJECTION Pulse Fuel Pump Delivery Test Purpose: This test will indicate pulse fuel pump is capable of supplying the low pressure fuel route with ade- quate fuel supply. 1. Place emergency stop switch in OFF position to prevent engine from starting. 2.
  • Page 255: Water Separating Filter Inspection

    FUEL INJECTION Results: If low or no fuel flow is present, inspect fuel hose for restrictions. Inspect anti-siphon valve and boat fuel tank for proper fuel delivery. If fuel flow is present, remove, disassemble and inspect pulse fuel pump. All fragments of failed pump must be located before reassembly. 58799 Pulse Fuel Pump Water Separating Filter Inspection...
  • Page 256: Vapor Separator Float Test

    FUEL INJECTION Vapor Separator Float Test NOTE: If squeezing the primer bulb in the Vapor Separator Fuel Delivery Test previous provides adequate fuel to the vapor separator, the vapor separator float, needle and seat is functioning properly and the following test does not need to be performed. Purpose: This test will indicate if float is stuck in the up (closed) position.
  • Page 257 FUEL INJECTION Electric Fuel Pump Inlet Filter Check and De-Pressurizing EFI System Procedures Purpose: Checking the inlet filter for obstructions, damage etc. eliminates this component as a possible source of restriction in the system. 1. De-pressurize EFI fuel system by wrapping a clean cloth around pressure port valve and inserting tip of screwdriver into valve, depressing valve core.
  • Page 258 FUEL INJECTION 3. Remove 3 bolts securing vapor separator assembly to manifold. 58801 Bolts 4. Tilt vapor separator assembly out from manifold and remove 9 screws securing cover. 5. Remove vapor separator tank from cover. 6. Pull downward to remove filter from fuel pump. 58869 Inlet Filter 7.
  • Page 259: Pressure Regulator Test

    FUEL INJECTION Pressure Regulator Test NOTE: Low fuel pressure can be caused by inadequate fuel supply, a defective electric fuel pump or fuel pressure regulator. Verify adequate fuel is being supplied to the vapor separator. If fuel supply is proper, inspect final filter inside outlet fuel fitting on vapor sepa- rator for debris.
  • Page 260 FUEL INJECTION Electric Fuel Pump Voltage/Pressure Test NOTE: The Digital Diagnostic Terminal (DDT) can implement a load test for the electric fuel pump. If the electric fuel pump does not appear to run, it is recommended that the DDT load test be performed first before performing the following voltage test. Purpose: If insufficient electrical power is available at the pump, no or low fuel pressure will be developed.
  • Page 261: Injector Electrical Harness Test

    FUEL INJECTION Injector Electrical Harness Test An injector load test can be performed using the Digital Diagnostic Terminal (DDT). An au- dible click will be heard each time an injector is activated. If an injector does not respond to the load test, an ohm test can be made on the harness and the injector(s). 58886 Injector Harness Injector Resistance...
  • Page 262: Injector Load Test

    FUEL INJECTION Injector Load Test An injector load test can be performed using the Digital Diagnostic Terminal (DDT). An au- dible click will be heard each time an injector is activated. This test will verify that each in- jector is operating mechanically, not that each injector is allowing the proper amount of fuel to enter each cylinder.
  • Page 263: Air Temperature Sensor And Head Temperature Sensor Test

    FUEL INJECTION Air Temperature Sensor and Head Temperature Sensor Test Purpose: This test eliminates possibilities of improper fuel delivery related to air/head temperature sensors. NOTE: Air/Head Temperature Sensor functioning can be monitored using the Digital Diag- nostic Terminal (DDT). The Air Temperature sensor should indicate ambient air tempera- ture.
  • Page 264: Detonation Control System Test (200 Models Only)

    FUEL INJECTION 2083 2488 2986 3603 4370 5327 6530 8056 10000 12493 15714 19903 25396 32654 –10 55319 –15 72940 Detonation Control System Test (200 Models Only) 58893 Knock Sensor Purpose: Determines whether the detonation sensor and circuit located in the ECM is functioning. 1.
  • Page 265: Throttle Position Sensor Test

    FUEL INJECTION Throttle Position Sensor Test 58871 Throttle Position Sensor Purpose: Determines whether Throttle Position Sensor is functioning properly through the use of the Digital Diagnostic Terminal (DDT). The Throttle Position Sensor is not adjustable. 1. Place outboard in water, connect Digital Diagnostic Terminal (DDT) to engine. NOTE: If throttle position sensor is not functioning, #4 LED indicator light on DDT will be illuminated.
  • Page 266: Map Sensor Test

    FUEL INJECTION PRESSURE TEST IMPORTANT: When testing TPS voltage, do not move the drive mechanism (rotor/ wiper). 1. Connect DDT and rotate the key to the “ON” position. 2. Set DDT to read TPS voltage; expand the screen to show Now/Min/Max. NOTE: Test accuracy is improved when TPS is at its lowest voltage reading;...
  • Page 267: Problem Diagnosis

    FUEL INJECTION Problem Diagnosis Condition Possible Source Action Engine Down On Power Or RPM – Failed Ignition Coil Refer to Section 2 Electrical and Ignition Tests. – Low Compression Refer to Section 4 Power Head. – Broken Reed Inspect Reeds. –...
  • Page 268 FUEL INJECTION Condition Possible Source Action Poor Acceleration – Idles Ok, – Timing Not Advancing. Check Timing Advance with DDT. Top Speed Ok (Continued) Engine Surges Between 4000 – Intermittant Ignition Coil Fail- Refer to Section 2A Electrical And 5000 RPM ure.
  • Page 269 FUEL INJECTION Condition Possible Source Action Engine Idles Rough (May Lean – Ignition Coil Failure. Refer to Section 2A Electrical Sneeze) – Acceleration OK; Full and Ignition Tests. Throttle Ok. (continued) – Broken Reed. Inspect Reed Assembly Engine Runs but Slowly Drops –...
  • Page 270 FUEL INJECTION Engine Head Temperature Sensor Removal ANALOG TEMPERATURE SENSOR 1. Remove screw and retaining plate. 2. Disconnect bullet connector and remove sensor. DIGITAL TEMPERATURE SENSOR 1. Disconnect wire harness for PORT and STARBOARD sensors 58893 Bullet Connector Digital Temperature Sensor Analog Temperature Sensor...
  • Page 271: Fuel Management Assembly Removal

    FUEL INJECTION Fuel Management Assembly Removal CAUTION Fuel system must be bled off prior to removal of fuel system components. NOTE: Use Fuel/Air Pressure Gauge 91-881834A1 to de-pressurize fuel system. 1. De-pressurize fuel system. 91-881834A1 58874 Fuel Pressure Port Fuel Pressure Gauge 91-881834A1 2.
  • Page 272 FUEL INJECTION 3. Disconnect the following hoses and connectors: 58878 VST Vent Hose Fuel Pressure Regulator Vent Hose VST Output Fuel Hose VST Oil Input Hose VST Electric Fuel Pump Harness Connector Water Sensor Bullet Connector Fuel/Water Separator Input Fuel Hose Page 3B-40 90-883728 JULY 2001...
  • Page 273 FUEL INJECTION 4. Remove ground lead between VST and air plenum. 5. Remove 3 bolts securing VST to air plenum and remove VST. 58896 VST Ground Lead VST Attaching Bolts 6. Disconnect throttle cam link rod and the Throttle Position Sensor link rod. 58871 Throttle Cam Link Rod Throttle Position Sensor Link Rod...
  • Page 274 FUEL INJECTION 7. Disconnect the following hoses and connectors: 58886 Air Temperature Sensor Oil Inlet Hose (plug to prevent leakage) MAP Sensor Oil Output Hose Fuel Regulator Hose Fuel Injector Harness Connector Engine Harness 8. Disconnect oil pump electrical harness. 58875 Electrical Harness Page 3B-42...
  • Page 275: Fuel Rail Removal

    FUEL INJECTION 9. Remove 12 bolts securing air management assembly to crankcase and remove as- sembly. 58793 Bolts (12 each) Fuel Rail Removal The fuel rail/injector assembly is attached to the reed block assembly plate by 4 screws. 58797 Fuel Rail/Injector Assembly Reed Block Assembly 90-883728 JULY 2001 Page 3B-43...
  • Page 276 FUEL INJECTION 1. Remove 4 screws to securing fuel rail/injector assembly to reed block assembly. 58798 Screws 2. Lift fuel rail assembly from reed block assembly. 3. Inspect o-rings for cuts and abrasions. Replace if necessary. 58881 Fuel Injectors (6) Fuel Rail Fuel Rail Fuel Inlet Pipe Reed Block Assembly...
  • Page 277: Fuel Rail Installation

    FUEL INJECTION 4. Individual fuel injectors and fuel inlet pipe can be removed from fuel rail by removing attaching screws. Use Tamper Proof Torx Screw Set 91-881828 to remove screws. 58792 Fuel Injector Attaching Screws Fuel Inlet Pipe Attaching Screw Fuel Rail Installation NOTE: Inspect all o-rings for cuts and abrasions.
  • Page 278 FUEL INJECTION 3. Apply light oil to all o-rings and o-ring contact surfaces on reed block assembly plate to ease installation of fuel rail assembly. 58881 Fuel Injectors (6) Fuel Rail Fuel Rail Fuel Inlet Pipe Reed Block Assembly O-Rings O-Ring Contact Surface 4.
  • Page 279: Reed Block Assembly Removal

    FUEL INJECTION Reed Block Assembly Removal 1. Remove 12 screws securing air plenum to reed plate assembly. 2. Remove 12 screws securing reed blocks to reed plate assembly. Screws (2 each per reed block) (M4x16) Air Plenum Screws (12 each) (1/4x20x0.88) Gasket Adaptor Plate Gasket...
  • Page 280: Air Temperature Sensor Removal

    FUEL INJECTION Air Temperature Sensor Removal Disconnect sensor harness and unscrew sensor. 58898 Temperature Sensor Harness Air Temperature Sensor Air Temperature Sensor Installation 1. Carefully thread sensor into air plenum. Torque sensor to 14 lb. in. (1.6 Nm). 2. Reconnect sensor harness. Manifold Absolute Pressure (MAP) Sensor Removal 1.
  • Page 281: Throttle Plate Assembly Removal

    FUEL INJECTION Throttle Plate Assembly Removal NOTE: The throttle plate assembly is calibrated and preset for proper running characteris- tics and emissions at the factory. Other than complete assembly removal from the air ple- num, no further disassembly should be made. Remove 4 bolts securing throttle plate assembly to air plenum and remove assembly.
  • Page 282: Vapor Separator Reassembly

    FUEL INJECTION 4. Disconnect harness from pump to separate pump from cover. Inspect filter screen for debris. Screen may be pried out of pump and cleaned as required. 5. Inspect seal above fuel pump for cuts or abraisions. Replace seal if necessary. Apply 2-4-C w/Teflon to seal lips.
  • Page 283 FUEL INJECTION 3. Apply 2-4-C with Teflon to lips of seal in separator cover. 58787 58783 Screw [Torque to 10 lb. in. (1.0 Nm)] Float Gasket Sealing Bead Seal (Seal shoulder faces OUT) 4. Connect electrical harness to fuel pump. Inspect fuel pump filter screen for debris. Re- move screen and clean as required.
  • Page 284: Air Plenum Installation

    FUEL INJECTION 6. Install separator cover with pump onto separator tank. 7. Secure cover to tank with 7 screws. Torque screws to 30 lb. in. (3.5 Nm). 58784 Screws [Torque to 30 lb. in. (3.5 Nm)] Air Plenum Installation Secure plenum to crankcase with 12 bolts. Torque bolts to 125 lb. in. (14 Nm). in sequence shown 56144 Air Plenum...
  • Page 285: Vapor Separator (Vst) Installation

    FUEL INJECTION Vapor Separator (VST) Installation 1. Install ground lead between VST and air plenum. 2. Install 3 bolts securing VST to air plenum. Torque bolts to 140 lb. in. (16 Nm). 58896 VST Ground Lead Bolts [Torque to 140 lb. in. (16 Nm)] 3.
  • Page 286: Water Separating Filter Assembly Removal

    FUEL INJECTION Water Separating Filter Assembly Removal NOTE: To inspect or replace water separator, it is not necessary to remove inlet fuel line. 1. Remove water sensor lead from bottom of separator. 2. With wipe towels available, use Strap Wrench (91-24937A1) to remove water separa- tor.
  • Page 287: Throttle Position Sensor Removal

    FUEL INJECTION Throttle Position Sensor Removal NOTE: Vapor Separator has been removed for visual clarity. 1. Remove throttle position sensor (TPS) harness connector. 2. Remove sensor link rod. 3. Remove 3 screws securing sensor. 58871 Sensor Harness Connector Retaining Screws Sensor Link Rod Throttle Position Sensor Throttle Position Sensor Installation...
  • Page 288: Oil Reservoir Removal

    FUEL INJECTION Oil Reservoir Removal 1. Disconnect low oil sensor bullet connectors (BLUE leads). 2. Remove sta-strap securing reservoir hose to oil pump and remove hose. Plug hose to prevent leakage. 3. Remove oil input hose to oil reservoir from check valve. 4.
  • Page 289: Fuel Pressure Regulator Removal

    FUEL INJECTION Fuel Pressure Regulator Removal 1. Disconnect boat battery from engine harness. CAUTION Fuel system must be bled off prior to removal of fuel system components. NOTE: Use Fuel/Air Pressure Gauge 91-881834A1 to de-pressurize fuel system. 1. De-pressurize fuel system. 91-881834A1 58874 Fuel Pressure Port...
  • Page 290: Fuel Pressure Regulator Disassembly

    FUEL INJECTION Fuel Pressure Regulator Disassembly 1. Inspect O-rings for cuts and abraisions. Replace as required. 2. Inspect fuel filter for debris. Clean with solvent as required. 58789 O-Rings Filter Fuel Pressure Regulator Reassembly 1. Reinstall fuel regulator into vapor separator. 2.
  • Page 291: Efi System Cleaning And Inspection

    FUEL INJECTION EFI System Cleaning and Inspection Cleaning 1. Clean all non-electrical metal parts using a good grade solvent. 2. Use a soft bristle brush for removing large accumulations of dirt or grease and oil. 3. Varnish type coating of induction manifold parts may be removed using carburetor cleaner.
  • Page 292 OIL INJECTION FUEL SYSTEM Section 3C - Oil Injection Table of Contents Operation of the Oil Injection System ..3C-2 Priming the Oil Pump ....3C-14 Final Checks Before Operation of Engine 3C-2...
  • Page 293: Operation Of The Oil Injection System

    OIL INJECTION CAUTION Be careful not to get dirt or other contamination in tanks, hoses or other compo- nents of the oil injection system during installation. Operation of the Oil Injection System The oil injection system delivers oil mixture on engine demand, from 120:1 at idle to 50:1 at wide open throttle.
  • Page 294 OIL INJECTION Notes: 90-883728 JULY 2001 Page 3C-3...
  • Page 295: Oil Injection Components

    OIL INJECTION Oil Injection Components Page 3C-4 90-883728 JULY 2001...
  • Page 296 OIL INJECTION Oil Injection Components TORQUE REF. QTY. DESCRIPTION lb-in lb-ft OIL RESERVOIR ASSEMBLY OIL RESERVOIR DECAL-RESERVOIR GROMMET WASHER SCREW [5/16-18 x 1-1/4 IN) BUSHING SWITCH SCREW [0.164-18 x 1-1/4 IN) Drive Tight WASHER 90-883728 JULY 2001 Page 3C-5...
  • Page 297: Oil Lines

    OIL INJECTION Oil Lines Page 3C-6 90-883728 JULY 2001...
  • Page 298 OIL INJECTION Oil Lines TORQUE REF. QTY. DESCRIPTION lb-in lb-ft FITTING TEE FITTING TUBING [6 IN (15.2 CM)] HOSE ASSEMBLY FITTING FUEL FILTER HOSE STA-STRAP [8 IN (20.3 CM)] STA-STRAP [5-1/2 IN (14 CM)] TUBING [24 IN (60.9 CM)] 90-883728 JULY 2001 Page 3C-7...
  • Page 299 OIL INJECTION Oil Lines TO A TO B 58791 58795 58790 Page 3C-8 90-883728 JULY 2001...
  • Page 300 OIL INJECTION Oil Lines TORQUE REF. QTY. DESCRIPTION lb-in lb-ft FITTING TUBING [22 IN (55.8 CM)] TEE FITTING TUBING [1-1/2 IN (3.8 CM)] TUBING [4-3/4 IN (12 CM)] TUBING [3-1/2 IN (8.9 CM)] CHECK VALVE CHECK VALVE 90-883728 JULY 2001 Page 3C-9...
  • Page 301: Oil Injection Components

    OIL INJECTION Oil Injection Components REMOTE OIL TANK Holds 3 gallons (11.5 liters) of oil. NOTE: Some boats may be equipped with optional 1.8 gallon (7.0 liters) oil tank. The tank is pressurized by air from crankcase pressure thus forcing oil up the outlet hose to the oil reservoir on engine.
  • Page 302: Oil Injection Flow System

    OIL INJECTION Oil Injection Flow System 58888 Remote Oil Tank Vapor Separator Tank Oil Pick-up Tube Oil Inlet to Oil Pump Filter Oil Injection Pump 4 PSI Check Valve Oil Outlet Hose to Vapor Separator Tank Oil Reservoir Low Oil (Float) Sensor (Inside Reser- voir) 90-883728 JULY 2001 Page 3C-11...
  • Page 303: Oil Pump Removal And Installation

    OIL INJECTION Oil Pump Removal and Installation REMOVAL 1. Disconnect the wiring harness from the pump. 2. Disconnect the oil hoses. NOTE: Plug oil supply hose from oil reservoir to prevent spillage. 3. Remove three bolts and remove pump. 58781 Oil Pump Bushing (3) Rubber Grommet (3) –...
  • Page 304 OIL INJECTION Engine Oil Reservoir Removal and Installation REMOVAL 1. Disconnect the oil hoses. Plug the hoses to prevent spillage. 2. Disconnect the BLUE with BLACK STRIPE wire leads. 3. Remove three bolts securing oil tank to powerhead and remove tank. 58780 Oil Reservoir Bushing (3)
  • Page 305: Priming The Oil Pump

    OIL INJECTION Priming the Oil Pump NOTE: If a new powerhead is being installed or oil hoses/oil pump has been removed, it is recommended all air be purged from oil pump/oil lines using gearcase leakage tester (FT-8950)(a). Connect the leakage tester to the inlet t-fitting on the onboard oil reservoir. While clamping off the inlet hose, manually pressurize the reservoir to 10 psi.
  • Page 306: Priming Procedure - Method 1

    OIL INJECTION Refer to procedure in the Technician Reference Manual provided with the Digital Diagnos- tic Software Cartridge Part. No. 91-880118--1. Conditions Requiring Priming the Oil Pump Condition Priming Procedure New engine Use Method 1 or 2 Rebuilt Powerhead Use Method 1 or 2 New Powerhead Use Method 1 or 2 Oil system ran out of oil...
  • Page 307: Remote Oil Hose Connections

    OIL INJECTION Prime the oil injection pump as follows: 1. Fill the engine fuel system with fuel. Connect fuel hose and squeeze primer bulb until it fells firm. 2. Turn the ignition key switch to the “ON” position. 3. Within the first 10 seconds after the key switch has been turned on, move the remote control handle from neutral into forward gear 3 to 5 times.
  • Page 308: Filling The Oil Tanks

    OIL INJECTION CONNECTING OIL HOSE WITHOUT BLUE STRIPE 1. Remove shipping cap from fitting and connect hose (a). Fasten hose with sta-strap. Oil Hose Without Blue Stripe Filling the Oil Tanks 1. Fill remote oil tank with the recommended oil listed in the Operation and Maintenance Manual.
  • Page 309: Oil Warning Systems

    No lubricating oil is being supplied to the engine. NOTE: As an option, Mercury Monitor or SmartCraft Gauges may be used to provide low oil information or oil pump operation information. Page 3C-18...
  • Page 310: Oil System Troubleshooting

    OIL INJECTION Oil System Troubleshooting Low Oil Warning System is Activated Problem Problem Problem Problem Oil leaks out of Low oil level in en- Oil level is not low Low oil level in engine exhaust gine oil reservoir and in either tank oil reservoir but not low or #6 cylinder also remote oil tank...
  • Page 311 EMISSIONS FUEL SYSTEM Section 3D – Emissions Table of Contents Exhaust Emissions Standards ....3D-1 Emissions Information ......3D-4 What Are Emissions? .
  • Page 312: Oxides Of Nitrogen - Nox

    EMISSIONS Oxides of Nitrogen - NOx NOx is a slightly different byproduct of combustion. Nitrogen is one of the elements that makes up the air going into the engine. Under extremely high temperatures it combines with oxygen to form oxides of nitrogen (NOx). This happens in the engine’s combustion chambers when temperatures are too high.
  • Page 313: Stratified Vs Homogenized Charge

    EMISSIONS Stratified vs Homogenized Charge At certain operating conditions, DFI engines use a stratified charge inside the combustion chamber to aid in reducing emissions. All other models exclusively use a homogenized charge. The difference between the two is: Homogenized Charge A homogenized charge has the fuel/air particles mixed evenly throughout the cylinder.
  • Page 314: Stratified Charge

    EMISSIONS Stratified Charge A stratified charge engine only pulls air through the transfer system. The fuel required for combustion is forced into the cylinder through an injector placed in the top of the cylinder (head). The injector sprays a fuel/air mixture in the form of a fuel cloud into the cylinder. Surrounding this cloud is air supplied by the transfer system.
  • Page 315: Dealer Responsibility

    EPA Emission Regulations: All new 1998 and later outboards manufactured by Mercury Marine are certified to the United States Environmental Protection Agency as conforming to the requirements of the regulations for the control of air pollution from new outboard motors. This certification is contingent on certain adjustments being set to factory standards.
  • Page 316: Manufacturer's Certification Label

    Valve Clearance (Cold) mm Exhaust: N/A Spark Ignition (SI) Family example FEL: Represents (Mercury Marine) statement of the maximum emissions out- put for the engine family Timing specifications when adjustable Month and Year of Production Valve Clearance (Four Stroke engines only)
  • Page 317: Service Replacement Certification Label

    EMISSIONS Service Replacement Certification Label IMPORTANT: By federal law, it is required that all 1998 and newer Mercury Marine outboards have a visible and legible emission certification label. If this label is mis- sing or damaged, contact Mercury Marine Service for replacement if appropriate.
  • Page 318 POWERHEAD POWERHEAD Section 4A - Powerhead Table of Contents Specifications ......4A-2 Special Service Information .
  • Page 319: Specifications

    POWERHEAD Specifications Block Type ....... . . 60 V, 2 Cycle Displacement .
  • Page 320: Special Tools

    POWERHEAD Special Tools 1. Lifting Eye 91-90455 2. Flywheel Holder 91-52344 91–52344 54964 3. Protector Cap 91-24161 4. Flywheel Puller 91-849154T1 55117 5. Powerhead Stand 812549T 6. Piston Ring Expander 91-24697 7. Lockring Removal Tool 91-52952A1 90-883728 JULY 2001 Page 4A-3...
  • Page 321: Powerhead Repair Stand

    POWERHEAD 8. Piston Pin Tool 91-74607A1 9. Universal Puller Plate 91-37241 10. Snap Ring Pliers 91-24283 11. Lockring Installation Tool 91-91-79109A3 12. Piston Ring Compressor 91-818773 (for 2.5 Liter) 13. Compression Tester 91-29287 54965 Powerhead Repair Stand A powerhead repair stand may be purchased from: Bob Kerr’s Marine Tool Co.
  • Page 322: Notes

    POWERHEAD Notes: 90-883728 JULY 2001 Page 4A-5...
  • Page 323: Cylinder Block Assembly

    POWERHEAD Cylinder Block Assembly Loctite PST Pipe Sealant Loctite Master Gasket 2 Cycle Outboard Oil Loctite 680 2-4-C with Teflon Page 4A-6 90-883728 JULY 2001...
  • Page 324 POWERHEAD Cylinder Block Assembly TORQUE REF. QTY. DESCRIPTION lb-in lb-ft CYLINDER BLOCK (150) CYLINDER BLOCK (175/200) STUD–POWERHEAD (1-3/4 IN.) STUD–POWERHEAD (5-1/2 IN.) STUD–POWERHEAD (6-3/4 IN.) DOWEL PIN–LOCATING DOWEL PIN (BEARING RACE) COVER–STARTER MOTOR (UPPER) SCREW (1-1/2 IN.) (HEX FLANGE) 17.5 23.5 COVER (LOWER) SCREW (2 IN.)(HEX HEAD FLANGE)
  • Page 325: Exhaust Manifold And Exhaust Plate

    POWERHEAD Exhaust Manifold and Exhaust Plate Loctite 271 Loctite 222 3M Permabond #3MO8155 (Obtain Locally) 2-4-C with Teflon Page 4A-8 90-883728 JULY 2001...
  • Page 326 POWERHEAD Exhaust Manifold and Exhaust Plate TORQUE REF. QTY. DESCRIPTION lb-in lb-ft GASKET DIVIDER PLATE SEAL SCREW (5/16-18 x 1-1/2) 16.5 22.5 SCREW (5/16-18 x 1) 16.5 22.5 COVER-RELIEF VALVE SCREW (5/16-18 x 1-1/4) 16.5 22.5 SCREW (10-16 x 3/4 in.) WASHER DIAPHRAGM WATER DEFLECTOR...
  • Page 327: Crankshaft, Pistons And Connecting Rods

    POWERHEAD Crankshaft, Pistons and Connecting Rods 2 Cycle Outboard Oil 2-4-C with Teflon Page 4A-10 90-883728 JULY 2001...
  • Page 328 POWERHEAD Crankshaft, Pistons and Connecting Rods TORQUE REF. QTY. DESCRIPTION lb-in lb-ft CRANKSHAFT ASSEMBLY WEAR SLEEVE BALL BEARING (LOWER) RETAINING RING CARRIER ASSEMBLY SEAL RING–SEALING ROLLER BEARING RACE PISTON (STARBOARD) PISTON (PORT) PISTON RING LOCK RING CONNECTING ROD ASSEMBLY 1st Torque: 15 lb-in 2nd Torque: 20 lb-ft SCREW Turn screw addition-...
  • Page 329: Cylinder Head

    POWERHEAD Cylinder Head Loctite PST Pipe Sealant 2 Cycle Outboard Oil Page 4A-12 90-883728 JULY 2001...
  • Page 330 POWERHEAD Cylinder Head TORQUE REF. DESCRIPTION lb-in lb-ft CYLINDER HEAD (150) CYLINDER HEAD (175/200) SEAL SEAL SCREW (0.375-16 x 2.30) SEE NOTE #1 DOWEL PIN GASKET COVER THERMOSTAT SCREW (M8 x 25) 16.5 22.5 ELBOW HOSE [12-3/4 IN.(32.3 CM)] FITTING STA-STRAP HOSE [13-1/2 IN.(34.3 CM)] HOSE [4-1/2 IN.(11.4 CM)]...
  • Page 331: Bleed System Routing

    POWERHEAD Bleed System Routing TO A Note TO B 58791 58795 58790 Page 4A-14 90-883728 JULY 2001...
  • Page 332 POWERHEAD Bleed System Routing TORQUE REF. QTY. DESCRIPTION lb-in lb-ft FITTING TUBING [22 IN (55.8 CM)] TEE FITTING TUBING [1-1/2 IN (3.8 CM)] TUBING [4-3/4 IN (12 CM)] TUBING [3-1/2 IN (8.9 CM)] CHECK VALVE CHECK VALVE NOTE: High pressure fuel hose from fuel pump in vapor separator to fuel rail fitting on air plenum.
  • Page 333: Torque Sequence

    POWERHEAD Torque Sequence CRANKCASE COVER BOLTS Apply light oil to threads and bolt face: 8 Bolts (3/8 in. - 16 in. 38 lb. ft. (51.5 N·m) Bolts (5/16 in. - 18) 15 lb. ft. (20.3 N·m) EXHAUST COVER BOLTS 15 lb. ft. (20.3 N·m) Apply light oil to threads and bolt face 50806 Page 4A-16 90-883728 JULY 2001...
  • Page 334: General Information

    POWERHEAD CYLINDER HEAD BOLTS Apply light oil to threads and bolt face: 30 lb. ft. (40.7 N·m) and rotate 90 POWERHEAD TO ADAPTOR PLATE ATTACHING NUT Torque nuts to 25 lb. ft. (33.8 Nm) Starboard Side Front Port Side General Information Powerhead “Disassembly”...
  • Page 335: Powerhead Removal From Driveshaft Housing

    POWERHEAD Powerhead Removal from Driveshaft Housing 1. Disconnect battery cables from battery terminals. 2. Remove top cowling. 3. Remove two screws which secure remote control harness retainer and remove retainer. 57841 Screws Retainer 4. Remove bottom cowls. 58774 58068 Bolts Page 4A-18 90-883728 JULY 2001...
  • Page 336 POWERHEAD 5. Disconnect and/or remove the following: 58778 Remote Oil Tank Pressure Hose Remote Control Harness Power Trim Wires Negative Battery Cable Positive Battery Cable SmartCraft Harness Connector 90-883728 JULY 2001 Page 4A-19...
  • Page 337 POWERHEAD 6. Disconnect and/or remove the following: 58780 Oil Supply Hose Page 4A-20 90-883728 JULY 2001...
  • Page 338 POWERHEAD 7. Disconnect water pressure sensor (gray) hose and speedometer pressure sensor (black) hose. 58773 Water Pressure Sensor Speedometer Pressure Sensor Speedometer Sensor Hose (BLACK)(for Digital Gauges) Water Pressure Sensor Hose (GRAY)(for Digital Gauges) 90-883728 JULY 2001 Page 4A-21...
  • Page 339 POWERHEAD 8. Slide outboard shift lever into neutral position. 9. Remove locknut and flat washer securing throttle cable and remove cable. 10. Remove locknut that secures shift cable latch assembly and remove latch, flat washer, nylon wear plate, spring and shift cable from control cable anchor bracket. 57838 Lock Nut (Throttle Spring (Hidden)
  • Page 340 POWERHEAD 12. Remove water hose from fitting on exhaust adaptor plate. 58069 Water Hose Fitting 13. Remove 10 nuts and 10 washers (5 each side) from powerhead base. 51846 Nuts and Washers (5 each side) 14. Remove plastic cap from center of flywheel and install Lifting Eye 91-90455 into flywheel at least 5 full turns.
  • Page 341: Removing Engine Components

    POWERHEAD Removing Engine Components NOTE: Engine components can be removed individually or in some cases as an assembly. Removing Engine Components Individually Section 2 Starter Motor *Electronic Control Module *Ignition Coils *Starter Solenoid *Trim Relays Alternator Flywheel Section 3 Air Plenum Fuel Rail and Injectors Vapor Separator Assembly Pulse Fuel Pump...
  • Page 342: Removing Engine Components As An Assembly

    POWERHEAD Removing Engine Components as an Assembly VAPOR SEPARATOR TANK (VST) REMOVAL CAUTION Depressurize fuel system prior to opening line connections or removing fuel sys- tem components. 1. Use Fuel/Air Pressure Gauge 91-16850A7 or Fuel Pressure Gauge 91-881834A1 to de- pressurize fuel system.
  • Page 343 POWERHEAD 3. Disconnect and/or remove the following: 58878 Fuel Pump Harness Ground Lead (hidden) Connector between VST and Air Plenum High Pressure Fuel Hose Fuel Inlet Hose Fuel Regulator Hose Water Sensor Lead Vent Hose 4. Remove 3 bolts securing vapor separator to air plenum. 58801 Bolts Page 4A-26...
  • Page 344 POWERHEAD Ignition Coil Plate and Harness Removal Disconnect the following: 58893 Speedometer Sensor Port Temperature Sensor Water Pressure Sensor Starboard Temperature Sensor Ignition Coil Harness Connector Bolts (4) Spark Plug Leads (Use proper tool to remove spark plug boot to avoid damage to boot) Speedometer Hose Water Pressure Hose...
  • Page 345: Starter Motor

    POWERHEAD Starter Motor Disconnect and/or remove the following: 58803 Yellow Lead from Starter Bolts (4) Page 4A-28 90-883728 JULY 2001...
  • Page 346: Electrical Plate Removal

    POWERHEAD Electrical Plate Removal Disconnect and/or remove the following: 58895 Crank Position Sensor Connector Trim Motor Bullet Connectors Fuel Injector Harness Connector ECM Screws (3) Solenoid Plate Screws (3) 90-883728 JULY 2001 Page 4A-29...
  • Page 347: Oil Pump

    POWERHEAD Oil Pump Disconnect and/or remove the following: 58894 Oil Pump Electrical Connector Remote Oil Tank Pressure Hose Negative Battery Lead Bleed Hose Page 4A-30 90-883728 JULY 2001...
  • Page 348: Air Plenum

    POWERHEAD Air Plenum Disconnect and/or remove the following: 58886 Air Temperature Sensor Connector Manifold Pressure Sensor Connector Fuel Regulator Hose Remote Control Harness Connector Oil Pump Inlet Hose (Plug hose to prevent leakage) Oil Pump Outlet Hose (Plug hose to prevent leakage) Fuel Injector Harness Connector 90-883728 JULY 2001 Page 4A-31...
  • Page 349: Powerhead Disassembly

    POWERHEAD Powerhead Disassembly 1. Place powerhead in repair stand or on a bench. 2. Remove thermostat covers and washers. 51852 Cover Washer 3. Remove cylinder heads from engine block. 51847 Cylinder Head Engine Block Page 4A-32 90-883728 JULY 2001...
  • Page 350 POWERHEAD 4. Remove exhaust manifold and seal. 51852 Exhaust Manifold Seal Gasket 5. Remove reed block housing from cylinder block. 51845 Reed Block Housing 6. Inspect reeds as outlined in “Cleaning and Inspection”. 7. Remove bolts from end caps. 90-883728 JULY 2001 Page 4A-33...
  • Page 351 POWERHEAD UPPER END CAP 51854 Crankcase Attaching End Cap Bolts LOWER END CAP 51849 Crankcase Attaching End Cap Bolts 8. Remove bolts which secure crankcase cover to cylinder block. Page 4A-34 90-883728 JULY 2001...
  • Page 352 POWERHEAD 9. Pry crankcase cover off cylinder block using pry bars in locations shown. 51845 Pry Points Crankcase Cover CRANKCASE COVER REMOVED 51848 10. Use Powerhead Stand (91-30591A1) for rotating crankshaft to desired position for re- moval of connecting rods. 11.
  • Page 353 POWERHEAD 12. Use a 5/16 in. 12 point socket to remove connecting rod bolts, then remove rod cap, roll- er bearings and bearing cage from connecting rod. 51850 Connecting Rod Bolts 13. Push piston out of cylinder block. 14. After removal, reassemble each piston and connecting rod assembly. CAUTION Each connecting rod and end cap are a matched machined set and must never be mismatched.
  • Page 354 POWERHEAD 17. Using an awl, scribe identification number of connecting rod on inside of piston. Reas- semble piston on same connecting rod. 18. Using tool (91-52952A1), remove piston pin lock rings from both ends of piston pin. Nev- er re-use piston pin lockrings. 51083 51851 Lockring...
  • Page 355 POWERHEAD 21. Remove upper end cap and lower end cap from crankshaft. 22. Remove and discard O-ring seals from each end cap. 23. Remove oil seal(s) from end of each end cap by driving seal out with a punch and ham- mer.
  • Page 356 POWERHEAD 26. Remove crankshaft and place in powerhead stand as shown. IMPORTANT: DO NOT remove crankshaft sealing rings from crankshaft, unless re- placement of a sealing ring(s) is necessary. Usually, crankshaft sealing rings do not require replacement, unless broken. CAUTION Safety glasses should be worn when removing or installing crankshaft sealing rings.
  • Page 357 POWERHEAD Inspect crankshaft ball bearing as outlined in “Cleaning and Inspection,” following. IMPORTANT: DO NOT remove crankshaft ball bearing, unless replacement is re- quired. 29. Remove lower ball bearing from crankshaft as follows: a. Remove retaining ring using a pair of snap ring pliers. 51854 Crankshaft Ball Bearing Pliers...
  • Page 358: Torque Specifications

    POWERHEAD Water Pressure Relief Valve Components 1. If necessary, remove water pressure relief valve components as shown. 50803 Cover Bolt Gasket Relief Valve Plate Diaphragm Water Deflector Washer Screw Spring 10 - Poppet Valve 11 - Grommet 12 - Carrier 13 - Washer Torque Specifications...
  • Page 359: Cleaning And Inspection

    POWERHEAD Cleaning and Inspection Cylinder Block and Crankcase Cover IMPORTANT: Crankcase cover and cylinder block are a matched, line-bored assem- bly and never should be mismatched by using a different crankcase cover or cylinder block. CAUTION If crankcase cover or cylinder block is to be submerged in a very strong cleaning solution, it will be necessary to remove the crankcase cover/cylinder block bleed system from crankcase cover/cylinder block to prevent damage to hoses and check valves.
  • Page 360: Cylinder Bores

    POWERHEAD Cylinder Bores 1. Inspect cylinder bores for scoring, scuffing or a transfer of aluminum from piston to cylin- der wall. Scoring or scuffing, if NOT TOO SEVERE, can normally be removed by honing. If a transfer of aluminum has occurred, an acidic solution such as “TIDY BOWL CLEAN- ER”...
  • Page 361: Pistons And Piston Rings

    POWERHEAD Models 150/175/200 2.5 liter Cylinder Block Finish Hone Standard Piston 3.501 in. (88.93 mm) 0.015 in. (0.381 mm) Oversize Piston 3.516 in. (89.31 mm) 4. If a cylinder bore is tapered, out-of-round or worn more than 0.003 in. (0.076 mm) from standard “Cylinder Block Finish Hone”...
  • Page 362 POWERHEAD Piston with two half keystone (half tapered) rings Enlarged View of Piston Ring Grooves MEASURING PISTON ROUNDNESS Piston has a barrel profile shape and is not a true diameter. 1. Using a micrometer, measure dimension “A” at location shown. Dimension “A” should be as indicated in chart following.
  • Page 363: Crankshaft

    POWERHEAD Crankshaft 1. Inspect crankshaft to drive shaft splines for wear. (Replace crankshaft, if necessary.) 2. Check crankshaft for straightness – maximum runout: 0.006 in. (0.152 mm) (Replace as necessary.) 3. Inspect crankshaft oil seal surfaces. Sealing surfaces must not be grooved, pitted or scratched.
  • Page 364: Reed Block Assembly

    POWERHEAD 3. Thoroughly clean (with solvent) and dry crankshaft center main roller bearings. Lubri- cate bearings with 2-Cycle Outboard Oil. CAUTION DO NOT intermix halves of upper and lower crankshaft center main roller bearings. Replace bearings in pairs only. 4. Thoroughly inspect center main roller bearings. Replace bearings if they are rusted, fractured, worn, galled or badly discolored.
  • Page 365: Reed Block Housing

    POWERHEAD Reed Block Housing 1. Check rubber bleed hoses. Replace any hose that is cracked, cut or deteriorating. 2. Check operation of bleed system check valves in reed block housing. If valves are work- ing properly, air can be drawn thru check valves “one way” only. If air can pass thru a check valve both ways, valve is not working properly and must be replaced.
  • Page 366 POWERHEAD 4. Water Marks: When bearing surfaces are subjected to water contamination, a bearing surface “etching” occurs. This etching resembles the size of the bearing. 51853 5. Spalling: Spalling is the loss of bearing surface, and it resembles flaking or chipping. Spalling will be most evident on the thrust portion of the connecting rod in line with the “I”...
  • Page 367 POWERHEAD 6. Chatter Marks: Chatter marks are the result of a combination of low speed - low load - cold water temperature operation, aggravated by inadequate lubrication and/or im- proper fuel. Under these conditions, the crankshaft journal is hammered by the connect- ing rod.
  • Page 368: Powerhead Reassembly And Installation

    POWERHEAD IMPORTANT: Clean connecting rod just enough to clean up bearing surfaces. DO NOT continue to clean after marks are removed from bearing surfaces. 51083 Crocus Cloth c. Clean PISTON PIN END of connecting rod, using same method as in Step “b”, pre- ceding, but using 320 grit carborundum cloth instead of crocus cloth.
  • Page 369 POWERHEAD 1. If removed, press lower crankshaft ball bearing onto crankshaft as shown. Be sure bear- ing is pressed firmly against counterweight. 2. Reinstall retaining ring using a suitable pair of Snap Ring Pliers. 51854 51852 Crankshaft Crankshaft Ball Bearing Suitable Mandrel Press Retaining Ring...
  • Page 370 POWERHEAD 5. Lubricate center main crankshaft roller bearings and races with light oil. 51854 Install so larger of the 3 holes is toward bottom end of crankshaft Verify retaining ring bridges the separating lines of the bearing race 6. Place center main crankshaft roller bearings on upper and lower main bearing journals as shown.
  • Page 371 POWERHEAD 9. Install oil seals into lower end cap as follows: a. Apply a thin bead of Loctite 271 to outer diameter on 2 lower end cap oil seals (a). b. Using driver head (91-55919) press one oil seal (lip facing down) into lower end cap until firmly seated.
  • Page 372: Crankshaft Installation

    POWERHEAD Crankshaft Installation SPECIAL INFORMATION Installing A New Crankshaft Assembly Into Cylinder Block Check the crankshaft sealing ring mating surfaces in the cylinder block and crankcase cover for wear grooves that were caused by the crankshaft sealing rings from the previous crank- shaft.
  • Page 373 POWERHEAD 6. Lubricate crankshaft ends (oil seal areas) with light oil, then install upper and lower end caps (“a” and “b”). Secure end caps to cylinder block with attaching bolts. DO NOT tight- en end cap bolts at this time. 51848 51848 2 Cycle Outboard Oil...
  • Page 374 POWERHEAD Piston and Connecting Rod Reassembly 1. Place needle bearings on a clean piece of paper and lubricate with Quicksilver 2-4-C with Teflon Marine Lubricant. NOTE: There are 29 needle bearings per piston. 2. Place sleeve which is part of piston pin tool (91-74607A1) into connecting rod and install needle bearings around sleeve as shown.
  • Page 375: Piston And Piston Ring Combinations

    POWERHEAD 7. Make sure lockrings are properly seated in piston grooves. 51086 51086 Lockring Installation Tool Lockring Piston and Piston Ring Combinations All 153 cu. in. (2.5 Liter) models have two half keystone (half tapered) rings. .056 in. .056 in. Page 4A-58 90-883728 JULY 2001...
  • Page 376: Piston Installation

    POWERHEAD Piston Installation 1. Before installing new piston rings, check gap between ring ends by placing each ring in its respective cylinder, then pushing ring about 1/2 in. (12.7mm) into cylinder using piston to assure proper position. 2. Check end gap of each new piston ring with a feeler gauge. End gap must be within 0.018 in.
  • Page 377 POWERHEAD 5. Lubricate piston, rings and cylinder wall with 2-Cycle Outboard Oil. 51081 Piston Ring Expander (91-24697) Dot Side “Up” on Piston Ring 6. Rotate each piston ring so end of ring is aligned with locating pin as shown. 7. Install Piston Ring Compressor. 8.
  • Page 378 POWERHEAD 10. Apply Quicksilver 2-4-C with Teflon to bearing surface of connecting rod and, install bearing assembly as shown. IMPORTANT: It is recommended that connecting rod bolts not be reused. 11. Place connecting rod cap on connecting rod. Apply light oil to threads and face of con- necting rod bolts.
  • Page 379: Crankcase Cover Installation

    POWERHEAD 14. Verify that no piston rings were broken during installation by pressing in on each piston ring thru exhaust port using a screwdriver. If no spring tension exists (ring fails to return to position), it’s likely the ring is broken and must be replaced. 51852 Screwdriver Crankcase Cover Installation...
  • Page 380 POWERHEAD 3. Apply a thin, even coat of Loctite Master Gasket #203 on mating surfaces of crankcase cover and cylinder block. Loctite Master Gasket 58620 Loctite Master Gasket 4. Place crankcase cover in position on cylinder block. Turn the 8 center main bolts in a LITTLE at a time, (following torque sequence) compressing crankshaft seal rings until crankshaft cover has been drawn down to cylinder block.
  • Page 381: Reed Block Assembly

    POWERHEAD Reed Block Assembly IMPORTANT: DO NOT remove reeds from reed blocks, unless replacement is neces- sary. DO NOT turn used reeds over for re-use. Replace reeds in sets only. 1. Thoroughly clean gasket surfaces of reed blocks and reed block housing. Check for deep grooves, cracks and distortion that could cause leakage.
  • Page 382 POWERHEAD 4. Torque exhaust divider plate bolts in following sequence. 50805 56167 Divider Seal Gasket Exhaust Divider Plate Attaching Bolt 5. If removed, install water pressure relief valve components as shown. Torque bolts to specifications. 50803 Cover Screw - 25 lb. in. (3 N·m) Bolt - 150 lb.
  • Page 383: Cleaning And Inspection

    POWERHEAD Cleaning and Inspection Cylinder Block and Crankcase Cover IMPORTANT: Crankcase cover and cylinder block is a matched, line-bored assembly and should never be mismatched by using a different crankcase cover or cylinder block. CAUTION If crankcase cover or cylinder block is to be submerged in a very strong cleaning solution, it will be necessary to remove the crankcase cover/cylinder block bleed system from crankcase cover/cylinder block to prevent damage to hoses and check valves.
  • Page 384 POWERHEAD CYLINDER HEAD INSTALLATION 1. Install each cylinder head to engine block with thermostat pocket “UP”. Apply light oil to cylinder head bolt threads and torque bolts to 30 Ib. ft. (40.7 N·m) and rotate 90 . 2. Install thermostat washer into each cylinder head. 3.
  • Page 385: Reinstalling Engine Components

    POWERHEAD Reinstalling Engine Components Install the following engine components: SECTION 2 h. Fuel Pump a. Starter Motor Oil Reservoir b. Ignition Coils Oil Pump c. Starter Solenoid* k. Fuel Injection d. Trim Solenoids SECTION 4 e. Alternator Shift Cable Latch Assy. Control Module m.
  • Page 386: Notes

    POWERHEAD Notes: 90-883728 JULY 2001 Page 4A-69...
  • Page 387: Throttle Lever And Shift Shaft

    POWERHEAD Throttle Lever and Shift Shaft 2-4-C with Teflon Page 4A-70 90-883728 JULY 2001...
  • Page 388 POWERHEAD Throttle Lever and Shift Shaft TORQUE REF. QTY. DESCRIPTION lb-in lb-ft THROTTLE CONTROL LEVER SCREW (0.375-16 x 1-3/4 IN.) BUSHING SPACER SCREW (2-1/8 IN.) NUT (1/4-20) INSERT WASHER BUSHING SCREW (M8 x 40) SWIVEL BUSHING BEARING LINK ROLLER THROTTLE ROLLER SCREW (M5 x 16) WASHER STAR WASHER...
  • Page 389 POWERHEAD Throttle Lever and Shift Shaft 2-4-C with Teflon Page 4A-72 90-883728 JULY 2001...
  • Page 390 POWERHEAD Throttle Lever and Shift Shaft TORQUE REF. QTY. DESCRIPTION lb-in lb-ft SCREW (6-32) WASHER 90-883728 JULY 2001 Page 4A-73...
  • Page 391: Powerhead Installation On Driveshaft Housing

    POWERHEAD Powerhead Installation On Driveshaft Housing 1. Install Lifting Eye (91-90455) into flywheel. WARNING BE SURE that Lifting Eye is threaded into flywheel a minimum of five (5) turns BE- FORE lifting powerhead. 2. Using a hoist, lift powerhead high enough to allow removal of powerhead from repair stand.
  • Page 392 POWERHEAD 6. Install 10 flat washers,and 10 locknuts which secure powerhead to exhaust extension plate/driveshaft housing. Torque locknuts in 3 progressive steps until secured. 7. Disconnect hoist from Lifting Eye and remove Lifting Eye from flywheel. 8. Reinstall plastic cap into center of flywheel cover. 51846 Locknuts and Washers –...
  • Page 393 POWERHEAD 10. Reconnect and/or reinstall the following: 58778 Remote Oil Tank Pressure Hose Remote Control Harness Power Trim Wires Negative Battery Cable Positive Battery Cable SmartCraft Harness Connector Page 4A-76 90-883728 JULY 2001...
  • Page 394 POWERHEAD 11. Reinstall the following: 58780 Oil Supply Hose 90-883728 JULY 2001 Page 4A-77...
  • Page 395 POWERHEAD 12. Reconnect water pressure sensor (GRAY) hose and speedometer pressure sensor (BLACK) hose. 58773 Water Pressure Sensor Speedometer Pressure Sensor Speedometer Sensor Hose (BLACK)(for Digital Gauges) Water Pressure Sensor Hose (GRAY)(for Digital Gauges) Page 4A-78 90-883728 JULY 2001...
  • Page 396 POWERHEAD 13. Install bottom cowls. 58068 Bolts 14. Reconnect input fuel line, water pressure hose and speedometer hose. Input Fuel Hose Water Pressure Hose (GRAY) (Analog Gauges) Speedometer Hose (BLACK) (Analog Gauges) 90-883728 JULY 2001 Page 4A-79...
  • Page 397 POWERHEAD 15. Install harness retainer and secure with 2 screws. 57841 Screws Retainer 16. Slide outboard shift lever into neutral position. 17. Install throttle cable. 18. Install locknut that secures shift cable latch assembly and install latch, flat washer, nylon wear plate, spring and shift cable from control cable anchor bracket.
  • Page 398: Engine Break-In Procedure

    POWERHEAD Engine Break-in Procedure IMPORTANT: Prior to initially starting engine, oil pump prime sequence must be acti- vated using the Digital Diagnostic Terminal (DDT). Initiating the oil pump prime se- quence will vacate any air in the oil output hose and mix oil with fuel in the vapor sepa- rator thus preventing scoring of internal components during initial startup.
  • Page 399 COOLING POWERHEAD Section 4B - Cooling Table of Contents Specifications ....... . 4B-2 Water Flow Diagram .
  • Page 400: Specifications

    COOLING Specifications Thermostat ... 143 F (61.7 C) Water Pressure Idle 1.0 – 3.0 PSI (6.8 – 20.5 kPa) Poppet Valve Opening 4.0 – 9.0 PSI (27.4 – 61.6 kPa) W.O.T.
  • Page 401: Digital Port And Sstarboard Temperature Sensor

    COOLING Digital Port and Starboard Temperature Sensors An ohms test of the temperature sensors would be as follows: Disconnect temperature sensor harness and check continuity with digital or analog ohm- meter test leads between both connector pins. With engine at temperature (F ) indicated, ohm readings should be as indicated 10%.
  • Page 402: Analog Temperature Sensor

    COOLING Analog Temperature Sensor TAN/BLACK sensor lead (in port analog temperature sensor) provides signal for optional temperature gauge. An ohms test of the analog temperature sensor (in port cylinder head) would be as follows: Insert digital or analog ohmmeter test leads into both TAN/BLACK sensor leads. With en- gine at temperature (F ) indicated, ohm readings should be as indicated 10%.
  • Page 403: Special Tools

    COOLING Special Tools 1. DMT 2000 Digital Tachometer Multimeter P/N 91-854009A1 2. Water Pressure Gauge 91-79250A2 56725 90-883278 JULY 2001 Page 4B-5...
  • Page 404: Water Flow

    COOLING Water Flow Description Cooling water enters the cooling system through the lower unit water inlets. The pump assembly forces water through the water tube and exhaust adapter plate passages filling the power head central water chamber (located behind the exhaust cavity). Water enters the exhaust cover cavity through 2 holes near the top of the exhaust cover.
  • Page 405 COOLING 2.5 Litre V-6 Water Flow Diagram 2002 Models 58063 1. Water Inlet 2. Water Pump 3. Wall of Water – If water level height is insufficient, water pump may draw in air resulting in an overheated engine. 4. Water Tube 5.
  • Page 406: Notes

    COOLING Notes: Page 4B-8 90-883728 JULY 2001...
  • Page 407: Troubleshooting

    COOLING Troubleshooting Thermostat Test 1. Inspect thermostat covers and cylinder head covers (thermostat opening) for cracks and corrosion damage that could cause leakage. Replace parts as necessary. 2. Remove and discard gasket from each thermostat. 3. Wash thermostats with clean water. 4.
  • Page 408: Water Pressure Check

    COOLING Water Pressure Check Water pressure may be checked by attaching a test pressure gauge to the top of the engine block. A water pressure line (GRAY colored) is provided that exits at the front of the lower cowl. A dash style gauge may be connected to this line to register water pressure. WARNING Shut off engine and refer to troubleshooting chart if water pressure is not within specification.
  • Page 409: Water Pump Cleaning And Inspection

    COOLING Water Pump Cleaning and Inspection 1. Inspect the water tube coupling for wear or damage. If necessary replace. Water Tube Coupling 2. Inspect the water pump impeller for wear on the end, top and bottom of the impeller blades. Replace the impeller if this condition is found. 3.
  • Page 410: Problem Diagnosis

    COOLING Problem Diagnosis Condition Recommended Range Possible Cause Pressure below specification @ 1.0 – 3.0 PSI (6.8 – 20.5 kPa) Poppet valve spring defective idle (weak, broken, missing) Defective poppet valve seal Thermostat stuck open Severe internal leak Low output water pump Inlet restriction Pressure above 5 psi (34.2kPa) 1.0 –...
  • Page 411 CLAMP/SWIVEL BRACKETS & DRIVESHAFT HOUSING MID-SECTION Section 5A – Clamp/Swivel Brackets & Driveshaft Housing Table of Contents Swivel Bracket and Steering Arm ... . 5A-2 Drive Shaft Housing and Dyna-Float Transom Brackets .
  • Page 412: Swivel Bracket And Steering Arm

    CLAMP/SWIVEL BRACKETS & DRIVESHAFT HOUSING Swivel Bracket and Steering Arm Loctite 271 2-4-C with Teflon Page 5A-2 90-883728 JULY 2001...
  • Page 413 CLAMP/SWIVEL BRACKETS & DRIVESHAFT HOUSING Swivel Bracket and Steering Arm TORQUE REF. QTY. DESCRIPTION lb-in lb-ft SWIVEL BRACKET ASSEMBLY (BLACK) OIL SEAL (LOWER) BUSHING SPACER O-RING GREASE FITTING BUSHING THRUST WASHER SCREW (7/16-20 x 7-1/2 IN.) MOUNT WASHER WASHER STEERING LINK ASSEMBLY SCREW (3/8-24 x 1-1/4 IN.) See Note WASHER...
  • Page 414: Transom Brackets

    CLAMP/SWIVEL BRACKETS & DRIVESHAFT HOUSING Transom Brackets 2-4-C with Teflon Page 5A-4 90-883728 JULY 2001...
  • Page 415 CLAMP/SWIVEL BRACKETS & DRIVESHAFT HOUSING Transom Brackets TORQUE REF. QTY. DESCRIPTION lb-in lb-ft TRANSOM BRACKET (STARBOARD)(BLACK) TRANSOM BRACKET (PORT) (BLACK) GREASE FITTING (PORT) TILT TUBE NUT (1 IN.-14) O-RING WAVE WASHER NUT (7/8-14) BOLT WASHER TILT LOCK LEVER ASSEMBLY SPRING BUSHING SPRING KNOB...
  • Page 416: Drive Shaft Housing And Exhaust Tube

    CLAMP/SWIVEL BRACKETS & DRIVESHAFT HOUSING Drive Shaft Housing and Exhaust Tube Loctite 271 Soap (Purchase Locally) P80 Rubber Lubricant (Purchase Locally) Permabond 105 Cyanacrylate Adhesive (Purchase Locally) 2-4-C with Teflon Loctite Superbonder 454 Gel (Purchase Locally) Loctite “RCA/680” Retaining Compound Page 5A-6 90-883728 JULY 2001...
  • Page 417 CLAMP/SWIVEL BRACKETS & DRIVESHAFT HOUSING Drive Shaft Housing and Exhaust Tube TORQUE REF. QTY. DESCRIPTION lb-in lb-ft DRIVE SHAFT HOUSING (LONG) DRIVE SHAFT HOUSING (X-LONG) STUD SCREW (1/2-20 x 6 IN.) GROUND WIRE LOWER MOUNT WASHER GROUND WIRE SCREW (1/4-20 x 3/8 IN.) WASHER CLAMP SCREW (5/16-18 x 1-1/4 IN.)
  • Page 418: Drive Shaft Housing And Dyna-Float Suspension

    CLAMP/SWIVEL BRACKETS & DRIVESHAFT HOUSING Drive Shaft Housing and Dyna-Float Suspension Refer to “Powerhead Removal” section to remove powerhead. Refer to “Lower Unit Removal” in this section to remove lower unit. Removal and Disassembly 1. Remove shift shaft from driveshaft housing by pulling straight up on shaft. 2.
  • Page 419 CLAMP/SWIVEL BRACKETS & DRIVESHAFT HOUSING SHIFT LINKAGE ASSEMBLY Shift Shaft Assembly Bushing Lock Nut Washer (2) Bushing (Hidden) Spring Guide Block 1. Remove upper mount nuts and flat washers. Upper Mount Nuts 2. Lift driveshaft housing plate off housing. 51850 Drive Shaft Housing Plate Drive Shaft Housing 90-883728 JULY 2001...
  • Page 420 CLAMP/SWIVEL BRACKETS & DRIVESHAFT HOUSING 3. Remove water tube from driveshaft housing plate. 4. Exhaust diffuser is secured to housing plate with 6 bolts. Remove bolts, then remove diffuser. 5. Pull exhaust tube out of drive shaft housing. 51850 51857 Water Tube Exhaust Diffuser Exhaust Tube...
  • Page 421: Reassembly And Installation

    CLAMP/SWIVEL BRACKETS & DRIVESHAFT HOUSING 9. Remove lower mount nuts. 51855 Lower Mount Nuts Lower Mount (1 each side) 10. Remove driveshaft housing from swivel bracket by pulling alternately from top to bot- tom on housing. 11. Remove upper and lower mounts by lifting them out of driveshaft housing. Reassembly and Installation 1.
  • Page 422 CLAMP/SWIVEL BRACKETS & DRIVESHAFT HOUSING 3. Push exhaust tube boots onto tabs on each side of exhaust tube. 4. Position exhaust tube in drive shaft housing and push down on tube until boots rest in grooves on inside of housing. 5.
  • Page 423 CLAMP/SWIVEL BRACKETS & DRIVESHAFT HOUSING 9. Position drive shaft housing plate on top of housing. 10. Apply a thin coat of Perfect Seal onto metal portion of upper dyna-float mounts. 11. Position mounts on drive shaft housing plate. 12. Install a rubber washer onto each upper mount, followed by a metal washer. 51857 Water Tube Seal (Plastic End) Dyna-Float Mounts...
  • Page 424 CLAMP/SWIVEL BRACKETS & DRIVESHAFT HOUSING 22. Install lower mount retainers and secure each retainer with 2 bolts. (Secure ground strap with the nearest retainer bolt.) Torque bolts to 160 Ib. in. (18.0 Nm). 51855 51855 Lower Mount Nut (2) [Torque to 50 lb. ft. (68.0 Nm)] Rubber Cap Ground Strap (only one side) Lower Mount Retainer...
  • Page 425 POWER TRIM MID-SECTION Section 5B – Power Trim Table of Contents Power Trim Specifications ..... 5B-1 Installation ....... 5B-21 Special Tools .
  • Page 426: Special Tools

    POWER TRIM Special Tools 1. Alignment Tool 91-11230 17238 2. Trim Rod Removal Tool 91-44486A1 51337 3. Trim Rod Guide Removal Tool 91-44487A1 51337 4. Power Trim Test Gauge Kit 91-52915A6 73835 Page 5B-2 90-883728 JULY 2001...
  • Page 427 POWER TRIM 5. Adaptor Fitting 91-82278A2 and 91-82278A3 54458 6. Spanner Wrench 91-74951 51337 7. Multi-Meter DVA Tester 91-99750A1 or DMT 2000 Digital Tachometer Multi-meter 91-854009A1 Multi-Meter DVA Tester 91-99750A1 DMT 2000 Digital Tachometer Multi-meter 91-854009A1 90-883728 JULY 2001 Page 5B-3...
  • Page 428: Power Trim Components

    POWER TRIM Power Trim Components Loctite 271 Anti-Corrosion Grease GM Silicone Sealer Power Trim & Steering Fluid Page 5B-4 90-883728 JULY 2001...
  • Page 429 POWER TRIM Power Trim Components TORQUE REF. QTY. DESCRIPTION lb-in lb-ft – POWER TRIM ASSEMBLY–Complete MANIFOLD ASSEMBLY PIPE PLUG TILT CYLINDER ASSEMBLY PISTON ROD GUIDE KIT REPAIR KIT CHECK VALVE KIT GUIDE ASSEMBLY PISTON/ROD ASSEMBLY (PORT) PISTON/ROD ASSEMBLY (STBD.) TRIM FILTER ASSEMBLY VALVE ASSEMBLY E RING O RING KIT...
  • Page 430: Power Trim Motor

    POWER TRIM Power Trim Motor TORQUE REF. QTY. DESCRIPTION lb.in. lb.ft. N·m – POWER TRIM MOTOR BRUSH AND SEAL KIT ARMATURE KIT END FRAME (Complete) Page 5B-6 90-883728 JULY 2001...
  • Page 431: Power Trim - General Information

    POWER TRIM Power Trim - General Information Description The Power Trim System consists of an electric motor, pressurized fluid reservoir, pump, tilt cylinder, and two trim rams. The remote control (or trim panel) has switches that trim the outboard “Up” or “Down” and tilt the engine for “Trailering”.
  • Page 432: Trailering Outboard

    POWER TRIM TRIMMING OUTBOARD “DOWN” (IN): WARNING Excessive speed at minimum trim “In” may result in undesirable and/or unsafe steering conditions. Test for handling characteristics after any adjustment is made to the trim angle (and tilt pin location). Aids planing, particularly with heavy loads. Improves ride in choppy water conditions.
  • Page 433: Trim "In" Angle Adjustment

    POWER TRIM Trim “In” Angle Adjustment WARNING Boat operation with outboard trimmed to the full “In” trim angle [not using the trim angle adjustment bolt (a)] at planing speed may result in undesirable and/or unsafe steering conditions. A water test for handling/steering conditions is re- quired after any trim angle adjustments.
  • Page 434: Anode Plate

    POWER TRIM Anode Plate Anode plate is a self-sacrificing alloy plate that is consumed gradually by corrosion while providing protection to the midsection and power trim from galvanic corrosion. Replace anode plate when it is 50% consumed. 27932 Anode Plate IMPORTANT: Do not paint or place protective coating on anode plate, or corrosion protection function will be lost.
  • Page 435 POWER TRIM TO FILL: IMPORTANT: This trim system is pressurized. Remove “Fill” plug only when out- board is tilted to the full “Up” position or the trim/tilt rams are fully extended. Re- tighten “Fill” plug before tilting outboard down or retracting tilt/trim rams. Remove “Fill”...
  • Page 436: Troubleshooting

    POWER TRIM Troubleshooting IMPORTANT: Determine if Electrical or Hydraulic problem exists. IMPORTANT: Acceptable power trim leak down should not exceed 1 in. (25.4 mm) (when measured at the tilt ram) in a 24 hour period. HYDRAULIC SYSTEM TROUBLESHOOTING IMPORTANT: Make one correction at a time. Check operation of trim system before proceeding to the next check.
  • Page 437 POWER TRIM ELECTRICAL SYSTEM TROUBLESHOOTING CONDITION OF TRIM SYSTEM PROBLEM A. Trim motor does not run when trim button is depressed. 1, 2, 4, 5, 6, 7, 8 B. Trim system trims opposite of buttons. C. Cowl mounted trim buttons do not activate trim system. 2, 4, 5, 6, 7 PROBLEM 1.
  • Page 438: Power Trim System With Relays And 2 Wire Trim Motor

    POWER TRIM Power Trim System with Relays and 2 Wire Trim Motor 53794 UP Relay DOWN Relay BLK = Black BLU = Blue GRN = Green RED = Red WHT = White Page 5B-14 90-883728 JULY 2001...
  • Page 439: Electrical System Troubleshooting

    POWER TRIM Electrical System Troubleshooting General Checks Before troubleshooting the Power Trim electrical system, check the following: 1. Check for disconnected wires. 2. Make certain all connections are tight and corrosion free. 3. Check that plug-in connectors are fully engaged. 4.
  • Page 440: Troubleshooting The "Up" Circuit

    POWER TRIM Troubleshooting the “Up” Circuit Connect Voltmeter red lead to Point 8 and black lead to ground. Depress the “Up” trim button. No Voltage Indicated: Battery Voltage Indicated: Connect Voltmeter red lead to Connect Voltmeter red lead to Point 7 and black lead to ground. Point 9.
  • Page 441: Troubleshooting The "Down" And "Up" Circuits (All Circuits Inoperative)

    POWER TRIM Troubleshooting the “Down” and “Up” Circuits (All Circuits Inoperative) Check in-line fuse (under cowl) to see if fuse is blown. Fuse Not Blown: Blown Fuse: Connect Voltmeter red lead to Correct problem that caused Point 3 and black lead to fuse to blow.
  • Page 442: Power Trim Assembly Removal And Installation

    POWER TRIM Power Trim Assembly Removal and Installation Removal 1. Remove clamps on transom bracket to free power trim wiring. 2. Raise outboard to full “Up” position and engage tilt lock lever. 51377 50605 Clamps Tilt Lock Lever WARNING Failure to support outboard as shown could result in personal injury and/or dam- age to outboard or boat.
  • Page 443 POWER TRIM SUPPORT TOOL 3/8 in. diameter metal rod (a used shift shaft works well) 14” 2” 1/4” Drill holes for retaining clips METRIC CONVERSION 14 in. = 35.56 cm. 2 in. = 50.8 mm 3/8 in. = 9.5 mm. 1/4 in.
  • Page 444 POWER TRIM 5. Remove outboard transom mounting bolts, and loosen tilt tube nut until nut is flush with end of tilt tube thread. 6. Remove 3 screws and washers and move starboard transom bracket. 51375 51375 Transom Mount Bolts (2) Tilt Tube Nut (flush with end of thread) Screws (3) Washers (3)
  • Page 445: Installation

    POWER TRIM Installation 1. Paint any exposed metal surfaces to prevent corrosion. 2. Apply Loctite 271 to screws. Install trim system, starboard transom bracket, and tilt tube nut. 3. Use a 12 volt power source to extend tilt ram up to align upper swivel shaft hole and end of ram.
  • Page 446 POWER TRIM 6. Connect trim motor wires to solenoids. Refer to Wiring Diagrams in this manual. Route trim wires as specified in this manual. NOTE: The 2 power leads going to the trim motor should be encapsulated with conduit tubing. If tubing has not been previously installed, order 32-828547-353 and cut to ap- propriate length.
  • Page 447: Testing Power Trim System With Test Gauge Kit (91-52915A6)

    POWER TRIM WARNING Electrical wires passing through cowl openings must be protected from chafing or being cut. Follow the recommended procedures outlined in Section 1D of this Manual. Failure to protect wires as described could result in electrical system fail- ure and/or injury to occupants of boat.
  • Page 448 POWER TRIM 4. Install test adaptor 91-822778A2 into manual release valve hole. 54458 Test Adaptor (91-822778A2) 5. Thread hose from Test Gauge Kit (91-52915A6) into brass fitting on adaptor. 54459 Brass Fitting Test Gauge Assembly Tilt Pin (Position in Hole Shown) Hose Hose (Not Used) 6.
  • Page 449 POWER TRIM CAUTION Failure to install spare tilt pin (or hardened bolts and nuts) in hole shown could result in transom bracket failure and possible injury. 8. Move outboard “IN” until hole in swivel bracket “ear” aligns with the 3rd tilt hole in tran- som bracket.
  • Page 450: Down" Pressure Check

    POWER TRIM “DOWN” Pressure Check IMPORTANT: Insure battery is fully charged before performing tests. 1. Tilt outboard to full “Up” position and engage tilt lock lever. 2. Slowly remove “Fill” plug to bleed pressure from reservoir. 3. Remove circlip securing manual release valve and unscrew release valve from trim assembly.
  • Page 451 POWER TRIM 5. Thread hose from Test Gauge Kit (91-52915A6) into brass fitting on adaptor. 54459 Brass Fitting Test Gauge Assembly Tilt Pin (Position in Hole Shown) Hose Hose (Not Used) OPEN Valve CLOSE Valve 6. Reinstall fill plug. 7. Disengage tilt lock lever. 8.
  • Page 452: Hydraulic Repair

    POWER TRIM Hydraulic Repair TRIM ROD REMOVAL AND REPAIR NOTE: Power Trim does not have to be removed from outboard to remove trim rods. 1. Tilt outboard to full “UP” position and engage tilt lock lever. 2. Slowly remove “Fill” plug to bleed reservoir pressure. 3.
  • Page 453: Trim Rod End Cap Seal

    POWER TRIM CLEANING AND INSPECTION - TRIM RODS AND CAPS CAUTION Do not remove check valve (a). Check valve is preset to operate at a specific pres- sure. Removal and installation of check valve could result in improper operating pressure and possible system damage. NOTE: Check valve is in port side trim rod only.
  • Page 454: Tilt Ram

    POWER TRIM 2. Install trim rods and caps. Use installation tool (91-44487A1) or spanner wrench (91-74951) to tighten caps securely. 51353 Trim Rods Cylinder End Caps Rod End Rollers (lubricate with Quicksilver Anti-Corrosion Grease or Special Lubricant 101) Tilt Ram REMOVAL - TILT ROD ASSEMBLY ONLY NOTE: Tilt Rod Assembly can be removed from cylinder without removing entire power trim system from outboard.
  • Page 455: Disassembly

    POWER TRIM TILT RAM REMOVAL - POWER TRIM SYSTEM REMOVED FROM OUTBOARD CAUTION Insure trim system is depressurized prior to tilt ram removal. 1. Remove cross pin. 2. Remove lower swivel pin. 51355 51366 Cross Pin (Remove as shown) Lower Swivel Pin (Remove as shown) Disassembly 1.
  • Page 456 POWER TRIM 2. Clamp tilt rod in a soft jawed vise. Remove bolt or nut as applicable to disassemble rod assembly. Remove O-ring. 51378 51340 Bolt (Design 1) or Stud/Nut (Design 2) O-Ring IMPORTANT: Note Design 1 and 2 on page 5B-30. Design 1 tilt rod assembly re- places either tilt rod assembly.
  • Page 457 POWER TRIM 4. Remove end cap from tilt rod. 5. Remove allen plug. IMPORTANT: Remove plug from same side as holes in shaft. DO NOT REMOVE 51361 51376 End Cap Allen Plug Hole In Shaft 6. Lubricate shaft with Quicksilver Power Trim and Steering Fluid. Insert shaft into cylinder.
  • Page 458: Scraper Seal Replacement

    POWER TRIM WARNING Memory Piston Cup may be expelled at a high velocity when air pressure is applied. Failure to place cylinder as shown below could result in personal injury. 8. Place cylinder as shown. Hold down on cylinder and inject air into shaft opening. 51353 Shop Cloth Solid Surface...
  • Page 459 POWER TRIM REASSEMBLY IMPORTANT: Components must be clean for reassembly. Any debris in the system can cause the system to malfunction. NOTE: Refer to “Tilt Ram Components” for proper O-ring sizes. 1. Apply Quicksilver Power Trim and Steering Fluid on O-rings prior to reassembly. 2.
  • Page 460 POWER TRIM 5. Install components on rod. 51363 51340 Piston O-ring Check Valve Assembly (7) Washer Bolt or Locknut. (Tighten securely) 6. Clamp cylinder in a soft jawed vise and install tilt rod assembly. Use spanner wrench and tighten end cap securely. 91-74951 51337 51341...
  • Page 461 POWER TRIM TILT RAM ASSEMBLY INSTALLATION 1. Lubricate alignment tool (91-11230) and shaft. Use Quicksilver Power Trim and Steer- ing Fluid. 51369 Alignment Tool (91-11230) Shaft 2. Align tilt ram and housing using alignment tool. 3. Install shaft. 51348 51352 Alignment Tool (91-11230) Shaft Groove...
  • Page 462: Motor And Electrical Tests/Repair

    POWER TRIM Motor and Electrical Tests/Repair Trim Pump Motor Test WARNING Do not perform this test near flammable materials, as a spark may occur while making electrical connections. 1. Connect a 12 volt power supply to motor wires; one motor lead to POSITIVE (+) bat- tery terminal and the other motor lead to the NEGATIVE (–) battery terminal.
  • Page 463: Armature Tests

    POWER TRIM 2. Remove field housing and armature from end frame. Use care not to drop armature. 53779 Field Housing Armature End Frame Armature Tests TEST FOR SHORTS Check armature on a Growler per the Growler manufacturer’s instructions. Replace ar- mature if a short is indicated.
  • Page 464: Motor Repair

    POWER TRIM CHECKING AND CLEANING COMMUTATOR 1. If commutator is worn it may be turned on an armature conditioner or a lathe. 2. Clean commutator with “OO” sandpaper. 53775 Commutator FIELD TESTS IMPORTANT: Commutator end of armature must be installed in brushes when per- forming the following tests.
  • Page 465 POWER TRIM CLEANING AND INSPECTION Inspect O-rings and replace if necessary. Carefully inspect power cord for cuts or tears which will allow water to enter motor. Replace cord if cut or torn. Clean, inspect, and test motor components. Refer to “Brush Replacement”, “Armature Test”, and “Field Tests”...
  • Page 466 POWER TRIM 2. To replace brush card, disconnect spade terminal. 3. Cut crimped brush lead. 4. Remove 2 screws securing brush card to end cap. Spade Terminal Crimped Brush Lead Screws 5. Install new brush card (BRUSH and SEAL KIT 828714A1). 6.
  • Page 467 POWER TRIM END CAP INSPECTION 1. Inspect seal and O-ring for cuts and abraisions. If replacement is required, install BRUSH and SEAL KIT 828714A1. 2. Inspect bushing for wear. If bushing appears to be excessively worn – grooves, scratches, etc. – install END FRAME ASSEMBLY (COMPLETE) 828715A1. 53785 53783 Seal (Apply 2-4-C with Teflon to seal lips)
  • Page 468: Reassembly

    POWER TRIM Reassembly IMPORTANT: Components must be clean. Any debris in power trim system can cause system to malfunction. 1. Install armature into end cap/brush card assembly. 53779 53784 Armature Shim End Cap Assembly Armature (Spread brushes to install armature into end cap) 2.
  • Page 469 POWER TRIM IMPORTANT: Attach Vise Grip pliers to armature shaft before installing frame as- sembly. The Vise Grip pliers will prevent the armature from being drawn out of the brush card assembly by the frame magnets while installing the frame assembly. 3.
  • Page 470: Reassembly - Motor And Pump

    POWER TRIM Reassembly - Motor and Pump NOTE: Drive shaft is a loose part and may fall out of position. 1. Install pump onto power trim manifold. Insure O-rings are in proper locations. Secure with two (2) screws. Torque screws to 80 lb. in. (9 N·m). IMPORTANT: Install pump with location flat facing towards starboard transom bracket.
  • Page 471: Priming Power Trim System

    POWER TRIM NOTE: Verify motor and drive shaft are aligned. 53777 53782 Motor O-ring Screw (2) Tighten securely. 4. Complete reassembly of Power Trim System as outlined in “Installation” on page 5B-21. Priming Power Trim System 1. Fill system with Quicksilver Power Trim and Steering Fluid or Automatic Transmission Fluid (ATF) Type F,FA, Dexron II or Dexron III.
  • Page 472: Trim Indicator Gauge Needle Adjustment

    POWER TRIM Trim Indicator Gauge Needle Adjustment 1. Turn ignition key to “RUN” position. 2. Tilt outboard to full “IN” position. Needle of trim indicator gauge should be in full “IN” position. 3. If not, tilt outboard to full “OUT” position to gain access to trim sender and engage tilt lock lever.
  • Page 473: Trim Indicator Wiring Diagrams

    POWER TRIM Trim Indicator Wiring Diagrams Wiring Diagram - For boats equipped with Quicksilver Commander Series side mount remote control. Wiring Diagram - For boats equipped with Quicksilver Ignition/Choke and Main Harness Assembly. 22908 Trim Indicator Remote Control Trim Sender Engine Ground To Engine Ignition Switch...
  • Page 474 RIGHT HAND NON-RATCHETING LOWER UNIT Section 6A – Right Hand Non-Ratcheting Table of Contents Gear Housing Specifications (Standard Rotation) 6A-1 Gear Housing ......6A-26 Special Tools .
  • Page 475: Special Tools

    RIGHT HAND NON-RATCHETING Special Tools 1. Shift Shaft Bushing Tool 91-31107T 2. Gear Housing Cover Nut Tool 91-61069T 3. Bearing Carrier Removal Tool 91-46086A1 and Puller Bolt 91-85716 4. Slide Hammer Puller 91-34569A1 5. Bearing Removal and Installation Kit 91-31229A7. This kit contains the following tools: Pilot 91-36571T;...
  • Page 476 RIGHT HAND NON-RATCHETING 8. Puller Plate 91-29310 9. Mandrel 91-38628T 10. Driver Rod 91-37323 11. Universal Puller Plate 91-37241 12. Cross Pin Tool 91-86642 13. Driveshaft Holding Tool 91-90094 14. Oil Seal Driver 91-31108T 15. Forward Gear Bearing Tool 91-86943T 16.
  • Page 477 RIGHT HAND NON-RATCHETING 18. Backlash Indicator Rod 91-78473 19. Dial Indicator 91-58222A1 20. Bearing Retainer Tool 91-43506T 21. Bearing Preload Tool 91-14311A2 Adaptor (N.S.S.) Bearing (N.S.S.) Washer (N.S.S.) Spring (24-14111) Bolt (10-12580) Nut (11-13953) Set Screw (10-12575) Sleeve (23-13946) 22. Mandrel 91-92788 23.
  • Page 478: Notes

    RIGHT HAND NON-RATCHETING Notes: 90-883728 JULY 2001 Page 6A-5...
  • Page 479: Gear Housing (Drive Shaft)(Standard Rotation)

    RIGHT HAND NON-RATCHETING Gear Housing (Drive Shaft)(Standard Rotation) 4.75 IN/120.65MM TORPEDO DIA. Loctite 271 Perfect Seal Liquid Soap (Purchase Locally) Loctite 680 G.E. Sealer RTV #1473 Loctite 7649 Primer 2-4-C with Teflon Page 6A-6 90-883728 JULY 2001...
  • Page 480 RIGHT HAND NON-RATCHETING Gear Housing (Drive Shaft)(Standard Rotation) TORQUE REF. QTY. DESCRIPTION lb-in lb-ft GEAR HOUSING (BLACK)(BASIC) DOWEL PIN STUD (3-1/8 IN.) (LONG) STUD (3-11/16 IN.) (X-LONG) STUD (2-1/16 IN.) STUD (3-3/8 IN.) STUD (3-1/8 IN.) FILLER BLOCK ROLLER BEARING ANODE SCREW (M6 x 40) HOSE (10 IN.
  • Page 481: Gear Housing (Prop Shaft)(Standard Rotation)

    RIGHT HAND NON-RATCHETING Gear Housing (Prop Shaft)(Standard Rotation) 4.75 IN/120.65MM TORPEDO DIA. Loctite 271 Quicksilver Gear Lubricant Anti-Corrosion Grease 2-4-C with Teflon Page 6A-8 90-883728 JULY 2001...
  • Page 482 RIGHT HAND NON-RATCHETING Gear Housing (Prop Shaft)(Standard Rotation) TORQUE REF. QTY. DESCRIPTION lb-in lb-ft GEAR HOUSING(BASIC) CAM FOLLOWER SHIFT CAM FORWARD GEAR (1.87:1 – 15/28)(150) FORWARD GEAR (2:1 – 14/28)(115/135) SHIM (.006 thru 050) TAPERED ROLLER BEARING NEEDLE BEARING CLUTCH CROSS PIN DETENT PIN SPRING...
  • Page 483: General Service Recommendations

    RIGHT HAND NON-RATCHETING General Service Recommendations There may be more than one way to “disassemble” or “reassemble” a particular part(s), therefore, it is recommended that the entire procedure be read prior to repair. IMPORTANT: Read the following before attempting any repairs. In many cases, disassembly of a sub-assembly may not be necessary until cleaning and inspection reveals that disassembly is required for replacement of one or more compo- nents.
  • Page 484: Removal, Disassembly, Cleaning And Inspection

    RIGHT HAND NON-RATCHETING To prevent corrosion damage after reassembly, apply Quicksilver 2-4-C w/Teflon Marine Lubricant to external surfaces of bearing carrier and cover nut threads prior to installation. Removal, Disassembly, Cleaning and Inspection – Standard Rotation Removal WARNING Disconnect high tension leads from spark plugs and remove spark plugs from engine before removing gear housing from driveshaft housing.
  • Page 485: Draining And Inspecting Gear Housing Lubricant

    RIGHT HAND NON-RATCHETING 8. While pressing in on speedometer hose junction, pull out on hose to disconnect. 57735 Press in on Junction Pull out on Hose 9. Remove locknut from the front gear housing mounting stud. 10. Loosen the side mounting locknuts. (DO NOT attempt to remove one nut before oppo- site side is loosened sufficiently, or driveshaft housing could be damaged.) 51873 Front Mounting Locknut...
  • Page 486: Water Pump

    RIGHT HAND NON-RATCHETING 2. Position a clean drain pan under gear housing and remove “Fill” and “Vent” screws from gear housing. 51871 “Fill” Screw “Vent” Screw 3. Inspect gear lubricant for metal particles. Presence of a small amount of fine metal particles (resembling powder) indicates normal wear.
  • Page 487 RIGHT HAND NON-RATCHETING REMOVAL AND DISASSEMBLY 1. Slide rubber centrifugal slinger up and off driveshaft. 2. Remove water tube guide and seal from water pump cover. (Retain guide for reas- sembly and discard seal.) 3. Remove (and retain) 3 nuts, one bolt and all washers which secure water pump cover to gear housing.
  • Page 488 RIGHT HAND NON-RATCHETING b. Drill two 3/16 in. (4.8mm) diameter holes thru the top of water pump cover (but not thru insert). Drive insert out of cover with a punch and hammer. 51873 Drill Two Holes at These Locations 7. Remove impeller from driveshaft. (It may be necessary to use a punch and hammer to drive impeller upward on driveshaft.
  • Page 489: Bearing Carrier And Propeller Shaft Removal 6A-16

    RIGHT HAND NON-RATCHETING Bearing Carrier and Propeller Shaft Removal CAUTION Gear housing MUST BE in NEUTRAL position, and shift shaft MUST BE removed from gear housing before propeller shaft can be removed from gear housing. 1. Place gear housing in a suitable holding fixture with propeller shaft in a horizontal posi- tion.
  • Page 490 RIGHT HAND NON-RATCHETING NOTE: When bearing carrier is removed from gear housing, the bearing carrier alignment key will come out with it. 7. With gear housing in NEUTRAL, pull shift shaft out of gear housing. If necessary, use a pliers to pull shift shaft out of gear housing. If pliers are used to pull shift shaft out, wrap a strip of soft metal (aluminum) around splines before clamping pliers.
  • Page 491: Shift Shaft

    RIGHT HAND NON-RATCHETING Shift Shaft CLEANING AND INSPECTION 1. Clean shift shaft and bushing with solvent and dry with compressed air. 2. Check shift shaft splines on both ends for wear and/or corrosion damage. 3. Inspect shift shaft for groove(s) at shift shaft bushing seal surface. 4.
  • Page 492 RIGHT HAND NON-RATCHETING c. If reverse gear bearing remains attached to reverse gear, install Universal Puller Plate (91-37241) and position puller plate, gear and bearing on a press with gear side down. Use a suitable mandrel and press gear out of bearing. 51874 Universal Puller Plate Mandrel...
  • Page 493: Propeller Shaft

    RIGHT HAND NON-RATCHETING Propeller Shaft INSPECTION 1. Clean propeller shaft assembly with solvent and dry with compressed air. 2. Inspect bearing carrier oil seal surfaces for grooves. Run fingernail across seal sur- face to check for groove. Replace shaft if groove is found. 3.
  • Page 494 RIGHT HAND NON-RATCHETING 6. Inspect sliding clutch. Check reverse gear and forward gear clutch jaws. Rounded jaws indicate one or more of the following: a. Improper shift cable adjustment. b. Improper shift habits of operator(s) (shift from NEUTRAL to REVERSE gear too slowly).
  • Page 495: Clutch Actuator Rod

    RIGHT HAND NON-RATCHETING 4. Push cross pin out of sliding clutch and propeller shaft with Cross Pin Tool (91-86642). 5. Pull sliding clutch off propeller shaft. 6. Pull cam follower and clutch actuator rod out of propeller shaft. DO NOT force cam follower up-or-down or side-to-side when pulling from propeller shaft.
  • Page 496 RIGHT HAND NON-RATCHETING 5. Remove gear housing from vise and re-position it as shown. Be sure to use soft jaw vise covers and clamp as close as possible to water pump studs. 6. Place a block of wood on gear housing mating surface. Use a mallet and carefully tap gear housing away from driveshaft.
  • Page 497 RIGHT HAND NON-RATCHETING NOTE: FORWARD gear must be removed first BEFORE removing driveshaft needle bearing. IMPORTANT: Discard driveshaft needle bearing after removal. (Bearing cannot be reused.) 51869 Mandrel (91-37263) Pilot* (91-36571) Driver Rod* (91-37323) *From Bearing Removal and Installation Kit (91-31229A7) CLEANING AND INSPECTION 1.
  • Page 498: Forward Gear

    RIGHT HAND NON-RATCHETING Forward Gear REMOVAL AND DISASSEMBLY NOTE: Forward gear can only be removed from gear housing after driveshaft and pinion gear have been removed. 1. Reach into gear housing and lift out forward gear. IMPORTANT: DO NOT remove tapered bearing or needle bearings from forward gear, unless replacement of bearings is required.
  • Page 499 RIGHT HAND NON-RATCHETING CLEANING AND INSPECTION CAUTION DO NOT spin bearings dry with compressed air, as this could cause bearing to score. 1. Clean forward gear and bearings with solvent and dry with compressed air. 2. Inspect gear teeth for pitting, grooves, scoring, uneven wear and for discoloration (from overheating).
  • Page 500 RIGHT HAND NON-RATCHETING 3. Install and seat needle bearing with the following tools: Puller Rod* (91-31229), Nut* (11-24156), Pilot* (91-36571T), Plate* (91-29310) and Mandrel* (91-92788). Pull bearing up into bore until it bottoms on gear housing shoulder. (DO NOT use exces- sive force.) *From Bearing Removal and Installation Kit (91-31229A7) 51869...
  • Page 501 RIGHT HAND NON-RATCHETING 5. Press ball bearing onto gear with a suitable mandrel until firmly seated. (Be sure to press only on inner race of bearing and that bearing is firm against gear.) 6. Apply a light coat of Quicksilver Super Duty Gear Lubricant onto outside diameter of propeller shaft needle bearing.
  • Page 502 RIGHT HAND NON-RATCHETING 11. Place second seal on short shoulder side of seal driver with lip of seal toward shoulder. Press seal into bearing carrier until seal driver bottoms against bearing carrier. 51872 Oil Seal (Lip of Seal Up) Oil Seal Driver Seated 12.
  • Page 503 RIGHT HAND NON-RATCHETING Forward Gear REASSEMBLY 1. Place forward gear on a press with gear teeth down. 2. Apply a light coat of Quicksilver Super Duty Gear Lubricant onto the inside diameter of forward gear tapered bearing. 3. Position forward gear tapered bearing over gear. 4.
  • Page 504 RIGHT HAND NON-RATCHETING Forward Gear Bearing Race INSTALLATION 1. Place shim(s) (retained from disassembly) into gear housing. If shim(s) were lost or a new gear housing is being used, start with approximately 0.010 in. (0.254 mm). 2. Apply a light coat of Quicksilver Super Duty Gear Lubricant to forward gear bearing race bore in gear housing.
  • Page 505 RIGHT HAND NON-RATCHETING Driveshaft and Pinion Gear REASSEMBLY/INSTALLATION 1. Apply a light coat of Quicksilver Super Duty Gear Lubricant on l.D. of driveshaft ta- pered bearing. 2. Thread a used pinion nut onto end of driveshaft. Leave approximately 1/16 in. (1.6 mm) of nut threads exposed.
  • Page 506 RIGHT HAND NON-RATCHETING 9. Install bearing race and bearing retainer. 51867 51880 Driveshaft (rotate to engage splines with pinion gear) Forward Gear Assembly Pinion Gear Washer (located above pinion nut) Pinion Nut [apply Loctite 271 on threads and install with flat side away from pinion gear.] Shim(s) Bearing Race...
  • Page 507 RIGHT HAND NON-RATCHETING Pinion Gear Depth/Forward Gear Backlash/Reverse Gear Backlash DETERMINING PINION GEAR DEPTH NOTE: Read entire procedure before attempting any change in shim thickness. IMPORTANT: Forward gear assembly must be installed in gear housing when checking pinion gear depth or an inaccurate measurement will be obtained. 1.
  • Page 508 RIGHT HAND NON-RATCHETING 5. Measure distance (a) and increase that distance by 1 in. (25.4 mm) by turning bottom nut away from top nut. 1 in. (25.4 mm) 51870 Distance Adaptor Ledge 6. Turn driveshaft clockwise 2 or more turns to seat driveshaft bearings. 7.
  • Page 509 RIGHT HAND NON-RATCHETING NOTE: Bearing Preload Tool (91-14311A1) should remain installed on driveshaft after setting pinion gear depth as it is required to properly check forward gear and reverse gear backlash. DETERMINING FORWARD GEAR BACKLASH IMPORTANT: Bearing carrier must be assembled to provide a pilot for propeller shaft.
  • Page 510 RIGHT HAND NON-RATCHETING 7. Position dial indicator pointer on line marked “1” on Backlash Indicator Tool, if gear ratio is 1.87:1 (15 teeth on pinion gear), or on line marked “2” on Backlash Indicator Tool, if gear ratio is 2:1 (14 teeth on pinion gear). 51880 Thread Stud Adaptor (from 91-14311A2) Stud...
  • Page 511 RIGHT HAND NON-RATCHETING 5. Secure pipe against carrier with propeller nut and tab washer. 51866 Pipe [5-1/2 in. x 1.5 in. (139.7 mm x 38.0 mm)] Propeller Nut Tab Washer 6. Torque propeller nut to 45 lb. in. (5 Nm). 7.
  • Page 512 RIGHT HAND NON-RATCHETING Propeller Shaft REASSEMBLY/INSTALLATION 1. Insert clutch actuator rod assembly into end of propeller shaft. Align cross pin slot in actuator rod with cross pin slot in propeller shaft. 2. On PRODUCTION MODEL GEAR CASES, position sliding clutch onto propeller shaft with GROOVED RINGS (ON SLIDING CLUTCH) TOWARD PROPELLER END OF PROPELLER SHAFT.
  • Page 513 RIGHT HAND NON-RATCHETING 5. Install cross pin retaining spring onto sliding clutch as follows: IMPORTANT: DO NOT over-stretch retaining spring when installing onto sliding clutch. 6. Spirally wrap spring into groove on sliding clutch. 7. Place gear housing in a soft jaw vise with the driveshaft in a vertical position. 8.
  • Page 514 RIGHT HAND NON-RATCHETING CAUTION Until bearing carrier is installed into gear housing, extreme care MUST BE taken not to apply any side force on propeller shaft. Side force on propeller shaft may break the neck of the clutch actuator rod. 11.
  • Page 515 RIGHT HAND NON-RATCHETING NOTE: Before torquing bearing carrier cover nut, gear case should either be mounted in a stand specifically designed for holding gear cases or bolted to a driveshaft housing to avoid possible damage to the gear case. 19. Start cover nut a few turns by hand, then using Cover Nut Tool (91-61069T) and torque wrench, torque cover nut to 210 Ib.
  • Page 516 RIGHT HAND NON-RATCHETING 3. Install divider block if removed. Use RTV Sealer to seal seams between divider block and gear housing. 4. Install a new water pump base gasket and install water pump base. 51866 51870 Divider Block Water Pump Base Gasket Hole (MUST be positioned as shown) 5.
  • Page 517 RIGHT HAND NON-RATCHETING 7. Slide impeller down driveshaft to impeller drive key. Align drive key with keyway in the center hub of impeller, and slide impeller over drive key. 8. If removed, install new water pump insert into pump cover as follows: a.
  • Page 518 RIGHT HAND NON-RATCHETING Gear Lubricant Filling Instructions 1. Remove any gasket material from “Fill” and “Vent” screws and gear housing. 2. Install new gaskets on Fill and Vent screws. IMPORTANT: Never apply lubricant to gear housing without first removing Vent screw, or gear housing cannot be filled because of trapped air.
  • Page 519 RIGHT HAND NON-RATCHETING NOTE: If, while performing Step 8, the driveshaft splines will not align with crankshaft splines, place a propeller onto propeller shaft and turn it counterclockwise as the gear housing is being pushed toward driveshaft housing. 8. Move gear housing up toward driveshaft housing while aligning shift shaft splines and water tube with water tube guide (in water pump cover).
  • Page 520 RIGHT HAND NON-RATCHETING Propeller Installation WARNING When installing or removing propeller, because of the engine’s ease in starting, be sure that the remote control is in neutral position and that the key switch is “OFF.” Place a block of wood between the anti-cavitation plate and propeller to prevent accidental starting and to protect hands from propeller blades while re- moving or installing nut.
  • Page 521 RIGHT HAND NON-RATCHETING Speedometer Tube Installation 1. Route speedometer tube from gearcase around lower yoke and push into junction. Junction should be secured to yoke with sta-strap. 2. Route speedometer tube from swivel tube around lower yoke and push into junction. After insertion of speedometer tubes into junction, pull on each tube to verify that they are locked into junction.
  • Page 522: In. (0.635 Mm)With Tool 91-12349A2 Using Disc #2 And Flat #7

    LEFT HAND NON-RATCHETING LOWER UNIT Section 6B – Left Hand Non-Ratcheting Table of Contents Gear Housing Specifications (Counter Rotation) 6B-1 Reassembly and Installation of Counter Rotation Special Tools ....... . 6B-2 Gear Housing .
  • Page 523 LEFT HAND NON-RATCHETING Special Tools 1. Shift Shaft Bushing Tool 91-31107T 2. Gear Housing Cover Nut Tool 91-61069 3. Bearing Carrier Removal Tool 91-46086A1 and Puller Bolt 91-85716 4. Slide Hammer Puller 91-34569A1 5. Bearing Removal and Installation Kit 91-31229A5. This kit contains the following tools: Pilot 91-36571;...
  • Page 524 LEFT HAND NON-RATCHETING 8. Puller Plate 91-29310 9. Mandrel 91-38628 10. Driver Rod 91-37323 11. Universal Puller Plate 91-37241 12. Driveshaft Holding Tool 91-34377A1 or91-90094 13. Oil Seal Driver 91-31108 14. Forward Gear Bearing Tool 91-86943 15. Pinion Locating Gear Tool 91-12349A2 or 91-74776 16.
  • Page 525 LEFT HAND NON-RATCHETING 18. Bearing Retainer Tool 91-43506 19. Mandrel 91-92788 20. Mandrel 91-15755 21. Dial Indicator Holder 91-89897 22. Bearing Preload Tool 91-14311A1 Adaptor (N.S.S.) Bearing (N.S.S.) Washer (N.S.S.) Spring (24-14111) Bolt (10-12580) Nut (11-13953) Set Screw (10-12575) Sleeve (23-13946) 23.
  • Page 526 LEFT HAND NON-RATCHETING 25. Reverse Gear Installation Kit 91-18605A1 includes Pilot 91-18603; Retainer 91-18604; Shaft 91-18605 and Screw 10-18602 Pilot 91-18603 Shaft 91-18605 Retainer 91-18604 Screw 10-18602 90-883728 JULY 2001 Page 6B-5...
  • Page 527 LEFT HAND NON-RATCHETING Gear Housing (Drive Shaft)(Counter Rotation) 4.75 IN/120.65 MM TORPEDO DIA. Loctite 271 Perfect Seal Soap (Purchase Locally) Loctite 680 G. E. RTV Sealant Loctite 7649 Primer 2-4-C with Teflon Page 6B-6 90-883728 JULY 2001...
  • Page 528 LEFT HAND NON-RATCHETING Gear Housing (Drive Shaft)(Counter Rotation) TORQUE REF. QTY. DESCRIPTION GEAR HOUSING (BASIC) DOWEL PIN STUD (3-11/16 IN.) STUD (2-1/16 IN.) STUD (3-3/8 IN.) STUD (3-1/8 IN.) FILLER BLOCK ROLLER BEARING ANODE SCREW HOSE (12 IN.) FITTING PINION GEAR (1.87:1 - 15 TEETH) PINION GEAR (2:1 - 14 TEETH) WASHER SHIM (006 thru 048)
  • Page 529 LEFT HAND NON-RATCHETING Gear Housing (Prop Shaft)(Counter Rotation) 4.75 IN/120.65 MM TORPEDO DIA. Anti-Corrosion Grease Loctite 271 Quicksilver Gear Lubricant 2-4-C with Teflon Page 6B-8 90-883728 JULY 2001...
  • Page 530 LEFT HAND NON-RATCHETING Gear Housing (Prop Shaft)(Counter Rotation) TORQUE REF. QTY. DESCRIPTION lb-in lb-ft GEAR HOUSING (BLACK)(BASIC) CAM FOLLOWER SHIFT CAM SHIM SET BEARING ADAPTOR ASSEMBLY ROLLER BEARING THRUST WASHER THRUST BEARING REVERSE GEAR (1.87:1 – 15/28) REVERSE GEAR (2:1 – 14/28) ROLLER BEARING SPRING SLIDING CLUTCH...
  • Page 531 LEFT HAND NON-RATCHETING Gear Housing (Prop Shaft)(Counter Rotation) 4.75 IN/120.65 MM TORPEDO DIA. Anti-Corrosion Grease Loctite 271 2-4-C With Teflon Quicksilver Gear Lubricant Page 6B-10 90-883728 JULY 2001...
  • Page 532: General Service Recommendations

    LEFT HAND NON-RATCHETING Gear Housing (Prop Shaft)(Counter Rotation) TORQUE REF. QTY. DESCRIPTION lb-in lb-ft GEAR HOUSING (BLACK)(BASIC) ROLLER BEARING THRUST WASHER BEARING ADAPTOR ASSEMBLY ROLLER BEARING THRUST WASHER THRUST BEARING THRUST RACE KEEPER O RING BEARING CARRIER ASSEMBLY ROLLER BEARING OIL SEAL (INSIDE) OIL SEAL (OUTSIDE) TAB WASHER...
  • Page 533: Removal, Disassembly, Cleaning And Inspection Of

    LEFT HAND NON-RATCHETING BEARINGS Upon disassembly of gear housing, all bearings must be cleaned and inspected. Clean bearings with solvent and dry with compressed air. Air should be directed at the bearing so that it passes thru the bearing. DO NOT spin bearing with compressed air, as this may cause bearing to score from lack of lubrication.
  • Page 534 LEFT HAND NON-RATCHETING 5. Mark gear housing and trim tab so that trim tab can be reinstalled in the same position. Remove plastic cap at rear edge of driveshaft housing. Remove bolt that secures trim tab and remove tab from gear housing. 6.
  • Page 535 LEFT HAND NON-RATCHETING 9. Remove locknut from the front gear housing mounting stud. 10. Loosen the side mounting locknuts. (DO NOT attempt to remove one nut before oppo- site side is loosened sufficiently, or driveshaft housing could be damaged.) 51873 Front Mounting Locknut Side Mounting Locknut (One Each Side) 11.
  • Page 536 LEFT HAND NON-RATCHETING Water Pump CLEANING AND INSPECTION 1. Clean all water pump parts with solvent and dry with compressed air. 2. Inspect water pump cover and base for cracks and distortion (from overheating). 3. Inspect face plate and water pump insert for grooves and/or rough surfaces. IMPORTANT: When completing gear housing repairs, that require removal of water pump impeller, it is recommended that the impeller be replaced.
  • Page 537 LEFT HAND NON-RATCHETING NOTE: Try Step “a” first. If insert cannot be removed with Step “a,” use Step “b.” a. Drive water pump insert out of water pump cover with a punch and hammer. b. Drill two 3/16 in. (4.8 mm) diameter holes thru the top of water pump cover (but not thru insert).
  • Page 538: Bearing Carrier And Propeller Shaft

    LEFT HAND NON-RATCHETING Bearing Carrier and Propeller Shaft REMOVAL CAUTION Gear housing MUST BE in neutral position, and shift shaft MUST BE removed from gear housing before propeller shaft can be removed from gear housing. 1. Place gear housing in a suitable holding fixture or vise with propeller shaft in a horizon- tal position.
  • Page 539 LEFT HAND NON-RATCHETING CAUTION Once bearing carrier is removed from gear housing, extreme care MUST BE taken not to apply any side force on propeller shaft. Side force on propeller shaft may break the neck of the clutch actuator rod. 6.
  • Page 540: Shift Shaft

    LEFT HAND NON-RATCHETING CAUTION Propeller shaft, cam follower and shift cam, in most cases, will come out of gear housing by simply pulling outward on propeller shaft. DO NOT FORCE shaft side- ways or ATTEMPT TO PULL with a slide hammer or any mechanical puller. 8.
  • Page 541 LEFT HAND NON-RATCHETING DISASSEMBLY 1. Remove (and discard) shift shaft bushing oil seal by prying it out or driving it out with a punch and hammer. CLEANING/INSPECTION - BEARING CARRIER IMPORTANT: It is recommended that all seals and O-rings be replaced (as a normal repair procedure) to assure effective repair.
  • Page 542 LEFT HAND NON-RATCHETING 4. Use bearing removal and replacement tool (91-31229A5) or equivalent to press bear- ings out of bearing carrier. 51885 Needle Bearing Push Rod Mandrel Propeller Shaft INSPECTION 1. Clean propeller shaft assembly with solvent and dry with compressed air. 2.
  • Page 543 LEFT HAND NON-RATCHETING “Vee” Blocks and Dial Indicator Position propeller shaft roller bearing surfaces on vee blocks. Mount a dial indicator at front edge of propeller splines. Rotate propeller shaft. Dial indicator movement of more than 0.006 in. (0.152 mm) (or noticeable wobble) is reason for replacement. DISASSEMBLY 1.
  • Page 544 LEFT HAND NON-RATCHETING 5. Pull sliding clutch off propeller shaft. 6. Inspect sliding clutch. Check reverse gear clutch “jaws” and forward gear clutch “jaws.” Rounded “jaws” indicate one or more of the following: a. Improper shift cable adjustment. b. Improper shift habits of operator(s) (shift from neutral to reverse gear or forward gear too slowly).
  • Page 545: Forward Gear And Bearing Adapter

    LEFT HAND NON-RATCHETING Clutch Actuator Rod CLEANING AND INSPECTION 1. Clean clutch actuator rod in solvent and dry with compressed air. 2. Inspect actuator components for wear or damage. Replace components as required. Forward Gear and Bearing Adapter DISASSEMBLY/CLEANING/INSPECTION 1. Remove forward gear from bearing adapter. 2.
  • Page 546 LEFT HAND NON-RATCHETING 6. Remove thrust washer and O-ring. The thrust washer acts as a bearing surface for the thrust bearing and it should be inspected for pits, rust, scoring or discoloration due to lack of lubricant. O-ring should be inspected for cuts or abrasions and replaced if necessary.
  • Page 547: Pinion Gear And Driveshaft

    LEFT HAND NON-RATCHETING Pinion Gear and Driveshaft REMOVAL 1. Remove bearing retainer using Bearing Retainer Tool (91-43506). 51865 Bearing Retainer Bearing Retainer Tool (91-43506) 2. Place Driveshaft Holding Tool (91-34377A1) over driveshaft splines. 3. Use a socket and flex handle to hold pinion nut. (Pad area of gear housing, where flex handle will make contact, to prevent damage to gear housing.) 4.
  • Page 548 LEFT HAND NON-RATCHETING 8. After driveshaft is removed from gear case, remove and retain shim(s) that were lo- cated under upper tapered driveshaft bearing. 9. If inspection determines that replacement of driveshaft tapered bearing is required, remove bearing from driveshaft as follows: a.
  • Page 549: Reverse Gear

    LEFT HAND NON-RATCHETING CLEANING AND INSPECTION 1. Clean driveshaft, tapered bearing and race, and pinion gear with solvent. Dry with compressed air. DO NOT allow driveshaft bearing to spin while drying. 2. Inspect pinion gear for pitting, grooves, scoring, uneven wear and/or discoloration from overheating.
  • Page 550 LEFT HAND NON-RATCHETING 2. Remove thrust bearing and thrust washer from reverse gear bearing cup. 3. Remove reverse gear bearing adaptor. Remove, measure and make note of the shim thickness and discard (DO NOT reuse shims if they are damaged during removal) the shims.
  • Page 551 LEFT HAND NON-RATCHETING 3. Check clutch jaws on reverse gear for damage. Replace reverse gear if damage is found. 23351 Reverse Gear Teeth Clutch Jaws NOTE: The needle bearings in the reverse gear should not be removed unless damage has been found. Inspect to ensure that all of the needles are present and in position. Needles that have been dislodged may be snapped back into place as long as no damage has occurred to the bearing cage.
  • Page 552: Reassembly And Installation Of Counter Rotation

    LEFT HAND NON-RATCHETING Reassembly and Installation of Counter Rotation Gear Housing Driveshaft Needle Bearing REASSEMBLY/INSTALLATION CAUTION If driveshaft needle bearing failure has occurred, and original bearing race has turned in the gear housing, gear housing must be replaced. Loose fitting needle bearing will move out of position and cause repeated failures.
  • Page 553 LEFT HAND NON-RATCHETING Bearing Carrier, Forward Gear and Bearing Adaptor REASSEMBLY 1. Using suitable mandrel, press forward gear bearing into bearing adaptor until bearing is flush with lip of adaptor. Suitable Mandrel Forward Gear Bearing Bearing Adaptor PROPELLER SHAFT NEEDLE ROLLER BEARING AND OIL SEAL INSTALLATION 1.
  • Page 554 LEFT HAND NON-RATCHETING 3. With seal lip facing towards bearing, press inner seal (a) using long end of mandrel (b) (91-31108) into bearing carrier (c) until mandrel shoulder (d) bottoms out on bear- ing carrier. 51881 Inner Seal Mandrel (91-31108) Bearing Carrier Mandrel Shoulder 4.
  • Page 555 LEFT HAND NON-RATCHETING REVERSE GEAR AND BEARING CUP ADAPTOR REASSEMBLY 1. With reverse gear teeth facing down, use mandrel (91-86943) to press propeller shaft needle bearing (NUMBERS/LETTERS UP) into reverse gear until short shoulder on mandrel bottoms on reverse gear. NOTE: If gear housing has been replaced or inspection determines that reverse gear bearing adapter must be replaced, assemble and install as follows: 2.
  • Page 556: Reverse Gear Bearing Adaptor Assembly

    LEFT HAND NON-RATCHETING Reverse Gear Bearing Adaptor Assembly INSTALLATION NOTE: If the reverse gear, reverse gear adaptor, large thrust bearing, or bearing race in the gear housing were not replaced, install the same shim(s) (or the same thickness of shim(s)) that were taken out when adaptor was removed. If the reverse gear, reverse gear adaptor, large thrust bearing, bearing race, or gear housing were replaced, install 0.008 in.
  • Page 557 LEFT HAND NON-RATCHETING 4. Position the reverse gear (without the thrust race or thrust bearing) into the gear hous- ing and into the adaptor. 5. Install PILOT RING (91-18603) over DRIVER TOOL (91-18605) and seat pilot ring in gearcase against inner ledge. Thread RETAINER (91-18604) into bearing carrier threads.
  • Page 558: Driveshaft And Pinion Gear

    LEFT HAND NON-RATCHETING Driveshaft and Pinion Gear REASSEMBLY/INSTALLATION 1. Apply a light coat of Quicksilver Super Duty Gear Lubricant on l.D. of driveshaft ta- pered bearing. 2. Thread a used pinion nut onto end of driveshaft. Leave approximately 1/16 in. (1.6 mm) of nut threads exposed.
  • Page 559 LEFT HAND NON-RATCHETING 9. Install bearing race and bearing retainer. 51880 Shim(s) Bearing Race Bearing Retainer (Word “OFF” must be visible); Torque to 100 lb. ft. (135.5 Nm) Bearing Retainer Tool (91-43506) 10. Use a socket and breaker bar to hold pinion nut (pad area where flex handle will con- tact gear housing while torquing nut).
  • Page 560: Pinion Gear Depth

    LEFT HAND NON-RATCHETING Pinion Gear Depth DETERMINING PINION GEAR DEPTH NOTE: Read entire procedure before attempting any change in shim thickness. IMPORTANT: Reverse gear assembly must be installed in gear housing when checking pinion gear depth or an inaccurate measurement will be obtained. 1.
  • Page 561 LEFT HAND NON-RATCHETING 5. Measure distance (a) and increase that distance by 1 in. (25.4 mm) by turning bottom nut away from top nut. 1 in. (25.4 mm) 51870 Distance Adaptor Ledge 6. Turn driveshaft clockwise 2 or more turns to seat driveshaft bearings. 7.
  • Page 562: Reverse Gear

    LEFT HAND NON-RATCHETING NOTE: Bearing Preload Tool (91-14311A1) should remain installed on driveshaft after setting pinion gear depth as it is required to properly check forward gear and reverse gear backlash. Reverse Gear DETERMINING REVERSE GEAR BACKLASH NOTE: Reverse gear backlash is adjustable using shims; it can be checked as follows: 1.
  • Page 563: Forward Gear

    LEFT HAND NON-RATCHETING 9. Dial Indicator registers amount of backlash, which should be 0.030 in. to 0.050 in. (0.76 mm to 1.27 mm). 51880 Stud Adaptor (from 91-14311A1) Stud Backlash Indicator Tool (91-78473) Dial Indicator Holder (91-89897) Dial Indicator (91-58222A1) Dial Indicator Pointer NOTE: If reverse gear backlash is not within specifications, then gear case is not properly assembled or component(s) within gear case are excessively worn and must be replaced...
  • Page 564 LEFT HAND NON-RATCHETING 2. Assemble BEARING CARRIER, BEARING ADAPTOR, THRUST WASHER, THRUST BEARING, and FORWARD GEAR onto propeller shaft. 3. Position shim against shoulder in gear case. 55103 55104 Bearing Carrier Bearing Adaptor Thrust Washer Thrust Bearing Forward Gear Shim (PLACE IN GEARCASE FIRST) Shoulder Shim 4.
  • Page 565 LEFT HAND NON-RATCHETING 7. Tighten nut to 45 lb. in. (5 Nm). This will seat the forward gear against the forward thrust bearing and tends to hold the propeller shaft from moving when measuring backlash. NOTE: Bearing Preload Tool (91-44307A1) should still be installed from having previous- ly been used to determine pinion gear depth and reverse gear backlash.
  • Page 566: Propeller Shaft/Forward Gear Bearing Adapter/Bearing Carrier

    LEFT HAND NON-RATCHETING 12. If backlash is less than the specifications, then a larger shim should be installed. Con- versely, if the backlash indicated is greater than specifications, then a smaller shim should be installed. NOTE: By adding or subtracting 0.002 in. (0.051 mm) shim, the backlash will change ap- proximately 0.002 in.
  • Page 567 LEFT HAND NON-RATCHETING 2. Place a small amount of Quicksilver 2-4-C with Teflon Lubricant on actuator rod and install cam follower. Actuator Rod Cam Follower 3. Slide clutch actuator assembly into propeller shaft. Align cross pin slot in actuator rod with cross pin slot in clutch/propeller shaft.
  • Page 568 LEFT HAND NON-RATCHETING 6. Install cross pin retaining spring onto sliding clutch as follows: IMPORTANT: DO NOT over-stretch retaining spring when installing onto sliding clutch. a. Install spring. (1.) Spirally wrap spring into groove on sliding clutch. (2.) Position spring in groove so that straight end of spring is against the side of groove.
  • Page 569 LEFT HAND NON-RATCHETING 13. Install appropriate spacer shim into the gear housing. 14. Apply Quicksilver Super Duty Gear Lubricant to to thrust bearing and install thrust bearing and thrust race onto forward gear bearing adaptor. 55220 50782 Shim Bearing Adaptor Thrust Washer Thrust Bearing 15.
  • Page 570 LEFT HAND NON-RATCHETING 17. Install thrust race on top of bearing adaptor. 18. Apply Quicksilver Super Duty Gear Lubricant to small thrust bearing and install bear- ing on thrust race. 55108 55107 Thrust Race Thrust Bearing 19. Install thrust collar with its STEPPED SIDE DOWN toward the small thrust bearing. 20.
  • Page 571 LEFT HAND NON-RATCHETING 21. Install second thrust collar with its stepped side UP. 22. Apply Quicksilver Super Duty Gear Lubricant to the second thrust bearing and install it on top of the second thrust collar. 55112 Thrust Collar Thrust Bearing Thrust Collar 23.
  • Page 572 LEFT HAND NON-RATCHETING 25. Apply Quicksilver 2-4-C with Teflon Marine Lubricant to: a. Outer diameter of bearing carrier which contacts gear case. b. Space between carrier oil seals. 26. Apply Quicksilver Super Duty Gear Lubricant to bearing carrier needle bearing. 27.
  • Page 573: Water Pump

    LEFT HAND NON-RATCHETING 32. Bend one lock tab of tab washer into cover nut (only one will align). 33. Bend remaining tabs of tab washer toward front of gear housing. 34. Use Shift Shaft Bushing Tool (91-31107) and torque shift shaft bushing to 50 Ib. ft. (68 Nm).
  • Page 574 LEFT HAND NON-RATCHETING 3. Install divider block if removed. Use RTV Sealer to seal seams between divider block and gear housing. 4. Install a new water pump base gasket and install water pump base. 51866 51878 Divider Block Gasket Water Pump Base Hole (MUST be positioned as shown) 5.
  • Page 575 LEFT HAND NON-RATCHETING 7. Slide impeller down driveshaft to impeller drive key. Align drive key with keyway in the center hub of impeller, and slide impeller over drive key. 8. If removed, install new water pump insert into pump cover as follows: a.
  • Page 576: Gear Lubricant Filling Instructions

    LEFT HAND NON-RATCHETING Gear Lubricant Filling Instructions 1. Remove any gasket material from “Fill” and “Vent” screws and gear housing. 2. Install new gaskets on “Fill” and “Vent” screws. IMPORTANT: Never apply lubricant to gear housing without first removing “Vent” screw, or gear housing cannot be filled because of trapped air.
  • Page 577 LEFT HAND NON-RATCHETING 7. Position gear housing so that the driveshaft is protruding into driveshaft housing. NOTE: If, while performing Step 8, the driveshaft splines will not align with crankshaft splines, place a propeller onto propeller shaft and turn it counterclockwise as the gear housing is being pushed toward driveshaft housing.
  • Page 578: Propeller Installation

    LEFT HAND NON-RATCHETING Propeller Installation WARNING When installing or removing propeller, because of the engine’s ease in starting, VERIFY that the remote control is in NEUTRAL position and that the key switch is “OFF.” Place a block of wood between the anti-cavitation plate and propeller to prevent accidental starting and to protect hands from propeller blades while removing or installing nut.
  • Page 579 LEFT HAND NON-RATCHETING Speedometer Tube Installation 1. Route speedometer tube from gearcase around lower yoke and push into junction. Junction should be secured to yoke with sta-strap. 2. Route speedometer tube from swivel tube around lower yoke and push into junction. After insertion of speedometer tubes into junction, pull on each tube to verify that they are locked into junction.
  • Page 580: Ride Guide Steering Cable/Attaching Kit Installation (92876A10)

    ATTACHMENTS / CONTROL LINKAGE ATTACHMENTS / CONTROL LINKAGE Section 7 Table of Contents Ride Guide Steering Cable/Attaching Kit Installation Installation Requirements ....7-10 (92876A10) .
  • Page 581: Maintenance Instructions

    ATTACHMENTS / CONTROL LINKAGE STEERING LINK ROD INSTALLATION IMPORTANT: The steering link rod that connects the steering cable to the engine must be fastened using special washer head bolt (“a” - Part Number 10-849838) and self locking nuts (“b” & “c” - Part Number 11-826709113). These locknuts must nev- er be replaced with common nuts (non locking) as they will work loose and vibrate off freeing the link rod to disengage.
  • Page 582: Ride Guide Steering Cable/Attaching Kit Installation

    ATTACHMENTS / CONTROL LINKAGE NOTE: Ride-Guide Steering Cables are lubricated at the factory and require no additional lubrication at initial installation. WARNING Core of each steering cable (transom end) must be fully retracted into cable hous- ing before lubricating cable. If cable is lubricated while extended, hydraulic lock of cable could occur.
  • Page 583: Super Ride-Guide Steering Kit Installation

    ATTACHMENTS / CONTROL LINKAGE CAUTION Marine sealer must be used on shanks of bolts to make a water-tight installation. IMPORTANT: DO NOT use an impact driver when tightening transom bolts. Apply marine sealer to shanks of mounting bolts (not threads) and secure outboard to transom with 4 bolts, flat washers and locknuts, as shown.
  • Page 584: Steering Cable Mounting Tube Installation

    ATTACHMENTS / CONTROL LINKAGE Steering Cable Mounting Tube Installation IMPORTANT: Spacers (b) must be installed between outboard swivel bracket and mounting bracket for steering cable mounting tube to provide proper spacing be- tween steering cables. Secure mounting bracket for steering cable mounting tube on to swivel bracket of out- board.
  • Page 585: Installing Steering Cables

    ATTACHMENTS / CONTROL LINKAGE Installing Steering Cables IMPORTANT: Lubricate inside of outboard tilt tube, inside of steering cable mount- ing tube and rubber O-ring seal (located in outboard tilt tube) with Quicksilver 2-4-C with Teflon before installing steering cables. Lubricate inside of outboard tilt tube and inside of steering cable mounting tube with Quicksilver 2-4-C with Teflon.
  • Page 586: Coupler Installation

    ATTACHMENTS / CONTROL LINKAGE Coupler Installation WARNING Locknuts must be used with bolts to secure steering cables to coupler. Failure to adhere to this requirement could result in steering system failure. Slide coupler (a) onto steering cable ends and secure each steering cable to coupler with bolt (b) and locknut (c) as shown.
  • Page 587 ATTACHMENTS / CONTROL LINKAGE STEERING SYSTEM TENSION ADJUSTMENT IMPORTANT: After this dual steering cable attachment kit is installed, there must be proper tension in forward mounted steering cable tor this attachment kit to oper- ate properly. Not enough tension will cause slack (or play) in steering system. Too much tension will cause steering cables to bind.
  • Page 588: Maintenance Instructions

    ATTACHMENTS / CONTROL LINKAGE WARNING After installation is complete [and before operating outboard(s)], check that boat will turn right when steering wheel is turned right and that boat will turn left when steering wheel is turned left. Check steering thru full range (left and right) at all tilt angles to assure interference-free movement.
  • Page 589: Ride Guide Steering Cable/Attaching Kit Installation

    ATTACHMENTS / CONTROL LINKAGE Ride Guide Steering Cable/Attaching Kit Installation (92876A9) Dual Cable - Dual Outboard WARNING Quicksilver Super Ride-Guide Steering (dual cables) MUST BE USED with this at- taching kit. Failure to adhere to this requirement could result in steering system failure.
  • Page 590: Parallel Routed Steering Cables And Attaching Kit Installation

    ATTACHMENTS / CONTROL LINKAGE Parallel Routed Steering Cables and Attaching Kit Installation (Both Steering Cables Routed Together Down Starboard Side of Boat) SUPER RIDE-GUIDE STEERING KIT INSTALLATION IMPORTANT: Steering cable must be installed into tilt tube of port outboard before outboard is mounted on boat transom.
  • Page 591 ATTACHMENTS / CONTROL LINKAGE Install steering cable mounting tube into mounting bracket with 2 adjusting nuts and 2 locking tab washers. Be sure longer threaded end of tube is toward starboard side of boat. Temporarily adjust tube, so that longer threaded end of tube extends out the same dis- tance as the outboard tilt tube.
  • Page 592 ATTACHMENTS / CONTROL LINKAGE Place a mark (a) on steering cable mounting tube (b) 5/8 in. (16 mm) from end of mounting tube. Slide plastic spacer (c), O-ring (d) and cap (e) over steering cable. 5/8 in. (16 mm) 51890 Thread cap (e) onto steering cable mounting tube, up to mark (a).
  • Page 593 ATTACHMENTS / CONTROL LINKAGE STEERING LINK ROD INSTALLATION WARNING Steering link rods MUST BE secured between outboard steering arm and steering cable end, using special washer head bolt (10-849838) and two nylon insert lock- nuts (11-826709113), as shown. Both special washer head bolt and nylon insert locknuts MUST BE tightened as specified.
  • Page 594 ATTACHMENTS / CONTROL LINKAGE STEERING ARM EXTENSION BRACKET INSTALLATION Secure a steering arm extension bracket to each outboard’s steering arm. 51889 Steering Arm (Port Outboard Shown) Extension Bracket Locking Retainer (2 Each Bracket) Bolts (2 Each Bracket) 1-1/4 in. (31.8 mm) Long - Torque to 23 lb. ft. (31 Nm), Then Bend Corner Tabs of Locking Retainers Up Against Flats on Each Bolt WARNING Locking retainer corner tabs MUST BE bent up and against flats on each bolt that...
  • Page 595 ATTACHMENTS / CONTROL LINKAGE Lubricate ball joint in steering eyes, with SAE 30W Motor Oil. Assemble steering coupler between outboard steering arm extension brackets, using special washer head bolts (10-849838) provided and nylon insert locknuts as shown. IMPORTANT: With assembled steering coupler installed and before tightening spe- cial washer head bolts/locknuts, check outboard alignment.
  • Page 596 ATTACHMENTS / CONTROL LINKAGE STEERING SYSTEM TENSION ADJUSTMENT (PARALLEL ROUTED STEERING CABLES) IMPORTANT: For proper operation of this dual cable - dual outboard steering instal- lation, there MUST BE proper tension in the steering system. NOT ENOUGH ten- sion will cause slack (play) in steering system. TOO MUCH tension will cause steer- ing cables to bind.
  • Page 597: Opposite Side Routed Steering Cables And Attaching Kit Installation

    ATTACHMENTS / CONTROL LINKAGE WARNING After installation is complete (and before operating outboard(s), check that boat will turn right when steering wheel is turned right and that boat will turn left when steering wheel is turned left. Check steering thru full range (left and right) at all tilt angles to assure interference-free movement.
  • Page 598 ATTACHMENTS / CONTROL LINKAGE Temporarily adjust tube, so that longer threaded end of tube extends out the same dis- tance as the outboard tilt tube. Do not tighten adjustment nuts at this time. 51891 Steering Cable Mounting Tube (End of Tube with Longer Threads Toward Center of Boat Transom) Mounting Bracket Locking Tab Washers (2)
  • Page 599 ATTACHMENTS / CONTROL LINKAGE Thread cap (e) onto steering cable mounting tube, up to mark (a). 51888 STEERING CABLE INSTALLATION - PORT OUTBOARD IMPORTANT: Lubricate inside of port outboard’s tilt tube and rubber O-ring seal lo- cated inside tilt tube with 2-4-C with Teflon, before installing steering cable. Lubricate inside of port outboard’s tilt tube and rubber O-ring seal (a) with 2-4-C with Te- flon.
  • Page 600 ATTACHMENTS / CONTROL LINKAGE Lubricate ball joints in steering link rods with SAE 30W Motor Oil. Secure link rods to out- board steering arms, using special washer head bolts (10-8849838) provided and nylon insert locknuts as shown. Torque special bolts to 20 lb. ft. (27 Nm) then torque locknuts to 20 Ib.
  • Page 601 ATTACHMENTS / CONTROL LINKAGE STEERING ARM EXTENSION BRACKET INSTALLATION Secure a steering arm extension bracket to each outboard’s steering arm. 51889 Steering Arm (Port Outboard Shown) Extension Bracket Locking Retainer (2 Each Bracket) Bolts (2 Each Bracket) 1-1/4 in. (31.8 mm) Long - Torque to 23 lb. ft. (31 Nm), Then Bend Corner Tabs of Locking Retainers Up Against Flats on Each Bolt WARNING Locking retainer corner tabs, MUST BE bent up and against flats on each bolt that...
  • Page 602 ATTACHMENTS / CONTROL LINKAGE Lubricate ball joint in steering eyes with SAE 30W Motor Oil. Assemble steering coupler between outboard steering arm extension brackets, using special washer head bolts (10-849838) provided and nylon insert locknuts, as shown. IMPORTANT: With assembled steering coupler installed and before tightening spe- cial washer head bolts/locknuts, check outboard alignment.
  • Page 603 ATTACHMENTS / CONTROL LINKAGE STEERING SYSTEM TENSION ADJUSTMENT (PARALLEL ROUTED STEERING CABLES) IMPORTANT: For proper operation of this dual cable - dual outboard steering instal- lation, there MUST BE proper tension in the steering system. NOT ENOUGH ten- sion will cause slack (play) in steering system. TOO MUCH tension will cause steer- ing cables to bind.
  • Page 604: Trim Tab Adjustment

    ATTACHMENTS / CONTROL LINKAGE Trim Tab Adjustment DUAL OUTBOARD - COUNTER ROTATION INSTALLATION 1. Shift outboard into neutral and make sure ignition key is at “OFF” position. 2. Remove plastic cap from rear of driveshaft housing and loosen bolt and trim tab. 3.
  • Page 605: Maintenance Instructions

    ATTACHMENTS / CONTROL LINKAGE WARNING When 2 couplers are connected together with coupler link rod, a lock washer must be used on each side of coupler link rod, and link rod must be torqued to 20 Ib. ft. (27 Nm) into end of each coupler. 51890 Couplers Connected Together Lock washers...
  • Page 606 ATTACHMENTS / CONTROL LINKAGE 5. Inspection and lubrication of steering head assembly (rotary or straight rack) should be performed once each year (by your Authorized Dealer) or whenever steering mount and/or steering head are disassembled, or if steering effort has increased. Lu- bricate with 2-4-C w/Teflon.
  • Page 607: Transom Mounted Ride Guide Attaching Kit Installation (73770A1)

    ATTACHMENTS / CONTROL LINKAGE Transom Mounted Ride Guide Attaching Kit Installation (73770A1) Attaching Kit Installation 1. Lubricate both holes in pivot block (Figure 1) with Quicksilver 2-4-C with Teflon. 2. Place pivot block on pivot spacer and secure to transom bracket with 3/8 in. x 2-1/2 in.
  • Page 608 ATTACHMENTS / CONTROL LINKAGE 3. Place Ride-Guide yoke on pivot block and secure with 7/16 in. x 1-3/4 in. (11.1 mm x 44.5 mm) bolt and locknut, as shown in Figures 1 and 2. Torque locknut to 10 Ib. ft. (13.5 Nm), then back off 1/4-turn. Figure 2 Transom Backing Plate Bolt [5/16 in.
  • Page 609 ATTACHMENTS / CONTROL LINKAGE b. Position attaching kit on transom so that transom bracket is centered on the 15 in. (38.1 mm) (Figure 1) at a height where the center of Ride-Guide yoke is even with, or not more than 1/2 in. (12.7 mm) above top edge of transom. (Figure 3) Figure 3 Ride-Guide Yoke 0 in.
  • Page 610: Maintenance Instructions

    ATTACHMENTS / CONTROL LINKAGE WARNING After installation is completed (and before operating outboard), check that boat will turn right when steering wheel is turned right and that boat will turn left when steering wheel is turned left. Check steering thru full range (left and right) at all tilt angles to assure interference-free movement.
  • Page 611: Clevis Attaching Kit Installation (A-70599A5)

    ATTACHMENTS / CONTROL LINKAGE Clevis Attaching Kit Installation (A-70599A5) NOTE: This kit is used to attach Ride-Guide cable to outboard steering arm ONLY when “Transom Mounted Ride-Guide Attaching Kit” is being used. If Ride-Guide cable is installed thru outboard tilt tube, then “Steering Link Rod” must be used. Installation Instructions 1.
  • Page 612 COLOR DIAGRAMS COLOR DIAGRAMS Table of Contents 150/175/200 EFI 2002 Model Year Typical SmartCraft Dual Outboard Installation Wiring Diagram ......Page 8-3 2002 Model Year .
  • Page 613 COLOR DIAGRAMS Notes: Page 8-2 90-884294 OCTOBER 2001...
  • Page 614: 150/175/200 Efi 2002 Model Year

    COLOR DIAGRAMS 150/175/200 EFI WIRING DIAGRAM 2002 MODEL YEAR 90-883728 MAY 2001 Page 8-3...
  • Page 615 150/175/200 EFI 2002 Model Year 1. ECM 35. Cowl Mounted Trim Switch 2. Top ECM Connector 36. To Remote Control Trim Switch 3. Middle ECM Connector 37. 12 Volt Accessory Power 4. Bottom ECM Connector 38. To Analog Temperature Gauge 5.
  • Page 616 1 9 17 1 9 17 12 22 59138...
  • Page 617 COLOR DIAGRAMS TYPICAL SMARTCRAFT SYSTEM TACHOMETER & SYSTEM SPEEDOMETER INSTALLATION WITH SYSTEM LINK GAUGES 2002 MODEL YEAR 90-883728 MAY 2001 Page 8-5...
  • Page 618 Typical SmartCraft System Tachometer & System Speedometer with System Link Gauges 2002 Model Year 1. 8-Pin Digital Sensor Harness Extension, Connect 27. Analog Tachometer Harness (Not Used on CAN to 8-Pin SmartCraft Harness on Engine Installation) 2. Digital Speedometer Sensor 28.
  • Page 619 59265...
  • Page 620: Typical Smartcraft System Monitor/Tachometer

    COLOR DIAGRAMS TYPICAL SMARTCRAFT SYSTEM MONITOR/TACHOMETER INSTALLATION WITH SYSTEM LINK GAUGES 2002 MODEL YEAR 90-883728 MAY 2001 Page 8-7...
  • Page 621 Typical SmartCraft System Monitor/Tachometer with System Link Gauges 2002 Model Year 1. 8-Pin Digital Sensor Harness Extension, Connect 27. 4-Pin Digital Sensor Harness Connection to to 8-Pin SmartCraft Harness on Engine Paddle Wheel 2. Digital Speedometer Sensor 28. Digital Connections to Oil Sender 3.
  • Page 622 59266...
  • Page 623: Typical Smartcraft Dual Outboard Installation 2002 Model Year

    COLOR DIAGRAMS TYPICAL SMARTCRAFT DUAL OUTBOARD INSTALLATION 2002 MODEL YEAR 90-883728 MAY 2001 Page 8-9...
  • Page 624 Typical SmartCraft Dual Outboard Installation 2002 MY 1. 8-Pin Harness from Port Outboard 28. 10-Pin Control Area Network (CAN) Connection from System Tachometer Starboard Outboard to 2. Digital Sensor Harness Extension Port Outboard Junction Box 3. Digital Speedometer Sensor Port Outboard 29.
  • Page 625 59276...
  • Page 626: 150/175/200 Efi 2002 Model Year

    COLOR DIAGRAMS 150/175/200 EFI OIL & FUEL FLOW DIAGRAM 2002 MODEL YEAR 90-883728 MAY 2001 Page 8-11...
  • Page 627 150/175/200 EFI Oil & Fuel Flow 2002 Model Year 1. Fuel inlet from primer bulb 2. Engine Pulse Fuel Pump 3. Fuel line to Water Separating Fuel Filter - 2-8 psi (14-55 kPa) 4. Water Separating Fuel Filter in Vapor Separator Tank (VST) Assembly 5.
  • Page 628 58847...
  • Page 629: Water Flow Diagram

    COLOR DIAGRAMS 150/175/200 EFI WATER FLOW DIAGRAM 2002 MODEL YEAR 90-883728 MAY 2001 Page 8-13...
  • Page 630 150/175/200 EFI Water Flow 2002 Model Year 1. Water Inlet 2. Water Pump 3. Wall of Water - If water level height is insufficient, water pump may draw in air resulting in an overheated engine 4. Water Tube 5. Main Water Feed to Powerhead from Water Tube 6.
  • Page 631 58063...

This manual is also suitable for:

175 efi200 efi150xri175xri200xri0t409000

Table of Contents