Welch Allyn Connex VSM 6000 series Directions For Use Manual
Connex series
Hide thumbs
Also See for Connex VSM 6000 series:
- Directions for use manual (143 pages) ,
- Care & routine service (2 pages)
Table of Contents
Advertisement
Advertisement
Table of Contents

Related Manuals for Welch Allyn Connex VSM 6000 series


Summary of Contents for Welch Allyn Connex VSM 6000 series
- Page 1 ® Welch Allyn Connex Devices Directions for use Software version 2.3X...
- Page 2 © 2017 Welch Allyn. All rights are reserved. To support the intended use of the product described in this publication, the purchaser of the product is permitted to copy this publication, for internal distribution only, from the media provided by Welch Allyn.
-
Page 3: Table Of Contents
Contents Introduction ..................... 1 Connex Vital Signs Monitor 6000 Series .............. 1 Connex Integrated Wall System ................1 Indications for use ....................2 Contraindications ....................3 Symbols ....................5 Screen elements ..................9 About warnings and cautions .............. 15 General warnings and cautions ................15 Physical design .................. - Page 4 ® iv Contents Welch Allyn Connex Devices Mount the accessory bin ................... 48 Connect the blood pressure (NIBP) hose ............50 Set up the physical assessment instrument handles and specula dispenser ... 50 Set up the SureTemp® Plus thermometer ............51 Set up the Braun ThermoScan®...
- Page 5 Directions for use Contents v Profile feature comparison ................. 85 Changing profiles ....................86 Patient data management ..............91 Add a patient to the patient list ................91 Load patient data with a barcode scanner ............92 Select a patient ....................92 Office profile ......................
- Page 6 ® vi Contents Welch Allyn Connex Devices Data management ................... 199 Network ......................202 Service ......................205 Troubleshooting .................. 207 Patient movement messages ................207 CO2 messages ....................209 RRa messages ....................210 NIBP messages ....................211 SpO2 and SpHb messages ................212 Temperature messages ...................
-
Page 7: Introduction
Welch Allyn Connex Vital Signs Monitor 6000 Series with the Welch Allyn 767 Power Handles. This manual (directions for use) is designed to help you understand the capabilities and operation of the wall system. The information in this... -
Page 8: Indications For Use
For the latest information about products and features, please call Welch Allyn Customer Care. Indications for use The Connex VSM 6000 series of monitors is intended to be used by clinicians and medically qualified personnel for monitoring of neonatal, pediatric, and adult patients for •... -
Page 9: Contraindications
Directions for use Introduction 3 Handle module assembly (Integrated Wall System only) Handles supply power to Welch Allyn 3.5V instruments. Contraindications This system (all configurations) is not intended to be used: • on patients connected to heart/lung machines • on patients being transported outside a healthcare facility •... - Page 10 ® 4 Introduction Welch Allyn Connex Devices...
-
Page 11: Symbols
Follow the operating instructions/directions for use (DFU) — mandatory action. A copy of the DFU is available on this website. A printed copy of the DFU can be ordered from Welch Allyn for delivery within 7 days. Power symbols Power on/Display power-saving... - Page 12 ® Symbols Welch Allyn Connex Devices (on the monitor, green indicator) Battery charge level Alternating Current power present, battery fully charged (on the monitor, amber indicator) Battery cover Alternating Current power present, battery is charging Alternating Current (AC) Rechargeable battery...
- Page 13 Directions for use Symbols 7 Nonionizing electromagnetic Recycle the product separate from radiation other disposables Restrictions for use of wireless Call for maintenance device in Europe. European Community's Class 2 radio equipment. Defibrillation-proof Type BF applied Defibrillation-proof Type CF applied parts parts Atmospheric pressure limitation...
- Page 14 ® Symbols Welch Allyn Connex Devices...
-
Page 15: Screen Elements
Screen elements Global navigation, controls, and indicators Select option Process indicator for activities like acquiring measurements and connecting to a central station Select item from list Display lock/unlock Increase or decrease value Monitoring and connectivity Connect to the central station Disconnect from the central and retain patient data station but continue... - Page 16 ® 10 Screen elements Welch Allyn Connex Devices NIBP NIBP start NIBP stop Intervals status indicators NIBP view toggle Temperature Temperature site control Direct mode selector SpO2 and Pulse rate Pulse amplitude bar SatSeconds timer (Nellcor feature only) SpO2 view toggle...
- Page 17 Directions for use Screen elements 11 Capnography (CO2) etCO2 view toggle IPI view toggle IPI graphic indicators Respiration indicator Averaging mode selector (Fast mode selected) Patient movement Bed mode Bed exit Patient turn indicator and Bed exit (Review tab) timer Patient turn indicator (Review tab) Exit sensitivity indicator...
- Page 18 ® 12 Screen elements Welch Allyn Connex Devices Alarm and information messages Alarm limit control Alarm On/Off toggle Multiple alarms toggle Alarm audio paused Alarm active Information message Patient Rest Mode Patient data management Diacritical marks key Symbols key (available for languages that use diacritical marks;...
- Page 19 Directions for use Screen elements 13 Settings Save configuration Select state or view settings Save to USB flash Configure from USB drive flash drive Restore factory Close Advanced default settings settings...
- Page 20 ® 14 Screen elements Welch Allyn Connex Devices...
-
Page 21: About Warnings And Cautions
About warnings and cautions Warning and caution statements can appear on the monitor, on the packaging, on the shipping container, or in this document. The monitor is safe for patients and clinicians when used in accordance with the instructions and the warning and caution statements presented in this manual. Before using the monitor, you must familiarize yourself with all warnings and cautions, with the steps to power up the monitor, and with the sections of this directions for use that pertain to your use of the monitor. - Page 22 VSM 6000 series monitors, are intended for use in apnea monitoring. WARNING Use only Welch Allyn approved accessories, and use them according to the manufacturer’s directions for use. Using unapproved accessories with the monitor can affect patient and operator safety and can compromise product performance and accuracy.
- Page 23 WARNING Defective batteries can damage the monitor. If the battery shows any signs of damage or cracking, it must be replaced immediately and only with a battery approved by Welch Allyn. WARNING Improper disposal of batteries may create an explosion or contamination hazard.
- Page 24 Improper installation can result in the monitor falling off the wall and injuring someone. Welch Allyn is not responsible for the integrity of any installation not performed by authorized Welch Allyn service personnel.
- Page 25 WARNING Personal/patient injury risk. Welch Allyn is not responsible for the integrity of any wall structure or wall mounting interface. Welch Allyn recommends that you contact your Biomedical Engineering Department or maintenance service to ensure professional installation, safety, and reliability of any mounting accessory.
- Page 26 Replace the power cord if the strain relief or cord insulation is damaged or begins to separate from the attachment plug. CAUTION Use only the Welch Allyn USB client cable to connect a laptop computer to the USB client port. Any laptop connected to the monitor must be running on a battery, a 60601-1-compliant power supply, or a 60601-1- compliant isolation transformer.
- Page 27 On-time should not exceed 2 minutes. Allow at least 10 minutes off-time between patients. CAUTION Welch Allyn is not responsible for the integrity of any wall mounting interface. Welch Allyn recommends that you contact your Biomedical Engineering Department or maintenance service to ensure professional installation, safety, and reliability of any mounting accessory.
- Page 28 ® 22 About warnings and cautions Welch Allyn Connex Devices...
-
Page 29: Physical Design
Physical design Vital Signs Monitor 6000 Series Standard and extended monitors The monitor is available in two sizes: standard and extended. The primary difference between these models is the number of parameters they support. Note Your monitor, based on size or configuration, might not contain all parameters or features illustrated in this section. - Page 30 ® 24 Physical design Welch Allyn Connex Devices The extended version can have a maximum of three modules (such as CO2, pulse oximetry, and blood pressure) on the left side. Extended monitor left side If the extended monitor is configured with EarlySense, it has an additional module on the right side.
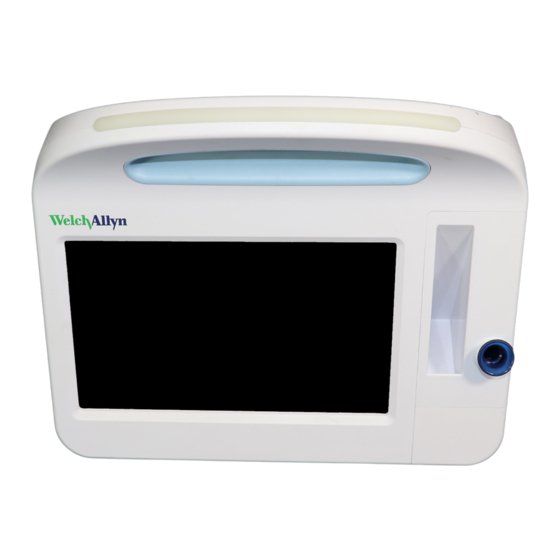
- Page 31 Directions for use Physical design 25 Top-Left-Front view No. Feature Description Printer Printer provides a printout of patient and device information. Light bar Provides a visual alarm with red and amber LEDs. Thermometry Temperature probe cover box. Thermometry Temperature probe. Thermometry (connector behind cover) Secures the probe connection to the monitor.
- Page 32 ® 26 Physical design Welch Allyn Connex Devices Right-Back-Bottom view No. Feature Description Power switch and LED Power-on/Display power-saving button. The LED indicates the charging status when the monitor is connected to AC power: • Green: The battery is charged.
-
Page 33: Integrated Wall System
No. Feature Description Physical assessment instruments - Handles Handles will accept any 3.5V Welch Allyn instrument head. and handle cradles The handle cradles support using one handle at a time. A handle turns on automatically when you remove it from a cradle and turns off when you return it. - Page 34 ® 28 Physical design Welch Allyn Connex Devices No. Feature Description SureTemp® Plus thermometer connector Secures the probe connection to the wall system. Blood pressure and pulse oximetry See front underside view for more detail. Power switch and LED Power-on/Standby switch.
- Page 35 Directions for use Physical design 29 No. Feature Description USB cable retainer Reduces strain on USB cables and connectors; helps prevent cables from disconnecting. Back view Recess for mounting bracket Secures the monitor when mounted on the wall. Ethernet RJ-45 Provides a hardwired connection to the computer network.
- Page 36 ® 30 Physical design Welch Allyn Connex Devices No. Feature Description Mounting materials Wall mounting rail bracket and hardware Secures the wall system to the wall. Accessory bin mounting bracket and Secures accessory bin to the wall and provides routing and strain hardware relief for power cord.
-
Page 37: Setup
Setup Vital Signs Monitor 6000 Series Supplies and accessories For a list of all approved supplies and accessories, see Approved accessories in the Appendix. Insert the battery This procedure applies to first-time setup of the monitor. WARNING Risk of fire, explosion, and burns. Do not short-circuit, crush, incinerate, or disassemble the battery pack. -
Page 38: Mount The Monitor
Mount the monitor You can install the monitor on a mobile stand or on an interior wall equipped with a Welch Allyn-approved wall-mount fixture. Check the mounting bracket Before you mount the monitor, make sure the stand or wall-mount fixture has the mounting bracket designed for your monitor. -
Page 39: Attach The Probe Well
Directions for use Setup 33 Mount the monitor on a stand 1. Align the monitor on the mounting bracket in the center of the stand tray. Slide the monitor into place, catching the bracket in the guides on the bottom of the monitor. 2. -
Page 40: Attach The Temperature Probe
® 34 Setup Welch Allyn Connex Devices Attach the temperature probe CAUTION The temperature module only operates with the probe well properly in place. 1. Remove the cover of the temperature module by pressing the tab on the bottom and sliding the cover to the right. -
Page 41: Connect The Nibp Hose
Directions for use Setup 35 2. Depress the spring tab on the temperature probe cable connector and withdraw it from the probe port. 3. Reattach the cover. Use the alignment tab and slide the cover to the left to click it back into place. - Page 42 ® 36 Setup Welch Allyn Connex Devices 1. Place your thumb and forefinger on the cable connector and squeeze the side tabs. 2. Align the cable connector with the cable connector port. 3. Insert the cable connector, pressing firmly until it clicks into place.
-
Page 43: Disconnect The Spo2 Cable Or The Spo2/Rra Dual Cable
Directions for use Setup 37 sensor cable connector into the SpO2 dual cable connector, and then close the protective cover. Note Arrows appear on the dual connector as well as on the sensor connectors to ensure proper cable connections. Note Typically, a clinician will connect the single-use RRa sensor to the RRa patient cable at the start of acoustic respiration monitoring. -
Page 44: Disconnect The Patient Movement Sensor And Cable
® 38 Setup Welch Allyn Connex Devices Typically, a clinician will connect the bed sensor and cable at the start of Note patient movement monitoring. See the Patient movement section of this directions for use for more information. Disconnect the patient movement sensor and cable To disconnect the EarlySense bed sensor, pull the sensor cable connector out of the cable connector port on the device. -
Page 45: Detach A Usb Accessory
Some accessories require a license to enable them for use. These accessories are packaged with an authorization code and instructions for activating the license using the Welch Allyn Service Tool. For more information, refer to the instructions and the service tool installation guide. -
Page 46: Connect Ac Power
® 40 Setup Welch Allyn Connex Devices 4. With one hand, pull lightly on the paper to take up any slack. With the other hand, close the printer door by pushing it down and into place until it clicks. Be certain that the paper does not catch in the printer door. -
Page 47: Integrated Wall System
Directions for use Setup 41 Integrated Wall System CAUTION Welch Allyn is not responsible for the integrity of any wall mounting interface. Welch Allyn recommends that you contact your Biomedical Engineering Department or maintenance service to ensure professional installation, safety, and reliability of any mounting accessory. -
Page 48: Insert The Battery
® 42 Setup Welch Allyn Connex Devices Insert the battery This procedure applies to first-time setup of the wall system. Therefore, the wall system is assumed to be shut down. WARNING Risk of fire, explosion, and burns. Do not short-circuit, crush, incinerate, or disassemble the battery pack. -
Page 49: Prepare For Mounting
Directions for use Setup 43 Prepare for mounting 1. Slide the mounting rail bracket out of the packing material and put it aside. Do not discard. Then flip the wall system onto its back. 2. Remove the cardboard end caps and all foam as shown and put aside for recycling. CAUTION Do not remove the cardboard securing the handles on the left side of the wall system at this time. -
Page 50: Mounting Location
® 44 Setup Welch Allyn Connex Devices • Mounting rail bracket • Accessory bin bracket • Screws Tools list Use these tools to mount the wall system. • #2 Phillips screwdriver • level • tape measure • stud finder •... - Page 51 Directions for use Setup 45 Recommendation: Place the mounting rail bracket 63 in. (1.6 m) from the floor, which places screen center height at approximately 63 in. (1.6 m) from the floor. CAUTION This drawing shows the physical relationships of the mounting brackets to each other and to the wall system after you complete the mounting instructions.
- Page 52 ® 46 Setup Welch Allyn Connex Devices 4. Before mounting the wall system, remove the cover by loosening the captive retention screws. 5. Hang wall system on the mounting rail bracket. WARNING Ensure that the ribs on the back of the wall system fully engage the mounting rail bracket.
- Page 53 Directions for use Setup 47 6. Select one of the three available slots at the bottom of the unit that overlaps a stud, and secure the unit to the stud with the remaining screw. WARNING Failure to install this security screw may result in personal injury and equipment damage.
-
Page 54: Mount The Accessory Bin
® 48 Setup Welch Allyn Connex Devices 8. Re-attach the cover. a. Thread the sensor cable through the cutouts on the top right and bottom left of the cover. b. Tighten the two retention screws. 9. Attach the system power cord to the wall unit. Do not plug the cord into an outlet at this time. - Page 55 Directions for use Setup 49 2. If your wall system is configured for SpO2 (or SpHb), attach the spool to the accessory bin by sliding the spool onto the retention clip. 3. Properly orient and insert the sensor cable into the patient cable connector. (You just connected the opposite end of the sensor cable to the wall system.) Ensure the sensor cable is inserted completely, then close the protective cover.
-
Page 56: Connect The Blood Pressure (Nibp) Hose
® 50 Setup Welch Allyn Connex Devices Connect the blood pressure (NIBP) hose 1. Align the hose connector with the hose connector port on the bottom of the monitor. 2. Insert the hose connector, pressing firmly until it clicks into place. -
Page 57: Set Up The Suretemp® Plus Thermometer
Directions for use Setup 51 3. Attach Welch Allyn 3.5V instrument heads of your choice to the handles. See the directions for use for each instrument head. Set up the SureTemp® Plus thermometer If your wall system is configured for a SureTemp Plus thermometer, follow these setup instructions. -
Page 58: Set Up The Braun Thermoscan® Pro Thermometer
® 52 Setup Welch Allyn Connex Devices Set up the Braun ThermoScan® PRO thermometer If your system is configured for the Braun ThermoScan thermometer, follow these setup instructions. 1. Remove the thermometer from the package. Then open a box of probe covers and place it in the dock. -
Page 59: Attach An Accessory
Directions for use Setup 53 1. Insert the power plug into an outlet to power the monitor and to charge the battery. Note New batteries are only 30 percent charged. You must plug the wall system into AC power to fully charge the battery. Do not plug in the power cord until completing all preliminary steps. - Page 60 Some accessories require a license to enable them for use. These Note accessories are packaged with an authorization code and instructions for activating the license using the Welch Allyn Service Tool. For more information, refer to the instructions and the service tool installation guide.
-
Page 61: Startup
Startup Power The device operates in one of two power states: • Device powered on. The device is operating on battery power or AC power. You can utilize the device's features, and the display is active. • Sleep (Display power-saving) mode. The device is operating on battery or AC power, but the display is off to conserve power. -
Page 62: Power Up The Monitor
1. Press to power up the monitor. Following a successful self-test, the monitor displays the Welch Allyn logo, the LED light bar (located on the handle) flashes, and a power-up tone sounds. The startup screen then appears with the following banner across the bottom. -
Page 63: Set The Date And Time
Directions for use Startup 57 If patient data was saved during the most recent power Note down and the device was in the Continuous Monitoring profile, a Confirm patient and location dialog appears with the following options: • Same patient and location •... -
Page 64: Reset The Monitor
® 58 Startup Welch Allyn Connex Devices Reset the monitor If the monitor stops functioning, you can press and hold for approximately 6 seconds to allow the hardware to completely cycle off and to reset the monitor configuration settings to the last saved default power-up configuration. The button is located on the side of the monitor and on the front of the wall system. -
Page 65: Navigation
Navigation The monitor screen provides the interface that you use to complete your workflow. You access the monitor's features by touching the screen. Home tab The Home tab includes the following areas: Item Area Device Status Content Navigation Device Status area The Device Status area, located at the top of the Home screen, displays the following monitor information, from left to right: •... - Page 66 ® 60 Navigation Welch Allyn Connex Devices • Time and date. Touch this area to navigate to date and time settings. • Current profile. Touch this area to navigate to the Profiles vertical tab (on the Device tab), which displays available profiles.
- Page 67 Directions for use Navigation 61 • The monitor is not connected to a power outlet and is running on battery power. The estimated charge time remaining is displayed in the hour(s):minute(s) format. Each section of the battery status indicator represents a percentage of remaining charge. When the battery switches from AC power to battery power, Note no charge time is displayed while the device calculates the...
-
Page 68: Content Area
® 62 Navigation Welch Allyn Connex Devices Information messages instruct you to interact with the monitor in a specific way or provide information that does not require action. You can dismiss an information message by selecting the control associated with the message or waiting for the message to time out. - Page 69 Directions for use Navigation 63 Office profile content area The Content area displays vital sign measurements. It also provides shortcuts to several controls. The Content area of the Office profile includes the following frames: • NIBP • BMI (including weight and height) •...
-
Page 70: Navigation Area
® 64 Navigation Welch Allyn Connex Devices During an NIBP averaging program, after acquiring an NIBP Note measurement, the monitor saves all measurements displayed on the Home tab and associated patient identification. To retain an NIBP average, touch Save upon completion of the averaging program. - Page 71 Directions for use Navigation 65 • A title bar with a lock icon ( ) replaces the Navigation area at the bottom of the screen. • Patient information no longer appears at the bottom left of the screen. • All controls on the screen are locked, except for on the title bar.
- Page 72 ® 66 Navigation Welch Allyn Connex Devices...
-
Page 73: Using The Keypad, Keyboard, And Barcode Scanner
Using the keypad, keyboard, and barcode scanner Open the numeric keypad Touch any field that includes the numeric keypad icon The numeric keypad appears. Numeric keypad The numeric keypad includes the following components: Component Name Description Data field Displays the numbers you enter. The field name appears above and the range of values you can enter appears below this field. -
Page 74: Enter A Number
® 68 Using the keypad, keyboard, and barcode scanner Welch Allyn Connex Devices Component Name Description Cancel button When touched, the numeric keypad disappears and the selected number does not change. OK button When touched, the numeric keypad disappears and the entered number appears in the associated frame or data field. - Page 75 Directions for use Using the keypad, keyboard, and barcode scanner 69 Component Name Description Data field Displays the characters you enter. Note The keyboard can be configured to mask character entries and display them as asterisks. Backspace key When touched, removes the rightmost character from the data field.
-
Page 76: Enter A Letter Or Number
® 70 Using the keypad, keyboard, and barcode scanner Welch Allyn Connex Devices Enter a letter or number 1. With the keyboard open, touch letters or numbers. 2. Do one of the following: • Touch Next. This control accepts the entry for the current field, then clears the data field to allow data entry in the next field. -
Page 77: Close The Keyboard
Directions for use Using the keypad, keyboard, and barcode scanner 71 Diacritical marks key Language(s) Polish Greek 1. With the keyboard open, touch the diacritical marks key. This key varies based on the language, as noted above. The keyboard displays diacritical marks for the selected language and therefore varies from one language to another. - Page 78 ® 72 Using the keypad, keyboard, and barcode scanner Welch Allyn Connex Devices You can scan a patient's barcode from the Home tab or the Summary tab. Note The scanned ID appears in the Patient frame on the Home tab and in the Patient ID field on the Summary tab.
-
Page 79: Host System
Host system Overview A monitor can be used as standalone device or be networked to a compatible Welch Allyn host system or central station. This section describes communication between the monitor and the host system. Monitors communicate with the host system through hardwired Ethernet and wireless networks. -
Page 80: Monitor Tab
® 74 Host system Welch Allyn Connex Devices connection to the host system in Advanced settings. Furthermore, you can add patients to a patient list on the monitor and then send them to the host system, and you can also retrieve patient lists from a host system. -
Page 81: Connect To The Central Station
Directions for use Host system 75 Connect to the central station To connect the monitor to a central station over a wireless or Ethernet network connection while in the Continuous Monitoring profile, you must first enable the Connect to CS option in Advanced setttings. When this control is enabled, the monitor automatically attempts to connect to the central station and continues to do so until a connection is achieved. -
Page 82: Activate The Continuous Monitoring Profile
® 76 Host system Welch Allyn Connex Devices Key terms Patient context Condition in which a patient ID and patient type have been selected on a device. Location context Condition in which a room or a room and bed have been selected on a device. -
Page 83: Pause Continuous Monitoring (Pause Mode)
Directions for use Host system 77 Another confirmation dialog appears asking you to confirm the patient and/or location context information or select a new patient. For example, if both patient and location context have been established, the following options appear: •... -
Page 84: Resume Continuous Monitoring
® 78 Host system Welch Allyn Connex Devices Resume continuous monitoring You can resume continuous monitoring after a pause when patient sensors are connected to a patient. The status of the pause timer determines your next step. Pause time remaining... -
Page 85: Assign A Patient And Location
Directions for use Host system 79 After approximately 30 seconds of inactivity, the "End Note monitoring" dialog disappears. If you do not respond to this dialog and continuous monitoring is interrupted, the "Confirm patient and location" dialog appears. You must respond to this dialog before continuous monitoring resumes. - Page 86 ® 80 Host system Welch Allyn Connex Devices 5. In the Location pane, select an available room and bed from the list box. The Location list only presents locations that are not already Note assigned to a continuous monitoring device.
-
Page 87: Profiles
Profiles Profiles are variations of the Home tab. Each profile gives you access to a different set of features. Choose the profile that best suits your needs. The monitor offers multiple profiles—including Continuous Monitoring, Intervals Monitoring, Spot Check, and Office—based on the configuration and any upgrade licenses you purchase. - Page 88 ® 82 Profiles Welch Allyn Connex Devices Oridion CO2-based Home tab Masimo RRa-based Home tab EarlySense patient movement-based Home tab...
-
Page 89: Saving Vital Sign Measurements (Continuous Monitoring Profile)
Directions for use Profiles 83 Saving vital sign measurements (Continuous Monitoring profile) In the Continuous Monitoring profile, measurements are automatically saved as follows: • Continuous measurements (SpO2, SpHb, pulse rate, etCO2, FiCO2, IPI, respiration rate, and patient movement) are saved once per minute. •... -
Page 90: Spot Check Profile
® 84 Profiles Welch Allyn Connex Devices Spot Check profile The Spot Check profile is optimized for clinicians who take spot-check vitals readings and do not need automatic reading or alarm features. Office profile The Office profile is designed for outpatient clinical settings, such as a physician's office. -
Page 91: Profile Feature Comparison
Directions for use Profiles 85 Profile feature comparison The following table compares the features of the profiles. Feature Continuous Intervals Spot Check Office Monitoring Monitoring Take NIBP, SpO2, temperature, and pulse rate measurements Configure and use NIBP averaging programs Take SpHb measurements (Masimo only) Monitor etCO2, FiCO2, and IPI (Oridion only) Monitor RR (EarlySense and Oridion only) Monitor patient movement (EarlySense only) -
Page 92: Changing Profiles
® 86 Profiles Welch Allyn Connex Devices Feature Continuous Intervals Spot Check Office Monitoring Monitoring * Braun IR thermometers configured to work with the monitor transfer temperature data automatically to the Temperature frame. You can enter temperature manually if you take a patient temperature with a thermometer that is not connected to the monitor, and you have selected temperature as one of the four manual parameters to display. - Page 93 Directions for use Profiles 87 The Profile vertical tab appears. 2. Select the desired profile. The profile change immediately takes effect. Note For all of these non-continuous profile changes, saved episodic patient measurements remain on the Review tab, and current measurements remain onscreen. Patient and/or location context, if established, remain onscreen for all non- continuous profile changes.
- Page 94 ® 88 Profiles Welch Allyn Connex Devices A confirmation dialog appears asking you to confirm the patient and/or location context information or select a new patient. For example, if both patient and location context have been established, the following options appear: •...
- Page 95 Directions for use Profiles 89 a. Remove continuous sensors from your patient. b. On the Settings tab, touch the Monitor tab. c. Touch End monitoring. An "End monitoring" dialog appears with the following options: • New patient – Clears patient and location context and review data •...
- Page 96 ® 90 Profiles Welch Allyn Connex Devices...
-
Page 97: Patient Data Management
Patient data management Patient demographic data is managed on the Patients tab. From this tab, you can do the following: • Retrieve a patient list from the network (for example, electronic medical records (EMR) or a central station). • Select a patient from the list. •... -
Page 98: Load Patient Data With A Barcode Scanner
® 92 Patient data management Welch Allyn Connex Devices 4. Touch OK to return to the Home tab. The information is saved. CAUTION Verify patient identity on the monitor after manual or barcode entry and before printing or transferring patient records. - Page 99 Directions for use Patient data management 93 When the monitor is connected to a central station, the Note monitor retrieves the patient list when you navigate to the Patients tab. c. Touch the patient's identifier (name, ID number, or location) you want to select. Note Patient data can be sorted in ascending or descending order by selecting the heading row and touching ▲...
-
Page 100: Office Profile
® 94 Patient data management Welch Allyn Connex Devices a. Touch the Settings tab. The Monitor tab appears. b. Touch End monitoring. An "End monitoring" dialog appears with the following options: • New patient – Clears patient and location context and review data after you remove patient sensors •... -
Page 101: Manage Patient Records (Continuous Monitoring Profile)
Directions for use Patient data management 95 Manage patient records (Continuous Monitoring profile) In the Continuous Monitoring profile, the Review tab enables access to tabular and graphical trend tables of all readings for the currently selected patient. You can configure the time intervals displayed, and you can scroll through the last 24 hours of patient measurements. - Page 102 ® 96 Patient data management Welch Allyn Connex Devices Event data (e.g., physiological alarms, patient movement, Note manual NIBP or temperature measurements, Manual parameter entries) is displayed in all trend intervals. By modifying the trend interval to one of the longer time spans,...
-
Page 103: Manage Patient Records (Intervals Monitoring, Spot Check, And Office Profiles)
Directions for use Patient data management 97 In the Continuous Monitoring profile, the Send option is not available on the Note Review tab. Manage patient records (Intervals Monitoring, Spot Check, and Office profiles) Patient records can be sent to the network, printed, or deleted in these profiles. 1. -
Page 104: Printer
® 98 Patient data management Welch Allyn Connex Devices Printer The monitor prints to a strip to create printouts of patient information and data. The sample printouts below are English, but the language in the printouts is Note defined by the language selected on the monitor. - Page 105 Directions for use Patient data management 99 2. From the List tab, touch the patient record you want to delete. 3. Touch Delete. At the Delete Confirmation window, touch OK to permanently delete the selected patient. Touch Cancel to cancel the deletion. Deleting a patient from the Patients List does not delete Note saved records.
- Page 106 ® 100 Patient data management Welch Allyn Connex Devices...
-
Page 107: Alarms
• Nurse Call systems • Welch Allyn software systems WARNING The monitor is the primary alarming source for the patient, and any external system (such as a Nurse Call or software system) is a backup alarm source. The external system is only as reliable as its network and can be relied on only as a backup alarming device. - Page 108 ® 102 Alarms Welch Allyn Connex Devices Alarm types Type Priority Color Alarm audio tone High 10-pulse tone • NIBP, SpO2, SpHb, etCO2, respiration, pulse rate, or IPI limit exceeded • No breath detected • Some technical alarms High Alternate 10-pulse tone •...
- Page 109 Directions for use Alarms 103 • Constant amber for low-priority and very low-priority alarms The light bar darkens when the alarm tone is reset. Home tab Home tab notifications Notification Description Device Status area The area changes color and displays a message with an accompanying status icon or button.
- Page 110 ® 104 Alarms Welch Allyn Connex Devices Icons on the Home tab Icons in parameter frames The icons in the parameter frames indicate alarm notification settings. When alarm limits are on, the icons are black and white until an alarm occurs. Then, the icons change color to indicate the priority of the alarm.
-
Page 111: Patient Rest Mode
The visual alarms indication on the device will display, and audible alarms will sound at a compatible Welch Allyn host with visual indications. The device may still be used for additional vitals capture. Touch the screen to remove the dimming while in use. If a loss of connectivity occurs, certain alarms become audible until connectivity is restored. -
Page 112: Reset (Pause Or Turn Off) Audio Alarms
® 106 Alarms Welch Allyn Connex Devices Reset (pause or turn off) audio alarms WARNING Do not pause or turn off an audible alarm if patient safety might be compromised. Audio alarm characteristics • After you reset an audio alarm, some tones do not return, but others return after a pause interval if the condition that caused the alarm persists. -
Page 113: Cancel A Paused Alarm
Directions for use Alarms 107 The multiple alarm toggle button displays the number of Note active alarms inside the alarm icon. A set of dots indicating the display order of alarms from highest (left) to lowest (right) priority (as well as the most recent in the case of multiple alarms of the same priority) appears below it. -
Page 114: Modify Audio Alarm Notification
® 108 Alarms Welch Allyn Connex Devices • To turn alarm limits off or on for the vital sign: Touch . This button toggles to display the current alarm state. If you turn off alarm limit checking for a vital sign, no visual or audio alarm signals will occur for those limits. -
Page 115: Alarm Messages And Priorities
Directions for use Alarms 109 in the Device Status area indicates alarm audio turned off, and a similar bell appears in the parameter frames . If an alarm condition occurs, the bell is red or amber in the alarming frame, according to the priority of the alarm, as shown here: •... - Page 116 ® 110 Alarms Welch Allyn Connex Devices Alarm messages Priority Alarm limit exceeded. SpO2 LOW. High Alarm limit exceeded. SpHb HIGH. High Alarm limit exceeded. SpHb LOW. High Alarm limit exceeded. Pulse rate HIGH. High Alarm limit exceeded. Pulse rate LOW.
- Page 117 Directions for use Alarms 111 Alarm messages Priority Unable to determine NIBP; check connections; limit patient movement. Very low Unable to determine NIBP; check inflation settings. Very low SpO2 not functional. Call for service. Very low Attach SpO2 sensor to monitor. Very low Replace the SpO2 sensor.
- Page 118 ® 112 Alarms Welch Allyn Connex Devices Alarm messages Priority Incompatible Welch Allyn device. Very low USB Communication failure. Call for service. Very low Low battery 30 minutes or less remaining. Very low Low SpHb signal quality. Check sensor. Very low Low SpO2 signal quality.
-
Page 119: Nurse Call
Directions for use Alarms 113 Alarm messages Priority Very low The sensor has expired. The sensor is defective. Very low Replace the bed sensor. Very low Very low The bed sensor is disconnected. The bed sensor is upside down. Very low Bed sensor expires in <"1 month", "1 week", "1 day", "x hours">... - Page 120 ® 114 Alarms Welch Allyn Connex Devices...
-
Page 121: Patient Monitoring
Patient monitoring This section of the directions for use describes the parameters available on the device, how to modify settings and alarm limits for those parameters, and how to take parameter measurements. Before focusing on each parameter, the section addresses features that generally apply to the parameters on your device: standard and custom modifiers, and manual overrides. -
Page 122: Custom Scoring
® 116 Patient monitoring Welch Allyn Connex Devices Custom scoring WARNING Risk to patient safety. Custom scores and messages serve as guides to your facility's protocols; do not subsitute custom scores for patient physiological alarms. Appropriate alarms settings must be set and maintained to ensure patient safety. - Page 123 Directions for use Patient monitoring 117 Monitors configured with EarlySense cannot be configured with Masimo Note rainbow Acoustic Respiration (RRa) or Oridion Microstream capnography. Note Patient movement monitoring is not available for neonatal/infant patients. The EarlySense system has not been studied on any specific patient group, Note nor has it been studied as a tool to diagnose any specific disease of medical condition.
- Page 124 ® 118 Patient monitoring Welch Allyn Connex Devices parameter. See "Configure movement alarms" to adjust alarm settings. Follow these steps to set up movement modifiers, if applicable. 1. Touch the Patients tab. 2. Touch the Manual tab. 3. Scroll through the list to find the Movement section, then enter or select the Movement modifier(s) as desired.
- Page 125 Directions for use Patient monitoring 119 WARNING Patient safety risk. The EarlySense system is not intended for high-risk patients in coronary or respiratory distress who require continuous monitoring of heart function or CO2. For these patients, the most reliable method of patient monitoring involves close personal surveillance and/or equipment suited to that type of monitoring.
- Page 126 ® 120 Patient monitoring Welch Allyn Connex Devices 5. Position the bed sensor (sensing unit) as follows: • horizontally under the patient's mattress • the top surface of the sensing unit facing the mattress • the sensing unit under the patient's chest area •...
- Page 127 Directions for use Patient monitoring 121 Patient movement, Respiration rate, and Pulse rate Note measurements taken by EarlySense are displayed in the Movement, RR, and Pulse rate frames, respectively. Each frame remains blank until the sensor acquires its first measurements, which could take approximately 1 to 2 minutes.
-
Page 128: Capnography (Co2)
® 122 Patient monitoring Welch Allyn Connex Devices Capnography (CO2) Monitors configured with Oridion Microstream capnography continuously measure or indicate the following: • End-tidal CO2 (etCO2): the level of CO2 in a patient's exhaled breath • Fraction of inspired CO2 (FiCO2): the level of CO2 in a patient's inhaled breath •... - Page 129 Directions for use Patient monitoring 123 Set up etCO2 Follow these steps to configure etCO2 parameter settings and to set up etCO2 modifiers. 1. Touch the Settings tab. 2. Touch the Setup tab. 3. Touch the etCO2 vertical tab. 4. Adjust the following settings as desired: •...
- Page 130 Reprocessing or reusing CO2 sampling lines could cause cross- contamination and inaccurate readings. CAUTION Only use Welch Allyn-approved CO2 sampling lines to ensure the monitor functions properly. CAUTION Dispose of Microstream CO2 sampling lines according to standard operating procedures or local regulations.
- Page 131 Directions for use Patient monitoring 125 • Duration of use • Patient's size and weight 4. Connect the sampling line to the monitor. a. Slide open the door that protects the sampling line port on the monitor. b. Connect the sampling line. Note The CO2 pump starts as soon as the pump sensor recognizes the sampling line.
-
Page 132: Respiration Rate
® 126 Patient monitoring Welch Allyn Connex Devices 7. Connect the sampling line to the patient as described in the directions for use supplied with the sampling line. 8. Perform the following checks: a. Check that CO2 values appear on the monitor. - Page 133 Directions for use Patient monitoring 127 • Respiration rate in breaths per minute (BPM) • Alarm limit control RR monitoring is available only in the Continuous Monitoring profile. Note Set up RR Only alarm delays and modifiers can be changed for the RR parameter. See "Configure RR alarms"...
-
Page 134: Ipi
® 128 Patient monitoring Welch Allyn Connex Devices • No breath detected alarm delay. Select the duration from the list box. This alarm delay specifies the minimum duration of a no-breath condition to activate an alarm signal. You can set the default in Advanced settings. - Page 135 Directions for use Patient monitoring 129 The frame provides a numeric view and a graphical trend view of IPI data. You can toggle between views by touching the left side of the frame. IPI numeric view This view displays the numeric value for the integrated parameters. The numeric view also includes a graphic indicator of the patient's current IPI value.
- Page 136 ® 130 Patient monitoring Welch Allyn Connex Devices IPI is available for adult patients as well as three groups of Note pediatric patients (1–3 years, 3–6 years, and 6–12 years), but it is not available for neonatal/infant patients. Note If you are monitoring a pediatric patient, the following...
-
Page 137: Acoustic Respiration Rate (Rra)
Directions for use Patient monitoring 131 3. Touch the IPI vertical tab. 4. Ensure that the Limits control is set to ON. Note If any parameter's alarm limit control is set to OFF, you cannot adjust alarm limits on the Alarm tab, and no visual or audio signals will occur for that specific parameter. - Page 138 ® 132 Patient monitoring Welch Allyn Connex Devices Averaging selector The averaging selector enables you to choose the desired visibility of subtle variations in RRa measurements. You can adjust averaging in the RRa frame by touching the averaging selector . Use this control toggle to select an averaging option (off, slow, medium, fast, or trending) while acquiring readings.
- Page 139 Directions for use Patient monitoring 133 alarm delay you select impacts both upper and lower alarm limits. You can set the default in Advanced settings. • No breath detected alarm delay. Select the duration from the list box. This alarm delay specifies the minimum duration of a no-breath condition to activate an alarm signal.
-
Page 140: Nibp
® 134 Patient monitoring Welch Allyn Connex Devices The sensor is for single-patient use only. You can reuse the Note sensor on the same patient if it is clean and dry, and the adhesive still adheres to the skin. Otherwise, use a new sensor. - Page 141 Directions for use Patient monitoring 135 NIBP frame in Intervals Monitoring profile NIBP frame in Spot Check profile NIBP frame in Office profile NIBP measurement display In all profiles, the frame can display systolic and diastolic measurements, and MAP calculations. You can configure the default view in Advanced settings. View indicator Touch the NIBP frame to toggle between views.
- Page 142 ® 136 Patient monitoring Welch Allyn Connex Devices Button name Button image Description Touch to start a manual measurement or a cycle of automatic measurements. Touch to stop a measurement that is in progress. In the Office profile, • Touch to stop a manual NIBP measurement.
- Page 143 3. Wrap the cuff around the patient's bare upper arm and verify that the artery index marker lies somewhere between the two range markings on the cuff. Cuff measurements The following tables provide measurements for Welch Allyn blood pressure cuffs. One-piece cuff measurements Cuff Size...
- Page 144 ® 138 Patient monitoring Welch Allyn Connex Devices Cuff Size Circumference (cm) Circumference (in) NEO 2 4.2 – 7.1 1.6 – 2.8 NEO 3 5.4 – 9.1 2.1 – 3.6 NEO 4 6.9 – 11.7 2.4 – 4.6 NEO 5 8.9 –...
- Page 145 For additional guidance addressing best practices for taking blood pressure measurements, see "Tips for Taking Accurate Blood Pressure Readings" on the Welch Allyn website. Set up NIBP Follow these steps to configure NIBP parameter settings and to set up modifiers. 1. Touch the Settings tab.
- Page 146 ® 140 Patient monitoring Welch Allyn Connex Devices 4. Ensure that the NIBP and MAP alarm limit controls are set to ON. If any parameter's alarm limit control is set to OFF, you Note cannot adjust alarm limits on the Alarm tab, and no visual or audio signals will occur for that specific parameter.
- Page 147 NIBP settings as follows: Patient = Neonate, Tube type = 1 tube, Algorithm = Step. Note Welch Allyn uses the following definition of Neonate: Children 28 days or less of age if born at term (37 gestation or more); otherwise, up to 44 gestational weeks.
- Page 148 ® 142 Patient monitoring Welch Allyn Connex Devices WARNING Patient injury risk. Any external compression of the blood pressure hose or cuff or kinked tubing may cause patient injury, system errors, or inaccurate measurements. 1. Properly size the blood pressure cuff and position it around the patient’s bare upper arm.
- Page 149 Directions for use Patient monitoring 143 Set up NIBP intervals Follow these steps to configure NIBP intervals. 1. Touch the Settings tab. 2. Touch the Setup tab. 3. Touch the Intervals vertical tab. 4. Select Automatic, Program, or Stat, and follow the steps presented in the associated topics that follow.
- Page 150 ® 144 Patient monitoring Welch Allyn Connex Devices Intervals are not available in all profiles. See the Profiles Note section for more information. Program intervals You can configure the monitor to take automatic NIBP measurements at variable intervals. The monitor comes with preset interval programs that can be edited to meet your needs.
- Page 151 Directions for use Patient monitoring 145 The new intervals take effect at the start of the next NIBP measurement. Stat intervals You can configure the monitor to take NIBP measurements continuously. When you select the Stat option, the monitor takes repeated NIBP measurements for 5 minutes, starting a new cycle each time the cuff deflates below safe venous return pressure (SVRP) for 2 seconds.
- Page 152 ® 146 Patient monitoring Welch Allyn Connex Devices 1. On the Home tab, touch the interval timer button ( Note The actual time remaining varies based on the length of the selected interval and the time expired. 2. Touch Stop intervals.
- Page 153 Directions for use Patient monitoring 147 Number Feature Description Numeric Displays the average of the readings. View indicator Displays “NIBP AVERAGED.” History • Displays the readings taken by the program. • A reading with a line through it is excluded from the average.
- Page 154 ® 148 Patient monitoring Welch Allyn Connex Devices Discard readings Readings that the program excludes from the average. For example, "1, 2" indicates that the program excludes the first and second readings. Delay to start Period between the start of the program (the moment that the "Start intervals"...
- Page 155 Directions for use Patient monitoring 149 The program establishes the baseline reading as follows: • At the start of the program, Reading 1 is the baseline reading. • The program compares the systolic value of Reading 2 to the systolic value of Reading 1.
-
Page 156: Temperature
® 150 Patient monitoring Welch Allyn Connex Devices This frame is available only in the Office profile. Note Enter pain level 1. Verify that you are using the Office profile. 2. From the Home tab, touch the up/down arrow keys or the keypad to manually adjust the pain level. - Page 157 For additional guidance addressing core temperature and variations in body temperature by measurement site, see the "Normal Body Temperature Ranges" Quick Reference Card on the Welch Allyn website. Remove the temperature probe and touch the Temperature site control toggle between sites. Pediatric axillary...
- Page 158 ® 152 Patient monitoring Welch Allyn Connex Devices The monitor displays the tympanic mode when it receives a temperature Note measurement from the ear thermometer. Temperature buttons The buttons on the right side of the frame enable you to do different tasks depending on the profile you are using.
- Page 159 Carefully place the probe in the axilla, avoiding contact with other objects or material. WARNING Patient injury risk. Always take a temperature measurement with a Welch Allyn single-use probe cover securely attached. Failure to use a probe cover can cause patient discomfort from a heated probe, patient cross-contamination, and inaccurate temperature readings.
- Page 160 ® 154 Patient monitoring Welch Allyn Connex Devices CAUTION Inaccurate measurement risk. Patient activities such as strenuous exercise, ingesting hot or cold liquids, eating, chewing gum or mints, brushing teeth, or smoking may affect oral temperature measurements for up to 20 minutes.
- Page 161 Directions for use Patient monitoring 155 Take a temperature in the Predictive mode WARNING Inaccurate measurement risk. To ensure optimal accuracy, always confirm that the correct mode and site are selected. WARNING Patient injury risk. Prior to taking a temperature, instruct the patient not to bite down on the probe as patient injury and damage to the probe may result.
- Page 162 ® 156 Patient monitoring Welch Allyn Connex Devices 5. The monitor sounds a tone when the final temperature is reached (in approximately 6 to 15 seconds). The temperature frame continues to display the temperature even after the probe is returned to the probe well.
- Page 163 Directions for use Patient monitoring 157 WARNING Patient injury risk. Do not exceed the recommended temperature measurement durations in Direct mode. Continuous measurement durations of 3 minutes at the oral and rectal sites and 5 minutes at the axillary site are recommended for accurate measurement. Do not continuously measure beyond 10 minutes in any mode.
- Page 164 ® 158 Patient monitoring Welch Allyn Connex Devices Take a temperature at the rectal site WARNING Patient injury risk. When taking rectal temperatures, insert the probe tip only 5/8 inch (approximately 1.5 cm) inside the rectum of adults and only 3/8 inch (approximately 1 cm) inside the rectum of children to avoid the risk of bowel perforation.
- Page 165 Do not autoclave the thermometer and probe covers. Ensure that probe covers are disposed of according to facility requirements or local regulations. CAUTION The thermometer has no user-serviceable parts. If service is required, call your nearest Welch Allyn Customer Service or Technical Support facility.
- Page 166 ® 160 Patient monitoring Welch Allyn Connex Devices CAUTION Store the thermometer and probe covers in a dry location, free from dust and contamination and away from direct sunlight. Keep the ambient temperature at the storage location fairly constant and within the range of 50°F to 104°F (10°C to 40°C).
- Page 167 Directions for use Patient monitoring 161 4. Firmly push the probe tip into the probe cover box. When the probe cover is in place, previously undocked thermometers turn on automatically. 5. Proceed as follows based on your Braun thermometer model: •...
- Page 168 The battery pack continues to charge while the monitor is in Display power saving mode. Note It is strongly recommended that you use only the Welch Allyn rechargeable battery pack in the thermometer because the dock cannot charge other batteries.
-
Page 169: Spo2
Directions for use Patient monitoring 163 SpO2 The SpO2 sensor measures oxygen saturation and pulse rate. Oxygen saturation is displayed as a percentage from zero (0) to 100%. The oxygen saturation and pulse rate are updated and refreshed each second, ± 0.5 seconds. SpO2 frame The SpO2 frame displays data and controls used in pulse oximetry measurements. - Page 170 ® 164 Patient monitoring Welch Allyn Connex Devices Continuous Monitoring profile Pulse amplitude The pulse amplitude bar indicates the pulse beat and shows the relative pulse strength. More bars illuminate as the detected pulse gets stronger. Response Mode Control The Response Mode Control allows you to set the SpO2 measurement time to either Normal or Fast.
- Page 171 Directions for use Patient monitoring 165 set to 0, 10, 25, 50, or 100 SatSeconds. If a desaturation event resolves on its own within the preset time, the clock will automatically reset and the monitor will not alarm. Note The SatSeconds feature has a built-in safety protocol that sounds an alarm whenever three SpO2 violations of any amount or duration occur within a 1-minute period.
- Page 172 ® 166 Patient monitoring Welch Allyn Connex Devices 9. Enter or select other modifier(s), if applicable, as desired. 10. Touch OK. The Home tab appears. In the Continuous Monitoring profile, the modifiers are saved with the next set of measurements sent to the network. In the episodic profiles, the modifiers are saved with the next set of measurements you take or with any current, unsaved measurements on the device when you touch Save.
- Page 173 Directions for use Patient monitoring 167 WARNING Inaccurate measurement risk. Use only Masimo rainbow SET sensors and accessories on Masimo-equipped monitors. WARNING Inaccurate measurement risk. Use only Nellcor sensors and accessories on Nellcor-equipped monitors. WARNING High-intensity lights (including pulsating strobe lights) directed on the pulse co-oximeter can prevent it from obtaining readings.
- Page 174 ® 168 Patient monitoring Welch Allyn Connex Devices WARNING The accuracy of SpO2 measurements can be affected by any of the following: • elevated levels of total bilirubin • elevated levels of Methemoglobin (MetHb) • elevated levels of Carboxyhemoglobin (COHb) •...
-
Page 175: Sphb
Directions for use Patient monitoring 169 WARNING Patient injury risk. Exercise caution whe applying a sensor to a patient with compromised skin integrity. Applying tape or pressure to compromised sites can reduce circulation and cause additional skin damage. Note If a sterile sensor is required, select a sensor that has been validated for sterilization, and follow the sensor manufacturer's directions for sterilizing the sensor. - Page 176 ® 170 Patient monitoring Welch Allyn Connex Devices • SpHbv indicates the venous calibrated reference for total hemoglobin measurement. • SpHb indicates the arterial calibrated reference for total hemoglobin measurement. You can specify the reference source in Advanced settings. The frame provides a numeric view and a graphical trend view of total hemoglobin data.
- Page 177 Directions for use Patient monitoring 171 Configure SpHb alarms Follow these steps to set alarm limits for SpHb measurements. 1. Verify that you are using the Intervals Monitoring or Continuous Monitoring profile. 2. Touch the Alarms tab. 3. Touch the SpHb vertical tab. 4.
- Page 178 ® 172 Patient monitoring Welch Allyn Connex Devices WARNING Use the pulse co-oximeter as an early warning device. As you observe a trend toward patient hypoxemia, use laboratory instruments to analyze blood samples to better understand the patient's condition. WARNING The accuracy of SpHb measurements can be affected by any of the following: •...
-
Page 179: Pulse Rate Frame
Directions for use Patient monitoring 173 WARNING Patient injury and inaccurate measurement risk. Do not use tape to secure the sensor to the patient. This can restrict blood flow, damage the patient's skin, cause inaccurate readings, and damage the sensor. WARNING Patient injury risk. - Page 180 ® 174 Patient monitoring Welch Allyn Connex Devices Continuous Monitoring profile The size of the pulse rate frame and displayed measurements varies based on your configuration. The Continuous Monitoring profile also provides a visual indication of aging episodic measurements (those more than 16 minutes old). When a pulse rate measurement derived from NIBP is displayed for more than 16 minutes, the numeric on the screen changes from its current color to gray.
-
Page 181: Manual Parameters Frame
Directions for use Patient monitoring 175 1. Verify that you are using the Intervals Monitoring or Continuous Monitoring profile. 2. Touch the Alarms tab. 3. Touch the Pulse rate vertical tab. 4. Ensure that the Pulse rate alarm limit control is set to ON. If any parameter's alarm limit control is set to OFF, you Note cannot adjust alarm limits on the Alarm tab, and no visual or... -
Page 182: Physical Assessment Instrument Handles
Physical assessment instrument handles Use the physical assessment instrument handles The handles supply power to Welch Allyn 3.5V instruments. This section focuses on operation of the handles only. Refer to the directions for use for each instrument head to use it properly. - Page 183 Directions for use Patient monitoring 177 The instrument will automatically power on when you remove it from the handle cradle. Only one handle is powered at a time. 2. Attach a specula to the end of the instrument head if appropriate. 3.
- Page 184 ® 178 Patient monitoring Welch Allyn Connex Devices...
-
Page 185: Maintenance And Service
Maintenance and service Perform periodic checks Welch Allyn recommends that each facility conduct periodic checks of each monitor. 1. Check the following at least daily: • Audio, especially at startup • Fan, especially at startup • Touchscreen alignment • Date •... -
Page 186: Replace The Printer Paper (Connex Vsm)
® 180 Maintenance and service Welch Allyn Connex Devices Replace the printer paper (Connex VSM) The printer is located on the top of the monitor. Follow these steps to replace the roll of printer paper: 1. Grasp the two tabs and pull up to open the printer door. -
Page 187: Change The Battery (Connex Vsm)
Directions for use Maintenance and service 181 Change the battery (Connex VSM) Before removing the battery, shut down the monitor. 1. Turn the monitor upside down to access the battery cover. 2. Locate the battery cover, indicated by 3. Insert a coin into the slot and push to open. Choose a coin that fits comfortably in the slot. -
Page 188: Remove The Wall System From The Wall (Connex Iws)
® 182 Maintenance and service Welch Allyn Connex Devices New batteries are only 30 percent charged. Therefore, connect the monitor Note to AC power immediately after inserting a new battery. WARNING Risk of fire, explosion, and burns. Do not short-circuit, crush, incinerate, or disassemble the battery pack. -
Page 189: Change The Battery (Connex Iws)
Directions for use Maintenance and service 183 8. Remove the security screw at the bottom of the wall system. 9. Carefully lift the wall system off the mounting rail bracket and place it onto a table or flat work surface. Change the battery (Connex IWS) Before removing the battery, follow the instructions to remove the wall system from the wall. -
Page 190: Clean The Monitor
® 184 Maintenance and service Welch Allyn Connex Devices 5. Mount the wall system on the wall using the instructions presented in the Setup section of this directions for use. WARNING Risk of fire, explosion, and burns. Do not short-circuit, crush, incinerate, or disassemble the battery pack. -
Page 191: Prepare To Clean The Equipment
Directions for use Maintenance and service 185 CAUTION Sterilizing the monitor could damage the device. Note Disinfect according to your facility's protocols and standards or local regulations. Note See separate instructions for cleaning accessories. Prepare to clean the equipment CAUTION Some cleaning agents are not appropriate for all components of the device. -
Page 192: Clean The Accessories
5% concentration). Ensure that the sensor is dry before re-use. Avoid excessive liquids. 6. (Connex IWS only) To clean Welch Allyn 3.5V instrument heads attached to the physical assessment handles, follow the instructions provided in their directions for use. -
Page 193: Advanced Settings
Advanced settings The Advanced tab provides password-protected access to the monitor's Advanced settings (or Admin mode), enabling nurse administrators, biomedical engineers, and/or service engineers to configure specific features. The Advanced tab also presents read- only information about the monitor. Note You cannot enter the Advanced settings if sensors or physiological alarms are active or if vital sign measurements are displayed. - Page 194 ® 188 Advanced settings Welch Allyn Connex Devices Specify date and time settings 1. Access the Advanced Settings. a. Touch the Settings tab. b. Touch the Advanced tab. c. Enter the Advanced settings code. d. Touch OK. The General tab appears.
- Page 195 Directions for use Advanced settings 189 Audio (vertical tab) Allow user to turn off general audio Select to allow clinicians to turn off all audio notification for alarms. This control is on the Alarms tab (on the General tab). Minimum alarm volume Select the minimum alarm volume available.
- Page 196 ® 190 Advanced settings Welch Allyn Connex Devices audio and visual signals occur (EarlySense configuration). etCO2 alarm condition delay Specify the minimum amount of time that an etCO2 alarm condition must be active before audio and visual signals occur. Respiration alarm condition delay...
- Page 197 Directions for use Advanced settings 191 • To continue in the Advanced Settings, touch another tab. • To exit the Advanced Settings and return to the Home tab, touch Exit. Specify advanced device settings 1. Access the Advanced Settings. a. Touch the Settings tab. b.
-
Page 198: Parameters
® 192 Advanced settings Welch Allyn Connex Devices The General tab appears. 2. Touch the General tab. 3. Touch the Demo tab. 4. Specify settings. Setting Action/Description Type Select a type of demonstration mode. Start Start Touch to put the monitor in demonstration mode. - Page 199 Directions for use Advanced settings 193 The General tab appears. 2. Touch the Parameters tab. 3. Touch the RRa tab. 4. Specify settings. Setting Action/Description RRa averaging Select the default averaging option that provides the desired visibility of subtle variations in RRa measurements.
- Page 200 ® 194 Advanced settings Welch Allyn Connex Devices The General tab appears. 2. Touch the Parameters tab. 3. Touch the Pulse rate tab. 4. Specify settings. Setting Action/Description Display source Select this to show the source of pulse rate measurements (NIBP or SpO2) on the Home tab.
- Page 201 Directions for use Advanced settings 195 • For more calibration information, see the Service manual. 5. Do one of the following: • To continue in the Advanced Settings, touch another tab. • To exit the Advanced tabs and return to the Home tab, touch Exit. Specify advanced SpHb settings 1.
- Page 202 ® 196 Advanced settings Welch Allyn Connex Devices Display MAP Select to display mean arterial pressure (MAP) in the NIBP frame on the Home tab. Display MAP is selected, specify which numerics are primary in the NIBP frame. On the Home tab, clinicians can touch the NIBP frame to toggle between views.
- Page 203 Directions for use Advanced settings 197 5. (Optional) Change the name of the program: a. Touch the keyboard icon. b. Enter the name of the program and touch OK. 6. Specify the settings for this program. Setting Action/Description Readings to average Select readings to include in the average.
- Page 204 ® 198 Advanced settings Welch Allyn Connex Devices d. Touch OK. The General tab will appear. 2. Touch the Parameters tab. 3. Touch the Temperature tab. 4. Specify settings. Setting Action/Description Unit of measure Select primary units of measure for the temperature...
-
Page 205: Data Management
Directions for use Advanced settings 199 4. Select up to four parameters and associated units of measure for display in the Manual Parameters frame. Note If the monitor has the SureTemp Plus temperature module, the Temperature parameter is not available here or in the Manual Parameters frame. - Page 206 ® 200 Advanced settings Welch Allyn Connex Devices 2. Touch the Data Management tab. 3. Touch the Patient tab. 4. Specify settings. Setting Action/Description Default patient type Select a default patient type for this monitor. The patient type shows in the Patient frame on the Home tab.
- Page 207 Directions for use Advanced settings 201 a. Touch the Settings tab. b. Touch the Advanced tab. c. Enter the Advanced settings code. d. Touch OK. The General tab appears. 2. Touch the Data Management tab. 3. Touch the Clinician tab. 4.
-
Page 208: Network
® 202 Advanced settings Welch Allyn Connex Devices The General tab appears. 2. Touch the Data Management tab. 3. Touch the Clinical Data tab. 4. Specify settings. Setting Action/Description Automatically send on manual save Select this option to specify that measurements are sent to the network when a clinician saves measurements on the Home tab. - Page 209 Directions for use Advanced settings 203 • To continue in the Advanced Settings, touch another tab. • To exit the Advanced Settings and return to the Home tab, touch Exit. Specify radio settings This task is applicable only to monitors that have a radio installed. 1.
- Page 210 ® 204 Advanced settings Welch Allyn Connex Devices Settings Device Touch the tab. Touch the tab. Power down Touch The radio will reboot. Note None of the changed radio settings take effect Configure radio until you touch 5. Do one of the following: •...
-
Page 211: Service
Directions for use Advanced settings 205 the Port entry field and enter the port number. The range of entry is 0 to 65535. Note The DNS name option is only available in the following conditions: • The version of the installed radio is 3.00.02 or greater •... - Page 212 ® 206 Advanced settings Welch Allyn Connex Devices...
-
Page 213: Troubleshooting
Troubleshooting This section presents tables of technical alarm and information messages, as well as problem descriptions that do not generate messages, to help you troubleshoot issues on the monitor. Note Problem descriptions without messages appear at the end of this section. When the monitor detects certain events, a message appears in the Device Status area at the top of the screen. - Page 214 ® 208 Troubleshooting Welch Allyn Connex Devices Message Possible cause Suggested action The bed sensor is upside down. The bed sensor was not placed properly under Turn the sensor right-side up. the mattress, mattress cover, or mattress pad Cannot measure patient. Lost or...
-
Page 215: Co2 Messages
Directions for use Troubleshooting 209 Message Possible cause Suggested action The sensor is defective. A sensor error occurred Replace the sensor. Trend change detected. Review Patient measurements have changed enough to Check the patient and patient patient history. require attention history. -
Page 216: Rra Messages
® 210 Troubleshooting Welch Allyn Connex Devices Message Possible cause Suggested action Check that the gas source is not running out. Check exhaust port for obstruction. The exhaust port is blocked Call for service. Internal flow problem Calibration overdue. CO2 might not... -
Page 217: Nibp Messages
Directions for use Troubleshooting 211 Message Possible cause Suggested action Excessive ambient or environmental noise Reduce the level of noise in the RRa background interference room. detected. NIBP messages Message Possible cause Suggested action NIBP air leak; check cuff and tubing The NIBP module has an air leak Check the cuff, tubing, and connections. -
Page 218: Spo2 And Sphb Messages
® 212 Troubleshooting Welch Allyn Connex Devices Message Possible cause Suggested action Tube type does not match device The tube connected to the NIBP sensor does not Touch OK to dismiss. configuration. match the monitor's configuration Use the tube type specified for (NIBP measurement is available) the monitor. -
Page 219: Temperature Messages
Directions for use Troubleshooting 213 Message Possible cause Suggested action Remove the sensor from the patient and reapply. SpO2 sensor expires in…. The SpO2 sensor will expire soon Replace the SpO2 sensor. Note This message only appears on devices configured with SpHb. Temperature messages Message Possible cause... -
Page 220: Weight Scale Messages
® 214 Troubleshooting Welch Allyn Connex Devices Message Possible cause Suggested action Unable to detect new temperature. The Braun thermometer is removed from the dock Return the thermometer to the Retry measurement. or not seated properly in the dock dock or adjust the thermometer in the dock. -
Page 221: Patient Data Management Messages
Directions for use Troubleshooting 215 Symptom Possible cause Suggested action The lamp brightness does not adjust The platform handle controller PCBA is Call service. defective The handle assembly is defective Call service. The handle becomes very hot to the The lamp has been on for an extended Return the handle to the cradle. -
Page 222: Communications Module Messages
® 216 Troubleshooting Welch Allyn Connex Devices Message Possible cause Suggested action Touch Clear to delete all data. To delete all unsaved data, touch Clear Communications module messages Message Possible cause Suggested action Communications module did not Communication failure Call for service. -
Page 223: System Messages
Allyn to activate the license. External device not recognized. An unrecognized external device is connected Disconnect the unrecognized device. Incompatible Welch Allyn device. A communication protocol failure has occurred Call for service. USB accessory disconnected. The USB cable between an external device and... -
Page 224: Configuration Manager Messages
® 218 Troubleshooting Welch Allyn Connex Devices Message Possible cause Suggested action Low battery 30 minutes or less Battery power is low Touch the alarm icon to dismiss remaining. or connect the monitor to AC power. Battery is absent or faulty. -
Page 225: Network Messages
Poor sensor placement on the patient Remove the sensor from the patient and reapply. The monitor may have the SpHb license, but the Contact Welch Allyn to verify SpO2 module does not that the SpO2 module contains the SpHb license. - Page 226 ® 220 Troubleshooting Welch Allyn Connex Devices Problem Possible cause Suggested action The height measurement is out of range Use the attached weight scale to retake the measurement. The Office profile does not appear The Office profile license is not installed...
-
Page 227: Specifications
Specifications Physical specifications Protection classifications, all monitor configurations Characteristic Specification Electrical rating 100 – 240 V AC, 50 – 60 Hz, 0.8 –1.5 A Duty cycle Continuous operation Duty cycle – physical assessment handles 2 minutes on, 10 minutes off Type of protection against electric shock Class I equipment (protectively earthed) with double insulation Type BF defibrillator proof... - Page 228 ® 222 Specifications Welch Allyn Connex Devices Protection classifications, all monitor configurations Weight (including battery) Standard chassis: 9.5 lb (4.3 kg) Extended chassis: 10.4 lb (4.7 kg) Integrated Wall System Height 10.5 in. (26.8 cm) Width 39.9 in. (101.4 cm) Depth 7.5 in.
- Page 229 Directions for use Specifications 223 Protection classifications, all monitor configurations Maximum delay for lost connection with 4 seconds host notification Note The relative sound pressure level of the harmonic components should be within 15 dB above or below the amplitude at the pulse frequency. Note See the "Alarm delays"...
- Page 230 ® 224 Specifications Welch Allyn Connex Devices Nurse Call connection specifications Nurse Call 50V DC maximum at 500mA (DC or ACRMS) Handle specifications Handle output 3.00 - 3.90 V, .700 - 1.5 A Leakage current is less than 10 microamps from any exposed metal part.
- Page 231 Directions for use Specifications 225 NIBP specifications Pulse rate accuracy (using blood pressure ±5.0% (±3 beats per minute) determination) Overpressure cutoff Adult: 300 mmHg ±15 mmHg (40.0 kPa ±2.0 kPa) Pediatric: 300 mmHg ±15 mmHg (40.0 kPa ±2.0 kPa) Neonate: 150 mmHg (20.0 kPa) maximum Note NIBP performance can be affected by extremes of humidity, temperature, and altitude.
- Page 232 ® 226 Specifications Welch Allyn Connex Devices SpO2 WARNING Functional testers cannot be used to assess the accuracy of a pulse oximeter monitor. Some models of commercially available bench-top functional testers and patient simulators can be used to verify the proper functionality of Nellcor and Masimo pulse oximeter sensors, cables and monitors.
- Page 233 Directions for use Specifications 227 Nellcor specifications (for additional information, refer to the directions for use that accompanies each accessory) Low Perfusion: 0.02% to 20% ± 2 digits Sensor Accuracy Saturation accuracy (sensors) 60% to 80% MAX-AI, MAX- ±3 digits PI, MAX-II 70% to 100% DS-100A...
- Page 234 ® 228 Specifications Welch Allyn Connex Devices Masimo specifications (for additional information, refer to the directions for use that accompanies each accessory) Masimo SpO2 sensor accuracy guide Accuracy specified when used with Masimo SET pulse oximetry monitors or with licensed Masimo SET pulse oximetry modules using PC series patient cables, during no motion.
- Page 235 Directions for use Specifications 229 Masimo specifications (for additional information, refer to the directions for use that accompanies each accessory) Adults, Pediatrics (no motion): 8 to 17 g/dL ±1 g/dL Accuracy Resolution 0.1 g/dL or mmol/L Unit of measure breaths per minute Body weight Adult >66 pounds (30 kilograms) Measurement range...
- Page 236 ® 230 Specifications Welch Allyn Connex Devices CO2 specifications (for additional information, refer to the directions for use that accompanies each accessory) Capnography is a non-invasive method for monitoring the level of carbon dioxide in exhaled breath (etCO2) to assess a patient’s ventilatory status.
- Page 237 Directions for use Specifications 231 CO2 specifications (for additional information, refer to the directions for use that accompanies each accessory) Dispose of sampled gases according to facility requirements or local regulations. Sampling rate 20 samples per second Calibration interval Initial: After 1200 operating hours Subsequent: After 4000 operating hours or annually (whichever comes first) Periodic service...
- Page 238 ® 232 Specifications Welch Allyn Connex Devices EarlySense specifications Sensor Dimensions 300 mm x 210 mm x 2.5 mm Weight 160 g Material Polycarbonate + ABS Connector RS232 (S11M03-P04M500-5260(ODU)) Sensor power supply Electrical absolute maximum current, DC in Minimum: –0.3 V Maximum: 5.5 V...
- Page 239 Directions for use Specifications 233 EarlySense specifications EH = 80% to 100% Accuracy Adult: 0 = 100%, L = 100%, M = 81%, H = 100%, EH = 96% Pediatric: 0 = 100%, L = 100%, M = 81%, H = 86%, EH = 94% Averaging period 15 seconds Respiration rate...
- Page 240 ® 234 Specifications Welch Allyn Connex Devices Alarm limits Upper limit range of entry Lower limit range of entry Pediatric: 17 to 140 mmHg (2.3 to 18.7 kPa). Pediatric: 15 to 138 mmHg (2.0 to 18.4 kPa). Factory default: 110 mmHg (14.7 kPa).
- Page 241 Directions for use Specifications 235 Alarm limits Upper limit range of entry Lower limit range of entry Adult: 5 to 150 breaths per minute. Factory Adult: 0 to 145 breaths per minute. Factory default: 50 breaths per minute. default: 3 breaths per minute. Patient movement Exit sensitivity: 1 to 6.
-
Page 242: Environmental Specifications
® 236 Specifications Welch Allyn Connex Devices Environmental specifications Operating temperature 50°F to 104°F (10°C to 40°C) Transport/storage temperature -4°F to 122°F (-20°C to 50°C) Operating altitude -557 to 10,000 ft. (-170 m to 3,048 m) Operating humidity 15 to 95% noncondensing... -
Page 243: Integrated Wall System
Directions for use Specifications 237 Monitors capable of supporting a combination of NIBP, SpO2, SpHb, pulse rate, and temperature Model Description 6300 Basic. Includes USB and Ethernet connectivity. Note This manual applies to 6300 models upgraded to 2.0X–2.3X software. The 6300 model is no longer available for sale. - Page 244 ® 238 Specifications Welch Allyn Connex Devices...
-
Page 245: Standards And Compliance
Standards and compliance General compliance and standards The monitor complies with the following standards IEC 60601-1 IEC 60601-1-2 IEC 60601-1-4 IEC 60601-1-6 IEC 60601-1-8 IEC 80601-2-30 IEC 60601-2-49 IEC 60601-2-51 ISO 80601-2-55 ISO 80601-2-56 ISO 80601-2-61 ISO 10993 IEC 62304 IEC 62366 Standards are essentially the IEC 60601-1 series of standards plus the listed country's National Deviations (e.g., AS/ NZ, CAN/CSA, EN Harmonized version, etc.). -
Page 246: General Radio Compliance
Electrical Equipment (WEEE). If this product is contaminated, this directive does not apply. For more specific disposal or compliance information, see www.welchallyn.com/weee, or contact Welch Allyn Customer Service at +44 207 365 6780. General radio compliance The wireless features of this monitor must be used in strict accordance with the manufacturer’s instructions as described in the user documentation that comes with the... - Page 247 This booklet is available from the U.S. Government Printing Office, Washington, D.C. 20402. Stock No. 004-000-0034504. Welch Allyn is not responsible for any radio or television interference caused by unauthorized modification of the devices included with this Welch Allyn product, or the substitution or attachment of connecting cables and equipment other than specified by Welch Allyn.
- Page 248 Undertegnede Welch Allyn erklærer herved, at følgende udstyr RLAN device overholder de væsentlige krav og øvrige relevante krav i direktiv 2014/53/EF Dutch Bij deze verklaart Welch Allyn dat deze RLAN device voldoet aan de essentiële eisen en aan de overige relevante bepalingen van Richtlijn 2014/53/EC.
- Page 249 Welch Allyn vakuuttaa täten että RLAN device tyyppinen laite on direktiivin 2014/53/EY oleellisten vaatimusten ja sitä koskevien direktiivin muiden ehtojen mukainen. French Par la présente, Welch Allyn déclare que ce RLAN device est conforme aux exigences essentielles et aux autres dispositions de la directive 2014/53/CE qui lui sont applicables German Hiermit erklärt Welch Allyn die Übereinstimmung des Gerätes RLAN device mit den grundlegenden...
- Page 250 ® 244 Standards and compliance Welch Allyn Connex Devices...
-
Page 251: Guidance And Manufacturer's Declaration
It is not safe to operate the monitor in the presence of high-frequency surgical equipment. • However, it is good practice to avoid using the monitor in extremely close proximity to other equipment. Emissions and immunity information For information about electromagnetic compatibility (EMC), see the Welch Allyn website: http://www.welchallyn.com/apps/products/product_category.jsp?catcode=PMS... - Page 252 ® 246 Guidance and manufacturer's declaration Welch Allyn Connex Devices...
-
Page 253: Appendix
Appendix Approved accessories The following tables list approved monitor and wall system accessories and documentation. For information about options, upgrades, and licenses, refer to the service manual. FlexiPort cuffs (not made with natural rubber latex) Part Number Model Description Reuse-08-2MQ Reusable Cuff, reuse, SM CHILD, 2-tube, MQ Reuse-09-2MQ... - Page 254 ® 248 Appendix Welch Allyn Connex Devices Part Number Model Description Soft-13-2MQ Disposable Cuff, soft, THIGH, 2-tube, MQ (box of 20) Neo-1-1 Disposable Cuff, soft, NEO 1, 1-TUBE, NQ (box of 10) Neo-2-1 Disposable Cuff, soft, NEO 2, 1-TUBE, NQ (box of 10)
- Page 255 Directions for use Appendix 249 Part Number Model Description Inf-Wrap-RP LNCS Replacement wrap for infant adhesives (100 per case) YI-AD LNCS Multisite adhesive wrap adult/pediatric/neonatal for YI sensor (100 per case) YI-FM LNCS Multisite foam wrap adult/pediatric/neonatal for YI sensor (12 per case) Masimo rainbow set (for use with devices with SpO2 and SpHb) Part Number...
- Page 256 ® 250 Appendix Welch Allyn Connex Devices SureTemp Plus thermometry Part Number Description 02895-000 Oral probe and well kit (9ft., 2.7M) 02895-100 Rectal probe and well kit (9ft., 2.7M) 02894-0000 Oral probe well (blue) 02894-1000 Rectal probe well (red) 05031-101...
- Page 257 Oridion Microstream etCO2 filter lines (sampling lines) have been tested for biocompatibility in accordance with ISO 10993 and are the only accessories approved by Welch Allyn for CO2 monitoring. They are available only from Oridion. To find an Oridion distributor, please refer to www.oridion.com.
- Page 258 ® 252 Appendix Welch Allyn Connex Devices Part Number Description 11710 Standard ophthalmoscope 11720 Coaxial ophthalmoscope 11730 AutoStep® coaxial ophthalmoscope 11735 Prestige coaxial-plus ophthalmoscope Illuminators 41100 Finnoff ocular transilluminator 41101 Finnoff ocular transilluminator with cobalt blue filter 43300 Curved all-purpose transilluminator...
-
Page 259: Mounting Options
Directions for use Appendix 253 Mounting options Part Number Description 4800-60 Accessory Cable Management (ACM) stand — organized mobile stand with bin, standard housing 4900-60 Accessory Cable Management (ACM) stand — organized mobile stand with bin, extended housing 104645 Mounting plate (bracket), ACM mobile stand, extended housing Note Use only with the ACM stand, not the MS2 stand. - Page 260 ® 254 Appendix Welch Allyn Connex Devices Part Number Description PWCD-7 Line cord 7, South Africa, 8' 6000-NC Nurse Call cable 6000-916 1900 2D barcode scanner 6000-916HS HS1-M 2D barcode scanner with coiled USB 6000-910 Mounting arm for HS1-M Barcode scanner (use with Economy...
- Page 261 Biomed partnership program, 5 years, with ES PRV-ESS Preventive annual sensor replacement program (selected countries) PRV-001 Preventive Welch Allyn bench service, per unit (selected countries) PRV-002 Preventive onsite service, per unit (selected countries) S4-6000 CVSM, Warranty extension, 1 year (selected countries)
- Page 262 ® 256 Appendix Welch Allyn Connex Devices Part Number Description S4-6000-ES-2 CVSM with EarlySense, Warranty extension, 2 years (selected countries) S4-6000-ES-5 CVSM with EarlySense, Warranty extension, 5 years (selected countries) Service, Integrated Wall System Part Number Description 103371 Barcode license...
- Page 263 Directions for use Appendix 257 Part Number Description 80021659 Service manual, Connex VSM 2.3X, Italian 80021660 Service manual, Connex VSM 2.3X, German 80021661 Service manual, Connex VSM 2.3X, Spanish 80021577 Service manual, Connex IWS 2.3X, English 80021662 Service manual, Connex IWS 2.3X, French 80021663 Service manual, Connex IWS 2.3X, Italian 80021664...
-
Page 264: Warranty
Warranty Vital Signs Monitor 6000 Series Welch Allyn warrants the product to be free of defects in material and workmanship and to perform in accordance with manufacturer's specifications for the period of two years from the date of purchase from Welch Allyn or its authorized distributors or agents. - Page 265 Directions for use Appendix 259 A service notification number must be obtained from Welch Allyn prior to returning any products or accessories to Welch Allyn's designated service centers for repair. To obtain a service notification number, contact Welch Allyn Technical Support.
Need help?
Do you have a question about the Connex VSM 6000 series and is the answer not in the manual?
Questions and answers