Sign In
Upload
Manuals
Brands
Volkswagen Manuals
Automobile
2004 Golf
Volkswagen 2004 Golf Manuals
Manuals and User Guides for Volkswagen 2004 Golf. We have
9
Volkswagen 2004 Golf manuals available for free PDF download: Service Manual, Workshop Manual, Service Training
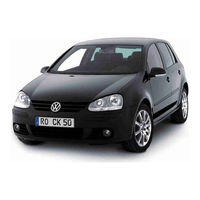
Volkswagen 2004 Golf Service Manual (4954 pages)
1.8 L turbo, 1.9 L TDI and PDI diesel. 2.0L Gasoline, 2.8L VR6
Brand:
Volkswagen
| Category:
Automobile
| Size: 108.52 MB
Table of Contents
Página 18 de
24
Página 7 de
35
Table of Contents
83
Cylinder Head
96
Disassembling and Assembling
115
Offset Gaps by
155
Fig
158
Checking
158
Fig
161
Position to
164
Installation Tool (Funnel)
200
Fig
203
Functional Check
392
Test Conditions
392
Coolant Temperature Must be at Least 85
392
C, Display Group 1, Display Zone 2
392
Test Sequence
393
Engine Control Module
394
Repair Manual, 2.8 Liter VR6 4V Fuel Injection
394
Indicated on Display
394
Readiness Code
636
Work Step
636
Display Display Zone
636
Converter (TWC)
642
Greater than
643
Rpm
733
Página 36 de 58
758
Display Zone 2
796
Checking Voltage Supply Terminal
910
Página 26 de
930
General Repair Instructions
1032
Gear Selector
1079
Adjust Selector Mechanism
1109
Clutch Housing
1177
Input Shaft
1213
Página 25 de
1244
Adjustment Overview
1320
Rapid Data Transfer HELP
1363
Select Function XX
1363
Página 5 de 10
1452
Press Key
1487
Indicated on Display
1487
By Pressing the HELP Key, a List of
1487
If "Control Module Does Not Answer!" Again Appears
1488
Indicated on Display
1488
Perform Test Steps 1, 2 and
1488
Front Brakes
1735
Rear Wheel
1788
Parking Brake
1831
Rear Brake
1868
Electrical Check
1918
Removing Tire
2267
Wheel Alignment
2270
Steering Column
2290
Front Wheel
2434
Tail Light
2536
Spare Wheel
2587
Front Door
2655
Advertisement
Volkswagen 2004 Golf Workshop Manual (418 pages)
Brand:
Volkswagen
| Category:
Automobile
| Size: 10.91 MB
Table of Contents
Table of Contents
3
Technical Data
9
Checklist for Evaluating Running Gear of Accident Vehicles
9
General Information
11
Front Suspension
12
Appraisal of Accident Vehicles
12
Repairing Front Suspension
13
Overview - Front Axle
13
Raising Wheel Suspension to Unladen Position, Golf
14
Raising Wheel Suspension to Unladen Position, Golf Plus, Crossgolf
16
Subframe, Anti-Roll Bar, Suspension Link
18
Assembly Overview: Subframe, Anti-Roll Bar, Suspension Links
18
Assembly Overview - Front Left Vehicle Level Sender G78
22
Removing and Installing Front Left Vehicle Level Sender G78
23
Repairing Thread in Longitudinal Member
24
Fixing Position of Subframe and Brackets
24
Lowering Subframe
25
Removing and Installing Subframe Without Steering Box
29
Removing and Installing Subframe with Steering Box
31
Repairing Subframe (Front-Wheel Drive)
36
Repairing Subframe (Four-Wheel Drive)
39
Checking Swivel Joint
41
Removing and Installing Swivel Joint
42
Removing and Installing Suspension Link with Mounting Bracket
44
Removing and Installing Suspension Link with Mounting Bracket (Left Side for Vehicles with DSG or Automatic Gearboxes)
47
Removing and Installing Suspension Link with Mounting Bracket (Right Side for Vehicles with 6-Cylinder Engines)
51
Renewing Bonded Rubber Bush for Suspension Link
55
Renewing Mounting Bracket with Suspension Link Bush
57
Removing and Installing Anti-Roll Bar
59
Assembly Overview - Wheel Bearing
64
Removing and Installing Wheel Bearing Housing (3-Point Mounting)
65
Removing and Installing Wheel Bearing Housing (4-Point Mounting)
66
Removing and Installing Wheel Bearing Housing
68
Assembly Overview: Suspension Strut
72
Removing and Installing Suspension Strut, Golf
73
Removing and Installing Suspension Strut, Golf Plus, Crossgolf
78
Repairing Suspension Strut
83
Removing and Installing Drive Shafts
85
Loosening and Tightening Drive Shaft Hexagon Bolt
85
Loosening and Tightening 12-Point Flange Bolt Securing Drive Shaft
86
Removing and Installing Drive Shaft with Constant Velocity Joint
87
Removing and Installing Left Drive Shaft with (Push-On) Constant Velocity Slip Joint
89
Removing and Installing Right Drive Shaft with (Push-On) Constant Velocity Slip Joint
93
Removing and Installing Drive Shafts with Triple Roller Joint Aar2600I
96
Removing and Installing Drive Shafts with Triple Roller Joint Aar3300I
98
Removing and Installing Intermediate Shaft
100
Repairing Drive Shaft - Overview of Drive Shafts
102
Heat Shields for Drive Shafts
104
Assembly Overview - Drive Shaft with VL90 or VL100 Constant Velocity Joint
105
Dismantling and Assembling Drive Shaft with VL90 or VL100 Constant Velocity Joint
107
Checking Outer Constant Velocity Joint
111
Checking Inner Constant Velocity Joint
112
Assembly Overview - Drive Shaft with VL107 Constant Velocity Joint (Bolt-On)
115
Dismantling and Assembling Drive Shaft with VL107 Constant Velocity Joint
117
Repairing Intermediate Shaft
122
Assembly Overview - Drive Shaft with VL107 Constant Velocity Slip Joint (Push-On)
124
Dismantling and Assembling Drive Shaft with VL107 (Push-On) Constant Velocity Slip Joint
125
Checking Outer Constant Velocity Joint
127
Assembly Overview - Drive Shaft with Triple Roller Joint Aar2600I
129
Dismantling and Assembling Drive Shaft with Triple Roller Joint Aar2600I
130
Assembly Overview - Drive Shaft with Triple Roller Joint Aar3300I
135
Dismantling and Assembling Drive Shaft with Triple Roller Joint Aar3300I
137
Rear Suspension
142
Appraisal of Accident Vehicles
142
Repairing Rear Suspension (Front-Wheel Drive)
143
Overview - Rear Axle
143
Rear Axle in Unladen Position, Golf
144
Rear Axle in Unladen Position, Golf Plus, Crossgolf
146
Assembly Overview: Subframe, Transverse Link, Track Rod (Front-Wheel Drive)
148
Removing and Installing Rear Axle
151
Vehicle Level Sender for Vehicles with Automatic Headlight Range Control
156
Renew Vehicle Level Sender in Vehicle
156
Removing and Installing Upper Transverse Link
157
Removing and Installing Lower Transverse Link
159
Removing and Installing Track Rod
160
Assembly Overview: Wheel Bearing Housing, Trailing Arm (Front-Wheel Drive)
164
Removing and Installing Wheel Bearing Housing
165
Renewing Bonded Rubber Bush for Wheel Bearing Housing
169
Removing and Installing Wheel Bearing/Wheel Hub Unit
172
Removing and Installing Trailing Arm with Mounting Bracket
174
Repairing Trailing Arm
178
Assembly Overview: Shock Absorber, Coil Spring (Front-Wheel Drive)
181
Removing and Installing Coil Spring
181
Removing and Installing Shock Absorbers
183
Repairing Shock Absorber
185
Assembly Overview: Anti-Roll Bar (Front-Wheel Drive)
187
Removing and Installing Anti-Roll Bar
187
Assembly Overview - Attachment Parts for Subframe Golf Bluemotion, Golf Plus Bluemotion (Front-Wheel Drive)
190
Repairing Rear Suspension (Four-Wheel Drive)
191
Overview of Rear Axle (Aluminium)
191
Overview of Rear Axle (Steel)
193
Rear Axle in Unladen State (Aluminium and Steel)
195
Assembly Overview - Subframe Made from Aluminium, Final Drive (Four-Wheel Drive)
197
Removing and Installing Rear Axle
197
Repairing Subframe
203
Assembly Overview - Subframe Made from Steel, Final Drive (Four-Wheel Drive)
207
Removing and Installing Rear Axle
207
Repairing Subframe
213
Assembly Overview - Control Arm, Track Rod (Four-Wheel Drive, Subframe Made from Aluminium and Wheel Bearing Housing Made from Cast Steel)
220
Overview - Rear Left Vehicle Level Sender G76
222
Renew Vehicle Level Sender in Vehicle
223
Removing and Installing Upper Transverse Link
223
Removing and Installing Lower Transverse Link
225
Removing and Installing Track Rod
227
Assembly Overview - Control Arm, Track Rod (Four-Wheel Drive, Subframe Made from Steel and Wheel Bearing Housing Made from Aluminium)
231
Overview - Rear Left Vehicle Level Sender G76
234
Renew Vehicle Level Sender in Vehicle
234
Removing and Installing Upper Transverse Link
235
Removing and Installing Lower Transverse Link
237
Removing and Installing Track Rod
239
Assembly Overview - Wheel Bearing Housing, Trailing Link (Four-Wheel Drive, Subframe Made from Aluminium and Wheel Bearing Housing Made from Cast Steel)
242
Changing from Wheel Housing Bearing Made from Cast Steel to Wheel Bearing Housing Made from Aluminium
243
Removing and Installing Wheel Bearing Housing
244
Renewing Bonded Rubber Bush for Wheel Bearing Housing
248
Removing and Installing Wheel Bearing/Wheel Hub Unit
250
Removing and Installing Trailing Arm with Mounting Bracket
251
Repairing Trailing Arm
256
Assembly Overview - Wheel Bearing Housing, Trailing Link (Four-Wheel Drive, Subframe Made from Steel and Wheel Bearing Housing Made from Aluminium)
259
Removing and Installing Wheel Bearing Housing
260
Renewing Bonded Rubber Bush for Wheel Bearing Housing
263
Removing and Installing Wheel Bearing/Wheel Hub Unit
263
Assembly Overview - Shock Absorber, Coil Spring (Four-Wheel Drive, Subframe Made from Aluminium and Wheel Bearing Housing Made from Cast Steel)
265
Removing and Installing Coil Spring
265
Removing and Installing Shock Absorbers
267
Repairing Shock Absorber
268
Assembly Overview - Shock Absorber, Coil Spring (Four-Wheel Drive, Subframe Made from Steel and Wheel Bearing Housing Made from Aluminium)
270
Removing and Installing Coil Spring
270
Removing and Installing Shock Absorbers
270
Repairing Shock Absorber
272
Assembly Overview - Anti-Roll Bar (Four-Wheel Drive, Subframe Made from Aluminium and Wheel Bearing Housing Made from Cast Steel)
273
Removing and Installing Anti-Roll Bar
273
Assembly Overview - Anti-Roll Bar (Four-Wheel Drive, Subframe Made from Steel and Wheel Bearing Housing Made from Aluminium)
277
Removing and Installing Anti-Roll Bar
277
Assembly Overview - Drive Shaft
281
Loosening and Tightening Drive Shaft Hexagon Bolt
282
Loosening and Tightening 12-Point Bolt for Drive Shaft
283
Removing and Installing Drive Shaft
284
Dismantling and Assembling Drive Shaft
286
Checking Outer Constant Velocity Joint
291
Checking Inner Constant Velocity Joint
292
Wheels, Tyres, Vehicle Geometry
295
Appraisal of Accident Vehicles
295
Torque Settings for Wheel Bolts
296
Fitting Wheel and Tyre
297
General Information
297
Removing and Fitting Tyres (Wheels with Tyre Pressure Monitoring)
298
Notes on Safety and Conditions for Removing and Fitting Tyres
298
Monitoring)
298
Wheel Change
298
Pressing Tyre off Wheel Rim
299
Removing Tyre from Wheel
300
Fitting Tyre to Wheel Rim
300
Removing and Fitting Tyres with Run-Flat Capability to Wheel Rims
302
Notes on Safety
302
Installation Conditions
302
Pressing Tyre off Wheel Rim
304
Removing Tyre from Wheel
304
Fitting Tyre to Wheel Rim
306
Tyre Monitor Display
308
Tyre Pressure Monitor (TPM)
310
Button Behaviour
310
Assembly Overview - Tyre Pressure Sensor
311
Removing and Installing Tyre Pressure Sensor
312
Wheel Alignment
313
General
313
Test Prerequisites
315
Test Preparations
315
Wheel Alignment Specifications, Golf
316
Wheel Alignment Specifications, Golf Plus, Crossgolf
317
Overview - Wheel Alignment Procedure
319
Volkswagen 2004 Golf Workshop Manual (285 pages)
Brand:
Volkswagen
| Category:
Automobile
| Size: 5.61 MB
Table of Contents
Table of Contents
3
Body - Front
9
Lock Carrier
9
Tools
9
Assembly Overview - Lock Carrier, Service Position
10
Service Position
11
Removing and Installing Lock Carrier with Add-On Parts
12
Wing
15
Tools
15
Assembly Overview - Front Wing
16
Removing and Installing Wing
16
Removing and Installing Wing Strut
18
Noise Insulation
20
Tools
20
Assembly Overview - Noise Insulation
21
Underbody Cladding
22
Tools
22
Assembly Overview - Underbody Cladding
23
Plenum Chamber Bulkhead
24
Tools
24
Assembly Overview - Plenum Chamber Bulkhead
24
Bonnet, Rear Lid
25
Bonnet
25
Tools
25
Assembly Overview - Bonnet
26
Removing and Installing Bonnet
27
Removing Gas Strut
28
Releasing Gas from Gas Strut
28
Removing and Installing Flap Hinge
28
Removing and Installing Insulation
30
Assembly Overview - Bonnet Latch and Release Components
32
Removing and Installing Bonnet Lock
33
Separating Bowden Cable
34
Adjusting Bonnet
34
Removing and Installing Release Lever
36
Rear Lid
37
Tools
37
Assembly Overview - Rear Lid
37
Removing and Installing Rear Lid
38
Removing Gas Strut
39
Releasing Gas from Gas Strut
39
Removing and Installing Rear Lid Hinges
39
Removing and Installing Striker Pin
42
Adjusting Lid
42
Assembly Overview - Rear Lid Latch and Release Components
45
Removing and Installing Release Element
45
Removing and Installing Lid Lock
47
Rear Lid Seal
47
Removing and Installing Rear Lid Seal
48
Tank Flap Unit
49
Tools
49
Assembly Overview - Tank Flap Unit
49
Front Doors, Door Components, Central Locking
53
Front Door
53
Tools
53
Materials
54
Assembly Overview - Door Assembly
54
Assembly Overview - Door Hinges
56
Removing and Installing Door
58
Adjusting Door
60
Removing and Installing Door Outer Panel
63
Installing New Outer Panel for Door
66
Removing and Installing Retaining Rail on Door Outer Panel
70
Installation Instructions for Bonding in New Door Outer Panel
71
Minimum Curing Period
72
Cleaning off Excess Adhesive Sealing Material
72
Assembly Overview - Door Inner Part
73
Assembly Overview - Door Handle and Door Lock
74
Removing and Installing Housing
75
Removing and Installing Door Handle
76
Removing and Installing Mounting Plate
78
Removing and Installing Door Lock
80
Assembly Overview - Side Impact Protection
82
Door Inner Seal
82
Removing and Installing Door Inner Seal
83
Removing and Installing Door Outer Seal
85
Central Locking
88
Location Overview - Central Locking Components
88
Adapting Keys with Remote Control
89
Assembly Overview - Battery for Folding Key with Remote Control
90
Removing and Installing Battery for Folding Key with Remote Control
91
Rear Doors, Door Components
93
Rear Door
93
Tools
93
Materials
94
Assembly Overview - Door Assembly
94
Assembly Overview - Door Hinges
96
Removing and Installing Door
97
Adjusting Door
99
Removing and Installing Door Outer Panel
102
Installing New Outer Panel for Door
105
Removing and Installing Retaining Rail on Door Outer Panel
109
Installation Instructions for Bonding in New Door Outer Panel
110
Minimum Curing Period
111
Cleaning off Excess Adhesive Sealing Material
111
Assembly Overview - Door Inner Part
112
Assembly Overview - Door Handle and Door Lock
113
Removing and Installing Housing
114
Removing and Installing Door Handle
114
Removing Bearing Bracket
116
Removing and Installing Door Lock
118
Assembly Overview - Side Impact Protection
119
Door Inner Seals
120
Removing and Installing Door Inner Seal
121
Removing and Installing Door Outer Seal
122
Sunroof
126
Sliding/Tilting Sunroof with Glass Panel (Meritor)
126
Tools
126
Function
127
Assembly Overview - Sliding/Tilting Sunroof with Glass Panel
128
Removing and Installing Bellows
130
Removing Glass Panel of Sliding/Tilting Sunroof
131
Installing Glass Panel of Sliding/Tilting Sunroof
132
Adjusting Height of Glass Panel of Sliding/Tilting Sunroof
132
Adjusting Panel Seal
133
Renewing Panel Seal
134
Removing and Installing Wind Deflector
134
Removing and Installing Sliding Headliner
135
Removing and Installing Sliding/Tilting Sunroof Glass Panel Drive
136
Adjusting Drive for Sliding/Tilting Sunroof Glass Panel (0 Position)
137
Removing and Installing Sliding/Tilting Sunroof Glass Panel Automatic Preselection Switch
138
Checking Parallel Running
138
Adjusting Parallel Running
138
Assembly Overview - Carrier Unit
139
Removing and Installing Carrier Unit
140
Operating Without Electrics
142
Removing and Installing Guide Plate
142
Removing and Installing Sliding Gate
143
Cleaning Water Drain Hoses
144
Bumpers
147
Front Bumper
147
Tools
147
Repairing Bumper Cover
147
Assembly Overview - Bumper Cover
148
Removing and Installing Front Bumper Cover
148
Front Bumper Attachments
150
Front Bumper Substructure
151
Assembly Overview - Bumper Carrier
152
Assembly Overview - Number Plate Carrier
153
Front Bumper for GTI, GTI Special Models, GT, R32
154
Tools
154
Repairing Bumper Cover
154
Assembly Overview - Bumper Cover for GTI, GT
154
Removing and Installing Front Bumper Cover for GT, GTI
155
Front Bumper Attachments for GT, GTI
157
Assembly Overview - Bumper Cover for R32
159
Removing and Installing Front Bumper Cover for R32
159
Front Bumper Attachments for R32
161
Assembly Overview - Front Bumper Cover for GTI Special Models
162
Removing and Installing Front Bumper Cover for GTI Special Models
162
Front Bumper Attachments for GTI Special Models
164
Front Bumper Substructure
165
Assembly Overview - Bumper Carrier
166
Rear Bumper
167
Tools
167
Repairing Bumper Cover
167
Assembly Overview - Bumper Cover
168
Removing and Installing Bumper Cover
168
Rear Bumper Attachments
170
Rear Bumper Substructure
171
Assembly Overview - Bumper Carrier
172
Assembly Overview - Towing Bracket
172
Rear Bumper for R32 and GTI Special Models
174
Tools
174
Repairing Bumper Cover
174
Assembly Overview - Bumper Cover for R32
175
Removing and Installing Bumper Cover for R32
175
Rear Bumper Attachments for R32
177
Assembly Overview - Rear Bumper Cover for GTI Special Models
178
Removing and Installing Rear Bumper Cover for GTI Special Models
178
Rear Bumper Attachments for GTI Special Models
180
Rear Bumper Substructure
181
Assembly Overview - Bumper Carrier
182
Glazing
183
Flush Bonded Windows
183
Tools
183
Golf
184
Materials
185
Repairing Windscreen
185
Assembly Overview - Windscreen
186
Assembly Overview - Plenum Chamber Cover
187
Removing Windscreen
190
Installing Windscreen
190
Assembly Overview - Rear Window
191
Removing Undamaged Rear Window
191
Removing Broken Rear Window
192
Installing Rear Window
193
Assembly Overview - Rear Side Window
194
Removing Undamaged Rear Side Window
194
Removing Damaged Rear Side Window
195
Installing Rear Side Window
195
Preparing Old Undamaged Window for Glazing
196
Preparing New Window Without Precoating for Glazing
196
Preparing New Window with Precoating for Glazing
197
Preparing Body Flange for Glazing
198
Installation Instructions
199
Minimum Curing Period
199
Touching up Paint Damage
200
Cleaning off Excess Adhesive Sealing Material
200
Front Door Windows
201
Tools
201
Assembly Overview - Front Door Window
202
Removing and Installing Door Window
203
Adjusting Door Window
205
Assembly Overview - Window Regulator Motor
206
Removing and Installing Window Regulator Motor
207
Assembly Overview - Window Guide
209
Removing and Installing Window Guide
209
Assembly Overview - Window Regulator
211
Removing and Installing Window Regulator
211
Rear Door Windows
213
Tools
213
Assembly Overview - Rear Door Window
214
Removing and Installing Door Window
214
Assembly Overview - Fixed Door Window with Window Guide
217
Removing and Installing Fixed Door Window with Window Guide
217
Assembly Overview - Window Regulator Motor
220
Removing and Installing Window Regulator Motor
220
Assembly Overview - Window Regulator
223
Removing and Installing Window Regulator
223
Advertisement
Volkswagen 2004 Golf Workshop Manual (336 pages)
Brand:
Volkswagen
| Category:
Automobile
| Size: 12.16 MB
Table of Contents
Table of Contents
3
Golf 2004 ➤ , Golf
8
Interior Equipment
9
Interior Mirror
9
Tools
9
Automatic Anti-Dazzle Interior Mirror
9
Removing and Installing Interior Mirror with Rain Sensor
9
Bonding on Retaining Plate for Interior Mirror with Rain Sensor
10
Removing and Installing Interior Mirror
12
Bonding on Retaining Plate for Interior Mirror Without Rain Sensor
12
Compartments, Covers and Trims
14
Tools
14
Removing and Installing Basic Version Centre Console (Golf 2004 ▸)
14
Removing and Installing Basic Version Centre Console (Golf 2009 ▸)
18
Removing and Installing Highline Centre Console (Golf 2004 ▸)
23
Removing and Installing Highline Centre Console (Golf 2009 ▸)
32
Removing and Installing Mounting Bracket for Centre Console (Golf 2004 ▸)
42
Removing and Installing Mounting Bracket for Centre Console and Mounting Bracket for Footwell Trim (Golf 2009 ▸)
46
Removing and Installing Cup Holder in Centre Console, Highline
51
Repairing Cup Holder in Centre Console, Highline
52
Removing and Installing Storage Compartment / Ashtray Unit (Golf 2004 ▸)
55
Removing and Installing Storage Compartment / Ashtray Unit (Golf 2009 ▸)
56
Removing and Installing Dash Panel Centre Vents (Vehicles with no Climatronic) (Golf 2004 ▸)
56
Removing and Installing Dash Panel Centre Vents (Vehicles with Climatronic) (Golf
58
Removing and Installing Centre Compartment in Dash Panel (Golf 2009 ▸)
61
Removing and Installing Spectacles Holder in Moulded Headliner
62
Removing and Installing Frame in Moulded Headliner
63
Removing and Installing Dash Panel Centre Vent (Golf 2009 ▸)
64
Removing and Installing Dash Panel Centre Trim (Golf 2004 ▸)
66
Removing and Installing Dash Panel Centre Trim (Golf 2009 ▸)
67
Removing and Installing Air Conditioner Controls Unit / Heater Controls Unit (Golf 2009 ▸)
67
Removing and Installing Dash Panel End Trims
68
Removing and Installing Steering Column Trim
69
Removing and Installing Left Trim Panel on Driver Side
70
Removing and Installing Right Trim Panel on Driver Side
72
Removing and Installing Centre Cover (Golf 2004 ▸)
76
Removing and Installing Centre Cover (Golf 2009 ▸)
76
Removing and Installing Glove Compartment
77
Removing and Installing Glove Compartment Lock Cylinder
81
Removing and Installing Footwell Cover on Driver Side
82
Removing and Installing Decorative Trim on Dash Panel (Golf 2004 ▸)
83
Removing and Installing Decorative Trim on Dash Panel (Golf 2009 ▸)
84
Removing and Installing Sun Visor
85
Sill Panel Trims
89
Removing and Installing Sill Panel Mouldings (2-Door)
89
Removing and Installing Sill Panel Mouldings (4-Door)
90
Removing and Installing Wheel Housing Trim (4-Door)
92
Grab Handles
96
Removing and Installing Roof Grab Handles
96
Passenger Protection
97
Seat Belts
97
General Safety Regulations When Working on Airbag, Belt Tensioner and Battery Isolator Units (Pyrotechnic Components)
98
Special Instructions for Belt Tensioners
99
Storage, Transportation and Disposal of Airbag, Belt Tensioner and Battery Isolator Units (Pyrotechnic Components)
99
Removing and Installing Front Seat Belt (2-Door)
100
Removing and Installing Front Seat Belt (4-Door)
103
Removing and Installing Front Belt Height Adjuster
105
Removing and Installing Front Seat Belt Buckle (2-Door)
106
Removing and Installing Front Seat Belt Buckle (4-Door)
108
Removing and Installing Rear Outer Seat Belts
110
Removing and Installing Middle Rear 3-Point Seat Belt
113
Removing and Installing Middle Rear Seat Lap Belt
114
Removing and Installing Rear Double Belt Buckle
115
Inspecting Seat Belts
117
Points to Check
117
Checking Child Seat Anchors (ISOFIX) after an Accident
120
Points to Check
120
Airbag
121
Overview of Locations - Airbag Systems
121
General Safety Regulations When Working on Airbag, Belt Tensioner and Battery Isolator Units (Pyrotechnic Components)
123
Special Instructions for Driver and Front Passenger Airbag
124
Special Instructions for Curtain Airbag Modules
124
Storage, Transportation and Disposal of Airbag, Belt Tensioner and Battery Isolator Units (Pyrotechnic Components)
124
Deactivating the Airbag
124
Renewing Airbag Units Following an Accident
125
Removing and Installing Airbag Control Unit J234
126
Removing and Installing Driver Side Airbag Unit (Golf 2004 ▸)
128
Removing and Installing Driver Side Airbag Unit (Golf 2009 ▸)
131
Removing and Installing Airbag Coil Connector and Return Spring with Slip Ring F138
135
Removing and Installing Key Operated Switch to Deactivate Front Passenger Airbag E224
135
Removing and Installing Knee Airbag (Golf 2009 ▸)
136
Removing and Installing Knee Airbag Bracket (Golf 2009 ▸) LHD Models
138
Removing and Installing Knee Airbag Bracket (Golf 2009 ▸) RHD Models
140
Removing and Installing Front Passenger Airbag Unit
142
Removing and Installing Driver and Front Passenger Side Airbag
147
Removing and Installing Rear Side Airbag (4-Door)
148
Removing and Installing Curtain Airbag on Driver and Passenger Side
150
Removing and Installing Curtain Airbag on Driver and Passenger Side (Golf 2009 ▸)
153
Removing and Installing Seat Occupied Sensor, Front Passenger Side G128
157
Adapting Components
161
Seat Occupied Recognition (USA)
162
Safety Precautions for When Working on Seat Occupied Recognition
162
Procedure for Seat Belt Tensioner after an Accident and /Or Triggering of Airbag
162
Assembly Overview - Seat Occupancy Detection (USA)
163
Components of Repair Kit for Seat Occupied Recognition
163
Removing Components of Seat Occupied Recognition
164
Seats)
164
Installing Repair Kit for Seat Occupied Recognition (Vehicles with Manually Operated Seats)
171
Golf 2004 ➤ , Golf
174
Installing Repair Kit for Seat Occupied Recognition (Vehicles with Electrically Operated Seats)
180
Importers Reporting Obligation
182
Crash Sensors
184
Removing and Installing Front Door Crash Sensors (Golf 2004 ▸)
184
Removing and Installing Side Airbag Crash Sensor on Driver Side G179 (Golf 2009 ▸)
185
Removing and Installing Side Airbag Crash Sensor on Front Passenger Side G180
187
Removing and Installing Rear Wheel Housing Crash Sensors (2-Door)
187
Removing and Installing Rear Wheel Housing Crash Sensors (4-Door)
189
Trim, Insulation
191
Dash Panel
191
Tools
191
Removing and Installing Dash Panel
191
Golf 2004 ➤ , Golf
192
Removing and Installing Dash Panel Cross Member (RHD Models)
197
Removing and Installing Dash Panel Cross Member (LHD Models)
203
Aligning Dash Panel in Vehicle (Golf 2004 ▸)
207
Door Trim (Golf 2004 ▸)
212
Tools
212
Removing and Installing Front Door Trim on Driver Side
212
Removing and Installing Front Door Trim on Passenger Side
214
Removing and Installing Door Lining Trim Strip
215
Removing and Installing Rear Door Trim
216
Removing and Installing Window Crank Handle
218
Door Trim (Golf 2009 ▸)
220
Tools
220
Removing and Installing Front Door Trim (2-Door Vehicles)
220
Removing and Installing Front Door Trim (4-Door Vehicles)
223
Removing and Installing Rear Door Trim
226
Removing and Installing Trim Strip and Door Trim
229
Removing and Installing Front Door Trim Cover
230
Pillar and Side Trims
231
Removing and Installing Upper A-Pillar Trim
231
Removing and Installing Middle A-Pillar Trim
232
Removing and Installing Lower A-Pillar Trim, Driver Side
233
Removing and Installing Lower A-Pillar Trim, Front Passenger Side
235
Removing and Installing Upper B-Pillar Trim
236
Removing and Installing Lower B-Pillar Trim
238
Removing and Installing C-Pillar Trim
240
Removing and Installing Sill Panel Moulding (2-Door)
241
Rear Lid Trim (Golf 2004 ▸)
243
Tools
243
Removing and Installing Rear Lid Trim
243
Removing and Installing Window Frame Trim
244
Rear Lid Trim (Golf 2009 ▸)
246
Tools
246
Volkswagen 2004 Golf Workshop Manual (299 pages)
Brand:
Volkswagen
| Category:
Automobile
| Size: 7.58 MB
Table of Contents
Table of Contents
3
Technical Data
7
Engine Number
7
Engine Data
7
Removing and Installing Engine
9
Removing Engine
10
Securing Engine to Assembly Stand
17
Notes on Installing
19
Assembly Mountings
20
Crankshaft Group
21
Dismantling and Assembling Engine
21
Assembly Overview - Poly V-Belt Drive
21
Removing and Installing Poly V-Belt
22
Assembly Overview - Toothed Belt Drive
24
Assembly Overview - Crankcase
29
Removing and Installing Sealing Flange and Flywheel
30
Renewing Crankshaft Sealing Flange - Flywheel End
31
Renewing Crankshaft Oil Seal - Pulley End
39
Removing and Installing Sealing Flange - Pulley End
41
Removing and Installing Engine Speed Sender G28
43
Pistons and Conrods
45
Assembly Overview - Pistons and Conrods
45
Piston and Cylinder Dimensions
46
Checking Piston Projection at TDC
46
Piston Rings, Cylinder Bore and Piston Installation Position
48
Crankshaft
50
Assembly Overview - Crankshaft
50
Crankshaft Dimensions
50
Pulling Needle Bearing out of and Driving into Crankshaft
51
Cylinder Head, Valve Gear
53
Cylinder Head
53
Assembly Overview - Cylinder Head
53
Removing and Installing Cylinder Head Cover
55
Removing, Installing and Tensioning Toothed Belt
57
Removing and Installing Cylinder Head
72
Checking Compression
77
Valve Gear
78
Assembly Overview - Valve Gear
78
Removing and Installing Roller Rocker Finger
80
Valves
82
Removing and Installing Camshafts
85
Removing and Installing Camshaft Oil Seal
90
Lubrication
92
Engine Oil
92
Oil Capacities - Golf, Golf Plus, Touran
92
Oil Capacities - Passat
92
Checking Engine Oil Level
92
Parts of Lubrication System (Golf, Golf Plus, Touran)
93
Assembly Overview - Oil Pump, Sump
93
Removing and Installing Oil Sump
95
Parts of Lubrication System (Passat)
98
Assembly Overview - Oil Pump, Sump, Balancer Shaft Module with Chain Drive
99
Removing and Installing Oil Pump (for Balancer Shaft Module with Chain Drive)
101
Removing and Installing Balancer Shaft Module with Chain Drive
104
Retrofitting Spur Gear Drive for Balancer Shaft Module
107
Assembly Overview - Oil Pump, Sump, Balancer Shaft Module with Spur Gear Drive
110
Removing and Installing Oil Pump (for Balancer Shaft Module with Spur Gear Drive)
113
Removing Balancer Shaft Module with Spur Gear Drive
113
Renewing Spur Gear for Crankshaft
114
Installing Balancer Shaft Module
117
Removing and Installing Oil Sump
123
Oil Filter Bracket, Oil Cooler, Oil Pressure and Oil Supply Line
126
Assembly Overview - Oil Filter Bracket and Oil Cooler
126
Checking Oil Pressure and Oil Pressure Switch
127
Assembly Overview - Oil Supply Line to Turbocharger
129
Removing and Installing Oil Supply Line to Turbocharger
129
Cooling
131
Parts of Cooling System
131
Parts of Cooling System, Body Side
132
Assembly Overview - Parts of Cooling System, Engine Side (Golf, Golf Plus, Touran)
133
Assembly Overview - Parts of Cooling System, Engine Side (Passat)
135
Coolant Hose Schematic Diagram
137
Draining and Filling Coolant
140
Removing and Installing Fan Support with Fans
145
Removing and Installing Radiator
146
Removing and Installing Coolant Pump
148
Removing and Installing Thermostat
150
Checking Cooling System for Leaks
152
Checking Oil Cooler for Leaks
154
Fuel Supply System
156
Safety Precautions
156
Safety Precautions When Working on Fuel Supply System
156
Rules for Cleanliness
157
Rules for Cleanliness When Working on Fuel Supply System
157
Parts of Fuel Supply System (Golf, Golf Plus)
158
Fuel Tank, Vehicles with Front-Wheel Drive
158
Fuel Tank, Vehicles with Four-Wheel Drive
162
Emptying Fuel Tank
168
Removing and Installing Fuel Delivery Unit
170
Removing and Installing Fuel Gauge Sender
172
Checking Fuel Pump
172
Assembly Overview - Fuel Filter
177
Removing and Installing Fuel Cooler
179
Parts of Fuel Supply System (Touran)
181
Assembly Overview - Fuel Tank with Attachments
182
Emptying Fuel Tank
183
Removing and Installing Fuel Tank
186
Assembly Overview - Fuel Filter
188
Removing and Installing Fuel Cooler
189
Removing and Installing Fuel Delivery Unit
190
Removing and Installing Fuel Gauge Sender
192
Checking Fuel Pump
192
Parts of Fuel Supply System (Passat)
198
Fuel Tank, Vehicles with Four-Wheel Drive
198
Emptying Fuel Tank, Vehicles with Four-Wheel Drive
208
Fuel Tank, Vehicles with Front-Wheel Drive
212
Emptying Fuel Tank, Vehicles with Front-Wheel Drive
219
Checking Fuel Pump
221
Assembly Overview - Fuel Filter
225
Removing and Installing Fuel Cooler
227
Accelerator Mechanism
229
Assembly Overview - Accelerator Mechanism
229
Tandem Pump
231
Checking Tandem Pump
231
Removing and Installing Tandem Pump
233
Turbocharging/Supercharging
236
Charge Air System with Turbocharger
236
Safety Precautions
236
Volkswagen 2004 Golf Service Manual (207 pages)
4-cylinder diesel engine (1.9 l engine)
Brand:
Volkswagen
| Category:
Automobile
| Size: 7.53 MB
Table of Contents
Table of Contents
3
Technical Data
7
Engine Number
7
Engine Data
7
Removing and Installing Engine
8
Removing Engine
8
Securing Engine to Assembly Stand
13
Notes on Installing
13
Assembly Mountings
16
Crankshaft Group
18
Dismantling and Assembling Engine
18
Assembly Overview - Poly V-Belt Drive
18
Removing and Installing Poly V-Belt
19
Assembly Overview - Toothed Belt Drive
21
Assembly Overview - Crankcase
25
Removing and Installing Sealing Flange and Flywheel
26
Assembly Overview - Sealing Flanges and Flywheel
26
Renewing Crankshaft Oil Seal - Pulley End
27
Removing and Installing Sealing Flange - Pulley End
29
Renewing Crankshaft Sealing Flange - Flywheel End
31
Removing and Installing Engine Speed Sender G28
37
Crankshaft
39
Assembly Overview - Crankshaft
39
Crankshaft Dimensions
44
Pistons and Conrods
45
Assembly Overview - Pistons and Conrods
45
Separating New Conrod
46
Checking Piston Projection at TDC
47
Piston and Cylinder Dimensions
48
Piston Rings, Cylinder Bore and Piston Installation Position
48
Cylinder Head, Valve Gear
50
Cylinder Head
50
Assembly Overview - Cylinder Head
51
Removing and Installing Cylinder Head Cover
54
Removing, Installing and Tensioning Toothed Belts
56
Removing and Installing Cylinder Head
73
Checking Compression
77
Valve Gear
80
Assembly Overview - Valve Gear
80
Checking Valve Guides
82
Renewing Valve Stem Seals
84
Removing and Installing Camshaft
86
Removing and Installing Camshaft Oil Seal
90
Lubrication
92
Engine Oil
92
Oil Capacities
92
Checking Engine Oil Level
92
Parts of Lubrication System
93
Assembly Overview - Oil Pump, Sump
93
Removing and Installing Sump
94
Oil Filter Bracket, Oil Pressure, Engine Oil Cooler and Oil Supply Line
98
Assembly Overview - Oil Filter Bracket and Engine Oil Cooler
98
Checking Oil Pressure and Oil Pressure Switch
99
Assembly Overview - Oil Supply Line to Turbocharger
100
Removing and Installing Oil Supply Line to Turbocharger
101
Cooling
103
Parts of Cooling System
103
Parts of Cooling System, Body Side
104
Parts of Cooling System, Engine Side
105
Coolant Hose Schematic Diagram
107
Draining and Filling with Coolant
108
Removing and Installing Radiator
111
Removing and Installing Coolant Pump
112
Removing and Installing Thermostat
114
Checking Cooling System for Leaks
116
Checking Engine Oil Cooler for Leaks
118
Fuel Supply System
120
Safety Precautions When Working on Fuel Supply System
120
Rules for Cleanliness
121
Fuel Tank, Vehicles with Front-Wheel Drive
122
Assembly Overview - Fuel Tank
122
Emptying Fuel Tank
123
Removing and Installing Fuel Tank
127
Removing and Installing Fuel Delivery Unit
129
Removing and Installing Fuel Gauge Sender
130
Checking Fuel Pump
131
Fuel Tank, Vehicles with Four-Wheel Drive
133
Assembly Overview - Fuel Tank
133
Emptying Fuel Tank
134
Removing and Installing Fuel Tank
138
Removing and Installing Fuel Gauge Sender 2 G169
141
Removing and Installing Suction-Jet Pump
143
Checking Fuel Pump
144
Repairing Fuel Supply System
146
Assembly Overview - Fuel Filter
146
Removing and Installing Fuel Cooler
147
Assembly Overview - Accelerator Mechanism
148
Checking Tandem Pump
149
Removing and Installing Tandem Pump
153
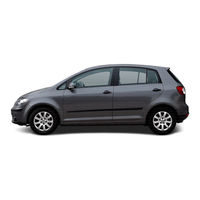
Volkswagen 2004 Golf Service Manual (185 pages)
Golf 2004; Golf Plus 2005
Brand:
Volkswagen
| Category:
Automobile
| Size: 6.79 MB
Table of Contents
Table of Contents
3
1 Engine List
5
Petrol Engines
5
Information on Long-Life Service and Time or Distance Dependent Service
11
2 Service Work
11
Service Interval Display
12
Service Tables
13
Service Intervals
14
Delivery Inspection
18
Oil Change Service
20
Interval Service ▸2007
21
Interval Service 2008
22
Interval Service Inspection ▸2007
24
Inspection Service 2008
26
Time or Distance Dependent Additional Work
29
3 General
33
Raising Vehicle with Lifting Platform and Trolley Jack
33
Sticker
34
Service Schedule
35
Connecting Vehicle Diagnostic Tester
36
Entries in Service Schedule
36
Vehicle Identification Number
38
Severe Operating Conditions
40
Vehicle Data Sticker
40
Engine Code and Engine Number
41
RME Fuel (Biodiesel) for Vehicles up to 05.2006
41
Type Plate
42
4 Descriptions of Work
43
Removable Towing Bracket: Check and Clean if Necessary
45
Driving Light Assist and Cornering Light: Check Function
47
Swivel Joints: Visual Check
47
Automatic Gearbox: Change ATF (09G Gearbox)
48
Automatic Gearbox: Check ATF Level, 09G Gearbox
48
Battery: Check Battery Terminal Clamps for Secure Seating
49
Battery: Check Using Battery Tester with Printer VAS 5097A or VAS 6161
52
Checking Tyres: Condition, Wear Pattern, Tyre Pressure, Tread Depth and Age of Tyres
52
General Notes
54
Brake and Clutch System: Change Brake Fluid
57
Brake Fluid Level: Check
61
Brake System and Shock Absorbers: Perform Visual Check for Leaks and Damage
62
Front and Rear Brake Pads/Linings: Check Thickness
63
Checking Diesel Particulate Filter
64
6-Speed Dual Clutch Gearbox (DSG) 02E: Change Oil and Filter
65
Electric Windows: Check Positioning (Open and Close Functions)
65
Vehicle System Test: Perform Test
66
Front Passenger Front Airbag: Check Key Switch and "On/Off Function
67
Protective Bellows: Visual Check
69
Haldex Coupling (Golf 4Motion): Change Oil
70
Poly V-Belt: Adjust Tension on Engines Without Automatic Tensioning Roller
73
Poly V-Belt: Check Condition
74
Calibrating Compass (for North American Region)
75
Cooling System: Check Frost Protection and Coolant Level
76
Fuel Filter: Renew
78
Air Filter: Clean Housing and Renew Filter Element
84
Engine Cover -Top-: Removing and Installing
93
Removing and Installing Engine Compartment Cover -Bottom- (Noise Insulation)
103
Engine and Components in Engine Compartment (from above and Below): Perform Visual Check for Leaks and Damage
104
Engine Oil Level: Check
105
Engine Oil: Drain or Extract; Renew Oil Filter and Replenish Engine Oil
105
Performing Road Test (Driving Behaviour, Noises, Air Conditioner Etc.)
116
Wheel Securing Bolts: Tighten to Prescribed Torque Setting
116
Reading Radio Code Using Vehicle Diagnostic Tester
118
Radio/Radio Navigation System: Enter PIN of Anti-Theft Coding and Store Local Radio Stations to Station Buttons
119
Tyre Pressure Monitoring: Perform Basic Setting
120
Dust and Pollen Filter: Clean Housing and Renew Filter Element
122
Tyre Repair Set: Check Bottle for Damage and if Used; Check and Enter Date of Tyre Sealant
122
Headlight Adjustment: Check
123
Adjusting Headlights
126
Service Interval Display: Reset
130
Service Interval Display: Recode
131
Sliding Sunroof Drains: Check Flow and Clean if Necessary
133
Sunroof: Check Function, Clean and Grease Guide Rails
133
Window Wash/Wipe System and Headlight Washer System: Check Function
135
Wiper Blade Protection: Remove
141
Wiper Blades: Check Park Position
143
Auxiliary Heater: Set Weekday in Menu of Combi-Instrument
144
Track Rod Ends: Check Play, Security and Boots
144
Door Arrester: Grease
145
Transportation Mode: Switch off
145
Lines, Plugs Etc
147
Transportation Devices: Remove Blocking Pieces from Front Axle Springs
147
Underbody: Visual Check for Damage to Underbody Sealant, Underbody Panels, Routing of
147
Clock and Date: Set to Correct Time
148
Camshaft Drive Toothed Belt: Check (4-Cylinder Petrol Engines 1.4 L 55 Kw and 1.6 L 75 Kw)
149
Camshaft Drive Toothed Belt: Renew (Only 2.0 L FSI and TFSI)
149
Toothed Belt and Toothed Belt Tensioning Roller: Renew (TDI Unit Injector)
149
Spark Plugs: Renew
150
Front and Rear Final Drive: Check Oil Level
163
Volkswagen 2004 Golf Workshop Manual (180 pages)
Brand:
Volkswagen
| Category:
Automobile
| Size: 1.72 MB
Table of Contents
Table of Contents
5
Technical Data
7
1 General Notes on Air Conditioning Systems
7
Introduction
7
Additional Information
7
Basics of Air Conditioning
8
Vapour Pressure Table for Refrigerant R134A
9
Refrigerant R134A
10
Characteristics of Refrigerant R134A
11
Refrigerant Machine Oil
13
Comfort
15
How Air Conditioning Works
15
General Safety
16
Safety Precautions for When Working on Vehicles with Air Conditioning and When Handling
19
Refrigerant R134A
19
Basics for Working on Refrigerant Circuit
20
2 General Information on Refrigerant Circuit
23
Refrigerant Circuit Components
23
Design of Refrigerant Circuit
31
Evacuation and Charging Valves for Quick-Release Couplings of Air Conditioner Service Station
31
On Refrigerant Circuit
31
Switch and Sender in Refrigerant Circuit and Related Connections
33
Electrical Components Not Installed in Refrigerant Circuit
36
Pressures and Temperatures in the Refrigerant Circuit
38
Refrigerant Circuit with Expansion Valve
38
Refrigerant Circuit with Restrictor and Reservoir
40
Test and Measurement Work that Can be Performed Using a Pressure Gauge
42
Air Conditioner Service and Recycling Equipment
43
Notes to Repairs on Refrigerant Circuit
44
3 Statutory Texts and Instructions
45
Statutes and Regulations
45
Recycling and Refuse Law
50
Converting R12 Refrigerant Circuits to R134A Refrigerant Circuits and Repairing Them (Retrofitting)
51
Maintaining Records on Refrigerant
51
4 Refrigerant Circuit
52
Important Repair Notes on Air Conditioning
52
Retrofitting Refrigerant Circuit from R12 Refrigerant to R134A Refrigerant
52
5 Working with the Air Conditioner Service Station
53
Important Notes for Working with the Air Conditioner Service Station
54
Connecting Air Conditioner Service Station for Measuring and Checking
54
Draining Refrigerant Circuit Using Air Conditioner Service Station
55
Evacuating Refrigerant Circuit Using Air Conditioner Service Station
56
Charging Refrigerant Circuit Using Air Conditioner Service Station
57
Bringing Air Conditioning System into Service after Charging
58
Charging Container in Air Conditioner Service Station with Refrigerant
59
Draining Air Conditioner Service Station
59
6 Detecting Leaks in Refrigerant Circuit
61
Leak Detection in Refrigerant Circuit Using Compressed Air or Nitrogen
62
Searching for Leaks in Refrigerant Circuits Using Leak Detector V.A.G 1796
64
Detecting Leaks in Refrigerant Circuit Using Leak Detecting System VAS 6196 or Leak Detecting
65
System VAS 6201 or a Later Model
65
7 Clearing Refrigerant Circuit of Contaminants
71
Blowing through Refrigerant Circuit with Compressed Air and Nitrogen
71
Purging (Cleaning) Refrigerant Circuit with Refrigerant R134A
73
Volkswagen 2004 Golf Service Training (60 pages)
Electrical system Design and function Self-study programme 319
Brand:
Volkswagen
| Category:
Automobile Electronics
| Size: 2.97 MB
Table of Contents
Table of Contents
3
Introduction
4
LIN Data Bus
16
Onboard Power Supply
18
Tyre Pressure Monitor
40
Convenience and Safety Electronics
42
Service
54
Test Yourself
56
Advertisement
Related Products
Volkswagen 2004 Jetta
VOLKSWAGEN 2005 Golf Plus
Volkswagen 2001 Passat
Volkswagen 2013 Tiguan
Volkswagen 2014 Passat
Volkswagen 2013 GTI
Volkswagen 2014 Jetta Hybrid
Volkswagen 2013 Tiguan SE
Volkswagen 2013 Tiguan SEL
Volkswagen 2013 Golf 2.5L
Volkswagen Categories
Automobile
Automobile Accessories
Adapter
Cables and connectors
Car Receiver
More Volkswagen Manuals
Login
Sign In
OR
Sign in with Facebook
Sign in with Google
Upload manual
Upload from disk
Upload from URL