Sign In
Upload
Manuals
Brands
Toshiba Manuals
All in One Printer
e-STUDIO203L
Toshiba e-STUDIO203L Manuals
Manuals and User Guides for Toshiba e-STUDIO203L. We have
7
Toshiba e-STUDIO203L manuals available for free PDF download: Service Handbook, Printing Manual, Service Manual, Scanning Manual, User Manual, Operator's Manual
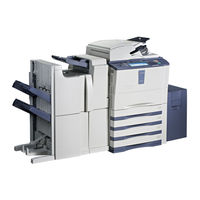
Toshiba e-STUDIO203L Service Handbook (762 pages)
Brand:
Toshiba
| Category:
All in One Printer
| Size: 23.52 MB
Table of Contents
Table of Contents
7
10 Wire Harness Connection Diagrams
11
1 Specifications / Accessories / Options / Supplies
13
Accessories
18
Options
19
E-STUDIO202L/203L/232/232S/233/282/282S/283/283S
20
Supplies
22
System List
23
E-STUDIO202L/203L/232/232S/233/282/282S/283/283S
29
2 Error Code and Self-Diagnostic Mode
37
Service Call
43
Error in Internet FAX / Scanning Function
46
Printer Function Error
56
Self-Diagnosis Modes
59
Input Check (Test Mode 03) (E-STUDIO200L/230/230L/280)
61
Input Check (Test Mode 03) (E-STUDIO202L/203L/232/233/282/283)
68
Output Check (Test Mode 03)
76
Test Print Mode (Test Mode 04)
79
Adjustment Mode (05) (E-STUDIO200L/230/230L/280)
80
Adjustment Mode (05) (E-STUDIO202L/203L/232/233/282/283)
100
Setting Mode (08) (E-STUDIO200L/230/230L/280)
120
Setting Mode (08) (E-STUDIO202L/203L/232/233/282/283)
189
Pixel Counter
300
Classification List of Adjustment Mode (05) / Setting
310
Adjustment
321
Image Dimensional Adjustment
323
Paper Alignment at the Registration Roller
325
Printer Related Adjustment
327
Scanner Related Adjustment
332
Image Quality Adjustment (Copying Function)
341
Gamma Slope Adjustment
342
Sharpness Adjustment
343
Setting Range Correction
344
Adjustment of Smudged/Faint Text
345
Adjustment of Image Density
346
Image Quality Adjustment (Printing Function)
347
Adjustment of Image Density
348
Gamma Balance Adjustment < E-STUDIO 202L/203L/232/233/282/283 >
349
Image Quality Adjustment (Scanning Function)
350
Sharpness Adjustment
351
Setting Range Correction
352
Setting Range Correction (Adjustment of Background Peak)
353
Adjustment of High-Voltage Transformer
354
Precautions
360
Adjustment of the Scanner Section
362
Lens Unit
367
Adjustment of the Paper Feeding System
370
Adjustment of Developer Unit
371
Adjustment of the RADF (MR-3016)
374
Adjustment of RADF Height
378
Adjustment of Skew
380
Automatic Adjustment of Sensors and Initialization of EEPROM
382
Adjustment of Aligning
383
Adjustment of Aligning at Reversing
384
Adjustment of Reverse Solenoid
385
Adjustment of RADF Opening/Closing Switch
387
Adjustment of RADF Opening/Closing Sensor
388
Adjustment of Tray Volume
389
Adjustment of the RADF (MR-3020)
390
Adjustment of RADF Height
395
Adjustment of Skew
397
Adjustment of the Leading Edge Position
400
Adjustment of Horizontal Position
401
Adjustment of Copy Ratio
403
Adjustment of RADF Opening/Closing Sensor
404
Adjustment of the Finisher (MJ-1022)
405
Adjusting the Angle of the Jogging Plate
407
Adjusting the Overlap of the Sensor Flag
408
Adjusting the Tension of the Stack Processing Motor Belt
409
Releasing the Stack Tray Guide Lever Fixing Plate
411
Adjustment of the Upper Tray Angle
412
DIP Switch Functions
414
Adjustment of the Finisher (MJ-1025)
416
Adjusting the Sensor Output (Electrical System (Puncher Unit; Option))
417
Registering the Number of Punch Hole (Electrical System (Puncher Unit; Option))
418
After Replacing the EEP-ROM (IC1002) (Electrical System (Puncher Unit; Option))
419
Key Copy Counter (MU-8, MU-10)
420
Adjustment of Dogleg
422
4 Preventive Maintenance (Pm)
425
Work Flow of Parts Replacement
430
General Descriptions for PM Procedure
431
Operational Items in Overhauling
432
Preventive Maintenance Checklist
433
Jig List
450
Grease List
451
Precautions for Storing and Handling Supplies
452
Checking and Cleaning of Photoconductive Drum
453
Checking and Cleaning of Drum Cleaning Blade
454
5 Troubleshooting
455
Paper Misfeeding
469
Cover Open Jam
476
Transport Jam (RADF)
482
Finisher Jam
489
Drive System Related Service Call
501
Paper Feeding System Related Service Call
502
Scanning System Related Service Call
508
Fuser Unit Related Service Call
510
Communication Related Service Call
512
RADF Related Service Call (MR-3016)
513
RADF Related Service Call (MR-3020)
514
Finisher Related Service Call
515
Service Call for Others
530
Error in Internet FAX / Scanning Function
535
Troubleshooting for the Image
550
Replacement of PC Boards and HDD
572
Replacing SYS Board
575
Caution When Data Overwrite Kit (GP-1050/1060) Is Installed
577
Replacing or Clearing NVRAM
580
6 Firmware Updating
581
Firmware Updating with Download Jig (E-STUDIO200L/230/230L/280)
583
Pwa-Dwnld-350-Jig2 (48 Mb)
585
Pwa-Dwnld-350-Jig1 (16 Mb)
592
Writing the Data to the Download Jig (PWA-DWNLD-350-JIG)
601
K-Pwa-Dlm-320
602
Firmware Updating with Download Jig (E-STUDIO202L/203L/232/233/282/283)
612
Pwa-Dwnld-350-Jig2 (48 Mb)
614
OS Update/Ui Data Update
617
OS Update
617
Sysfirm Update
617
UI Data Update
617
Engine MAIN Update
623
Scanner Firm Update
623
OS UI Update
625
Engine MAIN Update
626
Scanner Firm Update
627
Writing the Data to the Download Jig (PWA-DWNLD-350-JIG)
628
K-Pwa-Dlm-320
630
Firmware Updating with FSMS (Field Service Manager) (E-STUDIO200L/230/230L/280)
640
Firmware Updating with USB Storage Device (E-STUDIO200L/230/230L/280)
652
Firmware Updating with USB Storage Device (E-STUDIO202L/203L/232/233/282/283)
666
OS Update/Hd Data Update
675
HD Data Update
675
OS Update
675
Sysfirm Update
675
UI Data Update
675
Engine MAIN Update
682
Scanner Firm Update
683
Appendix
689
E-STUDIO202L/203L/232/233/282/283
690
7 Power Supply Unit
691
Fuse
693
Configuration of Power Supply Unit
694
8 Remote Service
695
Setting Item
696
Setting Procedure
699
Order Sheet Format
706
Service Notification
708
Items to be Notified (E-STUDIO200L/230/230L/280)
713
Setting (E-STUDIO202L/203L/232/233/282/283)
718
Items to be Notified (E-STUDIO202L/203L/232/233/282/283)
724
AC Wire Harness
755
Advertisement
Toshiba e-STUDIO203L Service Handbook (758 pages)
Brand:
Toshiba
| Category:
All in One Printer
| Size: 19.46 MB
Table of Contents
Table of Contents
7
10 Wire Harness Connection Diagrams
11
1 Specifications / Accessories / Options / Supplies
13
Accessories
18
Options
19
E-STUDIO202L/203L/232/232S/233/282/282S/283/283S
20
Supplies
22
System List
23
E-STUDIO202L/203L/232/232S/233/282/282S/283/283S
29
2 Error Code and Self-Diagnostic Mode
37
Service Call
43
Error in Internet FAX / Scanning Function
46
Printer Function Error
56
Self-Diagnosis Modes
59
Input Check (Test Mode 03) (E-STUDIO200L/230/280)
61
Input Check (Test Mode 03) (E-STUDIO202L/203L/232/233/282/283)
68
Output Check (Test Mode 03)
76
Test Print Mode (Test Mode 04)
79
Adjustment Mode (05) (E-STUDIO200L/230/280)
80
Adjustment Mode (05) (E-STUDIO202L/203L/232/233/282/283)
100
Setting Mode (08) (E-STUDIO200L/230/280)
120
Setting Mode (08) (E-STUDIO202L/203L/232/233/282/283)
189
Pixel Counter
298
Classification List of Adjustment Mode (05) / Setting
308
Adjustment
319
Image Dimensional Adjustment
321
Paper Alignment at the Registration Roller
323
Printer Related Adjustment
325
Scanner Related Adjustment
330
Image Quality Adjustment (Copying Function)
339
Gamma Slope Adjustment
340
Sharpness Adjustment
341
Setting Range Correction
342
Adjustment of Smudged/Faint Text
343
Adjustment of Image Density
344
Image Quality Adjustment (Printing Function)
345
Adjustment of Image Density
346
Image Quality Adjustment (Scanning Function)
347
Sharpness Adjustment
348
Setting Range Correction
349
Setting Range Correction (Adjustment of Background Peak)
350
Adjustment of High-Voltage Transformer
351
Precautions
357
Adjustment of the Scanner Section
359
Lens Unit
364
Adjustment of the Paper Feeding System
367
Adjustment of Developer Unit
368
Adjustment of the RADF (MR-3016)
371
Adjustment of RADF Height
375
Adjustment of Skew
377
Automatic Adjustment of Sensors and Initialization of EEPROM
379
Adjustment of Aligning
380
Adjustment of Aligning at Reversing
381
Adjustment of Reverse Solenoid
382
Adjustment of RADF Opening/Closing Switch
384
Adjustment of RADF Opening/Closing Sensor
385
Adjustment of Tray Volume
386
Adjustment of the RADF (MR-3020)
387
Adjustment of RADF Height
392
Adjustment of Skew
394
Adjustment of the Leading Edge Position
397
Adjustment of Horizontal Position
398
Adjustment of Copy Ratio
400
Adjustment of RADF Opening/Closing Sensor
401
Adjustment of the Finisher (MJ-1022)
402
Adjusting the Angle of the Jogging Plate
404
Adjusting the Overlap of the Sensor Flag
405
Adjusting the Tension of the Stack Processing Motor Belt
406
Releasing the Stack Tray Guide Lever Fixing Plate
408
Adjustment of the Upper Tray Angle
409
DIP Switch Functions
411
Adjustment of the Finisher (MJ-1025)
413
Adjusting the Sensor Output (Electrical System (Puncher Unit; Option))
414
Registering the Number of Punch Hole Electrical System (Puncher Unit; Option))
415
After Replacing the EEP-ROM IC1002) (Electrical System (Puncher Unit; Option))
416
Key Copy Counter (MU-8, MU-10)
417
Adjustment of Dogleg
419
4 Preventive Maintenance (Pm)
423
Work Flow of Parts Replacement
428
General Descriptions for PM Procedure
429
Operational Items in Overhauling
430
Preventive Maintenance Checklist
431
Jig List
448
Grease List
449
Precautions for Storing and Handling Supplies
450
Checking and Cleaning of Photoconductive Drum
451
Checking and Cleaning of Drum Cleaning Blade
452
5 Troubleshooting
453
Paper Misfeeding
467
Cover Open Jam
474
Transport Jam (RADF)
480
Finisher Jam
487
Drive System Related Service Call
499
Paper Feeding System Related Service Call
500
Scanning System Related Service Call
506
Fuser Unit Related Service Call
508
Communication Related Service Call
510
RADF Related Service Call (MR-3016)
511
RADF Related Service Call (MR-3020)
512
Finisher Related Service Call
513
Service Call for Others
528
Error in Internet FAX / Scanning Function
531
Troubleshooting for the Image
546
Replacement of PC Boards and HDD
568
Replacing SYS Board
571
Caution When Data Overwrite Kit (GP-1050/1060) Is Installed
573
Replacing or Clearing NVRAM
576
6 Firmware Updating
577
Firmware Updating with Download Jig (E-STUDIO200L/230/280)
579
Pwa-Dwnld-350-Jig2 (48 Mb)
581
Pwa-Dwnld-350-Jig1 (16 Mb)
588
Writing the Data to the Download Jig (PWA-DWNLD-350-JIG)
597
K-Pwa-Dlm-320
598
Firmware Updating with Download Jig (E-STUDIO202L/203L/232/233/282/283)
608
Pwa-Dwnld-350-Jig2 (48 Mb)
610
Status Display During Update/Scanner Firm Update
613
Engine MAIN Update
613
OS Update
613
Scanner Firm Update
613
Status Display During Update
613
Sysfirm Update
613
UI Data Update
613
Engine MAIN Update
619
Scanner Firm Update
619
Writing the Data to the Download Jig (PWA-DWNLD-350-JIG)
624
K-Pwa-Dlm-320
626
Firmware Updating with FSMS (Field Service Manager) (E-STUDIO200L/230/280)
636
Firmware Updating with USB Storage Device (E-STUDIO200L/230/280)
648
Firmware Updating with Usb Storage Device
662
OS Update/Hd Data Update
671
HD Data Update
671
OS Update
671
Sysfirm Update
671
UI Data Update
671
Engine MAIN Update
678
Scanner Firm Update
679
HDD SYS Update
681
OS UI Update
681
Engine MAIN Update
683
Scanner Firm Update
683
Appendix
685
E-STUDIO202L/203L/232/233/282/283
686
7 Power Supply Unit
687
Fuse
689
Configuration of Power Supply Unit
690
8 Remote Service
691
Setting Item
692
Setting Procedure
695
Order Sheet Format
702
Service Notification
704
Items to be Notified (E-STUDIO200L/230/280)
709
Setting (E-STUDIO202L/203L/232/233/282/283)
714
Items to be Notified (E-STUDIO202L/203L/232/233/282/283)
720
AC Wire Harness
751
Toshiba e-STUDIO203L Service Manual (354 pages)
MULTIFUNCTIONAL DIGITAL SYSTEMS
Brand:
Toshiba
| Category:
All in One Printer
| Size: 17.5 MB
Table of Contents
Service Manual
1
Table of Contents
7
1 Specifications / Accessories / Options / Supplies
11
Specifications
11
Accessories
16
Options
17
E-STUDIO200L/230/230L/280/280S
17
E-STUDIO202L/203L/232/232S/233/282/282S/283/283S
18
Supplies
20
E-STUDIO200L/230/230L/280/280S
20
E-STUDIO202L/232/232S/282/282S
20
E-STUDIO203L/233/283/283S
20
System List
21
E-STUDIO200L/230/230L/280/280S
21
E-STUDIO202L/203L/232/232S/233/282/282S/283/283S
27
2 Outline of the Machine
35
Sectional View
35
Electric Parts Layout
38
Front Side
39
Symbols and Functions of Various Components
51
General Description
60
System Block Diagram
60
Construction of Boards
62
Installation and Replacement of Covers and PC Boards
64
Covers
64
PC Boards
75
Installation and Replacement of Options
85
3 Copy Process
105
General Description of Copying Process
105
Details of Copying Process
106
Comparison with E-STUDIO350/450
117
4 General Operation
119
Overview of Operation
119
Description of Operation
120
Warming-Up
120
Ready State (Ready for Copying)
120
Drawer Feed Copying (Upper Drawer Paper Feeding)
121
Bypass Feed Copying
123
Interruption Copying
123
Detection of Abnormality
124
Types of Abnormality
124
Description of Abnormality
125
Flow Chart
130
Immediately after the Power Is Turned on
130
Automatic Paper Feed Copying
132
5 Control Panel
135
Control Panel and Display Panel
135
Items Shown on the Control Panel
136
Display
137
Relation between the Equipment State and Operator's Operation
142
Description of Operation
146
Dot Matrix LCD Circuit
146
LED Display Circuit
149
Disassembly and Replacement
150
6 Scanner
155
Function
155
Construction
156
Description of Operation
158
Scan Motor
158
Scanning Drive Circuit
159
Initialization at Power-ON
161
Control of Exposure Lamp
162
General Description
162
Exposure Lamp
163
Control Circuit for the Exposure Lamp
164
General Description of CCD Control
165
Opto-Electronic Conversion
165
Shading Correction
165
Automatic Original Size Detection Circuit
166
Principle of Original Size Detection
166
Process of Detection of Original Size
167
Disassembly and Replacement
171
7 Image Processing
185
General Description
185
Configuration
187
SLG Board
188
Features
188
Functions of Image Processing Circuit
188
LGC Board
192
Features
192
Functions of Image Processing Circuit
192
Laser Driving PC Board
193
8 Laser Optical Unit
195
General Description
195
Structure
197
Laser Diode
200
Polygonal Motor
201
Internal Cooling Fan-2
202
Disassembly and Replacement
203
9 Paper Feeding System
207
Functions
207
Operation
211
Operation of Bypass Pickup Roller
211
Operation of Drawer Pickup Roller
212
Separation of Paper
213
Operation of Clutch
214
General Operation
215
Drive Circuit of Tray-Up Motor
217
Disassembly and Replacement
219
10 Drive System
243
General Description
243
Functions
244
Main Motor
245
Main Motor Drive
245
Control Signals
246
Disassembly and Replacement
247
11 Drum Related Section
251
Configuration
251
Functions
252
High-Voltage Transformer Output Control Circuit
254
General Description
254
Description of Operation
255
Drum Temperature Detection Circuit
256
General Description
256
Construction
256
Temperature/Humidity Detection Circuit
257
General Description
257
Construction
257
Disassembly and Replacement
258
12 Development System
271
Configuration
271
Functions
272
General Description
272
Recovered Toner Supply Mechanism
273
Drive Circuit of Toner Motor
274
Auto-Toner Circuit
276
General Description
276
Function of Auto-Toner Sensor
277
Disassembly and Replacement
279
13 Fuser Unit
291
General Description
291
Operation
292
Functions
293
Heater Control Circuit
295
Configuration
295
Temperature Detection Section
296
Disassembly and Replacement
301
14 Paper Exit Section
309
General Description
309
Functions
310
Control Circuit of Exit Motor
311
Exit Motor Drive
312
Disassembly and Replacement
313
15 Automatic Duplexing Unit (Adu) (Option: MD-0102)
317
General Description
317
Description of Operations
318
Drive of ADU
323
Flow Chart
324
Disassembly and Replacement
326
16 Power Supply Unit
335
Construction
335
Operation of DC Output Circuits
336
Output Channel
337
Fuse
339
Configuration of Power Supply Unit
340
Sequence of Power Supply
341
AC Wire Harness
342
17 Pc Boards
343
2004 - 2008 TOSHIBA TEC CORPORATION All Rights Reserved E-STUDIO200L/202L/203L/230/232/233/280/282/283
343
Advertisement
Toshiba e-STUDIO203L Printing Manual (356 pages)
MULTIFUNCTIONAL DIGITAL SYSTEMS
Brand:
Toshiba
| Category:
Digital systems
| Size: 15.45 MB
Table of Contents
Software License Agreement
3
Trademarks and Copyright
5
Preface
6
Table of Contents
11
Overview
15
Features and Functions
16
About the Client CD-ROM
17
For Windows
17
For Macintosh
19
For UNIX
19
About Client Software for Windows
22
About the Installation
22
Planning for Installation
22
Installation for USB Printing by Plug and Play
29
Installing Client Software for USB Printing
29
Installation for Raw TCP/LPR Printing Using the Installer
39
Installing Client Software for Raw TCP/LPR Printing
39
Installation for Raw TCP/LPR Printing by Add Printer Wizard
52
Installing Client Software for SMB Printing
66
Installation for SMB Printing Using the Installer
67
Installation for SMB Printing by Point and Print
73
Installation for SMB Printing by Add Printer Wizard
77
Installation for IPP Printing by Add Printer Wizard
95
Installing Client Software for IPP Printing
95
Installing Client Software for Novell Printing
109
Installation for Novell Printing Using the Installer
110
Installation for Novell Printing by Point and Print
115
Installing Client Software for Web Services Print
122
Installing Client Software for Novell Iprint
127
Installing Client Software from Topaccess
128
Uninstalling Client Utilities Software
130
Chapter 3 Installing Client Software for Macintosh
134
About the Installation
134
About Client Software for Macintosh
134
Planning for Installation
134
Installing the Printer on Mac os X 10.2.4 to Mac os X 10.4.X
135
Installing the Macintosh PPD File
135
Configuring the Printer on Mac os X 10.4.X
139
Configuring the Printer on Mac os X 10.2.4 to Mac os X 10.3.X
151
Installing the Macintosh PPD File
162
Configuring the Printer on Mac os 8.6/9.X
162
Installing the Printer on Mac os 8.6/9.X
163
Installing Client Software from Topaccess
169
Chapter 4 Installing Client Software for UNIX
172
Setting up the UNIX Filters
172
About UNIX Filters
172
System Requirements
173
Configuring UNIX Printing Using UNIX Filters
173
Setting up the CUPS
182
About CUPS
182
Configuring UNIX Printing Using CUPS
182
Installing Client Software from Topaccess
198
Chapter 5 Printing from Windows
202
Before Using the Printer Driver
202
Configuring the Options
202
Setting the Department Code
206
Copying the PPD File for Windows
208
Printing from Application
209
Considerations and Limitations
209
How to Print
210
Setting up Print Options
212
How to Setup
212
Print Options
216
Printing with Extended Print Functionality
244
Printing Various Print Job Types
244
Printing with Various Layout and Finishing Options
251
Chapter 6 Printing from Macintosh
268
Printing from Application on Mac os X 10.2.4 to Mac os X 10.4.X
268
Considerations and Limitations
268
How to Print from Mac os X 10.2.4 to Mac os X 10.4.X
268
Page Setup Dialog on Mac os X 10.2.4 to Mac os X 10.4.X
269
Print Dialog on Mac os X 10.3.X to Mac os X 10.4.X
271
Print Dialog on Mac os X 10.2.X
285
Printing from Application on Mac os 8.6 to 9.X
299
How to Print from Mac os 8.6 or 9.X
299
Page Setup Dialog on Mac os 8.6/9.X
300
Print Dialog on Mac os 8.6/9.X
302
Chapter 7 Printing from UNIX
316
Printing from an Application
316
Considerations and Limitations
316
Printing Using LP Command
316
Generic "Lp" and "Lptap" Options
317
General Options
317
Pcl5E Specific Options
328
Other Printing Methods
333
FTP Printing
334
Email Printing
336
When Printing Cannot be Performed
338
Printer Driver Errors
339
Printer Driver Installation Error Messages
339
Printer Driver General Errors
340
Chapter 10 Appendix
344
Managing Fonts with Font Manager
344
Installing Font Manager
344
Searching Fonts
344
Installing Fonts in Windows
345
Uninstalling Fonts in Windows
345
Removing Fonts from the Computer
345
Displaying Font Preview
346
Creating a Font Group
346
Sorting Fonts in the List
347
Internal Fonts List
348
Internal PCL Fonts List
348
Internal PS Fonts List
349
Toshiba e-STUDIO203L Scanning Manual (148 pages)
Brand:
Toshiba
| Category:
All in One Printer
| Size: 3.61 MB
Table of Contents
Software License Agreement
3
Limitation of Liability
4
Trademarks and Copyright
5
Preface
6
About this Guide
6
Conventions
6
Lineup of Our Manuals
6
To Read Manuals in PDF (Portable Document Format) Files
8
Precautions in this Manual
9
Table of Contents
11
Chapter 1 Overview
16
About Scan Features
16
About Scan Mode
16
Scan to E-Filing Mode
16
Scan to File Mode
17
Scan to E-Mail Mode
18
Web Service Scan Mode
18
About Expansion Memories (Only for E-Studio281C/351C/451C)
19
About Scan Speed (Only for E-Studio281C/351C/451C)
20
How to Perform Scan Operations
21
Confirming the Scan Job Status
27
Confirming the Scan Log
28
Chapter 2 Scan to E-Filing
30
How to Perform Scan to E-Filing
30
How to Use Scanned Data Stored in E-Filing
39
Using Scanned Data in E-Filing from Touch Panel Display
39
Using Scanned Data in E-Filing from E-Filing Web Utility
39
Chapter 3 Scan to File
42
How to Perform Scan to File
42
How to Use Scanned Data Stored as Files
52
When Scanned Data Is Stored in MFP LOCAL
52
When Scanned Data Is Stored in REMOTE 1 or 2
52
Chapter 4 Scan to E-Mail
53
How to Perform Scan to E-Mail
54
Specifying Destinations
62
Chapter 5 Using Template
75
Scanning Using Template
76
Registering Scan Template
83
Chapter 6 Copy & File
91
How to Perform Copy & File
92
Chapter 7 Internet Fax
100
About Internet Fax
100
Precaution for Internet Transmission
100
Internet Fax Transmission Overview
101
How to Perform Internet Fax
102
Specifying Destinations
105
Advanced Function
116
Sending 2-Sided Originals
116
Priority Transmission
117
Receiving Internet Fax
118
Chapter 8 Remote Scan
122
Installing Remote Scan Driver
122
Planning for Installation
122
Installing the Remote Scan Driver
123
Installing from Client Utilities CD-ROM
123
Installing from Topaccess
126
Uninstalling Remote Scan Driver
128
Repairing Remote Scan Driver
129
Scanning Remotely Using Remote Scan Driver
130
How to Scan
130
When You Are Running the First Time
131
Configuring Discovery Settings
133
How to Use Remote Scan Driver
134
Adding a New Device Using Network Discovery
137
Changing the Target Device
137
Remote Scan Driver Errors
138
Remote Scan Driver Error Conditions
138
Cannot Find the Device
138
Cannot Connect to the Device Found by Discovery
138
Cannot Acquire Document
139
Chapter 9 Web Service SCAN
142
Preparing "Web Service Scan
142
Planning and Preparation
142
Installing a Driver
142
How to Perform Web Service Scan Operations
143
Index
145
Toshiba e-STUDIO203L User Manual (52 pages)
Print Solution
Brand:
Toshiba
| Category:
Printer Accessories
| Size: 3.51 MB
Table of Contents
Software License Agreement
3
Limitation of Liability
4
Trademarks and Copyright
5
Disclaimer Notice
6
Preface
7
About this Guide
7
Conventions
7
Table of Contents
9
1 AXIS Network Print Server
11
Overview
12
Components
12
Finishing Options and Logical Printers
13
Installation
14
Installation Procedure
14
Configuration
17
Available AXIS Firmware Version
17
Update Procedure
17
Copier Model
19
Only PCL Available
20
Available Finisher Options
21
Hole Punch
24
Paper Source
26
General Settings
28
IPDS Emulator
29
Custom Copier Driver
31
Problem Solving
32
Problems and Recommended Solutions
32
Customer Service
32
2 Workstation Customization Object for TOSHIBA E-STUDIO
33
Overview
34
Components
34
Finishing Options and Logical Printers
34
Installation
35
Installation Procedure
35
Uninstallation
40
Uninstallation Procedure
40
Operation
44
Operational Procedure
44
Print File Script
45
Appendix
47
Stapling Specifications
47
Printing Character Size - Reference Values
48
Glossary
49
Definitions of Terms
49
Toshiba e-STUDIO203L Operator's Manual (20 pages)
MULTIFUNCTIONAL DIGITAL SYSTEMS
Brand:
Toshiba
| Category:
All in One Printer
| Size: 0.71 MB
Table of Contents
Preface
3
Table of Contents
5
Chapter 1 OVERVIEW
7
System Requirements
8
Windows os
8
Macintosh os
8
Summary of Functions Newly Added
9
Printing Functions
9
Chapter 2 PRINTING FUNCTIONS
12
Setting up Print Options
12
[Others] Tab
12
Print Job Type
14
Storing to E-Filing
14
Index
17
Share and save
Advertisement
Related Products
Toshiba e-STUDIO203
Toshiba e-STUDIO203S
Toshiba e-STUDIO203SD
Toshiba e-STUDIO200
Toshiba e-studio 2006
Toshiba e-studio2007
Toshiba E-STUDIO2008A
Toshiba e-STUDIO2018A
Toshiba e-STUDIO2008A2508A
Toshiba e-STUDIO200L
Toshiba Categories
Laptop
Air Conditioner
TV
LCD TV
All in One Printer
More Toshiba Manuals
Login
Sign In
OR
Sign in with Facebook
Sign in with Google
Upload manual
Upload from disk
Upload from URL