Sign In
Upload
Manuals
Brands
Dentsply Sirona Manuals
Dental equipment
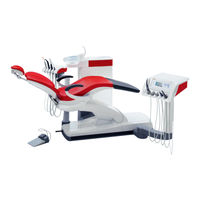
Sinius CS
Dentsply Sirona Sinius CS Manuals
Manuals and User Guides for Dentsply Sirona Sinius CS. We have
3
Dentsply Sirona Sinius CS manuals available for free PDF download: Operating Instructions Manual, Service Manual, Installation Instructions Manual
Dentsply Sirona Sinius CS Operating Instructions Manual (300 pages)
Brand:
Dentsply Sirona
| Category:
Dental equipment
| Size: 26 MB
Table of Contents
Table of Contents
2
1 General Information
11
Dear Customer
11
Contact Information
11
Notes on These Operating Instructions
12
General Information on the Operating Instructions
12
Scope of These Operating Instructions
12
Other Valid Documents
13
Warranty and Liability
13
Intended Use
13
Formats and Symbols Used
14
2 Safety Instructions
15
Identification of the Danger Levels
15
Information on the Unit
15
On-Site Installation
16
Installation of the Treatment Center
16
Media Quality
16
Connection to the Public Drinking Water System
17
Maintenance and Repair
17
Trouble-Free Operation
18
Vacuum System
18
Patient Chair
18
Intermittent Operation
18
Ventilation Slots
19
Touchscreen
19
Care, Cleaning, and Disinfecting Agents
19
Care and Cleaning Instructions for the Practice Team
19
Modifications and Extensions of the System
19
Electromagnetic Compatibility
20
Electrostatic Discharge
20
Dismantling/Installation
22
3 Unit Description
23
Standards/Approvals
23
Technical Data
25
System Overview
28
Patient Chair
31
Headrest
32
Motor-Driven Headrest
32
Double-Jointed Head Support
33
Foot Control
34
Dentist Element
35
Instrument Positions
40
Easytouch User Interface
41
Touchscreen
42
Fixed Keys on the Dentist Element
43
Assistant Element
45
Instrument Positions
46
User Interface
47
Fixed Keys on the Assistant Element
47
Water Unit
48
External Device Connection
50
Operation
52
Starting up the Treatment Center
52
Initial Startup
52
Switching the Treatment Center On/Off
52
Power Switch
52
Main Switch
53
Selecting a User Profile
54
Control Concept of Touchscreen
55
Virtual Function Keys
55
Start Program Operating Modes
56
Sub-Screens and Settings Screens
59
Status Bar
60
Foot Control
61
Wireless Foot Control
61
Battery Voltage Message
61
Setting the Wireless Foot Control on the Treatment Center
61
Operating the Foot Control
62
Using the Cursor Control
64
Functionality
64
Operating the Cursor Control
65
Patient Chair
67
Safety Instructions
67
Safety Stop
68
Triggering an Immediate Movement Stop
69
Armrests
70
Vario Footrest
70
Adjusting the Motor-Driven Headrest
71
Moving the Headrest In/Out
71
Inclining the Headrest
72
Adjusting the Double Articulating Headrest
73
Moving the Patient Chair to the Entry/Exit Position
74
Moving the Patient Chair Via Chair Programs
74
Moving the Patient Chair to the Mouth Rinsing Position
75
Using the Last Position Memory Function
75
Activating Other Chair Programs
76
Moving the Chair Manually
77
Open Manual Chair Setting Screen
77
Adjusting the Chair Height
78
Tilting the Patient Couch
78
Creating Chair and Shock Positioning Programs
79
Setting the Active Lumbar Support
80
Dentist Element
81
Maximum Load Capacity
81
Height Adjustment
82
Positioning the Dentist Element
82
Fixed Keys on the Dentist Element
85
Main Switch
85
Program Change Keys
85
Timer Function
86
Composite Function
87
Operating Light
87
Shock Positioning
87
Tumbler Filling
87
Flushing of the Cuspidor Bowl
88
Clean
89
Freely Selectable Function
89
Setup
89
Quick Setting Keys and Function Levels
90
Saving Instrument Settings
92
Placing the Instruments in Their Holders
94
General Instrument Functions
96
Opening the Sub-Screen
96
Selecting a Coolant
96
Switching the Preselected Coolant On/Off
96
Setting the Apexlocator
97
Setting the Foot Control as a Direct Starter or Speed Foot Control
97
Switch Instrument Light On/Off
97
Setting the Spray Amount
98
Preparing for Use of Nacl Saline Solution
100
Setting the Nacl Flow Rate
102
Apexlocator
103
Preparing to Use the Apexlocator
104
Distance Display
106
Beeps
109
Performing Manual Measurements with the File Clamp
110
Electric Motor
111
Motor and Coupling Versions
111
Setting the Speed
113
Setting the Direction of Rotation
115
Implantology/Endodontics Treatments with Motor
117
Highspeed Handpiece
120
Setting the Light of the Highspeed Handpiece
120
Using the Highspeed Handpiece
120
Sprayvit M Multifunctional Syringe
122
Safety Instructions
122
Instrument Light On/Off and Water Temperature Adjustment
123
Using the Sprayvit M Multifunctional Syringe
123
Sirosonic TL Scaler
125
Safety Instructions
125
Setting the Intensity
125
Implantology and Endodontic Treatment
129
Treatment Selection
129
Implantology
132
Endodontics
138
Assistant Element
149
Maximum Load Capacity
149
Positioning
149
Fixed Keys on the Assistant Element
149
Chair Programs S and 0
150
Flushing of the Cuspidor Bowl
150
Operating Light
150
Tumbler Filling
150
Hash Key
151
Suction Handpieces
152
Sprayvit M Multifunctional Syringe
154
Mini LED Curing Light
155
Safety Instructions
155
Symbols on the Mini LED
155
Connecting the Mini L.E.D
156
Functional Description
156
Operating the Mini LED
157
Technical Data
158
Water Unit
159
Swiveling the Cuspidor Bowl
159
Tumbler Filling with Automatic Sensor Control
159
Adjusting the Water Amount for Flushing
160
Self-Sufficient Water Supply
161
Tray
164
Tray on the Support Arm (for Sinius)
164
Tray on the Sinius CS Dentist Element
165
Tray on the Sinius TS Dentist Element
166
Cup Holder
167
Panoramic X-Ray Image Viewer
168
Switching On/Off the X-Ray Viewer or White Screen on the Sivision Monitor
168
Attaching the Anti-Glare Film
169
Operating Light
170
Setting the Brightness, Color Temperature, and Sensor Control
170
Switching the Operating Light On/Off
170
Activating Operating Light on the Assistant Element
171
Switching the Dentist Element Composite Function On/Off
171
X-Ray Tube Unit
172
Sivision Digital Video System
173
Sivision Monitor
174
Functional Description
175
Safety Instructions
175
Sirocam AF / AF+ Intraoral Camera
175
Connecting the Sirocam AF / AF+ Intraoral Camera
176
Operating the Sirocam AF / AF+ Intraoral Camera
177
Technical Camera Data
182
Operation with a PC
183
Sivision Program
184
Starting PC Communication
184
Communication with Microsoft Powerpoint
185
Communication with the Media Player
185
Communication with Sidexis
186
Communication with Video Plugin
188
USB Port
189
Configuration of the Treatment Center (Setup)
190
Opening the Setup Programs
190
Configuring the Easytouch User Interface
191
Adjusting the Touchscreen Brightness
191
Calibrating the Touchscreen
191
Switching the Key Sound On/Off
191
Setting the Date and Time
192
Configuring Control Options
193
Preselecting the Number of User Profiles
193
Select the Operating Mode of the Start Program
193
Setting the Cursor Control
193
Linking the Spray Aspirator to the 4-Way Foot Switch
194
Switching On/Off the Foot Control Function for Intraoral Camera Focus
194
Key for Showing/Hiding White Screen on the Sivision Monitor
195
Linking the Headrest Tilt to the 4-Way Foot Switch
195
Setting the Bell/Hash Fixed Key as a Pushbutton or as a Switch
195
Setting the Hash Key Function on the Assistant Element
195
Adjust Cleaning Agent Mixture for Chemical Suction Hose Cleaning
196
Switching the Central Supply for Chemical Suction Hose Cleaning off and on
196
Adjusting the Temperature of the Tumbler Heater
197
Linking the Tumbler Heater to the Chair Program
197
Configure Instruments
198
Preselecting How Instrument Settings Are to be Saved
198
Switching Afterblow On/Off
198
Setting the Spray Temperature
199
Showing/Hiding the Key for the External HF Surgical Unit
199
Configuring the Network Connection
200
Opening the Service Function
200
Care, Cleaning and Maintenance by the Practice Team
201
Basics
201
Intervals
201
Care, Cleaning, and Disinfecting Agents
203
Microbiological Water Test
203
General Handling Instructions
204
Inspection, Maintenance and Testing
205
Surfaces
206
Clean/Disinfect Surfaces
206
Disinfect the Easytouch
207
Disinfecting Handles
208
Disinfecting the Tray
210
Disinfecting the Cup Holder
211
Care For, Clean, and Disinfect Upholstery
212
Cleaning the Bottom Surface of the Mount for the Backrest Component
212
Thermally Disinfecting the Instrument Holder of the Dentist Element and Sterilizing the Silicone Mat
213
Clean the Foot Switch
215
Thermally Disinfecting the Instrument Holder of the Assistant Element and Sterilizing the Silicone Mat
215
Instruments and Instrument Hoses
216
Purge Water Paths (Purge Function)
216
Rinse Water Paths
216
Automatically Purge Water Paths (Autopurge Function)
219
Care For, Disinfect and Sterilize the Treatment Instruments
225
Clean and Disinfect/Sterilize the Components of the Apexlocator
225
Treatment Instruments
225
Disinfecting/Sterilizing Mini L.E.D. Curing Light
226
Check the Flow Rate on the Sprayvit M Multifunctional Syringe
227
Cleaning/Disinfecting the Sirocam AF / AF+ Intraoral Camera
227
Changing the Cotton Wool Roll on the High-Speed Handpiece Hose and Oil Collector
228
Vacuum System
230
Cleaning the Suction Hoses
230
Cleaning Vacuum System Using Cleaning Adapter in the Cuspidor or Via External Container
232
Cleaning Vacuum System Using Cleaning Adapter in the Cuspidor
232
Cleaning the Suction System Via External Container
233
Sterilize and Disinfect the Suction Handpieces
234
Cleaning and Disinfecting the Suction Hoses
235
Thermodisinfecting Suction Hoses
236
Components of the Water Unit
237
Clean the Gold Trap
237
Clean/Disinfect the Cuspidor
238
Cleaning the Outlet Lines of the Cuspidor
239
Refill Disinfectant for the Water Paths
240
Change the Water and Air Filters
241
Changing the Amalgam Rotor
242
Check the Message System of the Amalgam Separator
245
Emptying the Sediment Container
246
Cleaning the Filter Insert of the Standard Wet Suction
248
Sanitation
250
Interactively Guided Sanitation of the Treatment Center
250
Display Sanitation Report
256
Sanitizing the Treatment Center Manually
257
Biofilm Removal by the Service Technician
261
Foot Control and Connection Box
262
Changing the Battery of the Wireless Foot Control
262
Changing the Fuse of the External Device Connection
264
6 Maintenance by the Service Engineer
265
Inspection and Maintenance
265
Safety Checks
265
Maintenance Manual
266
7 Malfunctions
267
Error Messages
267
Remote Diagnosis
269
8 Spare Parts and Consumables
270
9 Disposal
272
10 Overview of All Function Keys
273
Index
292
Advertisement
Dentsply Sirona Sinius CS Installation Instructions Manual (152 pages)
Brand:
Dentsply Sirona
| Category:
Dental equipment
| Size: 28 MB
Table of Contents
Table of Contents
2
Structure of the Document
6
Identification of the Danger Levels
6
Formats and Symbols Used
6
General Safety Information
7
Qualification of Service Personnel
7
Power Connection
7
Modifications and Extensions of the System
7
Electrostatic Discharge
7
Chair Reference Travel
7
Preparations
8
Required Tools
8
SINIUS/SINIUS CS Scope of Delivery
9
SINIUS TS Scope of Delivery
10
Media Supply
11
Media Quality
11
Checking the Supply Lines
13
Cleaning Compressed Air and Water Paths
14
Installation
15
Preparing the Chair for Installation
15
Fastening of the Base of the Chair to the Floor
17
Stability
17
Direct Floor Fastening
18
Floor Fastening with Adapter Plate
20
Floor Fastening with Demo Plate
24
Installing the Water Unit
27
Removing the Covers of the Water Unit
27
Lifting the Water Unit off of the Transport Pallet
28
Fastening the Water Unit to the Floor
28
Removing the Transport Safety Devices
30
Connecting the Drain Hose
31
Connecting Media (Air and Water)
31
Making Electrical Connections
33
Connecting the Suction Hose
36
Moving the Patient Chair Upwards
37
Installing the Assistant Element
37
Mounting the Assistant Element
37
Connecting the Assistant Element
39
Adjusting the Brakes
39
Installing the SINIUS Dentist Element
41
Mounting the Dentist Element
41
Further Connections (HSA Board)
42
Adjusting the Dentist Element
42
Height Adjustment
42
Adjusting the Brakes
44
Installing the SINIUS CS Dentist Element
45
Installing the Dentist Element (Standard Position)
45
Adjusting the Brakes
46
Connecting the Dentist Element
47
Installing the Dentist Element (Special Position)
48
Mounting the Swivel Arm
50
Installing the SINIUS TS Dentist Element
50
Mounting the Dentist Element
50
Adjusting the Brakes
51
Connecting the Dentist Element
53
For Motorized Headrests Only: Installing the Backrest
54
Mounting the Backrest
54
Making Electrical/Pneumatic Connections
55
Double-Jointed Head Support Only: Installing the Backrest
58
Mounting the Backrest
58
Installing Ledview PLUS Operating Lights
59
Installing the Support Tube
59
Standard Installation
59
Installation with Monitor Adapter
61
Attaching the Lighting Support Arm to the Support Column
64
Mounting Lamp on Lamp Support Arm
66
Connecting the Connection Cable
68
Adjusting the Brakes
70
Adjusting the Pneumatic Spring on the Support Arm
71
Attaching Panels
72
Installing the Ledview Operating Light
74
Installing the Support Tube
74
Standard Installation
74
Installation with Monitor Adapter
76
Attaching the Lighting Support Arm to the Support Column
78
Connecting the Connection Cable
80
Adjusting the Brakes
81
Adjusting the Pneumatic Spring on the Support Arm
82
Attaching Panels
83
Installing the Tray
84
Standard Installation (Without Monitor)
84
Tray with Monitor Adapter
86
SINIUS CS: Mounting the Tray on the Dentist Element
91
SINIUS TS: Mounting the Tray on the Dentist Element
92
Connecting the PC
96
Connecting the Mini PC
96
Connecting the External PC
97
Installing the Monitor
99
Installation on the Monitor Adapter
99
Installation on the Tray Support Arm
104
Connecting the Monitor
109
Installing HELIODENT Plus on the Support Tube for the Operating Light
111
Scope of Delivery
111
Install the Support Column (if You Have Not Done It Already)
111
Mounting the Heliodent Plus Wall Adapter
113
Laying the L7 Radiator Cable from the Wall Adapter to the Dental
114
Treatment Center
115
Connecting the Power Cable to the Wall Adapter
115
Installing the Distribution Box
117
Installing the Support Arm
118
Installing the Scissor Arm
119
Routing Radiator Cable L1 in the Water Unit
121
Connecting the Radiator Cables L1 and L7
122
Final Tasks
124
Connecting the Instrument Hoses
125
SINIUS Dentist Element
125
SINIUS CS Dentist Element
125
SINIUS TS Dentist Element
126
Assistant Element
126
Plugging in Connector X1 of Cable L440
127
Commissioning, Demo Mode and Repacking
128
Starting up the Treatment Center
128
Checking and Adjusting the Operating Pressures of the Instruments
129
Factory Settings
129
Setting the Electric Motors
129
Setting the Driving Air Pressure (if Necessary)
130
Adjusting the Spray Air Pressure
132
Air/Water Factory Settings
132
Adjusting the Spring Force of the Flex Arm on the Dentist Element
134
Preparation
134
Setting the Spring Force on the CS Assistant Element
134
Setting the Spring Force on the TS Assistant Element
135
Set the Opening Time of the Cuspidor Bowl Valve
136
Setting the Wireless Foot Control on the Treatment Center
136
Finishing the Water Unit
137
Attaching the Covers of the Water Unit
137
Inserting the Tumbler Outlet
138
Inserting the Cuspidor Bowl
139
Safety Checks
139
Finishing the Chair
139
Attaching the Covers
139
Attaching the Armrest
140
Attaching the Backrest and Head Pads
142
Attaching the Seat Upholstery and Footrest
142
Configuring the Network
145
Starting the Network Configuration
145
Description of the Static and Dynamic Network Configuration
145
Setting up the Static Network Configuration
146
Setting up the Dynamic Network Configuration
147
Sanitation Procedure
147
Handing over the Technical Documents and Accessories to the Customer
148
Packing Position
149
Dentsply Sirona Sinius CS Service Manual (178 pages)
Brand:
Dentsply Sirona
| Category:
Dental equipment
| Size: 18 MB
Advertisement
Advertisement
Related Products
Dentsply Sirona SINIUS
Dentsply Sirona Sinius TS
Dentsply Sirona SiroLaser Blue
Dentsply Sirona SiroCam UAF Plus
Dentsply Sirona Sim Multi Bench
Dentsply Sirona SiroCam F
Dentsply Sirona SiroCam AF
Dentsply Sirona SureSmile VPro
Dentsply Sirona Schick AE
Dentsply Sirona SmartLite Pro
Dentsply Sirona Categories
Dental equipment
Medical Equipment
Barcode Reader
Furnace
Power Tool
More Dentsply Sirona Manuals
Login
Sign In
OR
Sign in with Facebook
Sign in with Google
Upload manual
Upload from disk
Upload from URL