Table of Contents
Advertisement
Quick Links
Advertisement
Table of Contents
Troubleshooting

Subscribe to Our Youtube Channel
Related Manuals for Jasic EVOLVE 200


Summary of Contents for Jasic EVOLVE 200
- Page 2 Please ensure that you carry out daily and periodic maintenance checks to ensure years of reliable and trouble free operation. Please call your Jasic distributor in the unlikely event of a problem occurring. Please record below the details from your product as these will be required for warranty purposes and to ensure you get the correct information should you require assistance or spare parts.
-
Page 3: Table Of Contents
MIG Torch Trigger Function (including remote control) Remote Control Mobile App Connectivity Maintenance & Troubleshooting WEEE Disposal and RoHS Compliance Declaration UKCA Declaration of Conformity EC Declaration of Conformity Statement of Warranty Schematic Synergic Program List Options and Accessories Notes Jasic Contact Details... - Page 4 SAFETY INSTRUCTIONS These general safety norms cover both arc welding machines and plasma cutting machines unless otherwise noted. The user is responsible for installing and operating the equipment in accordance with the enclosed instructions. It is important that users of this equipment protect themselves and others from harm, or even death. The equipment must only be used for the purpose it was designed for.
-
Page 5: Safety Instruction
SAFETY INSTRUCTION Use of Personal Protective Equipment (PPE) Welding arc rays from all welding and cutting processes can produce intense, visible and invisible (ultraviolet and infrared) rays that can burn eyes and skin. • Wear an approved welding helmet fitted with an appropriate shade of filter lens to protect your face and eyes when welding, cutting or watching. - Page 6 SAFETY INSTRUCTION Safety against fumes and welding gases The HSE have identified welders as being an ‘at risk’ group for occupational diseases arising from exposure to dusts, gases, vapours and welding fumes. The main identified health effects are pneumonia, asthma, chronic obstructive pulmonary disease (COPD), lung and kidney cancer, metal fume fever (MFF) and lung function changes.
- Page 7 SAFETY INSTRUCTION The working environment Ensure the machine is mounted in a safe and stable position allowing for cooling air circulation. Do not operate equipment in an environment outside the laid down operating parameters. The welding power source is not suitable for use in rain or snow. Always store the machine in a clean, dry space.
- Page 8 SAFETY INSTRUCTIONS Fire awareness The cutting and welding process can cause serious risks of fire or explosion. Cutting or welding sealed containers, tanks, drums or pipes can cause explosions. Sparks from the welding or cutting process can cause fires and burns. Check and risk assess the area is safe before doing any cutting or welding.
- Page 9 For more detailed information please refer to the HSE website www.hse.gov.uk EVOLVE 200 PACKAGE CONTENTS AND UNPACKING Supplied within your new Jasic Evolve 200 product package will be the following items with each model. Use care when unpacking the contents and ensure all items are present and not damaged.
-
Page 10: Product Overview
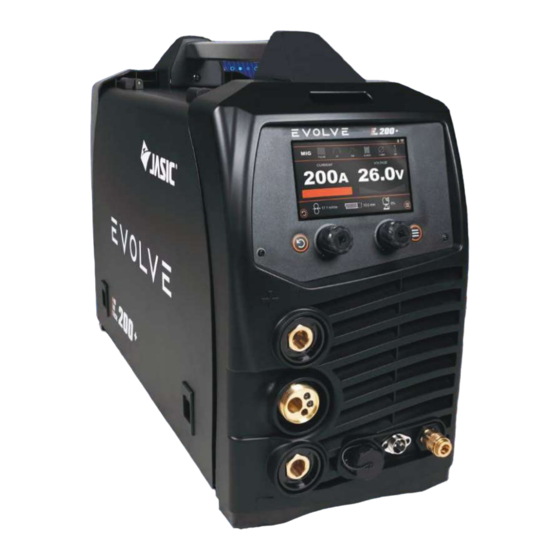
EVOLVE 200 PRODUCT OVERVIEW This digital Evolve 200 inverter welding machine feature advanced technology that provides excellent welding performance along with user experience. The Evolve offers a stable arc that is ideal for MIG, DC TIG and MMA which can weld carbon steel, low alloy steel, stainless steel and other materials. -
Page 11: Technical Specifications
EVOLVE 200 TECHNICAL SPECIFICATIONS Parameter Unit Jasic Evolve 200 (N2D2) Rated input (U1) AC Volts 230v +/- 15% Rated input Frequency 50/60 MMA 15.5 Rated input current (Ieff) MIG 15.8 TIG 11.9 MMA 31 Rated input current (Imax) MIG 31.5 TIG 23.7... -
Page 12: Description Of Controls
DESCRIPTION OF CONTROLS - JASIC EVOLVE 200 Front view Jasic Evolve 200+ 1. 5” Digital touch screen (see page 14 For further information) 2. Back ‘control’ button 3. Left control dial and switch 4. Right control dial and switch 5. Menu control button 6. - Page 13 DESCRIPTION OF CONTROLS - JASIC EVOLVE 200 Side view Jasic Evolve 200+ 18. Carry Handle. 19. 5Kg (200mm dia) reel of wire. 20. Wire spool holder and tensioner: Allows a 5Kg (200mm dia) reel of wire to be located in place via an alignment pin and then locked in place with the locking nut.
- Page 14 DESCRIPTION OF CONTROL PANEL - JASIC EVOLVE 200 Front control panel Jasic Evolve 200 The digital users control screen is a 5” touch screen which can easily be used to navigate the various welding process menus and parameters to select and adjust said values.
-
Page 15: Installation
Lifting The Jasic Evolve 200 has an integrated handle for easy hand lifting only. Always ensure the machine is lifted and transported safely and securely. Location The machine should be located in a suitable position and environment. - Page 16 Wired hand-held remote-control connection As standard the Evolve 200 machines are fitted with a 12 pin remote control socket (1). This allows for a matching 12 pin plug (2) of a hand held remote control (example shown right) or a foot pedal to be connected directly to the machine to offer the user remote operation control.
- Page 17 MACHINE POWER UP - MACHINE CONTROL SETTING Boot Up Sequence Upon switching the machine ON, the control panel has a boot up time of about 20 seconds, following the boot time the display shown will be the previous welding mode setup the last time the machine was used. During boot up, the cooling fan is activated for a short period of time in order to load up the power supply of the inverter and allow the initial self-test.
-
Page 18: Machine Control Settings
MACHINE CONTROL SETTING Wi-Fi Connectivity The Jasic Evolve 200 can be connected to your Wi-Fi network which offers additional features. Features include, software/firmware upgrades, remote controlling welding functions of the machine via the JTE Cloud mobile phone app. Connecting the Wi-Fi is done via the Wi-Fi settings tab and by either rotating and pressing the left hand control dial or pressing the relevant Wi-Fi tab feature via the torch screen. - Page 19 DESCRIPTION OF ‘LCD’ CONTROL PANEL Display screen The display screen offers the operator a wealth of information including operation modes, a vast array of MIG, TIG DC and MMA parameters. The example screen is shown right and using the adjustment dials or touching the screen allows you to navigate through the machines options and the following pages will explain in greater details these features.
- Page 20 DESCRIPTION OF ‘LCD’ CONTROL PANEL Memory function Saving, recalling and resetting welding jobs The Evolve 200 is capable of storing 100 TIG and MIG welding Jobs in it’s memory and the jobs menu can be accessed from pressing the job menu icon as shown circled red in the image right in either MIG or TIG mode.
- Page 21 DESCRIPTION OF ‘LCD’ CONTROL PANEL Memory function: (continued) Load Job Select Load Job to open up the list of saved jobs. These jobs can be filtered by material, wire diameter, gas type or your inputted description. Simply select and confirm the desired job to load the settings. Reset Job to Original Values If you have changed settings of a job and wish to reset the settings back to the original saved values, simply select the Reset Job to original values option.
-
Page 22: Welding Modes
EVOLVE 200 MACHINE WELDING MODES Welding modes available The Jasic Evolve 200 welding modes are as follows: • MMA mode (DC Only) (Manual and Synergic function is also available) • TIG HF mode (DC Only) Standard Pulse ... -
Page 23: Mma Setup
MMA SETUP Output connections Electrode polarity is generally determined by the type of welding rod being used although in general when using manual arc welding electrodes the electrode holder is connected to the positive terminal and the work return to the negative terminal. Generally, there are two connection methods of DC welder: DCEN and DCEP connection. -
Page 24: Operating Mma
Caution, there is voltage output at both output terminals. Please Note: The Evolve 200 is equipped with smart fan technology. When the power supply is first turned on after a short period before welding starts, the fan will automatically start and then stop. - Page 25 The example above shows arc force percentage set & will offer up to 50% of the welding current shown. Hot Start Current Adjustment With the Evolve 200 the hot start value is related to arc force current. The more arc force you set the more hot start current you will experience when initialising the welding arc.
- Page 26 OPERATION - MMA Before starting any welding activity ensure that you have suitable eye protection and protective clothing as, welding rays, spatter, smoke and high temperatures produced in the process may cause injury to personnel. Also take the necessary steps to protect any persons within the welding area that may cause injury too. To access the below options, you can either rotate the left hand control dial and confirm by pressing the left control dial OR by pressing the touch screen and sliding your finger to select your choice.
- Page 27 OPERATION - MMA Before starting any welding activity ensure that you have suitable eye protection and protective clothing as, welding rays, spatter, smoke and high temperatures produced in the process may cause injury to personnel. Also take the necessary steps to protect any persons within the welding area that may cause injury too. To access the below options, you can either rotate the left hand control dial and confirm by pressing the left control dial OR by pressing the touch screen and sliding your finger to select your choice.
- Page 28 OPERATION - MMA Before starting any welding activity ensure that you have suitable eye protection and protective clothing as, welding rays, spatter, smoke and high temperatures produced in the process may cause injury to personnel. Also take the necessary steps to protect any persons within the welding area that may cause injury too. To access the below options, you can either rotate the left hand control dial and confirm by pressing the left control dial OR by pressing the touch screen and sliding your finger to select your choice.
- Page 29 Hot start current: With the Evolve 200 hot start value is related to arc force current. The more arc force you set the more hot start current you will get.
- Page 30 This is suitable for welding thin parts. The Evolve 200 units have preset anti-stick function by default. In the welding process, if a short circuit occurs on the welding output for 2 seconds, the machine will automatically enter anti-stick mode.
-
Page 31: Guide To Mma Welding
GUIDE TO MMA WELDING Before starting any welding activity ensure that you have suitable eye protection and protective clothing. Also take the necessary steps to protect any persons within the welding area. Notes for the welding beginner This section is designed to give the beginner who has not yet done any welding some information to get them going. - Page 32 GUIDE TO MMA WELDING Before starting any welding activity ensure that you have suitable eye protection and protective clothing. Also take the necessary steps to protect any persons within the welding area. MMA process tips and guides Typical welder set up 1.
- Page 33 GUIDE TO MMA WELDING Before starting any welding activity ensure that you have suitable eye protection and protective clothing. Also take the necessary steps to protect any persons within the welding area. MMA arc striking Tap Technique Lift the electrode upright and bring it down to strike the work piece. After forming a short circuit, quickly lift up about 2 to 4mm and arc will be ignited.
- Page 34 GUIDE TO MMA WELDING Before starting any welding activity ensure that you have suitable eye protection and protective clothing. Also take the necessary steps to protect any persons within the welding area. Fillet welding The electrode should be positioned to split the angle i.e. 45°. Again the electrode should be inclined in the direction of travel at around 10°...
-
Page 35: Mma Welding Troubleshooting
MMA WELDING TROUBLESHOOTING Before starting any welding activity ensure that you have suitable eye protection and protective clothing. Also take the necessary steps to protect any persons within the welding area. Arc welding defects and prevention methods Defect Possible cause Action Amperage too high for the Reduce amperage or utilise larger... -
Page 36: Tig Setup
The TIG welding process with the Evolve 200 is DC mode only for welding: • Mild steel, stainless steel, copper etc. -
Page 37: Operating Tig
The TIG welding process with the Evolve 200 is DC mode only: DC - Direct current for welding steel, stainless steel, copper etc. Connect the TIG torch work return cable /ground clamp, gas hose and turn the machine on as shown on the previous page. - Page 38 OPERATION TIG Before starting any welding activity ensure that you have suitable eye protection and protective clothing. Also take the necessary steps to protect any persons within the welding area. Display Area Top Bar - TIG Mode This multi icon bar shows the operator a quick view of TIG options and settings. The icons shown will change depending on TIG background settings.
- Page 39 See pages 44 - 46 for further details on trigger mode functionality. 9. Memory function: The Evolve 200 is capable of storing 100 TIG Jobs in it’s memory and the jobs menu can be accessed from pressing the job menu icon as shown left. If a Job is selected, the reference number of the Job is showing in the icon display.
- Page 40 OPERATION TIG Before starting any welding activity ensure that you have suitable eye protection and protective clothing. Also take the necessary steps to protect any persons within the welding area. Display Area Top Bar - TIG (Continued) This multi icon bar shows the operator a quick view of TIG options and settings. The icons shown will change depending on TIG background settings.
- Page 41 OPERATION TIG Before starting any welding activity ensure that you have suitable eye protection and protective clothing. Also take the necessary steps to protect any persons within the welding area. TIG - Advanced settings menu (continued) Please Note: The advanced options listed will depend on a number of factors, If for example you have TIG Pulse, TIG Mix or Spot mode selected you would see additional options listed than if you had TIG standard selected.
- Page 42 OPERATION TIG Before starting any welding activity ensure that you have suitable eye protection and protective clothing. Also take the necessary steps to protect any persons within the welding area. TIG - Advanced settings menu (continued) Please Note: The advanced options listed will depend on a number of factors, If for example you have TIG Pulse, TIG Mix or Spot mode selected you would see additional options listed than if you had TIG standard selected.
- Page 43 OPERATION TIG Before starting any welding activity ensure that you have suitable eye protection and protective clothing. Also take the necessary steps to protect any persons within the welding area. TIG welding parameter settings Please remember that the advanced options listed will depend on a number of factors, If for example you have TIG Pulse, TIG Mix or Spot mode selected you would see additional options listed than if you had TIG standard selected.
- Page 44 TIG TORCH TRIGGER FUNCTION Before starting any welding activity ensure that you have suitable eye protection and protective clothing. Also take the necessary steps to protect any persons within the welding area. TIG Torch Trigger Operation 2T mode (normal trigger control) The 2T icon located in the top bar will be highlighted when the power source is in 2T welding mode.
- Page 45 TIG TORCH TRIGGER FUNCTION Before starting any welding activity ensure that you have suitable eye protection and protective clothing. Also take the necessary steps to protect any persons within the welding area. TIG Torch Trigger Operation (continued) 4T (latch trigger control) The 4T icon located in the top bar will be highlighted when the power source is in 4T welding mode, this trigger mode is mainly used for long welding runs to assist in reducing operator finger fatigue.
- Page 46 TIG TORCH TRIGGER FUNCTION Before starting any welding activity ensure that you have suitable eye protection and protective clothing. Also take the necessary steps to protect any persons within the welding area. TIG Torch Trigger Operation (continued) 4T Glick mode, also called ‘cycle’ mode), is a function that is available and active in 4T mode only. Glick Mode, is available in the following modes: •...
- Page 47 EVOLVE 200 TIG DC - Quick Set-Up Guide For DC TIG welding, set up as below, ensure you place the machine in TIG, HF ON and 2T trigger mode. This multi icon bar shows the operator a quick view of TIG options and settings. The icons shown will change depending on TIG background settings.
- Page 48 EVOLVE 200 TIG PULSE DC - Quick Set-Up Guide For DC TIG Pulse welding, set up as below ensure you place the machine in TIG pulse, HF ON and 2T trigger mode. This multi icon bar shows the operator a quick view of TIG options and settings. The icons shown will change depending on TIG background settings.
- Page 49 EVOLVE 200 TIG MIX DC - Quick Set-Up Guide For DC TIG Mix welding, set up as below ensure you place the machine in TIG MIX, HF ON and 2T trigger mode. This multi icon bar shows the operator a quick view of TIG options and settings. The icons shown will change depending on TIG background settings.
-
Page 50: Guide To Tig Welding
GUIDE TO TIG WELDING Before starting any welding activity ensure that you have suitable eye protection and protective clothing. Also take the necessary steps to protect any persons within the welding area. TIG torch body and components The torch body holds the various welding consumables in place as shown and is covered by a either a rigid phenolic or rubberised covering. - Page 51 GUIDE TO TIG WELDING Before starting any welding activity ensure that you have suitable eye protection and protective clothing. Also take the necessary steps to protect any persons within the welding area. TIG welding electrodes TIG welding electrodes are a ‘non consumable’ as it is not melted into the weld pool and great care should be taken not to let the electrode contact the welding pool to avoid weld contamination.
- Page 52 The TIG process can use both non contact and contact methods to provide arc starting. Depending on the Jasic model, the options are indicated on a selector switch on the front control panel of the power source. The most common method of arc starting is ‘HF’ start. This term is often used for a variety of starting methods and covers many different types of start.
- Page 53 The Jasic Evolve 200 offers Lift TIG mode utilising the TIG torch switch operation mode which starts the process with the internal gas valve opening to start the gas flow first.
- Page 54 GUIDE TO DC TIG WELDING Before starting any welding activity ensure that you have suitable eye protection and protective clothing. Also take the necessary steps to protect any persons within the welding area. Manual DC TIG Welding Amperage Guide- Mild Steel and Stainless Steel Base Metal Base Metal Tungsten...
- Page 55 TIG TORCH SPARE PARTS LIST TIG Welding Torch Air Cooled - Model TIG-110 Rating 200A DC, 150A AC @ 60% Duty Cycle EN60974-7 • 0.5mm to 4.0mm Electrodes 2 PIN Torch plug Pt No - JG071008-1 PLEASE NOTE: Check the torch supplied with your package to ensure it matches the above TIG torch details.
-
Page 56: Tig Welding Troubleshooting
TIG WELDING TROUBLESHOOTING Before starting any welding activity ensure that you have suitable eye protection and protective clothing. Also take the necessary steps to protect any persons within the welding area. TIG welding defects and prevention methods Defect Possible cause Action Set up for DCEP. - Page 57 TIG WELDING TROUBLESHOOTING Before starting any welding activity ensure that you have suitable eye protection and protective clothing. Also take the necessary steps to protect any persons within the welding area. TIG welding defects and prevention methods Defect Possible cause Action Excessive bead build up, poor Increase the welding amperage.
- Page 58 TIG TORCH TROUBLESHOOTING TIG welding defects and prevention methods The TIG torch used for lift TIG welding comprises of several items which ensure current flow and arc shielding from the atmosphere. Regular maintenance of the welding torch is one of the most important measures to ensure its normal operation and extend lifespan.
-
Page 59: Operating Mig
OPERATION MIG Before starting any welding activity ensure that you have suitable eye protection and protective clothing. Also take the necessary steps to protect any persons within the welding area. MIG/MAG welding • Insert the welding torch (A) into the “Euro connector for torch in MIG” output socket on the front panel of the machine and tighten it into position. - Page 60 OPERATION MIG Before starting any welding activity ensure that you have suitable eye protection and protective clothing. Also take the necessary steps to protect any persons within the welding area. Display Area Top Bar - MIG Mode This multi icon bar shows the operator a quick view of MIG options and settings. The icons shown will change depending on MIG background settings.
- Page 61 MIG background settings. Pressing the icons will allow entry to chosen setting. 6. Memory function: The Evolve 200 is capable of storing 100 Jobs in it’s memory and the jobs menu can be accessed from pressing the job menu icon as shown left. If a Job No is selected, the reference number of the Job is showing in the icon display.
- Page 62 OPERATION MIG Before starting any welding activity ensure that you have suitable eye protection and protective clothing. Also take the necessary steps to protect any persons within the welding area. Display Area Top Bar - MIG Mode (continued) The icons shown will change depending on MIG background settings.
- Page 63 OPERATION MIG Before starting any welding activity ensure that you have suitable eye protection and protective clothing. Also take the necessary steps to protect any persons within the welding area. MIG - Advanced settings menu (continued) Please Note: The advanced options listed will depend on a number of factors, for example, if in either MIG synergic, pulse or double pulse mode with ‘spot’...
- Page 64 OPERATION MIG Before starting any welding activity ensure that you have suitable eye protection and protective clothing. Also take the necessary steps to protect any persons within the welding area. MIG - Advanced settings menu (continued) Please Note: The advanced options listed will depend on a number of factors, for example, if in either MIG synergic, pulse or double pulse mode with ‘spot’...
- Page 65 OPERATION MIG MANUAL Before starting any welding activity ensure that you have suitable eye protection and protective clothing. Also take the necessary steps to protect any persons within the welding area. MIG/MAG Standard Welding Mode MIG - Metal Inert Gas Welding, MAG - Metal Active Gas Welding, GMAW - Gas Metal Arc Welding MIG welding was developed to help meet production demands of the war and post war economy which is an arc welding process in which a continuous solid wire electrode is fed through a MIG welding...
- Page 66 OPERATION MIG MANUAL Before starting any welding activity ensure that you have suitable eye protection and protective clothing. Also take the necessary steps to protect any persons within the welding area. MIG/MAG standard welding mode Selecting MIG Welding mode: Press the MIG/MMA/TIG icon to select MIG welding mode.
- Page 67 OPERATION MIG MANUAL Before starting any welding activity ensure that you have suitable eye protection and protective clothing. Also take the necessary steps to protect any persons within the welding area. MIG/MAG standard welding mode (Continued) Wire Feed Speed Control The control dial and display area right that is highlighted red when rotated in standard MIG mode gives the operator the ability to control wire feed speed.
- Page 68 Synergic mode is where Welding Power (voltage) and Wire Feed Speed are adjusted together, (rather than separately), via a single control. The Evolve 200 has been pre-program with various welding parameters including; MIG welding wire size, the material type and shielding gas being used.
- Page 69 OPERATION - SYNERGIC MIG Before starting any welding activity ensure that you have suitable eye protection and protective clothing. Also take the necessary steps to protect any persons within the welding area. MIG/MAG Synergic Welding Mode: (Continued) Synergic Welding Control: When in synergic mode welding amperage (80A as shown right) control becomes the default adjustment setting as shown right, and the upper rotary encoder and push button which when pressed will scroll the...
- Page 70 OPERATION - SYNERGIC MIG Before starting any welding activity ensure that you have suitable eye protection and protective clothing. Also take the necessary steps to protect any persons within the welding area. MIG/MAG Synergic Welding Mode: (Continued) Advanced Settings Menu Hot Start Mode: Press the hot start icon to select turning ON or Off the Hot Start feature.
- Page 71 OPERATION - SYNERGIC MIG Before starting any welding activity ensure that you have suitable eye protection and protective clothing. Also take the necessary steps to protect any persons within the welding area. MIG/MAG Synergic Welding Mode: Advanced Settings Menu (Continued) On entering the ‘extra’...
- Page 72 Press the Manual/Synergic/Pulse/Double Pulse icon to select Pulse. Upon selecting pulse mode, only the pulse corresponding icon will be shown as circled red right. The control panel image right is an example of the Evolve 200 now set up in Pulse MIG mode. Please Note:...
- Page 73 OPERATION - PULSE MIG Before starting any welding activity ensure that you have suitable eye protection and protective clothing. Also take the necessary steps to protect any persons within the welding area. MIG/MAG Pulse Welding Mode: (Continued) Pulse Welding Control: When in Pulse mode welding amperage (80A as shown right) control becomes the default adjustment setting (as shown right, and the upper rotary encoder and push button which when pressed will scroll the...
- Page 74 OPERATION - PULSE MIG Before starting any welding activity ensure that you have suitable eye protection and protective clothing. Also take the necessary steps to protect any persons within the welding area. MIG/MAG Pulse Welding Mode (Continued) Material, Wire Size and Gas Selection: In Pulse MIG mode, selecting material, wire size and shielding gas will have an effect on the welding characteristics as previously explained for Synergic welding mode.
- Page 75 OPERATION - PULSE MIG Before starting any welding activity ensure that you have suitable eye protection and protective clothing. Also take the necessary steps to protect any persons within the welding area. MIG/MAG Pulse Welding Mode (Continued) Advanced Settings Menu (Continued) Hot Start Mode: Pressing the hot start line will allow you to turn ON or Off the Hot Start.
- Page 76 OPERATION - PULSE MIG Before starting any welding activity ensure that you have suitable eye protection and protective clothing. Also take the necessary steps to protect any persons within the welding area. MIG/MAG Pulse Welding Mode: Advanced Settings Menu (Continued) On entering the ‘extra’...
- Page 77 Upon selecting synergic mode, only the double pulse corresponding icon will be shown as circled red right. The control panel image right is an example of the Evolve 200 now set up in double pulse MIG mode. Material, Wire Size and Gas Selection: In double pulse MIG mode, selecting material, wire size and shielding gas will have an effect on the welding characteristics, for example improves default ignition and burnback settings.
- Page 78 OPERATION - DOUBLE PULSE MIG Before starting any welding activity ensure that you have suitable eye protection and protective clothing. Also take the necessary steps to protect any persons within the welding area. MIG/MAG Double Pulse Welding Mode: (Continued) Double Pulse Welding Control: When in Double Pulse mode welding amperage (80A as shown right) control becomes the default adjustment setting (as shown right, and the upper rotary encoder and push button which when pressed will scroll...
- Page 79 OPERATION - DOUBLE PULSE MIG Before starting any welding activity ensure that you have suitable eye protection and protective clothing. Also take the necessary steps to protect any persons within the welding area. MIG/MAG Pulse Welding Mode: (Continued) Advanced Settings Menu Start Force Mode: Start force mode will offer an additional boost to initiating the welding arc in pulse and double pulse MIG mode only by increasing the welding...
- Page 80 OPERATION - DOUBLE PULSE MIG Before starting any welding activity ensure that you have suitable eye protection and protective clothing. Also take the necessary steps to protect any persons within the welding area. MIG/MAG Double Pulse Welding Mode: Advanced Settings Menu (Continued) On entering the ‘extra’...
- Page 81 OPERATION - DOUBLE PULSE MIG Before starting any welding activity ensure that you have suitable eye protection and protective clothing. Also take the necessary steps to protect any persons within the welding area. MIG/MAG Double Pulse Welding Mode: Advanced Settings Menu (Continued) Restore Settings: Resetting Double Pulse MIG parameters to factory settings.
- Page 82 SET-UP GUIDE STANDARD MIG/MAG Standard MIG welding, set up as below and select 2T/4T trigger mode dependant on user requirements. Material type and wire size selection will have no effect in standard MIG/MAG mode. This multi icon bar shows the operator a quick view of MIG options and settings. The icons shown will change depending on MIG background settings.
-
Page 83: Synergic Mig
SET-UP GUIDE SYNERGIC MIG/MAG For Synergic MIG welding, set up as below and select 2T/4T trigger mode dependant on user requirements. This multi icon bar shows the operator a quick view of MIG options and settings. The icons shown will change depending on MIG background settings. Pressing the icons will allow entry to chosen setting. -
Page 84: Pulse Mig
SET-UP GUIDE PULSE MIG/MAG For Pulse MIG welding, set up as below and select 2T/4T trigger mode dependant on user requirements. This multi icon bar shows the operator a quick view of MIG options and settings. The icons shown will change depending on MIG background settings. Pressing the icons will allow entry to chosen setting. -
Page 85: Double Pulse Mig
SET-UP GUIDE DOUBLE PULSE MIG/MAG For Double Pulse MIG welding, set up as below and select 2T/4T trigger mode dependant on user requirements. This multi icon bar shows the operator a quick view of MIG options and settings. The icons shown will change depending on MIG background settings. Pressing the icons will allow entry to chosen setting. - Page 86 OPERATION - MIG Torch trigger operation modes 2T MIG torch operation mode Press the torch trigger to initiate the welding arc, the arc is extinguished when you release the trigger. 焊枪开关 提前送气 Torch trigger Pre-flow 空载电压 No load voltage 防粘时间 送...
-
Page 87: Guide To Mig/Mag Welding
GUIDE TO MIG/MAG WELDING Before starting any welding activity ensure that you have suitable eye protection and protective clothing. Also take the necessary steps to protect any persons within the welding area. MIG process description The MIG process was first patented for the welding of aluminium in 1949 in the USA. The process uses the heat that is generated by an electric arc formed between a bare consumable wire electrode and the work piece. - Page 88 GUIDE TO MIG/MAG WELDING Before starting any welding activity ensure that you have suitable eye protection and protective clothing. Also take the necessary steps to protect any persons within the welding area. Notes for the welding beginner This section is designed to give the beginner who has not yet done any welding some information to get them going.
- Page 89 Please Note: Wire Speed Feed Welding Voltage The Evolve 200 machines top display defaults to wire feed speed, when welding starts a pop-up screen will then display ‘actual’ welding current and welding voltage. Voltage setting The voltage polarity in MIG/MAG welding is in the majority of cases with the positive (+). This means that the majority of the heat is in the electrode wire.
- Page 90 GUIDE TO MIG/MAG WELDING Before starting any welding activity ensure that you have suitable eye protection and protective clothing. Also take the necessary steps to protect any persons within the welding area. Modes of Transfer Dip or short circuit mode In the dip or short circuit, the wire (electrode) touches the work piece and a short circuit is created.
- Page 91 GUIDE TO MIG/MAG WELDING Before starting any welding activity ensure that you have suitable eye protection and protective clothing. Also take the necessary steps to protect any persons within the welding area. Modes of Transfer Spray Arc Mode The Spray arc mode is used with high voltage and current. Metal is projected in the form of a fine spray of molten droplets of the electrode, propelled across the arc to the work piece by an electromagnetic force without the wire touching the weld pool.
- Page 92 GUIDE TO MIG/MAG WELDING Before starting any welding activity ensure that you have suitable eye protection and protective clothing. Also take the necessary steps to protect any persons within the welding area. Welding Mode - Manual (Standard) Current or wire feed speed, workpiece thickness adjustment has no relation with voltage adjustment and other parameters.
- Page 93 GUIDE TO MIG/MAG WELDING Before starting any welding activity ensure that you have suitable eye protection and protective clothing. Also take the necessary steps to protect any persons within the welding area. Burn Back In the event that the welder was to stop welding and all functions of the machine stopped simultaneously then the consumable filler wire would in all likelihood freeze in the weld pool.
-
Page 94: Spool Gun Operation
Spool Gun Welding Mode The Jasic Evolve 200 machines can both be used with our optional spool gun which is a Euro style spool gun that connects to the Evolve 200 MIG machines via the Euro outlet connector. Connect the spool gun Euro plug to the (MIG) euro socket. Connect the spool gun 12 pin control plug to its matching 12 pin socket located on the front panel of the machine. - Page 95 MANUAL MIG WELDING GUIDE This information is intended to act as a starting point guide only for standard MIG mode.
- Page 96 EVOLVE 200 MIG SET-UP GUIDE Low carbon steel, stainless steel pulse MAG welding process reference Welding Material Wire Welding Welding Welding Nozzle and Gas-flow position thickness diameter current voltage speed workpiece rate (L/MIN) (MM) (MM) (CM/MIN) spacing (MM) 60-70 16-16.5...
- Page 97 EVOLVE 200 MIG SET-UP GUIDE Welding process of aluminum alloy pulse MIG welding process reference Welding Material Wire Welding Welding Welding Nozzle and Gas-flow position thickness diameter current voltage speed workpiece rate (L/MIN) (MM) (MM) (CM/MIN) spacing (MM) 60-80 16-18...
- Page 98 MIG WELDING PROBLEMS Before starting any welding activity ensure that you have suitable eye protection and protective clothing. Also take the necessary steps to protect any persons within the welding area. MIG welding defects and prevention methods Defect Possible cause Action Poor material Check the material is clean...
- Page 99 MIG WELDING PROBLEMS Before starting any welding activity ensure that you have suitable eye protection and protective clothing. Also take the necessary steps to protect any persons within the welding area. MIG welding defects and prevention methods Defect Possible cause Action Heat input too high Use lower amperage or smaller electrode...
- Page 100 MIG TORCH SPARE PARTS LIST MIG Welding Torch - Air Cooled 300A - Model: HC300-3E Hard Core HC300 Rating 300A Co2 / 220A Mixed Gases @ 60% Duty Cycle EN60974-7 Wire Size 0.6mm to 1.4mm PLEASE NOTE: Check torch supplied with your package to ensure it matches this page details.
- Page 101 REMOTE CONTROL SOCKET Before starting any welding activity please ensure that you have suitable eye protection and protective clothing. Always take the necessary steps to protect any persons within the welding area. Remote torch control The 2 pin remote control socket located on the front panel is used to connect a TIG torch trigger switch control plug.
-
Page 102: Remote Control Details
REMOTE CONTROL Before starting any welding activity please ensure that you have suitable eye protection and protective clothing. Always take the necessary steps to protect any persons within the welding area. Remote control application and function 1) Any type of TIG torch switch can be connected to the 2 pin remote socket. Trigger action can be chosen between 2T, 4T and Spot. - Page 103 OPERATION - DIGITAL MIG TORCH Digital MIG Torch Operation Option The Evolve 200 can be operated with the premium range of Starparts Hard Core MIG torches which offers the operator the ability to operate certain MIG functions from the MIG torch handle, this optional 4 button torch handle control module (shown right).
- Page 104 The App is available in the App store for IOS, and in the Play store for Android. Download and install the App mobile in your mobile, and follow the instructions. The connection from mobile to the Evolve 200 machine can be through your local Wi-Fi network or via you Bluetooth connection*.
- Page 105 Jasic Evolve products going forward to the app. Once the JTE cloud app is fully connected to your Evolve 200 machine, your mobile phone screen will show the current welding mode that the Evolve machine is presently in.
- Page 106 APP REMOTE CONTROL Before starting any welding activity please ensure that you have suitable eye protection and protective clothing. Always take the necessary steps to protect any persons within the welding area. App remote control (Continued) The JTE cloud app will not change between welding modes i.e. from MMA mode to TIG mode, this operation can only be carried out via the Evolve user screen.
- Page 107 MAINTENANCE The following operation requires sufficient professional knowledge on electric aspects and comprehensive safety knowledge. Make sure the input cable of the machine is disconnected from the electricity supply and wait for 5 minutes before removing the machine covers. In order to guarantee that the arc welding machine works efficiently and in safety, it must be maintained regularly.
- Page 108 The below is a list of error codes for the Jasic Evolve range of welding machines, so some error codes may not be applicable for certain models.
- Page 109 The below is a list of error codes for the Jasic Evolve range of welding machines, so some error codes may not be applicable for certain models.
- Page 110 The below is a list of error codes for the Jasic Evolve range of welding machines, so some error codes may not be applicable for certain models.
- Page 111 The below is a list of error codes for the Jasic Evolve range of welding machines, so some error codes may not be applicable for certain models.
- Page 112 The below is a list of error codes for the Jasic Evolve range of welding machines, so some error codes may not be applicable for certain models.
- Page 113 The below is a list of error codes for the Jasic Evolve range of welding machines, so some error codes may not be applicable for certain models.
- Page 114 Jasic has a relevant recycling system which is compliant and registered in the UK with the environment agency. Our registration reference is WEEMM3813AA.
-
Page 115: Ukca Declaration Of Conformity
EVOLVE 200 - UKCA DECLARATION OF CONFORMITY... -
Page 116: Ec Declaration Of Conformity
EVOLVE 200 - EC DECLARATION OF CONFORMITY... -
Page 117: Statement Of Warranty
3 month warranty. Jasic shall in no event be responsible for any third party expenses or expenses/costs or any indirect or consequential expenses/costs. -
Page 118: Schematic
EVOLVE 200 MACHINE SCHEMATIC... - Page 119 EVOLVE 200 SYNERGIC PROGRAM TABLE TIG Synergic program table Material Electrode (mm) 1.6, 2.4 CrNi Stainless Steel (308 - 316) 1.6, 2.4 MIG Synergic program table Weld Mode Weld Material Wire Diameter (mm) Weld Gas 80/20 92/8 Synergic SST (CrNi)
-
Page 120: Options And Accessories
JFC-EVOLVE Wired foot pedal remote current control JG07008-1 2 Pin control plug JM-12PP 12 pin control plug Drive rolls for the Evolve 200 (4 roll drive) *** 10055168 Feed Roller 0.6mm/0.8mm "V" Groove 10036428 Feed Roller 0.8mm/1.0mm "V" Groove 10039481 Feed Roller 1.0mm/1.2mm "V"... -
Page 121: Notes
NOTES _____________________________________ _____________________________________ _____________________________________ _____________________________________ _____________________________________ _____________________________________ _____________________________________ _____________________________________ _____________________________________ _____________________________________ _____________________________________ _____________________________________ _____________________________________ _____________________________________ _____________________________________ _____________________________________ _____________________________________ _____________________________________ _____________________________________ _____________________________________ _____________________________________... - Page 122 August 2024 Issue 1...
Need help?
Do you have a question about the EVOLVE 200 and is the answer not in the manual?
Questions and answers