Table of Contents
Advertisement
Quick Links
Advertisement
Table of Contents

Subscribe to Our Youtube Channel
Related Manuals for JDS Uniphase Wavetek DSAM Series


Summary of Contents for JDS Uniphase Wavetek DSAM Series
- Page 1 DSAM Product Family Wavetek™ Series Field Meter Quick-Start Guide...
- Page 3 DSAM Product Family Wavetek™ Series Field Meter Quick-Start Guide...
- Page 5 JDS Uniphase Corporation in the United States and/or other countries. Specifications, terms, and conditions are subject to change without notice. Ordering This guide is a product of JDS Uniphase Corporation's Technical Information Development Department. To order information additional copies, request document 6510-30-0384. EMC Directive...
- Page 6 DSAM Product Family Quick-Start Guide Rev. G...
-
Page 7: Table Of Contents
Table of Contents About This Guide Purpose and scope............viii Assumptions ..............viii Technical assistance............viii Conventions..............x Chapter 1 Saftey Instructions Important Safety Instructions ...........2 Meter Safety ..............2 Battery Safety ...............3 Battery Charger Module and Power Supply Module Safety................4 Chapter 2 DSAM Operation Product Overview ............8 Using this Quick-Start Guide.........8 Initial Set-Up ..............9... - Page 8 Table of Contents Making additional connections........12 Powering the Meter ............13 Selecting a power option ..........13 Charging the battery ...........13 Fast charge temperature range ........13 Interpreting the “Charge” LED ........14 Using the Keypad ............15 Using the mode keys ..........16 Using the display softkeys ..........17 Using Shift Key shortcuts..........18 Using the Help System ..........18 Accessing Help from a mode menu......18...
- Page 9 Table of Contents Cloning DSAM Meters ...........43 Replacing the Protective Lens ........44 Contrast Adjustment (Extreme Temperature Change) ..45 Appendix A Specifications DSAM-1500, -2500. -2600, -3500, 3600, 6000 Specifications..............48 Power Component Specifications........53 Appendix B Customer Services About our services............56 Customer care ...............56 Technical assistance (business hour) ......57 Instrument repair............57 Equipment return instructions ........57...
- Page 10 Table of Contents DSAM Product Family Quick-Start Guide Rev. G...
- Page 11 About This Guide – “Purpose and scope” on page viii – “Assumptions” on page viii – “Technical assistance” on page viii – “Conventions” on page ix DSAM Product Family Quick-Start Guide Rev. G...
-
Page 12: About This Guide
Technical assistance If you need assistance or have questions related to the use of this product, call or e-mail JDS Uniphase Corpora- tion’s Cable Technical Assistance Center for customer support. Table 1 Technical assistance centers... -
Page 13: Conventions
Africa, and (Europe) Mid-East +800 882 85822 support.uk@jdsu.com (European Freephone) +49 (0) 6172 59 11 00 hotline.germany@jdsu.com (JDS Uniphase Corpora- tion Germany) +33 (0) 1 39 30 24 24 hotline.germany@jdsu.com (JDS Uniphase Corpora- tion France) Asia and the +852 2892 0990... - Page 14 About This Guide Conventions Table 2 Typographical conventions Description Example User interface actions appear in On the Status bar, click Start. this typeface. Buttons or switches that you press Press the switch. on a unit appear in this YPEFACE Code and output messages appear All results okay in this typeface.
- Page 15 About This Guide Conventions Table 4 Symbol conventions This symbol represents a general hazard. This symbol represents a risk of electrical shock. NOTE This symbol represents a Note indicating related infor- mation or tip. Table 5 Safety definitions WARNING Indicates a potentially hazardous situation which, if not avoided, could result in death or serious injury.
- Page 16 About This Guide Conventions DSAM Product Family Quick-Start Guide Rev. G...
- Page 17 Saftey Instructions Chapter 1 This chapter describes DSAM Safety Instructions. The topics discussed in this chapter are as follows: – “Important Safety Instructions” on page 2 DSAM Product Family Quick-Start Guide Rev. G...
-
Page 18: Chapter 1 Saftey Instructions
DSAM meter: 1 Use the meter and its power components only as directed by the instructions in this guide or as directed by other resources provided by JDS Uniphase Corpo- ration. 2 When powering the meter, maintain the secure connection of each power component. -
Page 19: Battery Safety
Do not disassemble the meter. Do not attempt to service this product yourself. There are no user-serviceable parts inside. Contact the appropriate JDS Uniphase Corporation representative for meter repair or calibration. Battery Safety Follow these safety precautions to reduce the risk of fire,... - Page 20 Chapter 1 Saftey Instructions Important Safety Instructions – NiMH – Charging 0 to +40° C (+32° to +104° F) – Discharge -20° C to +50° C (-4° to +122° F) – Short term storage -20° C to +55° C (-4° to +131° F) (90 days or less) –...
-
Page 21: Safety
Power Supply 1 When powering the meter, maintain the secure Module Safety connection of each power component. 2 Use only JDS Uniphase Corporation-specified components to power and conduct measurements with this meter. 3 Do not damage the power cords. 4 Avoid using the meter or its power components during an electrical storm. - Page 22 Chapter 1 Saftey Instructions Important Safety Instructions DSAM Product Family Quick-Start Guide Rev. G...
- Page 23 DSAM Operation Chapter 2 This chapter describes the functionality of the DSAM. Topics discussed in this chapter are as follows: – “Product Overview” on page 8 – “Initial Set-Up” on page 9 – “Powering the Meter” on page 13 – “Using the Keypad”...
-
Page 24: Chapter 2 Dsam Operation Product Overview
The meter’s AutoTest capability makes installations easier and more reliable than ever before. JDS Uniphase Corporation has incorporated exclusive DSP, DOCSIS, and analog technology to enhance your DSAM’s usability and provide significant flexibility as addi- tional features become available. -
Page 25: Initial Set-Up
Chapter 2 DSAM Operation Initial Set-Up sources for additional technical assistance, the product warranty, equipment return instructions, and specifications for the meter and its power components. Initial Set-Up Typically your DSAM Wavetek™ Series Field Meter is shipped with the following accessories: –... -
Page 26: Connecting The Power Components
Chapter 2 DSAM Operation Initial Set-Up To remove the battery, hold the meter in the manner described above and press the release button located directly above the battery in the center of the back of the meter. When released, gently pull the battery out of the cavity in the back of the meter. - Page 27 Chapter 2 DSAM Operation Initial Set-Up Figure 1 DSAM Power Components Connect the power components in the manner shown in Figure 1 on page DSAM Product Family Quick-Start Guide Rev. G...
-
Page 28: Connecting The Rf Cable
Chapter 2 DSAM Operation Initial Set-Up Follow these three steps to connect the power compo- nents to the DSAM battery (the battery can be in or out of the meter): 1 Align the tabs of the charger module connector to the slots in the battery and gently insert the connector tabs into the battery slots. -
Page 29: Powering The Meter
Chapter 2 DSAM Operation Powering the Meter Powering the Meter IMPORTANT: Read all safety instructions in the front of this guide before attempting to power the meter or charge the bat- tery (see “Important Safety Instructions” on page Selecting a There are three ways to provide power to your DSAM. -
Page 30: Interpreting The "Charge" Led
Chapter 2 DSAM Operation Powering the Meter mode, the battery temperature should be approximately between 32 °F (0 °C) and 122 °F (50 °C). Fast charge mode automatically resumes when the battery tempera- ture returns within this range. Interpreting There are two LED indicator lights on your DSAM charger module -- the “Power”... -
Page 31: Using The Keypad
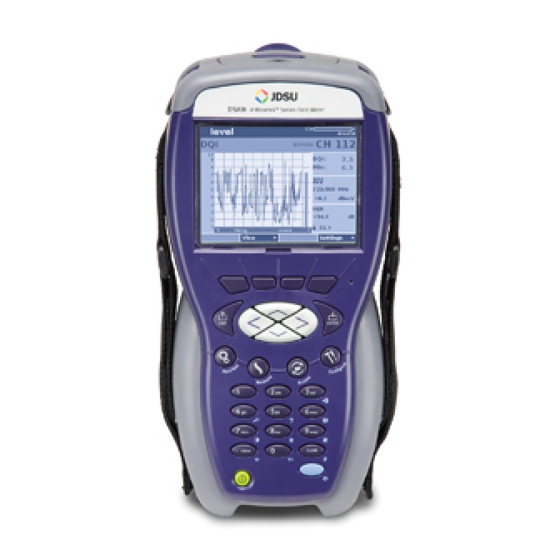
Chapter 2 DSAM Operation Using the Keypad For information about the charger module’s specifications, Table on page Using the Keypad Below the display screen on the front panel of your DSAM (Figure 2) is a keypad used to perform all functions of the meter. -
Page 32: Using The Mode Keys
Chapter 2 DSAM Operation Using the Keypad – four Display Softkeys (directly below the display screen) used to select screen-specific options or to select pop-up menus associated with each key – four directional Arrow Keys (located directly below the two center softkeys) used to navigate up, down, right, and left among the displayed menus and measurement features –... -
Page 33: Using The Display Softkeys
Chapter 2 DSAM Operation Using the Keypad Press the ACCESS mode key to display the Access mode menu (see Figure 23 on page 41). Press the CONFIGURE mode key to display the Configure mode menu (see Figure 9 on page 21). -
Page 34: Using Shift Key Shortcuts
Chapter 2 DSAM Operation Using the Help System Using Shift Use the Shift Key (Figure 2 on page 15) in conjunction with the alphanumeric keys or display softkeys for shortcut Key shortcuts access to specific features. Shortcut functions are indi- cated by symbols at the bottom-right of each shortcut key. -
Page 35: Accessing Help From A Submode
Chapter 2 DSAM Operation Using the Help System Figure 6 Help Menu for AutoTest Mode Accessing When you access the Help system from any screen within Help from a one of the submodes (such as Combo AutoTest, DOCSIS, or Synchronize), the DSAM displays a submode-level submode menu of specific Help topics (Figure... -
Page 36: Navigating Within Help
Chapter 2 DSAM Operation Configuring the Meter Navigating Use the Help screen softkeys (Figure 7) to move Forward to the highlighted menu selection or Back to the last- within Help viewed Help screen. The Exit softkey returns you to the beginning of the last active mode, and the Menu softkey displays the Help main menu (Figure... -
Page 37: Selecting A Configuration Mode
Chapter 2 DSAM Operation Configuring the Meter In addition to the Help texts linked to each topic in the four configuration modes, you may want to review the Help texts addressing configuration in the AutoTest and Measure modes for more complete information (Help texts such as, “Configuring Video Channels AutoTest”... -
Page 38: General Configuration
Chapter 2 DSAM Operation Configuring the Meter When you have displayed the mode menu you prefer, use the arrow keys to highlight the item you intend to configure and press ENTER. General To view the CONFIGURE GENERAL menu, press the General softkey when in Configure mode. -
Page 39: Measurement Configuration
Chapter 2 DSAM Operation Configuring the Meter Each edit box may be edited individually. To save time, you can edit fewer boxes by first editing the PRESET TO edit box (which automatically selects default settings for date format, signal level units, temperature units, and digital performance units based upon the locale you choose). -
Page 40: Channel Plan Configuration
Chapter 2 DSAM Operation Configuring the Meter Channel Plan A CATV system is comprised of channels representing the channel plan for that system. Each channel is identified by Configuration its carrier type, frequency, and other parameters. The parameters (characteristics) of individual channels can be edited within a plan to meet a variety of measurement objectives. -
Page 41: Access Configuration
Chapter 2 DSAM Operation Configuring the Meter Use the Help system on your DSAM to learn more about each configuration mode. Press SHIFT+? to find out what each option does, how it works, how to configure it, how to interpret the results, and more. Access To view the CONFIGURE ACCESS menu (Figure... -
Page 42: Using Measure Mode
Chapter 2 DSAM Operation Using Measure Mode Using Measure Mode Three measurement modes are indicated by softkey tabs at the bottom of the display screen -- Basic, Service, and Spectrum. Each measurement mode has a menu of measurement items specific to that mode. To access a Basic Mode menu, press the softkey directly below the mode you wish to view. - Page 43 Chapter 2 DSAM Operation Using Measure Mode Figure 13 Measure Mode Basic Menu Use Measure Basic Menu to select: – level - views and analyzes the signal level of each carrier within a channel (as defined by the active channel plan), –...
-
Page 44: Service Measurement Menu
Chapter 2 DSAM Operation Using Measure Mode Use the Help system on your DSAM to learn more about each measurement mode. Press SHIFT+? to find out what each option does, how it works, how to configure it, how to interpret the results, and more. Service To view the MEASURE SERVICE menu (Figure... -
Page 45: Spectrum Measurement Menu
Chapter 2 DSAM Operation Using Measure Mode – Ethernet - (optional purchase required) analyzes the internet protocol (IP) performance through the Ethernet, – CM Diagnostics page - (optional purchase required) displays a cable modem's internal web page, and – VoIP - (optional purchase required) provides the ability to measure voice quality of your VoIP networks and gateway, internet protocol (IP) phones and other end point devices. - Page 46 Chapter 2 DSAM Operation Using Measure Mode Figure 15 Measure Mode Spectrum Menu Use measure spectrum menu to select: – upstream spectrum - views and analyzes noise on the upstream path (return path), – downstream spectrum - (optional purchase required) view the entire CATV downstream spectrum frequency range (40 MHz to 1 GHz) in 50 Mhz (default) frequency spans with a dynamic range of 60...
-
Page 47: Performing Signal Level Measurements
Chapter 2 DSAM Operation Using Measure Mode Performing Level measurement mode views and analyzes the signal level of each carrier within a channel (as defined by the signal level active channel plan). measurements To access Level mode, use the arrow keys to highlight the Level option on the Measure mode menu (Figure 13 on page... -
Page 48: Performing Miniscan Measurements
Chapter 2 DSAM Operation Using Measure Mode Performing Miniscan Mode views and analyzes the carrier levels of up to twelve channels and displays the results on a single miniscan screen. measurements To access Miniscan Mode, use the arrow keys to highlight the Miniscan option on the Measure mode menu (Figure 13 on page 27), and press ENTER. -
Page 49: Performing Spectrum Measurements
Chapter 2 DSAM Operation Using Measure Mode The Help system offers additional instruction about these tasks. Performing Upstream Spectrum Mode views and analyzes ingress and distortion on the upstream (return) path. Initial spectrum measurements typically occur at the ground block with the measurements home disconnected from the network. -
Page 50: Performing Docsis Measurements
Chapter 2 DSAM Operation Using Measure Mode Use the up and down arrow keys to adjust the reference setting of the graph by one (1) dB per key press. Use the right and left arrow keys to move the vertical marker to the next or previous measurement data point. -
Page 51: Using Autotest Mode
Chapter 2 DSAM Operation Using AutoTest Mode Figure 19 DOCSIS Mode Screen To configure DOCSIS Mode: – confirm that you are testing the correct channel plan (plan label is in upper right corner), – confirm that you are testing the correct DOCSIS channel in that plan, –... - Page 52 Chapter 2 DSAM Operation Using AutoTest Mode – Combo AutoTest - a user-configured sequential combination of Video Channels AutoTest and Cable Modem AutoTest, – Video Channels AutoTest - user-configured level measurements of a series of analog and/or digital video channels, –...
-
Page 53: Using Combo Autotest
Chapter 2 DSAM Operation Using AutoTest Mode – the meter is receiving power, – the RF cable is connected to the meter (on the back panel), and – your DSAM has been configured to conduct AutoTest measurements (see “Configuring the Meter” on page 20). -
Page 54: Using Video Channels Autotest
Chapter 2 DSAM Operation Using AutoTest Mode – the parameters of your limit sets, and – your selection of a set of measurement limits (based on test location). The Help system offers additional instruction about these tasks. After a limit set has been selected, press the START softkey and Combo AutoTest measures the signal perfor- mance of all assigned channels in the Combo Test config- uration. -
Page 55: Using Techcomplete Closeout Test
Chapter 2 DSAM Operation Using AutoTest Mode The first Cable Modem AutoTest mode screen you see will look similar to the Combo AutoTest screen shown in Figure 21 on page Cable Modem AutoTests are configured in the same manner as Video Channels AutoTests. To perform this test, first select –... - Page 56 Chapter 2 DSAM Operation Using AutoTest Mode Figure 22 AutoTest Closeout Menu Each TechComplete Closeout test is based on three types of configuration: – your configuration of one Video Channels AutoTest, – one Cable Modem AutoTest, and – the parameters of your limit sets. After a limit set has been selected, press the START softkey and TechComplete Closeout test measures the signal performance of all assigned channels in the Combo...
-
Page 57: Using Access Mode
Chapter 2 DSAM Operation Using Access Mode Using Access Mode Use Access mode to efficiently manage your measure- ment files and folders. You can also use Access to synchronize your data with optional FDM utility software. The Help system offers additional instruction about these tasks. -
Page 58: Displaying The Access Browser Menu
– local browser - used to open a saved Browser page, – web access test - The Web Access Test connects to an JDS Uniphase Corporation test page on the internet to ensure internet connectivity. It accesses a single screen for view only. -
Page 59: Cloning Dsam Meters
Chapter 2 DSAM Operation Cloning DSAM Meters Use the Help system on your DSAM to learn more about each Access mode. Press SHIFT+? to find out what each option does, how it works, how to configure it, how to inter- pret the results, and more. -
Page 60: Replacing The Protective Lens
Chapter 2 DSAM Operation Replacing the Protective Lens Use an Ethernet crossover cable or a standard Ethernet cable with a crossover adapter to connect the DSAM meters. The Ethernet port is on the top of the meter. Replacing the Protective Lens Your DSAM is shipped with one protective lens covering the display screen and five additional protective lenses. -
Page 61: Contrast Adjustment (Extreme Temperature Change)
Chapter 2 DSAM Operation Contrast Adjustment (Extreme Temperature Change) Contrast Adjustment (Extreme Temperature Change) Your DSAM provides two modes of contrast adjustment (AUTO and MANUAL). The AUTO mode provides a limited contrast adjustment based upon the sensed temperature range. The MANUAL mode provides a full contrast adjustment across the entire operational temper- ature range (0 to +120 degrees Fahrenheit or -20 to +50 degrees Celsius). - Page 62 Chapter 2 DSAM Operation Contrast Adjustment (Extreme Temperature Change) DSAM Product Family Quick-Start Guide Rev. G...
-
Page 63: Appendix A Specifications
Specifications Appendix A This appendix describes the DSAM requirements. Topics discussed in this appendix are as follows: – “DSAM-1500, -2500. -2600, -3500, 3600, 6000 Speci- fications” on page 48 – “Power Component Specifications” on page 53 DSAM Product Family Quick-Start Guide Rev. G... -
Page 64: Dsam-1500, -2500. -2600, -3500, 3600, 6000 Specifications
Appendix A Specifications DSAM-1500, -2500. -2600, -3500, 3600, 6000 Specifications DSAM-1500, -2500. -2600, -3500, 3600, 6000 Specifications Table 2 Product Specifications Item Description Frequency Range 4 to 1,000 MHz Accuracy ±10 ppm at 25° C (77° F) Tuning Resolution Analog 10 KHz Digital 50 KHz Channel Bandwidth Models ending in A, 8 MHz... - Page 65 Appendix A Specifications DSAM-1500, -2500. -2600, -3500, 3600, 6000 Specifications Table 2 Product Specifications (Continued) Item Description Spans Models ending in A, 4 to 65 MHz Models ending in B, 4 to 45 MHz Sweep Rate Less than 2 seconds Display Scaling and Range 5 and 10 dB/division;...
- Page 66 Appendix A Specifications DSAM-1500, -2500. -2600, -3500, 3600, 6000 Specifications Table 2 Product Specifications (Continued) Item Description BER (Bit Error Rate) Pre and Post FEC: 10 to 10 MER (Modulation Error Ratio) Range 64 QAM: 21 to 35 dB Accuracy: ± 2 dB (typical) Range 256 QAM: 28 to 35 dB Accuracy: ±...
- Page 67 Appendix A Specifications DSAM-1500, -2500. -2600, -3500, 3600, 6000 Specifications Table 2 Product Specifications (Continued) Item Description RS232 Standard via DB9 on charger module or optional direct cable Printer Compatibility Epson and Citizen Ethernet RJ45, 10 base T, TCP/IP, and UDP supported v1.1 host mode, 150 mA maxi- mum slave (future firmware...
- Page 68 Appendix A Specifications DSAM-1500, -2500. -2600, -3500, 3600, 6000 Specifications Table 2 Product Specifications (Continued) Item Description Weight (Models 1500, 2500, and 2 pounds, 12 ounces (1.3kg) 3500) Weight (Model 2600 and 3600) 3 pounds, 4 ounces (1.5kg) Storage and Operating Tempera- -20 to +50°C;...
-
Page 69: Power Component Specifications
Appendix A Specifications Power Component Specifications b. Accuracy for levels between -20 to +60 dBmV Additional uncertainty of ± 1.0 dB from 4 MHz to 15 MHz Additional uncertainty of ± 0.5 dB across -20°C to +50°C. c. Total integrated power, At 64 QAM. d. - Page 70 Appendix A Specifications Power Component Specifications Table 3 Power Component Specifications (Continued) Item Description Fast charge rate 1000mA ± 10% @ 7.2V Maximum charge time Up to 5 hours Output - Li-Ion Battery Battery life 4.5 Hours (typical) Fast charge rate 1000mA ±...
- Page 71 Customer Services Appendix B This chapter describes the customer services available through Acterna. Topics discussed in this chapter include the following: – “About our services” on page 56 – “Customer care” on page 56 – “Global services and solutions” on page 61 DSAM Product Family Quick-Start Guide Rev.
-
Page 72: Appendix B Customer Services
Appendix B Customer Services About our services About our services Acterna offers an unmatched portfolio of services to deploy, support and innovate purchased equipment through its Customer Care and Global Services and Solu- tions organizations. Customer Care is standard with every product sale and consists of business hour technical assistance, in-warranty repair, calibration, and upgrade services. -
Page 73: Technical Assistance (Business Hour)
Appendix B Customer Services Customer care Technical Expert business hour technical support, including help with product configuration, circuit qualification, and assistance complete network trouble sectionalization is provided with (business your product (see“Technical assistance” on page viii). For hour) around-the-clock support, 7x24 technical assistance may be purchased through Global Services and Solutions FleetCare program (see “Product support”... -
Page 74: Warranty Information
Appendix B Customer Services Customer care – The serial number, product type, and model. – Warranty status. (If you are unsure of the warranty status of your instrument, contact Acterna Customer Care.) – A detailed description of the problem or service requested. - Page 75 Appendix B Customer Services Customer care Customer. If Installation Services have not been ordered, the warranty period shall begin upon ship- ment to Customer. Hereafter these periods of time shall be collectively referred to as the “Initial Warranty Period.” Acterna’s obligation and customer’s sole remedy under this Hardware Warranty is limited to the repair or replacement, at Acterna’s option, of the defective product.
- Page 76 Appendix B Customer Services Customer care rial respects in accordance with the published specifi- cations for such Software as established by Acterna. However, Acterna does not warrant that the Software will operate uninterrupted or error free, operate in the combination with other software, meet Customer’s requirements, or that its use will be uninterrupted.
-
Page 77: Global Services And Solutions
Appendix B Customer Services Global services and solutions TIONS, EXPRESS OR IMPLIED. ACTERNA SPECIFI- CALLY DISCLAIMS ALL OTHER WARRANTIES, EITHER EXPRESS OR IMPLIED, ON ANY HARDWARE, SOFT- WARE, DOCUMENTATION OR SERVICES INCLUDING BUT NOT LIMITED TO WARRANTIES RELATING TO QUALITY, PERFORMANCE, NONINFRINGEMENT, MERCHANTABILITY OR FITNESS FOR A PARTICULAR PURPOSE, AS WELL AS THOSE ARISING FROM ANY COURSE OF DEALING, USAGE OR TRADE PRACTICE. -
Page 78: Training
Appendix B Customer Services Global services and solutions Deployment — Thorough deployment process covers the initial site survey through hardware and software installation, allowing rapid integration of systems product into customers’ environment without the use of their own resources. Deployment includes survey, configuration, installation of hardware and software, site planning, cabling, acceptance testing, staging, certification and system documentation. -
Page 79: Alternative Learning
Appendix B Customer Services Global services and solutions from one to 10 participants. Prior to training, the instructor contacts the customer to ensure the course content is aligned with the organization’s training needs. We conduct step-by-step reviews of current technologies and products to help both new and experienced technicians translate theory into practical, hands-on expertise. -
Page 80: Product Support
Appendix B Customer Services Global services and solutions learning. In addition to our pre-packaged CBTs, Acterna custom-develops CBTs to meet your organization’s training needs. To enroll in a course or for more information on the variety of Acterna training programs available, call 1-800-638- 2049 or visit www.jdsu.com and complete the Training Requirement Form. -
Page 81: Consulting Services
Appendix B Customer Services Global services and solutions rial pricing, customers are billed for the actual cost of the repair, making this a cost-effective method for minor repairs. Under flat rate pricing, customers pay a fixed service charge to repair unit failures (excluding damage or abuse). -
Page 82: Integrated Service Programs
Appendix B Customer Services Global services and solutions The consulting team can develop and integrate automated testing applications on customers’ currently installed computer platforms that match existing methods and procedures. An Acterna team of consultants can assist customers throughout every stage of the development and implementation of automated and remote testing solu- tions. - Page 84 Test and Measurement Regional Sales North America Latin America Asia Pacific EMEA www.jdsu.com Toll Free: 1 800 638 2049 Tel: +55 11 5503 3800 Tel: +852 2892 0990 Tel: +49 7121 86 2222 Tel: +1 240 404 2999 Fax:+55 11 5505 1598 Fax:+852 2892 0770 Fax:+49 7121 86 1222 Fax:+1 240 404 2195...
Need help?
Do you have a question about the Wavetek DSAM Series and is the answer not in the manual?
Questions and answers