Table of Contents
Advertisement
Quick Links
Advertisement
Chapters
Table of Contents
Troubleshooting

Related Manuals for Barco CX-50 Gen2


Summary of Contents for Barco CX-50 Gen2
- Page 1 CX-50 Gen2 Installation manual ENABLING BRIGHT OUTCOMES...
- Page 3 Barco. If the purchaser or a third party carries out modifications or repairs on goods delivered by Barco, or if the goods are handled incorrectly, in particular if the systems are operated incorrectly or if, after the transfer of risks, the goods are subject to influences not agreed upon in the contract, all guarantee claims of the purchaser will be rendered invalid.
- Page 4 ClickShare applications (each a “Barco ClickShare Product”). • Term The Software can be used under the terms of this EULA from the date of first use of the Barco ClickShare Product, for as long as you operate such Barco ClickShare Product. •...
- Page 5 Agreement. “Documentation” means all technical, reference and installation manuals, user guides, published performance specifications and other written documentation provided by Barco generally to its licensees with respect to the Software, along with any modifications and updates thereto; “DRM” means Barco’s digital rights management platform used to provide access to and access conditions of the Software.
- Page 6 You may own the carrier on which the Software is provided, but the Software is owned and copyrighted by Barco or by third party suppliers. Your license confers no title or ownership and is not a sale of any rights in the Software or its Documentation.
- Page 7 6.1 ‘Reporting and Audit’. In addition to good practice record-keeping obligations, you agree to report the use of the Software and relating billing metrics in the DRM or otherwise as agreed. You grant to Barco and its designated auditors, at Barco’s expenses, the right to verify your Software deployments and to examine your books, records and accounts during your normal business hours so as to verify your compliance with the License Agreement.
- Page 8 (ii) any information designated as confidential by Barco or which has the necessary quality of confidence about it and (iii) any license key provided by Barco to you hereunder. 8.2 ‘Non-Disclosure’. You agree not to divulge any Confidential Information to any persons without Barco's...
- Page 9 Documentation. After such 60-day period, Barco shall have no obligation to maintain or provide any User Data, and as provided in the Documentation will thereafter delete or destroy all copies of User Data in Barco’s systems or otherwise in Barco’s possession or control, unless legally prohibited.
-
Page 11: Table Of Contents
Table of contents 1 Introduction........................................15 Documentation ....................................16 Symbols and fonts..................................16 2 CX-50 Gen2 Specifications .................................17 About the CX-50 Gen2.................................18 CX-50 Gen2 specifications................................19 About the Base Unit..................................21 Mobile Device Support.................................24 3 Getting started......................................25 Environmental Condition Check .............................26 Security recommendations before starting........................26 Basic Workflow....................................27... - Page 12 ClickShare Extension Pack installer.............................61 ClickShare Windows Certified driver ...........................63 ClickShare Button Manager..............................63 ClickShare Desktop App................................63 MSI installer of the ClickShare Desktop App........................63 6 CX-50 Gen2 Configurator ................................65 Accessing the Configurator ...............................67 ClickShare Configuration Wizard............................70 On-Screen ID information ................................72 Personalisation, Wallpaper................................74 Personalisation, Personalized wallpaper ..........................75...
- Page 13 6.41 Reset to factory defaults ................................116 6.42 Troubleshoot, diagnostics ................................117 7 Firmware updates ....................................119 Updating the CX-50 Gen2 firmware ..........................120 8 Troubleshooting ....................................121 Troubleshooting list..................................122 A Regulatory information................................. 125 Product compliance..................................126 Open source software provisions ............................129 Disposal information...................................
- Page 14 R5900120 /01 CX-50 Gen2...
-
Page 15: Introduction
Introduction R5900120 /01 CX-50 Gen2... -
Page 16: Documentation
1.1 Documentation About the documentation This installation guide explains how to install your CX-50 Gen2 in a meeting room, It explains also how to make everything operational. It provides detailed information on how to configure your CX-50 Gen2. Available System documentation Next to the installation manual, a user guide and a safety guide are available on Barco’s website,... -
Page 17: Gen2 Specifications
CX-50 Gen2 Specifications About the CX-50 Gen2 ........................18 CX-50 Gen2 specifications ......................19 About the Base Unit ........................21 Mobile Device Support ........................24 R5900120 /01 CX-50 Gen2... -
Page 18: About The Cx-50 Gen2
Everything becomes part of your laptop. This CX-50 Gen2 not only helps the presenter get the presentation on-screen in a second, but it also allows the other people in the conference to participate more actively. The result is enhanced meeting efficiency and better decision-making. -
Page 19: Gen2 Specifications
Printed safety manual R9861600D01C 1x R9861600D01C Contact your local sales representative for the correct regional variant to be used in your country. 2.2 CX-50 Gen2 specifications Dimensions (HxWxD) 39mm x 200mm x 202mm Power supply Standard 110/220 V AC plug Power consumption Operational: 74.5W (max) - Page 20 CX-50 Gen2 Specifications Noise Level Max. 25dBA @ 0-30°C Max. 30dBA @ 30-40°C Authentication protocol WPA2-PSK in stand alone mode WPA2-PSK or IEEE 802.1X using the ClickShare Button in network integration mode Wireless transmission IEEE 802.11 a/g/n/ac and IEEE 802.15.1...
-
Page 21: About The Base Unit
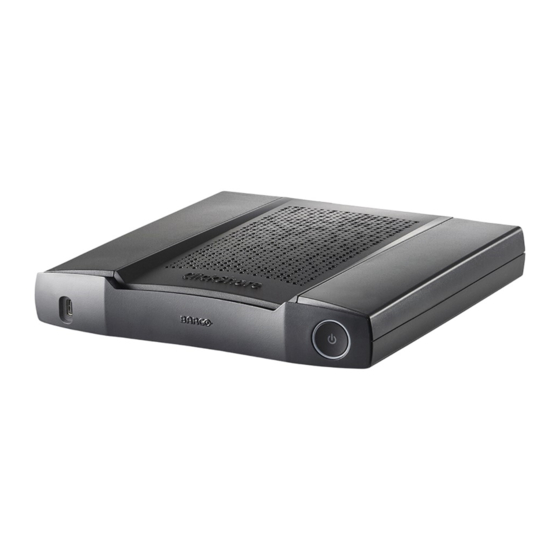
CX-50 Gen2 Specifications 2.3 About the Base Unit Base Unit The Base Unit receives the wireless input from the conferencing Buttons and controls the content of the meeting room display. Furthermore, a touch screen, USB camera and USB speakerphone can be connected to the Base Unit. - Page 22 CX-50 Gen2 Specifications USB Type-C Port The front USB Type-C port is used to pair the Button to the Base Unit. This port can also be used to update the software and firmware of both the Base Unit and the Buttons.
- Page 23 Image 2–5 Antenna The antenna is built-in in the CX-50 Gen2. Bottom layout of the Base Unit The serial number label containing the Barco part number, the revision number, production date (week-year) and the serial number (reference 2 on Image 2–5).
-
Page 24: Mobile Device Support
CX-50 Gen2 Specifications • markings for applicable standards (CE, CCC, UL, ...) • markings for waste regulation • “Made in ...” 2.4 Mobile Device Support Overview The below list of Apps are supported by ClickShare and can be installed on your mobile device from Google Play or Apple App Store. -
Page 25: Getting Started
Getting started Environmental Condition Check.....................26 Security recommendations before starting ..................26 Basic Workflow..........................27 R5900120 /01 CX-50 Gen2... -
Page 26: Environmental Condition Check
Keep your Base Units and Buttons up to date Barco keeps improving their devices, this means extending existing features and adding new ones, but also providing security patches. Therefore, it is strongly recommended to keep the Base Units up to date with the latest available firmware, and ensure Buttons are updated. -
Page 27: Basic Workflow
Before using CX-50 Gen2 Unpack the ClickShare components and accessories from the box. For a detailed overview of the content of the CX-50 Gen2 box, see “About the Base Unit”, page Install the Base Unit in the meeting room using one of the 2 possible installation methods. - Page 28 Getting started R5900120 /01 CX-50 Gen2...
- Page 29 CX-50 Gen2 Installation Installation methods for the Base Unit ....................30 Guidelines for ClickShare Conference system installation ..............30 Table mounting..........................31 Wall mounting ..........................31 Standalone setup .........................32 Network deployment requirements....................33 Network connected setup ......................34 Dedicated network setup.......................35 Dual network connected setup.......................36 4.10 Display connection to the Base Unit ....................37 4.11 Fully equipped, Audio only or Camera only conference room ............38...
-
Page 30: Gen2 Installation
CX-50 Gen2 Installation 4.1 Installation methods for the Base Unit For optimal performance, install the Base Unit close to the display and avoid obstacles between the Base Unit and the Buttons. Make sure not to install the Base Unit in a metal enclosure. -
Page 31: Wall Mounting
ClickShare apps and possibly the ClickShare Button will not be able to wake the Base Unit from standby. For a more detailed guidelines, see “Network Deployment Guide” available on the support pages of the product on Barco’s website. 4.3 Table mounting Overview Put the Base Unit directly on the meeting room table. -
Page 32: Standalone Setup
Insert a plug in each hole (if needed, depends on the wall type) and drive in 2 screws. Do not drive in the screws completely. Note: Mounting screws and plugs are not included in the CX-50 Gen2 box . The type of screws and plugs depend on the type of wall (stone, wood, plasterboard, ...) you are mounting the Base Unit to. -
Page 33: Network Deployment Requirements
Base Unit: first-time setup • Activation and update: for this action, similar to the auto-update functionality described below, an outbound TCP connection on port 443 is required towards update.cmp.barco.com and assets.cloud.barco. com. • Connection to XMS Cloud for activating SmartCare and XMS Cloud functionality: TCP Port 443 outbound to *.azure-devices.net, *.core.windows.net and global.azure-devicesprovisioning.net. -
Page 34: Network Connected Setup
CX-50 Gen2 Installation CX range Sender/Receiver 1900, 5353, 32768, 61000 Miracast MS-MICE 7236, 7250 7236 ClickShare Configurator 80, 443 XMS Cloud XMS Edge 4003 Auto-update 80, 443 Button Manager 6546 SNMP 161 and 162 REST API 4003 4.7 Network connected setup... -
Page 35: Dedicated Network Setup
CX-50 Gen2 Installation Miracast on CX-50 When the Base Unit is connected to the network via the LAN cable, than Miracast can be used via Wi-Fi Direct and over infrastructure (MS-MICE). When the Base Unit is connected to a wireless network via client mode, than Miracast can be used via Wi-Fi Direct and Over Infrastructure (MS-MICE). -
Page 36: Dual Network Connected Setup
CX-50 Gen2 Installation Select External Access Point from the drop down menu and select the preferred authentication mode and fill out the details. Click Save Changes. For more information, see “Buttons”, page 107 Pair the Buttons again with the Base Unit. -
Page 37: Display Connection To The Base Unit
Connect the USB Type-C port at the backside of the Base Unit to the USB input of the display (only for displays supporting video via USB). Check Barco’s website for the full list of supported/adviced cables. R5900120 /01 CX-50 Gen2... -
Page 38: Fully Equipped, Audio Only Or Camera Only Conference Room
CX-50 Gen2 Installation Image 4–7 Video and audio is transferred via the USB cable to the display. When the display is connected via USB Type-C port and that display has extra USB Type-C port(s), these ports can be used to connect a camera and/or an echo canceling speakerphone. - Page 39 CX-50 Gen2 Installation • a combined speaker - microphone system connected via USB. When connecting with the Button, it allows you to connect the room speakerphone, microphone and camera wireless to your laptop and use the better equipment of the room in your video conferencing call.
-
Page 40: Touch Screen Connections To The Base Unit
To connect video, an HDMI connection should be made between the Base Unit and the display. To connect the touch functionality, an USB cable should be connected between the touch screen and the Base Unit. A list of supported touch screen can be found on Barco’s website. See https://www. barco. com/en/support/docs/ TDE9538. -
Page 41: Echo Canceling Speakerphone Audio Connection
It is a bidirectional audio transmission between the Button and the speakerphone. USB speakerphone support A list of supported speakerphones can be found on Barco’s website. How to connect an echo-canceling speakerphone Connect your speakerphone device via USB to the Base Unit. -
Page 42: Lan Connection
About HDMI in By default there is no HDMI in to the Base Unit. To connect HDMI to the Base Unit a Barco adapter must be used. This adapter makes it possible to connect an HDMI source to the Base Unit and a USB Type-C port remains available. -
Page 43: Power Connection
WARNING: Use a power cord which complies to local regulations. If not included in the box, contact your local dealer for a correct power cord. The Base Unit is intended to be powered by the Barco supplied power adapter ATM090T-A190, with power specifications: input 100-240V, 1.2A 50/60Hz and output 19 VDC 4.74A. -
Page 44: Wired Roomdock
USB Type-C port of the Base Unit (can also with the USB Type-C port on the Barco HDMI-in to USB-C convertor) Note: Make sure that the laptop USB Type-C port supports display port alternate mode. R5900120 /01... -
Page 45: First Startup Of The Base Unit
CX-50 Gen2 Installation Image 4–13 Wired roomdock connection Before Wired Roomdock can be used, configure it in the Configurator. Go to Display & Audio and select Input. For more info, see “Display setup, Inputs”, page 79 4.20 First startup of the Base Unit Workflow First time boot of the Base Unit. -
Page 46: Preferred Way To Start Up
CX-50 Gen2 Installation There are now 2 ways to continue: 1. Check for updates (optional), configure your Base Unit and register to XMS Cloud. See “Preferred way to start up”, page 46 2. Plug in a button and start sharing your screen. See “Start up without configuration”, page 51... - Page 47 CX-50 Gen2 Installation Image 4–16 When connected to the internet you can select Automatic for firmware update (recommended). If you set it on No, you still have the choice to manually update by downloading the software on an USB stick.
- Page 48 CX-50 Gen2 Installation Image 4–18 Enter a time zone and make a selection between manual time setup and the use of NTP. For more info about manual time setup, see “Date & Time setup, manually”, page 104. For more info about the use of an NTP server, see “Date &...
- Page 49 CX-50 Gen2 Installation Image 4–20 We advise to change the default password to enter the Configurator. For more info, see “Security, passwords”, page 101. Network settings Image 4–21 Select the frequency band, channel and enter a Wi-Fi passphrase when desired. For more info, see “Wi-Fi...
- Page 50 CX-50 Gen2 Installation Image 4–22 To benefit from the SmartCare program, your device should be registered to XMS Cloud. Copy your device token by clicking on the copy icon next to the token. Click on the link to start the registration procedure.
-
Page 51: Start Up Without Configuration
CX-50 Gen2 Installation Image 4–24 4.22 Start up without configuration How to start Plug in a Button and start sharing your screen. As soon as a user connects to the Base Unit, the default wallpaper will be shown on the meeting room display and the unit can be used with it's default configuration. - Page 52 CX-50 Gen2 Installation Image 4–25 When your E-mail address is known by XMS Cloud you arrive on the tenant selection page. To continue, go to step 5. When your E-mail address is not known by XMS Cloud, a verification code will be sent to the entered E- mail address.
-
Page 53: Activating Calendar Integration With Xms Cloud
CX-50 Gen2 Installation Image 4–28 Enter device token Assign a meeting room and click Continue. Image 4–29 Assign meeting room Your device is successfully registered. 4.24 Activating calendar integration with XMS Cloud About Calendar The calendar capability allows to display your room calendar on the monitor connected with ClickShare device. - Page 54 The client secret is created by Microsoft with the following properties: randomly generated and expires automatically after 24 months. For more in-depth information, see Barco’s Security whitepaper “XMS Cloud and (Virtual) Edge Security Whitepaper” which can be downloaded from Barco’s website.
- Page 55 CX-50 Gen2 Installation Image 4–31 Click Connect. You will be redirected to your Microsoft Azure account to begin the integration and discover rooms. A sign in screen appears. Image 4–32 The IT Admin who has Global Administrator role in Azur Active Directory should sign in.
- Page 56 CX-50 Gen2 Installation Image 4–34 Once the process has finished, the screen is refreshed and shows the Continue integration button. Image 4–35 Click Continue integration to request the O365 admin’s final permission to read calendar information for each room-account and generate credential for devices to achieve that.
- Page 57 CX-50 Gen2 Installation Assign a meeting room to a calendar (no devices are mapped yet) Click the Settings icon next to the E-mail address of the meeting room. Image 4–38 A popup opens. Image 4–39 Click on Associated devices if not yet selected.
- Page 58 CX-50 Gen2 Installation R5900120 /01 CX-50 Gen2...
-
Page 59: Preparing The Buttons
Preparing the Buttons Pairing ............................60 ClickShare Extension Pack ......................61 ClickShare Extension Pack installer ....................61 ClickShare Windows Certified driver ....................63 ClickShare Button Manager......................63 ClickShare Desktop App .......................63 MSI installer of the ClickShare Desktop App ...................63 R5900120 /01 CX-50 Gen2... -
Page 60: Pairing
The Base Unit LED is blinking while the Button LED fills up a circle. This means pairing is in progress. The Base Unit automatically checks whether the software of the Button is up to date. If not, the Base Unit updates the Button software. This may take more time. R5900120 /01 CX-50 Gen2... -
Page 61: Clickshare Extension Pack
After the setup finished, the ClickShare launcher will be started automatically. The Extended desktop driver can only be used after the user reboots his computer. Starting the setup Download the ClickShare Extension Pack (download via http://www.barco.com/en/product/clickshare- extension-pack). Unzip the downloaded file. Click ClickShare-Extension-Pack.msi to start the installation. R5900120 /01 CX-50 Gen2... - Page 62 In this setup, a user or an IT admin can install the ClickShare Extension pack using the Windows command prompt. Following is an example of a silent installation (version numbers are only given as example, always check Barco’s web for the latest version): Launcher only install: msiexec.
-
Page 63: Clickshare Windows Certified Driver
Base Unit without plugging the Buttons to the Base Unit. The Buttons are plugged in to your laptop. For more information about the Button Manager, consult the Button Manager’s user guide which can be downloaded from Barco’s website or consult the article How to pair ClickShare Buttons on Barco’s... - Page 64 Read the License Agreement and check the 'I accept the terms in the license agreement' checkbox to continue. Click Next. Enable the necessary components and click Install. The ClickShare Desktop App and the selected features are now available for all users of your computer. R5900120 /01 CX-50 Gen2...
- Page 65 CX-50 Gen2 Configurator Accessing the Configurator ......................67 ClickShare Configuration Wizard ....................70 On-Screen ID information......................72 Personalisation, Wallpaper ......................74 Personalisation, Personalized wallpaper ..................75 Manage configuration files......................77 Display setup, Outputs ........................78 Display setup, Inputs........................79 Peripherals ..........................80 6.10 Wi-Fi settings ..........................81 6.11 Wi-Fi settings, Access Point settings ....................82 6.12 Wi-Fi settings, Wireless Client .......................84...
-
Page 66: Gen2 Configurator
CX-50 Gen2 Configurator About configuration The configuration of your device can be done in • XMS cloud • the local configurator The configurator in XMS cloud will (in time) more elaborated than the local configurator. Therefore it preferred to configure your devices via XMS cloud. For more info see XMS documentation. -
Page 67: Accessing The Configurator
CX-50 Gen2 Configurator 6.1 Accessing the Configurator Getting access to the Configurator There are three ways to access the Configurator: • Via the LAN • Direct Ethernet connection between PC and Base Unit. • Via the Base Unit's wireless network When accessing the configurator for the first time, the ClickShare Configuration Wizard starts automatically. - Page 68 CX-50 Gen2 Configurator Image 6–2 Configurator lanuguages The following languages are possible: • Arabic • Simplified Chinese • Traditional Chinese • Danish • Dutch • English • Finnish • French • German • Italian • Japanese • Korean • Norwegian •...
- Page 69 CX-50 Gen2 Configurator Image 6–3 Start screen The language of the configurator can be changed on any page in the interface. The screen is split up in 2 panes. Left pane with the selection buttons and a right pane to configure the selected function.
-
Page 70: Clickshare Configuration Wizard
CX-50 Gen2 Configurator To access the Configurator via the Base Unit wireless network On your laptop, connect to the Base Unit wireless network. The default SSID and password to connect to the Base Unit are respectively 'ClickShare-<serial base number>' and 'clickshare'. - Page 71 CX-50 Gen2 Configurator About the configuration wizard During the first start up of the Base Unit, the configuration wizard starts up automatically. Or, you can start up the configuration wizard by clicking at the bottom left on Configuration wizard or on Lauch configuration wizard on the dashboard page.
-
Page 72: On-Screen Id Information
CX-50 Gen2 Configurator Click Start configuration. Fill out the necessary items and click Next to continue. To return to the previous step, click on Back. For more information about a specific topic, see one of the following topics. The ClickShare Configuration Wizard can be started at any time to change the configuration just by clicking on ClickShare Configuration Wizard at the left bottom of each screen or on Lauch configuration wizard on the start page. - Page 73 CX-50 Gen2 Configurator Image 6–6 On-Screen ID On Screen language selection Log in to the Configurator. Click Personalisation → On-screen ID. Select the language of the on-screen text. Click on the drop down box next to Language for on-screen text and select the desired language.
-
Page 74: Personalisation, Wallpaper
CX-50 Gen2 Configurator 6.4 Personalisation, Wallpaper About wallpaper When CX-50 Gen2 starts up, a background (wallpaper) is displayed. The display of this background wallpaper can be disabled. By default two general ClickShare wallpapers are available. The possibility exists to upload personal backgrounds (wallpapers). -
Page 75: Personalisation, Personalized Wallpaper
CX-50 Gen2 Configurator Image 6–8 Download wallpaper The wallpaper is downloaded to your PC. Enable - disable Wallpaper Within the Wallpaper pane, check the check box next to Show the wallpaper when no one is sharing their screen. Checked: wallpaper will be displayed when no one is sharing content. - Page 76 CX-50 Gen2 Configurator The content of the file is checked and when valid (format and size), the file is uploaded. The new wallpaper gets a red border. Click on Save changes to apply the personalized wallpaper The message Successfully applied changes is displayed on top of the page.
-
Page 77: Manage Configuration Files
CX-50 Gen2 Configurator 6.6 Manage configuration files About Manage configuration files A full backup can be downloaded but cannot be used to duplicate configuration settings to other Base Units. Therefore, it is possible to download a Portable version. This portable version can be uploaded via the upload configuration button on other Base Units (same type). -
Page 78: Display Setup, Outputs
Resolution The output resolution to the display is set on Auto. That means that the CX-50 Gen2 output resolution is automatically adapted to the resolution of the display. For HDMI displays, a hot plug detection is available. -
Page 79: Display Setup, Inputs
CX-50 Gen2 Configurator Image 6–13 Display setup, output To activate the screen saver, drag the slider bar to the left or to the right until the desired delay time is reached. When the slider is set completely to the left, the screen saver will never be activated. -
Page 80: Peripherals
Update of firmware of the peripheral devices via the configurator is supported for Logitech Meetup and Rally and only when the camera is not in use. When the installed firmware version is lower than the Barco certified peripheral firmware version, then the install button becomes active. Click on Install the install the latest version. -
Page 81: Wi-Fi Settings
CX-50 Gen2 Configurator Image 6–16 Quality score • Green: >68 • Orange: 35 – 68 • Red: 0 – 34 Source (camera to Base Unit) is requested frame rate. This frame rate results in a destination frame rate between Base Unit and app or Button. -
Page 82: Wi-Fi Settings, Access Point Settings
CX-50 Gen2 Configurator For more detailed info about the access point settings, see “Wi-Fi settings, Access Point settings”, page Changing the IP address will require a repairing of the Buttons used with this Base Unit. 6.11 Wi-Fi settings, Access Point settings How to change Check the check box next to Enable. - Page 83 CX-50 Gen2 Configurator Channel Channel Channel Channel Channel Channel Channel Channel Channel Image 6–19 The 5 GHz channels do not overlap with each other and are less used by non-Wi-Fi devices than the 2.4 GHz channels. Moreover, 5 GHz signals are more rapidly damped than 2.4 GHz signals. Therefore, the use of a 5 GHz channel is recommended.
-
Page 84: Wi-Fi Settings, Wireless Client
CX-50 Gen2 Configurator 6.12 Wi-Fi settings, Wireless Client Introduction Wireless Client mode allows to connect the Base Unit to a network over Wi-Fi instead of via the Ethernet interface. It brings identical functionality as a wired network connection; complete network integration, auto- update functionality and central management in XMS. - Page 85 CX-50 Gen2 Configurator How to start up for EAP-TLS Select EAP-TLS from the drop down list next to Authentication Mode. Image 6–21 Wi-Fi Settings, Wireless Client, EAP-TLS Fill out a Corporate SSID. The SSID of your corporate wireless infrastructure to which the ClickShare Buttons will connect.
-
Page 86: Wi-Fi Settings, Wireless Client, Eap-Ttls
CX-50 Gen2 Configurator • .crt • .pb7 (Base64 encoded DER) File should at least contain the root CA certificate for your domain. Save Changes Using Auto enrollment The Simple Certificate Enrolment Protocol (SCEP) is a protocol which enables issuing and revoking of certificates in a scalable way. -
Page 87: Wi-Fi Settings, Wireless Client, Peap
CX-50 Gen2 Configurator password, but the password credentials are transported in a securely encrypted tunnel established based upon the server certificates. User authentication is performed against the same security database that is already in use on the corporate LAN: for example, SQL or LDAP databases, or token systems. Since EAP-TTLS is usually implemented in corporate environments without a client certificate we have not included support for this. -
Page 88: Wi-Fi Settings, Wireless Client, Wpa2-Psk
CX-50 Gen2 Configurator Image 6–25 Wi-Fi Settings, Wireless Client, PEAP Fill out a Corporate SSID. The SSID of your corporate wireless infrastructure to which the ClickShare Buttons will connect. Fill out the Domain and Identity. Enter a Password. Upload CA certificate. Click on Choose file and browse to the desired file. -
Page 89: Lan Settings
CX-50 Gen2 Configurator Image 6–26 Wi-Fi Settings, Wireless Client, WPA-PSK Fill out a Corporate SSID. The SSID of your corporate wireless infrastructure to which the ClickShare Buttons will connect. Fill out Passphrase. The key used in WPA2-PSK to authenticate onto the wireless infrastructure. This can be a string of 64 hexadecimal digits or a passphrase of 8 to 63 printable ASCII characters. - Page 90 CX-50 Gen2 Configurator Image 6–27 LAN settings Click in the input field next to Hostname and enter a host name for the Base Unit. The default host name is ClickShare-<serial number Base Unit>. To select the method, click on the drop down box next to Method and select the Automatic (DHCP) or Manual.
-
Page 91: Lan Settings, Wired Authentication
CX-50 Gen2 Configurator Click in the DNS Servers input field and fill out the preferred DNS servers (maximum 5) in a comma separated list. Click Save changes to apply the settings. Do not use IP address 192.168.2.x for a Subnet mask 255.255.255.0 and IP address 192.168.x.x for a Subnet mask 255.255.0.0... -
Page 92: Lan Settings, Eap-Tls Security Mode
CX-50 Gen2 Configurator Image 6–29 Wired authentication The setup wizard starts. Select the authentication method. Click on the drop down and select the desired method. The following methods are available: • No authentication: no authentication mechanism will be applied to the wired interface. - Page 93 CX-50 Gen2 Configurator Image 6–30 EAP-TLS Fill out the Domain and Identity. Select the certification method. Click on the drop down box and select the desired method. • Manually provide Client & CA certificates • Auto enrollment via SCEP Manually providing certificates Upload client certificate.
-
Page 94: Lan Settings, Eap-Ttls Security Mode
CX-50 Gen2 Configurator SCEP Server: This is the IP or hostname of the Windows Server in your network running the NDES service. Only http is allowed. E.g.: http://myserver or http://10.192.5.1 SCEP username: This is a user in your Active Directory which has the required permission to access the NDES service and request the challenge password. -
Page 95: Service, Mobile Devices
CX-50 Gen2 Configurator Image 6–33 EAP-TTLS Fill out the Domain and Identity. Domain The company domain for which you are enrolling, should match with the one defined in your Active Directory. Identity Identity of the user account in the Active Directory which will be used by the ClickShare Buttons to connect to the corporate network. - Page 96 Base Unit. Then AirPlay must be activated on your device. For more information about activating AirPlay, consult the user guide of your device. The supported versions of AirPlay can be found on Barco’s website, www.barco.com\clickshare. The support of non-released version of these protocols cannot be guaranteed by Barco.
-
Page 97: Service, Presentsense
CX-50 Gen2 Configurator To allow streaming (mirroring) via Google Cast, check the check box in front of Streaming via Google Cast. To allow streaming via Miracast, check the check box in front of Streaming via Miracast. Note: from firmware version 2.12, after a factory reset, AirPlay, Google Cast and Miracast are deactivated. -
Page 98: Service, Clickshare Api, Remote Control Via Api
CX-50 Gen2 Configurator • Medium • High 6.23 Service, ClickShare API, remote control via About API settings The API can be enabled or disabled, that means that the access to the unit from an external device can be allowed or can be blocked. -
Page 99: Services, Snmp
When using the default Engine ID, make sure the check box before Use default Engine ID is checked. The default engine ID is a combination of the Barco Enterprise Number with the MAC-address (eth0). Fill out the SNMP Manager address. -
Page 100: Security, Security Level
CX-50 Gen2 Configurator 6.25 Security, security level About security levels For the use of the ClickShare system, a security level can be set. By default, level 1 is activated. A security level is a predefined set of settings which are automatically set when a level is selected. -
Page 101: Security, Passwords
CX-50 Gen2 Configurator Image 6–38 Security levels Select the desired security level icon. Click Save changes to apply the setting. 6.26 Security, passwords About passwords To access the ClickShare Configurator a user name and password is needed. That password can be changed at any time to protect the ClickShare Configuration settings. -
Page 102: Security, Http Encryption
CX-50 Gen2 Configurator 6.27 Security, HTTP Encryption About HTTP encrytion HTTP encryption can be set up by using a self signed certificate or a custom certificate. By default, a self signed certificate is used. How to setup Log in to the Configurator. -
Page 103: Status Information Base Unit
CX-50 Gen2 Configurator Image 6–42 Upload custom certificate Click on Upload certificate. A browser window opens. Select the desired custom certificate file and click Open. The allowed file formats are: • .pfx/.p12 (PKCS#12) • .pem (Base64 encoded) Click on Generate CSR . -
Page 104: Date & Time Setup, Manually
CX-50 Gen2 Configurator Image 6–43 To restart the Base Unit, click on Restart Base Unit. A ClickShare system reboot message with progress bar is displayed while rebooting takes place. When the reboot is finished, a re-login is necessary. 6.29 Date & Time setup, manually About Date &... - Page 105 CX-50 Gen2 Configurator Image 6–44 Manual time & date update The current time is indicated next to Current time. Select your time zone. Click on the drop down box next to Time zone and select the corresponding time zone. Check the radio button in front of Set time and date manually.
-
Page 106: Date & Time Setup, Time Server
CX-50 Gen2 Configurator Not checked: use of 12 hour time format Click Save changes to apply. 6.30 Date & Time setup, time server About using NTP server The clock is continuously synchronized with an external time server and the deviation is in the order of milliseconds. -
Page 107: Buttons
CX-50 Gen2 Configurator Eco mode When the Base Unit enters standby mode, it will disable the HDMI output signal. The Base Unit's LEDs will be breathing white to indicate the standby mode. The Base Unit will activate the output with one of the following actions: •... -
Page 108: Buttons, External Access Point, Mode Eap-Tls
CX-50 Gen2 Configurator All Buttons used with the Base Unit are indicated in the Buttons List. The list contains the serial number, MAC address, article code and the firmware version, the number of connections and last connection date and time. - Page 109 CX-50 Gen2 Configurator Image 6–50 Buttons, External access point, mode EAP-TLS The SSID of your corporate wireless infrastructure to which the ClickShare Buttons will connect. Fill out the Domain and Identity. Select the certification method. Click on the drop down box and select the desired method.
-
Page 110: Buttons, External Access Point, Mode Peap
CX-50 Gen2 Configurator Up until Base Unit firmware version 02.11.01 the SCEP implementation was specifically targeted at the Network Device enrollment Service (NDES) which is part of Windows Server. From Base Unit firmware version 02.12.00 and later we support both NDES and standard SCEP. -
Page 111: Buttons, External Access Point, Mode Wpa2-Psk
CX-50 Gen2 Configurator Image 6–53 Buttons, External access point, mode PEAP The SSID of your corporate wireless infrastructure to which the ClickShare Buttons will connect. Fill out the Domain and Identity. Enter a Password. Upload CA certificate. Click on Choose file and browse to the desired file. -
Page 112: Blackboard
CX-50 Gen2 Configurator The SSID of your corporate wireless infrastructure to which the ClickShare Buttons will connect. Fill out Passphrase. The key used in WPA2-PSK to authenticate onto the wireless infrastructure. This can be a string of 64 hexadecimal digits or a passphrase of 8 to 63 printable ASCII characters. - Page 113 For those rare occasions when you encounter issues with our ClickShare units, we have launched SmartCare, a service package that provides your company with budget predictability, swift hardware replacement and expert support from both Barco and our partners for up to 5 years. R5900120 /01...
-
Page 114: Firmware Update
To upload a firmware version, click on Upload firmware... A browser window opens. Browse to the file with the new firmware and click Open to start the upload. Note: This should be an .enc file. You might have to unzip the file downloaded from Barco's website. R5900120 /01... -
Page 115: Support & Updates, Troubleshoot, Log Settings
When your device is connected to a network and managed via the XMS (Cloud) management platform, the firmware can be upgrade via this Management solution. For more information on upgrading firmware in this way, consult Barco’s web pages on XMS (https://www.barco.com/en/page/xms-cloud-management- platform). -
Page 116: Troubleshooting, Erase All Settings
CX-50 Gen2 Configurator To download the current log file, click on Download logs. To clear the current log file, click Clear logs. 6.40 Troubleshooting, Erase all settings About erasing all settings When erasing all settings, the device settings are reverted to defaults. There is no need to go through the onboarding procedure. -
Page 117: Troubleshoot, Diagnostics
CX-50 Gen2 Configurator Click Support & Updates → Troubleshoot. Image 6–61 Factory reset Click Reset to factory defaults. The following message is displayed: “This action will remove all settings of the Base Unit and replace them with the default settings. Are you sure you want to continue?”... - Page 118 CX-50 Gen2 Configurator Image 6–62 Troubleshoot, diagnositcs A separate file is written to the log archive. Only the TCP header info will be collected as part of this test. R5900120 /01 CX-50 Gen2...
-
Page 119: Firmware Updates
Firmware updates R5900120 /01 CX-50 Gen2... -
Page 120: Updating The Cx-50 Gen2 Firmware
USB stick To update the Base Unit software by copying the software on a USB stick Download the latest version of the firmware from Barco's website, www.barco.com/clickshare. Click on Support and select the update firmware button of your device type. -
Page 121: Troubleshooting
Troubleshooting R5900120 /01 CX-50 Gen2... -
Page 122: Troubleshooting List
Troubleshooting 8.1 Troubleshooting list Barco knowledge base and YouTube videos Go to the product page on Barco’s website and select in the right column Support. You will get access to Barco’s Knowledge base (https://www.barco.com/en/support/knowledge-base ) and Latest tutorial videos. For more YouTube videos, consult https://www.youtube.com/user/barcoTV... - Page 123 Insert the display cable to the connected display and the Base Unit. The display does not recognize or Change the corresponding setting is not able to display the Base Unit via the web interface. output resolution. R5900120 /01 CX-50 Gen2...
- Page 124 Locate the problem you are experiencing in the table below and apply the solution. R5900120 /01 CX-50 Gen2...
-
Page 125: A Regulatory Information
Regulatory information Product compliance ........................126 Open source software provisions ....................129 Disposal information ........................140 Rohs compliance ........................140 Production address........................142 Importers contact information ...................... 142 R5900120 /01 CX-50 Gen2... -
Page 126: Product Compliance
2. This equipment complies with RF radiation exposure limits set forth for an uncontrolled environment. This equipment should be installed and operated with a minimum distance of 20 cm between the radiator and your body. Base Unit Contains FCC ID: PPQ-WCBN814A Button FCC ID (model R9861600D01C): 2AAED-R9861600D01 R5900120 /01 CX-50 Gen2... - Page 127 The radiated output power of the Barco Wireless Device is below the Industry Canada (IC) radio frequency exposure limits. The Barco Wireless Device should be used in such a manner such that the potential for human contact during normal operation is minimized.
- Page 128 Informations concernant l'exposition aux fréquences radio (RF) La puissance de sortie émise par l'appareil de sans fil Barco est inférieure à la limite d'exposition aux fréquences radio d'Industry Canada (IC). Utilisez l'appareil de sans fil Barco de façon à minimiser les contacts humains lors du fonctionnement normal.
-
Page 129: Open Source Software Provisions
Open Source Software provisions This product contains software components released under an Open Source license. A copy of the source code is available on request by contacting your Barco customer support representative. EACH SEPARATE OPEN SOURCE SOFTWARE COMPONENT AND ANY RELATED DOCUMENTATION ARE PROVIDED "AS IS"... - Page 130 5.65 https://github.com/libical/libical/releases/download/v1.0.1 libical 1.0.1 http://ftpmirror.gnu.org/readline readline 8.1.2 https://github.com/eudev-project/eudev/releases/download/ eudev 3.2.11 v3.2.11 https://cdn.kernel.org/pub/linux/utils/kernel/kmod kmod bridge-utils https://cdn.kernel.org/pub/linux/utils/net/bridge-utils 1.7.1 busybox https://www.busybox.net/downloads 1.35.0 https://github.com/dosfstools/dosfstools/releases/download/ dosfstools v4.2 https://cdn.kernel.org/pub/linux/kernel/people/tytso/e2fsprogs/ e2fsprogs 1.46.5 v1.46.5 https://cdn.kernel.org/pub/linux/utils/util-linux/v2.37 util-linux 2.37.4 ftp://ftp.astron.com/pub/file file 5.41 R5900120 /01 CX-50 Gen2...
- Page 131 1.9.4 libgpg-error https://www.gnupg.org/ftp/gcrypt/libgpg-error 1.42 https://github.com/lm-sensors/lm-sensors/archive/V3-6-0 lm-sensors 3.6.0 https://git.kernel.org/pub/scm/linux/kernel/git/mcgrof/crda.git/ snapshot crda 4.14 https://github.com/thom311/libnl/releases/download/libnl3_5_ libnl 3.5.0 cryptsetup https://cdn.kernel.org/pub/linux/utils/cryptsetup/v2.4 2.4.3 json-c https://s3.amazonaws.com/json-c_releases/releases 0.15 https://github.com/P-H-C/phc-winner-argon2/archive/ libargon2 20190702 20190702 https://sourceware.org/ftp/lvm2 lvm2 2.03.14 https://releases.pagure.org/libaio libaio 0.3.112 popt http://ftp.rpm.org/popt/releases/popt-1.x 1.18 R5900120 /01 CX-50 Gen2...
- Page 132 3.18.1 https://linuxtv.org/downloads/v4l-utils libv4l 1.22.1 https://archive.mesa3d.org mesa3d 21.3.5 libva-dummy https://github.com/intel/libva/releases/download/2.13.0 2.13.0 https://github.com/llvm/llvm-project/releases/download/ llvmorg-13.0.0 13.0.0 llvm xlib_libXdamage http://xorg.freedesktop.org/releases/individual/lib 1.1.5 xlib_libXfixes http://xorg.freedesktop.org/releases/individual/lib 6.0.0 xlib_libXext http://xorg.freedesktop.org/releases/individual/lib 1.3.4 http://xorg.freedesktop.org/releases/individual/lib xlib_libXrandr 1.5.2 xlib_libXrender http://xorg.freedesktop.org/releases/individual/lib 0.9.10 xlib_libXxf86vm http://xorg.freedesktop.org/releases/individual/lib 1.1.4 xlib_libxshmfence http://xorg.freedesktop.org/releases/individual/lib R5900120 /01 CX-50 Gen2...
- Page 133 1.20.1 gst1-plugins-base https://gstreamer.freedesktop.org/src/gst-plugins-base 1.20.1 gstreamer1 https://gstreamer.freedesktop.org/src/gstreamer 1.20.1 http://xorg.freedesktop.org/releases/individual/lib xlib_libXv 1.0.11 gst1-plugins-bad https://gstreamer.freedesktop.org/src/gst-plugins-bad 1.20.1 gst1-plugins-good https://gstreamer.freedesktop.org/src/gst-plugins-good 1.20.1 libgudev http://ftp.gnome.org/pub/GNOME/sources/libgudev/236 gst1-vaapi https://gstreamer.freedesktop.org/src/gstreamer-vaapi 1.20.1 https://github.com/harfbuzz/harfbuzz/releases/download/3.3.2 harfbuzz 3.3.2 htop https://github.com/htop-dev/htop/releases/download/3.1.2 3.1.2 https://github.com/vcrhonek/hwdata/archive/v0.355 hwdata 0.355 iperf http://downloads.sourceforge.net/project/iperf2 2.1.6 R5900120 /01 CX-50 Gen2...
- Page 134 1.0.6 libnspr https://ftp.mozilla.org/pub/mozilla.org/nspr/releases/v4.33/src 4.33 https://ftp.mozilla.org/pub/mozilla.org/security/nss/releases/ NSS_3_75_RTM/src libnss 3.75 libopusenc https://downloads.xiph.org/releases/opus 0.2.1 libpcap https://www.tcpdump.org/release 1.10.1 http://xorg.freedesktop.org/releases/individual/lib libpciaccess 0.16 libqrencode http://fukuchi.org/works/qrencode 4.1.1 https://github.com/dottedmag/libsha1/archive/0.3 libsha1 http://ftpmirror.gnu.org/libtool libtool 2.4.6 https://github.com/uriparser/uriparser/releases/download/ liburiparser uriparser-0.9.6 0.9.6 https://github.com/libuv/libuv/archive/v1.42.0 libuv 1.42.0 https://xkbcommon.org/download libxkbcommon 1.3.1 R5900120 /01 CX-50 Gen2...
- Page 135 3.19.1 download/v3.19.1 https://files.pythonhosted.org/packages/36/2b/ 61d51a2c4f25ef062ae3f74576b01638beba- python-pyyaml d5e045f747ff12643df63844 https://files.pythonhosted.org/packages/1e/7d/ ae3f0a63f41e4d2f6cb66a5b57197850f919f59e558159a4d- python-serial d3a818f5082 qt6base https://download.qt.io/archive/qt/6.3/6.3.1/submodules 6.3.1 xcb-util-image http://xcb.freedesktop.org/dist 0.4.0 http://xcb.freedesktop.org/dist xcb-util 0.4.0 xcb-util-keysyms http://xcb.freedesktop.org/dist 0.4.0 http://xcb.freedesktop.org/dist xcb-util-renderutil 0.3.9 http://xcb.freedesktop.org/dist xcb-util-wm 0.4.1 qt6declarative https://download.qt.io/archive/qt/6.3/6.3.1/submodules 6.3.1 qt6shadertools https://download.qt.io/archive/qt/6.3/6.3.1/submodules 6.3.1 R5900120 /01 CX-50 Gen2...
- Page 136 5.16 tcpdump https://www.tcpdump.org/release 4.99.1 http://downloads.sourceforge.net/project/trousers/tpm-tools/ tpm-tools 1.3.9.1 1.3.9.1 http://downloads.sourceforge.net/project/trousers/trousers/ trousers 0.3.15 0.3.15 https://github.com/tpm2-software/tpm2-tools/releases/ tpm2-tools download/5.2 https://github.com/tpm2-software/tpm2-tss/releases/ tpm2-tss 3.1.0 download/3.1.0 https://www.iana.org/time-zones/repository/releases tzdata 2021e wireless-regdb https://cdn.kernel.org/pub/software/network/wireless-regdb 2022.02.18 wireless_tools 30.pre9 https://hewlettpackard.github.io/wireless-tools wpa_supplicant http://w1.fi/releases 2.10 xapp_beforelight http://xorg.freedesktop.org/releases/individual/app 1.0.5 R5900120 /01 CX-50 Gen2...
- Page 137 1.2.1 xlib_libxcvt https://xorg.freedesktop.org/releases/individual/lib 0.1.1 xdriver_xf86-video- amdgpu https://xorg.freedesktop.org/releases/individual/driver 22.0.0 xfont_font-alias http://xorg.freedesktop.org/releases/individual/font 1.0.4 xfont_font-util http://xorg.freedesktop.org/releases/individual/font 1.3.2 xfont_font-cursor-misc http://xorg.freedesktop.org/releases/individual/font 1.0.3 xfont_font-misc-misc http://xorg.freedesktop.org/releases/individual/font 1.1.2 http://invisible-mirror.net/archives/xterm xterm ftp://ftp.info-zip.org/pub/infozip/src arphic-uming-fonts http://archive.ubuntu.com/ubuntu/pool/main/t/ttf-arphic-uming 20080216 dejavu-fonts http://downloads.sourceforge.net/project/dejavu/dejavu/2.34 2.34 git://git.kernel.org/pub/scm/linux/kernel/git/jejb/efitools.git efitools v1.7.0 http://sourceforge.jp/projects/efont/downloads/10087 sazanami-fonts 20040629 R5900120 /01 CX-50 Gen2...
- Page 138 255e29fcae045a- ac7013e456- d688db0682bcb- hostapd http://w1.fi/hostap.git 255e29fcae045a- ac7013e456- d688db0682bcb- hostapd_cli http://w1.fi/hostap.git https://sourceforge.net/projects/rscode/files/rscode/ rscode https://tukaani.org/xz 5.1.1 https://github.com/secure-remote-password/stanford-srp/tree/ libsrp master/libsrp 2.1.2 https://github.com/mstorsjo/fdk-aac libfdk-aac 0.1.4 https://github.com/macosforge/alac libalac mDNSResponder https://opensource.apple.com/source/mDNSResponder 878.30.4 nlohmann::json https://github.com/nlohmann/json 3.7.3 https://github.com/Azure/azure-iot-sdk-c azure-iot-c-sdk 2022-01-01 bcryptjs https://github.com/dcodeIO/bcrypt.js 2.4.3 R5900120 /01 CX-50 Gen2...
- Page 139 0.3.0 passport http://github.com/jaredhanson/passport 0.6.0 promise https://github.com/then/promise 8.1.0 https://github.com/request/request request 2.88.2 swagger-parser https://github.com/APIDevTools/swagger-parser 10.0.3 swagger-ui-express https://github.com/scottie1984/swagger-ui-express 4.3.0 https://www.nxp.com/support/developer-resources/software- development-tools/mcuxpresso-software-and-tools/ mcuxpresso-software-development-kit-sdk:MCUXpresso- SDK?tab=Design_Tools_Tab NXP-SDK 2.5.0 https://github.com/lz4/lz4/blob/dev/lib/lz4.h unlz4 ring-buff https://code.google.com/archive/p/ring-buff/ wpa_supplicant http://w1.fi/wpa_supplicant/ f5a28c74f- ba7a99736fe49- d3a5243e- quiet-libcorrect https://github.com/quiet/libcorrect ca29517ae9 R5900120 /01 CX-50 Gen2...
-
Page 140: Disposal Information
Electronic Products” (Also called RoHS of Chinese Mainland), the table below lists the names and contents of toxic and/or hazardous substances that Barco’s product may contain. The RoHS of Chinese Mainland is included in the MCV standard of the Ministry of Information Industry of China, in the section “Limit Requirements of toxic substances in Electronic Information Products”. - Page 141 Mainland, marked with the Environmental Friendly Use Period (EFUP) logo. The number inside the EFUP logo that Barco uses (please refer to the photo) is based on the “General guidelines of environment-friendly use period of electronic information products” of Chinese Mainland.
-
Page 142: Production Address
The month and year of production is indicated on the product ID label on the product itself. A.6 Importers contact information Contact To find your local importer, contact Barco directly or one of Barco's regional offices via the contact information given on Barco's web site, www.barco.com. R5900120 /01... - Page 144 R5900120 /01 | 2023-01-17 www.barco.com...
Need help?
Do you have a question about the CX-50 Gen2 and is the answer not in the manual?
Questions and answers