Barco C 3010S Installation Manual
Hide thumbs
Also See for C 3010S:
- Safety manual (15 pages) ,
- User manual (74 pages) ,
- User manual (66 pages)
Table of Contents
Advertisement
Advertisement
Table of Contents

Related Manuals for Barco C 3010S


Summary of Contents for Barco C 3010S
- Page 1 ClickShare CX-20 Model C 3010S Installation manual ENABLING BRIGHT OUTCOMES...
- Page 2 Barco NV Beneluxpark 21, 8500 Kortrijk, Belgium Registered office: Barco NV President Kennedypark 35, 8500 Kortrijk, Belgium...
- Page 3 Barco. Changes Barco provides this manual 'as is' without warranty of any kind, either expressed or implied, including but not limited to the implied warranties or merchantability and fitness for a particular purpose. Barco may make improvements and/or changes to the product(s) and/or the program(s) described in this publication at any time without notice.
-
Page 5: Table Of Contents
Table of contents 1 CX-20Introduction....................................9 About the CX-20 ....................................10 CX-20 specifications ..................................11 About the Base Unit..................................13 2 Getting started......................................15 Installation requirements ................................16 Security recommendations before starting........................17 Basic Workflow....................................18 3 CX-20 Installation....................................19 Installation methods for the Base Unit ..........................20 Guidelines for ClickShare Conference system installation..................21 Table mounting....................................22 Wall or ceiling mounting ................................23... - Page 6 Pairing ........................................60 ClickShare Extension Pack ...............................61 ClickShare Extension Pack installer.............................62 ClickShare Windows Certified driver ...........................64 ClickShare Desktop App................................65 MSI installer of the ClickShare Desktop App........................66 5 CX-20 Configurator....................................67 Accessing the Configurator ...............................69 ClickShare Configuration Wizard............................73 On-Screen ID information ................................75 Personalisation, Wallpaper................................77 Personalisation, Personalized wallpaper ..........................79 Manage configuration files.................................81 Display &...
- Page 7 7 Troubleshooting ....................................137 Troubleshooting list..................................138 Index ..........................................141 R5900102 /11 ClickShare CX-20...
- Page 8 R5900102 /11 ClickShare CX-20...
-
Page 9: Cx-20Introduction
This installation manual explains how to install your CX-20 in a meeting room, It explains also how to make everything operational. It provides detailed information on how to configure your CX-20. Available System documentation Next to the installation manual, a user guide and a safety manual are available on Barco’s website, www. barco.com/clickshare. -
Page 10: About The Cx-20
CX-20Introduction 1.1 About the CX-20 CX-20 sets With the Conferencing Button, in seconds, you are automatically connected to cameras, mics, soundbars and any other AV peripherals in the room for a better, more immersive meeting experience. Everything becomes part of your laptop. This CX-20 not only helps the presenter get the presentation on-screen in a second, but it also allows the other people in the conference to participate more actively. -
Page 11: Specifications
CX-20Introduction 1.2 CX-20 specifications Base unit Dimensions (HxWxD) 34 mm x 135 mm x 135 mm Power supply Standard 110/220 V AC plug or USB-C (only Gen2) Power consumption Operational: 5-10W, 24W Max Weight 900 gr Operating system Windows 10 and higher macOS 11 (BigSur) and higher Android v11 and higher (ClickShare App) iOS 14 and higher (ClickShare App) System requirements... - Page 12 CX-20Introduction Operation: 0 to 85% relative humidity, non-condensing Anti-theft system Kensington lock Certifications FCC/CE Touch screen support & Interactivity Wireless conferencing via App or Button Local view Local view of the room display only Network connection LAN & WiFi Management and reporting Warranty 1 year standard.
-
Page 13: About The Base Unit
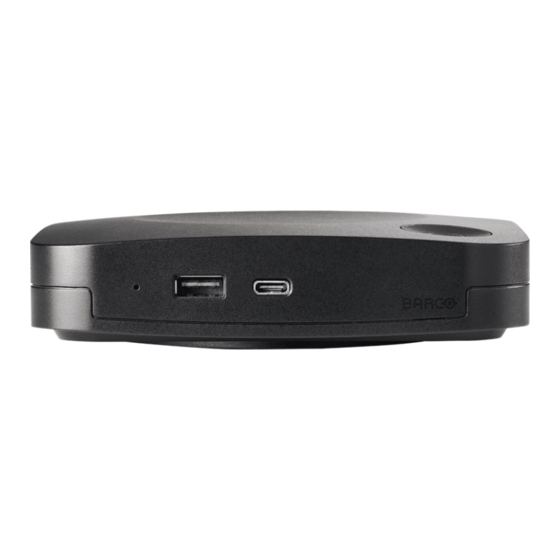
CX-20Introduction 1.3 About the Base Unit Base Unit functionality The Base Unit receives the wireless input from the Buttons and controls the content of the meeting room display and the peripherals connected to the Base Unit (speakers, microphones, webcam and soundbar). Furthermore, it will send out the content from the camera and/or the echo-cancelling speakerphone towards the Button. - Page 14 The antenna is built-in in the CX-20. Bottom layout of the Base Unit The serial number label containing the Barco part number, the revision number, production date (week-year) and the serial number. The product label with the applicable certification logos.
-
Page 15: Getting Started
Getting started Installation requirements .......................16 Security recommendations before starting ..................17 Basic Workflow..........................18 R5900102 /11 ClickShare CX-20... -
Page 16: Installation Requirements
Getting started 2.1 Installation requirements Ambient temperature conditions Max. ambient temperature : +40°C or 104°F Min. ambient temperature: +0°C or 32°F Storage temperature: -10°C to +60°C (14°F to 140°F) Humidity conditions Storage: 0 to 90% relative humidity, non-condensing Operation: 0 to 85% relative humidity, non-condensing Environment condition check For installations in environments where the device is subject to excessive dust, then it is highly advisable and desirable to have this dust removed prior to it reaching the device clean air supply. -
Page 17: Security Recommendations Before Starting
Keep your Base Units and Buttons up to date Barco keeps improving their devices, this means extending existing features and adding new ones, but also providing security patches. Therefore, it is strongly recommended to keep the Base Units up to date with the latest available firmware, and ensure Buttons are updated. -
Page 18: Basic Workflow
Register the Base Unit in XMS Cloud and claim the free SmartCare package. For more information, see “XMS Cloud registration”, page Pair your Buttons, see “Pairing”, page 60 For more information on using CX-20, refer to the CX-20 User Guide. This manual can be found on Barco's website www.barco.com/clickshare. R5900102 /11 ClickShare CX-20... -
Page 19: Installation
CX-20 Installation Installation methods for the Base Unit ....................20 Guidelines for ClickShare Conference system installation ..............21 Table mounting..........................22 Wall or ceiling mounting ........................23 Standalone setup .........................25 Network deployment requirements....................26 Network connected setup ......................28 Dual network connected setup.......................29 Dedicated network setup.......................31 3.10 Fully equipped, Audio only or Camera only conference room ............33 3.11 Video signal connections to the Base Unit ..................35 3.12 Camera connection........................36... -
Page 20: Installation Methods For The Base Unit
CX-20 Installation 3.1 Installation methods for the Base Unit For optimal performance, install the Base Unit close to the display and avoid obstacles between the Base Unit and the Buttons. Make sure not to install the Base Unit in a metal enclosure. Physical installation The Base Unit can be installed in different ways in a meeting room. -
Page 21: Guidelines For Clickshare Conference System Installation
ClickShare apps and possibly the ClickShare Button will not be able to wake the Base Unit from standby. For a more detailed guidelines, see “Network Deployment Guide” available on the support pages of the product on Barco’s website. R5900102 /11 ClickShare CX-20... - Page 22 CX-20 Installation 3.3 Table mounting Overview Put the Base Unit directly on the meeting room table. The total weight of the Base Unit is 530 g. R5900102 /11 ClickShare CX-20...
-
Page 23: Wall Or Ceiling Mounting
CX-20 Installation 3.4 Wall or ceiling mounting About wall or ceiling mounting A mounting base is used to mount the CX-20 to the wall or ceiling. This base has key-shaped screw holes to allow you to fasten the base to a wall or ceiling or you can use the self-adhesive layer to mount the base. Once you determine the location for your device follow the next procedure to mount the device. - Page 24 CX-20 Installation Image 3–2 Mounting with the self-adhesive layer Peel off the removable protection foil. Image 3–3 Stick the base on the chosen location. Place your device on the mounting base and turn it clockwise until it is locked (Image 3–2).
-
Page 25: Standalone Setup
CX-20 Installation 3.5 Standalone setup Overview This setup is the simplest in terms of installation and can be used for temporary setups and in organizations where central management and 3rd party integration are not required. The ClickShare Base Unit and Button (s) operate directly out of the box, without any integration in the Enterprise network. -
Page 26: Network Deployment Requirements
Base Unit: first-time setup • Activation and update: for this action, similar to the auto-update functionality described below, an outbound TCP connection on port 443 is required towards update.cmp.barco.com and assets.cloud.barco. com. • Connection to XMS Cloud for activating SmartCare and XMS Cloud functionality: TCP Port 443 outbound to *.azure-devices.net, *.core.windows.net and global.azure-devicesprovisioning.net. - Page 27 CX-20 Installation Sender/Receiver Ports SNMP 161 and 162 REST API 4003 R5900102 /11 ClickShare CX-20...
-
Page 28: Network Connected Setup
CX-20 Installation 3.7 Network connected setup Overview This is the simplest installation which offers a seamless experience for employees and is the recommended setup for temporary setups, visitors' centers, small to medium installations without network integration needs, for internal meeting rooms, for companies with a flat network topology or when the ClickShare Button will be the main way for people to the system. -
Page 29: Dual Network Connected Setup
CX-20 Installation 3.8 Dual network connected setup Overview This installation offers a seamless experience for employees and guests and is the recommended setup for any organization with an advanced network configuration, for meeting rooms which will be frequently used by guests, visitors and externals or when the ClickShare Apps and native BYOD protocols, such as AirPlay, Google Cast and Miracast, will be frequently used in the organization. - Page 30 CX-20 Installation Re-pair the ClickShare Buttons with the updated Base Unit(s) to apply the new configuration For more detailed information on how to use XMS, consult the XMS user guide. R5900102 /11 ClickShare CX-20...
-
Page 31: Dedicated Network Setup
CX-20 Installation 3.9 Dedicated network setup Overview This installation offers an isolated network setup where all connections from and to the Base Units can be controlled. This dedicated AV (or ClickShare) network or VLAN can be used for more fine-grained access control, to ensure no connection can happen between any of the connected physical or virtual LANs or to separate all ClickShare traffic from all other IP traffic to ensure business requirements in terms of bandwidth, security and latency. - Page 32 CX-20 Installation Setup via XMS Log in to XMS and go to the Base Units tab. In the device list select the Unit(s) for deploying network integration mode. Open the Configure dropdown list and choose Network integration. Select one of the authentication modes for network integration mode and fill out the details. Re-pair the ClickShare Buttons with the updated Base Unit(s) to apply the new configuration For more detailed information on how to use XMS, consult the XMS user guide.
-
Page 33: Fully Equipped, Audio Only Or Camera Only Conference Room
CX-20 Installation 3.10 Fully equipped, Audio only or Camera only conference room Fully equipped conference room The following components should be available in the room: • USB camera must support at least a resolution of 720p. • a combined speaker - microphone system connected via USB. When connecting with the Button, it allows you to connect the room speakerphone, microphone and camera wireless to your laptop and use the better equipment of the room in your video conferencing call. - Page 34 CX-20 Installation When connecting with the Button or ClickShare desktop app, it allows you to connect the room speakerphone and microphone to your laptop for use in a conferencing call. Video only room Video only rooms have just an USB camera connected to the Base Unit. R5900102 /11 ClickShare CX-20...
-
Page 35: Video Signal Connections To The Base Unit
CX-20 Installation 3.11 Video signal connections to the Base Unit About Video signal connection A single screen can be connected to the Base Unit. To connect a display, an HDMI connection should be made between the Base Unit and the display. To connect Connect the Base Unit to the display using a display cable. -
Page 36: Camera Connection
Any USB camera with at least a resolution of 720p can be connected to the Base Unit. A list of supported cameras can be found on Barco’s website. Since the USB ports are USB 2.0 or higher ports, HDMI cameras are supported via HDMI to USB converter. -
Page 37: Content Audio Connection
CX-20 Installation 3.13 Content Audio connection About content audio (no speakerphone connected) The ClickShare Button captures the audio output of the user’s laptop and sends it to the Base Unit together with the video signal. The audio can be output at line levels via the HDMI connector (can be set in the configurator). -
Page 38: Echo Canceling Speakerphone Audio Connection
It is a bidirectional audio transmission between the Button and the speakerphone. USB speakerphone support A list of supported speakerphones can be found on Barco’s website. How to connect an echo-canceling speakerphone Connect your speakerphone device via USB to the Base Unit. -
Page 39: Lan Connection
CX-20 Installation 3.15 LAN connection About LAN connection The Base Unit can be connected to a local network or directly to a laptop. Maximum allowed LAN speed: 1000 Mbit We do strongly advise the LAN connection and the use of XMS cloud for configuration, monitoring and additional functionality. -
Page 40: Power Connection
CX-20 Installation 3.16 Power connection About power An external power adapter is delivered with the product. The output rate is 12 VDC 2A. CAUTION: Once the Base Unit is powered, it starts up. Then the power button can be used to switch on or off. -
Page 41: First Startup Of The Base Unit
CX-20 Installation 3.17 First startup of the Base Unit Workflow First time boot of the Base Unit. The following screen is seen on the connected monitor. Image 3–11 Onboarding screen There are now 2 ways to continue: 1. Check for updates (optional), configure your Base Unit and register to XMS Cloud. See “Preferred way to start up”, page 43 2. -
Page 42: Start Up Without Configuration
CX-20 Installation 3.18 Start up without configuration How to start Plug in a Button and start sharing your screen. As soon as a user connects to the Base Unit, the default wallpaper will be shown on the meeting room display and the unit can be used with it's default configuration. However, as long as the Configuration Wizard has not been completed, the initial startup screen will again be shown at each reboot of the device. -
Page 43: Preferred Way To Start Up
CX-20 Installation 3.19 Preferred way to start up What will be done? After an optional firmware update check, the configuration wizard should be started to configure the Base Unit. How to handle Connect the device’s WiFi with the given instructions. The default SSID is ClickShare-[serial number]. - Page 44 CX-20 Installation Image 3–13 When connected to the internet you can select Automatic for firmware update (recommended). If you set it on No, you still have the choice to manually update by downloading the software on an USB stick. When connected to the internet and the setting is set to Automatic, the software check will be done and the latest version will be downloaded but the update of the firmware will be executed only when finishing the configuration wizard.
- Page 45 CX-20 Installation Image 3–15 Enter a time zone and make a selection between manual time setup and the use of NTP. For more info about manual time setup, see “Date & Time setup, manually”, page 116. For more info about the use of an NTP server, see “Date &...
- Page 46 CX-20 Installation Image 3–17 We advise to change the default password to enter the Configurator. For more info, see “Security, passwords”, page 112. Network settings Image 3–18 Select the frequency band, channel and enter a Wi-Fi passphrase when desired. For more info, see “Wi-Fi settings, Access Point settings”, page SmartCare registration...
- Page 47 CX-20 Installation Image 3–19 To activate SmartCare, registering the Base Unit in XMS Cloud is required. There are two ways to register on XMS Cloud. 1. Pc registration: click the link below the QR code to start the registration process. For more information, see “Pc onboarding”, page 49 2.
- Page 48 CX-20 Installation Image 3–21 R5900102 /11 ClickShare CX-20...
-
Page 49: Xms Cloud Registration
• XMS for management • 5-year analytics management For more info, see https://www.barco.com/en/clickshare/apps-accessories/smartcare. 3.20.1 Pc onboarding How to register on pc Click on the link below the QR code on the SmartCare page of the configurator. Image 3–22 Example of the registration log-in page on pc. -
Page 50: Mobile Onboarding
CX-20 Installation Available Base Unit(s) will automatically be scanned and prepped for registration. Review the information to ensure the correct Base Unit(s) will be added to the correct organisation. If the information is correct, click “Continue”. Image 3–23 Example of linked Base Unit(s) Connect the Base Unit to the network to finalise the onboarding. - Page 51 CX-20 Installation Click on the arrow “>” or search and click on the arrow “>” for the desired organisation from the list. Image 3–25 Example of the registration page. If the desired organisation is not in the list, follow the below substeps to create a new organisation within XMS.
- Page 52 CX-20 Installation Image 3–27 Example of the organisation overview. Scan the QR code on bottom of the Base Unit to register it to XMS Cloud. Tip: The browser must be given access to the camera to be able to scan the codes! Image 3–28 Example of QR code scanning page.
- Page 53 CX-20 Installation Image 3–29 Example of manual registration with a token. Enter the serial number of the Base Unit. Click “Verify Token” to process and register the Base Unit. Tip: If the camera and token registration cannot be found, click on “+ Add More” to reopen these. Image 3–30 Repeat these (sub)steps until all desired Base Units have been added.
-
Page 54: Activating Calendar Integration With Xms Cloud
Calendar Sync’ using a per customer unique and random client secret. The client secret is created by Microsoft with the following properties: randomly generated and expires automatically after 24 months. For more in-depth information, see Barco’s Security white paper “XMS Cloud and (Virtual) Edge Security Whitepaper” which can be downloaded from Barco’s website. - Page 55 CX-20 Installation How to setup the calendar (as IT administrator) The following actions are to be performed by the IT administrator with a global Administrator role in Azure Active Directory. In XMS Cloud, go to Marketplace >> Microsoft Calendar. The Calendar default page is displayed. Image 3–32 Click Connect Azure Account.
- Page 56 CX-20 Installation Image 3–34 This process should finish in 10 to 30 minutes. Only in exceptional cases, this could take longer. Once the process has finished, the screen is refreshed and shows the Continue integration button. Image 3–35 Click Continue integration to request the O365 admin’s final permission to read calendar information for each room-account and generate credential for devices to achieve that.
- Page 57 CX-20 Installation Image 3–37 In order to assign Base Unit devices to your calendar meeting rooms, click Manage Calendar. Alternatively, you can also browse in XMS Cloud to: “Manage” >> Calendar. Assign a meeting room to a calendar On the Manage Calendar page, spot the desired Meeting room and click on + Link Base Unit. Image 3–38 Example of the Manage Calendar window.
- Page 58 CX-20 Installation Image 3–40 Example of the meeting room linked with a Base Unit device Repeat this procedure for every meeting room that has a ClickShare Base Unit device. About Credentials By default the user does not need to do anything for expiring credentials. as XMS Cloud auto-renews credentials during an periodic credentials check.
-
Page 59: Preparing The Buttons
Preparing the Buttons Pairing ............................60 ClickShare Extension Pack ......................61 ClickShare Extension Pack installer ....................62 ClickShare Windows Certified driver ....................64 ClickShare Desktop App .......................65 MSI installer of the ClickShare Desktop App ...................66 R5900102 /11 ClickShare CX-20... -
Page 60: Pairing
Preparing the Buttons 4.1 Pairing Pairing of the Buttons with the Base Unit To be able to use a Button it should be assigned to the Base Unit you are using. This process is called pairing. All Buttons will need to be updated and paired before use. In case you buy additional Buttons or when a Button should be assigned to another Base Unit, the Button needs to be paired (again). -
Page 61: Clickshare Extension Pack
SCCM or other tools. The ClickShare Extension Pack can be used in combination with a Button and/or with the ClickShare desktop app. The latest extension pack can be downloaded via http://www.barco.com/en/product/clickshare-extension-pack R5900102 /11 ClickShare CX-20... -
Page 62: Clickshare Extension Pack Installer
In this setup, a user or an IT admin can install the ClickShare Extension pack using the Windows command prompt. Following is an example of a silent installation (version numbers are only given as example, always check Barco’s web for the latest version): Launcher only install: msiexec. - Page 63 Preparing the Buttons ACCEPT_EULA This parameter shows that the installer accepts the EULA text as is. This parameters must be set to YES in order to continue to the installation. INSTALLFOLDER This parameter specifies the installation directory for ClickShare launcher. If not specified, the default folder will be the Program Files folder.
-
Page 64: Clickshare Windows Certified Driver
Preparing the Buttons 4.4 ClickShare Windows Certified driver About The ClickShare Windows Certified driver is auto-installed when plugging in a Button in a Window PC. This Windows driver automatically lauches the executable on the Button. Note that at least version 1.20.0 is required in order to support Buttons with firmware version 4.10 or higher. In case an older version is installed on your PC, start windows update check for updates with a button inserted into your PC. -
Page 65: Clickshare Desktop App
Preparing the Buttons 4.5 ClickShare Desktop App About With the ClickShare Desktop App installed on your computer you can enter a meeting room and get on the screen in a few seconds without the need to plug in a Button. The ClickShare Desktop App can be used in combination with a Button. -
Page 66: Msi Installer Of The Clickshare Desktop App
Preparing the Buttons 4.6 MSI installer of the ClickShare Desktop App CAUTION: Installation can only be done with administrator rights. How to install Download the MSI installer from www.clickshare.app. Run the MSI installer by double clicking the downloaded file. The installation wizard starts. Follow the instruction on the different windows. Image 4–4 Read the License Agreement and check the 'I accept the terms in the license agreement' checkbox to continue. -
Page 67: Configurator
CX-20 Configurator Accessing the Configurator ......................69 ClickShare Configuration Wizard ....................73 On-Screen ID information......................75 Personalisation, Wallpaper ......................77 Personalisation, Personalized wallpaper ..................79 Manage configuration files......................81 Display & Audio setup ........................83 Peripherals ..........................84 Wi-Fi settings ..........................86 5.10 Wi-Fi settings, Access Point settings ....................87 5.11 Wi-Fi settings, Wireless Client .......................90 5.12 Wi-Fi settings, Wireless Client, EAP-TLS..................91 5.13 Wi-Fi settings, Wireless Client, EAP-TTLS..................94... - Page 68 CX-20 Configurator About configuration The configuration of your device can be done in • XMS cloud • the local configurator The configurator in XMS cloud will (in time) more elaborated than the local configurator. Therefore it preferred to configure your devices via XMS cloud. For more info see XMS documentation. The next topics are describing the local configurator.
-
Page 69: Accessing The Configurator
CX-20 Configurator 5.1 Accessing the Configurator Getting access to the Configurator There are three ways to access the Configurator: • Via the LAN • Direct Ethernet connection between PC and Base Unit. • Via the Base Unit's wireless network When accessing the configurator for the first time, the ClickShare Configuration Wizard starts automatically. This configuration wizard can be started at any moment to change your configuration instead of using the menus. - Page 70 CX-20 Configurator Image 5–2 Configurator lanuguages The following languages are possible: • Arabic • Simplified Chinese • Traditional Chinese • Danish • Dutch • English • Finnish • French • German • Italian • Japanese • Korean • Norwegian • Portuguese •...
- Page 71 CX-20 Configurator Image 5–3 Start screen The language of the configurator can be changed on any page in the interface. The screen is split up in 2 panes. Left pane with the selection buttons and a right pane to configure the selected function.
- Page 72 CX-20 Configurator To access the Configurator via the Base Unit wireless network On your laptop, connect to the Base Unit wireless network. The default SSID and password to connect to the Base Unit are respectively 'ClickShare-<serial base number>' and 'clickshare'. On your laptop, open a browser.
-
Page 73: Clickshare Configuration Wizard
CX-20 Configurator 5.2 ClickShare Configuration Wizard This procedure is equal with the onboarding procedure. About the configuration wizard During the first start up of the Base Unit, the configuration wizard starts up automatically. Or, you can start up the configuration wizard by clicking at the bottom left on Configuration wizard or on Lauch configuration wizard on the dashboard page. - Page 74 CX-20 Configurator Image 5–5 Configuration welcome page Click Start configuration. Fill out the necessary items and click Next to continue. To return to the previous step, click on Back. For more information about a specific topic, see one of the following topics. The ClickShare Configuration Wizard can be started at any time to change the configuration just by clicking on ClickShare Configuration Wizard at the left bottom of each screen or on Lauch configuration wizard on the start page.
-
Page 75: On-Screen Id Information
CX-20 Configurator 5.3 On-Screen ID information About device identification The following items can be set: • On-Screen language. Independent from the Configurator language. • Meeting room name • Location of the meeting room • Welcome message to be displayed in the meeting room •... - Page 76 CX-20 Configurator • Russian • Spanish • Swedish Meeting room name, location and welcome message Log in to the Configurator. Click Personalisation → On-screen ID. Click in the input field next to Meeting room name and enter a name for the meeting room. This text is shown on the user's device when the Button is ready to share ("Ready to share on..."), on the central screen connected to the Base Unit and in the list of AirPlay receivers on the user's iOS device.
-
Page 77: Personalisation, Wallpaper
The Wallpaper selection pane is shown. The current selected wallpaper is shown with a red border. Select one of the available wallpapers and click on Save Changes. Note: By default two general Barco wallpapers are available. They are automatically resized to fit the aspect ratio of the screen. - Page 78 CX-20 Configurator Image 5–8 Download wallpaper The wallpaper is downloaded to your PC. Enable - disable Wallpaper Within the Wallpaper pane, check the check box next to Show the wallpaper when no one is sharing their screen. Checked: wallpaper will be displayed when no one is sharing content. Not checked: no wallpaper will be displayed when no one is sharing content.
-
Page 79: Personalisation, Personalized Wallpaper
CX-20 Configurator 5.5 Personalisation, Personalized wallpaper How to upload Log in to the Configurator Click Personalisation → Wallpaper. The Wallpaper selection pane is shown. The current selected wallpaper is shown with a red border. Hoover your mouse over the free place and click on Choose image. Image 5–9 Personalized wallpaper selection A browser window opens. - Page 80 CX-20 Configurator Image 5–10 Change image Browse for the desired image, click Open to load the image. The content of the file is checked and when valid (format and size), the file is uploaded. The new wallpaper gets a red border. Click on Save changes to apply the personalized wallpaper and replace the previous file.
-
Page 81: Manage Configuration Files
CX-20 Configurator 5.6 Manage configuration files About Manage configuration files A full backup can be downloaded but cannot be used to duplicate configuration settings to other Base Units. Therefore, it is possible to download a Portable version. This portable version can be uploaded via the upload configuration button on other Base Units (same type). - Page 82 CX-20 Configurator R5900102 /11 ClickShare CX-20...
-
Page 83: Display & Audio Setup
CX-20 Configurator 5.7 Display & Audio setup Resolution The output resolution to the display is set on Auto. That means that the CX-20 output resolution is automatically adapted to the resolution of the display. For HDMI displays, a hot plug detection is available. When a display is connected to the output the Model &... -
Page 84: Peripherals
Update of firmware of the peripheral devices via the configurator is supported for Logitech Meetup and Rally and only when the camera is not in use. When the installed firmware version is lower than the Barco certified peripheral firmware version, then the install button becomes active. Click on Install the install the latest version. - Page 85 CX-20 Configurator Image 5–15 Quality score • Green: >68 • Orange: 35 – 68 • Red: 0 – 34 Source (camera to Base Unit) is requested frame rate. This frame rate results in a destination frame rate between Base Unit and app or Button. R5900102 /11 ClickShare CX-20...
-
Page 86: Wi-Fi Settings
CX-20 Configurator 5.9 Wi-Fi settings WARNING: It is not allowed to operate the Base Unit outside its intended geographical region. For wireless conferencing, it is recommended to use the 5 GHz frequency band. About The operational mode of the Wi-Fi setting can be set in 3 different modes: •... -
Page 87: Wi-Fi Settings, Access Point Settings
CX-20 Configurator 5.10 Wi-Fi settings, Access Point settings How to change Check the check box next to Enable. Checked: access point settings are enabled. All current settings can be changed. Unchecked: access point settings are disabled. If desired, enter a new Wi-Fi passphrase and confirm this Wi-Fi passphrase. Image 5–17 Wi-Fi settings, access point settings Enter a public name (SSID) for the wireless network. - Page 88 CX-20 Configurator Channel Channel Channel Channel Channel Channel Channel Channel Channel Image 5–18 The 5 GHz channels do not overlap with each other and are less used by non-Wi-Fi devices than the 2.4 GHz channels. Moreover, 5 GHz signals are more rapidly damped than 2.4 GHz signals. Therefore, the use of a 5 GHz channel is recommended.
- Page 89 CX-20 Configurator R5900102 /11 ClickShare CX-20...
-
Page 90: Wi-Fi Settings, Wireless Client
CX-20 Configurator 5.11 Wi-Fi settings, Wireless Client Introduction Wireless Client mode allows to connect the Base Unit to a network over Wi-Fi instead of via the Ethernet interface. It brings identical functionality as a wired network connection; complete network integration, auto- update functionality and central management in XMS. -
Page 91: Wi-Fi Settings, Wireless Client, Eap-Tls
CX-20 Configurator 5.12 Wi-Fi settings, Wireless Client, EAP-TLS About EAP-TLS EAP-TLS (Transport Layer Security) is an EAP method based on certificates which allows mutual authentication between client and server. It requires a PKI (Public Key Infrastructure) to distribute server and client certificates. - Page 92 CX-20 Configurator Manually providing certificates Upload client certificate. Click on Choose file and browse to the desired file. Allowed file formats: • .pfx (PKCS#12) • .p12 (Base64 encoded DER) The should at least include the client certificate and corresponding private key. Enter the Client certificate Password.
- Page 93 CX-20 Configurator Image 5–22 Wi-Fi Settings, Wireless Client, EAP-TLS, SCEP R5900102 /11 ClickShare CX-20...
-
Page 94: Wi-Fi Settings, Wireless Client, Eap-Ttls
CX-20 Configurator 5.13 Wi-Fi settings, Wireless Client, EAP-TTLS About EAP-TTLS EAP-TTLS (Tunneled Transport Layer Security) is an EAP implementation by Juniper networks. It is designed to provide authentication that is as strong as EAP-TLS, but it does not require each user to be issued a certificate. -
Page 95: Wi-Fi Settings, Wireless Client, Peap
CX-20 Configurator 5.14 Wi-Fi settings, Wireless Client, PEAP About PEAP PEAP (Protected Extensible Authentication Protocol) is an EAP implementation co-developed by Cisco Systems, Microsoft and RSA Security. It sets up a secure TLS tunnel using the servers CA certificate after which actual user authentication takes place within the tunnel. - Page 96 CX-20 Configurator File should at least contain the root CA certificate for your domain. Click Save Changes to save the settings. R5900102 /11 ClickShare CX-20...
-
Page 97: Wi-Fi Settings, Wireless Client, Wpa2-Psk
CX-20 Configurator 5.15 Wi-Fi settings, Wireless Client, WPA2-PSK About WPA2-PSK WPA2-PSK does not distinguish between individual users, there is 1 password (PSK – Pre-Shared Key) for all clients connecting to the wireless infrastructure. This makes setup very straightforward. Once connected, all data transmitted between client and AP (access point) is encrypted using a 256 bit key. -
Page 98: Lan Settings
CX-20 Configurator 5.16 LAN settings About LAN network settings A network connection can be configured through DHCP or by manually entering a fixed IP address. DHCP Dynamic host configuration protocol. DHCP is a communications protocol that lets network administrators manage centrally and automate the assignment of IP addresses in an organization's network. - Page 99 CX-20 Configurator When Automatic (DHCP) is selected, the IP address, subnet mask and default gateway fields are grayed out but the currently used settings are filled out. Click Save changes to apply the settings. Manual (fixed) IP address Click on the drop down box next to Method and select Manual. The IP address, subnet and gateway input fields are activated.
-
Page 100: Lan Settings, Wired Authentication
CX-20 Configurator 5.17 LAN Settings, Wired Authentication How to setup Click on Setup wired authentication..Image 5–28 Wired authentication The setup wizard starts. Select the authentication method. Click on the drop down and select the desired method. The following methods are available: •... -
Page 101: Lan Settings, Eap-Tls Security Mode
CX-20 Configurator 5.18 LAN Settings, EAP-TLS security mode About EAP-TLS EAP-TLS (Transport Layer Security) is an EAP method based on certificates which allows mutual authentication between client and server. It requires a PKI (Public Key Infrastructure) to distribute server and client certificates. - Page 102 CX-20 Configurator • .crt • .pb7 (Base64 encoded DER) File should at least contain the root CA certificate for your domain. Save configuration Using Auto enrollment The Simple Certificate Enrolment Protocol (SCEP) is a protocol which enables issuing and revoking of certificates in a scalable way.
-
Page 103: Lan Settings, Eap-Ttls Security Mode
CX-20 Configurator 5.19 LAN Settings, EAP-TTLS security mode About EAP-TTLS EAP-TTLS (Tunneled Transport Layer Security) is an EAP implementation by Juniper networks. It is designed to provide authentication that is as strong as EAP-TLS, but it does not require each user to be issued a certificate. - Page 104 CX-20 Configurator File should at least contain the root CA certificate for your domain. Click Save configuration. R5900102 /11 ClickShare CX-20...
-
Page 105: Services, Mobile Devices
Base Unit. Then AirPlay must be activated on your device. For more information about activating AirPlay, consult the user guide of your device. The supported versions of AirPlay can be found on Barco’s website, www.barco.com\clickshare. The support of non-released version of these protocols cannot be guaranteed by Barco. - Page 106 CX-20 Configurator Image 5–33 Services, mobile devices To allow sharing content via ClickShare app, Sharing via ClickShare app is activated by default and cannot be changed. To allow streaming via AirPlay, check the check box in front of Streaming via AirPlay. To allow streaming (mirroring) via Google Cast, check the check box in front of Streaming via Google Cast.
-
Page 107: Service, Presentsense
CX-20 Configurator 5.21 Service, PresentSense About PresentSense The PresentSense function makes it easy to connect to a Base Unit when walking in meeting room. When this function is enabled and the ClickShare desktop app is installed on the user’s PC, when walking in a meeting room the Base Unit detects via ultrasound, which contains the device ID and pin code, your presence and makes the connection with the included pin code after the user click Connect on a popup on his PC.. -
Page 108: Service, Clickshare Api, Remote Control Via Api
CX-20 Configurator 5.22 Service, ClickShare API, remote control via About API settings The API can be enabled or disabled, that means that the access to the unit from an external device can be allowed or can be blocked. This functions in enabled by default. API documentation The API documentation is included in the Base Unit. -
Page 109: Services, Snmp
When using the default Engine ID, make sure the check box before Use default Engine ID is checked. The default engine ID is a combination of the Barco Enterprise Number with the MAC-address (eth0). Fill out the SNMP Manager address. -
Page 110: Security, Security Level
CX-20 Configurator 5.24 Security, security level About security levels For the use of the ClickShare system, a security level can be set. By default, level 1 is activated. A security level is a predefined set of settings which are automatically set when a level is selected. Level 1 : offers support for normal day-to-day operations in any organization. - Page 111 CX-20 Configurator Image 5–37 Security levels Select the desired security level icon. Click Save changes to apply the setting. R5900102 /11 ClickShare CX-20...
-
Page 112: Security, Passwords
CX-20 Configurator 5.25 Security, passwords About passwords To access the ClickShare Configurator a user name and password is needed. That password can be changed at any time to protect the ClickShare Configuration settings. Changing the ClickShare Configurator & API password Log in to the Configurator. -
Page 113: Security, Http Encryption
CX-20 Configurator 5.26 Security, HTTP Encryption About HTTP encrytion HTTP encryption can be set up by using a self signed certificate or a custom certificate. By default, a self signed certificate is used. How to setup Log in to the Configurator. Click Security →... - Page 114 CX-20 Configurator Image 5–41 Upload custom certificate Click on Upload certificate. A browser window opens. Select the desired custom certificate file and click Open. The allowed file formats are: • .pfx/.p12 (PKCS#12) • .pem (Base64 encoded) Click on Generate CSR . A Download Certificate Signing Request page opens.
-
Page 115: Status Information Base Unit
CX-20 Configurator 5.27 Status information Base Unit Status information The following information can be found: • Model information, name and part number • Serial number • Firmware version • First used • Last used • Current uptime: time since last startup •... -
Page 116: Date & Time Setup, Manually
CX-20 Configurator 5.28 Date & Time setup, manually About Date & Time setup The date and time can be set manually using the time zone indication or using at least one NTP servers. How to setup Log in to the Configurator. Click System →... - Page 117 CX-20 Configurator Image 5–45 Time setup Click on the up down arrow of each scroll counter until the correct hour, minutes and seconds are obtained. Select the time format. Checked: use of 24 hour time format Not checked: use of 12 hour time format Click Save changes to apply.
-
Page 118: Date & Time Setup, Time Server
CX-20 Configurator 5.29 Date & Time setup, time server About using NTP server The clock is continuously synchronized with an external time server and the deviation is in the order of milliseconds. Extra time servers can be added. As long as there is no synchronization with a time server the status is indicated as disabled. How to setup Log in to the Configurator. -
Page 119: Energy Savers
CX-20 Configurator 5.30 Energy savers About standby Standby after (minutes): If there is no client connection detected during the standby timeout period, the Base Unit will enter the selected standby mode. Default setting: Time to standby: 10 min, the Base Unit will enter the Eco standby mode. Eco mode When the Base Unit enters ECO standby mode, it will disable the HDMI output signal. -
Page 120: Buttons
CX-20 Configurator 5.31 Buttons About Buttons The Button page indicates to which Base Unit or network the Buttons are connected. It also shows their current state. When connected to a network, it indicates the domain, the identity and provided certificate. The Buttons can be connected to a Base Unit or to an external access point. -
Page 121: Buttons, External Access Point, Mode Eap-Tls
CX-20 Configurator 5.32 Buttons, External access point, mode EAP- How to fill out Fill out a Corporate SSID. Image 5–49 Buttons, External access point, mode EAP-TLS The SSID of your corporate wireless infrastructure to which the ClickShare Buttons will connect. Fill out the Domain and Identity. - Page 122 CX-20 Configurator File should at least contain the root CA certificate for your domain. Save Changes Using Auto enrollment The Simple Certificate Enrolment Protocol (SCEP) is a protocol which enables issuing and revoking of certificates in a scalable way. SCEP support is included to allow a quicker and smoother integration of the ClickShare Base Unit and Buttons into the corporate network.
-
Page 123: Buttons, External Access Point, Mode Eap-Ttls
CX-20 Configurator 5.33 Buttons, External access point, mode EAP- TTLS How to fill out the settings Fill out a Corporate SSID. Image 5–52 Buttons, External access point, mode EAP-TTLS The SSID of your corporate wireless infrastructure to which the ClickShare Buttons will connect. Fill out the Domain and Identity. -
Page 124: Buttons, External Access Point, Mode Peap
CX-20 Configurator 5.34 Buttons, External access point, mode PEAP How to fill out the settings Fill out a Corporate SSID. Image 5–53 Buttons, External access point, mode PEAP The SSID of your corporate wireless infrastructure to which the ClickShare Buttons will connect. Fill out the Domain and Identity. -
Page 125: Buttons, External Access Point, Mode Wpa2-Psk
CX-20 Configurator 5.35 Buttons, External access point, mode WPA2- How to fill out the settings Fill out a Corporate SSID. Image 5–54 Buttons, External access point, mode WPA2-PSK The SSID of your corporate wireless infrastructure to which the ClickShare Buttons will connect. Fill out Passphrase. -
Page 126: Blackboard
CX-20 Configurator 5.36 Blackboard About Blackboard Saving information from a blackboard can be enabled or disabled. When enabled, the information is saved on hard disk of all connected Buttons, connected ClickShare apps and on the USB sticks connected with the Base Unit. -
Page 127: Xms Cloud Integration
When your device is not registered and connected to the cloud service, the following message will be displayed: Device has not been added to XMS cloud. To add your device to XMS cloud click here https://xms. barco.com/add. The device token is given and can be copied. - Page 128 Barco and our partners for up to 5 years. When SmartCare is activated, in the SmartCare pane the message SmartCare active, valid until... is displayed.
-
Page 129: Firmware Update
A browser window opens. Browse to the file with the new firmware and click Open to start the upload. Note: This should be an .enc file. You might have to unzip the file downloaded from Barco's website. Note: Updating the software to the Base Unit takes several minutes. Progress can be followed on the meeting room display. - Page 130 When your device is connected to a network and managed via the XMS (Cloud) management platform, the firmware can be upgrade via this Management solution. For more information on upgrading firmware in this way, consult Barco’s web pages on XMS (https://www.barco.com/en/page/xms-cloud-management- platform).
-
Page 131: Support & Updates, Troubleshoot, Log Settings
CX-20 Configurator 5.39 Support & Updates, Troubleshoot, log settings About logging Both Button and Base Unit log data is saved in log files on the Base Unit. These log files can contain debugging information. They can be downloaded on a local computer and cleared on the Base Unit. Debug logging covers only a few hours before it will be overwritten. -
Page 132: Troubleshooting, Erase All Settings
CX-20 Configurator 5.40 Troubleshooting, Erase all settings About erasing all settings When erasing all settings, the device settings are reverted to defaults. There is no need to go through the onboarding procedure. The device will not be removed from the organization account in XMS cloud. How to erase Log in to the Configurator. -
Page 133: Reset To Factory Defaults
CX-20 Configurator 5.41 Reset to factory defaults About the reset When applying a reset to factory defaults, the device settings are reverted to the factory defaults. Additionally, the Base Unit will be removed from the organization account in XMS cloud and the first time setup procedure will be initiated, as if the device came out of the box. -
Page 134: Troubleshoot, Diagnostics
CX-20 Configurator 5.42 Troubleshoot, diagnostics About diagnostics A TCP dump test will capture the network data for 2 minutes and the result will be written in a separate file in the log archive. This file can only be opened with a network monitoring tool. How to start Log in to the Configurator. -
Page 135: Firmware Updates
Firmware updates Updating the CX-20 firmware....................... 136 R5900102 /11 ClickShare CX-20... -
Page 136: Updating The Cx-20 Firmware
USB stick To update the Base Unit software by copying the software on a USB stick Download the latest version of the firmware from Barco's website, www.barco.com/clickshare. Click on Support and select the update firmware button of your device type. - Page 137 Troubleshooting Troubleshooting list........................138 R5900102 /11 ClickShare CX-20...
- Page 138 Troubleshooting 7.1 Troubleshooting list Barco knowledge base and YouTube videos Go to the product page on Barco’s website and select in the right column Support. You will get access to Barco’s Knowledge base (https://www.barco.com/en/support/knowledge-base ) and Latest tutorial videos. For more YouTube videos, consult https://www.youtube.com/user/barcoTV...
- Page 139 Troubleshooting Problem Cause Solution power USB devices when on battery power. Low video performance Laptop performance • Lower the screen resolution of the laptop. • Disable the hardware acceleration for video. • Use only a part of the display to show the video. •...
- Page 140 Avoid placing it inside cabinets, false ceiling, below the table, behind a wall, in another room, ..Check out the ClickShare White paper on WiFi See www.barco. com/clickshare. Web Interface shows error in the Configuration file is corrupted Browse to the Configuration tab on processes “WiFi Access Point...
- Page 141 Index API documentation 108 Calendar integration 54 API password 112 ClickShare API 108 API settings 108 Password 112 Audio setup 83 Condition 16 Configuration Wizard 73 Configuration files 81 Configurator 67 Base Unit 13 Access 69 Camera Configurator password 112 Connection 36 Connecting Content audio...
- Page 142 Index Installer 62 Mobile devices 105 Mobile onboarding XMS Cloud 50 Factory defaults 133 Firmware Update 135–136 Onboard XMS Cloud 49 Base Unit 129 Button 129 First startup Base Unit 41 Pairing No configuration 42 Button 60 Preferred way 43 Passwords 112 Full backup 81 Pc onboarding...
- Page 143 Index Update Firmware Base Unit 129 Button 129 Upload configuration 81 Wallpaper 77 Personalized 79 WebUI password 112 Welcome text 75 Wi-Fi settings 86–87 Wireless client 90 EAP-TLS 91 EAP-TTLS 94 PEAP 95 WPA-PSK 97 Windows Certified driver 64 XMS Cloud 127 Mobile onboarding 50 Pc onboarding 49 XMS Cloud calendar 54...
- Page 144 Index R5900102 /11 ClickShare CX-20...
- Page 146 R5900102 /11 | 2023-12-11 www.barco.com...
Need help?
Do you have a question about the C 3010S and is the answer not in the manual?
Questions and answers