Table of Contents
Advertisement
Quick Links
Advertisement
Chapters
Table of Contents

Related Manuals for Barco ClickShare CX-20 set Gen 2


Summary of Contents for Barco ClickShare CX-20 set Gen 2
- Page 1 Questo manuale d’istruzione è fornito da trovaprezzi.it. Scopri tutte le offerte per Barco ClickShare CX-20 set Gen 2 o cerca il tuo prodotto tra le migliori offerte di Altri dispositivi di rete CX-20 Installation manual ENABLING BRIGHT OUTCOMES...
- Page 2 Barco NV Beneluxpark 21, 8500 Kortrijk, Belgium www.barco.com/en/support www.barco.com Registered office: Barco NV President Kennedypark 35, 8500 Kortrijk, Belgium www.barco.com/en/support www.barco.com...
- Page 3 Barco. If the purchaser or a third party carries out modifications or repairs on goods delivered by Barco, or if the goods are handled incorrectly, in particular if the systems are operated incorrectly or if, after the transfer of risks, the goods are subject to influences not agreed upon in the contract, all guarantee claims of the purchaser will be rendered invalid.
- Page 4 ClickShare applications (each a “Barco ClickShare Product”). • Term The Software can be used under the terms of this EULA from the date of first use of the Barco ClickShare Product, for as long as you operate such Barco ClickShare Product. •...
- Page 5 ( http://www.barco.com/en/about-barco/legal/privacy-policy/clickshare-app). Via the Software, Barco may gather technical information about (i) the functioning and the functionality of the products which are connected through the Software, and/or (ii) as provided by you or generated by your use of the Software (“Functional Information”).
- Page 6 PACKAGE VERSION SOURCE https://github.com/libffi/libffi/archive/v3.3-rc0 libffi v3.3-rc0 http://www.zlib.net libzlib 1.2.11 http://0pointer.de/lennart/projects/libdaemon 0,14 libdaemon libglib2 http://ftp.gnome.org/pub/gnome/sources/glib/2.56 2.56.4 elfutils(tool) https://sourceware.org/elfutils/ftp/0.176 0,176 elfutils(library) https://sourceware.org/elfutils/ftp/0.176 0,176 bzip2 http://www.bzip.org/1.0.8 1.0.8 https://cdn.kernel.org/pub/linux/utils/util-linux/v2.33 2,33 util-linux linux-pam https://github.com/linux-pam/linux-pam/releases/download/v1.3.1 1.3.1 https://github.com/westes/flex/files/981163 flex 2.6.4 http://ftpmirror.gnu.org/readline readline http://alpha.gnu.org/gnu/bc 1.06.95 bellagio http://downloads.sourceforge.net/project/omxil/omxil/Bellagio%200.9.3 0.9.3 https://get.videolan.org/bitstream/1.4 bitstream bluez5_utils...
- Page 7 PACKAGE VERSION SOURCE https://cdn.kernel.org/pub/linux/utils/usb/usbutils usbutils https://github.com/libusb/libusb/releases/download/v1.0.22 libusb 1.0.22 http://c-ares.haxx.se/download c-ares 1.15.0 http://snapshot.debian.org/archive/debian/20190513T145054Z/pool/ ca-certificates 20190110 main/c/ca-certificates http://collectd.org/files collectd 5.7.2 libgcrypt https://gnupg.org/ftp/gcrypt/libgcrypt 1.8.4 libgpg-error ftp://ftp.gnupg.org/gcrypt/libgpg-error 1,33 lm-sensors (libsensors) https://github.com/lm-sensors/lm-sensors/archive/V3-5-0 3.5.0 lm-sensors (programs) https://github.com/lm-sensors/lm-sensors/archive/V3-5-0 3.5.0 https://git.kernel.org/pub/scm/linux/kernel/git/mcgrof/crda.git/snapshot 4,14 crda https://github.com/thom311/libnl/releases/download/libnl3_4_0 libnl 3.4.0 cryptsetup https://cdn.kernel.org/pub/linux/utils/cryptsetup/v2.0 2.0.6 json-c https://s3.amazonaws.com/json-c_releases/releases...
- Page 8 PACKAGE VERSION SOURCE http://downloads.xiph.org/releases/vorbis libvorbis 1.3.6 libogg http://downloads.xiph.org/releases/ogg 1.3.3 http://storage.googleapis.com/downloads.webmproject.org/releases/ libvpx 1.7.0 webm opus https://downloads.xiph.org/releases/opus 1.3.1 speex http://downloads.us.xiph.org/releases/speex 1.2.0 20e- d3452074664a- d07e380- e51321b148a- speexdsp https://git.xiph.org/speexdsp.git cebdf20 ftp://ftp.astron.com/pub/file 5,36 file http://ftpmirror.gnu.org/gdb 8.1.1 gnupg2 https://gnupg.org/ftp/gcrypt/gnupg 2.2.17 ftp://ftp.gnupg.org/gcrypt/libassuan libassuan 2.5.2 ftp://ftp.gnupg.org/gcrypt/libksba libksba 1.3.5 libnpth https://www.gnupg.org/ftp/gcrypt/npth sqlite...
- Page 9 PACKAGE VERSION SOURCE jsoncpp https://github.com/open-source-parsers/jsoncpp/archive/1.8.4 1.8.4 http://www.libarchive.org/downloads libarchive 3.3.3 ftp://xmlsoft.org/libxml2 libxml2 2.9.9 libconfig http://www.hyperrealm.com/libconfig 1.7.2 https://curl.haxx.se/download libcurl 7.65.3 http://libestr.adiscon.com/files/download libestr 0.1.10 libfastjson https://github.com/rsyslog/libfastjson/archive/v0.99.8 v0.99.8 libhttpparser https://github.com/nodejs/http-parser/archive/v2.9.0 v2.9.0 liblogging http://download.rsyslog.com/liblogging 1.0.6 https://ftp.mozilla.org/pub/mozilla.org/nspr/releases/v4.20/src libnspr https://ftp.mozilla.org/pub/mozilla.org/security/nss/releases/NSS_3_42_ 1_RTM/src libnss 3.42.1 https://downloads.xiph.org/releases/opus libopusenc 0.2.1 http://www.tcpdump.org/release libpcap 1.9.0 libqrencode...
- Page 10 PACKAGE VERSION SOURCE https://files.pythonhosted.org/packages/a8/c6/ python- a8d1555e795dbd0375c3c93b576ca13bbf139db51ea604a- pyyaml 4.2b4 fa19a2c35fc03 https://files.pythonhosted.org/packages/cc/74/ 11b04703ec416717b247d789103277269d567db575d2fd88f25d9767f- python-serial qt5base https://download.qt.io/archive/qt/5.12/5.12.4/submodules 5.12.4 qt5declarative https://download.qt.io/archive/qt/5.12/5.12.4/submodules 5.12.4 qt5xmlpat- https://download.qt.io/archive/qt/5.12/5.12.4/submodules terns 5.12.4 qt5imagefor- https://download.qt.io/archive/qt/5.12/5.12.4/submodules mats 5.12.4 qt5multimedia https://download.qt.io/archive/qt/5.12/5.12.4/submodules 5.12.4 qt5quickcon- https://download.qt.io/archive/qt/5.12/5.12.4/submodules trols 5.12.4 qt5quickcon- https://download.qt.io/archive/qt/5.12/5.12.4/submodules trols2 5.12.4 qt5serialport https://download.qt.io/archive/qt/5.12/5.12.4/submodules 5.12.4 qt5svg https://download.qt.io/archive/qt/5.12/5.12.4/submodules 5.12.4...
- Page 11 PACKAGE VERSION SOURCE alsa-plugins ftp://ftp.alsa-project.org/pub/plugins 1.1.1 arphic-uming- http://archive.ubuntu.com/ubuntu/pool/main/t/ttf-arphic-uming fonts 20080216 dejavu-fonts http://downloads.sourceforge.net/project/dejavu/dejavu/2.34 2,34 https://www.flexerasoftware.com/monetize/products/flexnet-licensing. flexnet 1.0.5 html sazanami- http://sourceforge.jp/projects/efont/downloads/10087 fonts 20040629 http://kldp.net/frs/download.php/1425 unfonts 65b1c68c63- f974d72610d- b38dfa- http://git.kernel.org/pub/scm/linux/kernel/git/firmware/linux-firmware.git linux-firmware e49861117cae2 https://github.com/secure-remote-password/stanford-srp/tree/master/ libsrp libsrp 2.1.2 https://github.com/mstorsjo/fdk-aac libfdk-aac 0.1.4 https://github.com/macosforge/alac libalac mDNSRes- ponder https://opensource.apple.com/source/mDNSResponder/ 878.30.4 AOP Alliance...
- Page 12 PACKAGE VERSION SOURCE Commons https://archive.apache.org/dist/commons/fileupload/source/commons- fileupload fileupload-1.3.2-src.tar.gz 1.3.2 Commons https://www.apache.org/dist/httpcomponents/commons-httpclient/ httpclient source/commons-httpclient-3.1-src.tar.gz http://apache.belnet.be/httpcomponents/httpclient/source/ Commons httpcomponents-client-4.5.3-src.tar.gz httpclient 4.5.3 https://archive.apache.org/dist/commons/io/source/commons-io-2.2-src. tar.gz Commons IO https://archive.apache.org/dist/commons/io/source/commons-io-2.5-src. tar.gz Commons IO Commons https://archive.apache.org/dist/commons/lang/source/commons-lang3- lang 3.1-src.tar.gz Commons https://archive.apache.org/dist/commons/lang/source/commons-lang3- lang 3.6-src.tar.gz Commons https://archive.apache.org/dist/commons/logging/source/commons- logging logging-1.2-src.tar.gz https://github.com/apache/webservices-commons-xmlschema/archive/ Commons XmlSchema-1.4.5.tar.gz schema 1.4.5 https://archive.apache.org/dist/commons/text/source/commons-text-...
- Page 13 PACKAGE VERSION SOURCE https://archive.apache.org/dist/jakarta/taglibs/standard/source/jakarta- Jakarta Taglib taglibs-standard-1.1.0-src.tar.gz Standards 1.1.0 JavaBeans Activation https://mvnrepository.com/artifact/javax.activation/activation/1.1 Framework JAXB XML https://mvnrepository.com/artifact/org.jvnet.jaxb2_commons/jaxb2- Processor 0.6.4 basics-runtime/0.6.4 https://github.com/jcabi/jcabi-manifests/releases/tag/1.1 Jcabi Manifest 1,1 Jetty embedded https://github.com/eclipse/jetty.project/releases/tag/jetty-9.3.14. server 9.3.14 v20161028 JQuery https://github.com/jquery/jquery/releases/tag/1.4.4 1.4.4 JQuery-ui https://github.com/jquery/jquery-ui/releases/tag/1.8.9 1.8.9 JSON in Java http://central.maven.org/maven2/org/json/json/20131018/json- (org.json) 20131018-sources.jar 20131018 JSON...
- Page 14 PACKAGE VERSION SOURCE Passay https://github.com/vt-middleware/passay/releases/tag/v1.1.0 1.1.0 SHA2 C- library https://github.com/ouah/sha2 Simple Logging Façade for https://github.com/qos-ch/slf4j/releases/tag/v_1.7.25 Java 1.7.25 https://repo1.maven.org/maven2/org/springframework/boot/spring-boot/ Spring Boot 1.5.6.RELEASE/spring-boot-1.5.6.RELEASE-sources.jar 1.5.6 Spring https://github.com/spring-projects/spring-framework/releases/tag/ framework 4.2.4 v4.2.4.RELEASE Springfox https://github.com/springfox/springfox/releases/tag/2.5.0 2.5.0 https://www.nuget.org/packages/starksoft.aspen/1.0.1 StarkSoft 1.0.130 https://archive.apache.org/dist/struts/2.3.34/struts-2.3.34-src.zip Struts 2.3.34 Swagger https://github.com/swagger-api/swagger-core/releases/tag/v1.5.9 1.5.9 Tiles https://archive.apache.org/dist/tiles/v2.0.6/tiles-2.0.6-src.tar.gz framework 2.0.6...
- Page 15 PACKAGE VERSION SOURCE nlohmann:: json https://github.com/nlohmann/json 3.7.3 mongo-java- https://mongodb.github.io/mongo-java-driver/3.4/ driver 3.4.1 org.mongodb. https://mongodb.github.io/morphia/1.3/ morphia 1.3.1 spark-core https://github.com/perwendel/spark/releases/tag/2.5.3 2.5.3 gson https://github.com/google/gson 2.8.0 slf4j-api https://www.slf4j.org 1.7.22 AspectJ Weaver & https://www.eclipse.org/aspectj/ Runtime 1.8.7 http://oval.sourceforge.net/ 1,87 oval Commons Lang https://commons.apache.org/proper/commons-lang/ Apache Commons Logging https://commons.apache.org/proper/commons-logging/ swagger- https://github.com/swagger-api/swagger-core/wiki/Annotations annotations...
- Page 16 PACKAGE VERSION SOURCE 7617e69a524a- cc1a50a8a98- b257d1374ea6f- https://github.com/rockchip-linux/avb/tree/master/libavb libavb e4a4 7617e69a524a- cc1a50a8a98- b257d1374ea6f- https://github.com/rockchip-linux/avb/tree/master/libavb_ab libavb-ab e4a4 7617e69a524a- cc1a50a8a98- b257d1374ea6f- https://github.com/rockchip-linux/avb/tree/master/libavb_user libavb-user e4a4 d6676eb02- c8a1b4966df7- rockchip- d8c4bb203e- https://github.com/rockchip-linux/bin linux-bin a25fc98b2 1e3bdb582- c52707d71e5c- be29- rockchip-tee- ca1064d7c04- https://github.com/rockchip-linux/rk_tee_user user b696 04e55089bb4b- de7c50d9b54- rockchip- b5a1c- binary https://github.com/rockchip-linux/rkbin fa70771cd6...
- Page 17 EN55032-CISPR32 Class B ITE (Information Technology Equipment) This is a class B product. In a domestic environment this product may cause radio interference in which case the user may be required to take adequate measures. If this equipment does cause interference to radio or television reception, the user may try to correct the interference by one or more of the following measures : •...
- Page 18 The radiated output power of the Barco Wireless Device is below the Industry Canada (IC) radio frequency exposure limits. The Barco Wireless Device should be used in such a manner such that the potential for human contact during normal operation is minimized.
- Page 19 Déclaration d'antenne d'Industrie Canada (IC) Conformément à la réglementation d'Industrie Canada, le présent émetteur radio peut fonctionner avec une antenne d'un type et d'un gain maximal (ou inférieur) approuvé pour l'émetteur par Industrie Canada. Dans le but de réduire les risques de brouillage radioélectrique à l'intention des autres utilisateurs, il faut choisir le type d'antenne et son gain de sorte que la puissance isotrope rayonnée équivalente (p.
- Page 21 Introduction to the Installation Guide Documentation ..........................22 Symbols and fonts ........................22 R5900102 /00 CX-20...
- Page 22 Available System documentation Next to the installation manual, a user guide, a safety guide, an API guide and a service manual are available on Barco’s website, www.barco.com/clickshare. A printed copy of the Safety Guide is included in the CX-20 box at purchase.
- Page 23 CX-20 Specifications R5900102 /00 CX-20...
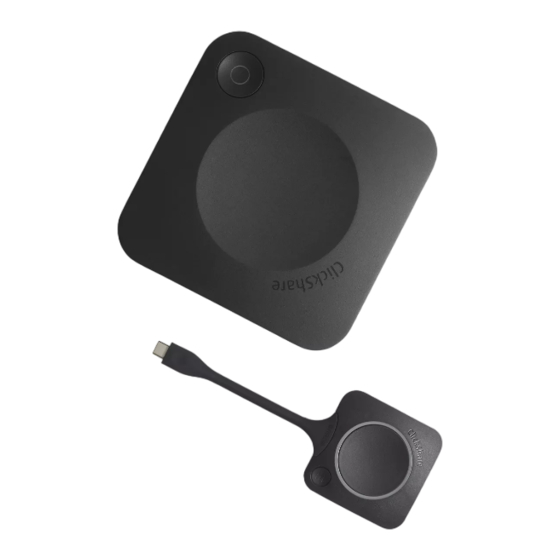
- Page 24 CX-20 Specifications 2.1 About the CX-20 CX-20 sets With the Conferencing Button, in seconds, you are automatically connected to cameras, mics, soundbars and any other AV peripherals in the room for a better, more immersive meeting experience. Everything becomes part of your laptop. This CX-20 not only helps the presenter get the presentation on-screen in a second, but it also allows the other people in the conference to participate more actively.
- Page 25 CX-20 Specifications 2.2 CX-20 Specifications Base unit Dimensions (HxWxD) 34 mm x 135 mm x 135 mm Power supply Standard 110/220 V AC plug Power consumption Operational: 5-10W, 24W Max Weight 900 gr Operating system Windows 8/8.1/10. macOS 10.13 and higher. Android v9 and higher (ClickShare app).
- Page 26 CX-20 Specifications Local view & moderation Local view of the room display only Network connection LAN & WiFi * Management and reporting Warranty 1 year standard. 5 years coverage via SmartCare * depends on configuration, available in future firmware updates 2.3 About the Base Unit Base Unit functionality The Base Unit receives the wireless input from the Buttons and controls the content of the meeting room...
- Page 27 The antenna is built-in in the CX-20 . Bottom layout of the Base Unit The serial number label containing the Barco part number, the revision number, production date (week-year) and the serial number. The product label with the applicable certification logos.
- Page 28 CX-20 Specifications • the power rating • markings for applicable standards (CE, CCC, UL, ...) • markings for waste regulation • “Made in ...” R5900102 /00 CX-20...
- Page 29 Getting started Environmental Condition Check.....................30 Basic Workflow..........................30 R5900102 /00 CX-20...
- Page 30 ). Register you device, online or offline. For more information on using CX-20 , refer to the CX-20 User Guide. This manual can be found on Barco's website www.barco.com/clickshare. R5900102 /00 CX-20...
-
Page 31: Table Of Contents
CX-20 Installation Installation methods for the Base Unit ....................32 Table mounting..........................32 Wall or ceiling mounting ........................32 Out-of-the-box use of the Base Unit ....................34 Out-of-the-box use of the Base Unit with Ethernet link ..............35 Video signal connections to the Base unit ..................35 Camera connection........................36 Content Audio connection ......................36 Echo Canceling Speakerphone audio connection................37... -
Page 32: Installation Methods For The Base Unit
CX-20 Installation 4.1 Installation methods for the Base Unit For optimal performance, install the Base unit close to the display and avoid obstacles between the Base unit and the Buttons. Make sure not to install the Base Unit in a metal enclosure. Physical installation The Base unit can be installed in different ways in a meeting room. - Page 33 CX-20 Installation Image 4-1 Select a drill bit slightly smaller than the size of the used anchors to ensure a snug fit. Drill the holes where marked. Tap plastic screw anchors into the drill holes with a hammer (if needed, depending on the wall or ceiling type). Place the mounting base on the ceiling or wall, drive in the screws.
-
Page 34: Out-Of-The-Box Use Of The Base Unit
CX-20 Installation Image 4-3 Stick the base on the chosen location. Place your device on the mounting base and turn it clockwise until it is locked (Image 4-2). 4.4 Out-of-the-box use of the Base Unit Overview The ClickShare Base Unit and Button (s) operate directly out of the box, without any integration in the Enterprise network. -
Page 35: Out-Of-The-Box Use Of The Base Unit With Ethernet Link
CX-20 Installation requires the least installation effort and keeps any shared data completely separated from your Enterprise network. Updating and configuring the Base Units will need to be done manually. 4.5 Out-of-the-box use of the Base Unit with Ethernet link Overview In this extended out-of-the-box mode, an Ethernet connection is made between the ClickShare Base Unit and the corporate network. -
Page 36: Camera Connection
Image 4-6: Display connection 4.7 Camera connection About USB cameras Any USB camera can be connected to the Base Unit. A list of supported cameras can be found on Barco’s website. To connect Connect the camera via USB to the Base Unit. -
Page 37: Echo Canceling Speakerphone Audio Connection
It is a bidirectional audio transmission between the Button and the speakerphone. USB speakerphone support A list of supported speakerphones can be found on Barco’s website. How to connect an echo-canceling speakerphone Connect your speakerphone device via USB to the Base Unit. -
Page 38: Power Connection
CX-20 Installation Connect the other side to a LAN. 4.11 Power connection About power An external power adapter is delivered with the product. The output rate is 12 VDC 2A. CAUTION: Once the Base Unit is powered, it starts up. Then the power button can be used to switch on or off. -
Page 39: First Setup Of The Base Unit
CX-20 Installation 4.13 First setup of the Base Unit After the physical installation is done, start with the first setup procedure to activate and configure your device. Preferred workflow Plug in the power supply and HDMI cable. The Base Unit starts up. Image 4-8 Plug in a network cable. -
Page 40: Registration To Xms Cloud
When software update is finished and reboot is done, the customer will be asked to surf to https://xms.cloud.barco.com/add. Image 4-10 The XMS login page is displayed. Login with your Barco account. When you do not have a Barco account yet, click on register here and follow the instructions. Image 4-11: Sign in page Click Sign in. - Page 41 CX-20 Installation Image 4-12: Welcome page to XMS-cloud Accept the End User License agreement and click Continue. Fill out your company information and click Continue. Image 4-13: Company information Enter the device token to setup your device and to receive your 5 years of service coverage. The device token is indicated on the ClickShare screen (see Image 4-10) Click Continue.
-
Page 42: Use Without Registration Of The Device
CX-20 Installation Assign a meeting room and click Continue. Image 4-15: Assign meeting room Your device is successfully registered. Start pairing your buttons to start using your device. Image 4-16: Start pairing buttons The wallpaper page will be displayed. 4.15 Use without registration of the device Why using offline Several reasons are possible to use your product without registration: •... - Page 43 CX-20 Installation How to handle Connect the device’s WiFi with the instruction given on the wallpaper. The default SSID is ClickShare-<serial number>. Password : clickshare Once your WiFi connection is made, continue with the network setting of your device. Browse to http://192.168.2.1 The ClickShare Configurator starts up.
- Page 44 CX-20 Installation Image 4-19: Registration message Click Register Later. Start pairing your buttons. Image 4-20: Start pairing Start configuring the network settings. For more info, see “Basic configuration of the ClickShare device”, page Your still have to register your device to get your 5 years warranty. XMS Cloud note in Configurator When browsing in the Configurator to Wi-Fi &...
-
Page 45: Basic Configuration Of The Clickshare Device
CX-20 Installation Image 4-21: XMS cloud message 4.16 Basic configuration of the ClickShare device Make sure you are connected via WiFi to the Base Unit. How to setup Open an internet browser and browse to http://192.168.2.1 The ClickShare Configurator starts up. Image 4-22: Configurator startup To change the language, click on the drop down box of the current indicated language and select the desired language. - Page 46 CX-20 Installation Image 4-23: Configurator, language selection Click Continue to start. A registration message is displayed. Click Next to continue. The Configurator Login page is displayed. Image 4-24: Configurator, login page Log in with the following default credentials. These credentials can be changed later on. Username: admin Password: admin A welcome page to the ClickShare Configuration Wizard opens.
- Page 47 CX-20 Installation Click Start configuration. Follow the instructions as given on the different pages. Click Next to continue to the next page and Back to return to the previous page. Fill out: Personali- • Language for on-screen text sation • Meeting room name •...
- Page 48 CX-20 Installation R5900102 /00 CX-20...
- Page 49 Preparing the Buttons Pairing ............................50 ClickShare Extension Pack ......................51 ClickShare Extension Pack installer ....................51 ClickShare Windows Certified driver ....................52 ClickShare Desktop app........................52 R5900102 /00 CX-20...
-
Page 50: Pairing
Preparing the Buttons 5.1 Pairing Pairing of the Buttons with the Base Unit To be able to use a Button it should be assigned to the Base Unit you are using. This process is called pairing. All Buttons will need to be updated and paired before use. In case you buy additional Buttons or when a Button should be assigned to another Base Unit, the Button needs to be paired (again). -
Page 51: Clickshare Extension Pack
In this setup, a user or an IT admin can install the ClickShare Extension pack using the Windows command prompt. Following is an example of a silent installation (version numbers are only given as example, always check Barco’s web for the latest version): Launcher only install:... -
Page 52: Clickshare Windows Certified Driver
Preparing the Buttons msiexec. exe ClickShare-Extension-Pack-01.00.02.0003. msi ACCEPT_EULA=YES INSTALLFOLDER=C:\ LAUNCH_APP=YES /qn Extended desktop only install : msiexec. exe ClickShare-Extension-Pack-01.00.02.0003. msi ACCEPT_EULA=YES ADDLOCAL=ExtendedDesktopDriverFeature INSTALLFOLDER=C:\ LAUNCH_APP=YES /qn Full install (laucher + extended desktop): msiexec. exe ClickShare-Extension-Pack-01.00.02.0003. msi ACCEPT_EULA=YES ADDLOCAL=ALL INSTALLFOLDER=C:\ LAUNCH_APP=YES /qn The computer will reboot. - Page 53 Preparing the Buttons Installation When the ClickShare desktop app is not pre-deployed in your IT environment, you can download and install the software without administrator rights from www.clickshare.app R5900102 /00 CX-20...
- Page 54 Preparing the Buttons R5900102 /00 CX-20...
- Page 55 CX-20 Configurator Accessing the Configurator ......................56 ClickShare Configuration Wizard ....................59 On-Screen ID information......................61 Personalisation, Wallpaper ......................62 Personalisation, Personalized wallpaper ..................64 Manage configuration files......................65 Display setup, Output........................66 Display & Audio setup ........................67 WiFi settings ..........................68 6.10 LAN settings..........................72 6.11 Services, Mobile devices.......................74 6.12 XMS Cloud Integration ........................75 6.13 Services, SNMP ...........................76 6.14 Security, security level........................77...
-
Page 56: Accessing The Configurator
CX-20 Configurator 6.1 Accessing the Configurator Getting access to the Configurator There are three ways to access the Configurator: • Via the LAN • Direct Ethernet connection between PC and Base Unit. • Via the Base Unit's wireless network When accessing the configurator for the first time, the ClickShare Configuration Wizard starts automatically. This configuration wizard can be started at any moment to change your configuration instead of using the menus. - Page 57 CX-20 Configurator Image 6-2: Configurator lanuguages The following languages are possible: • Arabic • Simplified Chinese • Traditional Chinese • Danish • Dutch • English • Finnish • French • German • Italian • Japanese • Korean • Norwegian • Portuguese •...
- Page 58 CX-20 Configurator Image 6-3: Start screen The language of the configurator can be changed on any page in the interface. The screen is split up in 2 panes. Left pane with the selection buttons and a right pane to configure the selected function.
-
Page 59: Clickshare Configuration Wizard
CX-20 Configurator On your laptop, open a browser. Note: Supported browsers are Internet Explorer, Firefox and Safari. Browse to http://192.168.2.1. A login screen appears. Enter the user name 'admin' and the password, read and accept the EULA and click OK. By default the password is set to 'admin'. - Page 60 CX-20 Configurator Image 6-5: Configuration wizard, Personalisation Fill out the necessary field and click Next to continue. To return to the previous step, click on Back. For more information about a specific topic, see one of the following topics. The ClickShare Configuration Wizard can be started at any time to change the configuration just by clicking on ClickShare Configuration Wizard at the left bottom of each screen.
-
Page 61: On-Screen Id Information
CX-20 Configurator Image 6-6: Configuration Wizard start 6.3 On-Screen ID information About device identification The following items can be set: • On-Screen language. Independent from the Configurator language. • Meeting room name • Location of the meeting room • Welcome message to be displayed in the meeting room •... -
Page 62: Personalisation, Wallpaper
CX-20 Configurator On Screen language selection Log in to the Configurator. Click Personalisation → On-screen ID. Select the language of the on-screen text. Click on the drop down box next to Language for on-screen text and select the desired language. The following languages are possible: •... - Page 63 The Wallpaper selection pane is shown. The current selected wallpaper is shown with a red border. Select one of the available wallpapers and click on Save Changes. Note: By default two general Barco wallpapers are available. They are automatically resized to fit the aspect ratio of the screen.
-
Page 64: Personalisation, Personalized Wallpaper
CX-20 Configurator Not checked: no wallpaper will be displayed when no one is sharing content. The video output of the Base Unit is disabled when no content is shared. This feature is especially useful when the Base Unit is integrated in a larger AK system 6.5 Personalisation, Personalized wallpaper How to upload... -
Page 65: Manage Configuration Files
CX-20 Configurator Image 6-11: Change image Browse for the desired image, click Open to load the image. The content of the file is checked and when valid (format and size), the file is uploaded. The new wallpaper gets a red border. Click on Save changes to apply the personalized wallpaper and replace the previous file. -
Page 66: Display Setup, Output
CX-20 Configurator • All display settings • OSD language • Location • Welcome message • WiFi channel • WiFi frequency To manage the configuration files Log in to the Configurator. Click Personalisation → Configuration Files. Image 6-13: Configuration files To download a full backup, click on Full Backup. An xml file, containing all information and history will be downloaded. -
Page 67: Display & Audio Setup
CX-20 Configurator Consumer Electronics Control (CEC) is a feature of HDMI designed to allow users to command and control devices connected through HDMI by using only one remote control. To enable CEC, check the check box before Enable CEC. Screen saver setup Log in to the Configurator. -
Page 68: Wifi Settings
CX-20 Configurator Screen saver setup Log in to the Configurator. Image 6-15 Click Display & Audio → Display & Audio. To activate the screen saver, drag the slider bar to the left or to the right until the desired delay time is reached. When the slider is set completely to the left, the screen saver will never be activated. - Page 69 CX-20 Configurator Image 6-16: WiFi settings When operational mode is set to Off. The following info is given: “When disabling the access point, the Buttons will need to be integrated in the corporate network. This is not supported yet.”. Click on here to start the button configuration. For more info, see “Buttons”, page 83. To change any WiFi-setting, click on Edit settings.
- Page 70 CX-20 Configurator Image 6-17: WiFi settings, edit Changing the IP address will require a repairing of the Buttons used with this Base Unit. Change operational mode Log in to the Configurator. Click Wi-Fi & Network → WiFi Settings. Click Edit settings. Click on the drop down box next to Operational Mode and select the desired mode.
- Page 71 CX-20 Configurator Channel Channel Channel Channel Channel Channel Channel Channel Channel Image 6-18 To limit the effect of overlapping networks, it is highly recommended to reduce the signal strenght (standard range of about 30m) of the ClickShare Base Units. Reducing the signal strenght to its minimal value will reduce the actual range of the ClickShare to about 10m.
-
Page 72: Lan Settings
CX-20 Configurator Signal strength Select the Signal Strength. Click on the slider and reduce the broadcasted power (signal strength) until the desired strength is obtained. Note: Too low power and interference by others might lead to connection issues. If so, increase again the signal strength until the issues are solved. - Page 73 CX-20 Configurator Image 6-19: LAN settings Click in the input field next to Hostname and enter a host name for the Base Unit. The default host name is ClickShare-<serial number Base Unit>. To select the method, click on the drop down box next to Method and select the Automatic (DHCP) or Manual. When Automatic (DHCP) is selected, the IP address, subnet mask and default gateway fields are grayed out but the currently used settings are filled out.
-
Page 74: Services, Mobile Devices
CX-20 Configurator Do not use IP address 192.168.2.x for a Subnet mask 255.255.255.0 and IP address 192.168.x.x for a Subnet mask 255.255.0.0 Use a proxy server This setting is important for the auto-update feature of the Base Unit, which require internet access. Check the check box next to Use a proxy server. -
Page 75: Xms Cloud Integration
CX-20 Configurator Image 6-21: Services, mobile devices Click on the drop down box and select the desired passcode type. • No passcode • Numeric passcode 6.12 XMS Cloud Integration Overview When your device is not registered and connected to the cloud service, the following message will be displayed: The ClickShare device is unable to connect to the cloud service. -
Page 76: Services, Snmp
CX-20 Configurator Image 6-22: Services, XMS cloud What can be done? Check your network settings or register your device to XMS Cloud. Follow procedure as described in “Registration to XMS Cloud”, page 40. 6.13 Services, SNMP About SNMP Simple Network Management Protocol (SNMP) is an internet standard protocol for collecting and organizing information about managed devices on IP networks and for modifying that information to change device behaviour. -
Page 77: Security, Security Level
When using the default Engine ID, make sure the check box before Use default Engine ID is checked. The default engine ID is a combination of the Barco Enterprise Number with the MAC-address (eth0). Fill out the SNMP Manager address. -
Page 78: Security, Passwords
CX-20 Configurator When a security level is set, the individual items included in that security level can be changed using the individual item in the Configurator. When changing an individual item the security level indication will be adapted accordingly, but no other settings will be changed automatically. E.g. -
Page 79: Status Information Base Unit
CX-20 Configurator Image 6-25: Passwords Click in the WebUI Password (configuration password) pane in the input field next to Old password and enter the old password. Click in the input field next to New password and enter a new password. Click in the input field next to Confirm password and enter the new password again. -
Page 80: Date & Time Setup, Manually
CX-20 Configurator Image 6-26 To restart the Base Unit, click on Restart Base Unit. A ClickShare system reboot message with progress bar is displayed while rebooting takes place. When the reboot is finished, a re-login is necessary. 6.17 Date & Time setup, manually About Date &... -
Page 81: Date & Time Setup, Time Server
CX-20 Configurator The current time is indicated next to Current time. Select your time zone. Click on the drop down box next to Time zone and select the corresponding time zone. Check the radio button in front of Set time and date manually. To change the date, click in the input field next to Date. -
Page 82: Energy Savers
CX-20 Configurator Image 6-30: Time server setup The current time is indicated next to Current time. Check the radio button next Use NTP. Enter a NTP server address next to NTP servers. Enter the IP address or server name. Note: Multiple servers (maximum 5) can be added, separated by a comma. Click Save changes to apply. -
Page 83: Buttons
CX-20 Configurator Image 6-31: Energy savers How to change the display timeout Log in to the Configurator. Click System → Energy Savers. To set a display time out, move the slider to the left or to the right until the desired standby timeout is reached. 6.20 Buttons About Buttons The Button page indicates to which Base Unit the Buttons are connected. -
Page 84: Firmware Update
For an internal access point, no settings are needed. 6.21 Firmware Update About Firmware update The firmware of the Base Unit can be updated via the web interface. The latest version of the firmware is available on Barco's website. Image 6-33: Firmware update R5900102 /00 CX-20... -
Page 85: Support & Updates, Troubleshoot, Log Settings
Browse to the file with the new firmware and click Open to start the upload. Note: This should be an .enc file. You might have to unzip the file downloaded from Barco's website. Note: Updating the software to the Base Unit takes several minutes. Progress can be followed on the meeting room display. -
Page 86: Factory Defaults
CX-20 Configurator Image 6-34: Troubleshoot, logging To create a debug log, check the check box next to Enable debug logging. Reproduce the issue you want to report. To download the current log file, click on Download logs. To clear the current log file, click Clear logs. 6.23 Factory defaults About default settings The ClickShare Base Unit can return to the factory default settings. - Page 87 CX-20 Configurator Image 6-35: Troubleshoot, factory defaults Click Reset to factory defaults. The following message is displayed: “This action will remove all settings of the Base Unit and replace them with the default settings. Are you sure you want to continue?” If you want to continue, click Yes, remove all settings otherwise click No, I changed my mind.
- Page 88 CX-20 Configurator R5900102 /00 CX-20...
- Page 89 Firmware updates R5900102 /00 CX-20...
- Page 90 USB stick To update the Base Unit software by copying the software on a USB stick Download the latest version of the firmware from Barco's website, www.barco.com/clickshare. Click on Support and select the update firmware button of your device type.
- Page 91 Troubleshooting R5900102 /00 CX-20...
- Page 92 Troubleshooting 8.1 Troubleshooting list Problem solving Problem Cause Solution Quality of the image on the The quality or length of the cable • Replace the cable. meeting room display is not between the Base Unit and the • Use another cable. satisfactory display or the connection between these two.
- Page 93 Troubleshooting Problem Cause Solution Low video performance Laptop performance • Lower the screen resolution of the laptop. • Disable the hardware acceleration for video. • Use only a part of the display to show the video. • Right click ClickShare icon in system tray and click on Capture mode to toggle the current setting..
- Page 94 Locate the problem you are experiencing in the table below and apply the solution. Barco knowledge base and YouTube videos Go to the product page on Barco’s website and select in the right column Support. You will get access to Barco’s Knowledge base and Latest tutorial videos. For more YouTube videos, consult https://www.youtube.com/user/barcoTV...
- Page 95 Troubleshooting R5900102 /00 CX-20...
- Page 96 R5900102 /00 | 2020-03-12 Barco NV | Beneluxpark 21, 8500 Kortrijk, Belgium Registered office: Barco NV | President Kennedypark 35, 8500 Kortrijk, Belgium www.barco.com...
Need help?
Do you have a question about the ClickShare CX-20 set Gen 2 and is the answer not in the manual?
Questions and answers