Christie APS Series User Manual
Hide thumbs
Also See for APS Series:
- Setup manual (402 pages) ,
- Service manual (145 pages) ,
- User manual (117 pages)
Table of Contents
Advertisement
Quick Links
Advertisement
Table of Contents

Related Manuals for Christie APS Series


Summary of Contents for Christie APS Series
- Page 1 User Manual 020-002086-01 APS Series LWU605ST-APS/LWU505ST-APS...
- Page 2 Christie's control such as maintenance of the product in proper working conditions. Performance specifications are based on information available at the time of printing. Christie makes no warranty of any kind with regard to this material, including, but not limited to, implied warranties of fitness for a particular purpose. Christie will not be liable for errors contained herein or for incidental or consequential damages in connection with the performance or use of this material.
-
Page 3: Table Of Contents
Adjusting the size and position....................29 Focus adjustment ......................29 Adjustment pad ......................29 APS Series User Manual 020-002086-01 Rev. 1 (05-2023) Copyright 2023 Christie Digital Systems USA, Inc. All rights reserved. © If printed, please recycle this document after use. - Page 4 Logo ..........................50 Security ........................50 Power management ....................... 52 Filter counter ........................ 52 APS Series User Manual 020-002086-01 Rev. 1 (05-2023) Copyright 2023 Christie Digital Systems USA, Inc. All rights reserved. © If printed, please recycle this document after use.
- Page 5 Projecting the USB display ....................75 Terminating the USB display ................... 75 Wake on LAN operation ......................76 APS Series User Manual 020-002086-01 Rev. 1 (05-2023) Copyright 2023 Christie Digital Systems USA, Inc. All rights reserved. © If printed, please recycle this document after use.
-
Page 6: Introduction
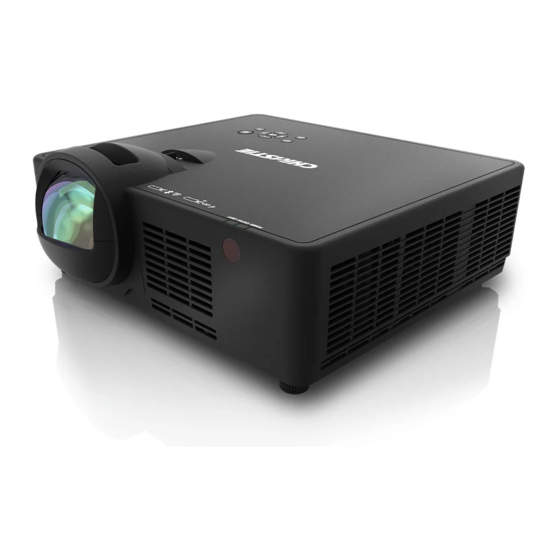
LWU505ST-APS Projector overview The APS Series is a 3LCD laser projector with new generation light source technology of liquid crystal. 5,000 to 6,000 lumens brightness, up to 20,000 hours of real time, which can keep the brightness diaplay throughout the life. Meanwhile, it can avoid the radiation on the human body and completely eliminate the interference of the shadow on the screen. -
Page 7: Key Features
• Warranty card Product documentation For installation, setup, and user information, see the product documentation available on the Christie website. Read all instructions before using or servicing this product. 1. Access the documentation from the Christie website: Go to this URL: https://bit.ly/3yJjZLh... -
Page 8: Related Documentation
1.6X 0.514-1.265(m) • Ambient brightness may affect your projection image quality. For the optimal image effect, Christie recommends to control brightness in your environment. • Values shown in figure below are approximates only. They may differ from the actual ones. - Page 9 0.769 1.939 1.199 0.0121 0.869 2.154 1.333 0.0135 0.969 2.800 1.733 0.0175 1.265 APS Series User Manual 020-002086-01 Rev. 1 (05-2023) Copyright 2023 Christie Digital Systems USA, Inc. All rights reserved. © If printed, please recycle this document after use.
-
Page 10: Installation And Setup
Identify the main components of the projector. Front view Identify the main components on the front of the projector. APS Series User Manual 020-002086-01 Rev. 1 (05-2023) Copyright 2023 Christie Digital Systems USA, Inc. All rights reserved. © If printed, please recycle this document after use. -
Page 11: Rear View
Rear view Identify the main components on the rear of the projector. LWU605ST-APS APS Series User Manual 020-002086-01 Rev. 1 (05-2023) Copyright 2023 Christie Digital Systems USA, Inc. All rights reserved. © If printed, please recycle this document after use. -
Page 12: Right View
Right view Identify the main component on the right side of the projector. LWU605ST-APS APS Series User Manual 020-002086-01 Rev. 1 (05-2023) Copyright 2023 Christie Digital Systems USA, Inc. All rights reserved. © If printed, please recycle this document after use. -
Page 13: Left View
Maintain at least a distance of 1 m (39.4 inches) away. LWU605ST-APS APS Series User Manual 020-002086-01 Rev. 1 (05-2023) Copyright 2023 Christie Digital Systems USA, Inc. All rights reserved. © If printed, please recycle this document after use. -
Page 14: Top Control Panel And Indicators
Opens or closes the projector. POWER Escapes or returns to the previous menu. EXIT APS Series User Manual 020-002086-01 Rev. 1 (05-2023) Copyright 2023 Christie Digital Systems USA, Inc. All rights reserved. © If printed, please recycle this document after use. -
Page 15: Connecting To Ports
Use the cables with straight plugs (not the L-shaped ones) as the input ports of the projector are recessed. LWU605ST-APS APS Series User Manual 020-002086-01 Rev. 1 (05-2023) Copyright 2023 Christie Digital Systems USA, Inc. All rights reserved. © If printed, please recycle this document after use. - Page 16 LAN terminal HDMI2 connector VIDEO IN terminal VGA IN VGA OUT terminal MONO(L/R) terminal APS Series User Manual 020-002086-01 Rev. 1 (05-2023) Copyright 2023 Christie Digital Systems USA, Inc. All rights reserved. © If printed, please recycle this document after use.
-
Page 17: Ir Remote Keypad
Enters the screen size adjustment menu. SCREEN Selects LIGHT mode. LIGHT Zooms in projected image . D.ZOOM + APS Series User Manual 020-002086-01 Rev. 1 (05-2023) Copyright 2023 Christie Digital Systems USA, Inc. All rights reserved. © If printed, please recycle this document after use. -
Page 18: Placing The Projector Correctly
Fans are designed to cool the projector. Fan speed is auto adjusted subject to internal temperature of the projector. APS Series User Manual 020-002086-01 Rev. 1 (05-2023) Copyright 2023 Christie Digital Systems USA, Inc. All rights reserved. © If printed, please recycle this document after use. -
Page 19: 360° Projection
The projector support 360° projection. LWU605ST-APS Vertical 360° Horizontal 360° Vertical & Horizontal 360° APS Series User Manual 020-002086-01 Rev. 1 (05-2023) Copyright 2023 Christie Digital Systems USA, Inc. All rights reserved. © If printed, please recycle this document after use. -
Page 20: Powering On The Projector
The countdown begins until the POWER indicator is bule and the LIGHT indicator is green. The cooling fan is starting working. APS Series User Manual 020-002086-01 Rev. 1 (05-2023) Copyright 2023 Christie Digital Systems USA, Inc. All rights reserved. © If printed, please recycle this document after use. -
Page 21: Entering A Password (Pin)
5. Move the cursor to set after typing the three-digit number. 6. To now use the projector, select the button. APS Series User Manual 020-002086-01 Rev. 1 (05-2023) Copyright 2023 Christie Digital Systems USA, Inc. All rights reserved. © If printed, please recycle this document after use. -
Page 22: Powering Off The Projector
Failure to unplug the cord may shorten life of the projector, lead to power on failures, or lead to operation abnormalities. APS Series User Manual 020-002086-01 Rev. 1 (05-2023) Copyright 2023 Christie Digital Systems USA, Inc. All rights reserved. © If printed, please recycle this document after use. -
Page 23: Indicator Status
Green A button has been selected while the KEY LOCK is activated. Orange APS Series User Manual 020-002086-01 Rev. 1 (05-2023) Copyright 2023 Christie Digital Systems USA, Inc. All rights reserved. © If printed, please recycle this document after use. - Page 24 (Flash*4) FAN-3 status is error Orange (Flash*4) FAN-4 status is error Orange (Flash*1) APS Series User Manual 020-002086-01 Rev. 1 (05-2023) Copyright 2023 Christie Digital Systems USA, Inc. All rights reserved. © If printed, please recycle this document after use.
- Page 25 Power is off Standy(Normal) Orange Standy(Network) Orange (Flash*1) Standy(ECO) Orange (Flash*2) Warm Up Orange (Flash*0) APS Series User Manual 020-002086-01 Rev. 1 (05-2023) Copyright 2023 Christie Digital Systems USA, Inc. All rights reserved. © If printed, please recycle this document after use.
- Page 26 Cooling status (Standby mode without signal) (Flash*2) PSENSER abnormality (poor contact) (Flash*1) Temp Error (Flash*2) Fan1 Error Orange APS Series User Manual 020-002086-01 Rev. 1 (05-2023) Copyright 2023 Christie Digital Systems USA, Inc. All rights reserved. © If printed, please recycle this document after use.
- Page 27 Communication abnormality (tx, rx abnormality, poor switch contact after lighting) (Flash*3) Main RX ACK ERR (Flash*4) APS Series User Manual 020-002086-01 Rev. 1 (05-2023) Copyright 2023 Christie Digital Systems USA, Inc. All rights reserved. © If printed, please recycle this document after use.
- Page 28 * 5: flashes five times and off 2 seconds, then repeat. And so on... APS Series User Manual 020-002086-01 Rev. 1 (05-2023) Copyright 2023 Christie Digital Systems USA, Inc. All rights reserved. © If printed, please recycle this document after use.
-
Page 29: Adjusting The Size And Position
Adjusting the size and position Adjust the projector’s size and position. Christie recommends warming the lens before completing these procedures as focus may change as the lens warms. Focus adjustment Use the focus ring to obtain the best focus. LWU605ST-APS... - Page 30 LWU605ST-APS APS Series User Manual 020-002086-01 Rev. 1 (05-2023) Copyright 2023 Christie Digital Systems USA, Inc. All rights reserved. © If printed, please recycle this document after use.
-
Page 31: Keystone Adjustment
• Reset value—Restores the correction values to the factory defaults. 3. Select OK. APS Series User Manual 020-002086-01 Rev. 1 (05-2023) Copyright 2023 Christie Digital Systems USA, Inc. All rights reserved. © If printed, please recycle this document after use. -
Page 32: Input Selection
USB Display—Selects input USB Display if a device is connected to the USB-B terminal. For more details, see USB Display function on page 73. APS Series User Manual 020-002086-01 Rev. 1 (05-2023) Copyright 2023 Christie Digital Systems USA, Inc. All rights reserved. © If printed, please recycle this document after use. -
Page 33: Menu Items
Auto PC Adjustment function may fail to work if computer models is not compatible with the input signal . • Christie recommends performing the Auto PC adj. function on a brighter screen. 1. Select Menu > Auto PC Adj. 2. Select OK. -
Page 34: H Position (Pc Signal Input Only)
Normal—Uses the maximum size to project while keeping the aspect of input signals unchanged. APS Series User Manual 020-002086-01 Rev. 1 (05-2023) Copyright 2023 Christie Digital Systems USA, Inc. All rights reserved. © If printed, please recycle this document after use. -
Page 35: Project Way
Ceiling/rear—Using the bracket to lift the projector (optional) in rear of the screen(using translucent screen). • Auto ceiling/Front—Projector is projected in front of the screen. APS Series User Manual 020-002086-01 Rev. 1 (05-2023) Copyright 2023 Christie Digital Systems USA, Inc. All rights reserved. © If printed, please recycle this document after use. -
Page 36: Menu Position
. VGA Signal Input The projector can display one of the following: APS Series User Manual 020-002086-01 Rev. 1 (05-2023) Copyright 2023 Christie Digital Systems USA, Inc. All rights reserved. © If printed, please recycle this document after use. - Page 37 Auto Video displays in the PC system menu. APS Series User Manual 020-002086-01 Rev. 1 (05-2023) Copyright 2023 Christie Digital Systems USA, Inc. All rights reserved. © If printed, please recycle this document after use.
-
Page 38: Color Adjust Settings
3. Select to select required item. • Dynamic • DICOM (LWU605ST-APS only) • Standard APS Series User Manual 020-002086-01 Rev. 1 (05-2023) Copyright 2023 Christie Digital Systems USA, Inc. All rights reserved. © If printed, please recycle this document after use. -
Page 39: Dynamic Mode(Lwu505St-Aps Only)
1. Select Menu > Setting menu. 2. Select to select required item. 3. Select OK. APS Series User Manual 020-002086-01 Rev. 1 (05-2023) Copyright 2023 Christie Digital Systems USA, Inc. All rights reserved. © If printed, please recycle this document after use. -
Page 40: Direct Power On
• On—Faster speed. Set this option when operating the projector in high altitudes. APS Series User Manual 020-002086-01 Rev. 1 (05-2023) Copyright 2023 Christie Digital Systems USA, Inc. All rights reserved. © If printed, please recycle this document after use. -
Page 41: Cooling Fast
Off—The control panel or remote control keypad are effective. • Projector—Control panel keypad is invalid. APS Series User Manual 020-002086-01 Rev. 1 (05-2023) Copyright 2023 Christie Digital Systems USA, Inc. All rights reserved. © If printed, please recycle this document after use. -
Page 42: Contrast Optimization(Only Lwu605St-Aps)
Sound menu. 2. Select OK. 3. Select to switch required menu. APS Series User Manual 020-002086-01 Rev. 1 (05-2023) Copyright 2023 Christie Digital Systems USA, Inc. All rights reserved. © If printed, please recycle this document after use. -
Page 43: Hdmi Setup
HDMI—When connect to the HDMI cable to tansmite images and audio when users do not need to connect to audio signal separately. APS Series User Manual 020-002086-01 Rev. 1 (05-2023) Copyright 2023 Christie Digital Systems USA, Inc. All rights reserved. © If printed, please recycle this document after use. -
Page 44: Expand Settings
The name of menus, settings, the on-screen display (OSD) button, and so on can be displayed in the selected language. Your projector supports English and simplified Chinese languages. APS Series User Manual 020-002086-01 Rev. 1 (05-2023) Copyright 2023 Christie Digital Systems USA, Inc. All rights reserved. © If printed, please recycle this document after use. -
Page 45: Auto Setup
Reset value—Cancels the Keystone after closing the projector or unplugging the AC power. APS Series User Manual 020-002086-01 Rev. 1 (05-2023) Copyright 2023 Christie Digital Systems USA, Inc. All rights reserved. © If printed, please recycle this document after use. - Page 46 LWU605ST-APS Maximum Keystone range is up to ±15° vertically and ±15° horizontally. LWU505ST-APS Maximum Keystone range is up to ±15° vertically and ±15° horizontally. APS Series User Manual 020-002086-01 Rev. 1 (05-2023) Copyright 2023 Christie Digital Systems USA, Inc. All rights reserved. © If printed, please recycle this document after use.
- Page 47 Correct the vertical line on the right. Select Expand the right vertical line outward while maintaining the left area. APS Series User Manual 020-002086-01 Rev. 1 (05-2023) Copyright 2023 Christie Digital Systems USA, Inc. All rights reserved. © If printed, please recycle this document after use.
- Page 48 While maintaining the right area, expand the left top and bottom horizontal lines outward. APS Series User Manual 020-002086-01 Rev. 1 (05-2023) Copyright 2023 Christie Digital Systems USA, Inc. All rights reserved. © If printed, please recycle this document after use.
- Page 49 Correct the horizontal line at the top. Select Expand the top horizontal line up while maintaining the bottom area. APS Series User Manual 020-002086-01 Rev. 1 (05-2023) Copyright 2023 Christie Digital Systems USA, Inc. All rights reserved. © If printed, please recycle this document after use.
-
Page 50: Logo
Security menu. 2. Select OK. 3. Select to switch required item. APS Series User Manual 020-002086-01 Rev. 1 (05-2023) Copyright 2023 Christie Digital Systems USA, Inc. All rights reserved. © If printed, please recycle this document after use. - Page 51 5. Select OK to confirm. Remember your new password and keep it protected. APS Series User Manual 020-002086-01 Rev. 1 (05-2023) Copyright 2023 Christie Digital Systems USA, Inc. All rights reserved. © If printed, please recycle this document after use.
-
Page 52: Power Management
Filter counter reset—Reset filter counter. • Filter check—Check the filter time of projector and respond (LWU505ST-APS only). APS Series User Manual 020-002086-01 Rev. 1 (05-2023) Copyright 2023 Christie Digital Systems USA, Inc. All rights reserved. © If printed, please recycle this document after use. -
Page 53: Test Pattern
This function is suitable for remote control of projector by computer in LAN. APS Series User Manual 020-002086-01 Rev. 1 (05-2023) Copyright 2023 Christie Digital Systems USA, Inc. All rights reserved. © If printed, please recycle this document after use. - Page 54 Preparing the network Follow these steps to prepare the network. • Christie recommends using a Category 5 or higher LAN cable. 1. Gather the required equipment: projector, computer, and network cable. 2. Make the connection: Connect the projector to a router or switch in the LAN with normal or jumper network cable. If a normal network cable failed to connect successfully, use a jumper cable.
-
Page 55: Factory Default
When selecting Memory Viewer as the input signal, the Memory Viewer menu is available. APS Series User Manual 020-002086-01 Rev. 1 (05-2023) Copyright 2023 Christie Digital Systems USA, Inc. All rights reserved. © If printed, please recycle this document after use. -
Page 56: Set Slide
Select this function to set the slide's order. 1. Select to select the Sort order menu. APS Series User Manual 020-002086-01 Rev. 1 (05-2023) Copyright 2023 Christie Digital Systems USA, Inc. All rights reserved. © If printed, please recycle this document after use. -
Page 57: Rotate
Off—Return to the thumbnail display screen, after playing the last one. Apply Select this function when playing slides. APS Series User Manual 020-002086-01 Rev. 1 (05-2023) Copyright 2023 Christie Digital Systems USA, Inc. All rights reserved. © If printed, please recycle this document after use. -
Page 58: Info. Settings
Image mode(LWU605ST-APS only) • Model name • • Firmware Version • SUBCPU(LWU505ST-APS only) APS Series User Manual 020-002086-01 Rev. 1 (05-2023) Copyright 2023 Christie Digital Systems USA, Inc. All rights reserved. © If printed, please recycle this document after use. -
Page 59: Signal Connectivity Specifications
○ 800x600,75Hz 46.875 75.000 49.500 ○ ○ 800x600,85Hz 53.674 85.061 56.250 ○ ○ APS Series User Manual 020-002086-01 Rev. 1 (05-2023) Copyright 2023 Christie Digital Systems USA, Inc. All rights reserved. © If printed, please recycle this document after use. - Page 60 - - ○ PAL-60 PAL60 - - ○ PAL-M PAL-M - - ○ APS Series User Manual 020-002086-01 Rev. 1 (05-2023) Copyright 2023 Christie Digital Systems USA, Inc. All rights reserved. © If printed, please recycle this document after use.
- Page 61 800x600,72Hz 48.077 72.188 50.000 ○ ○ - 800x600,75Hz 46.875 75.000 49.500 ○ ○ APS Series User Manual 020-002086-01 Rev. 1 (05-2023) Copyright 2023 Christie Digital Systems USA, Inc. All rights reserved. © If printed, please recycle this document after use.
- Page 62 74.038 59.950 154.000 ○ ○ 3840x2160,30Hz — - 3840x2160 67.500 30.000 297.000 ○ APS Series User Manual 020-002086-01 Rev. 1 (05-2023) Copyright 2023 Christie Digital Systems USA, Inc. All rights reserved. © If printed, please recycle this document after use.
- Page 63 - Shows input signal source not supported. • This specification is subject to change without prior notice. APS Series User Manual 020-002086-01 Rev. 1 (05-2023) Copyright 2023 Christie Digital Systems USA, Inc. All rights reserved. © If printed, please recycle this document after use.
-
Page 64: Network Control Operation
To select network icon, select MENU on the remote controller or on the top of the control panel, select ▲▼. APS Series User Manual 020-002086-01 Rev. 1 (05-2023) Copyright 2023 Christie Digital Systems USA, Inc. All rights reserved. © If printed, please recycle this document after use. -
Page 65: Wifi Display (For Pc)
For this function, users must purchase the WiFi dongle separately with their suppliers. APS Series User Manual 020-002086-01 Rev. 1 (05-2023) Copyright 2023 Christie Digital Systems USA, Inc. All rights reserved. © If printed, please recycle this document after use. -
Page 66: Entering Through A Web Browser
4. Select Login. System Status page The following displays the System Status page. APS Series User Manual 020-002086-01 Rev. 1 (05-2023) Copyright 2023 Christie Digital Systems USA, Inc. All rights reserved. © If printed, please recycle this document after use. - Page 67 Displays the LAN. connection status. LAN Status General setup page The following shows the General setup page. APS Series User Manual 020-002086-01 Rev. 1 (05-2023) Copyright 2023 Christie Digital Systems USA, Inc. All rights reserved. © If printed, please recycle this document after use.
- Page 68 Adjust the color temperature of the projected image. Color Temperature Image Setup page The following shows the Image setup page. APS Series User Manual 020-002086-01 Rev. 1 (05-2023) Copyright 2023 Christie Digital Systems USA, Inc. All rights reserved. © If printed, please recycle this document after use.
- Page 69 Correct the four corners of the projected image. Corner correction Network Setup page The following shows the Network setup page. APS Series User Manual 020-002086-01 Rev. 1 (05-2023) Copyright 2023 Christie Digital Systems USA, Inc. All rights reserved. © If printed, please recycle this document after use.
-
Page 70: Pwpresenter Software
2. After entering the IP address of the projector in the web page to the main interface, select Download and download the corresponding PwPresenter software for the projector. APS Series User Manual 020-002086-01 Rev. 1 (05-2023) Copyright 2023 Christie Digital Systems USA, Inc. All rights reserved. © If printed, please recycle this document after use. - Page 71 ---------- ⑥ • Before using the pwPresenter search, switch to network signal source. APS Series User Manual 020-002086-01 Rev. 1 (05-2023) Copyright 2023 Christie Digital Systems USA, Inc. All rights reserved. © If printed, please recycle this document after use.
-
Page 72: Memory Viewer Function
• The root directory of the USB memory is displayed in a thumbnail. APS Series User Manual 020-002086-01 Rev. 1 (05-2023) Copyright 2023 Christie Digital Systems USA, Inc. All rights reserved. © If printed, please recycle this document after use. -
Page 73: Playing The Image
Select this function to can project the image and audio from the computer through the USB converter cable. APS Series User Manual 020-002086-01 Rev. 1 (05-2023) Copyright 2023 Christie Digital Systems USA, Inc. All rights reserved. © If printed, please recycle this document after use. -
Page 74: Projecting The Usb Display
Monitor Resolution 640x480 or above, 1600x1200 or above • Christie does not guarantee a PC not meeting the above conditions will operate normally. Projecting the USB display 1. UseUSB-B cable to connect the projector to the USB-B terminals. Items in grey are not available. -
Page 75: Projecting The Usb Display
Memory Viewer function • Christie does not guarantee a PC not meeting the above conditions will operate normally. Projecting the USB display Follow these steps to project the USB display. • Resolution of the computer screen is switched. • You must wait for a few seconds if you want to project computer screen. -
Page 76: Wake On Lan Operation
14. Once the projector enters into Standby mode, right-click on the group and select Wake up. APS Series User Manual 020-002086-01 Rev. 1 (05-2023) Copyright 2023 Christie Digital Systems USA, Inc. All rights reserved. © If printed, please recycle this document after use.
Need help?
Do you have a question about the APS Series and is the answer not in the manual?
Questions and answers