Christie LW650 User Manual
Hide thumbs
Also See for LW650:
- User manual (54 pages) ,
- Instruction sheet (3 pages) ,
- Technical specifications (2 pages)

Related Manuals for Christie LW650


Summary of Contents for Christie LW650
- Page 1 LX750/LW650/LS+700 U S E R M A N U A L - O P E R A T I N G G U I D E 020-000159-01...
-
Page 3: About This Manual
Projector LW650/LS+700/LX750 User Manual (detailed) – Operating Guide Thank you for purchasing this projector. WARNING ►Before using this product, please read the "User's Manual - Safety Guide" and related manuals to ensure the proper use of this product. After reading them, store them in a safe place for future reference. -
Page 4: Table Of Contents
Contents Contents About this manual ... 1 EASY MENU....29 SPECT UTO KEYSTONE EYSTONE Contents ....2 EYSTONE ICTURE MODE CO MODE... -
Page 5: Introduction
Introduction Introduction Projector features This projector has a capability to project various picture signals onto a screen. This projector requires only a minimal amount of space for installation and can produce a large projected image from even a short distance. Moreover, the projector has the following features to extend its potentiality for broad use. -
Page 6: Checking The Contents Of Package
Introduction Checking the contents of package Soon after purchasing this product, check that all the following items are included in the package. If any items should be missing, tell your dealer immediately. (1) Projector (2) Lens adapter (3) Hexagon wrench (for installation of the optional lens unit) (4) Power cord (5) Computer cable... -
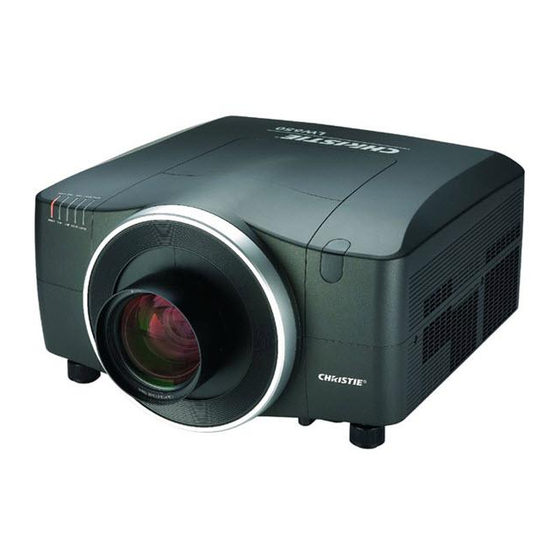
Page 7: Part Names
Part names Front ring Part names Front cover Projector (1) Dust protector (2) Remote sensors (x 2) ( (3) Exhaust vents (4) Filter cover ( HOT! The filter unit and intake vent are inside. See the NOTICE (5) Control panel ( (6) Rear panel ( (7) Shutdown switch ( (8) Lamp cover (... -
Page 8: Control Panel
Part names Control panel 19,20) (1) STANDBY/ON button ( STANDBY/ON (2) Cursor buttons ( ▲/▼/◄/► ) ( (3) MENU button ( (4) COMPUTER button ( (5) VIDEO button ( The indicator (6) DIGITAL button ( (7) LENS SHIFT button ( will light in MENU indicator of... -
Page 9: Remote Control
Part names Remote control (1) Laser pointer ( It is a beam outlet. (2) LASER INDICATOR ( LASER INDICATOR (3) LASER button ( STANDBY/ON MY SOURCE COMPUTER 19,20) (4) STANDBY/ON button ( VIDEO (5) ID (1-4) button ( ID 1 ID 3 (6) COMPUTER button ( DIGITAL... -
Page 10: Setting Up
Setting up Setting up Read this chapter through fi rst. Then install the projector into place. Installation environment This product requires an installing place that is stable, cool and airy. Check your installation environment in accordance with the following. WARNING ►Do not place the product on an unstable surface such as an uneven, tilted, or vibrating place. -
Page 11: Projection Distance
Setting up Projection distance See the user’s manual of your lens unit for your case. NOTICE ►Do not use a polarized screen, since it can cause a red image. -
Page 12: Placement
Setting up Placement In placing the projector in place in accordance with the preceding section 9) heed the following too. "Projection distance" ( WARNING ►Keep the projector away from anything that is easy to catch fire. ►Do not block or cover the openings on the projector, and keep sufficiently space for ventilation around the projector. -
Page 13: Connecting With Your Devices
Setting up Connecting with your devices Before connecting the projector to your devices, check the manual of the device in order to make sure that the device is suitable to connect with this projector and to check what is required for the connection. Consult your dealer when the required accessory did not come with the product or the accessory is damaged. -
Page 14: For Safety
Setting up Connecting your devices (continued) Example of connecting with VCR or DVD players S-VIDEO Video signal input VIDEO VIDEO COMPONENT Y Cb/Pb Cr/Pr Digital signal input S-VIDEO VIDEO VIDEO COMPONENT Y Cb/Pb Cr/Pr HDMI MONITOR HDMI DVI-D REMOTE CONTROL IN CONTROL OUT S-VIDEO CONTROL... -
Page 15: Wired Remote
Setting up Connecting your devices (continued) Example of connecting with another projector or a display device Computer signal input Control from the computer RS-232C RGB OUT Wired remote control MONITOR HDMI DVI-D REMOTE CONTROL IN CONTROL OUT S-VIDEO CONTROL COMPUTER IN1 COMPUTER IN2 VIDEO 1 R/Cr/Pr B/Cb/Pb... - Page 16 Setting up Connecting your devices (continued) NOTE • Be sure to read the manuals for devices before connecting them to the projector, and make sure that all the devices are suitable to be connected with this product. • Before connecting to a PC, check the signal level, the signal timing, and the resolution. - Be sure to consult to the administrator of the network.
-
Page 17: Connecting Power Supply
Setting up Connecting power supply In accordance with the warnings shown below, connect the AC inlet of the projector to the proper power outlet. The following walks you through the connection. Make sure that the power switch of the projector is set to the off-position (marked with “O”). -
Page 18: Remote Control
Remote control Remote control Putting batteries The remote control needs the two batteries of the following type. HITACHI MAXELL, part number LR6 or R6P The batteries that came with the product are a type suitable to this remote control. The following walks you through loading batteries into the remote control. Remove the battery cover in the back of the remote control. -
Page 19: Transmitting Condition
Remote control Transmitting condition Remote The remote control works with the remote sensors sensors on the projector using infrared light (Class 1 LED). The remote sensor senses the remote control signals reached into the range within 60 degrees (to right and left) and 3 meters about from the sensor. -
Page 20: Using The Remote Id Function
Remote control Using the REMOTE ID function This is the function to define which projector is controlled by the remote control. Utilize this function when you use some projectors of the same type at the same time. Set the ID number to the projector beforehand, VIDEO 52). -
Page 21: Operating
Operating Operating Turning on The following walks you through the steps to turn the projector on. For other devices, follow the manual of each. Make sure that the power cord is firmly and correctly connected to the projector and the outlet. Power POWER indicator Press down the side marked “I”... -
Page 22: Turning Off
Operating Turning off The following walks you through the steps to turn the projector off. Power POWER indicator Press the STANDBY/ON button on the projector switch or the remote control. The message "Power off?" will appear on the screen for about 5 seconds. Press the STANDBY/ON button again while the message is shown. -
Page 23: Using The Functions For The Lens
Operating Using the functions for the lens ZOOM / FOCUS Press the ZOOM / FOCUS button. The ZOOM / FOCUS dialog will appear. Adjust the zoom / focus using the ◄/► button while the dialog is displayed. Press the ▼ button to select "EXIT" on the dialog. -
Page 24: Displaying And Switching The Image
Operating Displaying and switching the image Press the COMPUTER button to select an input port for the RGB signal. LASER INDICATOR Each time you press the button, the projector switches its STANDBY/ON MY SOURCE COMPUTER RGB input port from the current port as below. COMPUTER IN1 COMPUTER IN2 ●... -
Page 25: Selecting An Aspect Ratio
For a video signal, s-video signal or component video signal 16:9 16:10 14:9 SMALL NATIVE FULL For no signal ENTER 4:3 (fixed, except LW650) / FULL (fixed, LW650) ● 16:10 / FULL: LW650 only. NATIVE: Except LX750. FREEZE MENU SMALL: Except LW650. SHUTTER RESET ASPECT ●... -
Page 26: Adjusting The Position
Operating Adjusting the position Press the POSITION button on the remote control when no menu is indicated. ENTER The “POSITION” indication will appear on the screen. Use the ▲/▼/◄/► cursor buttons to adjust the picture position. When you want to reset the operation, press the RESET FREEZE MENU button on the remote control during the operation. -
Page 27: Using The Magnify Feature
Operating Using the magnify feature Press the ON button of MAGNIFY on the remote control. PbyP AUTO POSITION The “MAGNIFY” indication will appear on the screen and MY BUTTON MAGNIFY the projector will go into the MAGNIFY mode. In the Magnify mode, the picture will be zoomed. -
Page 28: Temporarily Blanking The Screen
Operating Temporarily blanking the screen Press the BLANK button on the remote control. VIDEO The blank screen will be displayed instead of the screen of ID 1 ID 3 DIGITAL input signal. Please refer to the BLANK item in SCREEN ID 4 ID 2 42). -
Page 29: Pbyp (Picture By Picture)
Operating PbyP (Picture by Picture) The PbyP is a function to display two different picture signals on a screen that is split in two areas for each signal. Some of functions can be used with the same operation as it for the normal mode (not in the PbyP mode). There are some operations available only in the PbyP mode. -
Page 30: Using The Menu Function
Operating Using the menu function This projector has the following menus: PICTURE, IMAGE, INPUT, SETUP, SCREEN, OPTION, NETWORK, SECURITY and EASY MENU. The EASY MENU consists of functions often used, and the other menus are classified into each purpose and brought together as the ADVANCED MENU. Each of these menus is operated using the same methods with the ▲/▼/◄/►, ENTER and RESET buttons. -
Page 31: Easy Menu
EASY MENU EASY MENU From the EASY MENU, items shown in the table below can be performed. Select an item using the ▲/▼ cursor buttons on the projector or remote control. Then perform it according to the following table. Item Description Using the ◄/►... - Page 32 EASY MENU Item Description Using the ◄/► buttons turns off/on the eco mode. ECO MODE 41). See the ECO MODE item in SETUP menu ( Using the ◄/► buttons switches the mode for mirror status. MIRROR 41). See the MIRROR item in SETUP menu ( Performing this item resets all of the EASY MENU items except the FILTER TIME and LANGUAGE.
-
Page 33: Picture Menu
PICTURE menu PICTURE menu From the PICTURE menu, items shown in the table below can be performed. Select an item using the ▲/▼ cursor buttons on the projector or remote control, and press the ► cursor button on the projector or remote control, or the ENTER button on the remote control to execute the item. - Page 34 PICTURE menu Item Description Using the ▲/▼ buttons switches the color temperature mode. 1 HIGH 1 CUSTOM 2 MID 2 CUSTOM 3 LOW 6 CUSTOM 6 Hi-BRIGHT-3 3 CUSTOM 5 CUSTOM 5 Hi-BRIGHT-2 4 CUSTOM 4 Hi-BRIGHT-1 To adjust CUSTOM Selecting a mode whose name includes CUSTOM and then pressing the ►...
- Page 35 PICTURE menu Item Description Using the ▲/▼ cursor buttons changes the active iris control mode. PRESENTATION THEATER MANUAL Feature The active iris displays the best presentation PRESENTATION image for both bright and dark scenes. ACTIVE IRIS The active iris displays the best theater image for THEATER both bright and dark scenes.
-
Page 36: Image Menu
FULL* For no signal 4:3 (fixed, except LW650) / FULL (fixed, LW650) • *16:10 / FULL: LW650 only. NATIVE: Except LX750. SMALL: Except LW650. • The NORMAL mode keeps the original aspect ratio of the signal. Using the ◄/► buttons adjusts the over-scan ratio. - Page 37 IMAGE menu Item Description Using the ◄/► buttons adjusts the horizontal phase to eliminate flicker. Right Left H PHASE • This item can be selected only for a computer signal or a component video signal. (except 480i@60, 576i@50, SCART RGB input.
-
Page 38: Input Menu
INPUT menu INPUT menu From the INPUT menu, items shown in the table below can be performed. Select an item using the ▲/▼ cursor buttons on the projector or remote control, and press the ► cursor button on the projector or remote control, or ENTER button on the remote control to execute the item. - Page 39 INPUT menu Item Description Using the ▲/▼ buttons switches the function of the Component (Y, Cb/Pb, Cr/Pr) port. COMPONENT SCART RGB When the SCART RGB is selected, the Component (Y, Cb/Pb, Cr/Pr) and VIDEO 1 ports will function as a SCART RGB port. A SCART adapter or SCART cable is required for a SCART RGB input to the projector.
- Page 40 INPUT menu Item Description Set the digital range for HDMI port and DVI-D port. (1) Use the ▲/▼ buttons to select the input port. (2) Using the ◄/► cursor buttons changes the digital signal mode. AUTO NORMAL ENHANCED DIGITAL RANGE Feature AUTO Selecting the optimum mode automatically.
- Page 41 INPUT menu Item Description The resolution for the COMPUTER IN1, COMPUTER IN2 and BNC input signals can be set on this projector. In the RESOLUTION menu select the resolution you wish to display using the ▲/▼ buttons. ■AUTO Selecting AUTO will set a resolution appropriate to the input signal.
-
Page 42: Setup Menu
SETUP menu SETUP menu From the SETUP menu, items shown in the table below can be performed. Select an item using the ▲/▼ cursor buttons on the projector or remote control, and press the ► cursor button on the projector or remote control, or the ENTER button on the remote control to execute the item. - Page 43 SETUP menu Item Description Using the ◄/► buttons corrects the horizontal keystone distortion. Shrink the left of the image Shrink the right of the image • The adjustable range of this function will vary among inputs. For some input, this function may not work well. •...
-
Page 44: Screen Menu
SCREEN menu SCREEN menu From the SCREEN menu, items shown in the table below can be performed. Select an item using the ▲/▼ cursor buttons on the projector or remote control, and press the ► cursor button on the projector or remote control, or ENTER button on the remote control to execute the item. - Page 45 SCREEN menu Item Description Using the ▲/▼ buttons switches the mode for the start-up screen. The start-up screen is a screen displayed when no signal or an unsuitable signal is detected. MyScreen ORIGINAL Feature Screen can be registered by the MyScreen item MyScreen START UP ORIGINAL...
- Page 46 SCREEN menu Item Description This item allows you to capture an image for use as a MyScreen image which can be used as the BLANK screen and START UP screen. Display the image you want to capture before executing the following procedure.
- Page 47 SCREEN menu Item Description Using the ▲/▼ buttons turns on/off the message function. When the ON is selected, the following message function works. “AUTO IN PROGRESS” while automatically adjusting “NO INPUT IS DETECTED” “SYNC IS OUT OF RANGE” “INVALID SCAN FREQ” “Searching….”...
- Page 48 SCREEN menu Item Description Using the ▲/▼ buttons switches the mode for the template screen. Press the ► button to display the selected template, and press the ◄ button to close the displayed screen. TEMPLATE The last selected template is displayed when the MY BUTTON allocated to the TEMPLATE 49).
-
Page 49: Option Menu
OPTION menu OPTION menu From the OPTION menu, items shown in the table below can be performed. Select an item using the ▲/▼ cursor buttons on the projector or remote control, and press the ► cursor button on the projector or remote control, or ENTER button on the remote control to execute the item, except for the items LAMP TIME and FILTER TIME. - Page 50 OPTION menu Item Description Using the ▲/▼ buttons turns on/off the DIRECT ON function. When set to the ON, the lamp in projector will be 19), only automatically turned on without the usual procedure ( when the projector is supplied with the power after the power was DIRECT ON cut while the lamp was on.
- Page 51 OPTION menu Item Description This item is to assign one of the following functions to MY BUTTON -(1 to 4) on the remote control ( (1) Use the ▲/▼ buttons on the MY BUTTON menu to select a MY BUTTON - (1 to 4) and press the ►...
- Page 52 OPTION menu Item Description Selecting this item displays the SERVICE menu. Select an item using the ▲/▼ buttons, and press the ► button or the ENTER button on the remote control to execute the item. FAN SPEED Using the ▲/▼ buttons switches the rotation speed of the cooling fans.
- Page 53 OPTION menu Item Description LENS TYPE Select the lens type currently used using the ▲/▼ buttons. 1:USL-801 2:SL-802 3:SL-803 4:SD-804 7:AUTO 6:UL-806 5:LL-805 Please select one of them referring to the following. 1: for an ultra short throw lens (USL-801) 2: for a short throw lens (SL-802) 3: for a short throw lens (SL-803) 4: for a standard lens (SD-804)
- Page 54 OPTION menu Item Description REMOTE ID Use the ▲/▼ buttons on the REMOTE ID menu to select ID and press the ► button. The projector is controlled by the remote control whose ID button is set the same number as this number. When the ALL is selected, the projector is controlled by a remote control irrespective of the ID setting.
- Page 55 OPTION menu Item Description DAISY CHAIN: Select this type, if it is required to connect multiple projectors using a shared RS-232C communication bus, from the computer. ( Network Guide - 3.8 Multi-controlling the plural projectors (using DAISY CHAIN function)) OFF: Select this mode if you want to output no data from the CONTROL OUT port.
- Page 56 OPTION menu Item Description RESPONSE LIMIT TIME This menu is available only when the NETWORK BRIDGE is selected for the COMMUNICATION TYPE and the HALF-DUPLEX is selected for the TRANSMISSION METHOD. Select the time period to wait for receiving response data from other devise communicating by the NETWORK BRIDGE and the HALF-DUPLEX through the CONTROL OUT port.
- Page 57 OPTION menu Item Description COMMUNICATION GROUP / COMMUNICATION ID This menu is available only when DAISY CHAIN is selected for the COMMUNICATION TYPE. In simultaneous control of multiple projectors by a daisy chain, you can give the projectors the communication group identification and the ID number to identify projectors connected in the same bus.
-
Page 58: Network Menu
NETWORK menu NETWORK menu Remember that incorrect network settings on this projector may cause trouble on the network. Be sure to consult with your network administrator before connecting to an existing access point on your network. Select “NETWORK” from the main menu to access the following functions. - Page 59 NETWORK menu Item Description Use the ▲/▼/◄/► buttons to enter the IP ADDRESS. This function can only be used when DHCP is set to OFF. ADDRESS • The IP ADDRESS is the number that identifies this projector on the network. You cannot have two devices with the same IP ADDRESS on the same network.
- Page 60 NETWORK menu Item Description (1) Use the▲/▼ buttons on the NETWORK menu to select the PROJECTOR NAME menu and press the ► button. The PROJECTOR NAME dialog will be displayed. (2) The current PROJECTOR NAME will be displayed on the first 3 lines.
- Page 61 NETWORK menu Item Description Selecting this item displays the MY IMAGE menu. The application software “PJImage” is required to store image(s) into the projector. Use the ▲/▼ buttons to select an item which is a still image by the MY IMAGE ( MY IMAGE (Still Image Transfer) Display of the User’s Manual - Network Guide) and the ►...
- Page 62 NETWORK menu Item Description Selecting this item displays the NETWORK -INFORMATION- dialog for confirming the network settings. INFORMATION • Only the first 16 characters of the projector neme are displayed. • Nothing (blank) is shown in the “PROJECTOR NAME” field until 58).
-
Page 63: Security Menu
SECURITY menu SECURITY menu This projector is equipped with security functions. From the SECURITY menu, items shown in the table below can be performed. To use SECURITY menu: User registration is required before using the security functions. Enter the SECURITY menu 1. -
Page 64: Myscreen Password In Lock
SECURITY menu Item Description The MyScreen PASSWORD function can be used to prohibit access to the MyScreen function and prevent the currently registered MyScreen image from being overwritten. 1 Turning on the MyScreen PASSWORD 1-1 Use the ▲/▼ buttons on the SECURITY menu to select MyScreen PASSWORD and press the ►... - Page 65 SECURITY menu Item Description PIN LOCK is a function which prevents the projector from being used unless a registered Code is input. 1 Turning on the PIN LOCK 1-1 Use the ▲/▼ buttons on the SECURITY menu to select PIN LOCK and press the ► button or the ENTER button to display the PIN LOCK on/ off menu.
- Page 66 SECURITY menu Item Description If this function is set to ON when the vertical angle of the projector or mirror setting at which the projector is turned on is different than the previously recorded, the TRANSITION DETECTOR ON alarm will be displayed and the projector will not display the input signal.
- Page 67 SECURITY menu Item Description The MY TEXT PASSWORD function can prevent the MY TEXT from being overwritten. When the password is set for the MY TEXT; • The MY TEXT DISPLAY menu will be unavailable, which can prohibit changing the DISPLAY setting.
- Page 68 SECURITY menu Item Description 1 Use the ▲/▼ buttons on the SECURITY menu to select the MY TEXT DISPLAY menu and press the ► button to display the MY TEXT DISPLAY on/off menu. 2 Use the ▲/▼ buttons on the MY TEXT DISPLAY on/off menu to select on or off.
-
Page 69: Maintenance
Maintenance Maintenance Lamp unit A worn out lamp bulb could burn or burst. It is recommended to keep a spare lamp unit on hand and to replace the lamp unit when the projected image darkens or color reproduction becomes poor. To prepare the spare, contact your dealer and tell the following type number. -
Page 70: Lamp Warning
Maintenance Lamp warning HIGH TEMPERATURE HIGH PRESSURE HIGH VOLTAGE WARNING ►The projector uses a high-pressure mercury glass lamp. The lamp can break with a loud bang, or burn out, if jolted or scratched, handled while hot, or worn over time. Note that each lamp has a different lifetime, and some may burst or burn out soon after you start using them. -
Page 71: Filter Unit
Maintenance Filter unit To keep inside ventilation normal, keep a spare and replace the filter unit periodically, although frequent replacement is not needed for this product. To prepare the spare, contact your dealer and tell the following type number. Type number of the optional filter unit: 003-002722-01 (MU06351) The following walks you through the steps to replace the filter unit. -
Page 72: Internal Clock Battery
Maintenance Internal clock battery This projector is being loaded with a battery for the internal clock that the network function needs. When the clock does not work correctly, request your dealer to check the battery and to replace if needed. For replacement, prepare a new battery of the following type. -
Page 73: Troubleshooting
Troubleshooting Troubleshooting Related messages When the unit's power is on, messages such as those shown below may be displayed. When any such message is displayed on the screen, please follow the instructions described below. If the same message is displayed after the remedy, or if a message other than the following appears, please contact your dealer or service company. -
Page 74: Regarding The Indicator Lamps
Troubleshooting Regarding the indicator lamps Lighting and blinking of the POWER indicator, the TEMP indicator, the LAMP indicator, the SECURITY indicator and the SHUTTER indicator have the meanings as described in the table below. Please follow the instructions within the table. If the same indication is displayed after the remedy, or if an indication other than the following is displayed, please contact your dealer or service company. - Page 75 Troubleshooting Description POWER TEMP LAMP SECURITY SHUTTER The cooling fan is not operating. Please turn the power off, and allow the projector to cool down at least 20 minutes. After the projector has Blinking sufficiently cooled down, please make confirmation that Blinking Turned Turned...
-
Page 76: Phenomena That May Be Easily Mistaken For Machine Defects
Troubleshooting Phenomena that may be easily mistaken for machine defects WARNING ►Never use the projector if abnormal operations such as smoke, strange odor, excessive sound, damaged casing or elements or cables, penetration of liquids or foreign matter, etc. should occur. In such cases, immediately turn off the power switch and then disconnect the power plug from the power outlet. - Page 77 Troubleshooting Reference Phenomenon Cases not involving a machine defect page The signal cables are not correctly connected. Correctly connect the connection cables. The brightness is adjusted to an extremely low level. Adjust BRIGHTNESS to a higher level using the menu function or the remote control.
- Page 78 Troubleshooting Reference Phenomenon Cases not involving a machine defect page The FREEZE function is working. Video screen display freezes. Press the FREEZE button to restore the screen to normal. Color settings are not correctly adjusted. Perform picture adjustments by changing the COLOR Colors have a 32, 36 TEMP, COLOR, TINT and/or COLOR SPACE settings,...
-
Page 79: Warranty And After-Service
Item Specifications Product name Liquid crystal projector LX750: 1024 horizontal x 768 vertical Liquid Crystal Panel LW650: 1366 horizontal x 800 vertical LS+700: 1400 horizontal x 1050 vertical Lens * See the manual of the optional lens. Lamp 350W UHB Power supply AC 110-120V/6.0A, AC220-240V/3.1A... - Page 80 Specifications Specifications (continued) [unit: mm]...
Need help?
Do you have a question about the LW650 and is the answer not in the manual?
Questions and answers