Table of Contents
Advertisement
Quick Links
™
ClassicCombi
Operating instructions
ClassicCombi
Version
Type no. (electric)
ClassicCombi
ECC61XXXX
ClassicCombi
ECC62XXXX
ClassicCombi
ECC11XXXX
ClassicCombi
ECC12XXXX
ClassicCombi
ECC21XXXX
ClassicCombi
ECC22XXXX
Global Foodservice Solutions
Type no. (gas)
Size
GCC61XXXX
615
GCC62XXXX
620
GCC11XXXX
115
GCC12XXXX
120
GCC21XXXX
215
GCC22XXXX
220
*FM05-060-A* en-US
Open out the front cover to see the
controls.
Operating instructions
Advertisement
Table of Contents

Subscribe to Our Youtube Channel
Related Manuals for Henny Penny ClassicCombi


Summary of Contents for Henny Penny ClassicCombi
- Page 1 ™ ClassicCombi Global Foodservice Solutions Operating instructions ClassicCombi Open out the front cover to see the controls. Version Type no. (electric) Type no. (gas) Size ClassicCombi ECC61XXXX GCC61XXXX ClassicCombi ECC62XXXX GCC62XXXX ClassicCombi ECC11XXXX GCC11XXXX ClassicCombi ECC12XXXX GCC12XXXX ClassicCombi ECC21XXXX GCC21XXXX...
- Page 2 ™ ™ ClassicCombi ClassicCombi Controls Classic Button “On/Off” Display Button “FLEXI” Display Cooking mode button “Comb- Button “Preheat” isteaming” Cooking mode button “Regen- Cooking mode button “Convec- eration” tion” Button “Start/Stop” Cooking mode button “Steam- ing” Set button Button “Step”...
-
Page 3: Table Of Contents
™ ClassicCombi Contents Introduction ............Intended use ..............About this operating manual ......... Warnings ................. Warranty and liability ............. Signs and symbols ............Safety information ..........Construction and function ........ Description of the unit ........... Description of the controls .......... - Page 4 ™ ClassicCombi Contents 4.3.1 Filling and emptying the unit (with loading trolle y) ...... 4.3.2 Filling and emptying the unit (without loading trolle y) ....Filling and emptying the unit (floor standing units) ..Switch on/switch off unit ..........4.5.1 Switch on ..................
- Page 5 ™ ClassicCombi Contents 5.1.4 Cleaning the cooking chamber door ........5.1.5 Cleaning the steam outlet por t ..........5.1.6 Descaling ................. System-supported manual cleaning ......5.2.1 Preparing the cooking chamber ..........5.2.2 Starting the cleaning program ..........5.2.3 Spraying cleaning solution ............
-
Page 6: Introduction
Introduction 1 Introduction 1.1 Intended use Henny Penny combisteamers are solely intended to be used for commercial purposes, especially in commercial kitchens. The unit may only be used for cooking food and only with the correct racks, containers, baking sheets, rack trolleys and slide-in units. -
Page 7: Warnings
● unit Technical changes to the unit without the binding ag reement of the ● manufacturer Use of spare parts or accessories not approved by Henny Penny ● Faults resulting from the failure to comply with these operating ● instructions... -
Page 8: Signs And Symbols
™ ClassicCombi Introduction 1.5 Signs and symbols DANGER Imminent danger → Non-compliance poses a threat of death or serious injury. WARNING Possible danger → Non-compliance may pose a threat of death or serious injury. CAUTION Dangerous situation → Non-compliance may result in slight injuries. -
Page 9: Safety Information
™ ClassicCombi Safety information 2 Safety information Henny Penny appliances comply with the relevant safety standards. However, this does not exclude all possible dangers from arising, e.g. due to improper use. Therefore, when installing and operating the unit, the operating personnel must be familiar with and observe local regulations, including BGR 111 “Working in catering kitchens”. - Page 10 ™ ClassicCombi Safety information Hot surfaces, steam and Risk of burns due to hot surfaces liquids Wear insulated protective gloves during operation. ● Always open the door of the cooking chamber wide enough and let ● it lock in place.
- Page 11 ™ ClassicCombi Safety information CAUTION Dangerous situation → Non-compliance may result in equipment damage. Core temperature Do not overheat the core temperature sensor measurement Do not heat the core temperature sensor with a lighter or similar ● object. Incorrect handling...
- Page 12 ™ ClassicCombi Safety information For the function “Preset start time”, observe the provisions regarding ● foodstuffs. Operating instructions Global Foodservice Solutions...
-
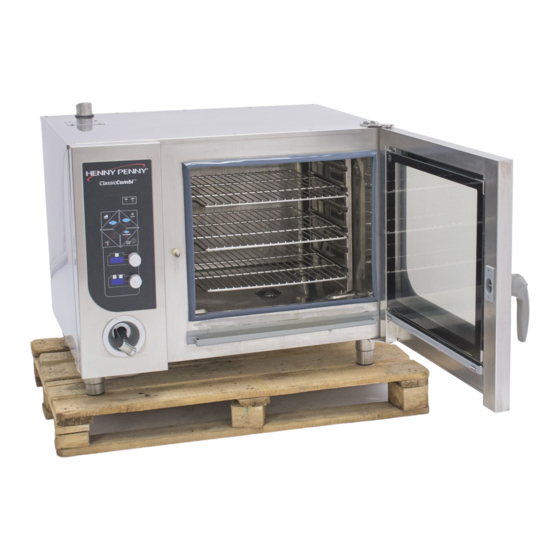
Page 13: Construction And Function
™ ClassicCombi Construction and function 3 Construction and function 3.1 Description of the unit Figure 1: Sizes 615 and 620, left: gas, right: electric Cooking chamber door Data interface (concealed) Insulated window Height-adjustable feet Controls Air intake port for the cooking... - Page 14 ™ ClassicCombi Construction and function Figure 2: Sizes 115 and 120, left: gas, right: electric Cooking chamber door Data interface (concealed) Insulated window Height-adjustable feet Controls Air intake port for the cooking chamber Door handle Steam outlet port Hand-held rinsing head (option-...
- Page 15 ™ ClassicCombi Construction and function Figure 3: Sizes 215 and 220, left: gas, right: electric Cooking chamber door Data interface (concealed) Insulated window Height-adjustable feet Controls Air intake port for the cooking chamber Door handle Steam outlet port Hand-held rinsing head (op-...
-
Page 16: Description Of The Controls
™ ClassicCombi Construction and function 3.2 Description of the controls NOTICE Open out the cover page to see the controls. Control Description Upper display Cooking temperature display Lower display Display of cooking time and core tem- perature Cooking mode button “Combisteaming”... -
Page 17: Operating Modes
™ ClassicCombi Construction and function 3.3 Operating modes The unit has two operating modes: Step mode ● Manual cooking ● You can use different cooking methods in both operating modes: Steaming ● Combisteaming ● Convection ● Regeneration ● Advanced cooking functions such as: Manual steaming ●... - Page 18 ™ ClassicCombi Construction and function Break up lumps of ice when using frozen foodstuffs so that all the ● food will be heated evenly. Chill vegetables quickly after steaming, add butter and season. ● Use stock for vegetable bundles. Steam the vegetables in perforated ●...
-
Page 19: Combisteaming
™ ClassicCombi Construction and function The cooking time is reduced by about 10% as compared to the Benefits “Steaming” cooking mode. Set the cooking temperature between 105 °C (221 °F) and 110 °C Tips ● (230 °F) for small loads. -
Page 20: Regeneration
™ ClassicCombi Construction and function Food starts to brown at a cooking chamber temperature of 120 °C ● (248 °F) and above. The higher the set cooking chamber temperature, the greater the food's weight loss but the more intensive the level of browning. - Page 21 ™ ClassicCombi Construction and function Size ∅ 26 cm (10.2") ∅ 28 cm (11") ∅ 32 cm (12.6") On slide-in racks (1/1 unit with special (plate rack frame FlexiRack racks) or rack trolley) Table 1: Plate capacities Size Regeneration temperat- Regeneration time 120 °C (248 °F)–130 °C...
-
Page 22: Advanced Cooking Functions
™ ClassicCombi Construction and function 3.6 Advanced cooking functions With the advanced cooking functions, individual cooking steps can be adjusted to suit the food being cooked, enabling you to optimise the cooking result even further. The following advanced cooking functions are available: Manual steaming ●... -
Page 23: Crisping Control (Optional)
™ ClassicCombi Construction and function 3.6.4 Crisping control (optional) With the advanced cooking function “Crisping control”, the cooking chamber humidity can be selected (0 % or 100 %) for the cooking modes “Combisteaming”, “Convection” and “Regeneration”. You can dehumidify the cooking chamber when cooking foods containing a lot of water by setting the value to 0%. - Page 24 ™ ClassicCombi Construction and function Serial no.: 01234567 Unit type: 6.1 Date of print: 23.06.2008 Abbrev. CM=cooking mode, S=steaming CS=combi steaming, HC=convection CT= core temperature Program: Knuckle (of pork) Cooking date:19.06.2008 8:59 End: 10:38 Cooking time: 1:39 Temp Time No. CM Min, Max act.
-
Page 25: Waveclean Automatic Cleaning System (Optional)
™ ClassicCombi Construction and function 3.9 “WaveClean” automatic cleaning system (optional) WaveClean is an automatic cleaning system, which cleans and r inses the cooking chamber by means of a special cartridge. Operating instructions Global Foodservice Solutions... -
Page 26: Operation
™ ClassicCombi Operation 4 Operation 4.1 Opening and closing cooking chamber door (tabletop units) 4.1.1 Opening the cooking chamber door 1. Turn the door handle to the side. The cooking chamber door will open. 2. Open the chamber door wide. -
Page 27: Opening And Closing Cooking Chamber Door (Floor Standing Units)
™ ClassicCombi Operation 4.2 Opening and closing cooking chamber door (floor standing units) 4.2.1 Opening the cooking chamber door 1. Turn door handle to horizontal. The cooking chamber door will open but remain engaged. 2. Turn the door handle further upwards. -
Page 28: Filling And Emptying The Unit (Tabletop Unit)
™ ClassicCombi Operation 4.3 Filling and emptying the unit (tabletop unit) 4.3.1 Filling and emptying the unit (with loading trolley) Suspension frame is removed Requirements Check that food racks are correctly positioned in the suspension frames NOTICE This section describes the process of filling/emptying with a loading trolley (optional accessory). -
Page 29: Filling And Emptying The Unit (Without Loading Trolley)
™ ClassicCombi Operation 4. Push the loading trolley (1) close to the unit. 5. Rotate the lever (2). Catch of the rack frame is released. Loading trolley is secured against rolling away. 6. Check the catch of the loading trolley by pulling lightly. -
Page 30: Filling And Emptying The Unit (Floor Standing Units)
™ ClassicCombi Operation 4.4 Filling and emptying the unit (floor standing units) Check that food racks are correctly positioned in the trolley Requirements CAUTION Risk of burns due to hot liquids → Only use the correct racks: The racks must lie safely on the supporting brackets. -
Page 31: Basic Functions
™ ClassicCombi Operation 4.6 Basic functions 4.6.1 Call up start mode Unit is switched on Requirements The process of making entries for a program must first be ended in order to be able to invoke other functions (e.g. setup menu). -
Page 32: Starting The Cooking Program
™ ClassicCombi Operation 10. To save the changes, press FL E X I ( 2 ) until display (9) shows “Sto” ( “Store”). S to Display (9) shows “PAS” ( “Password”). Display (8) shows “0”. P AS 11. Press St e p (1 3 ) to exit the setup menu. -
Page 33: Changing The Cooking Program During Operation
™ ClassicCombi Operation The LEDs for the cooking mode button are lit. Display (9) shows the preset cooking temperature. Display (8) shows the preset cooking time. 2. Press St a r t / St o p (5 ) or open the door of the chamber to tur n off the signal. -
Page 34: Setting The Core Temperature
™ ClassicCombi Operation 1. Turn s e t bu t t o n ( 7 ) clockwise. Setting range: 1 minute–24 hours, presetting “0:00”. 2. For continuous operation: With the time display at “0:00”, turn s e t bu t to n ( 7 ) anticlockwise. -
Page 35: Printing The Haccp Log
™ ClassicCombi Operation The illustration shows a measuring sensor with one measuring point 120 °C (standard). The core temperature measured at the tip of the sensor is used for controlling the cooking process. The tip of the sensor must be positioned exactly in the core of the food to be cooked. -
Page 36: Working With Multi-Step Cooking Programs (Step-Mode)
™ ClassicCombi Operation 4. Use s e t bu t t o n (7 ) to select the HACCP log to be printed. 5. Press F L E X I ( 1 3 ) briefly to print only the selected HACCP log. -
Page 37: Starting A Multi-Step Cooking Program
™ ClassicCombi Operation 9. Press the cooking mode button for the third cooking step. The LEDs for the cooking mode button light up. 10. Set the cooking temperature. 11. Set the cooking time or target core temperature. NOTICE The cooking steps already entered can be checked by repeatedly pressing St e p (1 3 ) . -
Page 38: Manual Cooking
™ ClassicCombi Operation 4.8 Manual cooking 4.8.1 Starting the steaming process Unit is switched on Requirements 1. Press St e a mi n g ( 1 2 ). The Ste a min g ( 1 2 ) LEDs light up. -
Page 39: Starting The Convection Cooking Mode
™ ClassicCombi Operation 6. Insert the core temperature sensor into the f o od to be cooked (see Chapter “Measuring the core temperature”, Page 34). 7. Press S t a r t / St o p (5 ). The S ta r t / St o p ( 5) LEDs flash. -
Page 40: Advanced Cooking Functions
™ ClassicCombi Operation 2. Set the cooking temperature. 3. Set the cooking time or target core temperature. 4. Set the “Crisping control” (optional) function. 5. Load the unit. 6. Insert the core temperature sensor into the food to be cooked (see Chapter “Measuring the core temperature”, Page... -
Page 41: Starting The Preheating Function
™ ClassicCombi Operation 4. Press S t a r t / St o p (5 ) to start the preset start time. The LEDs light up for the button S t a r t / St o p (5 ). -
Page 42: Standard Settings
™ ClassicCombi Operation Display (8) shows the cooking time or the target core temperature. 4.10 Standard settings The unit is already pre-configured when delivered. The values listed in the following table can be adjusted individually. Parameters Pre-set value Possible settings... - Page 43 ™ ClassicCombi Operation Parameters Pre-set value Possible settings Explanation Scroll direction The scroll direction for the set buttons in the menus can be changed. 0=normal ● 1=inverse ● Temp. Steam 30–130 °C The default cooking temperature for this cooking mode can be set within the shown limits.
-
Page 44: Cleaning
™ ClassicCombi Cleaning 5 Cleaning 5.1 General cleaning 5.1.1 Cleaning the outside of the housing CAUTION Damage caused by water penetrating the electronic controls The electronic controls are not splash-proof. → Only use the hand shower for rinsing the cooking chamber. -
Page 45: Cleaning The Cooking Chamber Door
™ ClassicCombi Cleaning 1. Clean fats from the door seal after operation using a mild soap solution. 2. Also clean the door seal in breaks during operation if the unit is mainly used for roasting. 5.1.4 Cleaning the cooking chamber door... -
Page 46: Cleaning The Steam Outlet Port
If hard water is used, the cooking chamber must be descaled regularly to avoid damage to the unit. Use Henny Penny special descaler together with a hand-held sprayer for manual decalcification. 1. Dilute the special descaler with water at the ratio of 1:2. -
Page 47: System-Supported Manual Cleaning
Requirements cooking chamber CAUTION Damage caused by unsuitable cleaning agents → Only use Henny Penny products for cleaning the cooking chamber. 1. Leftover food has been removed from the cooking chamber. The drain sieve must be clear. 2. With tabletop units: only leave the slide-in frame in the cooking chamber. -
Page 48: Spraying Cleaning Solution
™ ClassicCombi Cleaning Display (8) shows “–:– –”. LEDs of the P r e h e a t (1 0 ) and S t a r t / St o p (5 ) buttons flash. - -- A signal sounds when the soaking temperature is reached; the soaking program starts automatically. -
Page 49: Rinsing Out
™ ClassicCombi Cleaning In this process, the chamber is heated to 80 °C (176 °F). The S t e a min g (1 2 ) LEDs light up. ● Display (9) shows the current temper ature of the cooking chamber . -
Page 50: Preparing The Cooking Chamber
CAUTION Damage caused by unsuitable cleaning agents → Only use Henny Penny products for cleaning the cooking chamber. 1. Leftover food has been removed from the cooking chamber. The drain sieve must be clear. 2. With tabletop units: only leave the slide-in frame in the cooking chamber. -
Page 51: Using The Waveclean Cartridge
™ ClassicCombi Cleaning 5.3.3 Using the WaveClean cartridge Only use sealed cartridges. If the wax seal is damaged, this ma y lead to the cleaning agent enter i ng the cleaning cycle too ear ly or not dissolving fully; in this case thorough cleaning is not guaranteed. -
Page 52: Start Waveclean
™ ClassicCombi Cleaning NOTICE Use additional cartridges if necessary: If heavily soiled: use 2 two-in-one cartridges. Select “WaveClean extra” (“CL3”) cleaning level. If scaled: use a two-in-one cartridge + clear rinse cartridge. 4. Close chamber door. The Sta r t/ S t o p ( 5 ) LEDs are lit. -
Page 53: Cancelling Waveclean
™ ClassicCombi Cleaning 5.3.6 Cancelling WaveClean The WaveClean automatic cleaning function can also be ended manually. Power failure during cleaning also leads to the process being terminated. 1. Press S t e p (1 3 ) to abort the cleaning program. -
Page 54: Removing The Ventilation Plate
™ ClassicCombi Cleaning Information regarding NOTICE operation with hard water The unit can be used without softening the water up to a hardness of 5 °dH. However, water having a total hardness e xceeding 0 °dH contains lime scale, which may form deposits in the cooking chamber. -
Page 55: Removing The Ventilation Plate (Floor Standing Units)
™ ClassicCombi Cleaning 11. Check the catches. 12. Replace the suspension frame on the left-hand side. 5.4.2 Removing the ventilation plate (floor standing units) Necessary tools: box spanner Requirements The ventilation plate can be removed for cleaning. CAUTION Risk of crushing fingers due to rotating fan →... -
Page 56: Faults
™ ClassicCombi Faults 6 Faults 6.1 Correcting faults This section describes the steps to be taken in the event that faults with the unit occur during operation. 1. Reset control electronics (Chapter “Resetting the control electronics”, Page 56). 2. Observe the information in the table “Causes of faults and troubleshooting”... - Page 57 ™ ClassicCombi Faults Error Possible causes Remedy Core temperature sensor Sensor broken Use cooking program without core ● faulty temperature measurement Contact customer service ● Chamber sensor 1 faulty Sensor broken Use core temperature sensor as a ● substitute Chamber sensor 2 faulty...
- Page 58 ™ ClassicCombi Faults Error Possible causes Remedy HW faulty, UREF0 t-meas- Core temperature sensor or Contact customer service ● urement too high keypad defective “-C-” Perform configuration Necessary configuration not per- Perform configuration ● formed Contact customer service ● –...
-
Page 59: Limited Warranty
Any claim must be presented to either Henny Penny or the distributor from whom the appliance was purchased. No allowance will be granted for repairs made by anyone else without Henny Penny’s written consent. If damage occurs during shipping, notify the sender at once so that a claim may be filed. - Page 60 ™ ClassicCombi Operating instructions Global Foodservice Solutions...
- Page 61 ™ ClassicCombi Operating instructions Global Foodservice Solutions...
- Page 62 ™ ClassicCombi Operating instructions Global Foodservice Solutions...
- Page 63 ™ ClassicCombi Operating instructions...
- Page 64 ™ ClassicCombi Global Foodservice Solutions Henny Penny Corporation P.O. Box 60 Eaton, OH 45320 1-937-456-8400 1-937-456-8402 Fax Toll free in USA 1-800-417-8417 1-800-417-8434 Fax www.hennypenny.com Manufactured by: MKN Maschinenfabrik Wolfenbüttel, Germany Operating instructions...
Need help?
Do you have a question about the ClassicCombi and is the answer not in the manual?
Questions and answers