
Subscribe to Our Youtube Channel
Related Manuals for Henny Penny Wendy’s Evolution Elite EEG-253


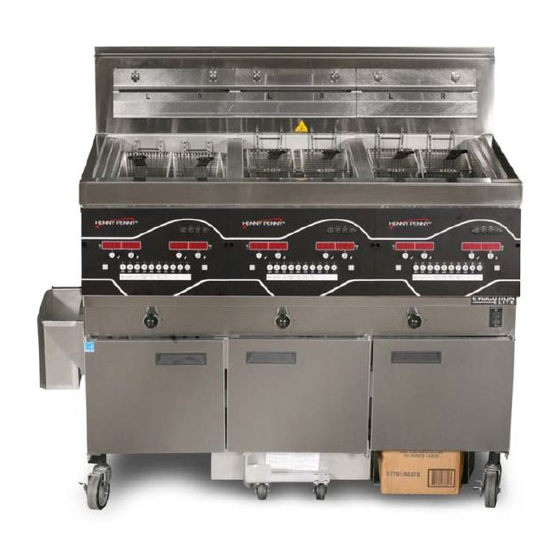
Summary of Contents for Henny Penny Wendy’s Evolution Elite EEG-253
- Page 1 SERVICE MANUAL W W e e n n d d y y ’ ’ s s E E v v o o l l u u t t i i o o n n E E l l i i t t e e ™ ™ ( ( G G a a s s ) ) R R e e d d u u c c e e d d O O i i l l C C a a p p a a c c i i t t y y O O p p e e n n F F r r y y e e r r EEG-253...
- Page 3 Table of Contents Safety and Compliance....................v Chapter 1 Troubleshooting ....................1 1.1 Introduction ......................1 1.2 Troubleshooting .....................1 1.3 Error Codes ......................3 Chapter 2 Info & Filter Button Stats ..................7 2.1 Info Button Stats ....................7 2.2 Filter Button Stats ....................7 Chapter 3 Information Mode ....................9 3.1 Information Mode Details ..................9 3.1.1 E-Log (Error Code Log) ..................9 3.1.2 Last Load ......................10...
- Page 4 5.1.11 SP-11 Clean-Out Time ..................25 5.1.12 SP-12 Clean-Out Temperature ..............25 5.1.13 SP-13 Cooking User IO ................25 5.1.14 SP-14 Number Of Baskets................25 5.1.15 SP-15 Cooking Indicator ................25 5.1.16 SP-16 2nd Language ...................25 5.1.17 SP-17 2nd Volume ..................25 5.1.18 SP-18 Energy Save Mode................26 5.1.19 SP-19 Fryer Type ..................26 5.1.20 SP-20 Vat Type ....................26 5.1.21 SP-21 Auto-Lift Enabled ................26...
- Page 5 6.7.1 Temperature Probe Checkout .................42 6.7.2 Temperature Probe Replacement..............42 6.8 Solenoid Valves ....................45 6.8.1 Solenoid Valve Checkout ................45 6.8.2 Solenoid Valve Replacement ................45 6.9 Selector Valve Motor Encoder Replacement............46 6.10 JIB Pump......................49 6.10.1 Replacement ....................49 6.11 Blower Cleaning ....................50 6.11.1 In Housing Wheel Cleaning ................50 6.11.2 Wheel Removal Cleaning................51 6.12 Blower Replacement ..................52 6.13 Blower Wheel Replacement ................53...
- Page 7 S S a a f f e e t t y y a a n n d d C C o o m m p p l l i i a a n n c c e e Henny Penny fryers have many safety features incorporated. However, the only way to ensure safe operation is to fully understand the proper installation, operation, and maintenance procedures.
- Page 8 These are the original version controlled Henny Penny instructions for Evolution Elite Gas (EEG) model 252, 253 or 254 (EEG-252/253/254). This manual is available on the Henny Penny Public website (www.hennypenny.com). Read these instructions completely prior to installation and operation of this appliance to ensure compliance to all required installation, operation and safety standards.
- Page 9 person responsible for their safety. Children should be supervised to ensure that they do not play with the appliance. This appliance is not intended to be operated by means of an external timer or a separate remote control system. This appliance must be installed with suitable ventilation in accordance with the manufacturer’s instructions and the regulations in force to prevent the occurrence of unacceptable concentrations of substances harmful to health.
- Page 10 Gas supply tubing or hose must comply with the national requirements in force and be periodically examined and replaced as necessary. Use an approved flexible hose with a length that does not exceed 1.5 m. Also follow these guidelines: Figure-1 Guidelines for Gas Piping viii...
- Page 11 T T e e c c h h n n i i c c a a l l D D a a t t a a F F o o r r C C E E / / A A G G A A M M a a r r k k e e d d P P r r o o d d u u c c t t s s Nominal Heat Input (Net): Natural (I ) = 19.8 KW (67,560 Btu/h)
- Page 12 Liquid Propane (I ) = 30/37/50 mbar (3.0/ 3.7/5.0 kPa) Liquid Propane / Butane (I ) = 30/37/50 3 B/P mbar (3.0/3.7/5.0 kPa) Test Point Pressure Natural (I ) = 8.7 mbar (0.87 kPa) Natural (I ) = 8.7 mbar Natural (I +) = N/A Natural (I...
- Page 13 C C h h a a p p t t e e r r 1 1 T T r r o o u u b b l l e e s s h h o o o o t t i i n n g g 1 1 .
- Page 14 Problem Cause Correction Improper filtering. Refer to filtering procedures. Improper rinsing Clean and rinse vat and then dry thoroughly. after cleaning the vat. Oil will not Drain valve Open valve, force cleaning brush through drain. drain from clogged with vat. crumbs.
- Page 15 1 1 . . 3 3 E E r r r r o o r r C C o o d d e e s s In the event of a control system failure, the digital display shows an error message. The message codes are shown in the display column below.
- Page 16 Display Cause Panel Board Correction E-20A Pressure switch If fan is not running, have pressure switch checked; FAN SEN- failure. should be open circuit if no air pressure. SOR STUCK Wiring problem. If fan is running, wiring error, or relay on I/O board CLOSED closed.
- Page 17 Display Cause Panel Board Correction between the PC boards checked; check AIF fuse, re- place AIF PC board or control PC board if necessary. E-70C Drain valve jumper Have the jumper wire checked on the PC board at wire missing or drain switch interlock position.
- Page 19 C C h h a a p p t t e e r r 2 2 I I n n f f o o & & F F i i l l t t e e r r B B u u t t t t o o n n S S t t a a t t s s I I N N F F O O : If no buttons are pressed within 5 seconds in any of stats modes, the controls revert back to normal operation.
- Page 21 1 1 6 6 . . USB SUPPORT NOTE: Not all Information Mode functions are discussed in this section. To ensure proper operation of fryer, please consult Henny Penny Corp. before changing any of these settings. For more information on these functions, contact Technical Support at 1-800-417-8405, or 1-937-456-8405.
- Page 22 controls recorded. Sometimes the characters “L:” and “R:” appear in front of the error code on the display which refers to the left or right vat of a split vat. Press the down arrow and the next latest error code information can be seen. 4 4 ) ) Up to 10 error codes (B to K) can be stored in the E-LOG section.
- Page 23 Function Display Example Day for which this data was recorded APR-30 TUE - - - - Number of Hours: Minutes the fryer was (L/R) ON HRS TUE 3:45 Number of times filtered (L/R) FILTERED Number of times filter skipped (L/R) SKIPPED Number of times oil added (L/R) ADD OIL Number of times oil discarded...
- Page 24 Function Display Example Start date of new oil (L/R) NEW OIL MAR-23 Number of days oil in use (L/R) OIL USE 4 DAYS Number of filters on this oil (L/R) FILTERED Number of times filter skipped (L/R) SKIPPED Number of cook cycles on this oil (L/R) TOT CK Average number of days per oil change (L/R) AVG DAYS...
- Page 25 Function Display Example Cook Cycles for Product #2 COOK -2- Cook Cycles for Product #3 COOK -3- Cook Cycles for Product #4 COOK -4- Cook Cycles for Product #5 COOK -5- Cook Cycles for Product #6 COOK -6- Cook Cycles for Product #7 COOK -7- Cook Cycles for Product #8 COOK -8-...
- Page 26 3 3 . . 1 1 . . 9 9 C C P P U U T T e e m m p p e e r r a a t t u u r r e e Press the right arrow and “9.CPU TMP” shows in the left display and the current 1 1 ) ) PC board temperature displays.
- Page 27 C C h h a a p p t t e e r r 4 4 P P r r o o d d u u c c t t P P r r o o g g r r a a m m M M o o d d e e This mode allows you to program the following: •...
- Page 28 A A s s s s i i g g n n B B u u t t t t o o n n Press the right arrow until “ASSIGN BTN” shows in the display, along with the 8 8 ) ) product (ex: NUGGETS).
- Page 29 and temperature of the cooking load. Press the product buttons, or the up or down arrow, to change this value of 0 to 20. L L o o a a d d C C o o m m p p e e n n s s a a t t i i o o n n R R e e f f e e r r e e n n c c e e Press the right arrow until “LCMP REF”...
- Page 31 C C h h a a p p t t e e r r 5 5 L L e e v v e e l l 2 2 P P r r o o g g r r a a m m m m i i n n g g Used to access the following: •...
- Page 32 Mode Description S S P P - - 5 5 Audio Tone (Frequency) S S P P - - 6 6 Melt Cycle Selection - 1.LIQUID; 2.SOLID S S P P - - 7 7 Idle Mode Enabled - YES or NO S S P P - - 7 7 A A Use “0”...
- Page 33 Mode Description Spanish “ESPANOL” or French “FRANCAIS”. S S P P - - 1 1 7 7 2nd Audio Volume S S P P - - 1 1 8 8 Energy Save Enabled? - YES or NO S S P P - - 1 1 9 9 Fryer Type - GAS or ELECTRIC S S P P - - 2 2 0 0 Vat Type - SPLIT or FULL...
- Page 34 To reset the controls to factory default settings, press and hold the ✓ button and 2 2 ) ) controls count down “IN 3”, “IN 2”, “IN 1”. Once the display shows “-INIT-” and “*DONE*”, the controls are reset to factory defaults. 5 5 .
- Page 35 Press and release the right arrow until “SP-8” “FILTER TRACKING MODE” 1 1 ) ) shows in the display. Use the up or down arrow to choose either “1.MIXED” filter tracking or “2. 2 2 ) ) GLOBAL” NOTE: • GLOBAL means all the products have the same number of cook cycles between filters •...
- Page 36 5 5 . . 1 1 . . 8 8 . . 2 2 . . 1 1 S S p p l l i i t t V V a a t t If unit is a split vat, “SP-8A” and “LEFT VAT FILTER CYCLES” shows in the left 1 1 ) ) display, and the number of cook cycles between filters shows on the right display (0 to 99).
- Page 37 5 5 . . 1 1 . . 1 1 0 0 S S P P - - 1 1 0 0 C C h h a a n n g g e e F F i i l l t t e e r r P P a a d d R R e e m m i i n n d d e e r r T T i i m m e e Press and release the right arrow until “SP-10 CHANGE PAD REMINDER”...
- Page 38 Press the up or down arrow, or product buttons, to select the desired 2nd 2 2 ) ) volume. NOTE: Be setting a 2nd volume in the controls, 2 volumes can now be chosen by pressing the program button twice during normal operation. One volume setting shows in the left display (NONE to 10;...
- Page 39 5 5 . . 1 1 . . 2 2 4 4 S S P P - - 2 2 4 4 S S e e r r i i a a l l N N u u m m b b e e r r L L o o g g Press and release the right arrow until “SP-24 S/N ✓EDIT”...
- Page 40 5 5 . . 1 1 . . 2 2 8 8 S S P P - - 2 2 8 8 L L o o n n g g e e r r F F i i l l l l T T i i m m e e Press and release the right arrow until ”SP-28 LONGER FILL TIME ENABLED?”...
- Page 41 Press the up or down arrow to choose “YES” or “NO”. 2 2 ) ) 5 5 . . 2 2 D D o o N N o o t t D D i i s s t t u u r r b b Time periods of peak operations during which the “FILTER NOW?”...
- Page 42 C C o o n n t t r r o o l l M M o o d d e e s s The Data Logging, Heat Control, Tech, Stat and Filter Control Modes are advanced diagnostic and program modes, mainly for Henny Penny use only. For more information on these modes, contact the Service Department at 1-800-417-8405 or 1- 937-456-8405.
- Page 43 I I N N F F O O : Not all Tech Mode functions are discussed in this section. To ensure proper operation of fryer, please consult Henny Penny Corp. before changing any of these settings. For more information on these functions, contact the Service Department at 1-800-417-8405, or 1-937-456-8405.
- Page 44 5 5 . . 5 5 . . 7 7 T T - - 7 7 D D e e c c i i m m a a l l P P o o i i n n t t s s T T e e s s t t Press timer button 1 to view all decimal points across the displays.
- Page 45 – Full vat — Press product button 8 to open and close the outputs on the ignition modules. – Left split vat — Press product button 3 to open and close the outputs on the ignition modules. – Right split vat — Press product button 8 to open and close the outputs on the ignition modules.
- Page 46 Press the down arrow until OIL IN PAN? NO displays. This indicates whether or 8 8 ) ) not the drain pan currently contains oil during a drain procedure. Press the down arrow until and “INP E_P_” and “JL_Rx DF_” displays. 9 9 ) ) E = Stop button Ex = E-Stop pressed.
- Page 47 • Press product button 1 to open and close the bulk oil discard valve (display shows “DISCARDo” when open). • Press product button 2 to open and close the bulk oil JIB fill valve (display shows “JIBFILLo” when open). Press the down arrow for selector valve calibration, index, or continous run. 4 4 ) ) •...
- Page 48 • ST-4 Left Vat Cook Cycle Hours • ST-5 Left Vat Idle Hours • ST-6 Right Vat Melt Cycle Hours • ST-7 Right Vat Cook Cycle Hours • ST-8 Right Vat Idle Hours • ST-9 Power-Ups Count • ST-10 Error Counts •...
- Page 49 C C h h a a p p t t e e r r 6 6 M M a a i i n n t t e e n n a a n n c c e e 6 6 . . 1 1 I I n n t t r r o o d d u u c c t t i i o o n n This section provides checkout and replacement procedures, for various parts of the fryer.
- Page 50 6 6 . . 4 4 C C o o n n t t r r o o l l P P a a n n e e l l & & M M e e n n u u C C a a r r d d R R e e p p l l a a c c e e m m e e n n t t Should the control panel become inoperative, or the menu card needs changed, follow these instructions: Remove electrical power supplied to the vat.
- Page 51 Install a new control panel in reverse order. New control panel set up code is 1– 6 6 ) ) 2–3. 6 6 . . 5 5 H H i i g g h h T T e e m m p p e e r r a a t t u u r r e e L L i i m m i i t t C C o o n n t t r r o o l l Remove electrical power supplied to the unit.
- Page 52 Remove the clamp bars. 6 6 ) ) Using a 5/16 inch wrench remove the two nuts on the high limit bracket, and 7 7 ) ) then slide the high limit control off of mounting studs. Install the new control in reverse order. 8 8 ) ) 6 6 .
- Page 53 6 6 . . 7 7 T T e e m m p p e e r r a a t t u u r r e e P P r r o o b b e e The temperature probe (1) is the center probe inside the vat and it relays the actual oil temperature to the control.
- Page 54 Resist- Resist- Resist- ance ance ance °F °C Ohms °F °C Ohms °F °C Ohms 43.33 1168.26 115.56 1443.85 187.78 1713.38 48.89 1189.67 121.11 1464.79 193.33 1733.87 54.44 1211.05 126.67 1485.71 198.89 1754.31 60.00 1232.39 132.22 1506.58 204.44 1774.72 65.56 1253.70 137.78 1527.43...
- Page 55 Pull both burner jets (3) from unit. 3 3 ) ) Using a 1/2 inch wrench, remove the nut on the compression fitting, and remove 4 4 ) ) the temperature probe form the vat. Using a terminal extractor, remove the probe terminals from the connector and 5 5 ) ) remove probe from unit.
- Page 56 Locate temperature probe through pot wall. 7 7 ) ) Figure 6-1 Probe Assembly Install , Place gauge against pot wall as shows in 8 8 ) ) page Figure 6-1 Probe Assembly Install Push temperature probe through until it makes contact with gauge. 9 9 ) ) Tighten temperature probe in place.
- Page 57 and “PUMP” “EXIT” shows in the display. Press ✓ again, and oil fills form vat. Once vat is full, press X X twice to return to normal operation. 6 6 . . 8 8 S S o o l l e e n n o o i i d d V V a a l l v v e e s s Each vat has a solenoid plumbed-into the oil return lines.
- Page 58 Remove elbow and fittings from solenoid stem assembly and attach them to the 6 6 ) ) new solenoid using pipe sealant on the threads. Reattach the conduit to the new solenoid, threading the wires through the 7 7 ) ) conduit.
- Page 59 Remove 3 button head cap screws (1) . 3 3 ) ) Figure 6-3 Motor Encoder Assembly, Spool Coupler, and Selector Valve Separate old motor encoder assembly (2) from selector valve (3). See Figure 4 4 ) ) Figure 6-3 Motor Encoder Assembly, Spool Coupler, and Selector Valve , page Connect both harnesses from new motor encoder assembly to AIF board.
- Page 60 Figure 6-4 Spool Alignment Indicators over Port 10 S S H H O O C C K K H H A A Z Z A A R R D D M M a a n n u u a a l l l l y y r r o o t t a a t t i i n n g g t t h h e e m m o o t t o o r r...
- Page 61 6 6 . . 1 1 0 0 J J I I B B P P u u m m p p This pump keeps the vats filled and is used in the Oil Guardian™ process. 6 6 . . 1 1 0 0 . . 1 1 R R e e p p l l a a c c e e m m e e n n t t Remove electrical power supplied to the unit 1 1 ) ) T T o o a a v v o o i i d d e e l l e e c c t t r r i i c c a a l l s s h h o o c c k k o o r r p p r r o o p p e e r r t t y y d d a a m m a a g g e e , , m m o o v v e e...
- Page 62 6 6 . . 1 1 1 1 B B l l o o w w e e r r C C l l e e a a n n i i n n g g S S H H O O C C K K H H A A Z Z A A R R D D T T o o a a v v o o i i d d e e l l e e c c t t r r i i c c a a l l s s h h o o c c k k , , m m o o v v e e t t h h e e p p o o w w e e r r s s w w i i t t c c h h t t o o o o f f f f a a n n d d d d i i s s c c o o n n n n e e c c t t m m a a i i n n c c i i r r c c u u i i t t b b r r e e a a k k e e r r , , o o r r u u n n p p l l u u g g c c o o r r d d a a t t...
- Page 63 6 6 . . 1 1 1 1 . . 2 2 W W h h e e e e l l R R e e m m o o v v a a l l C C l l e e a a n n i i n n g g Loosen set screw using a hex-key.
- Page 64 File down the burr on the shaft left by the set screw, to allow wheel to slide onto 5 5 ) ) shaft freely. Install wheel with hub set to end of shaft and tighten set screw. 6 6 ) ) If serial number is NY1611006 or higher, turn on blower and verify that pressure 7 7 ) ) is 1.7 inwc at 60 Hz (1.4 inwc at 50 Hz) or greater.
- Page 65 Cut zip ties that are holding the wires to the blower. Remove the wirenuts from 4 4 ) ) the wires. Remove blower. 5 5 ) ) Reconnect new blower wires to the existing wires with wirenuts. 6 6 ) ) Tighten the new blower onto the flue with the two screws.
- Page 66 Open the door. 1 1 ) ) Locate pump and motor in the front of the fryer. If the motor is hot, allow it to 2 2 ) ) cool for about 5 minutes. Using the blunt end of a crosshead screwdriver, press the reset button until you 3 3 ) ) hear a “click”.
- Page 67 To reassemble, place rotor on drive shaft (if necessary), and place roller into 3 3 ) ) rotor. NOTICE — A small amount of grease might be needed to hold the bottom roller into place until cover plate is put on. Make sure O-ring is in proper position on plate.
- Page 68 Using a 1” wrench, loosen the rear pump fitting. 3 3 ) ) Locate the appropriate conduit on right side of the unit and disconnect the 4 4 ) ) conduit from the fryer. Using a 1/2 in. wrench, remove 4 bolts securing motor to motor bracket and pull 5 5 ) ) pump and motor assembly from fryer.
- Page 69 6 6 . . 1 1 7 7 R R e e p p l l a a c c i i n n g g t t h h e e H H u u b b m m o o u u n n t t e e d d F F i i l l t t e e r r P P u u m m p p a a n n d d M M o o t t o o r r A A s s s s e e m m b b l l y y T T h h e e f f o o l l l l o o w w i i n n g g p p r r o o c c e e d d u u r r e e o o n n l l y y a a p p p p l l i i e e s s t t o o u u n n i i t t s s w w i i t t h h s s e e r r i i a a l l n n u u m m b b e e r r s s a a f f t t e e r r...
- Page 70 Using a bungee cord, secure the ignition box out of the way. 8 8 ) ) Open the motor access panel. 9 9 ) ) Remove the M1 and M2 terminal connectors and unscrew the conduit 1 1 0 0 ) ) connector.
- Page 71 Reach around the module box housing and remove the last 7/16” bolt from the 1 1 3 3 ) ) motor bracket. Remove the hubmounted filter pump and motor assembly. 1 1 4 4 ) ) 6 6 . . 1 1 7 7 . . 2 2 I I n n s s t t a a l l l l i i n n g g t t h h e e H H u u b b m m o o u u n n t t e e d d F F i i l l t t e e r r P P u u m m p p a a n n d d M M o o t t o o r r A A s s s s e e m m b b l l y y Place the hubmounted filter pump and motor assembly on the motor bracket 1 1 ) )
- Page 72 6 6 . . 1 1 8 8 F F i i l l t t e e r r B B e e a a c c o o n n ™ ™ R R e e p p l l a a c c e e m m e e n n t t T T o o a a v v o o i i d d e e l l e e c c t t r r i i c c a a l l s s h h o o c c k k o o r r p p r r o o p p e e r r t t y y d d a a m m a a g g e e , , m m o o v v e e t t h h e e p p o o w w e e r r s s w w i i t t c c h h t t o o o o f f f f a a n n d d d d i i s s c c o o n n n n e e c c t t m m a a i i n n c c i i r r c c u u i i t t b b r r e e a a k k e e r r , , o o r r u u n n p p l l u u g g c c o o r r d d a a t t w w a a l l l l r r e e c c e e p p t t a a c c l l e e .
- Page 73 Restore power to the unit. 6 6 ) ) 6 6 . . 1 1 9 9 A A i i r r P P r r e e s s s s u u r r e e S S w w i i t t c c h h e e s s Remove the electrical power supplied to the unit.
- Page 74 Using a cross bit or screwdriver, remove the two screws securing switch to the 5 5 ) ) cover. Disconnect the wires on the switch. 6 6 ) ) Replace switch in reverse order. 7 7 ) ) 6 6 . . 2 2 0 0 P P i i l l o o t t R R e e p p l l a a c c e e m m e e n n t t T T o o a a v v o o i i d d e e l l e e c c t t r r i i c c a a l l s s h h o o c c k k o o r r p p r r o o p p e e r r t t y y d d a a m m a a g g e e , , m m o o v v e e t t h h e e p p o o w w e e r r s s w w i i t t c c h h t t o o o o f f f f a a n n d d d d i i s s c c o o n n n n e e c c t t m m a a i i n n c c i i r r c c u u i i t t b b r r e e a a k k e e r r , , o o r r u u n n p p l l u u g g c c o o r r d d a a t t w w a a l l l l r r e e c c e e p p t t a a c c l l e e .
- Page 75 Remove the two screws securing the pilot to the burner assembly (2). The right 5 5 ) ) hand screw will have the ground wire. While using a 1/2” wrench to hold the base of the pilot orifice (4), use a 7/16 inch 6 6 ) ) wrench to loosen the pilot tube (5) from the pilot.
- Page 77 blank page...
- Page 78 H H e e n n n n y y P P e e n n n n y y C C o o r r p p o o r r a a t t i i o o n n P P .
Need help?
Do you have a question about the Wendy’s Evolution Elite EEG-253 and is the answer not in the manual?
Questions and answers