Table of Contents
Advertisement
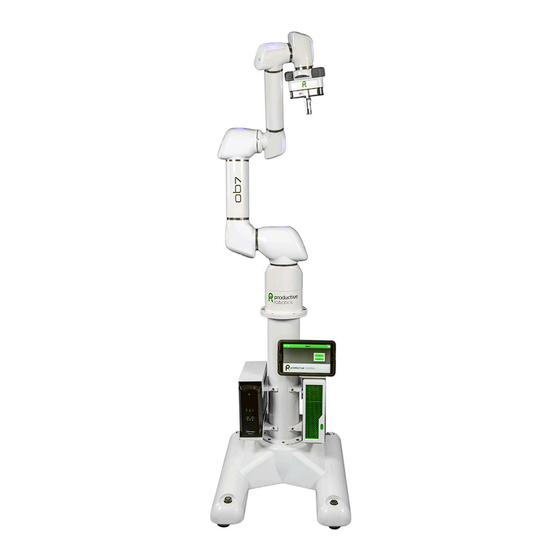
OB7
COLLABORATIVE ROBOT
USER MANUAL
NEXT GENERATION
COLLABORATIVE ROBOTS
VERSION 0.6
JUNE 2018
CONTACT
Address
Productive Robotics Inc.
1033 Cindy Lane Carpinteria,
CA 92013 United States
Phone & Fax
Phone: 805-244-9300
Sales: 805-244-9300 ext. 7001
Support: 805-244-9300 ext. 7117
Designed and Manufactured In the USA
Online
info@productiverobotics.com
sales@productiverobotics.com
www.productiverobotics.com
Advertisement
Table of Contents

Subscribe to Our Youtube Channel
Related Manuals for productive robotics OB7

Summary of Contents for productive robotics OB7
- Page 1 COLLABORATIVE ROBOTS VERSION 0.6 JUNE 2018 Designed and Manufactured In the USA CONTACT Address Phone & Fax Online Productive Robotics Inc. Phone: 805-244-9300 info@productiverobotics.com 1033 Cindy Lane Carpinteria, Sales: 805-244-9300 ext. 7001 sales@productiverobotics.com CA 92013 United States Support: 805-244-9300 ext. 7117...
- Page 2 Productive Robotics Inc. Copyright © 2018 by Productive Robotics Inc.
- Page 3 COLLABORATIVE ROBOT USER MANUAL VERSION 0.6 JUNE 2018...
-
Page 4: Table Of Contents
How to Use This Manual Document change record Request for OB7 Password GETTING STARTED WITH OB7 Unpacking the OB7 Stand Assembling the OB7 Stand Assembling the OB7 Assembly Table Unpacking OB7 Installing the General Equipment Interface (Optional) Quick Start Start OB7... - Page 5 OB7 Control Tablet OB7 CONTROL FUNCTIONS OB7 Control Handle OB7 Control Tiles TECHNICAL DRAWINGS OB7 Mounting OB7 Gripper/Tool Mounting OB7 Robot Stand Dimensions Mechanical Specifications Technical Specifications INSTRUCTIONAL DOCUMENTS OB7 Software Update Instructions Exporting Diagnostics Data From OB7 Cleaning The Fan Filter...
-
Page 6: Preface
PREFACE OB7 Collaborative Robot User Manual Version 0.6 Preface / 6... -
Page 7: Safety Notice
Do not operate or power your robot before reading this: Robots, including OB7, can be dangerous. By definition, the robot alone does not constitute the complete machine or system. A Risk Assessment, performed by a qualified person or team, is absolutely necessary to understand the risks associated with operating any robot. -
Page 8: General Safety Considerations
Do not use the robot without performing a Risk Assessment. • Do not power on or use the robot in applications in which the specifications or performance of the robot is inadequate for the job. OB7 Collaborative Robot User Manual Version 0.6 Preface / 8... -
Page 9: Limitation Of Liability
• OB7’s payload limit is 5kg (11 lbs). The payload limit includes the weight of the end effector. Exceeding this limit can result in potential injury as well as damage to the robot. -
Page 10: Document Change Record
Exporting Diagnostics Data From OB7 on page 115 • Updated graphic on page 17 • Updated Installing the GEI on page 22 • Added an entry in Start OB7 on page 27 03/09/2018 0.5.2 • Updated Request for OB7 Password sheet on page 11 •... -
Page 11: Request For Ob7 Password
I understand that a similarly thorough Risk Assessment and reduction must be performed if/when OB7 is moved to a new location or application. I have educated all employees and/or other persons Working with or near OB7 in the possible risks, and will continue to educate future employees or persons who may come in contact with OB7. - Page 12 OB7 Collaborative Robot User Manual Version 0.6 Preface / 12...
- Page 13 OB7 Collaborative Robot User Manual Version 0.6 Preface / 13...
-
Page 14: Getting Started With Ob7
GETTING STARTED WITH OB7 OB7 Collaborative Robot User Manual Version 0.6 Getting Started With OB7 / 14... -
Page 15: Unpacking The Ob7 Stand
GETTING STARTED WITH OB7 UNPACKING THE OB7 STAND OB7 arrives in a single carton. If you’ve purchased a stand with your OB7 it will arrive in a small wooden crate. Before unpacking your OB7, you should prepare its mounting location. -
Page 16: Assembling The Ob7 Assembly Table
If you have purchased the OB7 assembly table, follow these steps to assemble and install it on the OB7 Stand. The OB7 assembly table attaches to the top of the stand column with 4 M8 screws. Use two people to install the assembly table on the column. -
Page 17: Unpacking Ob7
Gripper (optional) Robot Computer Interface (Optional) Cables 5mm Allen Wrench Tablet Dock/Stand M8 Mounting Screws Emergency Stop OB7 Control Tablet All OB7 Components Inside the Package Before Unpacking OB7 Collaborative Robot User Manual Version 0.6 Getting Started With OB7 / 17... - Page 18 Step 2: Remove OB7 keeping it attached to the foam packaging. DO NOT remove OB7 from the foam packaging yet. After removing, clip ONLY the tie which is around the base of OB7. Do not clip the other ties yet.
- Page 19 Use two people for this step. Using the 6 screws provided, mount OB7. Tighten the mounting screws securely. After securely mounting OB7, clip the remaining ties and remove the foam packaging. Note: The OB7 weighs 26 kg, or 58 lbs. Use two people to lift OB7 onto its mounting. Tighten 8 mounting screws securely.
- Page 20 Robot Tablet USB Network Connection Cable Wifi Antenna Mains Power Power Switch Cable Power Cable to Emergency Stop Robot Back of OB7 PC Back of OB7 PC OB7 Collaborative Robot User Manual Version 0.6 Getting Started With OB7 / 20...
- Page 21 Locate Control Tablet Locate Emergency Stop Refer to your Risk Assessment when considering the location of your control tablet and emergency stop button. OB7 is now ready for use! OB7 Collaborative Robot User Manual Version 0.6 Getting Started With OB7 / 21...
-
Page 22: Installing The General Equipment Interface (Optional)
If OB7 is to be moved between multiple locations, it is suggested that the General Equipment Interface to be installed on the external equipment and not on OB7 itself. This allows OB7 to be moved by simply unplugging the network cable connection from the General Equipment Interface at one station and plugging it into a second unit at the next station. - Page 23 If both sets of safety inputs are used, OB7 can be configured to slow to collaborative speed when one signal activates, and stop completely when the other signal activates.
-
Page 24: Quick Start
OB7 is now ready to start. The following "Quick Start" directions will get OB7 running. We'll Learn how to teach OB7 a simple job, and OB7 will be ready to "Learn" and get right to "Work". OB7 LIGHTS Each of OB7's joints light up. The color of the lights indicate the current status of OB7. For safety purposes ensure that the OB7 is located such that the lights are visible to persons approaching the robot. - Page 25 Joint 7 Joint 6 Control Handle Camera Gripper Joint 4 Joint 5 Joint 3 Joint 2 Joint 1 Control Tablet Uninterruptable Power Supply Control Computer Rolling Stand OB7 Collaborative Robot User Manual Version 0.6 Getting Started With OB7 / 25...
- Page 26 Set Position Set Position Open Gripper Close Gripper Close Gripper Open Gripper Camera Release Arm Release Arm OB7 Control Handle OB7 Collaborative Robot User Manual Version 0.6 Getting Started With OB7 / 26...
- Page 27 OB7 a new job. information for OB7. Learn Work Work: Messages appear here. Tap this icon to start OB7 working on a job. OB7 Tablet Home Screen OB7 Collaborative Robot User Manual Version 0.6 Getting Started With OB7 / 27...
-
Page 28: Start Ob7
When you press the Emergency Stop switch, or power down OB7, the power will be cut and the arm will droop down. If you are powering down OB7 to move it, or for the night, first position OB7 into a safe position so it will not hit anything as it droops. - Page 29 Unlike most robots, OB7 moves freely when it is not Working. While idle, you can push OB7 around easily by hand. If you push OB7 by grasping the handle, it will stay wherever you leave it when you release the handle. Alternately, if you push OB7 without grasping the handle, OB7 will return to its original position when you stop pushing it.
- Page 30 OB7 learns its tasks without programming. Teaching OB7 a job is as simple as showing it what to do. Here is a quick introduction to teaching a simple job to OB7. For this quick lesson, we will teach OB7 to move an object from a conveyor belt into a box. Here it goes: Tell OB7 it’s time to Learn, and give this job a name.
- Page 31 The “Learning” screen is displayed when OB7 is ready to Learn a new job. OB7 has not learned anything in this job yet. First, let’s give the job a name. Tap the title bar where it says “Learning:” and enter the name for this job.
- Page 32 Next, show OB7 how to pick up an object. Move OB7 to place the gripper in position to pick up the chosen object. Then, press the ▶ ◀ button to close the gripper. OB7 learns how to pick up this object.
- Page 33 Next, we show OB7 where to place the object. Move OB7 to locate the object in the position where it should be placed. Then, press the ◀ ▶ button to open the gripper. OB7 learns where to place the object.
- Page 34 Now let’s put OB7 to Work and watch what it has learned: Press “Done”. Press “Done”. Press “Work”. Press “Work”. OB7 Collaborative Robot User Manual Version 0.6 Getting Started With OB7 / 34...
- Page 35 Select the job. Tap the job to run. Start the job. Press “Go”. Press “Go”. OB7 Collaborative Robot User Manual Version 0.6 Getting Started With OB7 / 35...
-
Page 36: Meet Ob7
MEET OB7 OB7 Collaborative Robot User Manual Version 0.6 Meet OB7 / 36... - Page 37 MEET OB7 OB7 can be used in many different configurations: On a stand, on stand with assembly table, and on a ceiling mount (not pictured). OB7 on Stand OB7 on Stand With Assembly Table OB7 has 7 joints which allows maximum flexibility.
- Page 38 ISO standard tool mounting OB7 USB 2.0 Camera ISO9409-1-50-4-M6. End of Arm Interface Connector OB7 will Work with many types of grippers (often called “End Of Arm Tooling”). OB7 Parallel Gripper Robotiq 82 Gripper Suction Gripper Remember that weight of the gripper is included in the total payload weight.
-
Page 39: Ob7 Control Tablet
OB7 CONTROL TABLET Easy to teach does not mean OB7 is limited in its operation. Complex jobs can be set up using the OB7 control tablet. All job settings and parameters are entered using the OB7 tablet. HOME Battery: This icon indicates the charge level of the battery. - Page 40 HELP Live Help (Coming Soon): Chat live with Productive Robotics technical support. I/O help: Instructions for interfacing OB7 to external devices. Instruction Manual: A complete copy of this instruction manual can be found here. Diagnostics: Various diagnostic information which may be important in the event of any technical problems.
- Page 41 Demo Jobs: Preprogrammed sample and demonstration jobs. Passwords: Passwords are used to allow OB7 to operate above “human safe” speeds and forces. Owner Info: Contact information for OB7 owner and operators for sending email and text message warnings and error message.
- Page 42 INS AND OUTS OB7 provides input and output connections at the end of the arm on the handle. These inputs and outputs are available to power and/or control end of arm tooling. Use Productive Robotics cable part number: CBL801 to connect your end of arm devices.
- Page 43 Input: Enter the name of the signal. Continuous: OB7 will set this output to be either on or off. Pulse: OB7 will send a pulse to this output for the time specified. Time: Duration of pulse if this output is set to "pulse".
- Page 44 "yes"/"no". This threshold is used by OB7 when considering whether this signal is "on" or "off" (or "pass"/"fail", etc) Reverse: Leave this box unchecked if the signal is “on” when the voltage is high. Check this box for the signal to be “on” when the voltage is low.
- Page 45 If OB7 is to be moved between multiple locations, it is suggested that the General Equipment Interface to be installed on the external equipment and not on OB7 itself. This allows OB7 to be moved by simply unplugging the network cable connection from the General Equipment Interface at one station and plugging it into a second unit at the next station.
- Page 46 Relay # 5 NO Relay # 1 NO Relay # 5 COM Relay # 1 COM Relay # 5 NC Relay # 1 NC OB7 General Equipment Interface Connections OB7 Collaborative Robot User Manual Version 0.6 Meet OB7 / 46...
- Page 47 Relay # 6 NC Relay # 2 NC Relay # 5 NO Relay # 1 NO Relay # 5 COM Relay # 1 COM Relay # 5 NC Relay # 1 NC OB7 Collaborative Robot User Manual Version 0.6 Meet OB7 / 47...
- Page 48 Relay # 6 NC Relay # 2 NC Relay # 5 NO Relay # 1 NO Relay # 5 COM Relay # 1 COM Relay # 5 NC Relay # 1 NC OB7 Collaborative Robot User Manual Version 0.6 Meet OB7 / 48...
- Page 49 Relay # 1 COM Relay # 1 COM Relay # 5 NC Relay # 5 NC Relay # 1 NC Relay # 1 NC OB7 # 2 OB7 # 1 OB7 Collaborative Robot User Manual Version 0.6 Meet OB7 / 49...
- Page 50 Object Acquisition Input: Select the input signal that informs OB7 that the gripper has closed on, or grasped, an object. If this is a vacuum gripper, this signal tells OB7 that the vacuum has been created and the suction cup has hold of the object.
- Page 51 Center of Mass (X,Y and Z): enter the distance from the center of mass of the gripper to tool plate flange on OB7. Generally, X and Y are zero, and Z measures the distance from the center of mass of the gripper to the tool mounting plate flange on OB7 Width: Enter the default open and close widths of this gripper.
- Page 52 OB7 provides for contact information from three people in your organization. This contact information is used when requesting service or technical support. It is also used for OB7 to send status information while Working on a job. The three contacts are:...
- Page 53 Minor Error: OB7 will send a message if a minor error occurs which does not stop the running of the job. An example of this could be when OB7 attempts to pick up an object but misses and has to try again.
- Page 54 In either case, jobs will be restricted to “human safe” speeds and forces. Work Fast: If the Work FAST password is left blank it will not be possible to run OB7 jobs in excess of “human safe” speeds and forces. The Work FAST PASSWORD is necessary to run jobs in excess of “human safe”...
- Page 55 Tapping the control will cause OB7 to move in a small increment in the direction specified. Tapping close to the center of the control will cause OB7 to move in steps of 0.1mm. Tapping at the outside of the control will cause OB7 to move in steps of 1mm. When the rotational controls are used, tapping the control will cause OB7 to move in increments of 0.5 degrees and 2 degrees respectively.
- Page 56 Press this button to move the straight line moves to grippe r to ve rtical or horizontal. rotational controls Tap or swipe to close this screen. Rolls the gripper on its axis. OB7 Collaborative Robot User Manual Version 0.6 Meet OB7 / 56...
- Page 57 CAMERA Camera screen. OB7 Collaborative Robot User Manual Version 0.6 Meet OB7 / 57...
- Page 58 The column of tiles in the middle of the screen are all the operations that OB7 has learned for this job. In the picture shown here, only the "Start" operation has been learned so far. All jobs begin with a "Start"...
- Page 59 WORK The Work screen displays the job OB7 will perform. The column of tiles on the left side are the same tiles you saw when OB7 was Learning the job. To start OB7 on this job, press "Go". You can select the speed for OB7 to Work from 10%-100% (full speed).
- Page 60 JOB SELECT The Job Select screen appears whenever OB7 is to Learn a job, edit a job, or Work on a job. Select the job to be accessed from this screen Job Select Screen OB7 Collaborative Robot User Manual Version 0.6...
- Page 61 “Wait” tile. Simply “drag” the tile into the job and “drop” it into the job where you would like OB7 to wait. Use your finger to drag the tile into the job.
-
Page 62: Ob7 Control Functions
OB7 CONTROL FUNCTIONS OB7 Collaborative Robot User Manual Version 0.6 OB7 Control Functions / 62... -
Page 63: Ob7 Control Handle
OB7 CONTROL FUNCTIONS OB7 CONTROL HANDLE Set Position Set Position Open Gripper Close Gripper Close Gripper Open Gripper Camera Release Arm Release Arm OB7 Collaborative Robot User Manual Version 0.6 OB7 Control Functions / 63... -
Page 64: Ob7 Control Tiles
OB7 CONTROL TILES OB7 learns its jobs without programming or coding. This does not limit OB7 to simple tasks or operations. All OB7 jobs, both simple and complex, are composed of OB7 Command Tiles. OB7 command tiles contain all the various OB7 operations and allow you to set up even the most sophisticated operations. - Page 65 A START tile is the first tile in every job. The Start tile holds the general information for this job. That includes: The type of gripper used, the speed to run the job, as well as several other items. OB7 Collaborative Robot User Manual Version 0.6...
- Page 66 Enter descriptive comment. This is a reusable simple task: If this is only a portion of a larger job and you want OB7 to do this task in other jobs, check this box. For example: If this job opens the door on your machine, you can re-use it within every job that operates the machine.
- Page 67 Note that you will need to hold this button down while the robot is moving to the starting position. If you release the button, the robot will stop moving. Set a start point for the job or select “Go to start”. OB7 Collaborative Robot User Manual Version 0.6 OB7 Control Functions / 67...
- Page 68 PICK TILE When OB7 learns to pick up an object, the Pick tile will be added to the job. Normally, OB7 will add this tile automatically when it picks up the object during Learning. It is also possible for you to insert this tile into the job manually by dragging it and dropping it into the job sequence.
- Page 69 Enter descriptive comment. Single A “single” pick tells OB7 that only one object will be picked up and that it will be picked up from a single predefined location. Unless you tell OB7 otherwise, it will assume that you are only intending to pick up a "single"...
- Page 70 Grid When grid is selected it tells OB7 that there is a group of objects to be picked up and that they are arranged in a grid pattern. In the case of a grid pattern, it is necessary to show OB7 three corners of the grid, and to enter the number of objects in each dimension of the grid.
- Page 71 Random If your objects are not placed in a precise grid, you can ask OB7 to pick them up from random locations, by checking this box. If you choose random locations, you must show OB7 where those locations are. Random Positions Select “Random”...
- Page 72 OB7 learns this position automatically when you pick up the object during Learning. If you need to change the position, you can use this button. OB7 will change the pick location to the current position at the time you press this button. This button is most commonly used when you want to adjust the pick position by a small amount after OB7 has already learned the job.
- Page 73 Select the input to check for this signal. Wait Time: Check here to add a time delay before moving away with the object. Specify the “Pick” options (used when OB7 must communicatewith another machine). OB7 Collaborative Robot User Manual Version 0.6...
- Page 74 All of these override functions require a gripper with these control capabilities. Use the “Override Gripper Settings” to specify the width, speed, and force for picking up delicate objects. OB7 Collaborative Robot User Manual Version 0.6 OB7 Control Functions / 74...
- Page 75 PLACE TILE When OB7 learns to place an object, the Place tile will be added to the job. Normally, OB7 will add this tile automatically when it places up the object during Learning. It is also possible for you to insert this tile into the job manually by dragging it and dropping it into the job sequence.
- Page 76 Enter descriptive comment. Single A “single” place tells OB7 that only one object will be placed and that it will be placed from a single predefined location. Unless you tell OB7 otherwise, it will assume that you are only intending to place a "single"...
- Page 77 Use these buttons to set the corners of the grid: Select the corner of the grid to be learned by pressing the corner 1, 2 or 3. button. Position OB7 in the corner position of the grid and press the “Set Position” button on the handle. Repeat this for each of the 3 corners.
- Page 78 Random If your objects are not to be placed in a precise grid, you can ask OB7 to place them at random locations by checking this box. If you choose random locations, you must show OB7 where those locations are.
- Page 79 OB7 learns this position automatically when you pick up the object during Learning. If you need to change the position, you can use this button. OB7 will change the place location to the current position at the time you press this button. This button is most commonly used when you want to adjust the place position by a small amount after OB7 has already learned the job.
- Page 80 Select the input to use for this signal. Wait Time: Check here to add a time delay before moving away after releasing the object. Specify the “Place” options if OB7 needs to place an object into another machine. OB7 Collaborative Robot User Manual Version 0.6...
- Page 81 All of these override functions require a gripper with these control capabilities. Use the “Override Gripper Settings” to specify the width, speed, and force for picking up delicate objects. OB7 Collaborative Robot User Manual Version 0.6 OB7 Control Functions / 81...
- Page 82 This causes OB7 to move more gently when placing the object. Vibrate: This causes OB7 to Vibrate the object as it is placed. This can be useful for fitting a component into a tight space. Wen Vibrating, you can select both the speed (from a slow “wiggle”...
- Page 83 The paths which OB7 moves through may be as simple as a direct move in a straight line, or may be along a very complex. As OB7 learns it’s move, it stores the details in the move tile. In most cases the best practice is to specify as few move positions as possible.
- Page 84 If this option is not selected, OB7 will proceed directly with the rest of the job when this move is finished. In most cases this option is NOT selected.
- Page 85 Overrides Speed: This option will tell OB7 to proceed through this move at a particular speed. Ordinarily OB7 will move at the speed set in the Start tile. Use this option if you want OB7 to move at a different speed.
- Page 86 WAIT TILE OB7 will always try to progress through its job directly and without pausing. In cases where OB7 must wait for someone or something, you can add a Wait tile to the job. OB7 can wait for various reasons.
- Page 87 Comment: Enter any comments here. Entering a comment is optional. Enter descriptive comment. Until Input: OB7 will wait until an input signal is either on or off. For example: OB7 might wait until another machine finishes its cycle before removing a part.
- Page 88 OB7 will wait for the operator to acknowledge the message. The message may be acknowledged either by tapping “continue” on the tablet, or by tapping OB7 directly on one if it’s joints, as shown: Tap Robot to Continue: If this option is selected, OB7 will continue waiting, AFTER the condition above is satisfied, for the operator to tap the robot.
- Page 89 PICK . For example: A grip may be used to hold an object in position while an operator, or a welder, Works on the object. If you would like OB7 to close the gripper, or activate a vacuum gripper, without performing a Pick...
- Page 90 Grip Now: This button will cause the gripper to activate immediately when pushed. This button is only used while OB7 is Learning. This option is not present when OB7 is performing the job. Release Now: This button will cause the gripper to release immediately when pushed. This button is only used while OB7 is Learning.
- Page 91 PLACE . (For example: A release may be used to release an object which was being held waiting for a person to take it from the robot.) OB7 Collaborative Robot User Manual Version 0.6 OB7 Control Functions / 91...
- Page 92 Reverse Release direction: This option will cause the gripper to close when releasing. This is necessary if an object is gripped from its inside. Set the Override Gripper Settings to limit the amount OB7 will open. All of these override functions require a gripper with these control capabilities.
- Page 93 Release Now: This button will cause the gripper to release immediately when pushed. This button is only used while OB7 is Learning. This option is not present when OB7 is performing the job. Grip Now: This button will cause the gripper to activate immediately when pushed. This button is only used while OB7 is Learning.
- Page 94 OB7 Collaborative Robot User Manual Version 0.6 OB7 Control Functions / 94...
- Page 95 (“a vibration or “buzz”). Set the amplitude of the movement from smallest to largest. A slow speed setting causes the OB7 to "wiggle" the part as it pushes it in. A high speed setting causes the part to vibrate or "buzz" as it is inserted.
- Page 96 OB7 can take pictures of its Work for record keeping or inspection purposes. Add the photo tile at any point you would like OB7 to take a picture. Normally, OB7 would MOVE to the position for the picture and then take the picture.
- Page 97 Large Image: Check this option to capture a large image file. The large image is approximately 5M pixels. Small Image: Check this option to capture a small image file. The small image is approximately 1M pixels. Select small or large image. OB7 Collaborative Robot User Manual Version 0.6 OB7 Control Functions / 97...
- Page 98 OUTPUT TILE The OUTPUT tile is used to tell OB7 to turn on an output signal. The output signal may be used to initiate some action on a machine. The output signal could come from the OB7 General Equipment Interface, or it might come from the End of Arm output plug.
- Page 99 Select name of signal. Turn On Now: Immediately turn ON the signal for testing purposes. Note that this button is only available while OB7 is Learning a job. Once OB7 begins to Work that job, these buttons are not available.
- Page 100 "wrap" itself around the portion of the job you want OB7 to repeat. Add the Repeat tile to the job. Drag those steps of the job inside the repeat icon. OB7 will repeat this portion of the job, based on the rules you select.
- Page 101 OB7 that bin still has room for more parts. When the signal changes, indicating that there is no more room in the bin, OB7 will stop repeating this portion of the job and continue to the next part of the job (which might be to replace the full bin with an empty one).
- Page 102 At the end of each cycle, OB7 will do the following: Tap Robot to Continue: If this option is selected, OB7 will wait after each cycle of the repeat for the operator to tap the robot. When the operator Taps OB7, it will continue on with the job.
- Page 103 IF/DO TILE The IF/DO tile is used to tell OB7 to respond to a particular condition. If the condition is met, then the portion of the job that is inside the IF/DO tile will be done. If the condition is not met, then the portion of the job inside the IF/DO tile will be skipped.
- Page 104 For example: This signal may specify that a bin has become empty. In this case, OB7 may perform the steps necessary to re-fill the bin. Pick Empty: Select this input to tell OB7 what it should do when the Pick supply becomes empty. In a PICK and PLACE operation, the source of objects to PICK may eventually be empty.
- Page 105 For Example: The signal from a machine might specify which of two different stations are ready to receive parts. OB7 would use this signal to decide which station to place the part into. The...
- Page 106 IF-Do part of the tile. This is the upper half of the tile. If the signal is NOT present, OB7 will perform the portion of the job that is wrapped inside the Else-Do part of the tile.
- Page 107 MESSAGE TILE The MESSAGE tile is used by OB7 to send a message to a person. The message can be written out on the tablet, Spoken from the tablet, or emailed. The message will display on the tablet until an operator acknowledges it with a tap on the message on the tablet.
- Page 108 IF/DO or IF/ELSE/DO portion of the job. It is not necessary to use a STARTOVER tile at the end of the job. OB7 will automatically start over at the end of the job (according to the setting in the ART tile).
- Page 109 OB7 Collaborative Robot User Manual Version 0.6 OB7 Control Functions / 109...
-
Page 110: Technical Drawings
TECHNICAL DRAWINGS OB7 Collaborative Robot User Manual Version 0.6 Technical Drawings / 110... -
Page 111: Ob7 Mounting
TECHNICAL DRAWINGS OB7 MOUNTING OB7 Collaborative Robot User Manual Version 0.6 Technical Drawings / 111... -
Page 112: Ob7 Gripper/Tool Mounting
OB7 GRIPPER/TOOL MOUNTING OB7 Collaborative Robot User Manual Version 0.6 Technical Drawings / 112... -
Page 113: Ob7 Robot Stand Dimensions
OB7 ROBOT STAND DIMENSIONS OB7 Collaborative Robot User Manual Version 0.6 Technical Drawings / 113... -
Page 114: Mechanical Specifications
All dimensions indicate Top View SIZE PART NO. REV. center of outer surface of Horizontal Position mounting boss on handle. DWG. NO. 1:20 SCALE SHEET 1 OF 1 PUB OB7 OB7 Collaborative Robot User Manual Version 0.6 Technical Drawings / 114... -
Page 115: Technical Specifications
Control Box Size (W x H x D) Control Box I/O Ports Tool I/O Ports I/O Power Supply Communication Programming Noise IP Classification Cleanroom Classification Power Consumption Collaboration Operation Temperature Power Supply Calculated Operating Life Cabling OB7 Collaborative Robot User Manual Version 0.6 Technical Drawings / 115... -
Page 116: Instructional Documents
INSTRUCTIONAL DOCUMENTS OB7 Collaborative Robot User Manual Version 0.6 Instructional Documents / 116... -
Page 117: Ob7 Software Update Instructions
Tap “Diagnostics”. Tap “Update System”. Home OB7. The “home” position is with the arm pointing straight up. Press and hold the “Home” button until ob7 is pointing straight up. When you are prompted, tap “OK” to return to the home screen and begin the update. -
Page 118: Exporting Diagnostics Data From Ob7
EXPORTING DIAGNOSTICS DATA FROM OB7 Insert a USB flash drive into the robot controller computer. Enter Help by tapping the question mark at the top left of the screen. Enter Diagnostics by tapping the 'Diagnostics' selection from the list on the left of the screen. -
Page 119: Cleaning The Fan Filter
CLEANING THE FAN FILTER Step 1 Step 2 Step 3 OB7 Collaborative Robot User Manual Version 0.6 Instructional Documents / 119...
Need help?
Do you have a question about the OB7 and is the answer not in the manual?
Questions and answers