Table of Contents
Advertisement
Quick Links
Advertisement
Table of Contents

Related Manuals for Lantronix SLB088411-01


Summary of Contents for Lantronix SLB088411-01
- Page 1 SLB™ Branch Office Manager User Guide Part Number 900-510 Revision C October 2013...
-
Page 2: Copyright & Trademark
Copyright & Trademark © 2013 Lantronix, Inc. All rights reserved. No part of the contents of this book may be transmitted or reproduced in any form or by any means without the written permission of Lantronix. Lantronix is a registered trademark of Lantronix, Inc. in the United States and other countries. -
Page 3: Disclaimer & Revisions
CLI; new option for local users to display a custom menu at login. October 2013 Updated product name and trademark information. Warranty For details on the Lantronix warranty replacement policy, please go to our web site at http://www.lantronix.com/support/warranty/index.html. SLB™ Branch Office Manager User Guide... -
Page 4: Table Of Contents
Table of Contents Copyright & Trademark ___________________________________________________ 2 Open Source Software ___________________________________________________ 2 Contacts ______________________________________________________________ 2 Sales Offices ___________________________________________________________ 2 Disclaimer & Revisions ___________________________________________________ 3 Disclaimer & Revisions ___________________________________________________ 3 Warranty ______________________________________________________________ 3 1: About This Guide Purpose and Audience __________________________________________________ 10 Chapter Summaries ____________________________________________________ 10 Additional Documentation ________________________________________________ 11 2: Overview... - Page 5 Connecting Devices to Power Outlets ___________________________________________ 26 Connecting Devices to the 8-Port Ethernet Switch _________________________________ 27 Typical Installations _____________________________________________________ 27 4: Quick Setup IP Address ____________________________________________________________ 29 Method #1 Using the Front Panel Display ___________________________________ 30 Before You Begin __________________________________________________________ 30 Front Panel LCD Display and Pushbuttons _______________________________________ 30 Navigating ________________________________________________________________ 31 Entering the Settings ________________________________________________________ 31...
- Page 6 NFS and SMB/CIFS ____________________________________________________ 69 NFS and SMB/CIFS Commands _______________________________________________ 71 Secure Lantronix Network ________________________________________________ 72 Secure Lantronix Network Commands __________________________________________ 76 Date and Time _________________________________________________________ 76 Date and Time Commands ___________________________________________________ 78 8: Device Ports Connection Methods ____________________________________________________ 80...
- Page 7 Remote Access Server _____________________________________________________ 126 Reverse Terminal Server____________________________________________________ 127 Multiport Device Server _____________________________________________________ 127 Console Server ___________________________________________________________ 127 Connection Configuration _______________________________________________ 129 Connection Commands _____________________________________________________ 131 11: User Authentication Authentication Commands __________________________________________________ 136 Local and Remote Users _______________________________________________ 137 Local/Remote User Settings _____________________________________________ 138 Local Users Commands ____________________________________________________ 143 Local User Rights Commands ________________________________________________ 144 Remote User Commands ___________________________________________________ 144...
- Page 8 13: Application Examples Telnet/SSH to a Remote Device __________________________________________ 207 Dial-in (Text Mode) to a Remote Device ____________________________________ 208 Local Serial Connection to Network Device via Telnet _________________________ 210 14: Command Reference Introduction to Commands ______________________________________________ 212 Command Syntax _________________________________________________________ 212 Command Line Help _______________________________________________________ 213 Tips ____________________________________________________________________ 213 Administrative Commands ______________________________________________ 214...
- Page 9 Accessing the Bootloader _______________________________________________ 264 Bootload Commands___________________________________________________ 264 User Commands __________________________________________________________ 264 Administrator Commands ___________________________________________________ 265 B: Security Considerations Security Practice ______________________________________________________ 266 Factors Affecting Security _______________________________________________ 266 C: Safety Information Safety Precautions ________________________________________________________ 267 D: Adapters and Pinouts E: Protocol Glossary F: Compliance Information List of Figures Figure 2-1.
-
Page 10: 1: About This Guide
1: About This Guide Purpose and Audience This guide provides the information needed to install, configure, and use the Lantronix® SLB™ branch office manager. The SLB branch office manager is for IT professionals who must remotely and securely configure and administer servers, routers, switches, telephone equipment, or other devices equipped with a serial port for facilities that are typically remote branch offices or "distributed"... -
Page 11: Additional Documentation
F: Compliance Information Provides information about the SLB device’s compliance with industry standards. Additional Documentation Visit the Lantronix Web site at www.lantronix.com/support/documentation for the latest documentation and the following additional documentation. SLB Branch Office Manager Describes the steps for getting the SLB branch office Quick Start manager up and running. -
Page 12: 2: Overview
The SLB branch office manager enables IT System Administrators to manage remote servers and IT infrastructure equipment securely over the Internet. This innovative device combines the capabilities of the award-winning Lantronix® SLC™ console manager with remote power management and an Ethernet switch into a compact, 1U rack-mountable appliance. -
Page 13: Meets Needs Of Branch Offices
2: Overview Meets Needs of Branch Offices Designed to meet the specific needs of the remote branch office, the SLB branch office manager conserves rack space and reduces costs by enabling system administrators at a main corporate facility to manage the IT equipment distributed among branch offices simply and cost-effectively. -
Page 14: Typical Equipment
2: Overview Typical Equipment You can configure, administer, and manage IT equipment in a variety of ways, but most devices have one method in common: an RS-232 serial port, sometimes called a console, auxiliary, or management port. These ports are often accessed directly by connecting a terminal or laptop to them, meaning that the user must be in the same physical location as the equipment. -
Page 15: Models
Two SLB models have the following hardware components: Two Models: The SLB branch office manager is available in a 100-120 VAC output model (SLB088411-01) with NEMA 5-15R type outlets and a 208-240 VAC output model (SLB088412-01) with IEC60320/C13 type outlets. ... -
Page 16: System Features
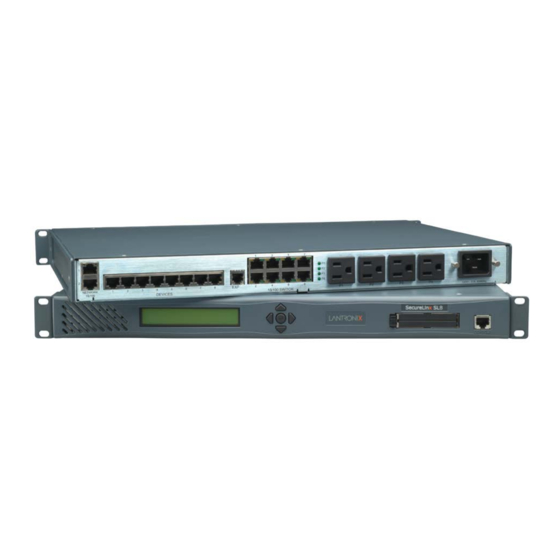
2: Overview Figure 2-1. SLB 8 Front Two-Line Front Panel 1U Tall, Self-Contained Two PC Card Slots Console Port LCD Display Pushbuttons Rack-Mountable Chassis (RS-232) Figure 2-2. SLB 8 Back — 8 Device Ports, 4 Power Outlets, 8 Switch Ports; 1 AC Power Supply Two 10/100 Network Ports RS-232 Device Ports (1-8) 8 Switch Ports... -
Page 17: Protocols Supported
2: Overview Protocols Supported The SLB branch office manager supports the TCP/IP network protocol as well as: SSH, Telnet, PPP, NFS, and CIFS for connections in and out of the SLB device SMTP for mail transfer DNS for text-to-IP address name resolution ... -
Page 18: Application Example
2: Overview Application Example The figure below is an example deployment. An SLB branch office manager is deployed in each branch office and an (optional) SLM management appliance at the main office. The branch offices are interconnected (always on) by VPN routers overlaid on the Internet, and also interconnected (on demand) through the analog phone system. -
Page 19: Hardware Features
8 RS-232 serial device ports connected via Category 5 (RJ45) wiring AC Power Input: − SLB088411-01 model: - (1) IEC-60320/C20 inlet, 100-120 VAC, 50/60Hz - (20A Branch Circuit) 16A max input current - (15A Branch Circuit) 12A max input current −... -
Page 20: Serial Connections
D: Adapters and Pinouts.) Note: RJ45 to DB9/DB25 adapters are available from Lantronix. Device ports and the console port support eight baud-rate options: 300, 600, 1200, 2400, 4800, 9600, 19200, 38400, 57600, and 115200 baud. Figure 2-3. Device Port Connections Figure 2-4. -
Page 21: Network Connections
Figure 2-5. Network Connection PC Card Interface The SLB has two PC Card slots. Lantronix qualifies cards continuously and publishes a list of qualified cards on the Lantronix web site. Figure 2-6. PC Card Interface... -
Page 22: 3: Installation
PC-based Linux servers ADP010104-01 Adapter: RJ45 rolled serial, Cisco, and Sun Netra Note: An optional adapter for external modems is also available from Lantronix: 200.2073 Adapter: DB25M (DCE) to RJ45, external modems. Cables: 500-184-R Cable: RJ45 to RJ45, Cat-5, 1 Ft (.3m) 200.0063... -
Page 23: Product Information Label
Serial Interface (Console) (1) RJ45-type 8-pin connector (DTE) Speed software selectable (300 to 115,200 baud) Power Input Model SLB088411-01: (1) IEC-60320/C20 inlet, 100-120 VAC, 50/60Hz (20A Branch Circuit) 16A max input current (15A Branch Circuit) 12A max input current Model SLB088412-01:... -
Page 24: Physical Installation
3: Installation Relative Humidity Operating: 10% to 90% non-condensing Storage: 10% to 90% non-condensing Heat Flow Rate 68 BTU per hour Current measurement ± 12% accuracy The max input/output current is de-rated to 12A when using the supplied NEMA 5-15P (15A) cable (p/n SLPP012310-01). The max input/output current is de-rated to 16A when using the optional NEMA 5-20P (20A) cable (p/n SLPP012410-01, SLPP012510-01, SLPP012610-01). -
Page 25: Connecting To A Device Port
To connect to a device port: 1. Connect one end of the Cat 5 cable to the device port. 2. Connect the other end of the Cat 5 cable to a Lantronix serial console adapter. Note: To connect a device port to a Lantronix® SLP™ management appliance, use the rolled serial cable provided with the SLB branch office manager, a 200.2225 adapter and... -
Page 26: Connecting To A Power Source
Cable/Adapter Lookup on the Support menu. To connect a terminal: 1. Attach the Lantronix adapter to your terminal (use PN 200.2066A adapter) or your PC's serial port (use PN 200.2070A adapter). 2. Connect the Cat 5 cable to the adapter, and connect the other end to the SLB console port. -
Page 27: Connecting Devices To The 8-Port Ethernet Switch
3. Up to 6 more Ethernet devices may be connected to your network. Use standard Ethernet patch cables from the Ethernet devices to the SLB device's switch ports. An example of a standard Ethernet patch cable is the Lantronix 200.0062 RJ45 TO RJ45 CAT5 CABLE (LAN PINNING) 6.6 Ft. -
Page 28: Figure 3-4. Slb Installation Using The Integrated Ethernet Switch
3-5, the SLB branch office manager controls four serial devices and provides power to them. The devices use a managed switch to connect to the network. The figure also shows how Lantronix Spiders can be daisy chained. Figure 3-5. SLB Installation Using a Managed Switch... -
Page 29: 4: Quick Setup
The first time you power up the SLB unit, Eth1 tries to obtain its IP address via DHCP. If you have connected Eth1 to the network, and Eth1 is able to acquire an IP address, you can view this IP address on the LCD or Lantronix® Detector™ (downloadable at http://www.lantronix.com/support/downloads/). If Eth1 cannot acquire an IP address, you cannot use Telnet, SSH, or the web interface to run Quick Setup. -
Page 30: Method #1 Using The Front Panel Display
4: Quick Setup Method Description Front panel LCD You manually assign the IP address and other basic network, display and console, and date/time settings. If desired, you can restore the pushbuttons factory defaults. Serial port login to You assign an IP address and configure the SLB branch office command line manager using a terminal or a PC running a terminal emulation interface... -
Page 31: Navigating
4: Quick Setup Note: Have your information handy as the display times out without accepting any unsaved changes if you take more than 30 seconds between entries. Any changes made to the network, console port, and date/time settings take effect immediately. - Page 32 4: Quick Setup Note: If you have connected Eth1 to the network, and Eth1 is able to acquire an IP address through DHCP, this IP address displays, followed by the letter [D]. Otherwise, the IP address displays as all zeros (000.000.000.000). 2.
-
Page 33: Restoring Factory Defaults
40.) To complete the Quick Setup page: 1. Open a standard web browser. Lantronix supports the latest versions of Internet Explorer, Mozilla Firefox, Safari, Opera or Chrome web browsers. 2. In the URL field, type https:// followed by the IP address of your SLB. - Page 34 4: Quick Setup 4. To accept the defaults, select the Accept default Quick Setup settings checkbox in the top portion of the page and click the Apply button at the bottom of the page. Otherwise, continue with step 5. Note: Once you click the Apply button on the Quick Setup page, you can continue using the web interface to configure the SLB branch office manager further.
- Page 35 Domain If desired, specify a domain name (for example, support.lantronix.com). The domain name is used for host name resolution within the SLB branch office manager. For example, if abcd is specified for the SMTP server, and mydomain.com is specified for the domain, if abcd cannot be resolved, the SLB device attempts to resolve abcd.mydomain.com for the SMTP server.
- Page 36 4: Quick Setup Administrator Settings Sysadmin To change the password (e.g., from the default) enter a Password/ Retype password of up to 64 characters. Password 6. To save your entries, click the Apply button. SLB™ Branch Office Manager User Guide...
-
Page 37: Method #3 Quick Setup On The Command Line Interface
4: Quick Setup Method #3 Quick Setup on the Command Line Interface If the SLB branch office manager does not have an IP address, you can connect a dumb terminal or a PC running a terminal emulation program (VT100) to access the command line interface. - Page 38 Domain If desired, specify a domain name (for example, support.lantronix.com). The domain name is used for host name resolution within the SLB branch office manager. For example, if abcd is specified for the SMTP server, and mydomain.com is specified for the domain, if abcd cannot be resolved, the SLB device attempts to resolve abcd.mydomain.com for the SMTP server.
-
Page 39: Next Step
4: Quick Setup Figure 4-3. Completed Quick Setup 5. To logout, type logout at the prompt and press Enter. Next Step After quick starting the SLB branch office manager, you may want to configure other settings. You can use the web page or the command line interface for configuration. ... -
Page 40: 5: Web And Command Line Interfaces
5: Web and Command Line Interfaces The SLB branch office manager offers three interfaces for configuring the SLB device: a command line interface (CLI), a web interface, and an LCD with pushbuttons on the front panel. This chapter discusses the web and command line interfaces. (4: Quick Setup includes instructions for using the LCD to configure basic network settings.) Web Interface... -
Page 41: Figure 5-1. Web Page Layout
5: Web and Command Line Interfaces Figure 5-1. Web Page Layout Port Number Bar Logout Button Icons Tabs Options Help Button Entry Fields and Optons Apply Button The web page has the following components: Tabs: Groups of settings to configure. Options: Below each tab are options for specific types of settings. -
Page 42: Logging In
The system administrator may have changed the password using one of the Quick Setup methods in the previous chapter. The Lantronix SLB Quick Setup page displays automatically the first time you log in. Subsequently, the Lantronix SLB Home page displays. (If you want to display the Quick Setup page again, click Quick Setup on the main menu.) -
Page 43: Command Line Interface
5: Web and Command Line Interfaces Command Line Interface A command line interface (CLI) is available for entering all the commands you can use with the SLB branch office manager. In this user guide, after each section of instructions for using the web interface, you will find the equivalent CLI commands. You can access the command line interface using Telnet, SSH, or a serial terminal connection. -
Page 44: Command Syntax
5: Web and Command Line Interfaces Command Syntax Commands have the following format: <action> <category> <parameter(s)> where <action> is set, show, connect, admin, diag, pccard, or logout. <category> is a group of related parameters whose settings you want to configure or view. -
Page 45: Command Line Help
5: Web and Command Line Interfaces Command Line Help For general Help and to display the commands to which you have rights, type: help For general command line Help, type: help command line For more information about a specific command, type help followed by the command, for example: help set network or help admin firmware Tips... -
Page 46: General Cli Commands
5: Web and Command Line Interfaces General CLI Commands The following commands relate to the CLI itself. To configure the current command line session: set cli scscommands <enable|disable> Allows you to use SCS-compatible commands as shortcuts for executing commands: Note: Settings are retained between CLI sessions for local users and users listed in the remote users list. -
Page 47: 6: Basic Parameters
6: Basic Parameters This chapter explains how to set the following basic configuration settings for the SLB branch office manager using the SLB web interface or the CLI: Network parameters that determine how the SLB interacts with the attached network ... - Page 48 6: Basic Parameters To enter settings for one or both network ports: 1. Click the Network tab and select the Network Settings option. The following page displays: 2. Enter the following information: Eth1 and Eth2 Settings Note: Configurations with the same IP subnet on multiple interfaces (Ethernet or PPP) are not currently supported.
- Page 49 6: Basic Parameters Eth 1 and/or Eth 2 Disabled: If selected, disables the network port. Defaults Settings are Eth1 and Eth2 enabled. Obtain from DHCP: Acquires IP address, subnet mask, hostname and gateway from the DHCP server. (The DHCP server may not provide the hostname gateway, depending on its setup.) This is the default setting.
- Page 50 6: Basic Parameters Gateway Default IP address of the router for this network. If this has not been set manually, any gateway acquired by DHCP for Eth1 or Eth2 displays. All network traffic that matches the Eth1 IP address and subnet mask is sent out Eth1.
-
Page 51: Ethernet Counters
Domain If desired, specify a domain name (for example, support.lantronix.com). The domain name is used for host name resolution within the SLB branch office manager. For example, if abcd is specified for the SMTP server, and mydomain.com is specified for the domain, if abcd cannot be resolved, the SLB device attempts to resolve abcd.mydomain.com for the SMTP server. -
Page 52: Network Commands
6: Basic Parameters Network Commands The following CLI commands correspond to the web page entries described above. To configure Ethernet port 1 or 2: set network port <1|2> <parameters> Parameters: mode <auto|10mbit-half|100mbit-half| 10mbit-full|100mbit-full> state <dhcp|bootp|static|disable> [ipaddr <IP Address> mask <Mask>] [ipv6addr <IP v6 Address|Prefix>] To configure up to three DNS servers: set network dns <1|2|3>... -
Page 53: Ip Filter
6: Basic Parameters To view all network settings: show network all To view Ethernet port settings and counters: show network port <1|2> To view DNS settings: show network dns To view gateway settings: show network gateway To view the host name of the SLB device: show network host IP Filter IP filters (also called a rule set) act as a firewall to allow or deny individual or a range of... -
Page 54: Enabling Ip Filters
6: Basic Parameters Enabling IP Filters On the IP Filter page, you can enable all filters or disable all filters. Note: There is no way to enable or disable individual filters. To enable IP filters: 1. Enter the following: Enable IP Filter Select the Enable IP Filter checkbox to enable all filters, or clear the checkbox to disable all filters. - Page 55 6: Basic Parameters To add an IP filter: 1. On the IP Filter page, click the Add Ruleset button. The following page displays: 2. Enter the following Ruleset Name Name that identifies a filter; may be composed of letters, numbers, and hyphens only. (The name cannot start with a hyphen.) Example: FILTER-2 Rule Parameters...
-
Page 56: Updating An Ip Filter
6: Basic Parameters Port Range Enter a range of destination TCP or UDP port numbers to be tested. An entry is required for TCP, TCP New, TCP Established, and UDP, and is not allowed for other protocols. Separate multiple ports with commas. Separate ranges of ports by colons. -
Page 57: Ip Filter Commands
6: Basic Parameters To map a rule set to a network interface: 1. On the IP Filter page, select the IP filter rule set to be mapped. 2. From the Interface drop-down list, select the interface and click the Map Ruleset button. -
Page 58: Routing
6: Basic Parameters Routing The SLB branch office manager allows you to define static routes and, for networks using Routing Information Protocol (RIP)-capable routes, to enable the RIP protocol to configure the routes dynamically. To configure routing settings: 1. Click the Network tab and select the Routing option. The following page displays: 2. -
Page 59: Equivalent Routing Commands
6: Basic Parameters Note: To display the routing table, click the IP Routes Report link. The Status/Reports page displays. To view the report, select the IP Routes checkbox and click Generate Report. Equivalent Routing Commands The following CLI commands correspond to the web page entries described above. To configure static or dynamic routing: set routing [parameters] Parameters:... -
Page 60: 7: Services
The SLB branch office manager supports both MIB-II (as defined by RFC 1213) and a private enterprise MIB. MIB definition files for the private enterprise MIB are downloadable at http://www.lantronix.com/support/downloads/. The private enterprise MIB provides read-only access to all statistics and configurable items provided by the SLB. - Page 61 7: Services 2. Enter the following settings: System Logging In the System Logging section, select one of the following alert levels from the drop- down list for each message category: Off: Disables this type of logging. Info: Saves informative message, in addition to warning and error messages. ...
- Page 62 7: Services Remote Servers IP address of the remote server(s) where system logs (#1 and #2) are stored. The system log is always saved to local SLB storage. It is retained through SLB branch office manager reboots for files up to 200K. Saving the system log to a server that supports remote logging services (see RFC 3164) allows the administrator to save the complete system log history.
- Page 63 7: Services Web Telnet Enables or disables the ability to access the SLB command Iine interface or device ports (connect direct) through the Web Telnet window. Disabled by default. Timeout If you enable Telnet logins, you can cause an idle connection to disconnect after a specified number of minutes.
-
Page 64: Snmp
7: Services SNMP Simple Network Management Protocol (SNMP) is a set of protocols for managing complex networks. 1. Click the Services tab and select the SNMP option. The following page displays: 2. Enter the following: Enable Agent Enables or disables SNMP agent, which allows read- only access to the system. - Page 65 7: Services When SNMP is enabled, an NMS (Network Management System) acts as a central server, requesting and receiving SNMP-type information from any computer using SNMP. The NMS can request information from the SLB branch office manager and receive traps from the SLB device. Enter the IP address of the NMS server.
-
Page 66: Snmp, Ssh, Telnet, And Logging Commands
7: Services V3 Read-Only User User Name SNMP v3 is secure and requires user-based authorization to access SLB MIB objects. Enter a user ID. The default is snmpuser. Up to 20 characters. Password for a user with read-only authority to use to Password/Retype access SNMP v3. - Page 67 7: Services location <Physical Location> netlog <off|error|warning|info|debug> nms <IP Address or Name> phonehome <enable|disable> phoneip <IP Address> portssh <TCP Port> rocommunity <Read-Only Community Name> rwcommunity <Read-Write Community Name> servlog <off|error|warning|info|debug> smtpserver <IP Address or Hostname> snmp <enable|disable> ssh <enable|disable> syslogserver1 <IP Address or Name> syslogserver2 <IP Address or Name>...
- Page 68 7: Services To view current services: show services SLB™ Branch Office Manager User Guide...
-
Page 69: Nfs And Smb/Cifs
7: Services NFS and SMB/CIFS Use the NFS & SMB/CIFS page if you want to save configuration and logging data onto a remote NFS server, or export configuration and logging data by means of an exported CIFS share. Mounting an NFS shared directory on a remote network server onto a local SLB directory enables the SLB branch office manager to store device port logging data on that network server. - Page 70 7: Services 2. Enter the following for up to three directories: NFS Mounts Remote Directory The remote NFS share directory in the format: nfs_server_hostname or ipaddr:/exported/path Local Directory The local directory on the SLB branch office manager on which to mount the remote directory. The SLB device creates the local directory automatically.
-
Page 71: Nfs And Smb/Cifs Commands
7: Services Network Interfaces Select the network ports from which the share can be seen. The default is for the share to be visible on both network ports. CIFS User Only one user special username (cifsuser) can Password/Retype access the CIFS share. Enter the CIFS user Password password in both password fields. -
Page 72: Secure Lantronix Network
To view SMB/CIFS settings: show cifs Secure Lantronix Network Use the Secure Lantronix Network option to view and manage SLC console manager and Spiders on the local subnet. Note: Status and statistics shown on the web interface represent a snapshot in time. - Page 73 7: Services 2. To manage a secure IT management device, click its IP Address. A separate browser page takes the user to the web interface for the selected Secure IT management device (login required). 3. For SLM management appliances, if SSH or Telnet is enabled for the device (to the CLI) or for a device port and you want to access the device or device port: a) Click the View link in the Telnet/SSH to Device Ports or CLI column.
- Page 74 7: Services Above the table, the Telnet to the CLI Enabled and SSH to the CLI Enabled fields indicate whether the unit has been set for Telnet or SSH access to the CLI. The table page lists all of the unit’s device ports (if applicable), indicates whether they are Telnet enabled or SSH enabled, and lists their Telnet and SSH port numbers.
- Page 75 Enabled column. To configure how secure IT management devices are searched for on the network: 1. Click the Search Options link on the top right of the Secure Lantronix Network page. The following web page displays: 2. Enter the following: Secure Lantronix Select the type of search you want to conduct.
-
Page 76: Secure Lantronix Network Commands
7: Services Secure Lantronix Network Commands The following commands for the command line interface correspond to the web page entries described above. To detect and view all SLB branch office manager or user-defined IP addresses on the local network: set slcnetwork <one or more parameters>... - Page 77 7: Services 2. Enter the following: Change Select the checkbox to manually enter the date and time at Date/Time the SLB branch office manager’s location. Date From the drop-down lists, select the current month, day, and year. Time From the drop-down lists, select the current hour and minute.
-
Page 78: Date And Time Commands
7: Services Synchronize via Select one of the following: Broadcast from NTP Server: Enables the SLB branch office manager to accept time information periodically transmitted by the NTP server. This is the default if you enable NTP. Poll NTP Server: Enables the SLB device to query the NTP Server for the correct time. - Page 79 7: Services To synchronize the SLB branch office manager with a remote time server using NTP: set ntp <one or more ntp parameters> Parameters: localserver1 <IP Address or Hostname> localserver2 <IP Address or Hostname> localserver3 <IP Address or Hostname> poll <local|public> publicserver <IP Address or Hostname>...
-
Page 80: 8: Device Ports
8: Device Ports This chapter describes how to configure and use an SLB branch office manager device port connected to an external device, such as a server or a modem. The next chapter, Connections, describes how to use the Connections web page to connect external devices and outbound network connections (such as Telnet or SSH) in various configurations. -
Page 81: Permissions
8: Device Ports Permissions There are three types of permissions: Direct (or data) mode: The user can interact with and monitor the device port (connect direct command). Listen mode: The user can only monitor the device port (connect listen command). - Page 82 8: Device Ports Current port numbering schemes for Telnet, SSH, and TCP ports display on the left. The list of ports 1-8 on the right includes the individual ports and their current mode. Note: For units with more ports, click the buttons above the table to view additional ports.
-
Page 83: Global Commands
8: Device Ports Starting SSH Port Each port is assigned a number for connecting via SSH. Enter a number (1025-65535) that represents the first port. The default is 3000 plus the port number. For example, if you enter 3001, subsequent ports are automatically assigned numbers 3002, 3003, and so on. -
Page 84: Global Commands
8: Device Ports To configure settings for all or a group of device ports: set deviceport global <one or more parameters> Parameters: maxdirect <1-10> Sets the maximum number of direct connections for each device port. sshport <TCP Port> tcpport <TCP Port> telnetport <TCP Port>... - Page 85 8: Device Ports Click the desired port number in the green bar (shown below) at the top of any page: The following page displays: SLB™ Branch Office Manager User Guide...
- Page 86 8: Device Ports To enter device port settings: 1. Enter the following: Mode The status of the port; displays automatically. Name The name of the port. Valid characters are letters, numbers, dashes (-), periods, and underscores ( _ ). Banner Text to display when a user connects to a device port by means of Telnet, SSH, or TCP.
- Page 87 8: Device Ports IP Address IP address used for this device port so a user can Telnet, SSH, or establish a raw TCP connection to this address and connect directly to the device port. For Telnet and SSH, the default TCP port numbers (22 and 23, respectively) are used to connect to the device port.
- Page 88 8: Device Ports Show Lines on If enabled, when the user either does a connect direct Connecting from the CLI or connects directly to the port using Telnet or SSH, the SLB outputs up to 24 lines of buffered data as soon as the serial port is connected.
- Page 89 8: Device Ports Initialization Script Commands sent to configure the modem may have up to 100 characters. Consult your modem’s documentation for recommended initialization options. If you do not specify an initialization script, the SLB device uses a default initialization string of AT S7=45 SO=0 L1 V1 X4 &D2 &c1 E1 Q0.
- Page 90 8: Device Ports Modem Settings: PPP Mode Negotiate IP If the SLB branch office manager and/or the serial device Address have dynamic IP addresses (e.g., IP addresses assigned by a DHCP server), select Yes. Yes is the default. If the SLB branch office manager or the modem have fixed IP addresses, select No, and enter the local IP (IP address of the port) and remote IP (IP address of the modem).
-
Page 91: Port Status And Counters
8: Device Ports Restart Delay The number of seconds after the timeout and before the SLB branch office manager attempts another connection. The default is 30 seconds. 2. To save settings for just this port, click the Apply button. 3. To save selected settings to ports other than the one you are configuring: a) From the Apply Settings drop-down box, select none, a group of settings, or All. - Page 92 8: Device Ports To open the Device Ports – SLP page: 1. In the Connected to field above the IP Settings section of the Device Ports – Settings page, select an SLP or SLPEXP. 2. Click the Device Commands link. The following page displays: To enter SLP commands: 1.
-
Page 93: Device Port - Sensorsoft Device
8: Device Ports Infeed Status Click the link to view the status of the data the SLP power manager is receiving. System Info Click the link to see system information pertaining to the SLP device. SLP Commands Restart SLP To restart the SLP power manager, select the checkbox. Control Outlet For Tower A or Tower B, select All Outlets or Single Outlet and the number of the outlet to be controlled (1-8 for the... -
Page 94: Device Port Commands
8: Device Ports Humidity (%) Current relative humidity on the device the sensor is monitoring. Low Humidity Enter the relative humidity permitted on the device the sensor is monitoring below which the sensor sends a trap to the SLB branch office manager. High Humidity Enter the highest relative acceptable humidity permitted on the device above which the sensor sends a trap to the SLB... - Page 95 8: Device Ports dialoutpassword <Password> dialbacknumber <usernumber|Phone Number> dodauth <pap|chap> dodchaphost <CHAP Host or User Name> dodchapsecret <CHAP Secret or User Password> flowcontrol <none|xon/xoff|rts/cts> idletimeout <disable|1-9999 seconds> ipaddr <IP Address> initscript <Initialization Script> A script that initializes a modem. localipaddr <negotiate|IP Address> logins <enable|disable>...
-
Page 96: Device Commands
8: Device Ports To view the settings for one or more device ports: show deviceport port <Device Port List or Name> To view a list of all device port names: show deviceport names To view the modes and states of one or more device port(s): You can optionally email the displayed information. -
Page 97: Interacting With A Device Port
8: Device Ports single outlet. slp envmon Displays the environmental status (e.g., temperature and humidity) of the SLP power manager. slp infeedstatus Displays the infeed status and load of the SLP power manager. slp system Provides system information for the SLP power manager. sensorsoft lowtemp <Low Temperature in C.>... -
Page 98: Device Ports - Logging
8: Device Ports To connect to a device port to monitor and/or interact with it, or to establish an outbound network connection: connect direct <endpoint> endpoint is one of: deviceport <Port # or Name> ssh <IP Address> [port <TCP Port>][<SSH flags>] where: <SSH flags>... -
Page 99: Nfs File Logging
8: Device Ports only the oldest data is lost, and only in the amount of overrun (not in large blocks of memory). NFS File Logging Data can be logged to a file on a remote NFS server. Data logged locally to the SLB branch office manager is limited to 256 Kbytes and may be lost in the event of a power loss. -
Page 100: Sylog Logging
8: Device Ports Sylog Logging Data can be logged to the system log. If this feature is enabled, the data will appear in the Device Ports log, under the Info level. The log level for the Device Ports log must be set to Info for the data to be saved to the system log. - Page 101 8: Device Ports Email/SNMP Traps Email/Traps Select the checkbox to enable email and SNMP logging. Email logging sends an email message to pre-defined email addresses or an SNMP trap to the designated NMS (see Services) when alert criteria are met. Disabled by default.
- Page 102 8: Device Ports Text String The specific pattern of characters the SLB branch office manager must recognize before sending a notification to the technician about this port. The maximum is 100 characters. You may use a regular expression to define the pattern. For example, the regular expression “abc[def]g”...
-
Page 103: Logging Commands
8: Device Ports PC Card Logging PC Card Logging Select to enable PC Card logging. A PC Card Compact Flash must be loaded into one of the PC Card slots on the front of the SLB branch office manager and properly mounted ((see PC Card Logging on page 99). -
Page 104: Console Port
8: Device Ports emailrestart <Restart Delay> emailsend <email|trap|both> emailstring <Regex String> emailsubj <Email Subject> emailthreshold <Byte Threshold> emailto <Email Address> filedir <Logging Directory> filelogging <enable|disable> filemaxfiles <Max # of Files> filemaxsize <Max Size of Files> locallogging <enable|disable> name <Device Port Name> nfsdir <Logging Directory>... -
Page 105: Console Port Commands
8: Device Ports 2. Change the following as desired: Baud The speed with which the device port exchanges data with the attached serial device. From the drop-down list, select the baud rate. Most devices use 9600 for the administration port, so the console port defaults to this value. Data Bits Number of data bits used to transmit a character. -
Page 106: Power Outlets
8: Device Ports To configure console port settings: set consoleport <one or more parameters> Parameters: baud <300-115200> databits <7|8> stopbits <1|2> parity <none|odd|even> flowcontrol <none|xon/xoff|rts/cts> showlines <enable|disable> timeout <disable|1-30> To view console port settings: show consoleport Power Outlets The SLB branch office manager has four outlets that can provide power to other units in an IT environment. - Page 107 8: Device Ports 2. Enter the following: Switching Delay Number of milliseconds the SLB branch office manager between subsequent switching. The range is 1000-2500 msec. The default is 2000 msec (2 sec). Over Current If SNMP traps are enabled (see 7:Services), a trap (alarm) is Alarm sent if the total current for all outlets exceeds a threshold.
-
Page 108: Power Outlet Commands
8: Device Ports should be on, off, or returned to the state it was in before the reboot. Default is Off. Last State Select whether to return the outlet to the state it was in before the reboot. Reboot To power cycle the outlet, select the checkbox. Default is unchecked. - Page 109 8: Device Ports 2. Enter the following: Note: To clear fields in the lower part of the page, click the Clear Host List button. Host List Id (view Displays after a host list is saved. only) Host List Name Enter a name for the host list. Retry Count Enter the number of times the SLB branch office manager should attempt to retry connecting to the host list.
- Page 110 8: Device Ports Escape Sequence The escape character used to get the attention of the SSH or Telnet client. It is optional, and if not specified, Telnet and SSH use their default escape character. For Telnet, the escape character is either a single character or a two-character sequence consisting of '^' followed by one character.
- Page 111 8: Device Ports To view or update a host list: 1. In the Host Lists table, select the host list and click the View Host List button. The list of hosts display in the Hosts box. 2. View, add, or update the following: Host List Id (view Displays after a host list is saved.
-
Page 112: Host List Commands
8: Device Ports Escape Sequence The escape character used to get the attention of the SSH or Telnet client. It is optional, and if not specified, Telnet and SSH use their default escape character. For Telnet, the escape character is either a single character or a two-character sequence consisting of '^' followed by one character. - Page 113 8: Device Ports To add a new host entry to a list or edit an existing entry: set hostlist add|edit <Host List Name> entry <Host Number> [<parameters>] Parameters: host <IP Address or Name> protocol <ssh|telnet|tcp> port <TCP Port> escapeseq <1-10 Chars> To move a host entry to a new position in the host list: set hostlist edit <Host List Name>...
-
Page 114: 9: Pc Cards
99). The SLB branch office manager supports a variety of Compact Flash-to-PC Card adapters, as well as modem and Basic Rate Interface (BRI) ISDN cards. (See the Lantronix web site for a complete list.) To set up PC Card storage in the SLB device: 1. -
Page 115: Storage Settings
9: PC Cards 4. Enter the following settings for the selected PC Card: Storage Settings Mount Select the checkbox to mount the first partition of the Compact Flash on the SLB device (if not currently mounted). Once mounted, a Compact Flash is used for device port logging and saving/restoring configurations. - Page 116 5. Click the Apply button. To enter modem settings for a PC Card: 1. Insert any of the supported modem or ISDN cards (see www.lantronix.com/slb) into either of the PC Card bays on the front of the SLB branch office manager. (You can do this before or after powering up the SLB device.)
- Page 117 9: PC Cards 4. Enter or view the following: State Select to indicate whether to disable the PC Card or set it for dial-in, dial-out, dial-back, dial-on-demand, or dial-in & dial-on-demand. Disabled by default. SLB™ Branch Office Manager User Guide...
-
Page 118: Data Settings
9: PC Cards Mode The format in which the data flows back and forth. With Text selected, the SLB branch office manager assumes that the modem will be used for remotely logging into the command line. Text mode is only for dialing in. This is the default. -
Page 119: Isdn Settings
9: PC Cards Parity Parity checking is a rudimentary method of detecting simple, single-bit errors. From the drop-down list, select the parity. The default is none. Stop Bits The number of stop bit(s) used to indicate that a byte of data has been transmitted. -
Page 120: Text Mode
9: PC Cards Negotiated IP IP address associated with the GPRS connection. Text Mode Timeout If you selected Text mode, you can enable logins to time Logins out after the connection is inactive for a specified number of minutes. The default is No. This setting only applies to text mode connections. -
Page 121: Ip Settings
9: PC Cards Enables PAP or CHAP authentication for dial-in & dial-on- Authentication demand. PAP is the default. With PAP, users are authenticated by means of the Local Users and any of the remote authentication methods that are enabled. With CHAP, the DOD CHAP Handshake fields authenticate the user. -
Page 122: Pc Card Commands
9: PC Cards TCP Port The TCP (raw) session port number to use if you selected TCP. Defaults: Upper PC Card Slot: 4049 Lower PC Card Slot: 4050 Range: 1025-65535 Authenticate If selected, the SLB branch office manager requires user authentication before granting access to the port. -
Page 123: Pc Card Modem Commands
9: PC Cards Removes a file on a Compact Flash card: pccard storage delete <upper|lower> file <Current Filename> PC Card Modem Commands To configure a currently loaded PC Card modem: pccard modem <upper|lower> <parameters> Parameters: auth <pap|chap> 9600 is the default. baud <300-115200>... - Page 124 9: PC Cards modemmode <text|ppp> modemstate <disable|dialout|dialin|dialback|dialondemand| dialin+dialondemand|dialinhostlist> modemtimeout <disable|1-9999 sec> nat <enable|disable> parity <none|odd|even> remoteipaddr <negotiate|IP Address> restartdelay <PPP Restart Delay> service <none|telnet|ssh|tcp> sshauth <enable|disable> sshport <TCP Port> stopbits <1|2> tcpauth <enable|disable> tcpport <TCP Port> telnetauth <enable|disable> telnetport <TCP Port> timeoutlogins <disable|1-30>...
-
Page 125: 10: Connections
10: Connections Chapter 8: Device Ports described how to configure and interact with an SLB branch office manager device port connected to an external device. This chapter describes how to use the Connections web page to connect external devices and outbound network connections (such as Telnet or SSH) in various configurations. -
Page 126: Typical Setup Scenarios For The Slb Device
10: Connections Typical Setup Scenarios for the SLB Device Following are typical configurations in which SLB connections can be used, with references to settings on the Connections and Device Ports web pages. Terminal Server In this setup, the SLB branch office manager acts as a multiplexer of serial data to a single server computer. -
Page 127: Reverse Terminal Server
PC. To use the SLB branch office manager in this setup, the PC requires special software, for example, Com Port Redirector (available on www.lantronix.com) or similar software). Serial Printer... - Page 128 10: Connections Modem Settings section of the Device Ports – Settings web page. A user could then dial into the SLB branch office manager using another modem and terminal emulation program at a remote location. Web Server Serial Terminal Telnet/SSH Sessions Sessions SLB Branch Office Manager...
-
Page 129: Connection Configuration
10: Connections Connection Configuration To create a connection: 1. Click the Devices tab and select the Connections opton. The following page displays: 2. For a device port, enter the following: Port The number of the device port you are connecting. This device port must be connected to an external serial device and must not have command line interface logins enabled, be connected to a modem, or be running a loopback test. - Page 130 10: Connections From the drop-down list, select a destination for the connection: a device port connected to a serial device, a device port connected to a modem, or an outbound network connection (Telnet, SSH, TCP Port, or UDP Port). Note: To see the current settings for a selected device port, click the Settings link.
-
Page 131: Connection Commands
10: Connections To view, update, or disconnect a current connection: The bottom of the Connections web page displays current connections. 4. To view details about a connection, hold the mouse over the arrow in the Flow column. 5. To disconnect (delete) a connection, select the connection in the Select column and click the Terminate button. - Page 132 10: Connections To monitor a device port: connect listen deviceport <Device Port # or Name> To connect a device port to another device port or an outbound network connection (data flows in both directions): connect bidirection <Port # or Name> <endpoint> Endpoint is one of: charcount <# of Chars>...
- Page 133 10: Connections ssh <IP Address or Name> [port <TCP Port] >] <SSH flags>] where <SSH flags> is one or more of: user <Login Name> version <1|2> command <Command to Execute> tcp <IP Address> [port <TCP Port>] telnet <IP Address or Name> [port <TCP Port] trigger <now|datetime|chars>...
-
Page 134: 11: User Authentication
11: User Authentication Users who attempt to log in to the SLB branch office manager by means of Telnet, SSH, the console port, or one of the device ports are granted access by one or more authentication methods. The User Authentication page provides a submenu of methods (Local Users, NIS, LDAP, RADIUS, Kerberos, and TACACS+) for authenticating users attempting to log in. - Page 135 11: User Authentication 2. To enable a method currently in the Disabled methods list, select the method and press the left arrow to the left of the list. The methods include: NIS (Network A network naming and administration system developed by Sun Information Microsystems for smaller networks.
-
Page 136: Authentication Commands
11: User Authentication TACACS+ TACACS+ allows a remote access server to communicate with an (Terminal Access authentication server to determine whether the user has access to the Controller Access network. TACACS+ is a completely new protocol and is not compatible Control System) with TACACS or XTACACS. -
Page 137: Local And Remote Users
11: User Authentication Local and Remote Users The system administrator can configure the SLB device to use local accounts and remote accounts to authenticate users. 1. Click the User Authentication tab and select the Local/Remote Users option. The following page displays. The top of the page has entry fields for enabling local and remote users and for setting password requirements. -
Page 138: Local/Remote User Settings
11: User Authentication Local User Passwords Complex Select to enable the SLB branch office manager to enforce Passwords rules concerning the password structure (e.g., alphanumeric requirements, number of characters, punctuation marks). Disabled by default. Complexity rules: Passwords must be at least eight characters long. They must contain one upper case letter (A-Z), one lower case letter (a-z), one digit ( 0-9), and one punctuation character (()`~!@#$%%^&*-+=\{}[]:;"'<>,.?/_). - Page 139 11: User Authentication 2. Enter the following information for the user: Login User ID of selected user. Authentication Select the type of authenticated user: Local: User listed in the SLB database. Remote: User not listed in the SLB database. A unique numeric identifier the system administrator assigns to each user.
- Page 140 11: User Authentication Access The outlets the user may monitor and configure. Outlets Enable for Select to grant a local user dial-back access (see page 84). Users Dial-back with dial-back access can dial into the SLB branch office manager and enter their login and password. Once the SLB device authenticates them, the modem hangs up and dials them back.
- Page 141 Right to enable and disable system and audit logging, SSH and Telnet logins, SNMP, and SMTP. Includes NFS and CIFS. Secure Lantronix Right to view and manage secure IT management units (e.g., Network SLP power managers, Spiders, SLB branch office managers) on the local subnet.
- Page 142 11: User Authentication 5. Click the Back to Local/Remote Users link to return to the Local/Remote User Settings page. 6. Add another user or click the Back to Local/Remote Users link. The Local/Remote Users page displays with the new user(s) listed in the table. Note: The logged-in user's name displays at the top of the web page.
-
Page 143: Local Users Commands
11: User Authentication Local Users Commands The following CLI commands correspond to the web page entries described above. To configure local accounts (including sysadmin) who log in to the SLB branch office manager by means of SSH, Telnet, the Web, or the console port: set localusers add|edit <User Login>... -
Page 144: Local User Rights Commands
11: User Authentication To view settings for all users or a local user: show localusers [user <User Login>] To block (lock out) a user's ability to log in: set localusers lock <User Login> Note: This capability is not available on the web page. To allow (unlock) a user's ability to log in: set localusers unlock <User Login>... -
Page 145: Nis
11: User Authentication To configure attributes for users who log in by a remote authentication method: set remoteusers add|edit <User Login> [<parameters>] Parameters accessoutlets <Outlet List> breakseq <1-10 Chars> clearports <Port List> dataports <Port List> escapeseq <1-10 Chars> group <default|power|admin> listenports <Port List>... - Page 146 11: User Authentication 2. Enter the following: Enable NIS Displays selected if you enabled this method on the Authentication Methods page. If you want to set up this authentication method but not enable it immediately, clear the checkbox. Note: You can enable NIS here or on the first User Authentication page.
- Page 147 11: User Authentication Custom Menu If custom menus have been created you can assign a default custom menu to NIS users. Escape Sequence A single character or a two-character sequence that causes the SLB branch office manager to leave direct (interactive) mode.
-
Page 148: Nis Commands
11: User Authentication Secure Lantronix Right to view and manage secure IT management units (e.g., Network SLP power managers, Spiders, SLC console managers, SLB branch office managers) on the local subnet. Local Users Right to add or delete local users on the system. -
Page 149: Ldap
11: User Authentication To configure the SLB branch office manager to use NIS to authenticate users who log in via the Web, SSH, Telnet, or the console port: set nis <one or more parameters> Parameters: accessoutlets <Outlet List> breakseq <1-10 Chars> broadcast <enable|disable>... - Page 150 11: User Authentication LDAP allows SLB users to authenticate using a wide variety of LDAP servers, such as OpenLDAP and Microsoft Active Directory. The LDAP implementation supports LDAP servers that do not allow anonymous queries. Users who are authenticated through LDAP are granted device port access through the port permissions on this page.
- Page 151 11: User Authentication Base The name of the LDAP search base (e.g., dc=company, dc=com). May have up to 80 characters. Bind Name The name for a non-anonymous bind to an LDAP server. This item has the same format as LDAP Base. One example is cn=administrator,cn=Users,dc=domain,dc=com Bind Password and Password for a non-anonymous bind.
- Page 152 Right to enter Network settings. Services Right to enable and disable system logging, SSH and Telnet logins, SNMP, and SMTP. Secure Lantronix Right to view and manage secure IT management units (e.g., SLP Network power managers, Spiders, SLB branch office managers) on the local subnet.
-
Page 153: Ldap Commands
11: User Authentication LDAP Commands These commands for the command line interface correspond to the web page entries described above. To configure the SLB branch office manager to use LDAP to authenticate users who log in via the Web, SSH, Telnet, or the console port: set ldap <one or more parameters>... -
Page 154: Radius
11: User Authentication RADIUS The system administrator can configure the SLB branch office manager to use RADIUS to authenticate users attempting to log in using the Web, Telnet, SSH, or the console port. Users who are authenticated through RADIUS are granted device port access through the port permissions on this page. - Page 155 11: User Authentication Enable RADIUS Displays selected if you enabled this method on the User Authentication page. If you want to set up this authentication method but not enable it immediately, clear the checkbox. Note: You can enable RADIUS here or on the first User Authentication page.
- Page 156 Right to enter Network settings. Services Right to enable and disable system logging, SSH and Telnet logins, SNMP, and SMTP. Secure Lantronix Right to view and manage secure IT management units (e.g., Network SLP power managers, Spiders, SLB branch office managers) on the local subnet.
-
Page 157: Radius Commands
11: User Authentication Reboot & Right to use the CLI or shut down the SLB branch office Shutdown manager and then reboot it. Firmware & Right to upgrade the firmware on the unit and save or restore Configuration a configuration (all settings). Selecting this option automatically selects Reboot &... -
Page 158: Kerberos
11: User Authentication To set user group and permissions for RADIUS users: set radius group <default|power|admin> To set permissions for RADIUS users not already defined by the user rights group: set radius permissions <Permission List> where <Permission List> is one or more of nt, sv, dt, lu, ra, sk, um, dp, pc, rs, rc, dr, wb, sn, ad To remove a permission, type a minus sign before the two-letter abbreviation for a user right. - Page 159 11: User Authentication 2. Enter the following: Displays selected if you enabled this method on the User Enable Kerberos Authentication page. If you want to set up this authentication method but not enable it immediately, clear the checkbox. Note: You can enable Kerberos here or on the first User Authentication page.
- Page 160 11: User Authentication Enter the IP address of the Key Distribution Center (KDC). KDC IP Address KDC Port Port on the KDC listening for requests. Enter an integer with a maximum value of 65535. The default is 88. Custom Menu If custom menus have been created, you can assign a default custom menu to RADIUS users.
- Page 161 Right to enter Network settings. Services Right to enable and disable system logging, SSH and Telnet logins, SNMP, and SMTP. Secure Lantronix Right to view and manage secure IT management units (e.g., Network SLP power managers, Spiders, SLB branch office managers) on the local subnet.
-
Page 162: Kerberos Commands
11: User Authentication PC Card Right to enter modem settings for PC cards. Power Outlets Right to configure power outlets. 5. Click the Apply button. Note: You must reboot the unit before your changes will take effect. Kerberos Commands These commands for the command line interface correspond to the web page entries described above. -
Page 163: Tacacs
11: User Authentication To view Kerberos settings: show kerberos TACACS+ Similar to RADIUS, the main function of TACACS+ is to perform authentication for remote access. The SLB branch office manager supports the TACACS+ protocol (not the older TACACS or XTACACS protocols). The system administrator can configure the SLB device to use TACACS+ to authenticate users attempting to log in using the Web, Telnet, SSH, or the console port. - Page 164 11: User Authentication 2. Enter the following: Enable TACACS+ Displays selected if you enabled this method on the User Authentication page. If you want to set up this authentication method but not enable it immediately, clear the checkbox. You can enable TACACS+ here or on the first User Authentication page.
- Page 165 Right to enter Network settings. Services Right to enable and disable system logging, SSH and Telnet logins, SNMP, and SMTP. Secure Lantronix Right to view and manage secure IT management units (e.g., Network SLP power managers, Spiders, SLB branch office managers) on the local subnet.
-
Page 166: Tacacs+ Commands
11: User Authentication TACACS+ Commands These commands for the command line interface correspond to the web page entries described above. To configure the SLB branch office manager to use TACACS+ to authenticate users who log in via the Web, SSH, Telnet, or the console port: set tacacs+ <one or more parameters>... -
Page 167: Imported Keys
11: User Authentication not used, a user can access multiple hosts without entering a password. In either case, the authentication is protected against security attacks because both the public key and the private key are required to authenticate. For both imported and exported SSH keys, the SLB device supports both RSA and DSA keys, and can import and export keys in OpenSSH and SECSH formats. - Page 168 11: User Authentication 2. Enter the following: Imported Keys (SSH In) Host & User Associated with Key These entries are required in the following cases: The imported key file does not contain the host that the user will be making an SSH connection from, or ...
- Page 169 11: User Authentication ssh-rsa AAAAB3NzaC1yc2EAAAABIwAAAEEApUHCX9EWsHt+jmUGXa1YC3us ABYxIXUhSU1N+NU9HNaUADUFfd8LYz8/gUnUSH4Ksm8GRT7/8/Sn9jCVfGPh UQ== asallaway@winserver Host Host name or IP address from which the SSH connections to the SLB branch office manager will be made. User The User ID of the user being given secure access to the SLB device.
- Page 170 11: User Authentication Host and Login for Export Export via Select the method (SCP, FTP, or Cut and Paste) of exporting the key to the remote server. Cut and Paste, the default, requires no other parameters for export. Host IP address of the remote server to which the SLB branch office manager will SCP or FTP the public key file.
- Page 171 11: User Authentication 2. View or enter the following: Reset to Default Select the All Keys checkbox to reset all default Host Key key(s), or select one or more checkboxes to reset defaults for RSA1, RSA, or DSA keys. All checkboxes are unselected by default.
-
Page 172: Ssh Commands
11: User Authentication Public Key Filename of the public host key. Filename Private Key Filename of the private host key. Filename Host Host name or IPaddress of the host from which to import the key. Path Path of the directory where the host key will be stored. - Page 173 11: User Authentication To export a key: set sshkey export <ftp|scp|copypaste> <one or more parameters> Parameters: [format <openssh|secsh>] [host <IP Address or Name>] [login <User Login>] [path <Path to Copy Key>] bits <512|1024> keyname <SSH Key Name> keyuser <SSH Key User> type <rsa|dsa>...
-
Page 174: Custom User Menus
11: User Authentication To display SSH keys that have been imported: show sshkey import <one or more parameters> Parameters: [keyhost <SSH Key IP Address or Name>] [keyuser <SSH Key User>] [viewkey <enable|disable>] To display SSH keys that have been exported: show sshkey export <one or more parameters>... - Page 175 11: User Authentication Maximum of five nested menus can be called. No syntax checking (Enter each command correctly.) To assign a custom user menu to a local or remote user: set localusers add|edit <User Login> menu <Menu Name> To create a new custom user menu or add a command to an existing custom user menu: set menu add <Menu Name>...
-
Page 176: Example
11: User Authentication Example The system administrator creates two custom user menus, with menu1 having a nested menu (menu2): [SLB]> set menu add menu1 Enter optional menu title (<return> for none): Menu1 Title Specify nickname for each command? [no] y Enter each command, up to 50 commands ('logout' is always the last command). - Page 177 11: User Authentication __Custom User Menus___________________________________________________________ Menu: menu2 Title: Menu2 Title Show Nicknames: disabled Redisplay Menu: disabled Command 1: connect direct deviceport 3 Nickname 1: <none> Command 2: connect direct deviceport 4 Nickname 2: <none> Command 3: show datetime Nickname 3: <none>...
- Page 178 11: User Authentication Menu1 Title ------------------------------------------------------------------------- 1) connect Port-1 3) menu2 2) connect Port-2 4) log off [Enter 1-4]> 4 Executing: logout Logging out... SLB™ Branch Office Manager User Guide...
-
Page 179: 12: Maintenance And Operation
12: Maintenance and Operation The system administrator performs maintenance activities and operates the SLB branch office manager using the options for the Maintenance tab and additional commands on the command line interface. SLB Maintenance The Firmware & Configurations page allows the system administrator to: ... - Page 180 12: Maintenance and Operation 2. Enter the following: General Reboot Select this option to reboot the SLB branch office manager immediately. The default is No. Note: The front panel LCD displays the “Rebooting the SLB” message, and the normal boot sequence occurs. Shutdown Select this option to shut down the SLB device.
- Page 181 Firmware Filename The name of the firmware update file downloaded from the Lantronix web site. A key for validating the firmware file. The key is provided with the firmware file (32 hex characters).
- Page 182 12: Maintenance and Operation Boot Banks Bank 1 Version of SLB firmware in bank 1. Note: The word "current" displays next to the bank the SLB branch office manager booted from. Bank 2 Version of SLB firmware in bank 2. Next Boot Bank Current setting for bank to boot from at next reboot.
- Page 183 12: Maintenance and Operation Location for Save, If you selected to save or restore a configuration, select one of Restore, or Manage the following options: Default – Saved Configurations: If restoring, select a saved configuration from the drop-down list. FTP Server: The FTP server specified in the FTP/SFTP/TFTP section.
-
Page 184: Firmware & Configurations - Web Sessions
12: Maintenance and Operation 2. To delete files, select one or more files and click the Delete button. Firmware & Configurations – Web Sessions The Firmware & Configurations - Web Sessions page enables you to view and terminate current web sessions. To view or terminate current web sessions: 1. - Page 185 12: Maintenance and Operation 2. If desired, enter the following: Reset to Default To reset to the default certificate, select the checkbox to reset to Certificate the default certificate. Unselected by default. Import SSL To import your own SSL Certificate, select the checkbox. Certificate Unselected by default.
-
Page 186: Igoogle Gadgets
1. Load the following XML code on a web server that is accessible over the Internet. This code describes how to retrieve information and how to format the data for display. <?xml version="1.0" encoding="UTF-8" ?> <Module> <ModulePrefs title="__UP_model__ Devport Status" title_url="http://www.lantronix.com" directory_title="SLC/SLB Status" description="Devport status and counters" scrolling="true" width="400" height="360" /> <UserPref name="model"... -
Page 187: Administrative Commands
12: Maintenance and Operation Administrative Commands These commands for the command line interface correspond to the web page entries described above. To copy the boot bank from the currently booted bank to the alternate bank (for dual-boot SLB branch office managers): admin firmware copybank To reboot the SLB device: admin reboot... - Page 188 12: Maintenance and Operation To enable or disable iGoogle Gadget web content: admin web gadget <enable|disable> To configure the timeout for web sessions: admin web timeout <disable|5-120> Timeouts are measured in minutes. To terminate a web session: admin web terminate <web session id> To view current timeout and all active web sessions: admin web show To list current hardware and firmware information:...
- Page 189 12: Maintenance and Operation To view keypad settings: admin keypad show To set the FTP/TFTP/SFTP server used for firmware updates and configuration save/restore: admin ftp server <IP Address or Hostname> [login <User Login>] [path <Directory>] To view FTP settings: admin ftp show To set the FTP server password and prevent it from being echoed: admin ftp password To restore the SLB device to factory default settings:...
-
Page 190: System Logs
12: Maintenance and Operation To delete a saved configuration: admin config delete <Config Name> location <default|cifs|pccard> [pccardslot <upper|lower>] To list the configurations saved to a location: admin config show <default|ftp|sftp|nfs|cifs|pccard> [nfsdir <NFS Mounted Dir>] [pccardslot <upper|lower>] To run the quick setup script: admin quicksetup To import an SSL certificate, or reset the web server certificate to the default: admin web certificate import via <sftp|scp>... - Page 191 12: Maintenance and Operation 2. Enter the following: Select the type(s) of log you want to view. Level Select the alert level you want to view for the selected log. Starting at Select the starting point of the range you want to view: Beginning of Log: Beginning of the log.
- Page 192 Select to and enter the person’s email address. c) Press the Email Output button. 5. To email the system log to Lantronix Technical Support: a) In the Comment field, enter a comment (if desired). b) Select to: Lantronix Tech Support.
-
Page 193: System Log Command
12: Maintenance and Operation System Log Command The following command for the command line interface corresponds to the web page entries described above. To view the system logs containing information and error messages: show syslog [<parameters>] Parameters: [email <Email Address>] level <error|warning|info|debug>... -
Page 194: Diagnostics
12: Maintenance and Operation 2. To select a sort option (by Date/Time, User, Command/Action, click the appropriate button: To sort by date and time, click the Sort by Date/Time button. (This is the default.) To sort by user, click the Sort by User button. ... - Page 195 12: Maintenance and Operation 2. Enter the following: Select Diagnostics Select one or more diagnostic methods you want to run, or select All to run them all. ARP Table Address Resolution Protocol (ARP) table used to view the IP address-to-hardware address mapping. Netstat Displays network connections.
- Page 196 12: Maintenance and Operation Send Packet This option sends an Ethernet packet out one of the Ethernet ports, mainly as a network connectivity test. Enter the following: Protocol: Select the type of packet to send. Hostname: Specify a host name or IPaddress of the host to send the packet to.
- Page 197 6. To email the report(s) to Lantronix Technical Support: a) In the Comment field, enter a comment (if desired). b) Select to: Lantronix Tech Support c) Call Lantronix Tech Support and obtain a case number. Note: For contact information, click the Lantronix Tech Support link.
-
Page 198: Diagnostic Commands
12: Maintenance and Operation Diagnostic Commands The following CLI commands correspond to the web page entries described above. To display the ARP table of IP address-to-hardware address mapping: diag arp [email <Email Address>] You can optionally email the displayed information. To display a report of network connections: You can optionally email the displayed information. -
Page 199: Status/Reports
12: Maintenance and Operation To generate and send Ethernet packets: diag sendpacket host <IP Address or Name> port <TCP or UDP Port Number> [string <Packet String>] [protocol <tcp|udp>] [count <Number of Packets>] The default is 1. To display all network traffic, applying optional filters: Note: This command is not available diag nettrace <one or more parameters>... - Page 200 12: Maintenance and Operation The top half of the page displays the status of each port, power supply, and power outlet. Green indicates that the port connection or power supply is active and functioning correctly. Red indicates an error or failure or that the device is off. 2.
- Page 201 5. To email the report(s) to Lantronix Technical Support: a) In the Comment field, enter a comment (if desired). b) Select to: Lantronix Tech Support c) Call Lantronix Tech Support and obtain a case number. Note: For contact information, click the Lantronix Tech Support link.
-
Page 202: Status Commands
12: Maintenance and Operation Status Commands These commands for the command line interface correspond to the web page entries described above. To display device port modes and states for one or more ports: You can optionally email the displayed information. show portstatus [deviceport <Device Port List or Name>] [email <Email Address>] To display a snapshot of configurable parameters:... - Page 203 12: Maintenance and Operation 2. Enter the following: Event Trigger From the drop-down list, select the type of incident that triggers an event. Currently, the options are: Receive Trap Temperature Over/Under Limit: For Sensorsoft devices. Humidity Over/Under Limit: For Sensorsoft devices. Action From the drop-down list, select the action taken because of the trigger.
-
Page 204: Events Commands
12: Maintenance and Operation SNMP Trap OID Enter a unique identifier for an SNMP object. (An SNMP object is anything that can hold a value and can be read using an SNMP "get" action.) The OID consists of a string of numbers separated by periods (for example, 1.1.3.2.1). - Page 205 12: Maintenance and Operation To update event definitions: admin events edit <Event ID> <parameters> Parameters: community <SNMP Community> deviceport <Device Port # or Name> ethport <1|2> nms <SNMP NMS> oid <SNMP Trap OID> pccardslot <upper|lower> To delete an event: admin events delete <Event ID> To view events: admin events show SLB™...
-
Page 206: 13: Application Examples
13: Application Examples Each SLB branch office manager has multiple serial ports and two network ports. Each serial port can be connected to the console port of an IT device. Using a network port (in-band) or a modem (out-of-band) for dial-up connection, an administrator can remotely access any of the connected IT devices using Telnet or SSH. -
Page 207: Telnet/Ssh To A Remote Device
13: Application Examples Telnet/SSH to a Remote Device The following figure shows a Sun server connected to port 2 of the SLB device. Figure 13-2. Remote User Connected to a SUN Server via the SLB Device Sun Server Remote User Serial Cable to Device Port 2 Internet SLB Branch Office Manager... -
Page 208: Dial-In (Text Mode) To A Remote Device
13: Application Examples 3. Connect to the device port: [SLB]> connect direct deviceport 2 4. View messages from the SUN server console: Mar 15 09:09:44 tssf280r sendmail[292]: [ID 702911 mail.info] starting daemon (8.12.2+Sun): SMTP+queueing@00:15:00 Mar 15 09:09:44 tssf280r sendmail[293]: [ID 702911 mail.info] starting daemon (8.12.2+Sun): queueing@00:15:00 Mar 15 14:44:40 tssf280r sendmail[275]: [ID 702911 mail.info] starting daemon (8.12.2+Sun): SMTP+queueing@00:15:00... - Page 209 13: Application Examples [SLB]> 2. Configure the device port that is connected to the console port of the Sun UNIX server: [SLB]> set deviceport port 2 baud 57600 flowcontrol none Device Port settings successfully updated. 3. Dial into the SLB branch office manager via the modem using a terminal emulation program on a remote PC.
-
Page 210: Local Serial Connection To Network Device Via Telnet
13: Application Examples Local Serial Connection to Network Device via Telnet This example shows a terminal device connected to an SLB device port, and a Sun server connected over the network to the SLB branch office manager. When a connection is established between the device port and an outbound Telnet session, users can access the Sun server as though they were directly connected to it. - Page 211 13: Application Examples Byte Threshold: 100 Max number of files: 10 Email Delay: 60 seconds Max size of files: 2048 Restart Delay: 60 seconds Email To: <none> Email Subject: Port %d Logging Email String: <none> NFS File Logging: disabled Directory to log to: <none> Max number of files: 10 Max size of files: 2048 2.
-
Page 212: 14: Command Reference
14: Command Reference After an introduction to using commands, this chapter lists and describes all of the commands available on the SLB command line interface accessed through Telnet, SSH, or a serial connection. The commands are in alphabetical order by category. Introduction to Commands Following is some information about command syntax, command line help, and tips for using commands. -
Page 213: Command Line Help
14: Command Reference Table 14-1. Actions and Category Options Action Category network | ipfilter | routing | datetime | ntp | services | nfs | cifs | menu | auth | hostlist | localusers | remoteusers | ldap | radius | kerberos | tacacs+ | consoleport | deviceport | nis | slcnetwork | command | sshkey | password | history | cli | locallog | power show... -
Page 214: Administrative Commands
14: Command Reference Use the up and down arrows to scroll through previously entered commands. If desired, select one and edit it. You can scroll through up to 100 previous commands entered in the session. To clear an IP address, type 0.0.0.0, or to clear a non-IP address value, type CLEAR. - Page 215 14: Command Reference admin config delete Syntax admin config delete <Config Name> location <default|cifs|pccard> [pccardslot <upper|lower>] Description Deletes a configuration. admin config factorydefaults Syntax admin config factorydefaults [savesshkeys <enable|disable>] [savesSLBert <enable|disable>][preserveconfig <Config Params to Preserve>] <Config Params to Preserve> is a comma-separated list of current configuration parameters to retain after the config restore or factorydefaults: nt –...
- Page 216 14: Command Reference Description Saves the current SLB configuration to a selected location. admin config show Syntax admin config show <default|ftp|sftp|nfs|cifs|pccard> [nfsdir <NFS Mounted Dir>] [pccardslot <upper|lower>] Description Lists the configurations saved to a location. admin firmware bootbank Syntax admin firmware bootbank <1|2> Description Sets the boot bank to be used at the next SLB reboot.
- Page 217 14: Command Reference admin ftp password Syntax admin ftp password Description Sets the FTP server password and prevent it from being echoed. admin ftp server Syntax admin ftp server <IP Address or Hostname> [login <User Login>] [path <Directory>] Description Sets the FTP/TFTP/SFTP server used for firmware updates and configuration save/restore. admin ftp show Syntax admin ftp show...
- Page 218 14: Command Reference Description Displays keypad settings. admin lcd reset Syntax admin lcd reset Description Restarts the program that controls the LCD. admin quicksetup Syntax admin quicksetup Description Runs the quick setup script. admin reboot Syntax admin reboot Description Reboots the SLB branch office manager. The front panel LCD displays the “Rebooting the SLB”...
- Page 219 14: Command Reference admin web certificate Syntax admin web certificate import via <sftp|scp> certfile <Certificate File> privfile <Private Key File> host <IP Address or Name> login <User Login> [path <Path to Files>] Description Imports an SSL certificate. admin web certificate reset Syntax admin web certificate reset Description...
-
Page 220: Audit Log Commands
14: Command Reference admin web terminate Syntax admin web terminate <Session ID> Description Terminates a web session. admin web show Syntax admin web show Description Displays the current sessions and their ID. Add ‘admin web certificate’ commands Audit Log Commands show auditlog Syntax show auditlog [command|user|clear]... -
Page 221: Kerberos Commands
14: Command Reference Local Users authentication is always the first method used. Any methods omitted from the command are disabled. show auth Syntax show auth Description Displays authentication methods and their order of precedence. show user Syntax show user Description Displays attributes of the currently logged in user. -
Page 222: Ldap Commands
14: Command Reference Description Configures the SLB branch office manager to use Kerberos to authenticate users who log in via the Web, SSH, Telnet, or the console port. show kerberos Syntax show kerberos Description Displays Kerberos settings. LDAP Commands set ldap Syntax set ldap <one or more parameters>... -
Page 223: Local Users Commands
14: Command Reference show ldap Description Displays LDAP settings: Syntax show ldap Local Users Commands set localusers add|edit Syntax set localusers add|edit <User Login> <one or more parameters> Parameters accessoutlets <Outlet List> allowdialback <enable|disable> breakseq <1-10 Chars> changenextlogin <enable|disable> changepassword <enable|disable> clearports <Port List>... - Page 224 14: Command Reference set localusers allowreuse Syntax set localusers allowreuse <enable|disable> Description Sets whether a login password can be reused. set local users complexpasswords Syntax set localusers complexpasswords <enable|disable> Description Sets whether a complex login password is required. set localusers state Syntax set localusers state <enable|disable>...
- Page 225 14: Command Reference set localusers password Syntax set localusers password <User Login> Description Sets a login password for the local user. set localusers periodlockout Syntax set localusers periodlockout <Number of Minutes> Description Sets the number of minutes after a lockout before the user can try to log in again. Disabled by default.
-
Page 226: Nis Commands
14: Command Reference NIS Commands set nis Syntax set nis <one or more parameters> Parameters accessoutlets <Outlet List> broadcast <enable|disable> clearports <Port List> custommenu <Menu Name> dataports <Port List> domain <NIS Domain Name> breakseq <1-10 Chars> escapeseq <1-10 Chars> group <default|power|admin> listenports <Port List>... -
Page 227: Radius Commands
14: Command Reference RADIUS Commands set radius Syntax set radius <one or more parameters> Parameters: accessoutlets <Outlet List> state <enable|disable> clearports <Port List> custommenu <Menu Name> dataports <Port List> breakseq <1-10 Chars> escapeseq <1-10 Chars> group <default|power|admin> listenports <Port List> permissions <Permission List>... -
Page 228: Tacacs+ Commands
14: Command Reference TACACS+ Commands set tacacs+ Syntax set tacacs+ <one or more parameters> Parameters accessoutlets <Outlet List> clearports <Port List> custommenu <Menu Name> dataports <Port List> encrypt <enable|disable> breakseq <1-10 Chars> escapeseq <1-10 Chars> group <default|power|admin> listenports <Port List> permissions <Permission List>... - Page 229 14: Command Reference Description Adds a local user to a user group or changes the group the user belongs to. set localusers lock Syntax set local users unlock <User Login> Description Blocks (locks) a user's ability to login. set localusers unlock Syntax set local users unlock <User Login>...
- Page 230 14: Command Reference where <Permission List> is one or more of nt, sv, dt, lu, ra, sk, um, dp, pc, rs, rc, dr, wb, sn, ad, po To remove a permission, type a minus sign before the two-letter abbreviation for a user right. Description Sets attributes for users who log in by a remote authentication method.
-
Page 231: Cli Commands
14: Command Reference Description Sets permissions not already defined by the assigned permissions group. show user Syntax show user Description Displays the rights of the currently logged-in user: CLI Commands set cli Syntax set cli scscommands <enable|disable> Description Allows you to use SCS-compatible commands as shortcuts for executing commands. Enabling this feature enables it only for the current cli session. -
Page 232: Connection Commands
14: Command Reference Description Allow (unlock) a user’s ability to log in. show cli Syntax show cli Description Displays current CLI settings. show user Syntax show user Description Displays attributes of the currently logged in user. set history Syntax set history clear Description Clears the commands that have been entered during the command line interface session. - Page 233 14: Command Reference charxfer <toendpoint|fromendpoint> date <MMDDYYhhmm[ss]> deviceport <Device Port # or Name> exclusive <enable|disable> ssh <IP Address or Name> [port <TCP Port>][<SSH flags>] where <SSH flags> is one or more of: user <Login Name> version <1|2> command <Command to Execute> tcp <IP Address>...
- Page 234 14: Command Reference connect global outgoingtimeout Syntax connect global outgoingtimeout <disable|1-9999 seconds> Description Sets the amount of time the SLB branch office manager will wait for a response (sign of life) from an SSH/Telnet server that it is trying to connect to. Note: This is not a TCP timeout.
-
Page 235: Console Port Commands
14: Command Reference telnet <IP Address or Name> [port <TCP Port] trigger <now|datetime|chars> If the trigger is datetime (establish connection at a specified date/time), enter the date parameter. If the trigger is chars (establish connection on receipt of a specified number or characters or a character sequence), enter either the charcount or the charseq parameter. -
Page 236: Custom User Menu Commands
14: Command Reference Description Configures console port settings. show consoleport Syntax show consoleport Description Displays console port settings. Custom User Menu Commands When creating a custom user menu, note the following limitations: Maximum of 20 custom user menus. Maximum of 50 commands per custom user menu (logout is always the last command). -
Page 237: Date And Time Commands
14: Command Reference title <Menu Title> Description Changes a command within an existing custom user menu. Changes a nickname within an existing custom user menu. Enables or disables the redisplay of the menu before each prompt. Enables or disables the display of command nicknames instead of commands. Sets the optional title for a menu. -
Page 238: Device Commands
14: Command Reference show datetime Syntax show datetime Description Displays the local date, time, and time zone. set ntp Syntax set ntp <one or more ntp parameters> Parameters localserver1 <IP Address or Hostname> localserver2 <IP Address or Hostname> localserver3 <IP Address or Hostname> poll <local|public>... -
Page 239: Device Port Commands
14: Command Reference slp outletcontrol state <on|off|cyclepower> [outlet <Outlet #>][tower <A|B>] Outlet # is 1-8 for SLP8 power manager and 1-16 for SLP16 power manager. The outletcontrol parameters control individual outlets. slp outletstate [outlet <Outlet #>] The outletstate parameter shows the state of all outlets or a single outlet. slp envmon Displays the environmental status (e.g., temperature and humidity) of the SLP power manager. - Page 240 14: Command Reference calleridcmd <Modem Command String> calleridlogging <enable| disable> chaphost <CHAP Host or User Name> chapsecret <CHAP Secret or User Password> The user defines the secret. checkdsr <enable|disable> closedsr <enable|disable> databits <7|8> device <none|slp8|slp16> dialbacknumber <usernumber|Phone Number> dialoutlogin <User Login> dialoutnumber <Phone Number>...
- Page 241 14: Command Reference remoteipaddr <negotiate|IP Address> restartdelay <PPP Restart Delay> slp infeedstatus Displays the infeed status and load of the SLP power manager. sshauth <enable|disable> sshin <enable|disable> sshport <TCP Port> stopbits <1|2> telnetauth <enable|disable> telnetin <enable|disable> telnetport <TCP Port> timeoutlogins <disable or 1-30> webcolumns <Web SSH/Telnet Cols>...
-
Page 242: Diagnostic Commands
14: Command Reference Description Displays a list of all device port names. show deviceport port Syntax show deviceport port <Device Port List or Name> Description Displays the settings for one or more device ports. show portcounters Syntax show portcounters [deviceport <Device Port List or Name>] [email <Email Address>] Description Displays device port statistics and errors for one or more ports. - Page 243 14: Command Reference diag internals Syntax diag internals Description Displays information on the internal memory, storage and processes of the SLB branch office manager. Note: This command is available in the CLI but not the web. diag netstat Syntax diag netstat [protocol <all|tcp|udp>] [email <Email Address>] Description To display a report of network connections.
-
Page 244: End Device Commands
14: Command Reference xferdatasize <Size In Kbytes to Transfer> Default is 1 Kbyte. Description Tests a device port by transmitting data out the port and verifying that it is received correctly. A special loopback cable comes with the SLB branch office manager. To test a device port, plug the cable into the device port and run this command. -
Page 245: Events Commands
14: Command Reference Events Commands admin events add Syntax admin events add <receivetrap> <response> <response> is one of: action <fwdalltrapseth|fwdseltrapeth> ethport <1|2> nms <SNMP NMS> community <SNMP Community> [oid <SNMP OID>] action <fwdalltrapsmodem|fwdseltrapmodem> deviceport <Device Port # or Name> nms <SNMP NMS> community <SNMP Community> [oid <SNMP Trap OID>] action <fwdalltrapsmodem|fwdseltrapmodem>... -
Page 246: Host List Commands
14: Command Reference admin events show Syntax admin events show Description Displays event definitions. Host List Commands set hostlist add|edit <Host List Name> Syntax set hostlist add|edit <Host List Name> [<parameters>] Parameters name <Host List Name> (edit only) retrycount <1-10> Default is 3. -
Page 247: Ip Filter Commands
14: Command Reference set hostlist delete Syntax set hostlist delete <Host List> [entry <Host Number>] Description Deletes a host list, or a single host entry from a host list. show hostlist Syntax show hostlist <all|names|Host List Name> Description Displays the members of a host list. IP Filter Commands set ipfilter state Syntax... -
Page 248: Logging Commands
14: Command Reference edit <Ruleset Name> <Edit Parameters> Edit Parameters: append insert <Rule Number> replace <Rule Number> delete <Rule Number> Description Sets IP filter rules. Logging Commands set deviceport port Syntax set deviceport port <Device Port List or Name> <one or more deviceport parameters>... -
Page 249: Network Commands
14: Command Reference sysloglogging <enable|disable > Description Configures logging settings for one or more device ports. Local logging must be enabled for a device port for the locallog commands to be executed. To use the set locallog clear command, the user must have permission to clear port buffers (see 11: User Authentication). - Page 250 14: Command Reference set network dns Syntax set network dns <1|2|3> ipaddr <IP Address> Description Configures up to three DNS servers. set network gateway Syntax set network gateway <parameters> Parameters default <IP Address> precedence <dhcp|gprs|default> alternate <IP Address> pingip <IP Address> ethport <1 or 2>...
-
Page 251: Nfs And Smb/Cifs Commands
14: Command Reference show network dns Syntax show network dns Description Displays DNS settings. show network gateway Syntax show network gateway Description Displays gateway settings. show network host Syntax show network host Description Displays the network host name of the SLB branch office manager. show network port Syntax show network port <1|2>... - Page 252 14: Command Reference mount <enable|disable> remdir <Remote NFS Directory> rw <enable|disable> Enables or disables read/write access to remote directory. Description Mounts a remote NFS share. The remdir and locdir parameters are required, but if they have been specified previously, you do not need to provide them again. set nfs unmount Syntax set nfs unmount <1|2|3>...
-
Page 253: Pc Card Storage Commands
14: Command Reference show nfs Syntax show nfs Description Displays NFS share settings. PC Card Storage Commands pccard storage dir Syntax pccard storage dir <upper|lower> Description Views a directory listing of a Compact Flash card. pccard storage format Syntax pccard storage format <upper|lower> [filesystem <ext2|fat>] Description Formats a Compact Flash card. -
Page 254: Pc Card Modem Commands
14: Command Reference PC Card Modem Commands pccard modem Syntax pccard modem <upper|lower> <parameters> Parameters auth <pap|chap> baud <300-115200> 9600 is the default. calleridcmd <Modem Command String> calleridlogging <enable| disable> chaphost <CHAP Host or User Password> chapsecret <CHAP Secret or User Password> databits <7|8>... -
Page 255: Power Commands
14: Command Reference remoteipaddr <negotiate|IP Address> restartdelay <PPP Restart Delay> service <none|telnet|ssh|tcp> sshauth <enable|disable> sshport <TCP Port> stopbits <1|2> tcpauth <enable|disable> tcpport <TCP Port> telnetauth <enable|disable> telnetport <TCP Port> timeoutlogins <disable|1-30> Description Configures a currently loaded PC Card. Power Commands set power alarmthreshold Syntax set power alarmthreshold <disable|Tenths of Amps>... -
Page 256: Routing Commands
14: Command Reference set power switchingdelay Syntax set power switchingdelay <Delay in msec> Description Sets the delay after switching on an outlet before switching on the next. show power Syntax show power <Outlet # or Name> Description Displays power settings for all outlets or for a single outlet. Note: The screen displays PND when the outlet is powering up and is waiting for the delay period to expire. -
Page 257: Services Commands
14: Command Reference Services Commands set services Syntax set services <one or more services parameters> Parameters alarmdelay <1-6000 Seconds> auditlog <enable|disable> auditsize <Size in Kbytes> Limit is 1-500 Kbytes authlog <off|error|warning|info|debug> clicommands <enable|disable> contact <Admin contact info> devlog <off|error|warning|info|debug> diaglog <off|error|warning|info|debug> genlog <off|error|warning|info|debug>... -
Page 258: Slb Network Commands
14: Command Reference trapcommunity <Trap Community> v1ssh <enable|disable> v3password <Password for v3 auth> v3user <User for v3 auth> v3user <V3 RO User> v3password <V3 RO User Password> v3phrase <V3 RO User Passphrase> v3rwuser <V3 RW User> v3rwpassword <V3 RW User Password> v3rwphrase <V3 RW User Passphrase>... -
Page 259: Ssh Key Commands
14: Command Reference show slcnetwork Syntax show slcnetwork [ipaddrlist <all|Address Mask>] Description Detects and displays all SLB devices on the local network. Without the ipaddrlist parameter, the command searches the SLB network. With the ipaddrlist parameter, the command displays a sorted list of all IP addresses or displays the IP addresses that match the mask (for example, 172.19.255.255 would display all IP addresses that start with 172.19). - Page 260 14: Command Reference [path <Path to Copy Key>] bits <512|1024> keyname <SSH Key Name> keyuser <SSH Key User> type <rsa|dsa> Description Exports an sshkey. set sshkey import set sshkey import <ftp|scp> <one or more parameters> Parameters [keyhost <SSH Key IP Address or Name>] [keyuser <SSH Key User>] [path <Path to Public Key File>] file <Public Key File>...
-
Page 261: Status Commands
14: Command Reference Parameters [keyhost <SSH Key IP Address or Name>] [keyuser <SSH Key User>] [viewkey <enable|disable>] Description Displays all exported keys or keys for a specific user, IP address, or name. show sshkey import Syntax show sshkey import <one or more parameters>] Parameters [keyhost <SSH Key IP Address or Name>] [keyuser <SSH Key User>]... -
Page 262: System Log Commands
14: Command Reference Description Provides details, for example, endpoint parameters and trigger, for a specific connection. Optionally emails the displayed information. Note: Use the basic show connections command to obtain the Connection ID. show portcounters Syntax show portcounters [deviceport <Device Port List or Name>] [email <Email Address>] Description Generates a report for one or more ports. - Page 263 14: Command Reference level <error|warning|info|debug> log <all|netlog|servlog|authlog|devlog|diaglog|genlog> display <head|tail> [numlines <Number of Lines>] starttime <MMDDYYhhmm[ss]> endtime <MMDDYYhhmm[ss]> Description Displays the system logs containing information and error messages. Note: The level, display, and time parameters cannot be used simultaneously. show syslog clear Syntax show syslog clear <all|netlog|servlog|authlog|devlog|diaglog|genlog>...
-
Page 264: A: Bootloader
To access the bootloader command line interface 1. Power up the SLB branch office manager. 2. Type x15 within 10 seconds of power up. The bootloader halts the boot procedure and displays a Lantronix command prompt. Bootload Commands User Commands help Lists and prints the command list and online help. -
Page 265: Administrator Commands
A: Bootloader Displays information about the current user. Administrator Commands In addition to the commands that the user can issue, the administrator can issue the following commands: imagecopy Copies an image of the drive from the lower PCMCIA device to the internal CF card. passwd Provides a new password for user admin. -
Page 266: B: Security Considerations
B: Security Considerations The SLB branch office manager provides data path security by means of SSH or Web/SSL. Even with the use of SSH/SSL, however, do not assume you have complete security. Securing the data path is only one measure needed to ensure security. This appendix briefly discusses some important security considerations. -
Page 267: C: Safety Information
Opening or removing the cover may expose you to dangerous voltage that could cause fire or electric shock. Refer all servicing to Lantronix. Power Plug When disconnecting the power cable from the socket, pull on the plug, not the cord. - Page 268 C: Safety Information − Install only in restricted access areas (dedicated equipment rooms, equipment closets or the like) in accordance with Articles 110-16, 110-17, and 110-18 of the National Electrical Code, ANSI/NFPA 70. − Route and secure input wiring to terminal block in such a manner that it is protected from damage and stress.
-
Page 269: D: Adapters And Pinouts
Lantronix adapters. The cables are available in various lengths. In most cases, you will need an adapter for your serial devices. Lantronix offers a variety of RJ45-to-serial connector adapters for many devices. These adapters convert the RJ45... - Page 270 D: Adapters and Pinouts RJ45 Receptacle to DB25M DCE Adapter for the SLB Device (PN 200.2066A) Pin 1 DB25 Male RJ45 RTS 1 DTR 2 Tx 3 Gnd 4 Gnd 5 Rx 6 DSR 7 CTS 8 Use PN 200.2066A adapter with a dumb terminal or with many SUN applications. SLB™...
- Page 271 D: Adapters and Pinouts RJ45 Receptacle to DB25F DCE Adapter for the SLB Device (PN 200.2067A) Pin 1 DB25 Female RJ45 RTS 1 DTR 2 Tx 3 Gnd 5 Rx 6 DSR 7 CTS 8 SLB™ Branch Office Manager User Guide...
- Page 272 D: Adapters and Pinouts RJ45 Receptacle to DB9M DCE Adapter for the SLB Device (PN 200.2069A) Pin 1 DB9 Male RJ45 RTS 1 DTR 2 Tx 3 Gnd 4 Gnd 5 Rx 6 DSR 7 CTS 8 SLB™ Branch Office Manager User Guide...
- Page 273 D: Adapters and Pinouts RJ45 Receptacle to DB9F DCE Adapter for the SLB Device (PN 200.2070A) Pin 1 DB9 Female RJ45 RTS 1 DTR 2 Tx 3 Gnd 4 Gnd 5 Rx 6 DSR 7 CTS 8 Use PN 200.2070A adapter with a PC's serial port. SLB™...
- Page 274 D: Adapters and Pinouts RJ45 to RJ45 Adapter for Netra/Sun/Cisco and SLP Device (PNs 200.2225 and ADP010104-01) Note: The cable ends of the ADP010104-01 are an RJ45 socket on one end and a RJ45 plug on the other instead of RJ45 sockets on both ends. RTS 1 DTR 2 Tx 3...
-
Page 275: E: Protocol Glossary
E: Protocol Glossary BOOTP (Bootstrap Protocol) Similar to DHCP, but for smaller networks. Automatically assigns the IP address for a specific duration of time. CHAP (Challenge Handshake Authentication Protocol) A secure protocol for connecting to a system; it is more secure than the PAP. DHCP (Dynamic Host Configuration Protocol) Internet protocol for automating the configuration of computers that use TCP/IP. - Page 276 E: Protocol Glossary NMS (Network Management System) NMS acts as a central server, requesting and receiving SNMP-type information from any computer using SNMP. NTP (Network Time Protocol) A protocol used to synchronize time on networked computers and equipment. PAP (Password Authentication Protocol) A method of user authentication in which the username and password are transmitted over a network and compared to a table of name-password pairs.
- Page 277 E: Protocol Glossary TACACS+ (Terminal Access Controller Access Control System) A method of authentication used in UNIX networks. It allows a remote access server to communicate with an authentication server to determine whether the user has access to the network. Telnet A terminal protocol that provides an easy-to-use method of creating terminal connections to a network host.
-
Page 278: F: Compliance Information
F: Compliance Information Manufacturer’s Name & Address: Lantronix, Inc., 167 Technology Drive, Irvine, CA 92618 USA Declares that the following product: Product Name(s): SLB Branch Office Manager (SLB Series) Conforms to the following standards or other normative documents: SAFETY: •... - Page 279 F: Compliance Information • EN 55022 — “Limits and Methods of Measurement of Radio Interference Characteristics of Information Technology Equipment.” • EN 55024 — “Information technology equipment - Immunity characteristics - Limits and methods of measurement.” • EN 61000-3-2 — “Electromagnetic compatibility (EMC) - Part 3: Limits - Section 2: Limits for harmonic current emissions (Equipment input current up to and including 16 A per phase).”...
- Page 280 F: Compliance Information RoHS Notice: All Lantronix products in the following families are China RoHS-compliant and free of the following hazardous substances and elements: • • • Lead (Pb) Mercury (Hg) Polybrominated biphenyls (PBB) • • • Cadmium (Cd) Hexavalent Chromium (Cr (VI)) Polybrominated diphenyl ethers (PBDE) •...
Need help?
Do you have a question about the SLB088411-01 and is the answer not in the manual?
Questions and answers