
Related Manuals for Lantronix Spider


Summary of Contents for Lantronix Spider
- Page 1 Spider™ and SpiderDuo® KVM-over-IP Devices User Guide Part Number 900-495 Revision H December 2022...
-
Page 2: Copyright And Trademark
Copyright and Trademark © 2022 Lantronix, Inc. All rights reserved. No part of the contents of this book may be transmitted or reproduced in any form or by any means without the written permission of Lantronix. Lantronix is a registered trademark of Lantronix, Inc. in the United States and other countries. -
Page 3: Documentation Changes
The user is cautioned that changes and modifications made to the equipment without approval of the manufacturer could void the user’s authority to operate this equipment. Changes or modifications to this device not explicitly approved by Lantronix will void the user's authority to operate the device. -
Page 4: Table Of Contents
Telnet/SSH Connections to Serial Ports _____________________________________ 28 Cable Connections for KVM and USB ______________________________________ 28 Device Failure or Cable Break in the Daisy Chain __________________________28 Client Server Setup ________________________________________________________ 28 Network Environment ______________________________________________________ 29 Spider Power _____________________________________________________________ 29 Spider™ and SpiderDuo® KVM-over-IP Device User Guide... - Page 5 Serial Port Settings ________________________________________________________ 48 KVM Console Settings _____________________________________________________49 KVM Console Settings __________________________________________________ 50 Transmission Encoding _________________________________________________ 50 Miscellaneous KVM Console Settings ______________________________________ 51 Mouse Hotkey _________________________________________________________ 51 KVM Console Virtual Keys _______________________________________________51 Spider™ and SpiderDuo® KVM-over-IP Device User Guide...
- Page 6 10: Maintenance Device Status ____________________________________________________________ 72 Configuration/Factory Defaults _______________________________________________73 Update Firmware __________________________________________________________75 View Event Log ___________________________________________________________76 Unit Reset _______________________________________________________________ 77 11: Command Reference Command Syntax _________________________________________________________ 78 Command Help ________________________________________________________ 79 Tips _________________________________________________________________79 Spider™ and SpiderDuo® KVM-over-IP Device User Guide...
- Page 7 User Commands __________________________________________________________89 User Group Commands ____________________________________________________90 Group Permissions ________________________________________________________ 91 Appendix A: Troubleshooting Appendix B: Supported Resolutions and Refresh Rates Appendix C: Mounting Bracket Kit Appendix D: Technical Support Appendix E: Compliance Spider™ and SpiderDuo® KVM-over-IP Device User Guide...
- Page 8 Figure 2-5 SpiderDuo PS/2 Cable Dimensions__________________________________________ 19 Figure 2-6 SpiderDuo USB Cable Dimensions __________________________________________ 20 Figure 2-8 Spider Family Product Information Label______________________________________ 22 Figure 3-1 Spider RS-232 Serial Port and Pinouts _______________________________________24 Figure 3-3 Spider Login Window_____________________________________________________25 Figure 3-4 Spider Prompts _________________________________________________________ 25...
- Page 9 Figure 9-9 ConsoleFlow Settings Page________________________________________________ 70 Figure 10-1 Device Status Page _____________________________________________________72 Figure 10-3 Configuration Page _____________________________________________________73 Figure 10-4 Update Firmware Page __________________________________________________ 75 Figure 10-5 Event Log Page ________________________________________________________ 76 Figure 10-6 Unit Reset Page________________________________________________________ 77 Spider™ and SpiderDuo® KVM-over-IP Device User Guide...
- Page 10 Table 4-3 SpiderDuo Indicator LEDs _________________________________________________ 32 Table 4-6 Extended Length Cables __________________________________________________ 35 Table 9-2 Date/Time Settings ______________________________________________________ 62 Table 10-2 Device Status Settings ___________________________________________________ 72 Table 11-1 Action and Category ____________________________________________________79 Spider™ and SpiderDuo® KVM-over-IP Device User Guide...
-
Page 11: 1: About This Guide
About This Guide This guide describes how to install, configure, use, and update the Lantronix® Spider™ and SpiderDuo® distributed keyboard, video, and mouse (KVM) -over-IP devices. It describes how to remotely and securely provide monitoring and control of one target computer system by one or more remote users. -
Page 12: Conventions
Appendix B: Supported Resolutions and Lists the resolutions and refresh rates that are supported. Refresh Rates Appendix C: Mounting Bracket Kit Describes how to mount the Spider or SpiderDuo Device in a rack. Lists technical support telephone and fax numbers. Appendix D: Technical Support... -
Page 13: Additional Documentation
Visit the Lantronix web site at www.lantronix.com/support/documentation for the latest documentation and the following additional documentation: Spider View User Guide—Details instructions on using the Spider View utility. Note: Spider View 2.0.0 is required to manage Spider devices running firmware 5.0.0.0 and newer. -
Page 14: 2: Overview
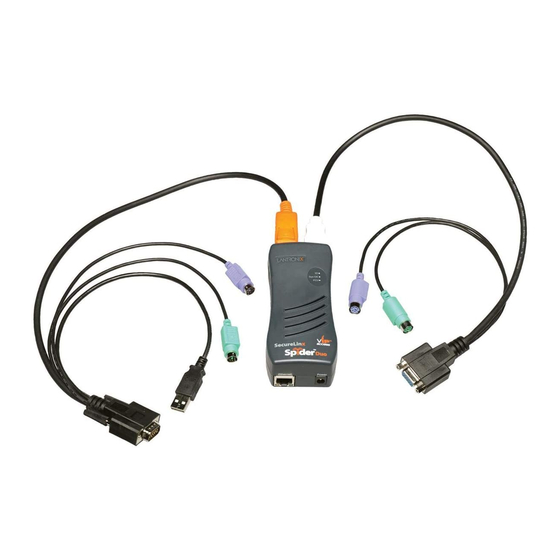
Features The Spider device is unique in that it is low-enough in power consumption to be powered from the attached server. The color-coded cable plugs for the keyboard, mouse, USB port and video are designed to plug directly into the target server. An optional external AC/DC power supply is available. -
Page 15: Functionality
The Spider device also uses KVM console to accept keystrokes and mouse movements on the user system; recognizes those intended for the target computer; transmits the keystrokes and mouse movements;... -
Page 16: Technical Specifications
User/Group management with permissions control Configurable port numbers (HTTPS, Telnet, SSH) Selective disable of Telnet/SSH Secure encryption of keyboard, mouse, and video data AES used as cipher for SSH/SSL communications Spider™ and SpiderDuo® KVM-over-IP Device User Guide... -
Page 17: Spiderduo Overview
Technical Specifications Features SpiderDuo provides secure, remote KVM and over-IP capabilities as well as transparent local access. Coupled with the optional single port power control unit (PCU), remote users can also Spider™ and SpiderDuo® KVM-over-IP Device User Guide... -
Page 18: Functionality
System Configuration and Cables shows a SpiderDuo system configuration, shows the PS/2 cable dimensions, Figure 2-4 Figure 2-5 Figure 2-6 shows the USB cable dimensions. Spider™ and SpiderDuo® KVM-over-IP Device User Guide... -
Page 19: Figure 2-4 Spiderduo System Configuration
2: Overview Figure 2-4 SpiderDuo System Configuration shows the PS/2 cable dimensions. Figure 2-5 Figure 2-5 SpiderDuo PS/2 Cable Dimensions Spider™ and SpiderDuo® KVM-over-IP Device User Guide... -
Page 20: Figure 2-6 Spiderduo Usb Cable Dimensions
Figure 2-6 SpiderDuo USB Cable Dimensions Note: The PS/2 cables and USB cables cannot be mixed and matched with each other due to the unique properties of each. Use the cables that come with your SpiderDuo. Spider™ and SpiderDuo® KVM-over-IP Device User Guide... -
Page 21: Technical Specifications
13.2 x 5.8 x 3.6 cm (5.2 x 2.3 x 1.4 in) (See Figure 2-5 (PS/2) and Figure 2-6 (USB) for cable dimensions.) Weight USB: 269g (9.50 oz) PS/2: 278g (9.80 oz) Shipping Weight 1.5 kg (3.3 lbs) Spider™ and SpiderDuo® KVM-over-IP Device User Guide... -
Page 22: Product Information Label
2: Overview Product Information Label The Product Information Label on the back of the Spider family units contains the following information: Part Number Product Revision Country of Manufacturing Origin Serial Number MAC Address Manufacturing Date Code ... -
Page 23: 3: Installing The Spider Device
Installing the Spider Device This chapter describes how to install the Lantronix Spider KVM-over-IP device. It contains the following sections: Package Contents Installing the Spider Target Computer Setup Client Server Setup Network Environment Spider Power ... -
Page 24: Figure 3-1 Spider Rs-232 Serial Port And Pinouts
Ethernet connection to access the administration user interface. Tag each Spider device with its IP address or write it on the serial number label on the bottom. -
Page 25: Figure 3-3 Spider Login Window
3: Installing the Spider Device bits, no parity, 1 stop bit, no flow control. Plug the power adapter into the Spider’s power connector. 3. Plug the Spider video, USB, and PS/2 keyboard and mouse cables into the target computer. The Spider device boots. -
Page 26: Target Computer Setup
Video Resolutions and Refresh Rates Configuration The Spider device recognizes video resolutions on the target computer up to a maximum of 1600 x 1200 at 60 Hz. For the complete list of supported video resolutions and refresh rates, see Appendix B: Supported Resolutions and Refresh Rates. -
Page 27: Mouse-To-Cursor Synchronization
2. Select Control Panel > Display > Settings > Advanced > Monitor. Modify the screen refresh rate. Because the server video card is driving the Spider device and not a monitor, a refresh rate higher than 60 Hz has no effect. -
Page 28: Telnet/Ssh Connections To Serial Ports
The serial port must be put in passthrough mode with the appropriate connection parameters and cabling, with Telnet and/or SSH access allowed. The default settings are 9600 bps, 8 data bits, 1 stop bit, no parity, and no flow control. The pinout of the included Spider cables match a standard DB9 COM port. -
Page 29: Network Environment
Pwr1 indicates that power is available only on the first USB port. Pwr2 indicates that power is available on the second USB port or the PS/2 port. When both LEDs are lit, the Spider device is powered and can boot. -
Page 30: 4: Installing The Spiderduo Device
Installing the SpiderDuo Device This chapter describes how to install the Lantronix SpiderDuo device. It contains the following sections: Package Contents Installing the SpiderDuo Target Computer Setup Client Server Setup Network Environment PCU Power ... -
Page 31: Installing The Spiderduo
The blue LED SysOK lluminates and flashes to indicate that the SpiderDuo device is booting up. Bootup completes within approximately one minute. The SysOK LED stops flashing and remains illuminated. Connections for video, USB, and keyboard/mouse are integrated into the SpiderDuo device. Spider™ and SpiderDuo® KVM-over-IP Device User Guide... -
Page 32: Figure 4-2 Spiderduo Local Kvm, Usb, Computer Input And Serial Ports
Figure 4-4. Figure 4-4 SpiderDuo Login Window 6. To change the default IP auto-configuration settings, type config and press Enter. At the IP configuration prompt, follow the prompts as shown in Figure 4-5. Spider™ and SpiderDuo® KVM-over-IP Device User Guide... -
Page 33: Target Computer Setup
Telnet/SSH connections match the Spider device; and, that the cable connections are correct. Each of these items are discussed in more detail in the following: Video Resolutions and Refresh Rates Configuration ... -
Page 34: Video Resolutions And Refresh Rates Configuration
There are no restrictions on the mouse settings of the client systems and no special care must be taken when setting mouse parameters of target servers for USB mice. The PS/2 interface performance (tracking) and synchronization can be optimized by removing any special acceleration or nonlinear ballistics. Spider™ and SpiderDuo® KVM-over-IP Device User Guide... -
Page 35: Telnet/Ssh Connections To Serial Ports
3. Turn on the SpiderDuo first and wait for the SpiderDuo to boot up completely. The SysOK LED will be on steady. 4. Turn on the PC. Client Server Setup Two mechanisms provide the monitoring of client servers that are connected through the Spider device: platform-dependent management and platform-independent management. Spider™ and SpiderDuo® KVM-over-IP Device User Guide... -
Page 36: Network Environment
Platform-dependent management—Spider View software is a standalone Windows 10 or later application that locates, manages, and accesses multiple Spider devices in an integrated view. Spider View application requires ActiveX controls enabled. Refer to the Spider View User Guide at http://www.lantronix.com/support/documentation.html for instructions on installation and operation of Spider View software. -
Page 37: Pcu Power
2. Connect the RJ45 cable from the PCU to the SpiderDuo serial port. 3. Connect the power input plug to AC power. Green LED = PCU ON (AC power pass- through), Blue LED = Sys OK. Spider™ and SpiderDuo® KVM-over-IP Device User Guide... - Page 38 4: Installing the SpiderDuo Device Warning: AC power passes through by default if the RJ45 cable is disconnected from the PCU. The SpiderDuo device gets its power from an external DC supply. Replacement power supplies are available. Spider™ and SpiderDuo® KVM-over-IP Device User Guide...
-
Page 39: 5: Web Browser Access
Accessing the KVM Console Perform the following steps to use a web browser. 1. Access the Spider or SpiderDuo device over the network by using a web browser by entering https://<ipaddress> (for a secure SSL connection). The browser must accept cookies for login. -
Page 40: 6: Remote System Control
Remote Console window, mouse movements and keystrokes are transmitted to a remote computer. The title bar of the window shows the IP address of the Spider device or SpiderDuo (useful when multiple windows are open on the client system). -
Page 41: Toolbar
The Screen Display Adjustments toolbar contains buttons that can be used to enter full-screen mode, reset the remote console screen size, maximize the console screen size within the browser window, and close the console screen Spider™ and SpiderDuo® KVM-over-IP Device User Guide... -
Page 42: Basic Remote Console Operation
(with a minor lag due to network latency). Windows may be opened, applications run, settings changed, maintenance functions performed, even system reboots performed. Powering down the target computer results in powering down the Spider device or SpiderDuo unless the redundant supply is used. -
Page 43: Auto Video Adjustment
RS-232 port. 1. From the client system, use a Telnet or SSH utility to connect to the IP address of the Spider device, at the assigned Telnet or SSH TCP port number. Or, log in to the Spider web UI and click the Terminal button at the top of the page. -
Page 44: Terminal Console Use
Terminal Console Use When using the Terminal Console, the Spider device opens a window on the client system that provides direct access to the Spider CLI. This eliminates the need to have a Telnet or SSH utility running on the client system. -
Page 45: 7: Interfaces
Network Miscellaneous Settings—Enables ports and Telnet/SSH access. To configure network settings, perform the following steps. (Alternately, the network settings can be modified via the Spider console port CLI.) 1. Click Interfaces > Network. shows the page that displays. Figure 7-1... -
Page 46: Network Basic Settings
Select DHCP to fetch network settings from the appropriate type of server. Select NONE for a fixed IP address. Host name DHCP servers can register a name for this Spider device to assist in finding th a short host name or a fully qualified it, or you can configure it wi domain name. -
Page 47: Lan Interface Settings
Disable Setup Protocol The Spider View application and KVM Search use a special protocol to locate and set up Spider device IP addresses. As a security measure you may wish to disable this protocol when deploying Spider devices. If the protocol is disabled, the Spider device network will not find the Spider device. -
Page 48: Serial Port Settings
After using the serial port to set up the network parameters, you can configure the serial port for other uses such as enabling command line interactions or controlling a connected peripheral device. If you want to access a console port remotely through the Spider device, SSH and Telnet passthrough is available. -
Page 49: Kvm Console Settings
Spider View User Guide for further information. The way in which the Spider device transmits video data back to the client system can be tailored for the type of network connection. On a LAN where bandwidth is not an issue, compression is not required and the speed of updates can be maximized. -
Page 50: Kvm Console Settings
Use the radio buttons to select the video transfer mode. The default selection is MJPEG/HTTP. Note: Spider API requires that the Video mode be set to MJPEG/HTTP. H.264/WebRTC is not supported with Spider API. Spider™ and SpiderDuo® KVM-over-IP Device User Guide... -
Page 51: Miscellaneous Kvm Console Settings
Button Keys may be defined for each user. 3. Click Save to save settings. Keyboard/Mouse To modify the keyboard and mouse settings, perform the following steps. 1. Click Interfaces > Keyboard/Mouse. The Keyboard/Mouse Settings page displays. Spider™ and SpiderDuo® KVM-over-IP Device User Guide... -
Page 52: Keyboard/Mouse Settings
In the default mode, Auto, the Spider device attempts to determine whether the attached computer supports a USB keyboard/mouse. If it does, that interface gets activated. If it does not, the Spider device falls back to PS/2. If you have a USB model Spider device and the attached computer does not support USB, the system will be view only. - Page 53 When using relative mode, the browser will exclusively capture your mouse when you click on the stream window in Spider once. When you press Esc, the browser releases the mouse. 3. Click Save to save settings.
-
Page 54: 8: User Accounts
RADIUS or LDAP to determine if a given user may log in. In both of these cases, the user name must be defined on the Spider device as a local user where it has its permissions assigned. -
Page 55: User And Group Management
You must be logged in under a user name that has permissions for User/Group Management to access this page. The Spider device supports a maximum of 60 configured users. When defining a user, make sure the group to which the user will belong has already been created. -
Page 56: User Management
2. Do one of the following: a. Click Create to add the new user. b. Click Modify to change an existing user. c. Click Copy to create a new user based on the selected existing user. Spider™ and SpiderDuo® KVM-over-IP Device User Guide... -
Page 57: Group Management
To modify user permissions, perform the following steps. 1. Click User Accounts > Permissions. The User/Group Permissions page displays. Figure 8-3 User Permissions Page 2. From the drop-down menu, select Group to configure: Spider™ and SpiderDuo® KVM-over-IP Device User Guide... -
Page 58: Remote Authentication
Click Reset to restore original settings. Remote Authentication If the authentication settings have been set to Local Authentication (the default), the Spider device uses its own database to perform authentication. If one of the remote authentication protocols is selected, the Spider device communicates with a remote server to authenticate user passwords. -
Page 59: Ldap
Directory or generic LDAP server for user authentication. The user profile must be set up in the local database as described in Local User Management, but no password is stored locally. When a user attempts to log in, the Spider device contacts the specified LDAP server, which either approves or denies access. -
Page 60: Radius
When RADIUS is selected, the Spider device communicates with a RADIUS server for user authentication; up to two RADIUS server entries can be created. To access a Spider device set up for RADIUS, log in with a name and password. The Spider device contacts the RADIUS server for authentication and, if approved, the Spider device uses the locally stored user profile. -
Page 61: 9: Services
Date/Time The Spider device contains an internal real time clock that maintains a basic date and time after being set. The clock, however, will reset if the unit loses power. If an accurate date and time are critical, the Spider device supports synchronization with Network Time Protocol servers. Internally, the date and time are only used to timestamp events in the log and for the inactivity timeout. -
Page 62: Security
User Specified Time Manually input the current date and time. The Spider device keeps time as long as power is applied. It has an internal calendar, but does not know about daylight savings time and requires resetting twice a year. The internal clock accuracy is ±30 ppm. -
Page 63: Login Limitations
Upon leaving the factory this certificate and the underlying secret key is the same for all Spider devices and will not match the network configuration where it is installed. The certificate’s underlying secret key is also used for securing the TLS handshake. -
Page 64: Figure 9-4 Certificate Signing Request Page
Description Common name The network name of the Spider device once it is installed in the user’s network (usually the fully qualified domain name). It is identical to the name that is used to access the Spider device with a web browser without the prefix http://. -
Page 65: Figure 9-5 Certificate Signing Request (Created)
4. Click Upload to upload the certificate from the client computer to the Spider device. The Spider device now has its own certificate used for identifying itself to its clients. Note that the device must be rebooted for the new SSL certificate to take effect. -
Page 66: Event Log
The Event Log maintains a list of significant events locally. Alternatively it can use an NFS log file, SMTP email, or SNMP to distribute event information on the network. The Spider device monitors five classes of events with the logging of each enabled or disabled. -
Page 67: Event Log Assignments
3. Click Save to save settings. SNMP The Spider device has an internal SNMP agent that has various objects accessible in its MIB. It also can generate traps based on events. The Spider device permits enabling or disabling the SNMP agent, input read and write communities, location information, contact information, and viewing the MIB. -
Page 68: Figure 9-7 Snmp Settings Page
2. Modify the following fields. Field Description Enable SNMP Agent Click the checkbox to enable the Spider device SNMP agent, and enter the system location and the contact name for the system. Use SNMPv3 Select to use SNMPv3 (rather than SNMPv1)and enter the following: Encrypt With: Select whether to tenable encryption with Data Encryption ... -
Page 69: Kvm Search
9: Services KVM Search The KVM Search option enables you to view the properties of other Spider devices on the network. The following items display: IP address Hostname Direct KVM Preview Terminal Telnet ... -
Page 70: Consoleflow
A Spider device requires a unique Device ID to communicate with the ConsoleFlow portal. The ID is viewable in the ConsoleFlow settings. If a device is not already pre-configured with the ID, the ID must be provisioned using Lantronix Provisioning Manager (LPM). -
Page 71: Client Settings
Long description that is displayed in the ConsoleFlow server UI. Device ID The unique device identifier. The ID is 32 alphanumeric characters. The ID may be provisioned using Lantronix Provision Manager (LPM). Contact Lantronix Tech Support for more information on LPM. View-only field. Displays the serial number. -
Page 72: 10: Maintenance
Unit Reset Device Status The Device Status page contains a table with information about the Spider device’s hardware and firmware. This information is useful if technical support is required. To view device information, perform the following steps. >... -
Page 73: Configuration/Factory Defaults
System Identifier Check the box to turn the ID indicator on and off. Each Spider device has an orange LED that can be lit by remote control. By default the LED is off, and when you clear the checkbox, the LED gets turned on. - Page 74 10: Maintenance Field Description Configuration Restore To return the Spider device settings to a previously saved configuration: Click the Choose File button. You can then browse to and select the saved configuration file. In the Preserve Following Settings: field, click the Network Basic ...
-
Page 75: Update Firmware
10: Maintenance Update Firmware Many of the functions and features of the Spider device are implemented in firmware and capable of field upgrades. The latest firmware may be found at www.lantronix.com. The firmware file is approximately 200 Mbytes in size and has a .tgz suffix. -
Page 76: View Event Log
To view the current event log, perform the following steps. 1. Click Maintenance > Event Log. The Event Log page displays. Figure 10-5 Event Log Page 2. Navigate between logs by clicking Prev and Next. Spider™ and SpiderDuo® KVM-over-IP Device User Guide... -
Page 77: Unit Reset
10: Maintenance Unit Reset In general, the Spider device requires a reset when implementing a firmware update. In the event of an abnormal operation, a number of subsystems may be reset without resetting the entire Spider device. To reset the Spider device, perform the following steps. -
Page 78: 11: Command Reference
For example, if you saved a device group name in mixed case, you must enter it in mixed case; if you saved it in lowercase, you must enter it in lowercase. Square brackets [ ]—Indicate optional parameters. Spider™ and SpiderDuo® KVM-over-IP Device User Guide... -
Page 79: Command Help
20), the "Type more to see the next page" message displays. To display the next page, type more and press Enter. You can override the number of lines (or disable the feature altogether) with the set cli command. To clear an IP address, type 0.0.0.0. Spider™ and SpiderDuo® KVM-over-IP Device User Guide... -
Page 80: Admin Commands
<Config Params to Preserve> is a comma separated list of current configuration parameters to retain after the config restore or factorydefaults: nt - Network Basic vp. Description Restores the Spider configuration and device database settings to factory defaults. Note: The unit reboots after this command. All current settings are lost. -
Page 81: Consoleflow Commands
Displays firmware version information. ConsoleFlow Commands set cflow client Syntax set cflow client <enable|disable> Description Configure interaction with ConsoleFlow management server. set cflow statusinterval Syntax set cflow statusinterval <1-60 minutes> Description Set interval between status updates. Spider™ and SpiderDuo® KVM-over-IP Device User Guide... - Page 82 Syntax set cflow id Description Set the device ID. set cflow key Syntax set cflow key Description Set the device key. show cflow Syntax show cflow Description Show ConsoleFlow settings and status. Spider™ and SpiderDuo® KVM-over-IP Device User Guide...
-
Page 83: Date/Time Commands
+/-0h, +1h, +2h, +3h, +4h, +5h, +6h, +7h, +8h, +9h, +10h, +11h, +12h Note: Select only one offset as shown above. Description Sets the date and time or UTC offset. show datetime Syntax show datetime Description Shows the date/time and UTC offset. Spider™ and SpiderDuo® KVM-over-IP Device User Guide... -
Page 84: Diagnostic Commands
Displays debugging information for internal KVM processes. diag ping Syntax diag ping <IPV4 Address> | ping6 <IPV6 Address> Description Verifies if the Spider or SpiderDuo device can reach a host over the network. History Commands set history clear Syntax set history clear Description Clears the CLI command history. -
Page 85: Log Commands
To clear IPV4 addresses, set ipv4 address to “0.0.0.0”.To clear IPV6 address, set ipv6 address to “::” or “::/128”. set network misc Syntax set network misc <parameters> Parameters httpsport <TCP Port> telnet <enable/disable> telnetport <TCP Port> setupprotocol <enable/disable> ssh <enable/disable> sshport <TCP Port> Spider™ and SpiderDuo® KVM-over-IP Device User Guide... - Page 86 Syntax show network basic Description Displays basic network parameters. show network misc Syntax show network misc Description Displays network miscellaneous parameters. show network interface Syntax show network interface Description Displays network interfaces. Spider™ and SpiderDuo® KVM-over-IP Device User Guide...
-
Page 87: Release Commands
Syntax connect serial Description Connects the Spider device to a device serial port. Note: To connect to a serial port, put the serial port in passthrough mode on the web interface. Spider™ and SpiderDuo® KVM-over-IP Device User Guide... -
Page 88: Sysconfig Commands
Displays serial port settings. Sysconfig Commands show sysconfig Syntax show sysconfig Description Displays a report of parameters with firmware version, serial number, basic network settings, security settings, user/group information, and basic system settings.device. Spider™ and SpiderDuo® KVM-over-IP Device User Guide... -
Page 89: User Commands
<User Login> Description Sets user password. show user name Syntax show user name [user <User Login>] Description Displays user names. show user Syntax show user [index <Index Number>] Description Displays index numbers. Spider™ and SpiderDuo® KVM-over-IP Device User Guide... -
Page 90: User Group Commands
[Group of 'None (username)'] indicates that user was created without defining a group, and permissions will be assigned specifically to the user. In order to specify a group of this type "None", use '@username' as the name parameter. Spider™ and SpiderDuo® KVM-over-IP Device User Guide... -
Page 91: Group Permissions
po: Power Control sn: SNMP Settings sa: SSH/Telnet Access sm: SSL Certificate Management sl: Security/Log/Authentication ss: Serial Settings us: USB Settings um: User/Group Management Spider™ and SpiderDuo® KVM-over-IP Device User Guide... -
Page 92: Appendix A: Troubleshooting
A firewall may prevent access to the Remote Console (TCP port 443). If there is a proxy server between the Spider device and your host, then you may not be able to transfer the video data using RFB. Check the settings of the Spider device and choose a different server port used for RFB transfer. - Page 93 Use the serial interface with a terminal emulator program set to 9600 or 115200, 8 bit characters, No parity, 1 Stop bit, and No flow control. Within 2 seconds of booting the Spider device, press the Esc key a few times to get a =>prompt. Type defaults at the => prompt.
-
Page 94: Appendix B: Supported Resolutions And Refresh Rates
The table below lists the supported resolution and refresh rates for video. Table B-1 Supported Video Resolutions and Refresh Rates Resolution (x,y) Refresh Rates (Hz) 640x480 800x600 60, 75 1024x768 60, 75 1152x864 1280x800 1280x960 1280x1024 60, 75 1440x900 1600x1200 Spider™ and SpiderDuo® KVM-over-IP Device User Guide... -
Page 95: Appendix C: Mounting Bracket Kit
Two (2) 1/2” long, #10-32 stainless steel Phillips-head screws Once the mounting bracket is installed in the rack, the Spider or SpiderDuo device can be easily and securely attached to the elevated mounting posts and easily removed if necessary. - Page 96 083-015-R Mounting Bracket Kit for Spider device The bracket kit is included in the box with the Spider or SpiderDuo device that ship with v2.0 firmware and later. For earlier shipments, the mounting kit is sold separately. For additional information contact Lantronix Sales at 800-422-7055, or for technical questions contact Lantronix Technical Support at http://www.lantronix.com/support.
-
Page 97: Appendix D: Technical Support
Target computer interface (PS/2 or USB) and video format Status of the unit when the problem occurred (please try to include information on user and network activity at the time of the problem) Spider™ and SpiderDuo® KVM-over-IP Device User Guide... -
Page 98: Appendix E: Compliance
Caution: Risk of explosion if battery is replaced by an incorrect type. Dispose of used batteries according to the instructions. Spider™ and SpiderDuo® KVM-over-IP Device User Guide... - Page 99 Appendix E: Compliance RoHS Notice All Lantronix products in the following families are China RoHS-compliant and free of the following hazardous substances and elements: Lead (Pb) Mercury (Hg) Polybrominated biphenyls (PBB) Cadmium (Cd) Hexavalent Chromium (Cr (VI)) Polybrominated diphenyl ethers (PBDE) ...
Need help?
Do you have a question about the Spider and is the answer not in the manual?
Questions and answers