
Subscribe to Our Youtube Channel
Related Manuals for ADLINK Technology HSL-4XMO


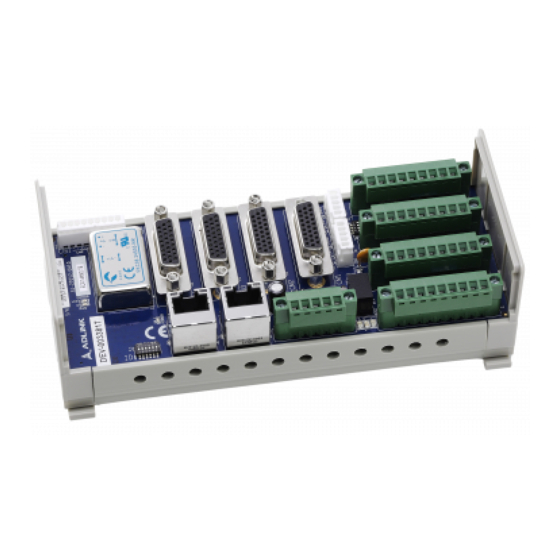
Summary of Contents for ADLINK Technology HSL-4XMO
- Page 1 HSL-4XMO High Speed Link 4-Axis Motion Control Module User’s Manual Manual Rev. 2.00 Revision Date: November 19, 2004 Part No: 50-1I001-200 Advance Technologies; Automate the World.
- Page 2 Copyright 2004 ADLINK TECHNOLOGY INC. All Rights Reserved. The information in this document is subject to change without prior notice in order to improve reliability, design, and function and does not represent a commitment on the part of the manufacturer.
- Page 3 Getting Service from ADLINK Customer Satisfaction is top priority for ADLINK Technology Inc. Please contact us should you require any service or assistance. ADLINK TECHNOLOGY INC. Web Site: http://www.adlinktech.com Sales & Service: Service@adlinktech.com TEL: +886-2-82265877 FAX: +886-2-82265717 Address: 9F, No. 166, Jian Yi Road, Chungho City,...
-
Page 5: Table Of Contents
Table of Contents Table of Contents..............i List of Tables................v List of Figures ............... vii 1 Introduction ................ 1 Features................2 Specifications............... 3 Supported Software ............. 5 Programming Library ............5 Motion Creator on LinkMaster Utility ....... 5 2 Installation ................7 Package Contents ............... - Page 6 Change Speed on the Fly ..........70 Change Position on the Fly ........... 76 4.12 Position Compare .............. 78 Comparators of the HSL-4XMO ........78 Position Compare ............79 4.13 Backlash Compensator and Vibration Suppression... 82 4.14 Software Limit Function ............. 83 4.15 Point Table Management...........
- Page 7 Motion Creator Form Introducing........87 Main Menu ..............87 Interface I/O Configuration Menu ........88 Pulse IO Configuration Menu ........89 Operation Menu ............91 6 Appendix ................99 HSL-4XMO Commmand Executuion Time ......99 Warranty Policy..............101 Table of Contents...
-
Page 8: List Of Tables
Table 4-5: Multiple HSL-4XMO Operations ......69 Table 4-6: HSL_M_v_change() Example ......... 73 Table 4-7: HSL_M_p_change() Constraints ......78 Table 4-8: HSL-4XMO Comparators ........78 Table 6-1: Commmand Executuion Classifications ....99 Table 6-2: HSL-4XMO Commmand Executuion Times ... 99 List of Tables... - Page 9 List of Figures Figure 2-1: HSL-4XMO-CG-N/P Mechanical Drawing ....8 Figure 2-2: S1: Switch Setting for HSL Slave ID......11 Figure 2-3: JP1: HSL Communication Speed Selection Jumper Set- ting................11 Figure 2-4: P2-3: HSL Full Duplex/Half Duplex Jumper Setting 12 Figure 2-5: JP4: HSL Termination Resistor Jumper Setting ..
- Page 10 Figure 4-15: Velocity and Acceleration Time A ......47 Figure 4-16: Velocity and Acceleration Time B ......48 Figure 4-17: home_mode=0............50 Figure 4-18: home_mode=1............51 Figure 4-19: home_mode=3............51 Figure 4-20: home_mode=4............52 Figure 4-21: home_mode=5............53 Figure 4-22: home_mode=6............53 Figure 4-23: home_mode=7............
-
Page 11: Introduction
Introduction The HSL-4XMO is a 4-axis motion controller module for HSL sys- tem. It can generate high frequency pulses (6.55MHz) to drive stepper or servomotors. As a motion controller, it can provide 2- axis circular interpolation, 4-axis linear interpolation, or continuous interpolation for continual velocity. -
Page 12: Features
1.1 Features High Speed Link (HSL) protocol compatible 3M/6M/12M data transfer rate selectable Support dual and half duplex modes On board DSP (TMS320C6711) 4-axis stepper or servo motor control by pulse signal com- mand Maximum pulse output frequency: 6.55 MPPS Pulse output types: OUT/DIR (single pulse), CW/CCW (dual pulse) Support up to 63 axes in one HSL network... -
Page 13: Specifications
User-friendly function libraries and utilities for DOS and Windows 9x/NT/2000/XP. Also supported under Linux 1.2 Specifications Command Response Time Half Duplex: 240us for one module under 6Mhz data trans- fer rate Full Duplex: 240us for two modules under 6Mhz data trans- fer rate Motion Control Maximum controllable axes in one module: 4... - Page 14 Digital Input Sink or source type can be selected via ICOM Switching capability: 10K Hz Input voltage range: Logic H: 14.4~24V Logic L: 0~5V Input resistor: 4.7K? @ 0.5W Isolated voltage: 500 Vrms Digital Output Output type: Open-collector (PC3H7C) Sink Current: 4 mA max. Switching capability: 10 KHz @ 24V, load = 4.7 K? Isolated voltage: 500 Vrms General Purpose Output...
-
Page 15: Supported Software
1.3 Supported Software Programming Library The Library supports Borland C/C++ (Version: 3.1) and Windows 95/98/NT/2000/XP. These function libraries are shipped with the module. Users can check ADLINK website for latest update. This module supports DOS/Windows 98/NT/2000/XP. For other OS, please contact the local vendors. Motion Creator on LinkMaster Utility This Windows-based utility is used to setup cards, motors, and systems. - Page 16 Introduction...
-
Page 17: Installation
Installation This chapter describes how to install the HSL-4XMO series. Please follow these steps below: Check what you have (section 2.1) Check the PCB (section 2.2) Install the hardware (section 2.3) Install the software driver (section 2.4) Understanding the I/O signal connections (chapter 3) and... -
Page 18: Pin Assignments And Jumper Settings
2.2 Pin Assignments and Jumper Settings Figure 2-1: HSL-4XMO-CG-N/P Mechanical Drawing CN1: External Power Input Connector (+24V) CN2: Digital Input Common and Emergency Input Pin HS1-2: HSL Communication Signal Connector (RJ45) HS3: HSL Communication Signal Connector (WAGO) CM1-4: Servo Interface Signal Connector... -
Page 19: Table 2-1: Cn1 Pin Assignments: External Power Input
JP4: HSL Termination Resistor Jumper CN1 Pin Name Description EGND External power ground ± E24V +24VDC 5% External power supply Table 2-1: CN1 Pin Assignments: External Power Input CN2 Pin Name Description ICOM Mechanical Input and General Input Common Emergency Stop Input Table 2-2: CN2 Pin Assignments: Emergency Input and General Input Common Note:... -
Page 20: Table 2-5: Cm1-Cm4 Pin Assignments: Servo Interface
No. Name Function No. Name Function Encoder A-phase (+) Encoder A-phase (-) Encoder B-phase (+) Encoder B-phase (-) Encoder Z-phase (+) Encoder Z-phase (-) PGND Ground of pulse I/O signals PGND Ground of pulse I/O signals OUT+ Pulse signal (+) OUT- Pulse signal (-) DIR+... -
Page 21: Figure 2-2: S1: Switch Setting For Hsl Slave Id
Figure 2-2: S1: Switch Setting for HSL Slave ID Note: Each HSL-4XMO occupies 4 HSL IDs. If using half duplex mode, the occupied ID will be continuously from this setting. For example, if you set the ID=1 then the occupied IDs will be 1, 2, 3, 4. -
Page 22: Figure 2-4: P2-3: Hsl Full Duplex/Half Duplex Jumper Setting
Figure 2-4: P2-3: HSL Full Duplex/Half Duplex Jumper Setting Figure 2-5: JP4: HSL Termination Resistor Jumper Setting Installation... -
Page 23: Signal Connections
Signal connections of all I/O’s are described in this chapter. Refer to the contents of this chapter before wiring any cables between the HSL-4XMO and any motor drivers. This chapter contains the following sections: Section 3.1 Pulse Output Signals OUT and DIR Section 3.2 Encoder Feedback Signals EA, EB and EZ... -
Page 24: Pulse Output Signals Out And Dir
3.1 Pulse Output Signals OUT and DIR There are 4 axis pulse output signals on the HSL-4XMO. For each axis, two pairs of OUT and DIR signals are used to transmit the pulse train and to indicate the direction. The OUT and DIR signals can also be programmed as CW and CCW signal pairs. -
Page 25: Figure 3-2: Non-Differential Type Wiring Example
Figure 3-2: Non-differential Type Wiring Example Warning: The sink current must not exceed 20mA or the 2631 will be damaged! Signal Connections... -
Page 26: Encoder Feedback Signals Ea, Eb And Ez
Connection to Line Driver Output To drive the HSL-4XMO encoder input, the driver output must pro- vide at least 3.5V across the differential pairs with at least 6mA driving capacity. The grounds of both sides must be tied together. -
Page 27: Table 3-1: Encoder Power / External Resistor
To connect with an open collector output, an external power sup- ply is necessary. Some motor drivers can provide the power source. The connection between the HSL-4XMO, encoder, and the power supply is shown in the diagram below. Note that an external current limiting resistor R is necessary to protect the HSL- 4XMO input circuit. -
Page 28: Origin Signal Org
Figure 3-5: Connection to Open Collector Output For more operation information on the encoder feedback signals, refer to section 4.9. 3.3 Origin Signal ORG The origin signals (ORG1-ORG4) are used as input signals for the origin of the mechanism. The input circuit of the ORG signals is shown below. Usually, a limit switch is used to indicate the origin on one axis. -
Page 29: End-Limit Signals Pel And Mel
and DIR). For detailed operations of the ORG signal, refer to sec- tion 4.8. 3.4 End-Limit Signals PEL and MEL There are two end-limit signals PEL and MEL for each axis. PEL indicates the end limit signal is in the plus direction and MEL indi- cates the end limit signal is in the minus direction. -
Page 30: In-Position Signal Inp
Figure 3-8: Ramping-down & Position Latch 3.6 In-position Signal INP The in-position signal INP from a servo motor driver indicates its deviation error. If there is no deviation error then the servo’s posi- tion indicates zero. The input circuit of the INP signals is shown in the diagram below: Figure 3-9: In-position Signal INP The in-position signal is usually generated by the servomotor... -
Page 31: Alarm Signal Alm
3.7 Alarm Signal ALM The alarm signal ALM is used to indicate the alarm status from the servo driver. The input alarm circuit is shown below. The ALM sig- nal usually is generated by the servomotor driver and is ordinarily an open collector output signal. -
Page 32: General-Purpose Signal Svon
Figure 3-11: Deviation Counter Clear Signal (ERC) 3.9 General-purpose Signal SVON The SVON signal can be used as a servomotor-on control or gen- eral- purposed output signal. The output circuit for the SVON sig- nal is shown below: Figure 3-12: General-purpose Signal SVON 3.10 General-purpose Signal RDY The RDY signals can be used as motor driver ready input or gen- eral purpose input signals. -
Page 33: Position Compare Output Cmp
Figure 3-13: General-purpose Signal RDY 3.11 Position Compare Output CMP The HSL-4XMO provides 4 comparison output channels. The comparison output channel will generate a pulse signal when the encoder counter reaches a pre-set value set by the user. The following wiring diagram is of the CMP signals:... -
Page 34: General-Purpose Input
The type of switch can be configured by software. Figure 3-15: Emergency Stop Input EMG 3.13 General-purpose Input HSL-4XMO has 4 opto-isolated digital inputs for general-purposed use. The following wiring diagrams are of these signals Figure 3-16: General-purpose Input 3.14 General-purpose Output HSL-4XMO has 4 opto-isolated digital outputs for general-pur- posed use. -
Page 35: Figure 3-17: Npn Type General Purpose Output
NPN type general purpose Output (available in –N modules): Figure 3-17: NPN Type General Purpose Output PNP type general purpose Output (available in –P modules): Figure 3-18: PNP Type General Purpose Output Signal Connections... - Page 36 Signal Connections...
-
Page 37: Operation Theory
Operation Theory 4.1 Communication Block Diagram Figure 4-1: Communication Block Diagram 4.2 Host Command Inside the HSL system, those remote modules communicate with each other with HSL network packets. Actually, users do not have to understand what the content of the packet is. Instead, we pro- vide many kinds of API functions for controlling this module. -
Page 38: Command Delivering Time
4.3 Command Delivering Time HSL-4XMO supports both full duplex and half duplex mode. In full duplex mode, one module occupies 4 HSL slave IDs by two ID number steps. For example, if the module start ID=1, then it occu- pies ID 1, 3, 5, 7. If having two slave modules, we suggest that the second ID can be set at 2. -
Page 39: Table 4-1: Base Scan Times
Figure 4-2: Single Command Timing The base scan time table is as follows, N is the range of total IDs. Half Duplex Full Duplex Maximum Length 120 us x N 60 us x N 400 meters 60 us x N 30 us x N 200 meters 30 us x N... -
Page 40: Command Dispatching In Dsp
4.4 Command Dispatching in DSP Command-dispatching task is executed by the DSP on the mod- ule. Once the DSP receives a new command, it will process this command within the time less than the HSL scan time. The dis- patching task includes the motion ASIC command, data download- ing command, point table command and script program downloading command. -
Page 41: The Role Of Dsp And Motion Asic
Pulse Command Output The HSL-4XMO uses pulse commands to control servo/stepper motors via the drivers. A pulse command consists of two signals: OUT and DIR. There are two command types: (1) single pulse out-... -
Page 42: Figure 4-4: Single Pulse Output Mode (Out/Dir Mode)
sents direction command of positive (+) or negative (-). This mode is most commonly used. The diagrams below show the output waveform. It is possible to set the polarity of the pulse chain. Figure 4-4: Single Pulse Output Mode (OUT/DIR Mode) Dual Pulse Output Mode (CW/CCW Mode) In this mode, the waveform of the OUT and DIR pins represent CW (clockwise) and CCW (counter clockwise) pulse output... -
Page 43: Velocity Mode Motion
Figure 4-5: Dual Pulse Output Mode (CW/CCW Mode) Relative Function: HSL_M_set_pls_outmode() Velocity Mode Motion This mode is used to operate a one-axis motor with Velocity mode motion. The output pulse accelerates from a starting velocity (StrVel) to a specified maximum velocity (MaxVel). The HSL_M_tv_move() function is used for constant linear accelera- tion while the HSL_M_sv_move() function is use for acceleration according to the S-curve. -
Page 44: Trapezoidal Motion
tions, tv_move or sv_move. The velocity profile is shown as fol- lows: Note: The v_change and stop functions can also be applied to Pre- set Mode or Home Mode (refer to 4.1). Figure 4-6: Velocity Mode Motion Relative Functions: HSL_M_tv_move() HSL_M_sv_move() HSL_M_v_change() HSL_M_sd_stop() -
Page 45: Figure 4-7: Trapezoidal Motion
Figure 4-7: Trapezoidal Motion There are 2 trapezoidal point-to-point functions supported by the HSL-4XMO. In the HSL_M_start_ta_move() function, the absolute target position must be given in units of pulses. The physical length or angle of one movement is dependent on the motor driver and mechanism (including the motor). - Page 46 The resolution of encoder is 2000 counts per phase. The maxi- mum rotating speed of motor is designed to be 3600 RPM. What is the maximum pulse command output frequency that you have to set on HSL-4XMO? Answer: MaxVel = 3600/60*2000*4 = 480000 PPS Multiplying by 4 is necessary because there are four states per AB phase (See Figures in Section 4.4).
-
Page 47: S-Curve Profile Motion
Figure 4-8: Encoder Diagram If this ratio is not set before issuing the start moving command, it will cause problems when running in “Absolute Mode” because the HSL-4XMO won’t recognize the actual absolute position during motion. Relative Functions: HSL_M_start_ta_move() HSL_M_start_tr_move() -
Page 48: Figure 4-9: S-Curve Profile Motion
There are several parameters that need to be set in order to make a S-curve move. They are: Pos: target position in absolute mode, in units of pulses Dist: moving distance in relative mode, in units of pulses StrVel: start velocity, in units of PPS MaxVel: maximum velocity, in units of PPS Tacc: time for acceleration (StrVel ->... -
Page 49: Figure 4-10: Automatic Velocity Decrease
velocity from (StrVel + VSacc) to (MaxVel - VSacc) constantly. The deceleration period is similar in fashion. Note: If user wants to disable the linear region, the VSacc/VSdec must be assigned “0” rather than “0.5” (MaxVel-StrVel). Remember that the VSacc/VSdec is in units of PPS and it should always keep in the range of [0 to (MaxVel - Strvel)/2 ], where “0”... -
Page 50: Linear Interpolation For 2-4 Axes
The Following table shows the differences between all single axis motion functions, including preset mode (both trapezoidal and S- curve motion) and constant velocity mode. Velocity Profile Trapezoidal S-Curve Relative Absolute HSL_M_tv_move ----------- ----------- HSL_M_sv_move ----------- ----------- HSL_M_v_change ----------- ----------- HSL_M_sd_stop ----------- ----------- HSL_M_emg_stop() -
Page 51: Figure 4-11: 2 Axes Linear Interpolation
Figure 4-11: 2 Axes Linear Interpolation ∆ ∆ The speed ratio along X-axis and Y-axis is ( Y), respectively, and the vector speed is: When calling 2-axis linear interpolation functions, the vector speed needs to define the start velocity, StrVel, and maximum velocity, MaxVel. -
Page 52: Figure 4-12: 3-Axis Linear Interpolation
– Absolute motion 3-Axis Linear Interpolation Any 3 of the 4 axes of the HSL-4XMO may perform 3-axis linear interpolation. As shown the figure below, 3-axis linear interpolation means to move the XYZ (if axes 0, 1, 2 are selected and assigned to be X, Y, Z respectively) position from P0 to P1, starting and stopping simultaneously. - Page 53 ∆ ∆ ∆ The speed ratio along X-axis, Y-axis, and Z-axis is ( respectively, and the vector speed is: When calling 3-axis linear interpolation functions, the vector speed is needed to define the start velocity, StrVel, and maximum veloc- ity, MaxVel. Both trapezoidal and S-curve profiles are available. Example: ∆...
-
Page 54: Circular Interpolation For 2 Axes
– Absolute motion Circular interpolation for 2 axes Any 2 of the 4 axes of the HSL-4XMO can perform circular interpo- lation. In the example below, circular interpolation means XY (if axes 0, 1 are selected and assigned to be X, Y respectively) axes simultaneously start from initial point, (0,0) and stop at end point,(1800,600). -
Page 55: Circular Interpolation With Acc/Dec Time
To specify a circular interpolation path, the following parameters must be clearly defined: Center point: The coordinate of the center of arc (In abso- lute mode) or the off_set distance to the center of arc (In rel- ative mode) End point: The coordinate of end point of arc (In absolute mode) or the off_set distance to center of arc (In relative mode) Direction: The moving direction, either CW or CCW. -
Page 56: Relationship Between Velocity And Acceleration Time
and Axis1, and also Axis3 (Axis0=x, Axis1=y, Axis2=z, Axis3=u). For the full lists of functions. To check if the board supports these functions use the HSL_M_version_info() function. If hardware information for the card returns a value with the 4th digit greater then 0, for example '1003', users can use this group of circular interpolation to perform S or T-curve speed profiles. -
Page 57: Figure 4-15: Velocity And Acceleration Time A
Figure 4-15: Velocity and Acceleration Time A How do users decide an optimum value for “OverVelocity” in the HSL_M_fix_speed_range() function? The HSL_M_verify_speed() function is provided to calculate such value. The inputs to this function are the start velocity, maximum velocity and over velocity values. -
Page 58: Figure 4-16: Velocity And Acceleration Time B
HSL_M_verify_speed(0,5000,&minAccT, &maxAccT,140000); The value miniAccT will be 0.000948sec and maxAccT will be 31.08sec. This minimum acceleration time meets the require- ments. So, the motion command can be changed to: HSL_M_fix_speed_range(AxisNo,140000); HSL_M_start_tr_move(AxisNo,5000,0,5000,0.001,0.0 01); Note: The return value of HSL_M_verify_speed() is the minimum velocity of motion command, it does not always equal to your start velocity setting. -
Page 59: Home Return Mode
HSL_M_unfix_speed_range() HSL_M_verify_speed() Home Return Mode In this mode, the HSL-4XMO is allowed to continuously output pulses until the condition to complete the home return is satisfied after writing the command HSL_M_home_move(). There are 13 home moving modes provided by the HSL-4XMO. The “home_mode”... -
Page 60: Figure 4-17: Home_Mode=0
target position “0” calling function HSL_M_reset_target_pos(). The following figures show the various home modes and the reset points, when the counter is cleared to “0.” home_mode=0: ORG -> Slow down -> Stop When SD (Ramp-down signal) is inactive. Figure 4-17: home_mode=0 home_mode=1: ORG ->... -
Page 61: Figure 4-18: Home_Mode=1
Figure 4-18: home_mode=1 home_mode=3: ORG -> EZ -> Slow down -> Stop Figure 4-19: home_mode=3 Operation Theory... -
Page 62: Figure 4-20: Home_Mode=4
home_mode=4: ORG -> Slow down -> Go back at FA speed -> EZ -> Stop Figure 4-20: home_mode=4 home_mode=5: ORG -> Slow down -> Go back ->? Accelerate to MaxVel -> EZ -> Slow down -> Stop Operation Theory... -
Page 63: Figure 4-21: Home_Mode=5
Figure 4-21: home_mode=5 home_mode=6: EL only Figure 4-22: home_mode=6 home_mode=7: EL -> Go back -> Stop on EZ signal Figure 4-23: home_mode=7 Operation Theory... -
Page 64: Figure 4-24: Home_Mode=8
home_mode=8: EL -> Go back -> Accelerate to MaxVel -> EZ - > Slow down -> Stop Figure 4-24: home_mode=8 home_mode=9: ORG -> Slow down -> Go back -> Stop at beginning edge of ORG Figure 4-25: home_mode=9 Operation Theory... -
Page 65: Figure 4-26: Home_Mode=10
home_mode=10: ORG -> EZ -> Slow down -> Go back -> Stop at beginning edge of EZ Figure 4-26: home_mode=10 home_mode=11: ORG -> Slow down -> Go back (backward) -> Accelerate to MaxVel -> EZ -> Slow down -> Go back again (forward) ->... -
Page 66: Figure 4-27: Home_Mode=11
Figure 4-27: home_mode=11 home_mode=12: EL -> Stop -> Go back (backward) -> Accel- erate to MaxVel -> EZ -> Slow down -> Go back again (for- ward) -> Stop at beginning edge of EZ Figure 4-28: home_mode=12 Operation Theory... -
Page 67: Figure 4-29: Home Search Example
Home Search Example (Home mode=1) Figure 4-29: Home Search Example Operation Theory... - Page 68 Moving Steps 1. Home searching start (-) 2. –EL touches, slow down and reverse moving (+) 3. ORG touches, slow down 4. Escape from ORG according to ORG offset 5. Start searching again (-) 6. ORG touches, slow down then using searching speed to escape ORG (+) 7.
-
Page 69: The Motor Driver Interface
4.7 The Motor Driver Interface The HSL-4XMO provides the INP, ALM, ERC, SVON, and RDY signals for a servomotor driver control interface. The INP and ALM are used for feedback of the servo driver status, ERC is used to reset the servo driver’s deviation counter under special conditions, VON is a general purpose output signal, and RDY is a general purpose input signal. -
Page 70: Alm
The signal immediately stops the HSL-4XMO from generat- ing any further pulses or stops it after deceleration. If the ALM sig- nal is in the ON status at the start of an operation, the HSL-4XMO will generate the INT signal and thus not generate any command pulses. -
Page 71: Svon And Rdy
Since the servomotor operates with some delay from the pulse generated from the HSL-4XMO, it continues to move until the deviation counter of the driver is zero even if the HSL-4XMO has stopped outputting pulses because of the ?EL signal or the com- pletion of home return. -
Page 72: The Limit Switch Interface And I/O Status
HSL-4XMO to stop automatically outputting pulses. If an SD signal is active during moving condi- tions, it will cause the HSL-4XMO to decelerate. If operating in a multi-axis mode, it automatically applies to all related axes. -
Page 73: Org
The latch function is used to capture values on all 4 counters (refer to section 4.4) at the instant the latch signal is activated. latched data read function HSL_M_get_latch_data(). The latch logic can be set by the func- tion HSL_M_set_ltc_logic(). Relative Functions: HSL_M_set_sd() HSL_M_get_io_status() -
Page 74: The Counters
Relative Functions: HSL_M_set_home_config(), HSL_M_home_move() 4.9 The Counters There are four counters for each axis of the HSL-4XMO. They are described in this section: Command position counter: counts the number of output pulses Feedback position counter: counts the number of input... -
Page 75: Feedback Position Counter
Relative Functions: HSL_M_set_command(), HSL_M_get_command(): Feedback Position Counter The HSL-4XMO has a 28-bit binary up/down counter managing the present position feedback for each axis. The counter counts signal inputs from the EA and EB pins. It accepts 2 kinds of pulse inputs: (1). Plus and minus pulse inputs (CW/CCW mode). -
Page 76: Figure 4-30: 90° Phase Difference Signals
motor. The up/down counter counts up when the phase of EA sig- nal leads the phase of EB signal. The following diagram shows the waveform. Figure 4-30: 90° Phase Difference Signals The index input (EZ) signals of the encoders are used as the “ZERO”... -
Page 77: Position Error Counter
It will add one count when the HSL-4XMO outputs one pulse and subtracts one count when the HSL-4XMO receives one pulse (from EA, EB). It is useful in detecting step-loses (stalls) in situations of a stepping motor when an encoder is applied. -
Page 78: Target Position Recorder
Target Position Recorder The target position recorder is used for providing target position information. For example, if the HSL-4XMO is operating in contin- uous motion with absolute mode, the target position lets the next absolute motion know the target position of previous one. -
Page 79: Multiple Hsl-4Xmo Operations
When multiple modules are used, the order of axes number is from low to high and each module takes four axis number. Table 4-5: Multiple HSL-4XMO Operations Example: To accelerate CM3 of module 2 from 0 to 10000pps in 0.5sec for... -
Page 80: Change Position Or Speed On The Fly
4.11 Change Position Or Speed On The Fly The HSL-4XMO provides the ability to change position or speed while an axis is moving. Changing speed/position on the fly means that the target speed/position can be altered after the motion has started. - Page 81 The first 4 functions can be used for changing speed during a sin- axis motion. Functions HSL_M_sd_stop() HSL_M_emg_stop() are used to decelerate the axis speed to “0.” HSL_M_fix_speed_range() necessary before HSL_M_v_change() function, and HSL_M_unfix_speed_range() releases speed range constrained HSL_M_fix_speed_range(). The function HSL_M_cmp_v_change() almost has the same func- tion as HSL_M_v_change(), except HSL_M_cmp_v_change() acts only when a general comparator comes into existence.
-
Page 82: Figure 4-32: Hsl_M_V_Change() Theory
Figure 4-32: HSL_M_v_change() Theory Constraints of HSL_M_v_change() In a single axis preset mode, there must be enough remaining pulses to reach the new velocity, else the HSL_M_v_change() will return an error and the velocity remains unchanged. Example: A trapezoidal relative motion is applied: HSL_M_start_tr_move(0,10000,0,1000,0.1,0.1). -
Page 83: Table 4-6: Hsl_M_V_Change() Example
NewVel (PPS) Tacc (Sec) Necessary remaining pulses OK / Error Acceleration Deceleration Total 5000 5000 3000 3125 6125 Error 10000 1106 50000 2550 2551 5101 Error HSL_M_v_change() Example Table 4-6: 1. To maximum velocity, function HSL_M_fix_speed_range() must be used in order for the function HSL_M_v_change() to work correctly. -
Page 84: Figure 4-34: Velocity Suggestions B
Figure 4-34: Velocity Suggestions B Example: There are 3 speed change sensors during an absolute move for 200000 pulses. Initial maximum speed is 10000pps. Change to 25000pps if Sensor 1 is touched. Change to 50000pps if Sensor 2 is touched. Change to 100000pps if Sensor 3 is touched. Then the code for this application and the resulting velocity profiles are shown below. -
Page 85: Figure 4-36: Velocity Profile Example
if((Sensor1==High) && (Sensor2==Low) && (Sensor3 == Low)) HSL_M_v_change(axis, 25000, 0.02); else if((Sensor1==Low) && (Sensor2==High) && (Sensor3 == Low)) HSL_M_v_change(axis, 50000, 0.02); else if((Sensor1==Low) && (Sensor2==Low) && (Sensor3 == High)) HSL_M_v_change(axis, 100000, 0.02); The information of the three sensors is acquired from another I/O card, and the resulting velocity profile from experiment is shown below: Figure 4-36: Velocity Profile Example... -
Page 86: Change Position On The Fly
Change Position on the Fly When operating in single-axis absolute pre-set motion, it is possi- ble to change the target position during moving by using the func- tion HSL_M_p_change(). Figure 4-37: Change Position on the Fly Theory of HSL_M_p_change(): HSL_M_p_change() applicable HSL_M_start_ta_move(), and HSL_M_start_sa_move() functions only. -
Page 87: Figure 4-38: Theory Of Hsl_M_P_Change()
2. Position change during the deceleration period is not allowed. 3. There must be enough distance between the new target position and current position where HSL_M_p_change() is executed because the HSL-4XMO needs enough space to finish deceleration. Example: A trapezoidal absolute motion is applied: HSL_M_start_ta_move(0,10000,0,1000,0.5,1). -
Page 88: Position Compare
CMP1~CMP4 are used as a comparison trigger. Comparators of the HSL-4XMO There are 5 comparators for each axis of the HSL-4XMO. Each comparator has its unique functionality. Below is a table for com- parison:... -
Page 89: Position Compare
(Only Axes 0 & 1) tion counter function (Trigger) HSL_M_build_compare_table HSL_M_set_auto_compare Table 4-8: HSL-4XMO Comparators Note: Only comparator 5 has the ability to trigger an output pulse via the CMP. Comparators 1 and 2 are used for soft limits. Refer to section 4.9. -
Page 90: Figure 4-39: Continuously Comparison With Trigger Output
Continuously Comparison with Trigger Output To compare multiple data continuously, functions for building com- parison tables are provided and are shown below: HSL_M_build_comp_function(AxisNo, Start, End, Interval) HSL_M_build_comp_table(AxisNo, tableArray, Size) HSL_M_set_auto_compare(AxisNo, SelectSource) The first function builds a comparison list using start and end points and constant intervals. - Page 91 HSL-4XMO. An image of the moving object is easily obtained. Working Spec: 34000 triggering points per stroke, trigger speed is 6000 pts/sec ) Program Settings: Table starts moving from 0 to 36000 Compare points are on 1001 35000, total 34000 pts,...
-
Page 92: Backlash Compensator And Vibration Suppression
The function HSL_M_backlash_comp() is used to set the pulse number. In order to minimize vibration when a motor stops, the HSL-4XMO can output a single pulse for a negative direction and then single pulse for a positive direction right after completion of a command movement. -
Page 93: Software Limit Function
4.14 Software Limit Function The HSL-4XMO provides 2 software limits for each axis. The soft limit is extremely useful in protecting a mechanical system as it works like a physical limit switch when correctly set. The soft limits are built on comparators 1 and 2 (Refer to section 4.7), and the comparing source is the command position counter. -
Page 94: Motion Script Download
Users can use any text editor pro- gram to define their motion sequence and download it into the HSL-4XMO. At any moment, you may want to execute it by issuing a run command or run it cyclically by a repeat command. -
Page 95: Motion Creator In Linkmaster
800x600. 5.1 Execute Motion Creator in LinkMaster After installing the software drivers for the HSL-4XMO in Windows, the motion creator program can be located at <chosen path >\LinkMaster. To execute the program, double click on the execut- able file or use Start->Program Files->HSL->LinkMaster. -
Page 96: Figure 5-1: Hsl Master Utility
developed program. This function is available in a DOS environment as well. Figure 5-1: HSL Master Utility Motion Creator in LinkMaster... -
Page 97: Motion Creator Form Introducing
5.3 Motion Creator Form Introducing Main Menu The main menu appears after running Motion Creator. It is used to: Figure 5-2: Main Menu Select Axis Go to Operate menus Go to Interface I/O configuration menus Go to Config Pulse I/O menus Show Module information Show Software information Exit Motion Creator... -
Page 98: Interface I/O Configuration Menu
Interface I/O Configuration Menu In this menu, users can configure EL, ORG, EZ, ERC, ALM, INP, SD, and LTC. Figure 5-3: Interface I/O Configuration Menu Motion Creator in LinkMaster... -
Page 99: Pulse Io Configuration Menu
HSL_M_set_ltc_logic(). 8. Buttons: Next Axis: Change operating axis. Save Config: Save current configuration to HSL-4XMO.ini. Operate: Go to the operation menu, refer to section 5.3.4 Config Pulse : Go to the Pulse IO Configuration menu, refer to section 5.3.3 Back: Return to the main menu. -
Page 100: Figure 5-4: Pulse Io Configuration Menu
HSL_M_set_pls_iptmode(), HSL_M_set_feedback_src(). 3. Buttons: Next Axis: Change operating axis. Save Config: Save current configuration to HSL-4XMO.ini. Operate: Go to the operation menu, refer to section 5.3.4 Config Pulse: Go to the Pulse IO Configuration menu, refer to section 5.3.3 Back: Return to the main menu. -
Page 101: Operation Menu
Operation Menu In this menu, users can change the settings a selected axis, including velocity mode motion, preset relative/absolute motion, manual pulse move, and home return. Motion Creator in LinkMaster... -
Page 102: Figure 5-5: Operation Menu
Figure 5-5: Operation Menu 1. Position: Command: displays the value of the command counter. The related function is HSL_M_get_command(). Feedback: displays the value of the feedback position counter. The related function is HSL_M_get_position() Pos Error: displays the value of the position error counter. The related function is HSL_M_get_error_counter(). -
Page 103: Figure 5-6: Show Velocity Curve
Figure 5-6: Show Velocity Curve 6. Operation Mode: Select operation mode. Absolute Mode: “Position1” and “position2” will be used as absolution target positions for motion. The related functions are HSL_M_start_ta_move(), HSL_M_start_sa_move(). Relative Mode: “Distance” will be used as relative displace- ment for motion. -
Page 104: Figure 5-7: Home Mode Configuration
Figure 5-7: Home Mode Configuration ERC Output: Select if the ERC signal will be sent when home move completes. EZ Count: Set the EZ count number, which is effective on certain home return modes. Mode: Select the home return mode. There are 13 modes available. - Page 105 SVdec: Set the S-curve range during deceleration in unit sof PPS. Move Delay: This setting is effective only when repeat mode is set “On.” It will cause the HSL-4XMO to delay for a speci- fied time before it continues to the next motion. Motion Creator in LinkMaster...
- Page 106 12.Speed Range: Set the max speed of motion. If “Not Fix” is selected, the “Maximum Speed” will automatically become the maximum speed range, which can not be exceeded by on-the-fly velocity change. 13.Servo On: Set the SVON signal output status. The related function is HSL_M_set_servo().
- Page 107 Active, while Light-Off indicates inactive. The related function is HSL_M_get_io_status(). 19.Buttons: Next Axis: Change operating axis. Save Config: Save current configuration to HSL-4XMO.ini. Config Pulse: Go to the Pulse IO Configuration menu, refer to section 5.3 Config Interface I/O: Go to the Interface I/O Configuration menu, refer to section 5.3...
- Page 108 Motion Creator in LinkMaster...
-
Page 109: Appendix
(ID: 1-32) 0.413 0.500 1.000 HSL_M_set_pls_outmode 0.429 0.501 1.000 HSL_M_set_home_config 0.453 0.501 1.000 HSL_M_set_position 0.497 0.505 1.000 HSL_M_get_io_status 0.500 0.509 1.000 HSL_M_get_position 2.588 3.023 6.000 HSL_M_start_tr_move 3.026 3.500 7.000 HSL_M_start_tr_move_xy 0.850 1.012 2.000 HSL_M_move_t_distance Table 6-2: HSL-4XMO Commmand Executuion Times Appendix... - Page 110 Notes: The cycle time is equal to maximum slave number *30.1 us. Theoretical command time is recommend as follows: If the module is smaller than 4, the time is roughly 0.5 If the quantity of the modules is odd, the time is about 0.5 + (Num +1–...
-
Page 111: Warranty Policy
Warranty Policy Thank you for choosing ADLINK. To understand your rights and enjoy all the after-sales services we offer, please read the follow- ing carefully. 1. Before using ADLINK’s products please read the user man- ual and follow the instructions exactly. When sending in damaged products for repair, please attach an RMA appli- cation form which can be downloaded from: http:// rma.adlinktech.com/policy/. - Page 112 3. Our repair service is not covered by ADLINK's two-year guarantee in the following situations: Damage caused by not following instructions in the user's manual. Damage caused by carelessness on the user's part dur- ing product transportation. Damage caused by fire, earthquakes, floods, lightening, pollution, other acts of God, and/or incorrect usage of voltage transformers.
Need help?
Do you have a question about the HSL-4XMO and is the answer not in the manual?
Questions and answers