
Related Manuals for Adaptec 5325302057


Summary of Contents for Adaptec 5325302057
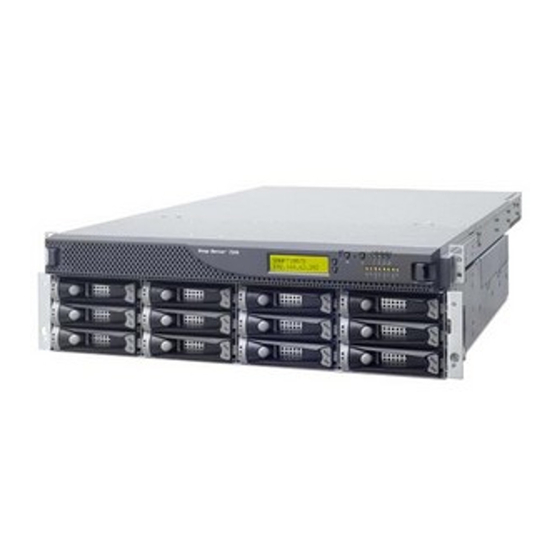
- Page 1 ™ Snap Server 700i Series User’s Guide ™ for Adaptec OnTarget -Powered Snap Servers...
- Page 2 Information in this document is subject to change without notice and does not represent a commitment on the part of Adaptec or any of its subsidiaries. The software described in this document is furnished under a license agreement. The software may be used only in accordance with the terms of the license agreement.
- Page 3 RESELL FOR PROFIT, DISTRIBUTE OR CREATE DERIVATIVE WORKS BASED UPON THE SOFTWARE OR ANY PART THEREOF. 3. Ownership. As Licensee, You own the media upon which the Software is recorded or fixed, but Adaptec and its licensors retain title, ownership and intellectual property rights of the Software recorded on the original media and all subsequent copies of the Software, regardless of the form or media in which or on which the original and other copies may exist.
- Page 4 The entire liability of Adaptec and its licensors, and your exclusive remedy for a breach of this warranty, shall be the replacement of any media not meeting the above limited warranty which is returned to Adaptec; or if...
- Page 5 Should any provision of this license be declared unenforceable in any jurisdiction, then such provision shall be deemed to be severable from this license and shall not affect the remainder hereof. All rights in the Software not specifically granted in this license are reserved by Adaptec. Should you have any questions concerning this license, contact: Adaptec, Inc.
-
Page 7: Table Of Contents
Notes and Cautions ...10 Finding More Information ...11 Chapter 2 Planning Your IP SAN ... 13 Introduction to Adaptec Storage Manager for iSCSI Storage ...13 Understanding Adaptec Storage Manager’s Main Components ...16 Planning Your IP SAN Configuration and Setup ...18 Sample IP SAN Configurations ...19... - Page 8 Step 6: Logging in to the iSCSI Storage ...46 Step 7: Registering Your iSCSI Storage Appliance ...47 Beginning to Use Your IP SAN ...47 Chapter 5 Getting to Know Adaptec Storage Manager... 51 Working in Adaptec Storage Manager...51 Navigating the Main Window ...52 Checking System Status from the Main Window ...59...
- Page 9 Notifying Users By Email About Status and Activity ... 120 Notifying Users By SNMP Trap About Status and Activity ... 124 Monitoring Your GuardianOS-Powered Snap Servers ... 126 Chapter 11 Updating and Customizing Adaptec Storage Manager ...133 Updating Adaptec Storage Manager ... 133 Customizing Adaptec Storage Manager... 133 Creating and Working with Display Groups ...
- Page 10 About the Command Format in This Guide ...182 Command Completion ...182 Command Line Editing ...183 Viewing Long Reports...184 The CLI and Adaptec Storage Manager ...184 Getting Help...185 Appendix C Your Snap Server 700i Series... 187 Hardware Components ...187 Product Descriptions...188 Identifying the Ethernet Ports ...189...
- Page 11 Changing from One RAID Level to Another... 200 Appendix E OS Support Quick Reference ...201 iSCSI Initiator Support by OS ... 202 Adaptec Storage Manager Feature Support by OS ... 203 Appendix F Completing a Silent Windows Installation...205 Completing a Silent Installation... 205 Available Properties and Values ...
- Page 12 Snap Server 700i User’s Guide...
-
Page 13: Preface
Use Adaptec Storage Manager (included on the Adaptec Storage Manager: Adaptec OnTarget User CD) to create and manage your iSCSI storage. You can also use Adaptec Storage Manager to monitor any GuardianOS-powered Snap Servers on your network, as well as any Adaptec direct attached storage (DAS) RAID controllers. -
Page 14: What's Included In This User's Guide
Snap Server • GuardianOS-powered Snap Server In this Guide, when the term ‘Adaptec Storage Manager’ is used, it refers to the graphical user interface (GUI)—the window that opens on your monitor when you run the software. For efficiency, the term “component” or “components” is used when referring generically to the physical and virtual parts of your IP SAN, such as systems, disk drives, pools, and logical devices. -
Page 15: Service And Technical Support
Documents Description Search for solutions to specific issues by clicking the Knowledge Base link on the Adaptec support page: http://www.snapserver.com/kb Purchase additional hardware components from authorized Adaptec resellers. To locate a reseller in your area, select the Where to Buy tab on the Adaptec home page: http://www.snapserver.com... -
Page 16: Notes And Cautions
Notes and Cautions Notes and Cautions Conventions used to call out useful or important information are described below: A note presents time-saving shortcuts related to the main topic. Note A caution alerts you to potential hardware or software issues or hazards in Caution the configuration or operation of Snap Server 700i Series. -
Page 17: Finding More Information
Finding More Information Product documentation related to the Adaptec OnTarget-powered Snap Server 700i Series and SANbloc S50 expansion array are listed below. The current versions of all these documents are always available from http://www.snapserver.com/support. Source and Location 700i Series Quick Start Guide... - Page 18 Finding More Information Snap Server 700i Series User’s Guide...
-
Page 19: Chapter 2 Planning Your Ip San
• View and monitor any GuardianOS-powered Snap Servers on your network • Create, monitor, and manage direct attached storage This Guide describes how to use Adaptec Storage Manager to set up, monitor, and manage iSCSI storage, and monitor GuardianOS-powered Snap Servers. - Page 20 Support for Adaptec Storage Manager’s iSCSI storage features varies by operating system (OS)—depending on which OS is running on an individual system, either the full set or a subset of Adaptec Storage Manager iSCSI storage features is available on that system.
- Page 21 Small Business Server 2003, and Windows Data Center 2003 operating systems are known collectively as ‘Windows 2003’. Refer to the Adaptec Web site at supported OSs. Introduction to Adaptec Storage Manager for iSCSI Storage Install the GUI to manage your IP SAN from a centralized location Provision storage to the system...
-
Page 22: Understanding Adaptec Storage Manager's Main Components
The GUI and the Agent The GUI (or graphical user interface) is the window that opens when you run Adaptec Storage Manager. You build, monitor, and modify your IP SAN from the GUI. The Adaptec Storage Manager Agent is a software component that runs in the background and communicates status and other information about any Adaptec direct attached storage on a system. -
Page 23: Windows Support
Storage Appliance. See “Installing Adaptec Storage Manager” on page 27 for more information. Adaptec recommends that you install the Management Service on the same system as the GUI and Agent; however, it can be installed anywhere on your IP SAN, as long as it’s on the same subnet as your iSCSI Storage Appliance. -
Page 24: Planning Your Ip San Configuration And Setup
Planning Your IP SAN Configuration and Setup Planning Your IP SAN Configuration and Setup As you plan your IP SAN, use this table to understand which Adaptec Storage Manager components can or must be installed on your IP SAN systems. -
Page 25: Sample Ip San Configurations
Sample IP SAN Configurations This section provides configuration examples that illustrate the storage management options and Adaptec Storage Manager installation requirements for each option. Basic Configuration #1 Note that because there is only one iSCSI Storage Appliance on this network, mirroring is not supported. - Page 26 Note that because there is only one iSCSI Storage Appliance on this network, mirroring is not supported. SUSE Linux Enterprise Server 10 • Backup server with manually provisioned storage • Adaptec Storage Manager components installed: GUI and Agent, Management Service Net A GbE Switch...
- Page 27 Note that because there are two iSCSI Storage Appliances on this network, mirroring is supported. Red Hat Enterprise Linux 9 • Backup Server with manually provisioned storage • Adaptec Storage Manager components installed: None Net A Net A GbE Switch...
- Page 28 GUI and Agent, Management Service, Windows Support Windows XP, SUSE Linux Enterprise Server 9 Workstations • No provisioned storage • Adaptec Storage Manager components installed: None Snap Server 700i Series User’s Guide iSCSI Storage Appliance Net B Net A...
- Page 29 Net C GbE Switch Net C Red Hat Enterprise Linux 5, SUSE Linux Enterprise Server 10 Workstations • No provisioned storage • Adaptec Storage Manager components installed: None Sample IP SAN Configurations Net B GbE Switch Net B Windows Data Center 2003 •...
-
Page 30: Building An Ip San Without A Dhcp Server
If you will be adding your iSCSI Storage Appliance to a network without a DHCP server, the IP address will default to 10.10.10.10. Follow the instructions in this section to place the server on your IP subnet before using Adaptec Storage Manager to configure the server as an iSCSI Storage Appliance. -
Page 31: System Requirements
System Requirements • PC-compatible computer with a single Intel Pentium 1.2 GHz processor or better, or equivalent, with a supported OS and an iSCSI initiator (see the following table). All OSs must have the latest Service Packs or Updates installed. Note Supported OSs Windows Server 2003 32-bit or 64-bit:... - Page 32 System Requirements Snap Server 700i Series User’s Guide...
-
Page 33: Chapter 3 Installing Adaptec Storage Manager
This section describes how to install Adaptec Storage Manager on systems running Windows. Adaptec Storage Manager includes the Java Runtime Environment (JRE). See page 25 for a list of supported OSs. Not all Adaptec Storage Manager features are supported by all Windows OSs. See “iSCSI Storage Feature Support” on page 14 for more information. - Page 34 Ensure that you select these minimum required features: • GUI and Agent— • Management Service your iSCSI Storage Appliance (Adaptec recommends the same system as the GUI and Agent) • Windows Support an iSCSI Storage Host; required on any system running Windows Vista, to enable support for third-party storage management tools The Windows Support option won’t appear during installation on any...
- Page 35 If prompted, enter Management Service log-in information for VSS/VDS support: Click Install When the installation is complete, click Continue installing Adaptec Storage Manager, as needed. Then continue with “Setting Up Your iSCSI Storage Appliance and IP SAN” on page 33. Installing on Windows Finish...
-
Page 36: Installing On Linux
This section describes how to install Adaptec Storage Manager on systems running Linux. Adaptec Storage Manager includes the Java Runtime Environment (JRE). See page 25 for a list of supported Linux OSs. Not all Adaptec Storage Manager features are supported by Linux. See “iSCSI Storage Feature Support” on page 14 for more information. - Page 37 Creating an Administrator and Starting the Management Service By default, Adaptec Storage Manager includes only one user account, the Administrator (which allows full access to your IP SAN and all Adaptec Storage Manager features). You use the Administrator user name and password to log into the Management Service.
-
Page 38: Using Adaptec Storage Manager With A Firewall
For more information, refer to the Adaptec Storage Manager User’s Guide for Note Direct Attached Storage on the installation CD that came with your Adaptec DAS RAID controller. If you have installed the GUI and Agent or Management Service on a system running Windows XP, you must also unblock the javaw process in the Windows firewall. -
Page 39: Chapter 4 Setting Up Your Iscsi Storage Appliance And Ip San
Setting Up Your iSCSI Storage Appliance and IP SAN Once you have installed Adaptec Storage Manager, your next task is to configure your iSCSI Storage Appliance and set up your iSCSI storage. Adaptec Storage Manager provides a wizard to guide you through these steps. -
Page 40: Before You Begin
Software Initiator installed, even if a hardware iSCSI initiator is also installed.) See “iSCSI Initiator Support by OS” on page 202 for a complete listing. • Ensure that Adaptec Storage Manager’s Windows Support components are installed on all systems running Windows 2003 (iSCSI Storage Hosts). -
Page 41: Step 1: Starting Adaptec Storage Manager
Step 1: Starting Adaptec Storage Manager You need root or administrative privileges to run Adaptec Storage Manager. Note You can’t run multiple instances of Adaptec Storage Manager on the same system. Start Adaptec Storage Manager. • On a system running Windows, click Manager •... -
Page 42: Step 2: Configuring The Iscsi Storage Appliance
Storage Appliance was added to another Management Service previously.) The default password is The iSCSI Storage Appliance is added to Adaptec Storage Manager. Step 2: Configuring the iSCSI Storage Appliance The wizard comprises three configuration steps, listed in the left panel: •... - Page 43 . By default, the current date and time is used for the iSCSI Storage Next Appliance. You can choose to manually set the date and time values, if required. The Adaptec OnTarget operating system does not automatically adjust the Note time setting on your iSCSI Storage Appliance to accommodate Daylight Saving Time.
-
Page 44: Step 3: Creating Raid Pools
Step 3: Creating RAID Pools The settings are applied to the iSCSI Storage Appliance. Click Register Now Storage Appliance. The wizard continues to the Create RAID Pools step. Step 3: Creating RAID Pools The wizard offers two methods for creating (or configuring) pools—express configuration and custom configuration. - Page 45 Select the disk drives you want to use in the pool. (Adaptec Storage Manager prompts you to select the correct number of disk drives.) Adaptec recommends that you not combine SAS and SATA disk drives Note within the same pool. Adaptec Storage Manager generates a warning if you try to create a pool using a combination of SAS and SATA disk drives.
-
Page 46: Step 4: Provisioning Storage To Your Systems
When you provision storage to an iSCSI Storage Host, you create a volume in Adaptec Storage Manager that automatically appears as a formatted disk drive on the iSCSI Storage Host and can be used right away to store data. You don’t have to manually partition or format the volume on the iSCSI Storage Host. - Page 47 Enter a size for the volume. (Adaptec Storage Manager won’t allow you to enter a number greater than the amount of available pool space.) Select the capacity units from the drop-down list (GB, for instance). Enter a name (or label) for the volume. Use a meaningful name that will help you easily identify it later.
- Page 48 Note than Windows 2003. When you provision storage manually, you create a logical device in Adaptec Storage Manager that becomes the iSCSI target accessed by an iSCSI initiator. Once a logical device is created, you must log into it from the iSCSI initiator and format it the same way you would format a physical disk drive.
- Page 49 A logical device with default settings appears in the Logical Devices panel. By default, the logical device is the same size as the pool. The Pool 1 tab opens by default Logical device added Change the logical device’s default settings by continuing with Step 5, or accept the default settings and continue with Step 8.
- Page 50 Step 4: Provisioning Storage to Your Systems • If you select SRP authentication, click inside the name for the scope, or choose an existing name from the drop-down menu. If you are using Internet Storage Name Service (iSNS) to discover iSCSI Note targets and want to control which logical devices can be logged into by which iSCSI initiators, you must use CHAP authentication.
- Page 51 Create an Auto-discovery Control List. (An auto-discovery control list allows one or more specified iSCSI initiators to discover an iSCSI target while preventing other iSCSI initiators from discovering it. See page 77 for more information.) Click Add Initiator The Add iSCSI Initiator window opens. Enter the IQN (iSCSI Qualified Name) assigned to the iSCSI initiator.
-
Page 52: Step 5: Continuing To Build Your Ip San
Step 5: Continuing to Build Your IP SAN Adaptec Storage Manager begins to build the logical device(s). The wizard closes. For more information about logical devices, see “Creating and Modifying Logical Devices” on page 98. Before you can begin to use the iSCSI storage, you must log in to the logical devices (iSCSI targets), then partition and format them. -
Page 53: Step 7: Registering Your Iscsi Storage Appliance
IP SAN. Logging In To Adaptec Storage Manager Next Time Once your IP SAN is set up, each time you start Adaptec Storage Manager, any Management Services on the iSCSI Storage branch will be grayed out. To begin a new session on Adaptec Storage Manager, click on the grayed out Management Service. - Page 54 After setup is complete, if you want to maintain security but allow other users limited or full access to your IP SAN, you can add them to Adaptec Storage Manager, assign them an access privilege level, and set passwords for them to use when logging in to the Management Service.
- Page 55 Adding a System to the VDS/VSS Host List To add a system to the VDS/VSS host list: In the Enterprise View, right-click the , then click service actions Manage VDS/VSS access The Microsoft VDS/VSS Access window opens. Click The Enable Microsoft VDS/VSS Access from this Host window opens.
- Page 56 Beginning to Use Your IP SAN Next Steps Once setup is complete, use Adaptec Storage Manager to modify and monitor your IP SAN. Adding More Components As your iSCSI storage requirements grow, you can add more components (Management Services, iSCSI Storage Appliances, and iSCSI Storage Hosts) to your IP SAN by following the instructions in “Adding More Components to Your IP...
-
Page 57: Chapter 5 Getting To Know Adaptec Storage Manager
Chapter 5 Getting to Know Adaptec Storage Manager This chapter will help you familiarize yourself with the main features of Adaptec Storage Manager and learn to navigate to the information you need. Working in Adaptec Storage Manager Adaptec Storage Manager provides multiple ways to work with its menus and windows. -
Page 58: Navigating The Main Window
Navigating the Main Window Navigating the Main Window The main window of Adaptec Storage Manager has three main panels—left, right, and bottom—in addition to the other features shown in this figure. The left panel always shows the Enterprise View; the bottom panel always shows the Event Viewer. - Page 59 The Direct Attached Storage Branch The Direct Attached Storage Branch lists any Adaptec DAS RAID controllers installed on the local system and any Adaptec DAS RAID controllers that you are managing remotely. The Direct Attached Storage branch is not covered in this Guide—refer to the Note Adaptec Storage Manager User’s Guide for Direct Attached Storage on the installation...
- Page 60 Properties panel used in Snap Server Manager (the management tool provided with your GuardianOS-powered Snap Server). For more information about monitoring GuardianOS-powered Snap Servers in Adaptec Storage Manager, see page 126. Snap Server 700i Series User’s Guide...
- Page 61 To view the pools or logical devices associated with a particular disk drive, see “The Logical Devices View” on page 56. Navigating the Main Window Enclosure Management Device Chapter 5 Getting to Know Adaptec Storage Manager...
- Page 62 Navigating the Main Window The Logical Devices View When you select the iSCSI Storage Appliance in the Enterprise View, the pools and logical devices associated with that appliance appear in the Logical Devices View. (A pool is a collection of disk drives combined in a RAID set. A logical device is created within a pool and is seen as a single iSCSI target.) This appliance is connected to...
- Page 63 Storage Hosts appear in the Snapshots View. If you have created third-party snapshots (snapshots created using a tool other than Adaptec Storage Manager), they also appear in the Snapshots View. The volumes associated with ...have four Adaptec Storage the iSCSI Storage Host...
- Page 64 Navigating the Main Window Revealing More Information You can reveal more information about volumes, disk drives, pools, and logical devices by using the View buttons (circled below) to change what information displays. Not all views are available for all components. Note Click this button to see the size capacities of your disk drives.
-
Page 65: Checking System Status From The Main Window
Checking System Status from the Main Window Checking System Status from the Main Window Adaptec Storage Manager includes an Event Viewer for at-a-glance system and event status information. The Event Viewer provides status information and messages about activity (or events) occurring on your IP SAN. Double-click any event to see more information in an easier-to-read format. -
Page 66: Getting Help
Uninstalling Adaptec Storage Manager Uninstalling From Windows Systems To uninstall Adaptec Storage Manager from a Windows system, use the Add or Remove Programs tool in the Control Panel. All Adaptec Storage Manager components, including the Management Service, will be uninstalled. -
Page 67: Chapter 6 Protecting Your Data
• You should select a disk drive that is at least as big as the largest disk drive it might replace. • Adaptec recommends that you not designate a SAS hot spare for a pool comprising SATA disk drives, or a SATA hot spare for a pool comprising SAS disk drives. - Page 68 Protecting Your Data with Hot Spares Creating a Global Hot Spare for a Pool This section describes how to designate a hot spare before or after you create a pool. To designate a hot spare while you’re creating a pool, see Step 6 on page 39. Note To designate a hot spare: In the Enterprise View, select the iSCSI Storage Appliance.
- Page 69 What Do the Hot Spare Icons Mean? Icon Explanation Healthy global or dedicated hot spare Hot spare is too small to protect the pool(s) it’s assigned to Hot spare has been built into a pool after disk drive failure Deleting a Hot Spare You can delete a hot spare.
-
Page 70: Backing Up Your Data With Snapshots
VSS Provider is not supported by the OSs. Adaptec Storage Manager’s snapshot feature creates a frozen copy of a volume at a point in time. A snapshot sets up a link between the source volume and the underlying logical devices in your iSCSI Storage Appliance. - Page 71 Select the volume(s) you want to include in the snapshot set. If the volume you select has dependent volumes listed, Adaptec strongly Note recommends that you copy the volume and its dependencies, to avoid losing related data. Type a name or description for the snapshot, then click The Snapshot Settings screen opens.
- Page 72 Backing Up Your Data with Snapshots Mounting a Snapshot Set When you create a snapshot set, you have the option to mount it to a specific system on your IP SAN. (The individual snapshots within a snapshot set are either all mounted or all unmounted.
- Page 73 IP SAN. If a job must be performed regularly, you can schedule it to recur at preset times. At this time, on the iSCSI Storage branch of Adaptec Storage Manager, you can schedule snapshot jobs. To schedule a job:...
- Page 74 Checking on Scheduled Jobs You can use Adaptec Storage Manager’s Schedule Manager to monitor and modify the jobs you have scheduled. (To schedule a job, see page 67.) Jobs are associated with Management Services.
-
Page 75: Backing Up Your Data With Mirrored Volumes
Modifying a Scheduled Job If your requirements change, you can reschedule a job to a different date or time, or change the frequency with which it recurs. For recurring snapshot jobs, you can also change the number of snapshots to retain at one time. To modify a scheduled job: Open the Schedule Manager (see page 68). - Page 76 See “Changing Mirror Priorities” on page 72 for instructions. Once a mirrored volume is created, you can use Adaptec Storage Manager to manage it. This section describes how to: • Create a mirrored volume (see page 71).
-
Page 77: Creating A Mirrored Volume
The Job Manager opens (see page 109) and the job begins. When the job is complete, the volume and its mirror can be used. If Adaptec Storage Manager displays a message that indicates there is Note insufficient space to create a mirror plex, press again. - Page 78 Backing Up Your Data with Mirrored Volumes Extending a Mirrored Volume You can increase the size of a volume, up to the space available in its pool. If you want to increase the size of a mirrored volume, the mirror also has to have enough space in its pool to be extended by the same amount.
- Page 79 Failing Back a Mirrored Volume When a data-access problem occurs on a mirrored volume, failover (from the original volume to the mirror) occurs automatically. Use Adaptec Storage Manager to fail back the mirrored volume and restore the original volume to mirror manager after the problem has been solved.
- Page 80 Backing Up Your Data with Mirrored Volumes Click to fail back the mirror. The mirror is failed back—the original volume is restored as the mirror manager. Breaking a Mirrored Volume You can break a mirrored volume so that data on the original volume is no longer duplicated on the second volume.
- Page 81 Deleting a Mirrored Volume You can delete a volume, if required. When you delete a volume or mirrored volume, all data is destroyed. Caution To delete a volume: In the Enterprise View, select the iSCSI Storage Host you want. In the Volumes View, right-click the mirrored volume you want, then select Delete volume.
- Page 82 Backing Up Your Data with Mirrored Volumes Snap Server 700i Series User’s Guide...
-
Page 83: Chapter 7 Controlling Access To Your Ip San
Controlling Access to Your IP SAN This chapter describes how to use Adaptec Storage Manager to restrict and control access to your IP SAN and iSCSI targets (logical devices) with auto-discovery control lists, authentication, and the Security Manager. Limiting Discovery of iSCSI Targets with Auto-discovery... - Page 84 Limiting Discovery of iSCSI Targets with Auto-discovery Control Lists Modifying an Auto-discovery Control List In the Enterprise View, click the iSCSI Storage Appliance you want. In the Logical Devices View, right-click the words ‘ Modify logical devices The wizard opens. See the figures in “Provisioning Storage Manually” on page 42 for more information.
-
Page 85: Controlling Access To Your Ip San With Authentication
Once an authentication method is set, any server trying to log in without authentication, or with the incorrect authentication, is rejected. Two authentication methods are available in Adaptec Storage Manager: • Challenge Handshake Authentication Password (CHAP) -
Page 86: Limiting User Access To Your Ip San With The Security Manager
To protect your IP SAN, you can use Adaptec Storage Manager’s Security Manager to control which users can access and modify your iSCSI storage. Each Adaptec Storage Manager user is given a password and is assigned one of two access privilege levels, Administrator level or Operator level (see page 81). To access Adaptec Storage Manager and your IP SAN, the user enters his or her password when logging in to the Management Service (see Step 2 on page 35). - Page 87 Understanding Access Privilege Levels This section describes the two access privilege levels supported by Adaptec Storage Manager. Administrator Level Administrators have full access to your IP SAN, and can manage and modify your iSCSI storage as required. Adaptec Storage Manager requires at least one Administrator-level user.
- Page 88 The Security Manager opens on the Security tab of a new window. By default, a single user—with the administrator name and password that you added during Adaptec Storage Manager installation—is included on the Security List. You can add, modify, and delete users as your requirements change: •...
- Page 89 You can remove any user from the Security Manager. (At least one user with Administrator-level privileges must remain.) Once a user has been deleted, he or she no longer has access to your IP SAN through Adaptec Storage Manager. To remove a recipient from the Security Manager: Open the Security Manager.
- Page 90 Limiting User Access to Your IP SAN with the Security Manager Snap Server 700i Series User’s Guide...
-
Page 91: Chapter 8 Modifying Your Iscsi Storage
The Login to Management Service window opens. Enter the name or TCP/IP address of the system on which the Management Service is installed, then enter the Administrator user name and password that you set when you installed Adaptec Storage Manager. Click Connect The Management Service is added to the iSCSI Storage branch. - Page 92 Snap Server 700i Series. The iSCSI Storage Appliance is added to the Management Service. Adding an iSCSI Storage Host To add a new iSCSI Storage Host to Adaptec Storage Manager: In the Enterprise View, select the Management Service. In the Actions menu, click The Add iSCSI Storage Host window opens.
- Page 93 Using the iSCSI Storage Appliance Wizard In the Enterprise View, select the Management Service. In the Actions menu, click The wizard opens. Click Add new iSCSI storage appliance The Add iSCSI Storage Appliance window opens. Enter the host name of an iSCSI Storage Host. Alternatively, if you assigned a static IP address to the iSCSI Storage Host, enter it instead of the host name.
-
Page 94: Creating And Modifying Pools
Logical devices and volumes are then built from the storage space contained within that pool. Once a pool is created, you can use Adaptec Storage Manager to increase its capacity, change its RAID level, and make other modifications. - Page 95 Storage Appliance. Up to 20 pools are supported on a single iSCSI Storage Appliance. Pool size is set by Adaptec Storage Manager and automatically maximizes the capacity of the disk drives. Pool size can’t be adjusted during creation, even using custom configuration.
- Page 96 Creating and Modifying Pools Adding Capacity to a Pool You can add disk drives to an existing pool to expand its capacity without changing its RAID level. When you expand a pool, stored data is distributed (or migrated) across all the original and new disk drives. You can expand pools with any of these RAID levels: RAID 0, RAID 5, RAID 6, or RAID 1E.
- Page 97 If an error (for instance, a power failure) occurs while a pool is being created, and the pool is only partially completed, it’s referred to as an alien pool. In Adaptec Storage Manager, alien pools are grayed out in the Logical Devices View and can’t be used to store data.
- Page 98 1) Ensure that no iSCSI initiators are accessing a pool before you attempt to Notes export it. Pools being accessed can’t be exported. 2) Adaptec recommends that you not export a pool while it is building, rebuilding, or synchronizing. If you do, it appears as an alien pool when you import it to a new iSCSI Storage Appliance.
- Page 99 Resetting Authentication on Imported Logical Devices If authentication was set on any logical devices before you exported the pool, it must be reset once the pool is imported. To reset authentication: In the Enterprise View, select the iSCSI Storage Appliance you want. In the Logical Devices View, right-click the words ‘...
- Page 100 Creating and Modifying Pools Changing the Controller Cache Settings for a Pool For each pool, you can use Adaptec Storage Manager to enable or disable the read and write cache of the RAID controller installed in your iSCSI Storage Appliance.
-
Page 101: Creating And Modifying Volumes
Storage Host, and formats it. The result is a volume—in Adaptec Storage Manager, a volume is a logical device that has been automatically provisioned to an iSCSI Storage Host. - Page 102 Creating and Modifying Volumes Once a volume is created, you can use Adaptec Storage Manager to modify it. This section describes how to: • Create a new volume after setup is complete (see the following section). • Add capacity to a volume (see page 97).
- Page 103 Adding Capacity to a Volume You can increase the size of a volume, up to the space available in its pool. To add capacity to a volume: In the Enterprise View, select the iSCSI Storage Host you want. In the Volumes View, right-click the volume you want, then select For help selecting the right volume, use the expansion arrows to display more volume information.
-
Page 104: Creating And Modifying Logical Devices
The job begins. Creating and Modifying Logical Devices In Adaptec Storage Manager, a logical device is an iSCSI target accessed by the iSCSI initiators in the systems on your IP SAN. When you manually provision storage manually, you begin by creating a logical device that you then log into from the system and format locally. - Page 105 In the tool bar, click Create Create logical device Alternately, click the Create Logical Device button in the Logical Devices View, as shown above right. The wizard opens. Continue with Step 3 on page 42 of “Provisioning Storage Manually”. Modifying a Logical Device You can change the size, name, and authentication method for any logical device.
- Page 106 Creating and Modifying Logical Devices Deleting a Logical Device Before you begin, ensure that you have backed up any data that you want Caution to save. When the logical device is deleted, any data or programs stored on that logical device are also deleted. To delete a logical device: In the Enterprise View, select the iSCSI Storage Appliance you want.
-
Page 107: Snap Server 700I User's Guide
Configuring the Uninterruptible Power Supply (UPS) Monitor You can use Adaptec Storage Manager to set the UPS monitor settings for each iSCSI Storage Appliance in your IP SAN. You can set customized UPS monitor settings for each separate iSCSI Storage Appliance. - Page 108 Configuring the Uninterruptible Power Supply (UPS) Monitor Select a UPS connection type. • If you select SNMP SNMP Name field. • If you select Local USB In the Add Remote USB Enclosure window, enter the name or IP address of a remote iSCSI Storage Appliance to which the local system will communicate UPS information, then click Repeat this step until you have added all the iSCSI Storage Appliances you...
-
Page 109: Blinking Appliances, Enclosures, And Disk Drives
To blink a component: In Adaptec Storage Manager, right-click the component, then select This table describes what to right-click to blink specific iSCSI Storage Appliances, enclosures, and disk drives. -
Page 110: Shutting Down The Iscsi Storage Appliance
Shutting Down the iSCSI Storage Appliance Shutting Down the iSCSI Storage Appliance You can use Adaptec Storage Manager to shut down your iSCSI Storage Appliance. You might want to do this to export a pool to another iSCSI Storage Appliance (see page 91) or complete maintenance tasks. -
Page 111: Updating The Adaptec Ontarget Operating System
Adaptec Storage Manager, complete that update before updating the controller image. See page 133 for more information. New images for your iSCSI Storage Appliance are posted on the Adaptec Web site at www.adaptec.com. Image files have a .upgrade file extension. Once you have downloaded a new image, use Adaptec Storage Manager to update your iSCSI Storage Appliances. - Page 112 Reverting to the Previous Image Adaptec Storage Manager stores two versions (or images) of Adaptec OnTarget at a time. If you experience problems with a newly downloaded image, you can revert to the previous one. You can also return from the previous image to the new one, if required.
- Page 113 Image 1 is currently running and will also run the next time the iSCSI Storage Appliance is restarted. Updating the Adaptec OnTarget Operating System Select controller image Chapter 9 Maintaining Your iSCSI Storage Appliance . The Current Image...
- Page 114 Updating the Adaptec OnTarget Operating System Snap Server 700i Series User’s Guide...
-
Page 115: Chapter 10 Monitoring Status And Activity
Monitoring Jobs in Progress You can monitor jobs, such as automatic storage provisioning or creating a snapshot, as they progress by using a utility in Adaptec Storage Manager called the Job Manager. To open the Job Manager, see page 110. - Page 116 • —Job is being cancelled (the Cancelling You can use Adaptec Storage Manager to monitor and manage jobs in progress: • To open the Job Manager, see page 110. • To cancel a job in progress, see page 110. • To resume a cancelled job, see page 111.
- Page 117 Resuming a Cancelled Job You can resume a job that in the process of being cancelled in the Job Manager. A resumed job continues from the last step it completed before the job was cancelled. Depending on the job, there may be very little opportunity time-wise to Note resume a cancelling job.
-
Page 118: Viewing Status And Activity
You can see status information and messages about the activity (or events) occurring on your IP SAN by checking component properties and looking at the Event Viewer and status icons in Adaptec Storage Manager. Using the Event Viewer and Event Log The Event Viewer displays a log of activity occurring on your IP SAN. - Page 119 What Do the Status Icons Mean? Adaptec Storage Manager indicates event status with icons. This table lists the three categories, or types, of events based on severity. Icon Status Examples Information • A connection to the Management Service was successfully established.
-
Page 120: Viewing Component Properties
Viewing Component Properties Double-click any component in the main window of Adaptec Storage Manager to view version numbers, status, model numbers, and other information about that component. (Alternatively, you can select any component, then click the button in the tool bar.) -
Page 121: Using Status And Drive Light Behavior To Monitor Components
(for ETH2 and ETH3, if applicable); two lights for each of the four disk drives; and an identification light, as shown in the following illustration: Adaptec recommends that you become familiar with the operation of these lights. Power, System, and LAN LEDs These status lights are located to the right of the power button. - Page 122 Using Status and Drive Light Behavior to Monitor Components The LEDs operate as described in the following tables: Power LED Solid green System LED Blinks green 2 times per second Blinks green 3 times per second Solid or blinking amber at boot time Blinking amber during normal operation...
- Page 123 Status LED (left) Activity LED (right) Solid green Solid green Blinking green Solid amber You can blink a disk drive from Adaptec Storage Manager by right-clicking Note the drive and selecting Blink disk drive Disk Drives” on page 103 for instructions.
- Page 124 Using Status and Drive Light Behavior to Monitor Components SANbloc S50 Enclosure, Disk Drive, APC Module, and Controller Behavior This section describes the LED indicators on the SANbloc S50 enclosure, disk drives, and APC modules. Enclosure LEDs On the right front of the SANbloc S50 (as shown in the following illustration) are four LEDs that indicate the status of the enclosure.
- Page 125 These LEDs operate as described in the following table: Condition Solid green Solid amber Solid green Green random flash APC Unit LEDs Each APC unit has two LEDs that indicate status. These LEDs operate as described in the following table: Condition Power Green (solid)
-
Page 126: Notifying Users By Email About Status And Activity
On continuously Notifying Users By Email About Status and Activity You can set up Adaptec Storage Manager to send email messages (or notifications) to a selected email address when an event, such as the creation of a pool or the failure of a disk drive, occurs on the iSCSI Storage Appliance. - Page 127 Setting Up Email Notifications This section describes how to set up email notifications for one Management Service. If you have multiple Management Services on your IP SAN, you must complete the tasks in this section for each one separately. Before you begin, note this information: •...
- Page 128 Notifying Users By Email About Status and Activity Sending a Test Message To ensure that an email recipient is receiving event notifications, you can send them a test message. To send a test message: In the Enterprise View, select the Management Service you want. Click the Configure Notifications...
-
Page 129: Disabling Email Notifications
Modifying Email Settings You can modify these email settings as your needs change: • Address of your SMTP server • ‘From’ address that will appear in email notifications To modify email settings: In the Enterprise View, select the Management Service you want. Click the button, select the Management Service, then select Configure... -
Page 130: Notifying Users By Snmp Trap About Status And Activity
Note traps concepts and technology. You can use Adaptec Storage Manager to monitor Simple Network Management Protocol (SNMP) traps on your iSCSI Storage Appliance, such as disk drive failures and logical device verifications. One system—typically the system where the GUI is installed—can receive SNMP trap notifications. - Page 131 Sending a Test Trap To send a test trap to the system on the SNMP Traps List: In the Enterprise View, select the Management Service. Click the button, select the Management Service you want, then select Configure SNMP Trap Manager Select the TCP/IP address of the listed system.
-
Page 132: Monitoring Your Guardianos-Powered Snap Servers
When you start Adaptec Storage Manager, it automatically discovers any GuardianOS-powered Snap Servers on your network and lists them under the Network Attached Storage branch of the Enterprise View. You can use Adaptec Storage Manager to view and monitor your GuardianOS-powered Snap Servers. You can also launch the GuardianOS Admin Tool from Adaptec Storage Manager, to administer individual servers. -
Page 133: Icon Description
“Identifying Failed or Failing Components” on page 143 for more information. What do the icons mean? Adaptec Storage Manager uses icons to indicate which feature of a server has a specific status level. These icons turn color to indicate status, as described in the previous section. - Page 134 Discovering New or Additional GuardianOS-Powered Snap Servers You can add new GuardianOS-powered Snap Servers to the Network Attached Storage branch of Adaptec Storage Manager at any time, or have Adaptec Storage Manager discover all GuardianOS-powered Snap Servers on a different subnet.
- Page 135 Removing Offline Servers from Adaptec Storage Manager To make monitoring easier, you can remove all offline GuardianOS-powered Snap Servers from Adaptec Storage Manager. You can’t specify which individual servers to remove from Adaptec Storage Note Manager; all offline GuardianOS-powered Snap Servers are removed.
- Page 136 • Specify whether Adaptec Storage Manager displays a warning if any server's Ethernet ports have no link (see page 131) • Instruct Adaptec Storage Manager to directly scan all servers (see page 132) • Configure an HTTP proxy server for online registration (see page 132) Snap Server 700i Series User’s Guide...
- Page 137 Displaying No-Link Status Warnings By default, Adaptec Storage Manager displays a warning status if one of a server's Ethernet ports has no link. You can disable the no-link status feature if your IP SAN doesn’t include any servers with only one active Ethernet port.
- Page 138 Monitoring Your GuardianOS-Powered Snap Servers Activating Autoscanning of All Remote GuardianOS-Powered Snap Servers When Adaptec Storage Manager is installed on a laptop that is moved from one network segment to another, some remote servers may appear to be offline when they are in fact online.
-
Page 139: Chapter 11 Updating And Customizing Adaptec Storage Manager
“downgradeable” after installation, you will be notified by Adaptec Storage Manager before the installation begins. If a previous version of Adaptec Storage Manager is installed on your system, Note you must remove it before installing a new version. - Page 140 See page 52 for more information. Setting the Standard Unit of Measure You can set Adaptec Storage Manager to show disk drive capacity in measures of megabytes (MB), gigabytes (GB), or terabytes (TB). You can also choose the Auto- select setting to allow Adaptec Storage Manager to show the most appropriate unit of measure based on disk drive size.
-
Page 141: Changing The Main Window Appearance
The display units in Adaptec Storage Manager are updated. Changing the Main Window Appearance You can choose to remove the tool bar and status bar from the main Adaptec Storage Manager window to save space on-screen. You can also choose to turn off the Tool Tips that automatically appear when you place your cursor over on-screen items. - Page 142 Creating and Working with Display Groups Enter a name for the new display group, then click The display group is created and the system you selected in Step 1 is added to it. To add another Management Service to the display group, select the Management Service in the Enterprise View, in the , then click the display group name.
-
Page 143: Chapter 12 Solving Problems
• Ensure that Adaptec Storage Manager is properly installed on the management system. • Ensure that no one is running Adaptec Storage Manager remotely on the management system. (Adaptec Storage Manager will only open once on a system.) •... -
Page 144: Troubleshooting Questions And Answers
Troubleshooting Questions and Answers Adaptec Storage Manager is installed properly. Why won’t it open? Adaptec Storage Manager won’t start on a system that uses only 16 colors. To successfully run Adaptec Storage Manager, your system must support 256 color video mode. - Page 145 In Adaptec Storage Manager, alien pools are greyed-out in the Logical Devices View and can’t be used to store data. Delete these alien pools from Adaptec Storage Manager. See “Deleting an Individual Pool” on page 94 or “Deleting All Pools”...
- Page 146 Storage Appliance is no longer used in a mirror, delete the IP address entry from the controller list. How can I stop Adaptec Storage Manager from generating ‘Terminating connection’ messages about my VMware systems? To stop receiving ‘Terminating connection’ messages from the VMware systems accessing storage on your iSCSI Storage Appliance, enable the VMware iSCSI initiators’...
- Page 147 If your IP SAN includes multiple iSCSI Storage Appliances, all remaining disk drives in a pool may disappear from the Adaptec Storage Manager GUI and the CLI device list if you remove a disk drive from the pool. Refresh the GUI and the CLI device list by shutting down and restarting the iSCSI Storage Appliance.
-
Page 148: Silencing An Alarm
Enter a name for the archive file or accept the default name, then click Silencing an Alarm At this time, the Silence button in Adaptec Storage Manager will not silence an alarm on iSCSI storage devices or JBODs. If an alarm sounds, you must silence it at the device level (for instance, by pressing the Mute button on the back of the JBOD), or use the CLI to enter a silence command (see page 177). -
Page 149: Identifying Failed Or Failing Components
Identifying Failed or Failing Components When your are notified of a Warning- or Error-level event, use Adaptec Storage Manager’s rapid fault isolation feature to quickly identify the source of the problem. For instance, in this example, an iSCSI Storage Appliance has stopped responding. -
Page 150: Hot Swapping Disk Drives
Hot Swapping Disk Drives Identifying Which Fan has Failed If the fan icon shows a failed fan, you can determine which fan failed by selecting the affected server in the Enterprise View, then double-clicking the Enclosure Management Device icon to open the Properties window for the server. -
Page 151: Recovering From A Disk Drive Failure
Replace the front bezel (700i Series only). Recovering from a Disk Drive Failure When a disk drive fails for any reason, it is represented in Adaptec Storage Manager with a red X, as shown at right. This section explains how to recover when a disk drive fails: •... - Page 152 Recovering from a Disk Drive Failure Failed Disk Drive Not Protected by a Hot Spare When a pool is not protected by a hot spare, if a disk drive in that pool fails, remove and replace the failed disk drive. The controller detects the new disk drive and begins to rebuild the pool.
-
Page 153: Rebuilding Pools
Note pool. When a disk drive fails, it may still appear in Adaptec Storage Manager although it is no longer available. To see an accurate representation of your IP SAN and make it easier to monitor your disk drives, you can remove a failed disk drive from the Physical Devices View. -
Page 154: Recovering Snapshots After A Pool Capacity Failure
Recovering Snapshots After a Pool Capacity Failure If pool capacity becomes exhausted, all snapshots within that pool (and all the volumes on which the snapshots are based) go offline, and Adaptec Storage Manager generates a failure message. When a pool capacity failure happens, the write that exhausted the pool’s capacity is failed back to the iSCSI initiator that wrote it. -
Page 155: Recovering From An Iscsi Storage Appliance Failure
Recovering from an iSCSI Storage Appliance Failure These instructions describe how to recover from the failure of an iSCSI Storage Appliance. If you are recovering from an appliance failure in a mirrored environment, see Note page 153. Shut down the appliance. In the Enterprise View, select the iSCSI Storage Appliance. - Page 156 Recovering from an iSCSI Storage Appliance Failure Right-click the Management Service, select iSCSI Storage Appliance. Right-click the Management Service, then select The Add iSCSI Storage Appliance dialog box opens. Enter the IP address of the iSCSI Storage Appliance, then click If prompted, enter the administrator password you set while configuring your iSCSI Storage Appliance, but don’t enter a user name.
- Page 157 Continue adding user names and passwords until all users are included on the list. The user list must have at least one name on it. Note Click to close the window. Cancel Repeat Step 2 to 5 for each logical device with CHAP authentication. Click , then click Next...
- Page 158 Recovering from an iSCSI Storage Appliance Failure Reconnecting Mirrored Volumes Before you begin, ensure that you are connected to each iSCSI Storage Appliance that hosts the mirrored volumes, using either a monitor and keyboard or a serial cable connected to a system running a terminal emulation program. In these steps, the iSCSI Storage Appliance with the replaced flash drive is Note called Appliance A;...
- Page 159 Use Appliance B’s CLI to update the IP addresses of remote plexes in Appliance B’s mirrors. Type mirror manage m1 plex 0/1 IPaddress_of_ApplianceA_iSCSI_interface press Enter Repeat Step 1 for each mirror. Last Step In the View menu, select Refresh mirrored volumes should appear online, connected, and in normal status. The recovery of each iSCSI Storage Host is complete.
- Page 160 Plex 0 Local and Plex 1 Remote should both appear as Synchronized Online. All iSCSI target, pool, and logical device information appears online in Adaptec Storage Manager. Check the iSCSI initiator to ensure that the iSCSI target connection is re- established.
-
Page 161: Appendix A Configuring Iscsi Initiators
Configuring iSCSI Initiators Use the information in this appendix in conjunction with the documentation supplied with your initiator to configure the iSCSI initiators that connect to the iSCSI targets on your iSCSI Storage Appliance. Configuring iSNS with the CLI You can use Microsoft iSNS Server to discover targets on an iSCSI network. To download the iSNS package, go to the Microsoft web site and search for isns. - Page 162 Configuring iSNS with the CLI Log in to the CLI as Administrator, using the password you set in “Step 2: Configuring the iSCSI Storage Appliance” on page 36. If you didn’t set a password, use the default password, Enter: isns Enter: server IP_address Where...
-
Page 163: Iscsi Configuration For Microsoft Windows
Configuration Notes • On pre-Vista operating systems, Microsoft does not support "dynamic" disks for use with the Microsoft iSCSI initiator. Adaptec recommends using the QLogic QLA4050/4052, which supports “dynamic disks”, or using only "basic" disks with the Microsoft initiator to avoid unexpected behavior and possible data loss when using the MS initiator to connect to iSCSI targets in your iSCSI Storage Appliance. - Page 164 iSCSI Configuration for Microsoft Windows Configuring the MS Initiator Connection to the iSCSI Storage Appliance (Target Portal) The Microsoft iSCSI initiator is available for download from the Microsoft support Web site. Search for iSCSI initiator, and download the initiator appropriate for your OS version.
- Page 165 iSCSI Configuration for Microsoft Windows Connecting to a Logical Device (iSCSI Target) Using the MS Initiator From the Targets tab, log into the logical device. Select the desired iSCSI target and click . To automatically re-establish the Log On connection when the Windows system reboots, select the Automatically restore...
- Page 166 iSCSI Configuration for Microsoft Windows Enter the CHAP user name and password (if applicable). If you are using CHAP authentication, click box, and enter the CHAP user name and password you created along information with the logical device. Verify that the unchecked.
- Page 167 Windows system whose registry is being modified. The result of any modifications to the Windows registry can vary, and implied outcomes of any modification suggested by Adaptec are NOT guaranteed, and may not be supported. Adaptec strongly recommends backing up your registry before making any modifications.
- Page 168 iSCSI Configuration for Microsoft Windows Editing the Windows Registry for MS Exchange Server or MS SQL Server Install Exchange Server 2003 and configure it to use the logical device as the location to store database files. On a Windows workstation running Windows 2000, enter this on the command line: regedt32 Navigate to the Key:...
- Page 169 Mounting a Logical Device Without a Drive Letter To complete this procedure, you must create and format an iSCSI target on the iSCSI Storage Appliance and connect to this logical device using the Microsoft initiator. You must also have an existing NTFS volume on a local disk within the Windows server, initiating the connection.
- Page 170 • Enter target information (for example, target portal information and target iSCSI name). • Configure the adapter’s BIOS. Refer to article 14837 on the Adaptec Support Knowledgebase at www.adaptec.com. You can use either the SANSurfer Management application that came with the QLA4050/4052 or Microsoft’s iSCSI initiator applet to set initiator parameters and...
- Page 171 Configuring the QLA4050/4052 Using SANSurfer Launch SANSurfer and click the button. Connect In the Connect to Host dialog, select Localhost and click the Connect button. SANSurfer requires you to use an application password each time you set or view confidential information or save changes.
- Page 172 iSCSI Configuration for Microsoft Windows In the left pane of the SANSurfer Manager, select an HBA port, click the Port Options tab, and enter the initiator information (name/alias, IP address, etc.). Then click Save Port and provide Settings the password when asked.
- Page 173 Click the plus sign, then type in the IP address of the target portal. Leaving the iSCSI Name field blank will force discovery of all available targets. Or you can double-click the iSCSI Name field and type in an iSCSI name of a target.
- Page 174 iSCSI Configuration for Microsoft Windows Configuring the QLA4050/4052 using Microsoft’s iSCSI Initiator Applet Open the Control Panel and select Select Device Manager , and select Adapter Select the HBA Information tab and enter the iSCSI name for the QLA4050/4052 adapter. Select the TCP/IP settings tab and enter the IP address and other network information.
-
Page 175: Iscsi Configuration For Red Hat Or Suse Linux
iSCSI Configuration for Red Hat or SUSE Linux This section provides information on supported iSCSI HBAs and initiators for Red Hat and SuSE Linux operating systems. Configuration Notes The QLogic QLA4050/4052 initiator supports Red Hat Enterprise Linux 4, QU4, and SUSE Linux Enterprise Server 9 or 10. This initiator provides CHAP authentication and can connect to multiple targets simultaneously. - Page 176 iSCSI Configuration for Red Hat or SUSE Linux If you want to use one-way CHAP for the logical devices on your iSCSI Storage Appliance, provide Username and Password values below the DiscoveryAddress parameter. • To indicate that the CHAP parameters are only associated with iSCSI targets behind the portal, leave at least one leading space before the lines, as shown in this example.
- Page 177 SESSION STATUS : ESTABLISHED AT Mon Jul 24 11:02:35 2006 NO. OF PORTALS PORTAL ADDRESS 1 : 192.3.2.187:3260,1 PORTAL ADDRESS 2 : 192.168.93.165:3260,1 SESSION ID : ISID 00023d000001 TSID 02 ****************************************************************** TARGET NAME : iqn.snap710628.iscsi0 TARGET ALIAS : iscsi0 HOST NO BUS NO TARGET ID : 47...
- Page 178 iSCSI Configuration for Red Hat or SUSE Linux Enter responses (shown in the following table) as appropriate to create the partition. If you don’t know the correct response, type command command action Partition Number First cylinder Last cylinder command Create file systems on the partitions so they can be mounted and used for storage. linux:~ #: mkfs -t ext3 /dev/sdb1 Mount the iSCSI volumes and use them as regular disks.
-
Page 179: Iscsi Configuration For Vmware
Using CHAP Authentication to Enable Multiple Linux Systems to Share Logical Devices on a Snap Server The instructions in this section are for users using ISNS. Note You can use CHAP authentication to enable multiple Linux systems with in-box initiators to share different logical devices on the iSCSI Storage Appliance. To do this, you would set up different Usernames and Passwords for a DiscoveryAddress, as described in Step 6 of “Setting up an In-box iSCSI Initiator”... -
Page 180: Iscsi Configuration For Solaris
iSCSI Configuration for Solaris restrict the number of logical devices the VMware initiator can access. See “Controlling Access to Your IP SAN with Authentication” on page 79 for more information. • The iSCSI initiator must have the “uses permanent discovery session” option enabled. - Page 181 • To configure dynamic discovery with iSNS, enter: # iscsiadm add iSNS-server 10.0.0.1:3205 where is the IP address of the iSCSI target. IP_address The iSCSI connection is not initiated until the discovery method is enabled. • To configure static discovery, enter: # iscsiadm add static-config eui.xxxx where is the Extended Unique Identifier (EUI) of the iSCSI target.
- Page 182 iSCSI Configuration for Solaris Snap Server 700i Series User’s Guide...
-
Page 183: Appendix B Using The Cli
U s i n g t h e C L I The Command Line Interface (CLI) software is a terminal-based command line interface that allows you to monitor and manage the iSCSI Storage Appliance. You can use the CLI to create and manage iSCSI targets that will appear as local disk storage on your server. -
Page 184: Access Levels And Passwords
Access Levels and Passwords Access Levels and Passwords The CLI has two levels of access: operator or administrator. The default password for both levels is admin Operator-level Access From the operator level, you can monitor the current status of the iSCSI Storage Appliance, but you cannot make any configuration changes. -
Page 185: Using The Wizard To Configure Your Iscsi Storage Appliance
Using the Wizard to Configure Your iSCSI Storage Appliance The Setup wizard runs if the iSCSI Storage Appliance is in factory default state when the CLI is started. (You can also run the Setup wizard by typing Setup wizard prompts you to enter the information required to connect the iSCSI Storage Appliance to a local network. - Page 186 The CLI Setup wizard then prompts you to enter the values you prepared in “Before You Begin” on page 34. Adaptec highly recommends that you record the values you enter during Note this task and store them for future reference.
-
Page 187: About Cli Commands And Parameters
About CLI Commands and Parameters A command is an area of functionality (for example, example, ), and possibly also followed by one or more parameters (for create example, ). For example: pool_name pool create mypool Different commands are available depending on what access level you’re working in ( operator administrator... -
Page 188: About The Command Format In This Guide
About the Command Format in This Guide About the Command Format in This Guide In this Guide, these formats are used to express commands and parameters. Format command or parameter command or parameter [parameter] value | value Command Completion You can request a command completion at any time by pressing the If the partial command you’ve typed can be completed by only one possible option, pressing adds that option to the end of the line automatically. -
Page 189: Command Line Editing
Command and Parameter Separation Commands and parameters are separated with one or more spaces and/or tab characters (white space). White space at the start and end of a command line is ignored. Character Case and White Space In general, the CLI is not case-sensitive. Commands and parameters can be typed using any combination of upper and lower case letters However, all IQNs, iSCSI Aliases, and initiator names must be entered in lower- case letters. -
Page 190: Viewing Long Reports
The CLI and Adaptec Storage Manager occasionally differ in terminology and other types of information. • Adaptec Storage Manager uses a disk drive’s World Wide Name (WWN), the CLI uses the disk drive's device ID for drive numbering. • Separate status PDU (Adaptec Storage Manager) and Piggybacking of SCSI status (CLI) both refer to an advanced iSCSI initiator setting. -
Page 191: Getting Help
Getting Help Getting Help You can request help at any time by typing anywhere in a line. The type of help help provided depends on where you are in the CLI. For instance, typing help generate a list of valid commands or parameters, or a list of all available commands. You can request a command completion at any time by pressing the key (see “Command Completion”... - Page 192 Getting Help Snap Server 700i Series User’s Guide...
-
Page 193: Appendix C Your Snap Server 700I Series
Appendix C Your Snap Server 700i Series This appendix provides information and assistance to system or network administrators preparing for the installation of a Snap Server 700i Series iSCSI Storage Appliance on their network. Every network topology is different, and every administrator works with different goals and resources. -
Page 194: Product Descriptions
The Snap Server 700i Series provides a cost-effective, low-maintenance network block iSCSI solution that supports simultaneous access by Windows and Linux hosts. All Adaptec OnTarget-powered Snap Servers come with three or four Gigabit Ethernet (GbE) ports, dual processors, and a SAS card for connecting to a SANbloc S50 expansion array. -
Page 195: Identifying The Ethernet Ports
• Standardize on a single vendor for external hardware components — Not only will standardization on a single vendor minimize the chance of unforeseen interoperability failures, it will also simplify troubleshooting procedures. (1) For a complete list of qualified components, including replacement parts Notes and installation instructions, see http://www.snapserver.com/support;... -
Page 196: Basic Hardware Shipped With Snap Server 700I Series
Basic Hardware Shipped with Snap Server 700i Series Basic Hardware Shipped with Snap Server 700i Series In addition to the enclosures and disk drives, the Snap Server 700i Series comes with these cables and components: Component Power Cables Ethernet Cables Rack Mount Assemblies Expansion Cables Dual Power Supply... - Page 197 For optimal performance, use only switches that support GbE. Switch(es) APC-Brand UPS Adaptec recommends that you use a UPS with the Snap Server 700i Device(s) Series. Snap Servers are compatible with USB-based and network- based APC-brand uninterruptible power supplies that allow you to take advantage of the automatic shutdown capability.
-
Page 198: Snap Server And Expansion Array Hardware Checklists
Snap Server and Expansion Array Hardware Checklists Snap Server and Expansion Array Hardware Checklists Hardware checklists show all hardware required for the installation of a Snap Server 700i Series or SANbloc S50 expansion array. Use the checklist to calculate the necessary rack allocations, switches, cables, and other materials needed for your chosen configuration prior to the arrival of the storage system. - Page 199 Snap Server 720i Hardware Checklist The following checklist shows the required and optional hardware to install a Snap Server 720i, and indicates whether a component comes with the server or must be supplied by the customer. Component Description Network and Ethernet Cables (3 per enclosure) Power Required to connect the Ethernet port(s) to the network.
- Page 200 Snap Server and Expansion Array Hardware Checklists Snap Server 730i and 750i Hardware Checklist The following checklist shows the required and optional hardware to install a Snap Server 730i or 750i, and indicates whether a component comes with the server or must be supplied by the customer.
- Page 201 SANbloc S50 Hardware Checklist The following checklist shows the required and optional hardware to install an S50 , and indicates whether a component comes with the server or must be supplied by the customer. Component Description Connection SAS Cable (1 per enclosure) and Power Required to connect the expansion array to the host Snap Server 700i Series.
-
Page 202: Snap Server And Expansion Array Hardware Specifications
Use only qualified components purchased from an authorized Adaptec Caution reseller to service Snap Server storage products. Qualified means that Adaptec technicians have tested and verified that the component operates properly with the Snap Server and other network components. Failure to use qualified components may seriously impact data availability, potentially lead to data loss and corruption, and will void your warranty. - Page 203 SANbloc S50 Specifications Feature Network Connection Dimensions Power Operating Environment Nonoperating Environment Regulatory Certifications Snap Server and Expansion Array Hardware Specifications Specification SAS connection to Snap Server 720i, 730i and 750i. No direct network connection. Width ...17.6 in (44.7 cm) Depth ...19.5 in (49.5 cm) Height ...3.5 in (8.9 cm), 2U Weight ...up to 60 lbs (27 kg) maximum...
-
Page 204: Safety Precautions
• Servicing the Unit — Never open the unit. For safety reasons, the unit should only be opened under the guidance of qualified service personnel. If one of the following situations arises, do not attempt a remedy; contact Adaptec technical support for assistance before proceeding: •... -
Page 205: Appendix D Raid Quick Reference
RAID Quick Reference This appendix provides quick-reference information about the RAID levels supported by your iSCSI Storage Appliance. Comparing RAID Levels Use this table to select the RAID levels that are most appropriate for the pools on your IP SAN, based on the number of available disk drives and your requirements for performance and reliability. -
Page 206: Selecting A Raid Level By Size Of Pool
Eight or more Expanding Pool Capacity Using Adaptec Storage Manager, you can expand the capacity of a pool by adding one or more disk drives (see page 90). You can expand pools with any of these RAID levels: RAID 0, RAID 5, RAID 6. -
Page 207: Appendix E Os Support Quick Reference
OS Support Quick Reference This appendix provides a quick-reference matrix of feature support by OS. For more information about Adaptec Storage Manager features (including special system requirements), see “Planning Your IP SAN” on page 13. Snap Server 700i Series User’s Guide... -
Page 208: Iscsi Initiator Support By Os
iSCSI Initiator Support by OS iSCSI Initiator Support by OS OS with Latest Service Pack Windows OSs Windows Server 2003: Enterprise Edition Enterprise Edition R2 Standard Edition Standard Edition R2 Web Edition Windows Small Business Server 2003 Windows Small Business Server 2003 R2 Windows Data Center 2003 Windows Data Center 2003 R2... -
Page 209: Adaptec Storage Manager Feature Support By Os
Adaptec Storage Manager Feature Support by OS OS with Latest Service Pack Windows OSs Windows Server 2003 Enterprise Edition R2 Windows Server 2003 Standard Edition R2 Windows Small Business Server 2003 R2 Windows Data Center 2003 R2 Windows Server 2003 Enterprise Edition... - Page 210 Adaptec Storage Manager Feature Support by OS Snap Server 700i Series User’s Guide...
-
Page 211: Appendix F Completing A Silent Windows Installation
You might want to do this for a batch file installation so that the setup will not return until the installation is finished. After a minute or two, the silent installation should be complete and the Adaptec Storage Manager icon should be accessible. Continue with “Setting Up Your iSCSI Storage Appliance and IP SAN”... -
Page 212: Available Properties And Values
(Not required) quotation marks. For example: INSTALLDIR=\"C:\Program Files\Adaptec\Adaptec Storage Manager\" Note: If you do not explicitly set the installation path, the default path is "C:\Program Files\Adaptec\Adaptec Storage Manager" USERNAME Specifies the log-in user name for the Management Service. - Page 213 ALL—Installs all of the following features. If you specify ALL, do not also specify any of the following values. l Agent—Installs the Adaptec Storage Manager Direct Attached Storage Agent. If this feature is installed, the machine will reboot if certain RAID controllers that use the filter driver are installed.
-
Page 214: Example Command Line Installations
ReallySuppress—Suppresses all reboots at the end of the installation. NOTE: A reboot is only forced by the Adaptec installer if you have installed the DSM feature, or if any files can’t be overwritten. Example Command Line Installations •... - Page 215 Example Command Line Installations • To install a local Management Service and the VDS/VSS Services with support for this local management service on machine COMP1234: setup.exe /s /v”/qn ADDLOCAL=Management Service,VDSExternal,VSSExternal USERNAME=admin PASSWORD=pass MGMTLOC=COMP1234 MGMTUSER=admin MGMTPASS=pass” Appendix F Completing a Silent Windows Installation...
- Page 216 Example Command Line Installations Snap Server 700i Series User’s Guide...
-
Page 217: Glossary
The Agent requires no user intervention and includes no user interface. Administrator A level of access privilege that allows full access to Adaptec Storage Manager, your iSCSI Storage Appliance, and your IP SAN. alien pool A partially configured pool, usually created as a result of an error during pool creation, such as a power failure. - Page 218 A non-700i Series Snap Server. See also iSCSI Storage Appliance. Graphical User Interface. The window that opens when you start Adaptec Storage Manager. The GUI must be installed on at least one system on your IP SAN. Host Bus Adapter. A hardware device that connects a host system, such as a workstation, to network or storage devices (such as DVD drives).
- Page 219 SAN. See also iSCSI target. iSCSI Storage Storage that is created, managed, and accessed over an IP SAN. Also one branch of the Enterprise View tree in Adaptec Storage Manager. iSCSI Storage A Snap Server 700i Series. The iSCSI initiators on your network...
- Page 220 Snap Server 700i Series User’s Guide Definition A utility in Adaptec Storage Manager that you can use to monitor jobs as they progress. See also job. Local Area Network. A network of interconnected systems sharing the resources of a single server, typically within the area of a small office building.
- Page 221 (fails over) to the remaining path. A component of the Windows Support installation option in Adaptec Storage Manager; must be installed on all iSCSI Storage Hosts on your IP SAN if you want to create volume mirrors or a multipath IP SAN.
- Page 222 RAID 6 pools. Also referred to as dual drive failure protection. In Adaptec Storage Manager, the trail of yellow or red warning icons that leads from the high-level system view to the failed or failing component.
- Page 223 Storage Hosts on your IP SAN if you have a mixed storage environment. Not all OSs support the VDS Provider. See “Adaptec Storage Manager Feature Support by OS” on page 203 for more information. See also Windows Support.
- Page 224 Collective term for Windows Server 2003 (all versions), Windows Small Business Server 2003, and Windows Data Center 2003 operating systems. Windows Support is a collection of enhanced Adaptec Storage Manager components that can be installed on iSCSI Storage Hosts only. Windows Support comprises these components: MPIO DSM (Multipath Driver), Two disk drives, where one disk drive is a mirror of the other (the same data is stored on each disk drive)., VDS...
-
Page 225: Index
Set snapshot group online 148 Shut down iSCSI Storage Appliance 104 SMTP server settings 123 Update controller images 105 activity on IP SAN 112 Adaptec ROM Update wizard 105 Adaptec Storage Manager adding iSCSI Storage Hosts 86 Administrators 81 display groups 135... - Page 226 Linux 60 Windows 60 updating 133 VDS Provider 17 VSS Provider 17 Windows Support components 17 Adaptec Storage Manager Agent 16 adding iSCSI Storage Appliance 86 adding iSCSI Storage Hosts 86 adding Management Services 85 ADDLOCAL 207 administrator password (default) 178...
- Page 227 help command 185 manage commands overview 181 parameters 181 password settings 37 passwords 178 reports 184 separators 183 Setup Wizard 179 Telnet 155 VT100 terminal emulation 155 white space 183 white space character 183 command line editing 183 Command Line Interface. See CLI component properties 114 component status 114 components...
- Page 228 failed test emails 122 modifying recipient information 122 removing a recipient 122 setup 121 SMTP server 123 SMTP server settings 121 test emails 122 troubleshooting 122 enclosure management 113 enclosure management device icon 113 Enterprise View 52 Direct Attached Storage branch 53 display groups 135 display options 134 iSCSI Storage branch 53...
- Page 229 147 icons disk drive failure 147 removing failed disk drive icon 147 information icon 113 INSTALLDIR 206 installing Adaptec Storage Manager 27 Linux 30 required and optional components 18 Windows 27 Windows silent installation 205 IP SAN access control 77...
- Page 230 111 Knowledge Base 9 Linux creating logical drives 42 feature support 14 installing Adaptec Storage Manager 30 iSCSI initiator configuration 169 in-box initiators 169 provisioning storage 42 recovering from flash drive failure 153 starting Adaptec Storage Manager 35...
- Page 231 creating dedicated hot spares 62 deleting 100 description 42 discovery settings 45 formatting on Windows 160 iSCSI ping settings 45 limitations 87 modifying 99 Protocol Data Unit settings 45 RAID level 56 selecting disk drives 39 size 39 SRP authentication settings 44 viewing disk drives 56 Logical Devices View 52 logical drives.
- Page 232 126 network card status 127 network settings 104 – notifications 120 online help 60 operating system support 25 Adaptec Storage Manager features 203 iSCSI initiators 202 Operator privileges 81 passwords (CLI) 178 permission levels 81 Physical Devices View 52 –...
- Page 233 Storage Appliance 35 configuring iSCSI Storage Appliance without DHCP server 24 configuring the iSCSI Storage Appliance creating pools 38 DHCP settings 37 installing Adaptec Storage Manager 27 – IP SAN 33 – iSCSI storage 33 iSCSI Storage Appliance 35...
- Page 234 Solaris iSCSI initiator configuration 174 Solaris iSCSI initiator configuration 174 SRP authentication 44 modifying 80 standard unit of measure 134 starting Adaptec Storage Manager 35 status 112 component properties 114 disk drives 55 display group 136 email notifications 120 enclosures 113...
- Page 235 Storage Appliance 149 snapshots 148 support archive file 142 volumes 139 typographical conventions 10 uninstalling Adaptec Storage Manager 60 Linux 60 Windows 60 units of measure 134 updating Adaptec Storage Manager 133 updating controller images 105...
- Page 236 Warning (job status) 68 warning icon 113 Web Administrator 130 white space character 183 Windows installing Adaptec Storage Manager 27 Snap Server 700i Series User’s Guide silent installation 205 iSCSI initiator configuration 157 QLogic initiators 164 starting Adaptec Storage Manager 35...
Need help?
Do you have a question about the 5325302057 and is the answer not in the manual?
Questions and answers