DiGidot C4 Manual
Hide thumbs
Also See for C4:
- Manual (78 pages) ,
- Quick start up manual (15 pages) ,
- Quick manual setup (2 pages)
Table of Contents
Advertisement
Quick Links
Advertisement
Table of Contents

Related Manuals for DiGidot C4


Summary of Contents for DiGidot C4
- Page 1 C4 MANUAL...
- Page 2 THANK YOU FOR CHOOSING DIGIDOT! The DiGidot C4 is the most advanced and versatile LED pixel controller of its kind. This multifunctional device enables you to create technically complex and creative pixel controlled light applications. We strive to offer you the latest technology in LED lighting control and we’re constantly innovating and expanding our control platform.
-
Page 3: Table Of Contents
Getting started Scenes (DiGidot C4 Extended only) Create scenes Record options Recording DMX Record settings Generate Scene (DiGidot C4 Extended only) Playlists (DiGidot C4 Extended only) Triggers (DiGidot C4 Extended only) Creating triggers Trigger inputs Analog triggers Creating analog triggers... - Page 4 Inputs & outputs configuration (manual configuration) In/out configuration item page Network settings Ethernet configuration Wi-Fi configuration Device License License upgrade Having trouble upgrading your DiGidot C4 license? Offline upgrade Account Interface Update Offline update Backup and restore TIPS & TROUBLESHOOTING...
- Page 5 What is the storage capacity of the C4 Extended? Can licenses be combined in a network? How does the DiGidot C4 know what time it is? Why do I get a repeating message; “The SD card(s) need to be formatted”?
-
Page 6: Introduction
A built in web based user interface allows the DiGidot C4 controller to be configured by computer and even by smartphone or tablet through the DiGidot C4 app. DiGidot C4 controllers can work together to create a huge device network to control any scale of pixel project. -
Page 7: Product Information
PRODUCT INFORMATION Box contents C4 Live version ‣ DiGidot C4 Live ‣ Output terminal connector ‣ Quick start guide ‣ USB power cable ‣ RJ45 network cable C4 Extended version DiGidot C4 Extended ‣ ‣ Output terminal connector ‣ Quick start guide... -
Page 8: Technical Specifications
Art-Net 1, 2, 3 & 4 (out/through) DMX512 (2 outputs) DMX TTL (4 outputs) 55+ SPI protocols (check supported IC’s list) UDP (DiGidot C4 Extended only) OSC (DiGidot C4 Extended only) Output channels (of 4 I/O ports): Up to 8192 Art-Net channels or 1.024 DMX channels (license dependent). - Page 9 Art-Net / DMX HTTP-Get JSON Internal tasks (presence/absence of Art-Net or when a scene is (not) playing) DiGidot C4 web based user interface DiGidot C4 app Programming & control: DiGidot C4 web based user interface DiGidot C4 app Any type of Art-Net Software/Device (visit our website: www.digidot.eu...
-
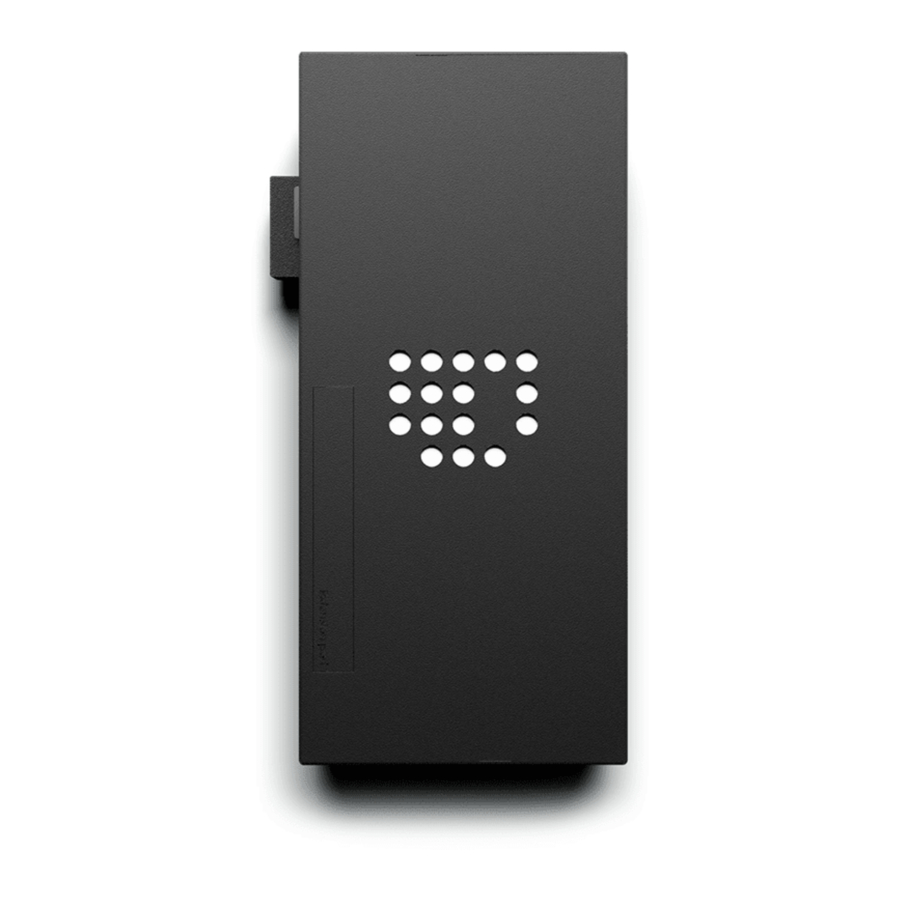
Page 10: Product Drawings
Product drawings The DiGidot C4 explained Top Status Light Micro SD Analog jack (TRRS) Side Status Light Power Port Input/Output Port Ethernet Ports Button C4 Manual Version 2.1.5 10 74... -
Page 11: Art-Net/Dmx Controller Required
Art-Net/DMX controller required In order for the DiGidot C4 to work in a live system setup or to be able to record scenes (DiGidot C4 extended only), a third party Art-Net/DMX software or console is required. The DiGidot C4 controllers are known to be working with various professional grade softwares and consoles, such as: MADRIX, Pharos, ArKaos, Resolume Arena, MadMapper, POET, grandMA and many more. - Page 12 DiGidot PxLNet Transmitter module is connected to the DiGidot C4. Art-Net IP Address filter With this feature you can configure the DiGidot C4 to only listen to a specific IP Address as input. Signals from other IP Addresses will be ignored.
- Page 13 Adjustable fall back color In case of absence or loss of the control signal, a fall back color can be set for every DiGidot C4. You can also set the delay time before the fall back activates. Online/offline firmware updates We offer online updates easily within the user interface and offline updates in case that the DiGidot C4 controllers are not connected to the internet.
-
Page 14: Before Installation
The DiGidot C4 is not POE ready (Power Over Ethernet)! Applying POE will cause fatal damage ‣ to the DiGidot C4. Make sure that POE is turned off in your access point, router or network switch settings, before connecting the DiGidot C4 to your network. -
Page 15: Register Your Product
DiGidot reseller or DiGidot Technologies B.V. prior to installation for further consultation. Wall mounting Use the mounting holes on the underside of the housing to mount the C4 to install the device vertically or horizontally. (screws not included) Mounting examples C4 Manual Version 2.1.5... - Page 16 Horizontal: Slide into place Vertical: Slide into place C4 Manual Version 2.1.5 16 74...
-
Page 17: Din-Rail Mounting
DIN-rail mounting For 35 mm DIN-rail mounting use the DiGidot DIN-rail clip, art. No. 20902 (not included). Place the DIN-rail clip against the DIN-rail alignment marker on the DiGidot C4 housing and align both mounting holes (see picture). Install the clip with the included 3x 12 mm screw. When the DIN-rail clip is secured properly, you can install the device easily on a DIN-rail (see picture). - Page 18 WARNING! Do not cover this device by any insulating material (fire hazard). The DiGidot C4 should not be placed in a hot environment or subjected to direct or indirect fire (explosion risk)! The DiGidot C4 should not be subjected to higher temperatures than their specification range (explosion risk)!
-
Page 19: Installation & Wiring
To avoid timing and synchronization issues, the SPI signal and ground wires that are running from one DiGidot C4 to the LEDs must be equal in length per port. It’s best to treat SPI signal and ground wires always as a paired cable. - Page 20 4X SPI OUT Recommendation is max. 3 SPI universes per port (check the C4 Performance guide) | SPI cable length max. 2 m. (7 ft.) 5-24 -- + Ethernet SPI DATA 1 DC + GND 1 DC -- SPI DATA 2...
- Page 21 Data + Clock) determines how you need to connect the SPI signal(s). A Data + Clock signal always requires two outputs of the C4. Cable should be DMX cable with an impedance of 110 Ohm or CAT5 or higher.
-
Page 22: Ethernet Connection
Ethernet connection The DiGidot C4 has a built-in two port ethernet switch that allows multiple units to be daisy chained. Due to syncing, latency and performance reliability, we advise to keep the amount of daisy chained devices to a minimum. Depending on the overall network data load, the amount of daisy-chainable devices might vary, we recommend not to exceed 5 daisy chained devices to ensure reliable performance. -
Page 23: Connecting Power
C4 can be max. 100 meters (CAT5E or higher). It’s recommended to use a Gigabit Ethernet switch when connecting more than five DiGidot C4 controllers. Connecting power Before connecting power, make sure that the outputs are wired properly to avoid short circuits. - Page 24 Wiring scheme 1 If DC Jack is connected for powering the C4, the grounds between PSU and C4 need to be connected. Wiring scheme 2 Each SPI Ground wire must be the same length as the Data wires per output, to prevent timing issues.
- Page 25 In this case the power supplies grounds do not need to be connected because they share the ground through the LED product. Wiring scheme 4 Grounds are not connected and not the same length as the data wires. C4 Manual Version 2.1.5 25 74...
-
Page 26: Use Of Trigger Inputs (Extended License Only)
The DiGidot C4 Trigger input has following pinout: 1. Analog trigger 3 2. Analog trigger 2 3. Analog trigger 1 4. Ground The DiGidot C4 TRRS Trigger cable has the following corresponding wires: 1. Red Analog 1 2. White Analog 2 3. -
Page 27: Configuration
DHCP server is enabled by default, please follow the steps in previous chapter. A fixed IP address may be required if you want to connect a control system to the DiGidot C4, such as a computer with MADRIX. -
Page 28: Configuring Wi-Fi For Digidot App Access
RJ45 network ports of the DiGidot C4 and into the computers Ethernet/ UTP port. NOTE: Please note that changing your Ethernet settings can prevent you from reaching the Internet and/or other devices in your network. -
Page 29: Wireless Quick Start
2. Press and hold the on board button for 10 seconds to turn on the Wi-Fi. This will automatically setup your DiGidot C4 as a temporary access point. The status LEDs of the DiGidot C4 will turn blue- white when the access point is activated. The access point wil be closed again after startup/reboot, unless you configure it permanently on the Wi-Fi settings page. - Page 30 Subnet-mask: 255.0.0.0 NOTE: These settings are just an example in order to get the DiGidot C4 to work. Alternatively the DiGidot C4 can be integrated in an existing network (be sure to change your DiGidot C4 network settings to match your local network). For questions about network integration, consult a local IT or network specialist.
-
Page 31: Interface
The interface can be accessed through a web browser by using a wired ethernet or Wi-Fi connection using the IP Address of the DiGidot C4 (default Ethernet IP Address: 10.254.254.254). You can also use our free DiGidot app for mobile devices with the same functionalities as the build in web interface. -
Page 32: Getting Started
Home > Getting started In order get started quickly or if you’re new to using the DiGiDot C4, we recommend using the Getting Started wizard from the Home menu. This wizard will guide you through all essential steps to get the DiGidot C4 up and running. -
Page 33: Record Options
To create an Art-Net trigger you need to specify a universe number, a channel number and a minimum and maximum DMX/channel value between 0 and 255, to determine when when the event should be triggered. These triggers can also be created manually on the Home > Triggers page. C4 Manual Version 2.1.5 33 74... -
Page 34: Generate Scene (Digidot C4 Extended Only)
Fixed frame rate If fixed frame rate is enabled (default) the DiGidot C4 will record at 62 fps. If the option is disabled, the DiGidot C4 will create a frame for each Art-Net/DMX message, this can be useful when your software is sending at a fixed frame rate for example. -
Page 35: Playlists (Digidot C4 Extended Only)
When the scenes have been added to the playlist, you can drag and drop scenes in any order with icon. Action output In case that there are multiple DiGidot C4 devices present in your network, you can assign which devices have to play a specific scene. Repeat The number of times that a scene is played. -
Page 36: Triggers (Digidot C4 Extended Only)
Triggers (DiGidot C4 Extended only) Home > Triggers The DiGidot C4 Extended is able to use a wide variety of triggers to control various events. Triggers can be used to control following events: Play scene(s), Play playlist(s), Action list, Stop, Next, Previous, Speed, Brightness, Record, Reset, send UDP message, send OSC message, etc. -
Page 37: Trigger Inputs
Home > Triggers > select ‘+’ to add a trigger > select ‘Analog’ The DiGidot C4 Extended has three analog inputs that can be used to control or trigger various events. Please make sure that the analog inputs are properly connected before you start using them. -
Page 38: Art-Net Or Dmx Triggers
If all ports are already in use you have to re-configure the input/output configuration. Home > Settings > In/out configuration and adjust I/O setting per port. NOTE: DMX uses two lines for data; DMX + and DMX - and therefore requires two DiGidot C4 ports. If this.. -
Page 39: Onboard Button
Select ‘TIME PERIOD’ for triggers that have to be active during a specific time frame. E.g. A trigger is created with a time frame from 10 AM till 12 AM. When the DiGidot C4 is powered within this time frame, it will execute the associated action. The action will not stop at the end of the time frame (12 AM). -
Page 40: Osc
This also allows users to incorporate control over the DiGidot C4 in other software programs. Detailed API information can be found in our DiGidot C4 API document on our website, go to https:// digidot.eu/support/documentation... -
Page 41: Udp
Home > Triggers > select ‘+’ to add a trigger > select ‘UDP’ UDP is a small message send over the network port. The DiGidot C4 can receive UDP messages. This can be useful if other software needs to control the DiGidot C4 controller. UDP is mostly used by developers. -
Page 42: Http
Home > Triggers > select ‘+’ to add a trigger > Internal task’ This trigger can be used to trigger events when the DiGidot C4 is in a specific status, such as playing a scene or when in idle state. -
Page 43: Counter
±20 minutes per year. In order to resynchronize the RTC, the C4 (network) must be connected to a computer or to the DiGidot C4 app and the interface must be loaded. The C4 will then automatically obtain the local real time and will reset its RTC. -
Page 44: Trigger Actions
Action 1: Select an action from the drop down menu. An action will add one or more extra options ‣ depending on the action type. E.G. a Scene will add a drop down menu to select a scene and an option to set a fade time. ADD SUBACTION: ‣ C4 Manual Version 2.1.5 44 74... - Page 45 This is the on/off switch for this trigger input. Please note that in case this trigger input should become (in)active again, another counter Reset counters: Select one one or multiple counters that need to be reset. C4 Manual Version 2.1.5 45 74...
-
Page 46: Pause
Action examples: Select an action from the pop up window. Restart: This trigger will perform a restart of the DiGidot C4 controller(s). You can add multiple subactions per action. + ADD ACTION: Add another action to the action list. -
Page 47: Previous
Link to another trigger You can link to other actions that have already been created. This also allows you to trigger an action list for example. Select action: Select an action from the pop up menu. C4 Manual Version 2.1.5 47 74... -
Page 48: Enable/Disable Other Trigger Input(S)
Value: Enter the value for OSC message. Restart This trigger will perform a restart of the DiGidot C4 controller(s). Custom Custom action: This trigger opens a note pad where custom trigger code can be entered. This option is usually reserved for developers or custom made code. -
Page 49: Groups
Groups Home > Groups This function allows you to create specific groups of DiGidot C4 controllers. This makes the configuration, identification, testing, restarting and organizing specific parts of your project or installation a lot easier. (This feature is still in development and will be updated in the future.) C4 Manual Version 2.1.5... -
Page 50: Add A Group
Ethernet latency shows the network message response time. When the Ethernet latency light is green, the network connection is working. When the Ethernet latency light is red the DiGidot C4 is not responding. Click on the “timeout” text to get more information about the timeout session. -
Page 51: Settings Overview
To edit the output options, click the universe item. The DiGidot C4 is able to output one SPI protocol type simultaneously. If you select an SPI protocol for one port, this protocol will be used for all other output ports. - Page 52 This also means that you can record an Art-Net stream and play it back using Art-Net. Recorded universes can outputted on different output universes, defined in the Art-Net redirect. NOTE: The DiGidot C4 starts to count universes at 0 (zero)! Some softwares or consoles, such as MADRIX may start counting at universe 1.
-
Page 53: In/Out Configuration Item Page
Explained: First, the start channel will shift 100 channels of the input. This will skip the first 100 channels of the universe. Then set the channels to 200, because 200 channels are required, starting after the first 100 skipped channels. C4 Manual Version 2.1.5 53 74... - Page 54 NOTE: Combining input channels will not reduce the amount of output channels. The DiGidot C4 is always limited to the total amount of output channels corresponding to the license. The number of input universes is not limited.
- Page 55 ‣ of this IO configuration item. 16 bit input: When sending 16 bit data to the DiGidot C4, two input channels are used for one ‣ color channel. If your IC does not support 16 bit and you want to convert 16 bit to 8 bit, please enable this option.
-
Page 56: Network Settings
Network broadcast range of your device. Smart ethernet DHCP Enable or disable the smart DHCP server. When enabled the DiGidot C4 will assign IP Addresses to devices that connect trough ethernet. In case you’ve changed any ethernet settings, click the ‘SAVE’ button to store them. - Page 57 This is the starting IP Address of the IP Address range that the DiGidot C4 can assign to other devices in the network. DHCP end IP Address This is the last IP Address of the IP Address range that the DiGidot C4 can assign to other devices in the network. Enable BSSID...
- Page 58 After selecting a network, you will be asked to enter the network password in case it is protected. Static IP Enable the option to fill in a static IP Address. When disabled the DiGidot C4 will use DHCP to get an IP Address from the network.
-
Page 59: Device
Another option quick option to upgrade a DiGidot C4 is to use your smart device camera, scan the QR code on the DiGidot C4 device label and follow the the link to our website. -
Page 60: Offline Upgrade
7. Open the file and copy the license key text. 8. Go to the DiGidot C4 interface and go to settings > license. Then toggle the option for the offline upgrade. A text field will appear. Paste the license key in the field and then click ‘upgrade’. -
Page 61: Update
Click the “Browse“ button and locate the update file. Then Click “update” to start the update process (this may take a few minutes). After the update is completed the DiGidot C4 status lights will return to idle state, fading blue to light blue. -
Page 62: Tips & Troubleshooting
2. Make sure that input and output matches the system setup. Please note: Some software start universe counting from 1 instead of universe 0. 7. Is your ground (DC-) from the DiGidot C4 output terminal connected to all the grounds of the LED products power supplies? 8. -
Page 63: Network Status Lights
‣ in case your data cable between the DiGidot C4 and your first LED/IC is longer than 2 meters ‣ (6.5 ft), please reduce this length to an absolute minimum and check if this solves the problem. -
Page 64: Art-Net Software Doesn't Recognize The Digidot C4
Some Art-Net consoles only work in the 2.0.0.255 range. Please configure your device in the same range if necessary. In case your console or software continues to fail to discover the DiGidot C4 you can try to reboot your DiGidot C4 device(s). If the problem still remains please contact DiGidot support. -
Page 65: Factory Reset
The device will reboot and is then ready to use. In case you’re not able to perform this reset due to accessibility and if the C4 network is or can be connected to a computer with internet access, contact DiGidot support for remote assistance. -
Page 66: Forgot The Username Or Password For The Digidot C4
Make sure that the computer network is in the same range as the DiGidot C4. For example when your DiGidot C4 is configured to use the IP address “10.0.0.2” with subnet mask “255.0.0.0” your computer network needs to be in that same “10.x.x.x” range on subnet mask “255.0.0.0”. -
Page 67: Some Led's/Colors Are Not Responding Correctly
NOTE: Re-supplying power must be done from the same power supply or if another power supply is being used, all grounds of of all power supplies must be connected in order to balance the ground potential. C4 Manual Version 2.1.5 67 74... -
Page 68: No Microsd Card
TIP: Do not use excessive wire gauges to transfer data from the DiGidot C4 to the LED products, this will only increase the risk of failures. Typically we recommend to use wire gauges for the data signal of 0.3-0.5 mm (20-22 AWG). -
Page 69: Faq
How does the DiGidot C4 know what time it is? As soon as you load the DiGidot C4 interface, the browser time of your computer or mobile device is copied. The internal battery will keep track of time, until you load the interface again to synchronize time. -
Page 70: Accessories
DiGidot C4 from the end of the LED product(s) and when more LEDs are turned on. Please check the voltage at the screw terminal of the DiGidot C4 and re-apply power or change your wiring if necessary. -
Page 71: Various
‘Manual version’. NOTE: This manual covers information for the DiGidot C4 Live and Extended controllers. In case of C4 Live controllers, some of the features may not be displayed in the user interface because they are limited to the Extended version only (refer to appropriate symbols in this manual). -
Page 72: Compliances & Eu Declaration Of Conformity
This product is designed and produced by DiGidot BV, Amsterdam, The Netherlands. Country Of Origin is The Netherlands. Official Certificates of Origin can be issued upon request. Hereby, DiGidot Technologies BV declares that the DiGidot C4 device complies with and was tested according to essential requirements of all relevant CE directives. -
Page 73: Disposal And Recycling
Feedback Tell us all about your experience with DiGidot! The continuous development of the DiGidot control platform is only possible thanks to feedback from our users. If you have any suggestions, please contact us by email: info@digidot.eu. Imprint... -
Page 74: Disclaimer
DiGidot Technologies BV from liability and warranty obligations. Manual version This manual version may pre date the firmware version of your DiGidot C4 controller. Some functions may be different and new features may have been added. Please make sure that you’re using the manual that matches your firmware version.
Need help?
Do you have a question about the C4 and is the answer not in the manual?
Questions and answers