DiGidot C4 Extended Manual
Hide thumbs
Also See for C4 Extended:
- Manual (74 pages) ,
- Quick start up manual (15 pages) ,
- Quick manual setup (2 pages)
Table of Contents
Advertisement
Quick Links
Advertisement
Table of Contents

Related Manuals for DiGidot C4 Extended


Summary of Contents for DiGidot C4 Extended
- Page 1 C4 MANUAL...
-
Page 2: Thank You For Choosing Digidot
THANK YOU FOR CHOOSING DIGIDOT! The DiGidot C4 is the most advanced and versatile LED pixel controller of its kind. This multifunctional device enables you to create technically complex and creative pixel controlled light applications. We strive to offer you the latest technology in LED lighting control and we’re constantly innovating and expanding our control platform. -
Page 3: Table Of Contents
Device network settings for Art-Net and sACN INTERFACE Interface map Getting started Scenes (DiGidot C4 Extended only) Create scenes (DiGidot C4 Extended only) Record scene Record settings Generate Scene (DiGidot C4 Extended only) Playlists (DiGidot C4 Extended only) Triggers (DiGidot C4 Extended only) - Page 4 Inputs & outputs configuration In/out configuration item page Network settings Ethernet configuration Wi-Fi configuration Device settings Remote Device Manager License License upgrade Having trouble upgrading your DiGidot C4 license? Offline upgrade Account Interface settings Update Offline update Backup and restore Support overview Manual F.A.Q.
- Page 5 C4 controllers are not starting up Factory reset Having trouble with your DiGidot C4 Setup? Forgot the username or password for the DiGidot C4? Can’t find your protocol/IC? Need to cover greater cable distances between the outputs and first LED/IC? Some LED’s/colors are not responding correctly...
-
Page 6: Introduction
INTRODUCTION The DiGidot C4 is a unique and powerful LED controller that allows you to control pixel controlled LED products through Art-Net, sACN or DMX which are converted to various SPI protocols. It has a huge controlling capacity up to 8092 individual channels (depending on the DiGidot C4 license). -
Page 7: Product Information
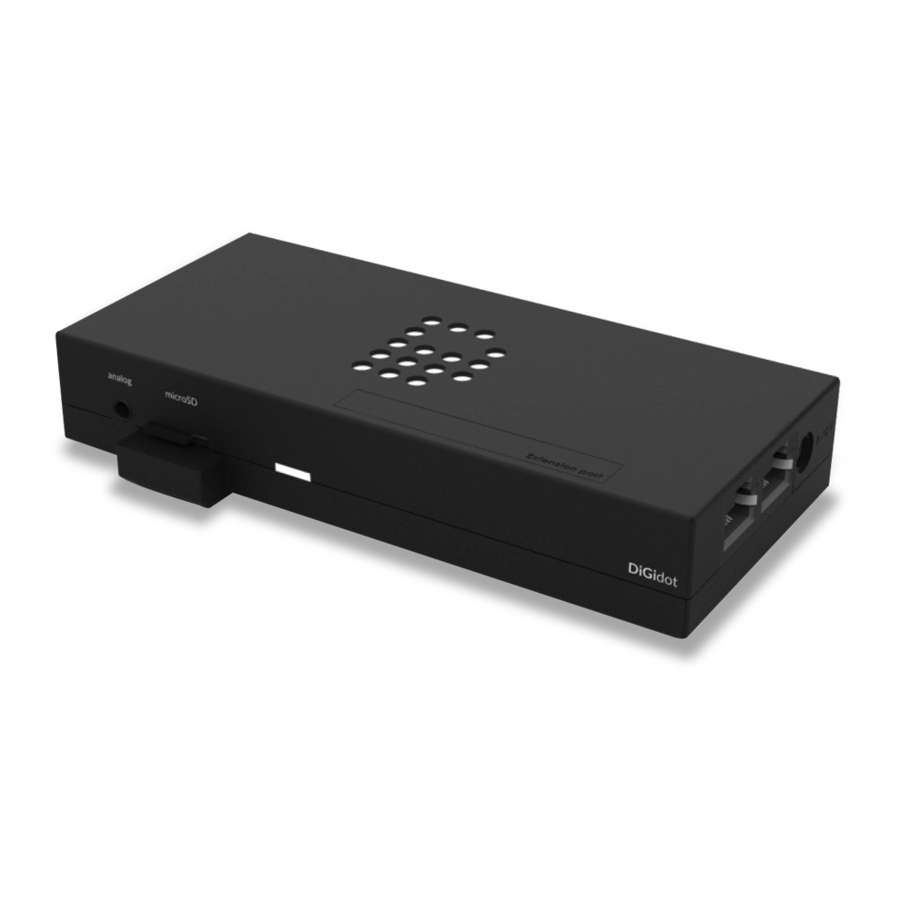
DiGidot C4 Live ‣ Output terminal connector Quick start guide ‣ USB power cable ‣ RJ45 network cable ‣ C4 Extended version ‣ DiGidot C4 Extended ‣ Output terminal connector Quick start guide ‣ DiGidot 8 GB microSD card ‣... -
Page 8: Technical Specifications
DMX512 (2 outputs) DMX TTL (4 outputs) 60+ SPI protocols (check supported IC’s list online) UDP (DiGidot C4 Extended only) OSC (DiGidot C4 Extended only) Output channels (of 4 I/O ports): Up to 8192 Art-Net or sACN channels or 1.024 DMX channels (license dependent). - Page 9 DiGidot C4 app Programming & control: DiGidot C4 web-based user interface DiGidot C4 app Any type of Art-Net or sACN Software/Device (visit our website: www.digidot.eu for a complete list of supported software) Connectivity Terminal wiring: Max. 2.5 mm (14 AWG)
-
Page 10: Product Drawings
Product drawings C4 Manual Version 2.2.0 10-78... -
Page 11: The Digidot C4 Explained
Art-Net, sACN or DMX controller required In order for the DiGidot C4 to work in a live system setup or to be able to record scenes (DiGidot C4 extended only), a third-party Art-Net, sACN or DMX software or console is required. The DiGidot C4 controllers are known to be working with various professional grade softwares and consoles, such as: MADRIX, Pharos, ArKaos, Resolume Arena, MadMapper, POET, grandMA and many more. -
Page 12: Key Features Explained
DiGidot PxLNet Transmitter module is connected to the DiGidot C4. IP Address filter With this feature you can configure the DiGidot C4 to only listen to a specific IP Address as input. Signals from other IP Addresses will be ignored. - Page 13 Adjustable fall back color In case of absence or loss of the control signal, a fall back color can be set for every DiGidot C4. You can also set the delay time before the fall back activates.
- Page 14 E.g.: Limiting power to 50% means that half of the channels can output 100% and the other half at 0% or all channels at 50%, etc. In case you would try to output all channels to 75%, the output of all channels would be automatically limited to a total 50%, but will maintain ratios relative to each other.
-
Page 15: Before Installation
The DiGidot C4 is not POE ready (Power Over Ethernet)! Applying POE will cause fatal damage to the DiGidot C4. Make sure that POE is turned off in your access point, router or network switch settings, before connecting the DiGidot C4 to your network. -
Page 16: Register Your Product
To register your product, you will require a DiGidot account. ‣ If you have created or signed into your DiGidot account with the User Interface of your DiGidot C4, your product may already be registered. To verify your registration, please log in and check your profile. -
Page 17: Wall Mounting
Wall mounting Use the mounting holes on the underside of the housing to mount the C4 to install the device vertically or horizontally. (screws not included) Mounting examples Horizontal: Slide into place C4 Manual Version 2.2.0 17-78... -
Page 18: Din-Rail Mounting
Slide into place DIN-rail mounting For 35 mm DIN-rail mounting use the DiGidot DIN-rail clip, art. No. 20902 (not included). Place the DIN-rail clip against the DIN-rail alignment marker on the DiGidot C4 housing and align both mounting holes (see picture). - Page 19 Install DIN-rail clip Mount DiGidot C4 on DIN-rail C4 Manual Version 2.2.0 19-78...
- Page 20 Removing the DiGidot C4 from a DIN-rail Warning Do not cover this device by any The DiGidot C4 should not be Do not use the DiGidot C4 insulating material (fire hazard). subjected to extremely low air outdoors or in humid...
-
Page 21: Installation & Wiring
To avoid timing and synchronization issues, the SPI signal and ground wires that are running from one DiGidot C4 to the LEDs must be equal in length per port. It’s best to treat SPI signal and ground wires always as a paired cable. - Page 22 4X SPI OUT Average recommendation is max. 3 SPI universes per port (check the C4 Performance guide for max. load per IC) | SPI cable length max. 2 m. (7 ft.) This option shows four SPI Data only outputs. Each SPI Ground wire must be the same length as the Data wires per output, to prevent timing issues.
- Page 23 1 x DMX IN/OUT + 1 x SPI OUT Max. 512 channels per combined DMX port | DMX cable length max. 500 m. (1640 ft.) | SPI cable length max. 2 m. (7 ft.) This option shows a combined output of SPI and DMX in or out. Please note that the SPI type (Data only or Data + Clock) determines how you need to connect the SPI signal(s).
-
Page 24: Ethernet Connection
Ethernet connection The DiGidot C4 has a built-in two port ethernet switch that allows multiple units to be daisy chained. Due to syncing, latency and performance reliability, we advise to keep the amount of daisy chained devices to a minimum. Depending on the overall network data load, the number of daisy- chainable devices might vary, we recommend not to exceed 5 daisy chained devices to ensure reliable performance. -
Page 25: Connecting Power
Before connecting power, make sure that the outputs are wired properly to avoid short circuits. IMPORTANT: When you’re using different power supplies to power the DiGidot C4 and the LEDs, it is of utmost importance to equalize the ground potentials. - Page 26 Wiring scheme 1 If DC Jack is connected for powering the C4, the grounds between PSU and C4 need to be connected. Wiring scheme 2 Each SPI Ground wire must be the same length as the Data wires per output, to prevent timing issues.
- Page 27 Wiring scheme 3 Each SPI Ground wire must be the same length as the Data wires per output, to prevent timing issues. In this case the power supplies grounds do not need to be connected because they share the ground through the LED product. Wiring scheme 4 Grounds are not connected and not the same length as the data wires.
-
Page 28: Use Of Trigger Inputs (Extended License Only)
The DiGidot C4 Trigger input has following pinout: 1. Analog trigger 3 2. Analog trigger 2 3. Analog trigger 1 4. Ground The DiGidot C4 TRRS Trigger cable has the following corresponding wires: 1. Red Analog 1 2. White Analog 2 3. -
Page 29: Configuration
DHCP server is enabled by default, please follow the steps in previous chapter. A fixed IP address may be required if you want to connect a control system to the DiGidot C4, such as a computer with MADRIX. - Page 30 The static IP address of your computer Subnet mask 255.0.0.0 Network broadcast range of your computer Gateway (empty) Router for Internet access Your computer is now ready to access the DiGidot C4. Open your web browser and go to http://10.254.254.254. C4 Manual Version 2.2.0 30-78...
-
Page 31: Configuring Wi-Fi For Digidot App Access
2. Press and hold the on-board button for 10 seconds to turn on the Wi-Fi. This will automatically setup your DiGidot C4 as a temporary access point. The status LEDs of the DiGidot C4 will turn blue- white when the access point is activated. The access point will be closed again after startup/reboot, unless you configure it permanently on the Wi-Fi settings page. - Page 32 2. Configure device name and network settings Home > Settings > Network. You can change the IP Address and subnet mask of the DiGidot C4. The IP Address needs to be unique in your network to avoid IP conflicts. The device name than will be shown in the network can be changed on device page.
-
Page 33: Interface
The interface can be accessed through a web browser by using a wired ethernet or Wi-Fi connection using the IP Address of the DiGidot C4 (default Ethernet IP Address: 10.254.254.254). You can also use our free DiGidot app for mobile devices with the same functionalities as the build in web interface. -
Page 34: Getting Started
By clicking the FPS monitor it will show the incoming signal for each DiGidot C4 device. This can help to check which device is getting a low FPS signal. To improve the incoming signal, try to set the software that is sending the signal to a higher output FPS rate. -
Page 35: Record Settings
On this page you can select and deselect the incoming universes that can be recorded. It will also show the FPS (frame per second) of the incoming signal for each DiGidot C4. Use Art-Net to start, stop and save records This option allows you to trigger following record functions: prepare record buffers, start, stop and save records with an Art-Net signal. -
Page 36: Generate Scene (Digidot C4 Extended Only)
Fixed frame rate If fixed frame rate is enabled (default) the DiGidot C4 will record at 62 fps. If the option is disabled, the DiGidot C4 will create a frame for each Art-Net, sACN or DMX message, this can be useful when your software is sending at a fixed frame rate for example. -
Page 37: Playlists (Digidot C4 Extended Only)
When the scenes have been added to the playlist, you can drag and drop scenes in any order with icon. Action output In case that there are multiple DiGidot C4 devices present in your network, you can assign which devices have to play a specific scene. Repeat The number of times that a scene is played. -
Page 38: Triggers (Digidot C4 Extended Only)
Triggers (DiGidot C4 Extended only) Home > Triggers The DiGidot C4 Extended is able to use a wide variety of triggers to control various events. Triggers can be used to control following events: Play scene(s), Play playlist(s), Action list, Stop, Next, Previous, Speed, Brightness, change color, saturation filter, Record, Reset, send UDP message, send OSC message, etc. -
Page 39: Trigger Inputs
Home > Triggers > select ‘+’ to add a trigger > select ‘Analog’ The DiGidot C4 Extended has three analog inputs that can be used to control or trigger various events. Please make sure that the analog inputs are properly connected before you start using them. -
Page 40: Art-Net, Sacn Or Dmx Triggers
Power up Home > Triggers > select ‘+’ to add a trigger > select ‘Power up’ This trigger will perform an action as soon as the DiGidot C4 booted or when the device is rebooted after performing a system restart. -
Page 41: Time/Date
Select ‘TIME PERIOD’ for triggers that have to be active during a specific time frame. E.g. A trigger is created with a time frame from 10 AM till 12 AM. When the DiGidot C4 is powered within this time frame, it will execute the associated action. The action will not stop at the end of the time frame (12 AM). -
Page 42: Digital Trigger Commands
Lemur from Liine or Ctrl from ON LX Ltd. Please note that DiGidot does not offer any support for third party apps and softwares. The DiGidot C4 only supports messages with the float type. Enable OSC trigger Before creating OSC triggers, OSC must be enabled first. This can be done by creating an OSC trigger and press the ‘enable’... -
Page 43: Udp
Home > Triggers > select ‘+’ to add a trigger > select ‘UDP’ UDP is a small message send over the network port. The DiGidot C4 can receive UDP messages. This can be useful if other software needs to control the DiGidot C4 controller. UDP is mostly used by developers. -
Page 44: Internal Task
Home > Triggers > select ‘+’ to add a trigger > Internal task’ This trigger can be used to trigger events when the DiGidot C4 is in a specific status, such as playing a scene or when in idle state. -
Page 45: Counter
Counter triggers can be used to trigger events when the counter is higher than the entered delay in seconds. The counter will start counting when the DiGidot starts up and all triggers are loaded. This takes about 5 seconds from powering the DiGidot C4. The counter can also be reset by trigger action. -
Page 46: Play Scene
Play scene ‣ Scene: Select the desired scene from the drop-down menu. ‣ Brightness: Set the brightness for this action. ‣ Fade time: Set the fade for this action. Layer: Set the layer where the scene needs to be played. ‣... -
Page 47: Stop
Stop Stops playing any scene or playlist. Target: Select what needs to be stopped Layer: Select layer number Next Skips to the next scene in the Scenes list or playlist. Previous Goes back to the previously played scene. Speed Changes the scene speed by adjusting the speed slider. 100 is the default scene speed and represents 100% of the original speed. -
Page 48: Link To Another Trigger
Address: Enter the address path where the message needs to be sent to within the recipient application. Value: Enter the value for OSC message. Restart This trigger will perform a restart of the DiGidot C4 controller(s). C4 Manual Version 2.2.0 48-78... -
Page 49: Custom
Custom This trigger opens a note pad where custom trigger code can be entered. This option is usually reserved for developers or custom-made code. Action examples: Select an action from the pop-up window. Open editor: This will open the custom command in a in browser editor. Creating linked triggers Home >... -
Page 50: Groups
Response time shows the network message response time. When the Response time light is green, the network connection is working. When the Response time light is red the DiGidot C4 is not responding. Click on the “timeout” text to get more information about the timeout session. -
Page 51: Settings Overview
Port This shows which ports have been configured as an output. If you click on a port, it will highlight the DiGidot C4 output until you click again. Actions Restart: will restart all devices that are currently selected and displayed on the Monitor page. - Page 52 To edit the output options, click the universe item. The DiGidot C4 is able to output one SPI protocol type simultaneously. If you select an SPI protocol for one port, this protocol will be used for all other output ports.
-
Page 53: In/Out Configuration Item Page
Global configuration This page offers advanced configuration item options that apply to all selected devices. Such as; ‣ Gamma Correction Color profile ‣ Fallback options ‣ IP Address filter ‣ Input watcher The input watcher is a useful tool that monitors incoming control signals. You can switch between: ‣... - Page 54 Click on Port D1-D4 to select or change the output protocol. Click on the ‘+’ symbol to add a universe to each port. Click on a universe item to change following settings. Channels: Define the number of output channels. Universe: Assign a universe number as input. Further configuration options will be shown when you collapse the ‘Show advanced settings' option.
- Page 55 NOTE: Combining input channels will not reduce the amount of output channels. The DiGidot C4 is always limited to the total amount of output channels corresponding to the license. The number of input universes is not limited.
-
Page 56: Network Settings
The ethernet IP Address of the DiGidot C4. Subnet-mask Network broadcast range of your device. Smart ethernet DHCP Enable or disable the smart DHCP server. When enabled the DiGidot C4 will assign IP Addresses to devices that connect trough ethernet. C4 Manual Version 2.2.0... -
Page 57: Wi-Fi Configuration
In case you’ve changed any ethernet settings, click the ‘SAVE’ button to store them. Wi-Fi configuration The DiGidot C4 has a build-in Wi-Fi module which is able to make different types of wireless connections. Wi-Fi mode There are three options for Wi-Fi mode. - Page 58 Enable or disable the DHCP server. When enabled the DiGidot C4 will assign IP Addresses to devices that connect to the access point. The built in DHCP server is smart and detects and adapts if there is already a DHCP server present in the network.
- Page 59 This is the starting IP Address of the IP Address range that the DiGidot C4 can assign to other devices in the network. DHCP end IP Address This is the last IP Address of the IP Address range that the DiGidot C4 can assign to other devices in the network. Enable BSSID...
-
Page 60: Device Settings
Time settings (extended only) It’s possible to synchronize the time of the computer or smart device with the DiGidot C4 when loading the interface. If disabled you can manually enter a time and date. The time can be used for triggering scenes. -
Page 61: Remote Device Manager
‘my devices’ tab at my account page. Another option quick option to upgrade a DiGidot C4 is to use your smart device camera, scan the QR code on the DiGidot C4 device label and follow the the link to our website. -
Page 62: Having Trouble Upgrading Your Digidot C4 License
6. Open the file and copy the license key text. 7. Go to the DiGidot C4 interface and go to settings > license. Then toggle the option for the offline upgrade. A text field will appear. Paste the license key in the field and then click ‘upgrade’. -
Page 63: Interface Settings
Click the “Browse“ button and locate the update file. Then Click “update” to start the update process (this may take a few minutes). After the update is completed the DiGidot C4 status lights will return to idle state, fading blue to light blue. -
Page 64: Support Overview
Save on SD card: This will create a backup on the SD card. This backup will be restored every time the DiGidot C4 boots. If you change any settings, this will be lost after a reboot. To keep your changed settings, you need to create a new backup on the SD card. To delete the backup and prevent it from loading at start up. -
Page 65: Tips & Troubleshooting
6.2. Make sure that input and output matches the system setup. Please note: Some software start universe counting from 1 instead of universe 0. Is your ground (DC-) from the DiGidot C4 output terminal connected to all the grounds of the LED products power supplies? Make sure that not more than one browser session is opened and connected to the DiGidot C4 interface. -
Page 66: Status Leds
Ethernet left LED (orange or green) - Link established Ethernet right LED (blinking green) - Data transfer active Some DiGidot C4 controller batches may have one color of ethernet lights but the left and right side represent the same status. -
Page 67: No Output Signal From Digidot C4
Some Art-Net consoles only work in the 2.0.0.255 range. Please configure your device in the same range if necessary. In case your console or software continues to fail to discover the DiGidot C4 you can try to reboot your DiGidot C4 device(s). If the problem still remains, please contact DiGidot support. -
Page 68: C4 Controllers Are Not Starting Up
‣ Factory reset Some problems require a factory reset if nothing else seems to work. In this way the DiGidot C4 device returns to its factory default. The factory reset will reset the input/output configuration, device settings, network settings and user accounts. -
Page 69: Having Trouble With Your Digidot C4 Setup
Please make a backup file and send it along with your email, as this will make trouble shooting for our engineers a lot easier. If you can’t connect to the DiGidot C4 User Interface, try to open the user interface by opening Google Chrome and typing http://10.254.254.254 in the address bar and press enter. -
Page 70: Forgot The Username Or Password For The Digidot C4
CMD + Spacebar and search for Terminal App. Type ping and the IP Address of the DiGidot C4 ‘ping 10.254.254.254’ and then press the Enter key of your keyboard to ping the DiGidot C4 device. A timeout will indicate a broken connection. -
Page 71: Some Led's/Colors Are Not Responding Correctly
0.3-0.5 mm (20-22 AWG). No microSD card The DiGidot C4 Extended versions that require a DiGidot microSD card. If the DiGidot microSD card is not present or formatted properly, the status lights will blink alternating red. Solution: (Re-)Formatting the microSD card C4 Manual Version 2.2.0... -
Page 72: C4 Extended Crashes
Note that all stored information will be lost! Confirm to continue the formatting process. ‣ If a microSD card is inserted in a DiGidot C4 Live version, both status light will also blink alternating red. Solution: Please remove the microSD card and restart the device. -
Page 73: Accessories
Spare RJ45 Network cable for connecting and daisy chaining DiGidot C4 (included with ‣ DiGidot C4 Extended) DiGidot USB Power Cable Art. no.: 20331 Spare Power cable to connect DiGidot C4 to 5 Vdc USB port (included with DiGidot C4 ‣ Extended) DiGidot DIN-Rail Clip Art. no.: 20902 ‣... - Page 74 DiGidot 8GB microSD Card Art. no.: 20901 ‣ Industrial grade spare microSD memory card for DiGidot C4 Extended (included with DiGidot C4 Extended) DiGidot RJ45 DMX Adapter Art. no.: 20329 ‣ Connects to a network cable that runs prom a PxLNet Transmitter port and can be plugged in any DMX controlled product with an XLR-3 socket.
-
Page 75: Various
‘Manual version’. NOTE: This manual cover information for the DiGidot C4 Live and Extended controllers. In case of C4 Live controllers, some of the features may not be displayed in the user interface because they are limited to the Extended version only (refer to appropriate symbols in this manual). -
Page 76: Compliances & Eu Declaration Of Conformity
This product is designed and produced by DiGidot BV, Amsterdam, The Netherlands. Country Of Origin is The Netherlands. Official Certificates of Origin can be issued upon request. Hereby, DiGidot Technologies BV declares that the DiGidot C4 device complies with and was tested according to essential requirements of all relevant CE directives. -
Page 77: Feedback
Errors and omissions excepted. The information in this document is subject to change at any time without prior notice. Visit our website www.digidot.eu for the most recent version of this document. It’s not allowed to copy or reproduce, translate or publish the information within this document without prior written approval from DiGidot Technologies BV. -
Page 78: Disclaimer
Any form of unintended or misuse of this information and/or DiGidot products indemnifies DiGidot Technologies BV from liability and warranty obligations.
Need help?
Do you have a question about the C4 Extended and is the answer not in the manual?
Questions and answers