Table of Contents
Advertisement
Quick Links
Advertisement
Table of Contents
Troubleshooting

Related Manuals for Stihl TS 700, TS 800


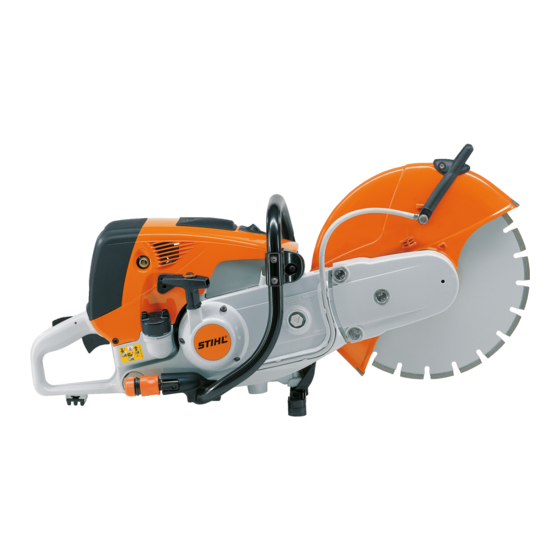
Summary of Contents for Stihl TS 700, TS 800
- Page 1 STIH) STIHL TS 700, 800 2012-06...
-
Page 2: Table Of Contents
7.6.2 Installation Actuating levers 7.6.3 Diaphragm, stratified scavenging 11.1 Switch shaft, Piston rings stop switch Crankcase / 11.2 Throttle trigger / crankshaft interlock lever 7.8.1 Removal 7.8.2 Installation © ANDREAS STIHL AG & Co. KG, 2012 TS 700, TS 800... -
Page 3: Introduction
"Special tools" of this manual. Use procedures for this cut-off machine the part numbers to identify the series. tools in the STIHL Special Tools Service procedures on manual. standardized parts and assemblies It lists all the special servicing tools which are used in several STIHL currently available from STIHL. -
Page 4: Safety Precautions
Important! Do not bring any fire, flame, spark or other source of heat near the fuel. All work with fuel must be performed outdoors only. Spilled fuel must be wiped away immediately. TS 700, TS 800... -
Page 5: Specifications
Specifications Power unit TS 700, TS 800 Displacement: 98.5 cm Bore: 56 mm Stroke: 40 mm Engine power to ISO 7293: 5.0 kW (6.8 HP) at 9300 rpm Nominal spindle speed 4620 rpm Idle speed: 2200 rpm Clutch: Centrifugal clutch without linings... -
Page 6: Abrasive Wheels
350 mm Cutting depth approx. 123.5 mm TS 800 Composite and diamond abrasive wheels Diameter 400 mm Cutting depth approx. 143 mm Special accessories Cart FW 20 Cutting direction indicator Water container kit Pressurized water container kit TS 700, TS 800... -
Page 7: Tightening Torques
Spark plug 28.0 M 10x1 L Belt pulley / bearing 40.0 Screw IS-M 6x28 Bearing flange / guard Screw M 10x18 Thrust washer / abrasive wheel 20.0 M 10x18 Abrasive wheel 30.0 M 10x1 Decompression valve 14.0 TS 700, TS 800... - Page 8 Remarks: 1) Secure screw with Loctite 270. 2) Place a washer under the screw head. Note: Screwdriver speed when used in plastic material: Plastoform screws max. 600 rpm. TS 700, TS 800...
-
Page 9: Troubleshooting
Clutch springs stretched or fatigued Replace all clutch springs Deep groove ball bearing on belt Replace deep groove ball bearing pulley damaged Clutch shoe retainer broken Fit new retainer Clutch shoes and carrier worn Install new clutch TS 700, TS 800... -
Page 10: Rewind Starter
Coat rewind spring with a little becomes viscous at very low standard solvent-based degreasant outside temperatures (spring (containing no chlorinated or windings stick together) halogenated hydrocarbons), then pull rope carefully several times until normal action is restored TS 700, TS 800... -
Page 11: Ignition System
If break is detected or high resistance measured, fit a new ignition lead Check operation of spark plug Clean the spark plug or replace if necessary Crankcase damaged (cracks) Replace crankcase TS 700, TS 800... -
Page 12: Carburetor
Inlet needle sticking to valve seat Remove inlet needle, clean and refit Diaphragm gasket leaking Fit new diaphragm gasket Metering diaphragm damaged or Fit new metering diaphragm shrunk Impulse hose damaged or kinked Fit new impulse hose TS 700, TS 800... - Page 13 Set low speed screw L correctly Setting of idle speed screw Reset idle speed screw LA incorrect - throttle shutter correctly completely closed Small plastic plate in valve jet Clean or renew valve jet does not close TS 700, TS 800...
- Page 14 H clockwise (leaner) – max. up to the stop. Main jet bores or ports blocked Clean the carburetor Pump diaphragm damaged or Fit new pump diaphragm fatigued Impulse hose damaged or kinked Fit new impulse hose TS 700, TS 800...
-
Page 15: Power Unit
Decompression valve sticking Replace the decompression valve Engine overheating Insufficient cylinder cooling. Air Thoroughly clean all cooling air inlets in fan housing blocked or openings and the cylinder fins cooling fins on cylinder very dirty TS 700, TS 800... -
Page 16: Abrasive Wheel Drive
: Remove the key (1) from the the hexagon of the tensioner washer (2). groove in the shaft. anticlockwise until the arrow points to the left (to "0"). – Remove the thrust washer. : Remove the washer (2) from the shaft. TS 700, TS 800... - Page 17 – Reassemble the parts in reverse order. : Remove the flange. : Remove the washer (1) and Note: rubber ring (2). Particular attention must be paid to the following steps. : Fit a circlip in a groove in the bearing. TS 700, TS 800...
- Page 18 : Slide the sleeve (1) and spring (2) : Fit the thrust washer so that the onto the screw (3). groove (arrow) is aligned with the lug. – Insert and tighten down the screws. – Fit the axial clamping ring. TS 700, TS 800...
-
Page 19: Testing Radial And Axial
– Tighten down all three fastening screws, starting with the one at the back. – Tightening torques, b 3.6 : Fit the thrust washer so that the locking lugs (1) engage the grooves (2) in the shaft. TS 700, TS 800... - Page 20 Replace spindle (shaft) force Tangible radial backlash in Deep groove ball bearings Replace spindle and the bearing seat → spindle damaged by dust and/or deep groove ball bearing faulty bearing seat worn at the bearings spindle TS 700, TS 800...
-
Page 21: Ribbed V-Belt
– Reassemble remaining parts in reverse order. : Remove the ribbed V-belt (1) : Unscrew the nut (arrow) from the from the belt pulley. starter cup. – Reassemble parts in reverse order. – Tightening torques, b 3.6 TS 700, TS 800... -
Page 22: Belt Pulley
– Reassemble parts in reverse order. : Remove the circlip (1). Note: : Remove the screws securing the Drive the ball bearing in as far as tensioner (arrows). possible with the drift pin (1) 4224 893 7200. TS 700, TS 800... -
Page 23: Clutch
The clutch has a left-hand thread. : Insert the hook of the tensioner in – Remove the cover washer (1) the hole (arrow) in the lever. from the crankshaft stub and clean it if necessary. – Fit the cover. TS 700, TS 800... -
Page 24: Tightening Torques, B 3.6
: Screw on the clutch and tighten it standard degreasant not down with a size 21 insert (1) containing any chlorinated or 5910 893 5616. halogenated hydrocarbons. Tightening torques, b 3.6 – Replace any defective parts. – Reassemble remaining parts in reverse order. TS 700, TS 800... -
Page 25: Power Unit
(arrows). arresting screen together with a suitable tool. : Remove the muffler (1). : Remove the clip (1) and spark arresting screen (2). – Clean the spark arresting screen or fit a new screen if necessary. TS 700, TS 800... -
Page 26: Preparations
This can be checked through the inlet port. : Mount test flange (1) 4224 890 1200 instead of the carburetor. Important: The pin must be correctly located in the impulse hose (2) when fitting the test flange. TS 700, TS 800... -
Page 27: Pressure Test
0.5 bar. If this pressure remains constant : Operate lever (2) until the for at least 20 seconds, the pressure gauge indicates a crankcase is airtight. vacuum of 0.5 bar. TS 700, TS 800... -
Page 28: Oil Seals
– Clean the sealing face with minute. standard solvent-based degreasant not containing any – Reassemble remaining parts in chlorinated or halogenated reverse order. hydrocarbons. – Lubricate the sealing lips of the new oil seal with grease. TS 700, TS 800... -
Page 29: Remove Shroud
– Clean the sealing face with standard solvent-based degreasant not containing any chlorinated or halogenated hydrocarbons. – Lubricate the sealing lips of the new oil seal with grease. : Undo screw (arrow). : Remove the filter cover (1). TS 700, TS 800... -
Page 30: Expose Cylinder
– Reassemble parts in reverse order. – Remove the short circuit lead from the wire guide on the ignition side of the housing. : Remove ignition lead (1) and short circuit wire (2) from the retainers (arrows). TS 700, TS 800... -
Page 31: Cylinder And Piston
: Remove the cylinder gasket (1). holes (arrows) in the cylinder. – Examine the cylinder for damage and scores and replace if necessary. – Always fit a new piston if a new cylinder has to be installed. TS 700, TS 800... -
Page 32: Installation
(1) (3) 1111 893 4700. and slide it into the piston (arrow). If the piston pin is stuck, tap the end of the assembly drift lightly with a hammer to loosen it. TS 700, TS 800... - Page 33 5910 890 2212 to the piston boss, hold the piston steady and The inner pin (1) must point towards press the tool shank home until the flat face (2) of the tool's shank. the snap ring slips into the groove. TS 700, TS 800...
- Page 34 7.7 : Carefully slide the cylinder over the piston, the clamping strap moves downwards at the same time. – Remove the clamping strap and wooden assembly block (arrows). TS 700, TS 800...
-
Page 35: Diaphragm, Stratified Scavenging
(arrows) face ensuring that the lug (1) on the towards the piston head. support plate is lined up with the groove (2) in the cylinder. TS 700, TS 800... -
Page 36: Crankcase
: Remove the caps (1) from the – Adjust the spindle (1) of the rubber buffers. assembly tool 5910 893 2102 (left-hand thread) so that it can be – Replace the rubber buffers, centred over the crankshaft stub. b 10.2 TS 700, TS 800... -
Page 37: Crankshaft
15,2 Note: : Remove the oil seal on the clutch Assembly tools without holes side with a suitable punch. marked "19" can be reworked as illustrated. The diagram shows the drilled plate as seen from below. TS 700, TS 800... -
Page 38: Installation
8.1.1 Note: Examine both halves of the crankcase for cracks and check all mating surfaces for signs of damage. – Examine the clutch side of the crankcase for signs of damage. TS 700, TS 800... - Page 39 : Fit the drilled plate (2) 5910 893 2102 and spindle 5910 890 1800. : Screw the threaded sleeve (1) 5910 893 2421 onto the spindle when it has been screwed in completely. TS 700, TS 800...
- Page 40 1107 893 4600 over the mating face of the ignition side of crankshaft stub on the clutch the crankcase. side. – Slip the oil seal with the open side facing the crankcase over the assembly sleeve. TS 700, TS 800...
- Page 41 : Screw the threaded sleeve (1) anywhere. 5910 893 2421 onto the spindle – Remove the two M5x72 screws when it has been screwed in which were fitted to prevent completely. twisting. TS 700, TS 800...
-
Page 42: Decompression Valve
– Check the mating face for the cylinder on the crankcase and remove any excess gasket material. – Reassemble remaining parts in reverse order. : Examine the sealing cone (arrow) on the decompression valve for signs of damage. TS 700, TS 800... -
Page 43: Ignition System
(1) and flywheel (2). – Remove the ignition module (1). : Push the rubber cuff (1) off the ignition module. : Unscrew the ignition module from the ignition lead (2). TS 700, TS 800... -
Page 44: Ignition Timing
– Reassemble remaining parts in reverse order. : Slide the setting gauge (1) 1111 890 6400 between the arms of the ignition module and the magnet pole of the flywheel. – Press the ignition module against the setting gauge. TS 700, TS 800... -
Page 45: Testing The Ignition Module
: Use adjusting knob (4) to set the rewind starter and check spark gap to approx. 2 mm, sparkover in the window (2) of the see window (3). ignition system tester. Important! The engine may start and accelerate during the test. TS 700, TS 800... -
Page 46: Ignition Lead / Spark Plug Boot
– Screw the ignition lead into the ignition module. – Push the grommet over the high- voltage output. : Pinch the hook of the leg spring into the centre of the ignition lead (arrow). TS 700, TS 800... -
Page 47: Removing And Installing
: Push the locking strip (1) 0000 893 5903 as far as possible into the cylinder. – Position the piston against the locking strip (1). TS 700, TS 800... -
Page 48: Short Circuit Wire
– Reassemble parts in reverse order. – Check the air gap between flywheel and ignition module, b 8.1.1 – If neither of these checks reveals a fault, install a new ignition module, b 8.1.1 – Reassemble parts in reverse order. TS 700, TS 800... -
Page 49: Removal / Installation
: Release the short circuit wire (1) be guided better between cylinder from the cable guide (arrow) and and tank housing, tie the old wire to pull it out with the string. a piece of string about 75 cm long. TS 700, TS 800... - Page 50 – Untie the string from the old wire – Reassemble remaining parts in and tie it to the new wire. reverse order. : Use a deflector when pulling the wire through between cylinder and tank housing. TS 700, TS 800...
-
Page 51: Troubleshooting Chart, Ignition System
– Spark plug boot damaged? – Replace spark plug boot and/or leg spring if necessary b 8.4 Check ignition: with ZAT 3 or ZAT 4 (use ZAT 3 as main spark gap see TI 32.94) b 8.2 and b 8.3 TS 700, TS 800... - Page 52 – Spark plug boot: holes / cracks? – Resistance of spark plug boot to ground: required: 1.5...12 kΩ – Check resistance of ignition lead: value required < 10 Ω, – Replace spark plug boot and/or ignition lead if necessary b 8.4 TS 700, TS 800...
- Page 53 Engine runs Engine runs smoothly, – Look for fault in fuel or carburetor troubleshooting procedure completed system – Check power unit for leaks – Check position of flywheel on crankshaft b 12.2, b 7.8, b 8.1.1 TS 700, TS 800...
-
Page 54: Rewind Starter
Before installing, lubricate the rewind spring and starter post with – Reassemble parts in reverse – Grease the pegs (arrow) of the STIHL special lubricant, b 14 order. new pawls, b 14 – Tighten down the screws. – Reassemble parts in reverse order. -
Page 55: Rope Rotor
– Reassemble remaining parts in reverse order. : Remove the washer (1) from the starter post. The rewind spring must be relieved. – Carefully pull the rope rotor off the starter post. TS 700, TS 800... -
Page 56: Starter Rope / Grip
9.2 : Pull the rope or remaining rope : Finally, draw the rope (1) into the out of the starter grip. rope rotor (arrows). – Remove any remaining rope from the rope rotor if necessary. TS 700, TS 800... -
Page 57: Tension The Rewind Spring
The rewind spring is correctly tensioned when the starter grip sits firmly in the rope guide bushing (arrow) without drooping to one side. If this is not the case, the spring must be tensioned by one additional turn. TS 700, TS 800... -
Page 58: Replacing The Rewind Spring
Installation Removal – Lubricate the spring with a few Important! drops of STIHL special lubricant Wear a face shield and protective before installation, b 14 gloves. : Fit the rewind spring (1) in a – Remove the starter cover with circular fashion, working in rewind starter, b 9.2... -
Page 59: Starter Rope
: Place the new guide bushing (1) in the hole in the starter cover. : Insert the screw spindle (1) of the installing tool 0000 890 2201 through the guide bushing from inside the housing. TS 700, TS 800... -
Page 60: Rubber Buffer Between Front Handle And Crankcase
– Steady the nuts on the back with a suitable wrench when unscrewing the screws. : Undo screw (arrow). : Remove the screws (arrows) from the rubber buffers. – Take off the rubber buffer, stop buffer and sleeve. TS 700, TS 800... - Page 61 (2) of the mount. – Reassemble remaining parts in – Reassemble remaining parts in reverse order. reverse order. – Tightening torques, b 3.6 – Tightening torques, b 3.6 : Remove the screw (arrow) from the rubber buffer. TS 700, TS 800...
-
Page 62: Spring Between Crankcase And Tank Housing
– Reassemble remaining parts in reverse order. – Tightening torques, b 3.6 : Undo screw (arrow). : Remove the screw (arrow) from the upper bearing plug (1). – Remove the bearing plug (1). – Reassemble parts in reverse order. TS 700, TS 800... -
Page 63: Rubber Buffers
: Remove the support (1) with the lug and edge of the housing rubber buffer. – Reassemble parts in reverse (arrows). order. – Remove the front handle from the – Reassemble parts in reverse machine. – Tightening torques, b 3.6 order. TS 700, TS 800... -
Page 64: Actuating Levers
: Pull the switch shaft (1) out of the : Carefully place the leaf spring (1) left-hand bearing (arrow) and in the fixture on the tank housing. remove it from the tank housing. – Note the installed position. TS 700, TS 800... - Page 65 : Drive out the e-clip (1) with a : Unhook the throttle trigger (1) suitable tool. from the interlock lever and remove it from the handle of the Note: tank housing. The e-clip may pop out as it is removed. TS 700, TS 800...
-
Page 66: Interlock Lever
: Note the assembly sequence and bolt (2) through the washer, installed position of the interlock throttle trigger and bearing hole. The torsion spring or interlock lever lever (1), throttle trigger (2) and must be replaced if damaged. torsion spring (3). TS 700, TS 800... -
Page 67: Fuel System
– Check correct functioning. – Reassemble remaining parts in reverse order. : Remove the screws (arrows) from the filter housing (1). – Remove the filter housing. – Clean away loose dirt from around the filter. TS 700, TS 800... -
Page 68: Air Filter Base
: Press the rubber grommet (1) base. into the hole in the tank housing until the rubber lip lies tightly : Disconnect the compensator against the housing. hose (2) and fuel pump intake hose (3) from the carburetor. TS 700, TS 800... -
Page 69: Carburetor
(2). fuel pump out of the retainer in the filter base. – Examine the fuel pump and replace it if necessary. : Disconnect the fuel hose (1) from the carburetor (arrow). TS 700, TS 800... - Page 70 – Reassemble the carburetor in reverse order. Note: The loose throttle rod may be lost when working on the disassembled carburetor. : Unhook the throttle rod (1) from the carburetor. TS 700, TS 800...
-
Page 71: Leakage Testing
– Install the carburetor, b 12.2.1 – Tightening torques, b 3.6 – Reassemble remaining parts in reverse order. : Push the fuel line with double : Carefully separate the metering connector onto the fuel port diaphragm (1) and gasket (2). (arrow). TS 700, TS 800... -
Page 72: Inlet Needle
: Pull out the inlet needle (arrow). (4) moves easily. (2) and gasket (1) on the pegs (3) of the carburetor. – Install the metering diaphragm, b 12.3.1 – Reassemble remaining parts in reverse order, tightening torques, b 3.6 TS 700, TS 800... -
Page 73: Fixed Jet
: Carefully remove the gasket with and clean or replace it. pump diaphragm from the carburetor body. – Reassemble parts in reverse order. : Carefully separate the pump diaphragm (1) and gasket (2). TS 700, TS 800... -
Page 74: Choke Shaft / Choke Shutter
– Tightening torques, b 3.6 : Remove the circlip (arrow) with a suitable tool. Note: The spring on the choke shutter may pop out when the circlip is removed. : Remove the screw (arrow) from the choke shaft. TS 700, TS 800... - Page 75 (2) first. Note: Ensure that the marks (arrow) on the choke shutter are visible as indentations. : Push the spring (1) onto the choke shaft. TS 700, TS 800...
-
Page 76: Throttle Shaft / Throttle Shutter
– Examine the torsion spring and replace it if necessary. : Remove the lever (1) from the : Remove the circlip (arrow) with a throttle shaft. suitable tool. TS 700, TS 800... - Page 77 – Check correct functioning and easy movement. – Secure the screw with Loctite, b 14. – Check correct functioning again. : Slide the throttle shutter (1) into the slot in the throttle shaft with the recess (2) first. TS 700, TS 800...
-
Page 78: Air Flap Shaft / Air Flap
: Undo screw (arrow). : Remove the circlip (arrow) with a suitable tool. – Turn the air flap shaft until the air : Pull the ring (1) and O-ring (2) off flap is horizontal. the air flap shaft. TS 700, TS 800... -
Page 79: Air Flap Rod
– Secure the screw with Loctite, b 14. – Check correct functioning again. – Turn the air flap shaft until the flat : Unhook the rod (1) from the air side of the shaft faces flap lever (arrow). downwards. TS 700, TS 800... - Page 80 Removal and installation of the complete air flap rod : Take out the screws (arrows) in : Use a suitable tool to prise the the upper and lower levers. lower lever (1) and torsion spring off the air flap shaft. TS 700, TS 800...
-
Page 81: Adjusting The Air Flap Rod
: Turn the air flap shaft (2) anticlockwise until the air flap (1) is closed. : Insert the screw (arrow) and : Fit two screws M5x80 (arrows) to tighten it down. secure the test flange (1). TS 700, TS 800... - Page 82 When the throttle shutter opens, the air flap opens with a delay equal to roughly one-third of the throttle shutter opening. – Reassemble parts in reverse order. : Insert the screw (1) and tighten it down. TS 700, TS 800...
-
Page 83: Sealing Rings Of Choke And Air Flap Shaft
– Adjust the air flap rod if necessary, b 12.3.9 : Pull the ring (1) and sealing : Take out the low speed screw (1). ring (2) off the choke shaft. – Examine the sealing ring and replace it if necessary. TS 700, TS 800... -
Page 84: Carburetor Adjustment
The mark (arrow) on the low speed screw L (2) can be used to aid : Prise the limiter cap (1) off the adjustment. high speed screw with tool 5910 890 4501. Note: Always fit a new limiter cap. TS 700, TS 800... -
Page 85: User Setting
L clockwise as far as possible, then open it 1 turn. The high speed screw H is now limited. The standard setting has been obtained when the high speed screw H is turned anticlockwise until it engages. TS 700, TS 800... - Page 86 (LA), engine stops when troubleshooting chart for ignition changing from part-load to idle system, carburetor and power unit, speed – Turn the low speed screw L approx. 1/4 turn clockwise. TS 700, TS 800...
-
Page 87: Removal And Installation Of The Manifolds
– Draw the intake manifold (arrow) off the cylinder port and hole in – Reassemble remaining parts in the tank housing. reverse order. – Tightening torques, b 3.6 TS 700, TS 800... -
Page 88: Removal And Installation Of The Manifold
: Release hose clips (arrows). tank housing. – Push the manifold off the connectors on the cylinder and tank housing, pressing the tank housing down lightly at the same time. TS 700, TS 800... -
Page 89: Impulse Hose
0000 850 3501 to the elbow the cylinder. connector (arrow) and apply a – Reassemble remaining parts in negative pressure to the fuel reverse order. tank. TS 700, TS 800... -
Page 90: Removal / Installation Of The Tank Vent
: Press the tank vent (1) into the : Check tank vent hose (1) and grommet as far as possible. ventilation insert (2) and replace if necessary. A new tank vent is supplied complete with ventilation insert. TS 700, TS 800... -
Page 91: Fuel Intake
Clean the fuel tank : Remove the pick-up body (2) from the fuel hose (1). : Remove the filler cap (1) and empty the tank. – Check the pick-up body and clean or replace it if necessary. TS 700, TS 800... -
Page 92: Fuel Hose
: Push the fuel hose (1) back into elbow connector (2) and replace the tank. if necessary. – Pull the fuel hose out of the tank housing and check it; it must be replaced if necessary. TS 700, TS 800... -
Page 93: Fuel Filler Cap
Take care not to overextend the fuel hose. – Attach the pick-up body and line up the fuel hose, b 12.7.1 : Pull the cord out of its mount in the filler cap with a suitable tool. TS 700, TS 800... -
Page 94: Removal / Installation Of The Tank Housing
: Press the nipple at the other end of the cord into the mount inside the tank. – Perform leakage test, b 12.6.1 : Draw the tank housing (1) out of the crankcase to the rear. – Reassemble parts in reverse order. TS 700, TS 800... -
Page 95: Special Tools
Remove crankshaft (clutch side) Puller 1106 890 4501 Remove flywheel Threaded sleeve 5910 893 2421 Install crankshaft Ignition system tester ZAT 4 5910 850 4503 Test ignition system Ignition system tester ZAT 3 5910 850 4520 Test ignition system TS 700, TS 800... - Page 96 Diaphragm / support plate on cylinder Flange 4224 893 2501 Seal cylinder exhaust port Test wheel 5910 851 6100 Test truth of running of mount for abrasive wheel Remark: 1) Use only for releasing P screws TS 700, TS 800...
-
Page 97: Service Accessories
(Loctite 270) Very high-strength thread-locking 0786 111 2117 adhesive (Loctite 648) Standard commercial solvent- Cleaning sealing faces and the carburetor, based degreasant containing no cleaning the crankshaft stub and tapers in chlorinated or hydrogenated flywheel hydrocarbons TS 700, TS 800... - Page 98 englisch / english 0455 376 0123. VA0.F12. Printed in Germany...
Need help?
Do you have a question about the TS 700, TS 800 and is the answer not in the manual?
Questions and answers