Table of Contents
Advertisement
Dear User of Inspur Yingxin Server,
Heartfelt thanks for your use of Inspur Yingxin Server!
This manual introduces the technical characteristics, the system instal-
lation and setup of the server to help you to fully understand and expediently
use this server.
Please deliver the package of our product to the waste recycling station
for recycling, in favor of pollution prevention and humankind's benefit.
This manual is the property of the Inspur Group Co., Ltd.
This User Manual is not to be copied by any group or person in any
manner without the consent of Inspur Group Co., Ltd. The Inspur Group
Co., Ltd. reserves the right of revising this manual momentarily.
Any alteration about the content of this manual will not be informed.
Please contact Inspur Group Co., Ltd. if you have any questions or ad-
vice about this manual.
"Inspur" is registered trademark of Inspur Group Co., Ltd.
Other trademarks belong to other corresponding registered companies.
Inspur Group Co., Ltd.
August, 2012
Advertisement
Table of Contents

Related Manuals for Inspur NP5540M3


Summary of Contents for Inspur NP5540M3
- Page 1 Co., Ltd. reserves the right of revising this manual momentarily. Any alteration about the content of this manual will not be informed. Please contact Inspur Group Co., Ltd. if you have any questions or ad- vice about this manual. Inspur Group Co., Ltd.
- Page 2 9. The copyrights of the markers and names of the software and hardware product referred in this manual are the property of corresponding companies. 10. In the above statement, “us” indicates the Inspur Group Co., Ltd.; Inspur Group Co., Ltd. reserves the right of final explanation about the above statement.
- Page 3 We suggest you read this manual carefully before you use this server in case of the unnecessary faults in your operation. Address: NO.1036 Langchao Road, Jinan, China, Inspur Group Co., Ltd Post Code: 250101...
-
Page 4: Table Of Contents
5.2 Control Key Application ................29 5.3 SAS RAID Setup ...................29 Chapter Six Install Operating System ..............33 6.1 Application Instructions for Inspur driver U disk .........33 6.2 Manually Install Windows Server 2008 Enterprise Edition ......38 6.2 Manually Install Windows Server 2003 Enterprise Edition 6.3 Manually Install Windows Server 2008 Enterprise Edition ......44... - Page 5 7.4 Additional Notes ....................57 Chapter Eight Instruction of Integrated Management Card Management Function..59 8.1 Management Chip BMC IP ................59 8.2 Remote Login ....................59 8.3 Function Menu Introduction .................60 Chapter Nine Server Installation Guide ..............68 9.1 Cabinet Preparation ..................68 9.2 Install Server Chassis Handles ..............69 9.3 Server Slide Rail Suite ..................70 9.4 Install Inner Rail ....................71 9.5 Install Outer Rail to Cabinet ................72...
-
Page 7: Chapter One Safety Information
Inspur; only maintenance technicians trained by Inspur have the right to disassemble the cover of the host, dismount and replace the internal components. - Page 8 Chapter One Safety Information shock hazards, please do not fill any object into the open pores of the system. Warning 7: Please place the system far away from the cooling plate and at the place with heat sources, and be sure not to block the air vents. Warning 8: Be sure not to scatter food or liquid in the system or on other components, and do not use the product in humid and dusty environment.
- Page 9 - Close the cover of the host, re-connect the system to the power socket, and then start the equipment. - In case of operation failure or abnormal situation, please contact Inspur and get technical support. 3. Pay attention to the position of the system cables and power cables, wire them in places not to be stepped on or knocked down and ensure not to place other objectives on the cables.
- Page 10 7. When dismounting the internal components with the approval of Inspur, please pay attention to the following matters: - Switch off the system power supply and disconnect the cables, including discon- necting any connection of the system.
- Page 11 Chapter One Safety Information - After the installation of cabinet is finished, please ensure that the supporting feet have been fixed to the rack and supported to the ground, and all weight of the rack have been fell onto the ground. - It shall install into the cabinet according to the sequences from the bottom to the top, and first install the heaviest component.
-
Page 12: Chapter Two Product Introduction
Chapter Two Product Introduction 2.1 Server Technical Specification Processors Processor Type Intel Sandy Bridge-EN E5-2400 series CPU Processor Number Processor Interface Socket 1356 Chipset Chipset Type Intel C600 chipset Memory Memory Type DDR3 ECC Unbuffered/Registered Number of memory slots Up to 12 When single 8G memory is adopted, it can support up to 96GB. - Page 13 Support up to 16 pieces of hot-swap 2.5″SATA/SAS hard disks External Storage Drive Optical drive (Optional) Optional SATA optical drive Optional Inspur driver U disk used to load hard disk Inspur driver U disk controller driver when installing the operating system manually Power Supply...
-
Page 14: Front Panel View
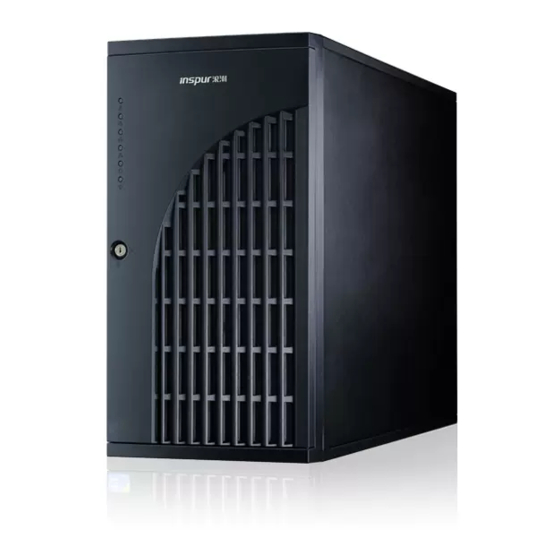
Chapter Two Product Introduction W (width) 220mm; H (height) 435mm; D (depth) Whole Chassis Size 610mm Full configuration: Net weight: 25 Kg Weight Gross weight: 28.75 kg (full configuration includes: single power supply + 2 * 2.5″ module + 2 pieces of RAID adapters) Environment Parameters Operating Environment... - Page 15 Chapter Two Product Introduction The front panel will appear when the front door is opened, and the configuration can be divided into 2.5″ hard disk configuration and 3.5″ hard disk configuration ac- cording to the configured different hard disk types. The following picture is just for reference.
- Page 16 Chapter Two Product Introduction Provide the warning function of power supply Power supply failure indicator failure light Off: normal state; On: power supply failure Provide the advanced warning function of chas- System overheat/fan failure sis system overheat and fan failure alarm light Off: normal state;...
-
Page 17: Back Panel View
Chapter Two Product Introduction Built-in hard 3.5″ hard disk configuration: install built-in 3.5″ disk 1 installation position SATA hard disk Built-in hard 3.5″ hard disk configuration: install built-in 3.5″ disk 2 installation position SATA hard disk Built-in hard 3.5″ hard disk configuration: install built-in 3.5″ disk 3 installation position SATA hard disk Built-in hard... - Page 18 Chapter Three System Setup Serial interface For connecting serial interface device For connecting display device with VGA in- VGA interface terface USB interface For connecting the USB devices USB interface For connecting the USB devices IPMI management interface Onboard IPMI management special interface 82574 network card 2 inter- Integrated 82574 network card 2nd interface face...
-
Page 19: Chapter Three System Setup
Chapter Three System Setup In this chapter, the regular jumper of motherboard and BIOS function setup of this server are introduced. Only operator or administrator with qualification of system maintenance can implement these operations described in this part. 3.1 System BIOS Setup BIOS is a basic input and output system. - Page 20 Chapter Three System Setup tem detecting and configuration. For some items, there is a right pointer, which means if you select this item and press [Enter], cascading menu or submenu will be displayed on the screen. 3.1.2 BIOS System Menu Introduction Next the following main function menus of BIOS are introduced.
- Page 21 Chapter Three System Setup 1. Main menu In BIOS setup utility, Main menu first displays. In this menu, BIOS version and memory capacity can be viewed. System time, date, etc. also can be set up in this menu. While setting the system date and time, please use arrow keys to select, press [En- ter] to select a certain sub field, and then use [-] and [+] button to set the 0 field value.
- Page 22 Chapter Three System Setup interfaces, and enables the user to set SATA controller model and all SATA interfaces. * SATA Mode This item is used to set onboard SATA controller modes including [Disabled], [IDE Mode], [AHCI Mode] and [RAID Mode] four items. If you want to use serial devices as parallel IDE storage devices when onboard SATA controller is used, please set this item to [IDE Mode].
- Page 23 Chapter Three System Setup The submenu of this menu can set up QPI speed mode, frequency and other items. If it is single CPU configuration and the “QPI Link Speed Mode” is set to be <Fast>, the displayed status of “Current QPI Link Speed” item is “Slow”. * DIMM Information This menu can be used to examine the information of installation slots and memo- ry capacity of system memory.
- Page 24 Chapter Three System Setup ● PCH Display PCH chip related information and set PCH chip parameters. * SMBus Controller This item is used to open or close system management bus, including [Enabled] (default) and [Disabled] two items. * Restore AC Power Loss Set power supply status after system powers off abnormally.
- Page 25 Chapter Three System Setup abled] and [Disabled] (default configuration) two items. ● System Event Log This menu shows the features of system event log. Any configuration modification in this menu will take effect only after system restart. * SEL Components This item is used to set whether the system shall record all the logs from system starts, including [Enabled] and [Disabled] (default configuration) two items.
- Page 26 Chapter Three System Setup ● System Health Information This menu enables user to check CPU temperature, memory slot temperature, PCH temperature, fan speed, voltage and other information. ● View System Information This menu enables user to check detailed information of the system, such as sys- tem manufacturer, product name and other information.
-
Page 27: Motherboard Jumper Settings
Chapter Three System Setup Select this item and press [Enter]. After you select <Yes> for confirmation, the changes in the BIOS settings will be saved and the system will exit the BIOS setup. The menu function can use [F10] shortcut key to realize. ●... - Page 28 3.2.1 How to Open the Front and Side Panel of Chassis If motherboard jumper change is needed, please get the authorization of Inspur Group Co., Ltd. according to the methods as follows to open the chassis front panel and...
- Page 29 Chapter Three System Setup (3) Press the bottom of the chassis front panel with hand and pull it out to the di- rection indicated by an arrow, then take it off. Take off the chassis front panel (4) Loosen the 2 screws fixing side panel in the following figure and open the right side panel (see from the rear of the chassis) Take off the side panel 3.2.2 Introduction of Common Motherboard Jumper Function...
- Page 30 Chapter Three System Setup Motherboard common use jumper location picture Jumper name Function description Jumper function Short-cutting pin1 and 2, normal state (default) CLR_CMOS Clear CMOS jumper Short-cutting pin2 and 3, clear CMOS: Notes: 1. When clearing CMOS, the system must be shut down and cut off the power supply.
-
Page 31: Chapter Four Setup Of Sata Raid
Chapter Four Setup of SATA RAID This chapter mainly introduces the configuration of onboard Intel SATA controller HostRaid and its application method. If the server you purchased does not use onboard SATA HostRaid, you can skip this chapter. If it does use onboard SATA HostRaid, please enter BIOS and set Advanced→SATA Configuration→SATA Mode option to [RAID Mode] and it only supports Windows system at this point. - Page 32 Chapter Four Setup of SATA RAID The executable menus of the configuration interface of SATA HostRAID are the following four: ● Create RAID Volume Create RAID volume. ● Delete RAID Volume Delete existing RAID volume. ● Reset Disks to Non-RAID Reset HDDs in volume to non-RAID state.
- Page 33 Chapter Four Setup of SATA RAID disks. RAID5 (Parity): it allows 3 and more than 3 hard disks to form this RAID vol- ume. Disks: select hard disks to be used to form RAID volume, select this option and press [Enter] key. It will enter the hard disk selection interface. Please press [Space] key to select the hard disk in turn to form RAID volume, and then press [Enter] key to return to the menu interface of volume creation.
- Page 34 Chapter Four Setup of SATA RAID III. Reset Disks to Non-RAID menu After entering the configuration interface of SATA HostRAID, you can select the menu by up and down arrows, and then press [Enter] key to enter the menu. The system will display all hard disks in RAID volume. Please select hard disks to be reset by [Space] key based on actual demand, and then reset hard disk by pressing [Enter] key.
-
Page 35: Chapter Five Sas Raid Setup
Chapter Five SAS RAID Setup This chapter mainly introduces the configuration and using method of onboard SAS RAID controller. If the server you purchased doesn’t use onboard SAS RAID, it is not necessary to refer to this chapter. If you want to use onboard SAS RAID, you need to enter BIOS and set Chipset→PCH→Onboard SAS Oprom to <Enabled>. - Page 36 Chapter Five SAS RAID Setup The executable menus of the configuration interface of SAS RAID are the follow- ing four: ● Create RAID Volume Create RAID volume. ● Delete RAID Volume Delete existing RAID volume. ● Reset Disks to Non-RAID Reset HDDs in volume to non-RAID state.
- Page 37 Chapter Five SAS RAID Setup RAID0: it allows 2 or more than 2 hard disks to form this RAID volume. RAID1: it allows 2 hard disks to form this RAID volume. RAID10: it allows 4 hard disks to form this RAID volume with 4 or more hard disks.
- Page 38 Chapter Five SAS RAID Setup you sure you want to delete “Volume*”? (Y/N):”. If confirming to delete RAID vol- ume, please enter “Y”. And if you want to cancel the operation of deleting RAID vol- ume, please enter “N”. III. Reset Disks to Non-RAID menu After entering the configuration interface of SAS HostRAID, you can select the menu by up and down arrows, and then press [Enter] key to enter the menu or input di- rectly.
-
Page 39: Chapter Six Install Operating System
During manual setup of the operating system, some operating system may need the floppy drive or Inspur driver U disk to load the driver of hard disk controller. Re- fer to the readme.pdf file under the root directory in Inspur driver CD for the making method of the driver floppy disk. - Page 40 U disk to load the drive of hard disk controller (at present, the operating systems that use Inspur driver U disk to load the hard disk controller support Windows XP or above versions, Red Hat Linux 4.5 or above versions, and Suse Linux 9.0 SP2 or above versions).
- Page 41 If the system forbids the automatic operation of CD, please enter CD directory and operate dolphin. bat (Inspur system driver CD) in CD or setup.exe (RAID card driver CD) in CD direc- tory.
- Page 42 Chapter Six Install Operating System Two methods to enter drive making software main interface, as sollows: ● In the text box below “Please input navigation No.”, input navigation No (check navigation No. on CD set or name plate), then log in the drive making software main interface.
- Page 43 Inspur driver U disk, entering the interface of disk parti- tion, Inspur driver U disk will occupy a disk letter. If the disk is not partitioned, U disk will occupy disk C:. If the disk has other partitions, U disk will occupy other disk letter (please distinguish according to the actual hard disk partition).
-
Page 44: Manually Install Windows Server 2008 Enterprise Edition
Note: When making the above driver, if you use USB floppy, please make the driver in the floppy disk; if you use Inspur driver U disk, please make the driver in the Inspur driver U disk. - Page 45 Windows 2003”. Select “Intel(R) C600 Series Chipset SATA AHCI Controller” from the drive list and press [Enter] to load driver. If Inspur driver U disk is used (please connect Inspur driver U disk well be- fore the system starts up.) Firstly, ensure that the corresponding driver has been made into the [3.5 Floppy...
- Page 46 Chapter Six Install Operating System The following list shows the existing partitions and unpartitioned space on this computer. Use the UP and DOWN ARROW keys to select an item in the list. ⊙ To set up Windows on the selected item, press ENTER. ⊙...
- Page 47 Chapter Six Install Operating System date, Preparing installation, etc. Install Wizard collects related information for installa- tion preparation. The installation program detects and installs the equipment. During this process, if prompts like ‘Software Installation’, ‘Hardware Installation’ and others pop up, click <Yes>...
- Page 48 22. Install Chipset patch (1) Insert Inspur driver CD into the optical drive. Enter “Welcome to use Inspur driver CD” window, input the navigation code (on the driver CD case) or select ma- chine type (for the specific type, please check the host nameplate tag), and click <OK>...
- Page 49 Chapter Six Install Operating System (2) In the “Select OS” column, select Windows 2003; (3) In the “Select Hardware” column, select Network card driver; (4) Click <Next> to start the installation; (5) Enter the interface of “Intel ® Network Connections”, and double click “Install Drivers and Software”;...
-
Page 50: Manually Install Windows Server 2008 Enterprise Edition
(Advanced)”, and click <Next> to continue; (5) Put Inspur driver CD into optical drive, select “Search for the best driver in these locations”, select “Include this location in the search”, then select the path of driver :\driver\IPMI\driver\win03_64 and click <OK>... - Page 51 ●As for the above mentioned drivers, if USB floppy drive is used, please make the driver into floppy disk; if Inspur driver U disk is used, please make the driver into Inspur driver U disk; if general driver U disk is used, input the disk letter occupied by general U disk and the directory for saving the driver to make the driver into general U disk.
- Page 52 Chapter Six Install Operating System character), and then click <Next> to continue. 8. In “Select the edition of Windows that you purchased” interface, select the operating system version to be installed, then select “I have selected the edition of Win- dows that I purchased”, and click <Next>...
- Page 53 16. Install Chipset patch (1) Insert Inspur driver CD into the optical drive, click the blue dolphin icon un- der the installation or operation procedure item in the automatically playing interface popped out after the disk’s running. Enter “Welcome to use Inspur driver CD” window, input the navigation code (on the driver CD case) or select machine type (for the specif- ic type, please check the host nameplate tag), and click <OK>...
- Page 54 Chapter Six Install Operating System terface popped out after the disk’s running. Enter “Welcome to use Inspur driver CD” window, input the navigation code (on the driver CD case) or select machine type (for the specific type, please check the host nameplate tag), and click <OK> to enter the in- stallation interface automatically;...
-
Page 55: Manually Install Red Hat Enterprise Linux 6.1
(4) The system prompts “Browse for driver software on your computer”. After putting the Inspur driver CD into the optical drive, click the <Browse> button in the back of “Search for driver software in this location:” and select the path of the driver in the CD: \driver\SCU\driver\win_64 (if it is 32bit system, please select \driver\SCU\ driver\win_32), and then click <OK>. - Page 56 Chapter Six Install Operating System 2. The system enters the interface of “Welcome to Red Hat Enterprise Linux 6.1!”. This includes the following items: Install or upgrade an existing system Install system with basic video driver Rescue installed system Boot from local driver You can use up and down arrow key to select items.
- Page 57 Chapter Six Install Operating System 8. The system enters Please name this computer. The hostname identifies the com- puter on a network. Please input the Hostname. Here we also can select <Configure Network> on the left bottom of the window to configure the network.
- Page 58 Chapter Six Install Operating System select the hard disk to install the system in Allowable Drives window, input the Size (MB) of partition and click <OK> to finish the creating of root partition. Create the boot par- tition in the same way: /boot. ②...
- Page 59 You can use the driver CD attached with the machine to update the network card manually. (1) Insert Inspur driver CD into the optical drive; click the Terminal menu in Applications→System Tools; input the following in the windows:...
-
Page 60: Chapter Seven Common Problems And Trouble-Shooting
Chapter Seven Common Problems and Trouble-shooting This chapter focuses on the common problems and trouble-shooting of the server. If you are not sure about the cause of a failure and its removal method, please contact our customer service center for solution. Notes: When replacing or installing hardware device for the server, you should disconnect the power cable from the server completely. - Page 61 ● If you are using the system CD to boot and install the operating system directly, the hard disk drive is generally added through the floppy driver or Inspur driver U disk. When using USB floppy driver to add the drive, please set the BIOS first and close the onboard floppy driver controller.
-
Page 62: Machine Alarm
Chapter Seven Common Problems and Trouble-shooting CD) and whether there is fault in the floppy disk or Inspur driver U disk. 7.2.4 Instruction of Onboard SATA Controller If it is configured onboard SATA HostRAID, it only supports windows system of above Windows XP versions and connects 6 SATA devices at most. -
Page 63: Additional Notes
3. After having collected the basic information, please feedback the detailed alarm information to Inspur technical support personnel in a timely manner. We will make further analysis and judgment and help you solve the problem as soon as possible. - Page 64 RAID volume to 97% of the minimum physical disk volume. Because of the different suppliers, physical disk capacity may vary. 6. For more notices of our products, please refer to the FAQ for server in the of- ficial website of Inspur: http://www.inspur.com/support/Channel_Home/support_sv.asp...
-
Page 65: Chapter Eight Instruction Of Integrated Management Card Management Function
Browser plug-in module 12 or higher version TCP/IP network protocol stack Support TCP/IP network protocol stack The download address of browser plug-in module: Java SE Runtime Environment:http://www.java.com/en/download/ You can use Inspur driver CD to get and install browser plug-in module: enter... -
Page 66: Function Menu Introduction
Chapter Eight Instruction of Integrated Management Card Management Function the java directory in the CD root directory (here is the Java SE Runtime Environment 6, Update 18 plug-in module based on Windows system) and directly install browser plug-in module. Please install the browser plug-in module on the user end before log into the re- mote desktop. - Page 67 Chapter Eight Instruction of Integrated Management Card Management Function The following function menus can be found on the top of the interface: Dash- board, FRU Information, Server Health, Configuration, Remote Control and Mainte- nance. 1. Dashboard menu In this menu, the information of management chip Firmware version, modification time and MAC address, etc.
- Page 68 Chapter Eight Instruction of Integrated Management Card Management Function software events, OEM events and remote console software event logs. It can display according to category or display uniformly. The user can view logs anytime and also can clear logs. ③ System and Audit Log menu: displays system log and check Log. System log needs displaying according to category.
- Page 69 Chapter Eight Instruction of Integrated Management Card Management Function The username should start with English letters and have a character size within 4~32 and a password of at least 8 characters size. 5. Remote Control Menu This function menu allows you to perform various remote operations on the serv- er, including operating remote console, system switch and other control operations.
- Page 70 Chapter Eight Instruction of Integrated Management Card Management Function B. Remote desktop: Keyboard menu Menu Function Select this option, equal to click the “Ctrl” key on the Hold Right Ctrl Key right side of the keyboard when operating. Select this option, equal to click the “Alt” key on the right Hold Right Alt Key side of the keyboard when operating.
- Page 71 Chapter Eight Instruction of Integrated Management Card Management Function Menu Function Select this option to display local mouse and redirec- Show Cursor tion mouse on remote desktop at the same time. D. Remote desktop: Options menu Menu Function Bandwidth Select this item to set displayed bandwidth Keyboard/Mouse Encryption Encryption configuration for keyboard and mouse Select this item to magnify or minify the window Zoom...
- Page 72 Chapter Eight Instruction of Integrated Management Card Management Function ent, set client CD drive as the first startup sequence in server BIOS settings. Installation of ISO file is the same with remote CDROM installation, which needs to set startup sequence in server BIOS. F.
- Page 73 Chapter Eight Instruction of Integrated Management Card Management Function ③ Remote Control Function menu Select Server Power Control menu and enter the interface shown in the following figure: Select <Light on UID> option and click <Perform Action> to execute. After that, ID light of front and back panel of corresponding server will be on.
-
Page 74: Chapter Nine Server Installation Guide
We recommend you to use the cabinet specially designed by Inspur for the server. If so, the internal of the cabinet should be already grounded. Please don’t change the ground joint in the cabinet unless it is of absolute necessity. -
Page 75: Install Server Chassis Handles
Chapter Nine Server Installation Guide space between cabinet front and back angle rail (mobile rail) according to the depth of the server. 9.2 Install Server Chassis Handles 1. Take chassis handles and fixed screws out of the package, and install handles on both sides of chassis. -
Page 76: Server Slide Rail Suite
Chapter Nine Server Installation Guide Figure 3 9.3 Server Slide Rail Suite Take slide rail suite out of package. Slide rail suite attached with server NP5540M3 contains the following items: 1. Outer rail 2. Middddle rail 3. Inner rail 4. Long adjustment sheet 4 sheets 5. -
Page 77: Install Inner Rail
Chapter Nine Server Installation Guide Long adjustment sheet is installed in outer rail, used to adjust the length of the outer rail. Short adjustment sheet is installed in the inner side of cabinet angle rail, used to fix outer rail into cabinet angle rail. ●... -
Page 78: Install Outer Rail To Cabinet
Chapter Nine Server Installation Guide Figure 7 2. The screw holes location on chassis side that need to be corresponding to inner rail are shown in Figure 8. Figure 8 3. Make smooth face of inner rail corresponding with the side of chassis and the holes location in inner rail corresponding with the screw holes on chassis. -
Page 79: Install Server To Cabinet
Chapter Nine Server Installation Guide according to the depth of the cabinet; adjust the long adjustment sheet on both sides of the outer rail properly, and then fix it using 4 round head M4*6 screws and flat washers (used below the screw). The fixing hole position is shown in figure 10. Figure 10 is just for reference, the actual fixing hole position will be determined according to the depth of the cabinet. - Page 80 Chapter Nine Server Installation Guide 2. Stick the inner rails on both sides of the server on the middle rail groove on the cabinet outer rails. 3. Keep the server horizontal and push it stably into the cabinet. During the push, if the serve is stuck, please push the bayonet lock between the inner rail and middle rail in both sides of the server upward or downward (the directions are opposite on either side), meanwhile, push the server into the cabinet, as shown in figure 12.
Need help?
Do you have a question about the NP5540M3 and is the answer not in the manual?
Questions and answers