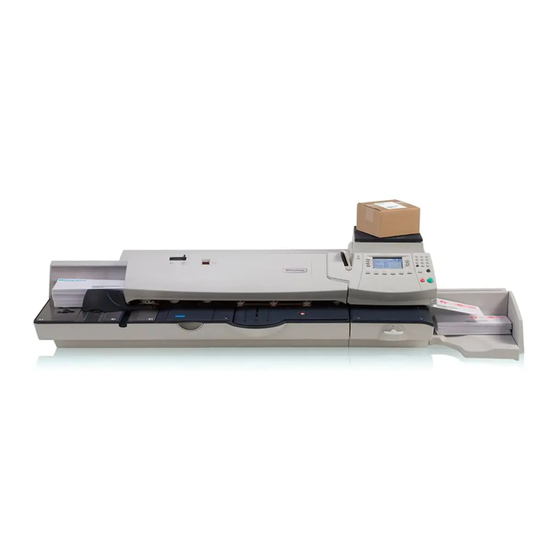
Pitney Bowes DM475 Operator's Manual
Digital postage meter
Hide thumbs
Also See for DM475:
- Service manual (227 pages) ,
- Operator's manual (224 pages) ,
- Setup manual (65 pages)

Related Manuals for Pitney Bowes DM475


Summary of Contents for Pitney Bowes DM475
- Page 1 Postage Meters DM475 ™ Digital Postage Meter Operator Guide Canada English Version SV62415 Rev. B April 2016...
- Page 2 SV62415 Rev. B ©2016 Pitney Bowes Inc. All rights reserved. This book may not be reproduced in whole or in part in any fashion or stored in a retrieval system of any type or transmitted by any means, electronically or mechanically, without the express, written permission of Pitney Bowes.
- Page 3 Servicing This equipment is not intended to be serviced by the user. Please refer to the warranty information if problems occur. The responsible party is Pitney Bowes Canada, 5500 Explorer Drive, Mississauga, Ontario L4W 5C7. All service and supply inquiries can be done by calling 1-800-672-6937 and following the telephone prompts.
- Page 4 This page was put in as a placeholder so you can print this entire guide in a duplex (double-sided) mode while keeping the proper page positions.
- Page 5 Pitney Bowes Contact List Machine Identification Product Name: DM475 Digital Mailing System PCN: Refer to the label on the back of your DM475 NOTE: If you need to contact customer support, refer to What Information You Need to Provide Customer Support before making the call.
- Page 6 This page was put in as a placeholder so you can print this entire guide in a duplex (double-sided) mode while keeping the proper page positions.
-
Page 7: Table Of Contents
2 • Getting to Know Your System Parts of the Machine ............2-2 Control Panel ..............2-4 Connections on Back of Machine ........2-6 Special Warning for Not Moving DM475 by Yourself ..2-7 3 • Running Mail Home Screen ..............3-2 Before Applying Postage ...........3-3 Checking Funds (Postage) Availability in Machine .. - Page 8 Table of Contents Processing Parcels ............3-12 Processing a Parcel Using the Optional Parcel Rate Module ................ 3-12 Printing a Statement of Mailing or Manifest Payment 3-14 Printing a Single Tape ..........3-15 Printing Multiple Tapes ..........3-15 Adding Postage to Correct a Mail Piece ......3-16 Correcting a Date on a Mail Piece ........3-17 Using WOW®...
- Page 9 6 • Adding Postage/Connecting to the Data Centre Postage and Your Machine ..........6-2 Establishing Communications Between Your Machine and the Pitney Bowes Data Centre ..........6-2 Downloads from the Data Centre to Your Machine ....6-3 Using LAN Network (Constant Connection) to Establish Communications with the Data Centre .......6-6...
- Page 10 Table of Contents Activating/Setting Up Standard Accounting Option ...8-4 Turning On Accounting ............8-6 Turning Off Accounting ............8-6 Turning On Account Passwords ........8-7 Turning Off Account Passwords ........8-8 Creating New Accounts .............8-9 Editing Account Names and Passwords ......8-10 Selecting An Account to Track Postage ......8-11 Displaying Account Totals ..........8-12 Printing Account Reports ..........8-13 Printing to an Attached Printer .........
- Page 11 Table of Contents Rate the Mail on Scale ............10-3 Key In Postage ..............10-3 Turning Auto Scale On or Off ...........10-4 Change/Retain Class (When a New Piece is Put On) ..10-5 Change/Retain Destination (When Selecting New Class)10-6 (Weigh-on-the-Way) and Shape-Based Rating ...10-7 ®...
- Page 12 Table of Contents To clear stalled envelope in feeder/WOW area .....12-5 Moistening Problems (envelopes don't seal) ....12-7 Mail Transport Error Messages ..........12-8 Problems Connecting to Data Centre via LAN Network..12-9 Viewing System Configuration Levels ......12-10 13 • Supplies and Options Supplies and Accessories ..........13-2 Options ................13-2 Weighing Platform ............
- Page 13 Table of Contents This page was put in as a placeholder so you can print this entire guide in a duplex (double-sided) mode while keeping the proper page positions. SV62415 Rev. B xiii...
-
Page 14: Introduction
1 • Introduction This chapter lists the key features of your mailing system, tells you what's in this guide, and presents important safety information. What's in this Guide ............1-2 About Your Digital Mailing System........1-3 Postal Requirements ............1-4 Sections of the Meter Stamp ..........1-5 What is IntelliLink ? ............1-5 ®... -
Page 15: What's In This Guide
1 • Introduction What's in this Guide Section Description Chapter 1 Describes the key features of your mailing system. It Introduction also includes important safety notes. Chapter 2 Explains the purpose and shows the location of each control and machine feature. Please read this section Getting to Know Your System carefully. -
Page 16: About Your Digital Mailing System
1 • Introduction About Your Digital Mailing System Your digital mailing system's advanced features include: • ENERGY STAR compliant design lowers operating costs and ® helps preserve the environment • Large, easy-to-read display shows system status and prompts you through setup operations •... -
Page 17: Postal Requirements
Contact Pitney Bowes (see page v) when you need to do this. • Each time you add postage to the machine, the Pitney Bowes Data Centre automatically performs a postal inspection. NOTE: If the interval between inspections is more than 60 days, your machine's display prompts "Inspection Due."... -
Page 18: Sections Of The Meter Stamp
1 • Introduction Sections of the Meter Stamp These are the sections that make up the meter stamp printed on your mail piece. Meter Serial Postage Applied Number Postal Code of Date Encrypted Envelope Ad postage meter Canpost Indicia Optional Printing Required Printing What is IntelliLink™? Your mailing system takes full advantage of IntelliLink™, your digital... -
Page 19: About Constant Connection
About Constant Connection Constant Connection is an option that allows you to connect your machine to the Pitney Bowes Data Centre via a LAN network that has Internet access. To use, plug one end of the Ethernet cable (supplied) to your Internet LAN network port and the other end to the LAN port on the back of the machine (see also Chapter 6, Adding Postage). -
Page 20: Important Safety Notes
Please read all instructions before you attempt to operate the system. Save these instructions for future use. • Use only Pitney Bowes-approved supplies, in particular aerosol dusters. Improper storage and use of aerosol dusters or flammable aerosol dusters can cause an explosive-like condition that could result in personal injury and/or property damage. - Page 21 Pitney Bowes. See page v for contact information. CAUTION: Do not move the DM475 by yourself. The machine is made to separate into two sections, and by moving it without proper disassembly, you may: •...
- Page 22 1 • Introduction This page was put in as a placeholder so you can print this entire guide in a duplex (double-sided) mode while keeping the proper page positions. SV62415 Rev. B...
-
Page 23: Getting To Know Your System
2 • Getting to Know Your System In this chapter you'll find out where everything is and what it does. Parts of the Machine............2-2 Control Panel ..............2-4 Connections on Back of Machine ........2-6 Special Warning for Not Moving DM475 by Yourself ..2-7 SV62415 Rev. B... -
Page 24: Parts Of The Machine
2 • Getting to Know Your System Parts of the Machine (shown with optional weighing platform) (shown with cover open) Item Part Description Feeder/WOW Open this cover to gain access to the WOW deck and two clearance levers (items #16 and #17) Cover Seal/No Seal Allows you to turn envelope sealing on and off... -
Page 25: Control Panel
2 • Getting to Know Your System Parts of the Machine Collects ink waste Ink Waste Tank (in tray under printer section) Stacker Tray Allows you store the Quick Reference Guide, CD, etc. for easy access. Storage Slot Stacker Tray Allows the neat stacking of finished mail pieces Control Panel Allows you to enter and set up information on... -
Page 26: Control Panel
2 • Getting to Know Your System Control Panel ® ® Scale Weight 21 g 2010.06.15 Account :ABC INC Class :Letterpost :Recycle :None Back Enter Home Normal Custom Tape Preset Refill Menu Weigh/Rate Presets Postage Funds Start Stop Shift Back space Symbol Space Item Part/Key... - Page 27 2 • Getting to Know Your System Control Panel Item Part/Key Description Numeric Allows you to type in numbers for postage values, account names, and text messages Allows you to move back one level in a menu, or Back/C Key clear an entry Allows you to accept an entry or choice Enter Key...
-
Page 28: Connections On Back Of Machine
2 • Getting to Know Your System Connections on Back of Machine Item Part Description LAN Port Allows you to connect your system to the Pitney Bowes Data Centre via a LAN network that has Internet access. See Chapter 6, Adding Postage for more information. -
Page 29: Special Warning For Not Moving Dm475 By Yourself
2 • Getting to Know Your System Special Warning for not Moving the DM475 by Yourself You should not move the DM475 machine by yourself. Call Pitney Bowes to arrange a Service visit. CAUTION: Do not move the DM475 by yourself. The... - Page 30 2 • Getting to Know Your System This page was put in as a placeholder so you can print this entire guide in a duplex (double-sided) mode while keeping the proper page positions. SV62415 Rev. B...
-
Page 31: Running Mail
3 • Running Mail This chapter explains how to run mail of various sizes. Home Screen..............3-2 Before Applying Postage ............3-3 Checking Funds (Postage) Availability in Machine ..3-3 Selecting a Class or Special Service ......3-4 Before Selecting or Changing a Class ......3-4 Selecting an Account to Track Postage .......3-5 Using Presets to Speed the Rating Process ....3-6 Processing Letter Mail ............3-7... -
Page 32: Home Screen
3 • Running Mail Home Screen When you power up your system, the Home screen appears on the operating display. If your system has been set up to require a Lock Code or password, you are prompted to enter it. A typical Home screen is shown below (your screen may vary slightly if you have not purchased the optional accounting feature or weighing platform):... -
Page 33: Before Applying Postage
3 • Running Mail Before Applying Postage Checking Funds (Postage) Availability in Machine It is a good idea to check the amount of funds (postage) in your meter before running your daily mail. 1. Press Funds. 2. View funds used and pieces processed. Funds Available : $204.94... -
Page 34: Selecting A Class Or Special Service
3 • Running Mail Before Applying Postage Selecting a Class or Special Service Selecting a class is a required action in order to generate the appropriate rate for your mail piece. The procedure for setting a class special service or carrier depends on whether you enter the weight of the mail manually or use the interfaced scale to weigh your mail piece. -
Page 35: Selecting An Account To Track Postage
3 • Running Mail Before Applying Postage Selecting an Account to Track Postage You can select an account to track postage if one of the optional departmental accounting features is turned on. See Chapter 8, Standard Accounting Option, for additional information. 1. -
Page 36: Using Presets To Speed The Rating Process
3 • Running Mail Before Applying Postage Using Presets to Speed the Rating Process Selecting the Normal Preset The Normal Preset is the factory default setting which contains no predetermined mail job settings (e.g., Postage Value, Class, or Weight). Pressing the Normal Preset key will clear your current mail job settings and take you back into Seal Only Mode. -
Page 37: Processing Lettermail
3 • Running Mail Processing Lettermail Processing Lettermail Using the Integrated Weigh Platform 1. If you have the optional accounting feature, from the home screen select Account and choose an account. 2. Weigh Mail Piece – Place mail piece on the integrated weigh platform. -
Page 38: Processing Lettermail Using Manual Weight Entry
3 • Running Mail Processing Lettermail Processing Lettermail Using Manual Weight Entry 1. If you have the optional accounting feature, from the home screen select Account and choose an account. 2. At Home screen, press the Weigh/Rate button and then choose “Enter Weight Manually”. -
Page 39: Processing Incentive Lettermail
3 • Running Mail Processing Lettermail Processing Incentive Lettermail Incentive Lettermail is a category of Lettermail that consists of identical items of Standard, Long and Oversize mail as defined by Canada Post that must be deposited in Canada for delivery in Canada. -
Page 40: Automatically Feeding Of Envelopes
3 • Running Mail Processing Lettermail Automatically Feeding of Envelopes 1. Tap lead edges and top edges of envelopes on table. NOTE: Do not use the WOW deck for tapping the edges of the envelopes. 2. Shingle envelopes (slant the stack as shown) so the bottom envelope feeds first. - Page 41 3 • Running Mail Processing Lettermail Automatically Feeding of Envelopes (cont'd) NOTE: For a proper seal, the envelope’s minimum flap angle must meet the following criteria: • For envelopes with a flap length from 25 to 60mm (1 to 2.36 inches), the minimum flap angle is 18 degrees.
-
Page 42: Processing Parcels
3 • Running Mail Processing Parcels Processing a Parcel Using the Optional Parcel Rate Module The following outlines the procedure for processing a parcel using the optional Parcel rate module. 1. Place your mail piece on the integrated weigh platform or enter the weight manually through the following steps: a. - Page 43 3 • Running Mail Processing Parcels Processing a Parcel Using the Optional Parcel Rate Module US Destinations 3. For US destinations you must select USA Parcel and then press Enter to confirm. 4. Select your desired sub-class Expedited USA or US Xpresspost.
-
Page 44: Printing A Statement Of Mailing Or Manifest Payment
3 • Running Mail Processing Parcels Printing a Statement of Mailing or Manifest Payment This procedure is used when you have multiple parcels to send and want to evidence the postage payment for these shipments through one single digital indicia. 1. -
Page 45: Printing A Single Tape
3 • Running Mail Processing Parcels If your mail piece is too thick to pass through the feeder (non-Letter size), you can use a tape strip to print the indicia on, then apply it to your mail piece. Printing a Single Tape Strip 1. -
Page 46: Adding Postage To Correct A Mail Piece
3 • Running Mail Adding Postage to Correct a Mail Piece This procedure is used if you have applied the incorrect amount of postage and need to make a correction to ensure that a mail piece has sufficient postage. 1. At the Home screen: •... -
Page 47: Correcting A Date On A Mail Piece
3 • Running Mail Correcting a Date on a Mail Piece This procedure is used if you have applied the wrong date to a mail piece and need to make a correction. For example, if you already ran your mail for the day but it was too late for that day's mail pickup, you can apply the next business day's date on the mail pieces so they can be processed correctly by the post office. -
Page 48: Using Wow® (Weigh-On-The-Way)
When enabled, the Weigh-on-the Way (WOW®) feature increases your productivity because you don't have to presort the mail by weight before loading the pieces onto the machine. The DM475 has a special scale built into its deck that can weigh mail pieces on-the- fly (that is, as they pass along the deck) so the system can determine the correct postage of each item. -
Page 49: Using Differential Weighing
3 • Running Mail Using Differential Weighing Differential Weighing is an optional feature that allows you to place all your mixed weight mail on the scale and have the system automatically calculate the correct weight as you remove each mail piece. It is a fast and convenient method for processing mixed weight, but same class mail. - Page 50 3 • Running Mail Using Differential Weighing 6. The total weight of the mail pieces are displayed. As prompted, remove one item from the scale. Remove One Mail Piece From the Scale Total weight: 90 g ◄ Exit Diff. Weighing 7.
- Page 51 3 • Running Mail Using Differential Weighing 11. When you have removed the last item from the scale, the "Last Item" screen displays. Last Item Print postage for last item removed? ◄ Yes ◄ No, Do not print Select "Yes" to rate the item or "No, Do not print". 12.
-
Page 52: Checking And Clearing The Batch Count
3 • Running Mail Checking and Clearing the Batch Count Your system has the ability to keep track of batches of mail if desired. You may use this feature to track the amount of mail going out per day, per week, per month, etc. The system stores the postage value and piece count information in a "batch register". -
Page 53: Printing The Batch Count
3 • Running Mail Checking and Clearing the Batch Count Printing the Batch Count 1. Press Funds. 2. Press Menu and select "Print Funds Report". 3. When prompted, load envelope onto the feeder and press Start or load a tape strip and press the Tape button. The Funds Reports is printed (see sample below) and the envelope/tape strip is ejected. - Page 54 3 • Running Mail This page was put in as a placeholder so you can print this entire guide in a duplex (double-sided) mode while keeping the proper page positions. 3-24 SV62415 Rev. B...
-
Page 55: Printing Options
4 • Printing Options This chapter explains your printing options for incoming and outgoing mail. Printing Options Overview ..........4-2 Sections of the Meter Stamp ..........4-3 Printing a $0.00 Meter Stamp ..........4-3 Auto-Advance of Printed Date for the Meter Stamp ...4-3 Manually Changing Printed Date for the Meter Stamp ..4-4 Sealing Envelopes without Printing a Meter Stamp....4-5 Printing the Date and Time or Ad (no meter stamp) ...4-6... -
Page 56: Printing Options Overview
4 • Printing Options Printing Options Overview There are various printing options available when processing mail through the system. You can: • Seal the envelope without printing the meter stamp • Print the date and time, or advertisment (no meter stamp) •... -
Page 57: Sections Of The Meter Stamp
4 • Printing Options Sections of the Meter Stamp These are the sections that make up the meter stamp printed on your mail piece. Meter Serial Postage Applied Number Postal Code of Date Encrypted Envelope Ad postage meter Canpost Indicia Optional Printing Required Printing Printing a $0.00 Meter Stamp... -
Page 58: Manually Changing Printed Date For The Meter Stamp
4 • Printing Options Manually Changing Printed Date for the Meter Stamp You may want to advance the date printed on the meter stamp if it is after normal business hours and you want to prepare outgoing mail for a future business day's mailing. IMPORTANT: •... -
Page 59: Sealing Envelopes Without Printing A Meter Stamp
4 • Printing Options Sealing Envelopes without Printing a Meter Stamp You can set up your mailing system to seal envelopes without printing a digital indicia on them. 1. Make sure the seal/no seal lever is set to the seal position (see Chapter 2 - Getting to Know Your System). -
Page 60: Printing The Date And Time Or Ad (No Meter Stamp)
4 • Printing Options Printing the Date and Time or Ad (No Meter Stamp) You may want to use this feature to time-stamp incoming mail or sensitive documents, or to include an ad to outgoing letters already having a meter stamp. 1. -
Page 61: Adding/Removing An Envelope Ad To The Meter Stamp
Downloading an Envelope Ad into Your Machine Your system comes pre-loaded with several envelope ads. If you want another envelope ad, contact Pitney Bowes (see page v). Ready-made items can be purchased and downloaded directly into your meter. We can also work with you to create custom ads. - Page 62 4 • Printing Options This page was put in as a placeholder so you can print this entire guide in a duplex (double-sided) mode while keeping the proper page positions. SV62415 Rev. B...
-
Page 63: Normal And Custom Presets
5 • Normal and Custom Presets This chapter discusses the Normal and Custom Presets feature available on your machine. What is a Preset? ...............5-2 Why Should I Use Presets?..........5-2 Normal Preset..............5-3 Selecting the Normal Preset ........5-3 Defining New Values for the Normal Preset ....5-3 Custom Presets ..............5-5 Selecting Custom Presets ..........5-5 Viewing a Custom Preset ..........5-5... -
Page 64: What Is A Preset
5 • Normal and Custom Presets What is a Preset? A preset is very similar to a “shortcut” on your computer. It recalls a setting that already contains the postage class, the postage value, and possibly other values. Your machine has two types of presets, Normal and Custom; and they actually work the same way. -
Page 65: Normal Preset
5 • Normal and Custom Presets Normal Preset Normal Preset comes pre-configured. You can change these settings by re-defining new values (vs. editing existing values) using the procedure below. IMPORTANT: • You cannot delete the Normal Preset, but you can define new values for the Normal Preset based on the current condition of the machine. - Page 66 5 • Normal and Custom Presets Normal Preset Defining New Values for the Normal Preset (cont'd) View Settings Preset: Normal Preset Class : Dom Standard : None Inscrip : Not Avail-NonDis Date : Print Select This Preset [Enter] View Settings Preset: Normal Preset Hor.
-
Page 67: Custom Presets
5 • Normal and Custom Presets Custom Presets You have the option of viewing, editing the name of, overwriting (save new settings for), or deleting a Custom Preset as necessary. IMPORTANT: When a rate change becomes effective, always check the postage values assigned to all presets to make sure that they comply with the new rates. -
Page 68: Defining Custom Presets
5 • Normal and Custom Presets Custom Presets Defining Custom Presets To define (create) a new Custom Preset: 1. Establish the proper settings on the machine (such as No Ad, a class, a specific departmental account, etc.) that you want the preset to contain. - Page 69 5 • Normal and Custom Presets Custom Presets Defining Custom Presets (cont'd) View Settings Preset: Custom 1 Class : Dom Standard : None Inscrip : None Date : Print Select This Preset [Enter] View Settings Preset: Custom 1 Hor. Pos Mode : Platform Select This Preset [Enter]...
-
Page 70: Editing A Custom Preset Name
5 • Normal and Custom Presets Custom Presets Editing a Custom Preset Name You may change the name of a preset if you want. 1. Press Menu. 2. If necessary, press the green down arrow key to scroll through the menu screens. 3. -
Page 71: Deleting A Custom Preset
5 • Normal and Custom Presets Custom Presets Deleting a Custom Preset Deleting a preset removes all the settings assigned to it and removes it from the Presets Menu. IMPORTANT: Once you deleted a preset, its values are gone. You can't recover a deleted preset. - Page 72 5 • Normal and Custom Presets This page was put in as a placeholder so you can print this entire guide in a duplex (double-sided) mode while keeping the proper page positions. 5-10 SV62415 Rev. B...
- Page 73 This chapter explains how to add postage to your system using Pitney Bowes' Postage By Phone service and ® connecting to the Pitney Bowes Data Centre. Postage and Your Machine..........6-2 Establishing Communications Between Your Machine and the Pitney Bowes Data Centre ...........6-2 Downloads from the Data Centre to Your Machine ....6-3...
-
Page 74: Postage And Your Machine
Postage By Phone ® meter payment account (send in a cheque, direct withdrawal, establish credit, etc.). See the Pitney Bowes Contact List on page v to call for further information. Establishing Communications Between Your Machine... -
Page 75: Downloads From The Data Centre To Your Machine
6 • Adding Postage/Connecting to Data Centre Downloads from the Data Centre to Your Machine When you connect to the Pitney Bowes Data Centre to add postage or perform other functions, the Data Centre may activate other downloads while the machine is connected. If some type of software/ postal update or download is available, a message stating so displays. - Page 76 Downloads from the Data Centre to Your Machine Postal/ZIP Code Update If the Postal Code on record at the Pitney Bowes Data Centre does not match the Postal/ZIP Code of your system, the code will be downloaded into your system. (When a system is moved to a new Postal Code, the Data Centre enters the new code into the record.
- Page 77 6 • Adding Postage/Connecting to Data Centre Downloads from the Data Centre to Your Machine Postal Rate Update Postal rates change periodically by the CPC If new rates are available, you can download them quickly and easily directly from the Pitney Bowes Data Centre.
-
Page 78: Using Lan Network (Constant Connection) To Establish
Establish Communications with the Data Centre Constant Connection is a feature that allows you to connect your system to the Pitney Bowes Data Centre via a LAN network that has Internet access. This provides a quick way to download postage and software updates to your machine. -
Page 79: Checking Funds (Postage) Availability In Machine
6 • Adding Postage/Connecting to Data Centre Checking Funds (Postage) Availability in Machine 1. Press Funds. 2. View funds used and pieces processed. Funds Available : $204.94 Used $17.06 Total Pieces Ctl Sum : $222.00 More Options (Menu) Available – the amount of funds (postage) left in your meter Used –... -
Page 80: Checking Your Postage By Phone ® Account Balance
® You can check your Postage By Phone account balance at any ® time, as long as your system is connected to the Pitney Bowes Data Centre. NOTE: The Postage By Phone® account balance represents the funds in your account, not the amount in your meter. -
Page 81: Adding Postage
The amount shown in the "Add $xx" selection line represents the amount of postage you added the last time. 3. The system connects to the Pitney Bowes Data Centre (this may take a few moments). Various screens displays, letting you know the status of the process. - Page 82 – the amount you have on credit Additional Funds Available on your Postage By Phone® account balance (by signing up to one of the various Pitney Bowes credit programs such as Pitney Works, etc.) Account No. – your Postage By Phone® account number Meter No.
-
Page 83: Printing A Funds Report
6 • Adding Postage/Connecting to Data Centre Printing a Funds (Postage) Report A funds report allows you to print a record of how much postage has been used and how much is remaining in the machine. 1. Press Funds. 2. Press Menu and select "Print Funds Report". 3. -
Page 84: Downloading Files Or Updating System
The system automatically dials the centre. NOTE: Make sure the system is connected in the proper manner to communicate to the Pitney Bowes Data Centre (see page 6-2). 5. After connection is made, if some type of software or postal update or download is available, a message stating so displays. -
Page 85: Settings For Connecting To The Data Centre
ID, password, and server IP address. IMPORTANT: Do not change the Data Centre settings unless directed to do so by your Pitney Bowes representative. LAN Connection Network Settings Follow the steps below to ensure your LAN Internet connection is set up properly. -
Page 86: Data Centre Distributor Settings
Settings for Connecting to the Data Centre Data Centre Distributor Settings This option allows you to modify the connection parameters that your machine uses to connect to the Pitney Bowes Data Centre. A brief description of each parameter is provided on the next page. IMPORTANT: Do not change these settings unless directed to do so by your Pitney Bowes representative. - Page 87 - This is the account number and the user • ID that your system uses to dial into the Internet service provider (ISP) that allows you to connect to Pitney Bowes. Global Password - This is the password your system uses to •...
- Page 88 6 • Adding Postage/Connecting to Data Centre This page was put in as a placeholder so you can print this entire guide in a duplex (double-sided) mode while keeping the proper page positions. 6-16 SV62415 Rev. B...
-
Page 89: System Options
7 • System Options This chapter presents system options you can setup or modi- fy, such as setting time, date, passwords, warnings, etc. System Options Overview ..........7-2 Basic Options ..............7-3 Setting the Time, Date, and Timeouts ......7-3 Changing Language .............7-8 Adjusting the Contrast of the Display ......7-8 Setting Postage Limits (Funds Warnings) ....7-9 Enabling, Changing or Disabling Lock Codes and... -
Page 90: System Options Overview
7 • System Options System Options Overview System Options allow you to customize the machine for the way you run your mail and add security to those features that are sensitive to your organization. Because of the many settings available, the set- tings are categorized into "Basic"... -
Page 91: Basic Options
7 • System Options Basic Options Setting the Time, Date, and Timeouts You can change the system time/date, set the time/date to daylight saving time, change the time at which your system advances the date/time to the next day, and set the amount of time your system can remain inactive before reverting to the Normal Preset values. - Page 92 7 • System Options Basic Options Setting the Time, Date, and Timeouts (cont'd) Setting Auto Date Advance Time Your system can automatically advance the date every day at a time you specify. The date advance time is factory set to 12:00 AM. If your mail is picked up at a certain time each day, you can set the system to advance the date after the mail pickup time.
- Page 93 7 • System Options Basic Options Setting the Time, Date, and Timeouts (cont'd) Setting the Normal Preset Timeout The Normal Preset is a pre-defined set of values (postage, ad, ac- count and so on) that your machine display automatically returns to after a set period of time.
- Page 94 7 • System Options Basic Options Setting the Time, Date, and Timeouts (cont'd) Setting Daylight Saving Time 1. Press Menu. 2. Select "Setup". 3. Select "Time and Timeouts". 4. If necessary, press the green down arrow key to scroll through the menu screens.
- Page 95 7 • System Options Basic Options Setting the Time, Date, and Timeouts (cont'd) Setting the Envelope Timeout You can set the amount of time the system waits for the next enve- lope to feed before the machine stops running. 1. Press Menu. 2.
-
Page 96: Changing Language
7 • System Options Basic Options Changing Language The machine is capable of displaying all screens, operator prompts, and options in either English or Francais (French). English is the de- fault language when the machine is initially powered up. To change the screens to Spanish (or back to English when Español is selected): 1. -
Page 97: Setting Postage Limits (Funds Warnings)
7 • System Options Basic Options Setting Postage Limits (Funds Warnings) You can specify values so that when your postage funds drop below a certain level, or if you try to enter too much postage for a piece of mail, the system displays a warning. Setting the High Value Warning You can have the system warn you when you manually key in a post- age value that is higher than a maximum amount that you specify. -
Page 98: Enabling, Changing Or Disabling Lock Codes And Passwords
7 • System Options Basic Options Enabling, Changing or Disabling Lock Codes and Passwords Enabling the Lock Code The Lock Code prevents unauthorized access to your mailing system after the machine has entered sleep mode. 1. Press Menu. 2. Select "Setup". 3. - Page 99 7 • System Options Basic Options Enabling, Changing or Disabling Lock Codes and Passwords Changing the Lock Code You can change the Lock Code if it has been enabled. 1. Press Menu. 2. Select "Setup". 3. If necessary, press the green down arrow key to scroll through the menu screens.
- Page 100 7 • System Options Basic Options Enabling, Changing or Disabling Lock Codes and Passwords Disabling the Supervisor Password You can disable the Supervisor Password if it has been enabled. 1. Press Menu. 2. Select "Setup". 3. If necessary, press the green down arrow key to scroll through the menu screens.
-
Page 101: Configuring The Tape Button
7 • System Options Basic Options Configuring the Tape Button You can specify the action the system takes when the Tape button is pressed. 1. Press Menu. 2. Select "Setup". 3. If necessary, press the green down arrow key to scroll through the menu screens. -
Page 102: Advanced Options
5. You will be prompted to "Transfer all funds from meter to PBP account". Select "Continue". 6. The system dials into the Pitney Bowes Data Centre (this may take a few moments). Various screens display, letting you know the status of the process. -
Page 103: Running Install Mode
7 • System Options Advanced Options Running Install Mode Running “Install Mode” allows you to review, and change if desired, most of the values that were selected when the machine was first installed via the procedure in the Quick Install Guide. This option provides a convenient location to set several values all at once. - Page 104 7 • System Options This page was put in as a placeholder so you can print this entire guide in a duplex (double-sided) mode while keeping the proper page positions. 7-16 SV62415 Rev. B...
-
Page 105: Standard Accounting Option
8 • Standard Accounting Option This chapter explains how to take advantage of the standard accounting option of the system. Overview of Accounting Options.........8-3 Activating/Setting Up Standard Accounting Option ....8-4 Turning On Accounting ............8-6 Turning Off Accounting ............8-6 Turning On Account Passwords .........8-7 Turning Off Account Passwords .........8-8 Creating New Accounts ............8-9 Editing Account Names and Passwords ......8-10... - Page 106 8 • Standard Accounting Option This page was put in as a placeholder so you can print this entire guide in a duplex (double-sided) mode while keeping the proper page positions. SV62415 Rev. B...
-
Page 107: Overview Of Accounting Options
8 • Standard Accounting Option Overview of Accounting Options An accounting feature on a mailing system allows you to track your postage costs by categories. These categories can represent whatever makes sense to your organization - departments, people, locations, projects, etc. Tracking your mailing expenses by category allows you to manage and budget your postal costs in a more effi- cient manner. -
Page 108: Activating/Setting Up Standard Accounting Option
8 • Standard Accounting Option Activating/Setting Up Standard Accounting Option Use the table below to step you through the process of setting up standard accounting (assuming you purchased it). The table covers the entire "life cycle" of an account, from creation to deletion. Step Action Description/Procedure Turn On... - Page 109 8 • Standard Accounting Option Activating/Setting Up Standard Accounting Option Step Action Description/Procedure Create Sets up your account name (and password if de- sired). See Creating New Accounts later in this Account chapter for procedure. Maintain (Edit) Allows you to change the name and/or password Account of an account.
-
Page 110: Turning On Accounting
8 • Standard Accounting Option Turning On Accounting 1. Press Menu. 2. Select "Accounts". NOTE: If the supervisor password is enabled, you will need to enter it to gain access to all of the accounting functions. 3. When prompted, select "Turn Accounting ON". •. -
Page 111: Turning On Account Passwords
8 • Standard Accounting Option Turning On Account Passwords You can turn on the requirement for all operators to enter passwords when choosing an account. NOTE 1: You need to set up a Supervisor password (see Chapter 7, System Options) before you can enable Account passwords. NOTE 2: Turning on the account password feature forces you to select a new account, just in case your existing account uses a... -
Page 112: Turning Off Account Passwords
8 • Standard Accounting Option Turning Off Account Passwords You can turn off the requirement for all operators to enter passwords (if passwords are set up) when choosing an account . 1. Press Menu. 2. Select "Accounts". NOTE: If the supervisor password is enabled, you will need to enter it to gain access to all of the accounting functions. -
Page 113: Creating New Accounts
8 • Standard Accounting Option Creating New Accounts You need to create an account before you can use the departmental accounting feature to track postage. 1. Press Menu. 2. Select "Accounts". Number of Accounts Created Accounts Accounts In Use: 0/25 Number of Accounts ◄... -
Page 114: Editing Account Names And Passwords
8 • Standard Accounting Option Editing Account Names and Passwords You can edit an account name and establish passwords for each ac- count if you wish. 1. Press Menu. 2. Select "Accounts". NOTE: If the supervisor password is enabled, you will need to enter it to gain access to all of the accounting functions. -
Page 115: Selecting An Account To Track Postage
8 • Standard Accounting Option Selecting an Account to Track Postage You need to select an account to track postage when using Depart- mental Accounting. 1. From Home screen, press the selection key next to Account. The "Select Account" screen displays. Select Account Current: None ... -
Page 116: Displaying Account Totals
8 • Standard Accounting Option Displaying Account Totals You can view your account totals anytime using this option. 1. Press Menu. 2. Select "Accounts". NOTE: If the supervisor password is enabled, you will need to enter it to gain access to all of the accounting functions. 3. -
Page 117: Printing Account Reports
8 • Standard Accounting Option Printing Account Reports Your system allows you to print accounting reports for a specific ac- count or all accounts, and also to print a list of accounts. The reports are accessed by pressing Menu and selecting "Reports", then select- ing "Accounts". -
Page 118: Printing On An Envelope Or Tape Strip
8 • Standard Accounting Option Printing Account Reports Printing on an Envelope or Tape Strip 1. Press Menu. 2. Select "Reports". 3. Seelct "Accounts" 4. Select the appropriate report from the list. You may need to press the down arrow key to view additional reports. NOTE: If you have an attached printer, but want to print on an envelope or tape strip, select "Mailing Machine"... - Page 119 8 • Standard Accounting Option Printing Account Reports Single Accounts Report This report provides the postage amount and number of pieces ap- plied against a single account. It must be printed on an envelope or tape strip. Account Name: SALES 1019699 06 08 28 Acct Number: 1...
-
Page 120: Clearing All Account Totals
8 • Standard Accounting Option Clearing All Account Totals You can clear the postage totals on all accounts (for example, at the beginning of a new fiscal year) with this option. IMPORTANT: Make sure you really want to clear an account. Once you do, the account information is gone. -
Page 121: Deleting Accounts
8 • Standard Accounting Option Deleting Accounts You can delete an account from the system if necessary. IMPORTANT: Make sure your really want to delete an account. Once you do, the account information is gone. 1. Press Menu. 2. Select "Accounts". NOTE: If the supervisor password is enabled, you will need to enter it to gain access to all of the accounting functions. - Page 122 8 • Standard Accounting Option This page was put in as a placeholder so you can print this entire guide in a duplex (double-sided) mode while keeping the proper page positions. 8-18 SV62415 Rev. B...
-
Page 123: Reports
9 • Reports This chapter explains how to take advantage of the reporting capabilities of your system. Overview of Reports ............9-2 Last 5 Refills Report ............9-3 Funds Report ..............9-3 Accounts ................9-4 Single Accounts Report ..........9-4 Multi-Account Summary Report ........9-4 Account List Report ............9-4 System Setup Report ............9-5 Error Report ................9-5 Configuration Report ............9-6... -
Page 124: Overview Of Reports
9 • Reports Overview of Reports Your system allows you to print reports for funds usage, postage refills, postage tracked by account, and other valuable data. The re- ports are accessed by pressing Menu and selecting "Reports". NOTE: Some reports can be printed on an envelope or tape strip; others require an optional attached printer (laser). -
Page 125: Last 5 Refills Report
9 • Reports Last 5 Refills Report This report lists the last five postage refills. It must be printed on an envelope or tape strip. Date of Refill Time Refill Amount Acct No.: 99999999 06 08 28 3 : 32P $75 . -
Page 126: Accounts
9 • Reports Accounts Single Accounts Report This report provides the postage amount and number of pieces ap- plied to all of your accounts (if the Departmental Accounting feature is set up on your system). It must be printed on an envelope or tape strip. -
Page 127: System Setup Report
This report provides a history of error codes that your machine has encountered. It is generally a report you will not have to access un- less your Pitney Bowes Customer Service Representative requests that you print it out. Error Date... -
Page 128: Configuration Report
Platform: D0 . 07 PHS: 1 . 11 Software Version Report This report provides system software version information. You may be directed to print this report by a Pitney Bowes agent. 06 08 28 0011969 Rate Mgr. #: 03.10 PBP Serial #:... -
Page 129: Printing A Report
9 • Reports Printing a Report The report printing options available to you will depend on the type of report you have selected. Printing to an Attached Printer 1. Press Menu. 2. Select "Reports". 3. Select the appropriate report from the list. You may need to press the green down arrow key to view additional reports. - Page 130 9 • Reports This page was put in as a placeholder so you can print this entire guide in a duplex (double-sided) mode while keeping the proper page positions. SV62415 Rev. B...
-
Page 131: 10 • Scale Options
10 • Scale Options This chapter presents system settings you can setup or modi- fy the optional weighing platform (scale). Scale Options Overview ...........10-2 Zeroing the Scale .............10-3 Rate the Mail on Scale .............10-3 Key In Postage ..............10-3 Turning Auto Scale On or Off..........10-4 Change/Retain Class (When a New Piece is Put On) ..10-5 Change/Retain Destination (When Selecting New Class)10-6 (Weigh-on-the-Way) and Shape-Based Rating ..10-7... -
Page 132: Scale Options Overview
10 • Scale Options Scale Options Overview There are various options you can set with your weighing platform. These can be accessed by pressing the Weigh/Rate key. NOTE: All menu options shown may not be available on your system, due to the features/configuration purchased for your machine. Weigh/Rate Current: xx g ◄... -
Page 133: Zeroing The Scale
10 • Scale Options Zeroing the Scale You may need to run this option to zero out the weighing platform before processing mail. 1. Press Weigh/Rate. 2. Select "Zero the Scale". 3. The weighing platform will zero out the weight and return to the Home screen. -
Page 134: Turning Auto Scale On Or Off
10 • Scale Options Turning Auto Scale On or Off Use the Auto Scale option to determine if you want the system to switch to "scale" mode (using the scale to weigh a mail piece for rat- ing) when the weighing platform is touched. 1. -
Page 135: Change/Retain Class (When A New Piece Is Put On)
10 • Scale Options Change/Retain Class (When a New Piece is Put On) You can set how the weighing platform reacts regarding the class of service or destination when the weight changes. 1. Press Weigh/Rate. 2. If necessary, press the green down arrow key to scroll through the menu screens. -
Page 136: Change/Retain Destination (When Selecting New Class)10-6
10 • Scale Options Change/Retain Destination (When Selecting a New Class) You can set how the weighing platform reacts regarding the destina- tion when the class of service changes. 1. Press Weigh/Rate. 2. If necessary, press the green down arrow key to scroll through the menu screens. -
Page 137: Wow
When enabled, the Weigh-on-the Way (WOW®) feature increases your productivity because you don't have to presort the mail by weight before loading the pieces onto the machine. The DM475 has a special scale built into its deck that can weigh mail pieces on-the- fly (that is, as they pass along the deck) so the system can determine the correct postage of each item. -
Page 138: W1P- Weigh First Piece Mode (A Wow® Mode)
10 • Scale Options (Weigh-on-the-Way) ® W1P- Weigh First Piece Mode (a WOW® Mode) In this mode, when processing mail pieces of same weight and size, the machine weighs the first mail piece automatically and processes the remaining mail pieces at the same postage rate. This allows fast- er processing of the mail because the system doesn't have to weigh each piece separately as it goes through the system. -
Page 139: Wow® (Weigh-On-The-Way) Start Key
If you fullfill the requirements for the lower rates, this option al- lows you to enter the discount code. Depending on the circumstanc- es, a Pitney Bowes service technician may enter this code for you. 1. Press Weigh/Rate. 2. If necessary, press the green down arrow key to scroll through the menu screens. -
Page 140: Setting The Scale Location Code
10 • Scale Options Setting the Scale Location Code The location code is used to calibrate your scale to your geographic location, based on your latitude coordinates. Normally, you do not need to change the scale location code once your system has been installed. -
Page 141: 11 • Maintenance
11 • Maintenance This chapter explains how to maintain your mailing system. Printing a $0.00 Meter Stamp ...........11-2 Messages Indicating Ink Tank Cartridge Maintenance ..11-2 Replacing the Ink Tank Cartridge ........11-3 Printer Maintenance ............11-6 Printing a Test Pattern ..........11-6 Cleaning the Printer Nozzle ........11-7 Replacing the Print Head ...........11-8 Filling the Moistener ............11-10 Maintaining the Moistener .......... -
Page 142: Printing A $0.00 Meter Stamp
11 • Maintenance Printing a $0.00 Meter Stamp If you want to check the ink imprint (meter stamp) on your machine, you can generate a $0.00 meter stamp for this purpose. At the Home screen, simply press Zero, then Enter, and slide an envelope (or tape strip) through the machine. -
Page 143: Replacing The Ink Tank Cartridge
11 • Maintenance Replacing the Ink Tank Cartridge 1. If you have an optional scale, simply lift it up and remove it from the top of the machine. 2. Open the ink access cover. At the screen with the red X, select "Replace Ink Tank". - Page 144 11 • Maintenance Replacing the Ink Tank Cartridge 4. Lift up and remove old ink tank cartridge. 5. Remove tape on bottom of new ink tank cartridge. 6. Lower the ink tank cartridge into the cavity. The cartridge should drop in freely - do not push. The ridges on either side of the car- tridge will slide into the grooves.
- Page 145 11 • Maintenance Replacing the Ink Tank Cartridge 8. Close the ink access cover. The system automatically recognizes the new cartridge. 9. You are prompted to print a test pattern. • Select "Yes, Print Test Pattern" to print a test pattern. See Printing a Test Pattern in this chapter for more information.
-
Page 146: Printer Maintenance
11 • Maintenance Printer Maintenance The system has several replacement procedures and tests that let you replace the ink tank cartridge and/or print head, check print per- formance and help you determine printing problems. These tests and procedures are accessible by pressing Menu, pressing the down arrow key, and selecting "Maintenance", then "Printer Maintenance". -
Page 147: Cleaning The Printer Nozzle
5. Select "Clean Printer Nozzle". 6. You have a choice of four purges to use. Normally selecting "Purge A" is sufficient to purge the system, unless directed by a Pitney Bowes agent to do otherwise. Clean Printer Nozzle Select Purge ◄... -
Page 148: Replacing The Print Head
11 • Maintenance Printer Maintenance Replacing the Print Head 1. If you have an optional scale, simply lift it up and remove it from the top of the machine. 2. Open the ink access cover. At the screen with the red X, select "Replace Print Head". - Page 149 11 • Maintenance Printer Maintenance Replacing the Print Head (cont'd) 6. Pull up and remove the black cap on the new print head (if present). Also remove the protective tape from the bottom. 7. Squeeze the two gray tabs on either side of the new print head and slightly angle the print head while sliding it back into its holder.
-
Page 150: Filling The Moistener
3. Remove the moistener bottle, and place it on the table top with its cap facing up. 3. Unscrew the moistener bottle cap and fill the moist- ener bottle with Pitney Bowes E-Z Seal sealing solu- ® tion. We recommend E-Z Seal because it helps keep ®... -
Page 151: Maintaining The Moistener
11 • Maintenance Maintaining the Moistener If you notice incomplete or poor sealing and the moistener tank is full, you may need to clean the moistener brush or wick. If seal quality doesn’t improve after cleaning, you can replace the stripper blade and brush assembly or wick as needed. - Page 152 11 • Maintenance Maintaining the Moistener Cleaning the Stripper Blade/Brush Assembly (cont'd) 3. Push down on the blue button and slide the blade/brush assem- bly out of the deck. 90° Blade/Brush Assembly Blue Button 4. Clean the moistener brush by running the it under plain water. Blot the excess water from the brush after rinsing it.
-
Page 153: Cleaning The Shield And Wick
11 • Maintenance Maintaining the Moistener Cleaning the Shield and Wick NOTE: This procedure assumes you have already removed the stripper blade/brush assembly (see previous pages). Open the feeder/WOW cover, remove the moistener bottle, and place it on the table top with its cap facing up. Pull the moistener tank (located under moistener bottle) straight out towards you. - Page 154 11 • Maintenance Maintaining the Moistener Cleaning the Shield and Wick (cont'd) Pull up and remove the shield and wick from the moistener tank Separate wick from the shield. Clean the wick in plain water, and rinse thoroughly. Blot the excess water from the wick. NOTE: Replace the wick and shield if they cannot be cleaned thoroughly.
-
Page 155: Cleaning The Feeder Exit Sensor
11 • Maintenance Cleaning the Feeder Exit Sensor The feeder exit sensor will require cleaning periodically. Lift the cover on the feeder/WOW and locate the sensor (see figures below). Use a cotton-tipped swab to clean both the top and bottom surfaces/holes. Cleaning the bottom section of Cleaning the under side of the top feeder exit sensor (the swab must... - Page 156 11 • Maintenance This page was put in as a placeholder so you can print this entire guide in a duplex (double-sided) mode while keeping the proper page positions. 11-16 SV62415 Rev. B...
-
Page 157: 12 • Troubleshooting
12 • Troubleshooting This chapter explains how to troubleshoot your mailing system. Getting Help..............12-2 Messages on the LCD Display .........12-2 Blank Display ..............12-2 Display Difficult to Read ...........12-3 Printing Problems .............12-3 Feeding Problems (stalled envelopes) ......12-4 To avoid stalled envelopes .........12-4 To clear stalled envelope in printer area ....12-4 To clear stalled envelope in feeder/WOW area ....12-5 Moistening Problems (envelopes don't seal) ....12-7... -
Page 158: Getting Help
There may be times when you need help to solve a problem, or you may want more information about how your mailing system works. Pitney Bowes provides several information resources. See page v for our web and phone support information. -
Page 159: Display Difficult To Read
See "Clean- ing the Printer Nozzle" in Chapter 11, Maintenance. NOTE: If printer maintenance fails to correct the problem, call Pitney Bowes (see page v). Sample Meter Stamp with Poor Print Quality 12-3 SV62415 Rev. B... -
Page 160: Feeding Problems (Stalled Envelopes)
12 • Troubleshooting Feeding Problems (stalled envelopes) To avoid stalled envelopes: • Make sure your envelopes meet Pitney Bowes published specifi- cations. See Appendix A, Specifications. • Feed envelopes correctly. See the instructions in Chapter 3, Running Mail. Don't try to feed oversize envelopes through the machine. -
Page 161: To Clear Stalled Envelope In Feeder/Wow Area
12 • Troubleshooting Feeding Problems (stalled envelopes) To clear stalled envelope in the feeder/WOW area: 1. Open the feeder/WOW cover. Feeder/WOW Cover 2. Raise the moistener clearance lever two clicks to the fully upright postion remove mail under the feeder rollers. Moistener Clearance 90°... - Page 162 12 • Troubleshooting Feeding Problems (stalled envelopes) To clear stalled envelope in the feeder/WOW area: 4. Raise the feeder/WOW clearance lever. Lift the blue feeder clearance lever IMPORTANT: Do not remove mail without lifting the clearance lever. 5. Lower all levers and close the feeder/WOW cover. 12-6 SV62415 Rev.
-
Page 163: Moistening Problems (Envelopes Don't Seal)
12 • Troubleshooting Moistening Problems (envelopes don't seal) Symptom Solution Check that sealer bottle has fluid and that it has been Low sealant level seated properly in the holder (should make a “glug” sound when seated properly). See the instructions in Chapter 11, Maintenance. Dry moistener Check that sealer bottle/moistener has fluid. -
Page 164: Mail Transport Error Messages
12 • Troubleshooting Mail Transport Error Messages Occasionally, an error message may display. In most cases, simply following the on-screen instructions will solve the issue. Screen Title Screen Message Error Action Code Mail Jammed Clear Feeder 372D, Follow screen directions Transport. -
Page 165: Problems Connecting To Data Centre Via Lan Network
12 • Troubleshooting Problems Connecting to Data Centre via LAN Network Symptom Solution Machine may not be • Make sure you've connected your machine to a connected to LAN working LAN Internet connection. Contact your Internet Connection network administrator if you suspect issues with your LAN network. -
Page 166: Viewing System Configuration Levels
12 • Troubleshooting Viewing System Configuration Levels Sometimes in an effort to fix your problem over the phone, a Pitney Bowes representative may request you to look up the software and firmware level that is on your machine. Follow these steps to do this: 1. -
Page 167: 13 • Supplies And Options
This chapter explains how to order supplies and accessories for your digital mailing system. It also tells you a little about optional equipment that can help you get the most value from your Pitney Bowes equipment. Supplies and Accessories ..........13-2 Options ................13-2 Weighing Platform ............13-2... -
Page 168: Supplies And Accessories
601-9 ® Options Pitney Bowes offers a number of flexible options so you can tailor your mailing system to meet your needs today, and expand them as your business grows tomorrow. Contact your Pitney Bowes Sales Representative or visit the Pitney Bowes web site to order these op- tions. -
Page 169: Advertisements
Your system comes pre-loaded with ten envelope advertisements. Envelope ads give your mail a professional appearance and can turn your mailings into a powerful promotional tool. Pitney Bowes also of- fers additional envelope ads (up to a total of 20). - Page 170 13 • Supplies and Options This page was put in as a placeholder so you can print this entire guide in a duplex (double-sided) mode while keeping the proper page positions. 13-4 SV62415 Rev. B...
-
Page 171: Appendix A • Specifications
Appendix A • Specifications Equipment Specifications System Dimensions 51.3" x 22.5" x 12.3" (L x D x H) (1296 mm x 572 mm x 312 mm) includes integrated scale, but not stacker Weight 64.1 lbs (29 kg ) without weighing platform 67.0 lbs. -
Page 172: Material Specifications
Appendix A • Specifications Material Specifications Envelope Size Minimum: 3.5 x 5" (88.9 x 127 mm) Maximum: 13 x 15" (330 x 381 mm) Maximum: 13 x 14" (330 x 356 mm) [in WOW mode] Envelope Flap Depth 3" (72.2 mm) Envelope Thickness Minimum: .02"... - Page 173 Appendix A • Specifications Material Specifications (cont'd) NOTE: For a proper seal, the envelope’s minimum flap angle must meet the following criteria: • For envelopes with a flap length from 25 to 60mm (1 to 2.36 inches), the minimum flap angle is 18 degrees. •...
- Page 174 Appendix A • Specifications This page was put in as a placeholder so you can print this entire guide in a duplex (double-sided) mode while keeping the proper page positions. SV62415 Rev. B...
- Page 175 —A Pitney Bowes technology that allows you to ® download machine features, postal rates, and system software updates via a digital link to the Pitney Bowes Data Center. LAN (Local Area Network)—a network installed in a company that allows computers and printers to communicate with each other, and to the Internet (if configured).
- Page 176 Code—the postal code where the mailing machine/ meter is located. Postage-By-Phone —A service available through Pitney Bowes that ® allows you to buy postage and check account status via a phone line or the Internet. It also permits convenient postal inspection.
- Page 177 Index Advertisement, Envelope Downloading 4-7 About Your Digital Mailing Glossary Entry B-1 System 1-3 Purchasing 13-3 Accessories and Supplies 13-2 Alpha/Numeric and QWERTY Account Keypads 2-4 Explanation in Glossary B-1 Connection Settings 6-15 Accounting Explanation in Glossary B-1 Account List Report 8-15, 9-4 Auto-Advance of Printed Date for Account Totals, Clearing All the Meter Stamp 4-3...
- Page 178 Index Checking Funds (Postage) Selecting 5-5 Availability in Machine 3-3, Viewing 5-5 Checking Your Postage By Phone® Account Balance Data Center Connecting to 6-14 Cleaning Data Center Distributor Settings Cleaning the Printer Nozzle 6-18 11-7 Date Cleaning the Shield and Wick Correcting, on a Mail Piece 11-13 3-17...
- Page 179 Error Report 9-5 Problems, Being blank 12-2 Establishing Communications Displaying Account Totals 8-12 Between Your Machine Distributor Settings, Data Center and the Pitney Bowes Data 6-18 Center 6-2 Documentation (Sources of External (Attached) Printer 9-7 Information) 1-6 External Weighing Platform 13-2...
- Page 180 How to Order 13-2 also Moistener;See Messages Indicating also Printer Maintenance Replacement 11-2 Cleaning the Feeder Exit Replacing the 11-3 Sensor (DM475) 11-15 Ink Waste Tank Location 2-3 Maintaining the Moistener 11- Inscription, Postal.See Postal Inscription Manifest Payment 3-14 Inspection (Postal) B-1...
- Page 181 Index 12-7 3-16 Multi-Account Summary Report Adding to Meter 6-10 8-15, 9-4 How it is stored in your meter Minimum Amount for Adding to machine 6-10 Normal Preset Postage-By-Phone® Defining 5-6 Account Balance, Checking Key Location 2-5 Selecting the Normal Preset Changing Access Number 6-17 Timeout setting 7-5...
- Page 182 Index Replacing the Print Head 11-8 LAN Network 12-9 Printing Display Difficult to Read 12-3 Adding/Removing an Envelope Feeding 12-4, 12-5 Ad to the Meter Stamp Getting Help 12-2 Mail Transport Error Messages Auto-Advance of Printed Date 12-8 4-3, 7-4 Messages on the LCD Display Manually Changing Printed 12-2...
- Page 183 Index Replacing Seal/No Seal Lever 2-2 Ink Cartridge 11-3 Secondary DNS Server 6-19 Print Head 11-8 Sections of the Meter Stamp 4-3 Reports Selecting Account List Report 9-4 Account to Track Postage 3-5, Configuration Report 9-6 8-11 Error Report 9-5 Custom Presets 5-5 Funds Report 6-12, 9-3 Normal Preset 5-3...
- Page 184 Supplies and Accessories 13-2 Ink Out 11-2 System Clock 7-3, 7-4, 7-5, 7-6, Low Ink 11-2 Special Warning for not Moving System Options the DM475 by Yourself Advanced 7-14 Basic 7-3 Weighing Overview 7-2 Differential Weighing 3-19 System Setup Report 9-5...
- Page 185 Index WOW® Weight Limit 10-8 Zeroing the Scale 10-3 SV62415 Rev. B...
- Page 186 Index This page was put in as a placeholder so you can print this entire guide in a duplex (double-sided) mode while keeping the proper page positions. I-10 SV62415 Rev. B...
Need help?
Do you have a question about the DM475 and is the answer not in the manual?
Questions and answers