Pitney Bowes DM300c Operator's Manual
Digital mailing systems
Hide thumbs
Also See for DM300c:
- Service manual (227 pages) ,
- Operator's manual (196 pages) ,
- Quick reference manual (9 pages)
Table of Contents
Advertisement
Quick Links
Advertisement
Table of Contents

Related Manuals for Pitney Bowes DM300c


Summary of Contents for Pitney Bowes DM300c
- Page 1 Operator Guide DM300c / DM400c / DM475 Digital Mailing Systems...
- Page 2 SV62261 Rev. C ©2009 Pitney Bowes Inc. All rights reserved. This book may not be reproduced in whole or in part in any fashion or stored in a retrieval system of any type or transmitted by any means, elec tron i cal ly or mechanically, without the express, written permission of Pitney Bowes.
- Page 3 Failed units will be returned to the Pitney Bowes U.S. Service Center. For reference purposes, the Pitney Bowes U.S. Service Center contact address is: Pitney Bowes Inc., 1 Elmcroft Road, Stamford, CT, 06926-0700. All inquiries can be done by calling 1-800 522- 0020 and following the telephone prompts.
- Page 4 If trouble is experienced with this equipment, please contact Pitney Bowes, 1 Elmcroft Rd., Stamford, CT 06926-0700, for repair or warranty information (also see Servicing section on previous page).
- Page 5 Pitney Bowes Contact List DM475 DM400c DM300c Machine Identification Product Name: DM300c Digital Mailing System Model Number: 3C00 Product Name: DM400c Digital Mailing System Model Number: 4C00 Product Name: DM475 Digital Mailing System Model Number: 6C00 Resources For support information, go to www.pb.com and click on Customer Support.
- Page 6 This page was put in as a placeholder so you can print this entire guide in a duplex (double-sided) mode while keeping the proper page positions.
-
Page 7: Table Of Contents
Important Safety Notes ............1-7 Important Telephone Safety Instructions ......1-9 2 • Getting to Know Your System Parts of the Machine - DM300c .........2-2 Parts of the Machine - DM400c .........2-4 Parts of the Machine - DM475 ...........2-6 Control Panel ..............2-8 Connections on Back of Machine (DM300c/DM400c) ..2-10... - Page 8 Auto-Advance of Printed Date for the Meter Stamp ..4-3 Manually Changing Printed Date for the Meter Stamp ..4-4 Sealing Envelopes without Printing a Meter Stamp ...4-5 DM300c Only ............. 4-5 DM400c/DM475 ............4-5 Printing the Date and Time, Ad or Text (no meter stamp) ..4-6 Omitting/Restoring Day or Date on the Meter Stamp ..4-7...
- Page 9 6 • Adding Postage/Connecting to the Data Center Postage and Your Machine ..........6-2 Establishing Communications Between Your Machine and the Pitney Bowes Data Center ..........6-2 Downloads from the Data Center to Your Machine ....6-3 Using LAN Network (Constant Connection) to Establish Communications with the Data Center .......6-6...
- Page 10 Table of Contents Basic Options ..............7-3 Setting the Time, Date, and Timeouts ......7-3 Changing Language ........... 7-7 Adjusting the Contrast of the Display ......7-7 Setting Postage Limits (Funds Warnings) ....7-8 Enabling, Changing or Disabling Lock Codes and Passwords ..............
- Page 11 Table of Contents Single Accounts Report .............9-3 Multi-Account Summary Report .........9-3 Account List Report ............9-4 System Setup Report ............9-5 Error Report ...............9-5 Configuration Report ............9-6 Software Version Report ............9-6 Confirmation Services Report ..........9-6 Printing a Report ..............9-7 Printing to an Attached Printer ........9-7 Printing on an Envelope or Tape Strip ......
- Page 12 Filling the Moistener (DM300c) ........12-10 Filling the Moistener (DM400c/DM475) ......12-11 Maintaining the Moistener ..........12-12 Removing the Moistener (DM300c) ....... 12-12 Removing the Shield and Wick (DM300c) ..... 12-14 Cleaning the Stripper Blade/Brush Assembly (DM400c) ............12-15 Cleaning the Stripper Blade/Brush Assembly (DM475) ..............
- Page 13 Table of Contents Display Difficult to Read ..........13-3 Printing Problems ............13-3 Feeding Problems (stalled envelopes) ......13-4 To avoid stalled envelopes ........13-4 To clear stalled envelope in printer area ....13-4 To clear stalled envelope in feeder area (DM400c) ..13-5 To clear stalled envelope in transport/WOW area (DM475) ................13-6 Moistening Problems (envelopes don't seal) ....13-8...
- Page 14 Table of Contents This page was put in as a placeholder so you can print this entire guide in a duplex (double-sided) mode while keeping the proper page positions. SV62261 Rev. C...
-
Page 15: Introduction
1 • Introduction DM475 DM400c DM300c This chapter lists the key features of your mail ing system, tells you what's in this guide, and pre sents important safety information. What's in this Guide ............1-2 About Your Digital Mailing System........1-3 Postal Requirements ............1-4 Sections of the Meter Stamp ..........1-5... -
Page 16: What's In This Guide
1 • Introduction What's in this Guide Section Description Describes the key features of your mail ing system. It Chapter 1 also includes important safety notes. Introduction Explains the purpose and shows the lo ca tion of each Chapter 2 control and ma chine feature. -
Page 17: About Your Digital Mailing System
• Large, easy-to-read display shows system status and prompts you through setup operations • Semi-automatic (DM300c) and automatic envelope feeding (DM400c/DM475), transport, and auto-eject • Compliant (DM475) with USPS shape based rating requirements that are based on the weight and dimensions (thickness, length, width) of the mail piece. -
Page 18: Postal Requirements
The USPS requires a postal inspection of your machine ® every 120 days. This postal inspection requirement can be automatically met by connecting to the Pitney Bowes Data Center to check your Postage By Phone meter payment ® account balance or to add postage to your meter. -
Page 19: Sections Of The Meter Stamp
IntelliLink™ technology gives you the ability to: Add postage funds conveniently You can add funds to your machine electronically via Pitney Bowes Postage By Phone (requires analog phone line, a Windows PC with ®... -
Page 20: About Constant Connection
About Constant Connection Constant Connection is an option that allows you to connect your machine to the Pitney Bowes Data Center via a LAN network that has Internet access. Constant Connection’s high-speed connectivity eliminates the need for an analog line and provides faster transmission speed when connecting through your local network. -
Page 21: Other Sources Of Information
You can normally store this handy guide in the storage slot in the stacker tray. • The Pitney Bowes Contact List on page v, which provides helpful websites and phone numbers. Important Safety Notes Follow the normal safety precautions for all of fice equipment. - Page 22 • cause serious damage to the machine • cause the WOW module to go off of calibration • void any service warranties Contact Pitney Bowes to arrange a Service visit for moving the machine (additional charges may apply). See page v for contact information.
-
Page 23: Important Telephone Safety Instructions
1 • Introduction Important Safety Notes (cont'd) Note for California Customers Only The battery in this product contains perchlorate material. California requires perchlorate-containing products to be accompanied by the following notice: Percholrate Material - special handling may apply. See: http://www.dtsc.ca.gov/hazardouswaste/perchlorate/ Important Telephone Safety Instructions If a LAN or Internet connection is not available, the machine connects directly to an a log tele phone lines. - Page 24 1 • Introduction This page was put in as a placeholder so you can print this entire guide in a duplex (double-sided) mode while keeping the proper page positions. 1-10 SV62261 Rev. C...
-
Page 25: Getting To Know Your System
DM400c DM300c In this chapter you'll find out where everything is and what it does. Parts of the Machine - DM300c ..........2-2 Parts of the Machine - DM400c ..........2-4 Parts of the Machine - DM475 ..........2-6 Control Panel ..............2-8 Connections on Back of Machine (DM300c/DM400c) ..2-10 Connections on Back of Machine (DM475) ......2-11... -
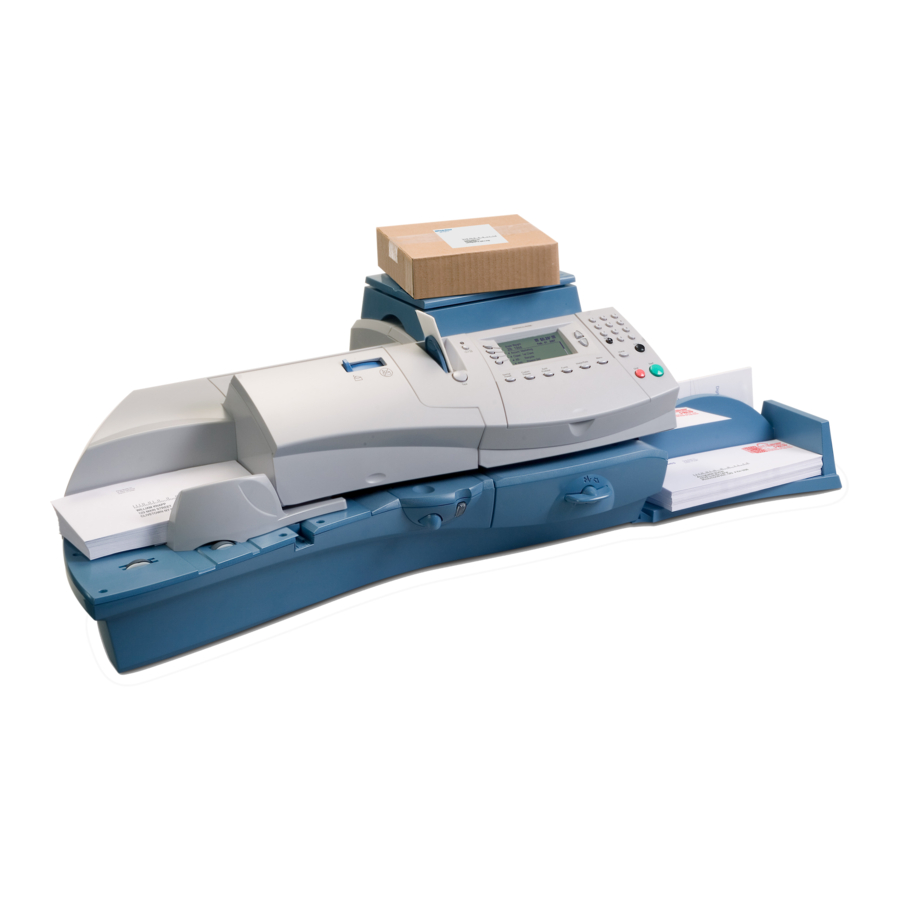
Page 26: Parts Of The Machine - Dm300C
2 • Getting to Know Your System Parts of the Machine - DM300c (shown with optional weighing platform) SV62261 Rev. C... - Page 27 2 • Getting to Know Your System Parts of the Machine - DM300c (cont'd) Item Part Description Allows you to enter and set up information on Control Panel your machine (see page 2-8 for details) Holds and feeds tape strips for printing...
-
Page 28: Parts Of The Machine - Dm400C
2 • Getting to Know Your System Parts of the Machine - DM400c (shown with optional weighing platform) (shown with optional weighing platform) SV62261 Rev. C... - Page 29 2 • Getting to Know Your System Parts of the Machine - DM400c (cont'd) Item Part Description Open this cover to access the moistener bottle Feeder Access Cover Allows you to turn envelope sealing on and off Seal/No Seal Lever Opens up to allow replacement of the ink Ink Access cartridge (see Chapter 12, Maintenance)
-
Page 30: Parts Of The Machine - Dm475
2 • Getting to Know Your System Parts of the Machine - DM475 (shown with optional weighing platform) (shown with cover open) Item Part Description Open this cover to gain access to the WOW deck Feeder/WOW and two clearance levers (items #16 and #17) Cover Allows you to turn envelope sealing on and off Seal/No Seal... - Page 31 2 • Getting to Know Your System Parts of the Machine - DM475 (cont'd) Collects ink waste Ink Waste Tank (in tray under printer section) Allows you store the Quick Reference Guide, CD, Stacker Tray etc. for easy access. Storage Slot Allows the neat stacking of finished mail pieces Stacker Tray Allows you to enter and set up information on...
-
Page 32: Control Panel
2 • Getting to Know Your System Control Panel Item Part/Key Description Allows you to print tape strip(s) Tape Key Allows you to lock or put machine in sleep mode. Lock/Sleep Key If the lock code feature has been enabled, you can either put the machine in sleep mode or put the machine into lock-down mode. - Page 33 2 • Getting to Know Your System Control Panel (cont'd) Item Part/Key Description Allows you to type in numbers for postage values, Numeric account names, and text messages Allows you to move back one level in a menu, or Back/C Key clear an entry Allows you to accept an entry or choice Enter Key...
-
Page 34: Connections On Back Of Machine (Dm300C/Dm400C)
USB Ports • an external printer to print report data • an external weighing platform (scale) • the Pitney Bowes Data Center via the Internet using either a USB network adapter (known as "Constant Connection") or a USB cable connected to a Windows PC that has Internet access (known as PC Meter Connect™"). -
Page 35: Connections On Back Of Machine (Dm475)
USB Ports • an external printer to print report data • an external weighing platform (scale) • your system to the Pitney Bowes Data Center via the Internet using a USB cable connected to a Windows PC that has Internet access (known as PC Meter Connect™). -
Page 36: Moving The Dm300C/Dm400C
2 • Getting to Know Your System Moving the DM300c/DM400c If you need to move your DM300c/DM400c mailing system, simply unplug the power and any other cables attached to the back of the machine (see figure on previous pages) and slide the stacker tray away from the unit. -
Page 37: Running Mail
Keying In the Postage Directly ........3-4 Entering Weight Manually ...........3-4 Using the Optional Weighing Platform ......3-5 Processing Letter Mail ............3-6 Manually Feeding Envelopes (DM300c) ......3-6 Automatically Feeding Envelopes (DM400c/DM475) ..3-7 WOW® (Weigh-on-the-Way) and Shape Based Rating (DM475) ..................3-9 Processing Flats, Packages, or Non-Letter Mail ....3-11 Printing a Single Tape ..........3-11... -
Page 38: Home Screen
3 • Running Mail Home Screen When you power up your system, the Home screen ap pears on the operating display. If your sys tem has been set up to require a Lock Code or password, you are prompted to enter it. A typical Home screen is shown below (your screen may vary slightly if you have not purchased the optional accounting feature or weighing platform):... -
Page 39: Applying Postage
3 • Running Mail Applying Postage There are several ways you can apply postage using your mailing system: • Key in the postage directly from the keyboard when you already know the amount • Enter the weight of the mail piece manually and have the system calculate the postage amount using the system's internal rating feature •... -
Page 40: Keying In The Postage Directly
3 • Running Mail Applying Postage (cont'd) Keying In the Postage Directly 1. From the Home screen, en ter the post age us ing the nu mer ic keys. You do not need to enter the decimal point. 2. Press Enter or select "Accept" to confirm the amount. Key In Postage $0.00 Oct 05 2009... -
Page 41: Using The Optional Weighing Platform
3 • Running Mail Applying Postage (cont'd) Using the Optional Weighing Platform 1. Make sure weighing platform is activated. See Chapter 11, Scale Options to turn your weighing platform on and customize your settings, if necessary. 2. Place mail piece on weighing platform (you will see “lb. and oz” under the "Scale"... - Page 42 3 • Running Mail Processing Letter Mail Manually Feeding of Envelopes (DM300c) 1. If using the moistener, place flap along moistener and move towards the right. 2. Place the envelope up against the registration wall of the sys tem and slide it to the right until the sys tem grasps it. The system prints the dig i tal indicia and ejects the envelope.
- Page 43 3 • Running Mail Processing Letter Mail (cont'd) Automatically Feeding of Envelopes (DM400c/DM475) 1. Tap lead edges and top edges of envelopes on table. Do not use the WOW deck for tapping the NOTE for DM475: edges of the envelopes. 2.
- Page 44 3 • Running Mail Processing Letter Mail (cont'd) For a proper seal, the envelope’s minimum flap angle NOTE: must meet the following criteria: • For envelopes with a flap length from 25 to 60mm (1 to 2.36 inches), the minimum flap angle is 18 degrees. •...
-
Page 45: Processing Letter Mail
3 • Running Mail Processing Letter Mail (cont'd) WOW® (Weigh-on-the-Way) and Shape-Based Rating (DM475) Refer to Chapter 11- Scale Options for settings regarding NOTE: these features on your DM475 machine. When enabled, the Weigh-on-the Way (WOW ) feature increases ® your productivity because you don't have to presort the mail by weight before loading the pieces onto the machine. -
Page 46: Wow® (Weigh-On-The-Way) And Shape Based Rating (Dm475)
3 • Running Mail Processing Letter Mail (cont'd) WOW® (Weigh-on-the-Way) and Shape-Based Rating (DM475) To rate your mail according to USPS shape-based requirements, ® the system must be in WOW mode and you must select a class that ® has "SBR" in its name (see sample screen below). WOW + SBR $0.44 0lb 1.0oz... -
Page 47: Processing Flats, Packages, Or Non-Letter Mail
3 • Running Mail Processing Flats, Packages, or Non-Letter Mail If your mail piece is too thick to pass through the feeder (non-Letter size), you can use a tape strip to print the indicia on, then apply it to your mail piece. Printing a Single Tape Strip 1. -
Page 48: Selecting An Account To Track Postage
3 • Running Mail Selecting an Account to Track Postage You can select an account to track postage if one of the optional departmental accounting features is turned on. See Chapter 8, Standard Accounting Option, for additional information. 1. From Home screen, press the selection key next to Account. The "Select Account"... -
Page 49: Using Differential Weighing
3 • Running Mail Using Differential Weighing Differential Weighing is an optional feature that allows you to place all your mixed weight mail on the scale and have the system automatically calculate the correct weight as you remove each mail piece. It is a fast and convenient method for processing mixed weight, but same class mail. - Page 50 DM400c/DM475 - Load the envelope onto the feeder with the flap down and fac ing the rear wall. 9. DM300c - Place the envelope up against the registration wall of the sys tem and slide it to the right until the sys tem grasps it. The system prints the meter stamp and ejects the envelope.
- Page 51 3 • Running Mail Using Differential Weighing (cont'd) 11. When you have removed the last item from the scale, the "Last Item" screen displays. Last Item Print postage for last item removed? ◄ Yes ◄ No, Do not print Select "Yes" to rate the item or "No, Do not print". 12.
-
Page 52: Checking And Clearing The Batch Count
3 • Running Mail Checking and Clearing the Batch Count Your system has the ability to keep track of batches of mail if desired. You may use this feature to track the amount of mail going out per day, per week, per month, etc. The system stores the postage value and piece count in for ma tion in a "batch register". -
Page 53: Printing The Batch Count
2. Press Menu and select "Print Funds Report". 3. When prompted either: • Insert an envelope (DM300c): Place the envelope up against the back wall of the sys tem and slide it to the right until the sys tem grasps it. -
Page 54: Clearing The Batch Count
3 • Running Mail Checking and Clearing the Batch Count (cont'd) Clearing the Batch Count IMPORTANT: Make sure you really want to clear the batch count; once you do, you can't re store the data. 1. Press Funds. 2. Press Menu and select "Clear Batch Value". 3. -
Page 55: Printing Options
Auto-Advance of Printed Date for the Meter Stamp ...4-3 Manually Changing Printed Date for the Meter Stamp ..4-4 Sealing Envelopes without Printing a Meter Stamp....4-5 DM300c ................4-5 DM400c/DM475 ............4-5 Printing the Date and Time, Ad or Text (no meter stamp) ...4-6 Omitting/Restoring Day or Date on the Meter Stamp ..4-7... -
Page 56: Printing Options Overview
4 • Printing Options Printing Options Overview There are various printing options available when processing mail through the system. You can: • Seal the envelope without printing the meter stamp. • Print the date and time, an advertisement, or text on mail. •... -
Page 57: Sections Of The Meter Stamp
4 • Printing Options Sections of the Meter Stamp These are the sections that make up the meter stamp printed on your mail piece. Postage Value Inscription* Meter Serial Applied Number Datamatrix ZIP Code Envelope Ad Date Barcode Origination Optional Printing Required Printing *required only for certain classes of mail Printing a $0.00 Meter Stamp... -
Page 58: Manually Changing Printed Date For The Meter Stamp
4 • Printing Options Manually Changing Printed Date for the Meter Stamp You may want to advance the date printed on the meter stamp if it is after normal business hours and you want to prepare outgoing mail for a future business day's mailing. IMPORTANT: •... -
Page 59: Sealing Envelopes Without Printing A Meter Stamp
4 • Printing Options Sealing Envelopes without Printing a Meter Stamp DM300c You can use your DM300c as an envelope sealer to seal pre- addressed envelopes without printing a meter stamp. 1. Press Menu. 2. Select "Printing Options." 3. Select "No Printing (Seal Only)."... -
Page 60: Printing The Date And Time, Ad Or Text (No Meter Stamp)
Text Messages for more information about configuring text messages. 4. To manually feed envelopes (DM300c): Place the envelope up against the registration wall of the sys tem and slide it to the right until the sys tem grasps it. The system prints the dig i tal indicia and ejects the envelope. -
Page 61: Omitting/Restoring Day Or Date On The Meter Stamp
4 • Printing Options Omitting/Restoring Day or Date on the Meter Stamp For most mailings, you normally print the date as part of the meter stamp. However, for certain classes of mail, you may want to turn off the date. Call your local post office or visit www.USPS.com for further information. -
Page 62: Adding/Removing A Postal Inscription To Meter Stamp
Downloading a Postal Inscription into Your Machine Your system comes pre-loaded with certain postal inscriptions. If you want another postal inscription, contact Pitney Bowes (see page v). Inscriptions can be purchased and downloaded directly into your meter. Your inscription must be purchased and the machine must be... -
Page 63: Adding/Removing An Envelope Ad To The Meter Stamp
Downloading an Envelope Ad into Your Machine Your system comes pre-loaded with several envelope ads. If you want another envelope ad, contact Pitney Bowes (see page v). Ready-made items can be purchased and downloaded directly into your meter. We can also work with you to create custom ads. - Page 64 4 • Printing Options This page was put in as a placeholder so you can print this entire guide in a duplex (double-sided) mode while keeping the proper page positions. 4-10 SV62261 Rev. C...
-
Page 65: Normal And Custom Presets
5 • Normal and Custom Presets DM475 DM400c DM300c This chapter discusses the Normal and Custom Presets feature available on your machine. What is a Preset? ...............5-2 Why Should I Use Presets?..........5-2 ® Why Should I Use a USPS “Class” in my Preset? ....5-2 Normal Preset..............5-3... -
Page 66: What Is A Preset
5 • Normal and Custom Presets What is a Preset? A preset is very similar to a “shortcut” on your computer. It recalls a setting that already contains the postage class, the postage value, fees for special service such as Delivery Confirmation, and possibly other values. -
Page 67: Normal Preset
5 • Normal and Custom Presets Normal Preset Normal Preset comes pre-configured. You can change these settings by re-defining new values (vs. editing existing values) by following the procedure below. IMPORTANT: • You cannot delete the Normal Preset, but you can define new values for the Normal Preset based on the current condition of the machine. - Page 68 5 • Normal and Custom Presets Normal Preset (cont'd) Defining New Values for the Normal Preset (continued) View Settings Preset: Normal Preset Postage : $ 0.00 Class : None ZIP/Zone : None Fees : $ 0.00 Select This Preset [Enter] View Settings Preset: Normal Preset : None...
-
Page 69: Custom Presets
5 • Normal and Custom Presets Custom Presets You have the option of viewing, editing the name of, overwriting (save new settings for), or deleting a Custom Preset as necessary. IMPORTANT: When a rate change becomes effective, always check the post age values assigned to all presets to make sure that they comply with the new rates. -
Page 70: Defining Custom Presets
5 • Normal and Custom Presets Custom Presets (cont'd) Defining Custom Presets To define (create) a new Custom Preset: 1. Establish the proper settings on the machine (such as No Ad, a class, a specific departmental account, etc.) that you want the preset to contain. - Page 71 5 • Normal and Custom Presets Custom Presets (cont'd) Defining Custom Presets (continued) View Settings Preset: Custom 1 Preset Postage : $ 0.00 Class : None ZIP/Zone : None Fees : $ 0.00 Select This Preset [Enter] View Settings Preset: Custom 1 Preset : None : None Text Msg...
-
Page 72: Editing A Custom Preset Name
5 • Normal and Custom Presets Custom Presets (cont'd) Editing a Custom Preset Name You may change the name of a preset if you want. 1. Press Menu. 2. If necessary, press the green down arrow key to scroll through the menu screens. -
Page 73: Deleting A Custom Preset
5 • Normal and Custom Presets Custom Presets (cont'd) Deleting a Custom Preset Deleting a preset removes all the settings assigned to it and removes it from the Presets Menu. IMPORTANT: Once you deleted a preset, its values are gone. You can't recover a deleted preset. - Page 74 5 • Normal and Custom Presets This page was put in as a placeholder so you can print this entire guide in a duplex (double-sided) mode while keeping the proper page positions. 5-10 SV62261 Rev. C...
- Page 75 This chapter explains how to add postage to your system using Pitney Bowes' Postage By Phone service and ® connecting to the Pitney Bowes Data Center. Postage and Your Machine..........6-2 Establishing Communications Between Your Machine and the Pitney Bowes Data Center ...........6-2 Downloads from the Data Center to Your Machine ....6-3...
-
Page 76: Postage And Your Machine
Postage By Phone meter payment account (send in a check, direct withdrawal, establish credit, etc.). See the Pitney Bowes Contact List on page v to call for further information. Establishing Communications Between Your Machine... -
Page 77: Downloads From The Data Center To Your Machine
6 • Adding Postage/Connecting to Data Center Downloads from the Data Center to Your Machine When you connect to the Pitney Bowes Data Center to add postage or perform other functions, the Data Center may activate other downloads while the machine is connected. If some type of software/ postal update or download is available, a message stating so displays. - Page 78 Postal/ZIP Code Update If the Postal Code on record at the Pitney Bowes Data Cen ter does not match the Postal/ZIP Code of your system, the code will be down load ed into your system.
- Page 79 ® available, you can download them quickly and easily directly from the Pitney Bowes Data Center. The new rates are normally available for download at least seven days before the effective date. The display tells you when a Rate Change up date is com plete. It also tells you if the up date is im me di ate or takes effect at a later date by listing the new date.
-
Page 80: Using Lan Network (Constant Connection) To Establish
Establish Communications with the Data Center Constant Connection is a feature that allows you to connect your system to the Pitney Bowes Data Center via a LAN network that has Internet access. Internet connection is normally much quicker than using the analog phone line option to download postage and software updates to your machine. -
Page 81: The Data Center
™ icon will restart the software. Alternately, you may click on the Start button > All Programs > Pitney Bowes > PC Meter Connect. A PC Meter Connect icon will then appear in system tray. - Page 82 PC Meter Connect ™ Right Click on PC Meter Connect ™ Icon in System Tray Option Description Connects you to a Pitney Bowes website for the latest Update PC Meter version of the PC Meter Connect software ™ Connect ™...
-
Page 83: Communications With The Data Center
Using an Analog Phone Line to Establish Communications with the Data Center If you do not have Internet access available, you may establish communications to the Pitney Bowes Data Center using an analog phone line. The following use analog phone lines: •... -
Page 84: Checking Funds (Postage) Availability In Machine
6 • Adding Postage/Connecting to Data Center Checking Funds (Postage) Availability in Machine 1. Press Funds. 2. View funds used and pieces processed. Funds Available : $204.94 Used $17.06 Total Pieces Ctl Sum : $222.00 More Options (Menu) 3. Press the down arrow key to view additional information. Funds Batch Value : $ 11.65... -
Page 85: Checking Your Postage By Phone Account Balance
Account Balance You can check your Postage By Phone ac count balance at any ® time, as long as your system is connected to the Pitney Bowes Data Center. The Postage By Phone® ac count balance represents the NOTE: funds in your account, not the amount in your meter. -
Page 86: Adding Postage
The amount shown in the "Add $xx" selection line NOTE 2: represents the amount of postage you added the last time. 3. The system connects to the Pitney Bowes Data Center (this may take a few moments). Various screens displays, letting you know the status of the process. - Page 87 – the amount you have on credit on Additional Funds Available your Postage By Phone® ac count balance (by signing up to one of the various Pitney Bowes credit programs such as Purchase Power, etc.) – your Postage By Phone® ac count number Account No.
-
Page 88: Printing A Funds Report
2. Press Menu and select "Print Funds Report". 3. When prompted either: • Manually feed an envelope (DM300c): Place the envelope up against the back wall of the sys tem and slide it to the right until the sys tem grasps it. -
Page 89: Downloading Files Or Updating System
The system automatically dials the center. Make sure the system is connected in the proper NOTE: manner to communicate to the Pitney Bowes Data Center (see page 6-2). 5. After connection is made, if some type of software or postal update or download is available, a message stating so displays. -
Page 90: Settings For Connecting To The Data Center
ID, password, and server IP address. IMPORTANT: Do not change the Data Center settings un less directed to do so by your Pitney Bowes representative. LAN Connection Network Settings Follow the steps below to ensure your LAN Internet connection is set up properly. -
Page 91: Analog Phone Line Connection Settings
6 • Adding Postage/Connecting to Data Center Settings for Connecting to the Data Center (cont'd) Analog Phone Line Connection Settings If an Internet connection is not available, you can use an analog phone line to connect to the Data Center. The Phone Settings menu allows you to modify the phone con nec tion settings on your machine (tone or pulse, dial prefix, etc.) Phone Settings... - Page 92 6 • Adding Postage/Connecting to Data Center Settings for Connecting to the Data Center (cont'd) Analog Phone Line Connection Settings (continued) Selecting the Dialing Type ( Tone/Pulse) Use this to tell the system whether your have a tone or pulse type phone.
- Page 93 Phone Settings menu. Changing Modem Parameters Use this if you need to change the modem settings used to dial into the Pitney Bowes Data Center but only if you are directed to by a Pitney Bowes representative. 1. Press Menu.
-
Page 94: Data Center Distributor Settings
Data Center Distributor Settings This option allows you to modify the con nec tion parameters that your machine uses to connect to the Pitney Bowes Data Center. A brief description of each parameter is provided on the next page. IMPORTANT: Do not change these settings un less directed to do so by your Pitney Bowes representative. - Page 95 - This is the account number and the user Account and User ID ID that your sys tem uses to dial into the Internet service provider (ISP) that allows you to connect to Pitney Bowes. • - This is the password your system uses to Global Password dial into your Internet Service Provider.
- Page 96 6 • Adding Postage/Connecting to Data Center This page was put in as a placeholder so you can print this entire guide in a duplex (double-sided) mode while keeping the proper page positions. 6-22 SV62261 Rev. C...
-
Page 97: System Options
7 • System Options DM475 DM400c DM300c This chapter presents system options you can setup or modi- fy, such as setting time, date, passwords, warnings, etc. System Options Overview ..........7-2 Basic Options ..............7-3 Setting the Time, Date, and Timeouts ......7-3 Changing Language .............7-7... -
Page 98: System Options Overview
7 • System Options System Options Overview System Options allow you to customize the machine for the way you run your mail and add security to those features that are sensitive to your organization. Because of the many settings available, the set- tings are categorized into "Basic"... -
Page 99: Setting The Time, Date, And Timeouts
7 • System Options Basic Options Setting the Time, Date, and Timeouts You can change the system time/date, set the time/date to day light sav ing time, change the time at which your sys tem advances the date/time to the next day, and set the amount of time your sys tem can re main in ac tive be fore re vert ing to the Normal Preset val ues. - Page 100 7 • System Options Basic Options (cont'd) Setting Auto Date Advance Time Your system can automatically advance the date every day at a time you specify. The date advance time is factory set to 12:00 AM. If your mail is picked up at a certain time each day, you can set the system to advance the date after the mail pickup time.
- Page 101 7 • System Options Basic Options (cont'd) Setting the Normal Preset Timeout The Normal Preset is a pre-defined set of values (postage, ad, ac- count and so on) that your machine display au to mat i cal ly returns to after a set period of time.
- Page 102 7 • System Options Basic Options (cont'd) Setting Daylight Sav ing Time 1. Press Menu. 2. Select "Setup". 3. Select "Time and Timeouts". 4. If necessary, press the green down arrow key to scroll through the menu screens. 5. Select "Daylight Savings". The display shows the cur rent set ting. Daylight Saving Current Time: 1:38 PM ◄...
-
Page 103: Changing Language
7 • System Options Basic Options (cont'd) Changing Language The machine is capable of displaying all screens, operator prompts, and options in either English or Spanish (Español). English is the de- fault language when the machine is initially powered up. To change the screens to Spanish (or back to English when Español is selected): 1. -
Page 104: Setting Postage Limits (Funds Warnings)
7 • System Options Basic Options (cont'd) Setting Postage Limits (Funds Warnings) You can specify values so that when your postage funds drop below a certain level, or if you try to enter too much postage for a piece of mail, the system displays a warning. -
Page 105: Enabling, Changing Or Disabling Lock Codes And Passwords
7 • System Options Basic Options (cont'd) Enabling, Changing or Disabling Lock Codes and Passwords Enabling the Lock Code The Lock Code prevents unauthorized access to your mail ing system after the machine has entered sleep mode. 1. Press Menu. 2. - Page 106 7 • System Options Basic Options (cont'd) Changing the Lock Code You can change the Lock Code if it has been enabled. 1. Press Menu. 2. Select "Setup". 3. If necessary, press the green down arrow key to scroll through the menu screens.
- Page 107 7 • System Options Basic Options (cont'd) Disabling the Supervisor Password You can disable the Supervisor Password if it has been enabled. 1. Press Menu. 2. Select "Setup". 3. If necessary, press the green down arrow key to scroll through the menu screens.
-
Page 108: Configuring The Tape Button
7 • System Options Basic Options (cont'd) Configuring the Tape Button You can specify the action the system takes when the Tape button is pressed. 1. Press Menu. 2. Select "Setup". 3. If necessary, press the green down arrow key to scroll through the menu screens. - Page 109 7 • System Options Basic Options (cont'd) ® Setting Up (USPS ) Confirmation Services 1. Press Menu. 2. Select "Setup". 3. If necessary, press the green down arrow key to scroll through the menu screens. 4. Select "Confirmation Service". The Display Following During Confirmation Records screen displays.
-
Page 110: Advanced Options
5. You will be prompted to "Transfer all funds from meter to PBP account". Select "Continue". 6. The system dials into the Pitney Bowes Data Center (this may take a few moments). Various screens display, letting you know the status of the process. - Page 111 7 • System Options Advanced Options (cont'd) ® Managing (USPS ) Confirmation Records 1. Press Menu. 2. If necessary, press the green down arrow key to scroll through the menu screens. 3. Select "Advanced Features". 4. Select "Confirmation Records". The Manage Confirmation Re- cords screen displays.
-
Page 112: Managing (Usps) Confirmation Records
7 • System Options Advanced Options (cont'd) Managing (USPS) Confirmation Records (continued) 8. If you want to delete the record of an uploaded session, select "Delete Record". A. Select the record from the list provided that you want to de- lete. -
Page 113: Running Install Mode
7 • System Options Advanced Options (cont'd) Running Install Mode Running “Install Mode” allows you to review, and change if desired, most of the values that were selected when the machine was first installed via the procedure in the Quick Install Guide. This option provides a convenient location to set several values all at once. - Page 114 7 • System Options This page was put in as a placeholder so you can print this entire guide in a duplex (double-sided) mode while keeping the proper page positions. 7-18 SV62261 Rev. C...
-
Page 115: Standard Accounting Option
8 • Standard Accounting Option DM475 DM400c DM300c This chapter explains how to take advantage of the standard accounting option of the system. Overview of Accounting Options.........8-2 Activating/Setting Up Standard Accounting Option ....8-4 Turning On Accounting ............8-6 Turning Off Accounting ............8-6 Turning On Account Passwords .........8-7... - Page 116 8 • Standard Accounting Option This page was put in as a placeholder so you can print this entire guide in a duplex (double-sided) mode while keeping the proper page positions. SV62261 Rev. C...
-
Page 117: Overview Of Accounting Options
Budget Manager Option Budget Manager adds a handy budgeting feature in addition to enhanced accounting. For more information, refer to the Budget Manager for DM300c/DM400c Operator Guide, SV62079. • Business Manager Option Business Manager is an accounting and budgeting package. You... -
Page 118: Activating/Setting Up Standard Accounting Option
8 • Standard Accounting Option Activating/Setting Up Standard Accounting Option Use the table below to step you through the process of setting up standard accounting (assuming you purchased it). The table covers the entire "life cycle" of an account, from creation to deletion. Step Action Description/Procedure Turns on the Standard Accounting feature. - Page 119 8 • Standard Accounting Option Activating/Setting Up Standard Accounting Option (cont'd) Step Action Description/Procedure Sets up your account name (and password if de- Create sired). See Creating New Accounts later in this Account chapter for procedure. Allows you to change the name and/or password Maintain (Edit) of an account.
-
Page 120: Turning On Accounting
8 • Standard Accounting Option Turning On Accounting 1. Press Menu. 2. Select "Accounts". If the supervisor password is enabled, you will need NOTE: to enter it to gain access to all of the accounting functions. 3. When prompted, select "Turn Accounting ON". •. -
Page 121: Turning On Account Passwords
8 • Standard Accounting Option Turning On Account Passwords You can turn on the requirement for all operators to enter passwords when choosing an account. You need to set up a Supervisor password (see Chapter NOTE 1: 7, System Options) before you can enable Account passwords. Turning on the account password feature forces you to NOTE 2: select a new account, just in case your existing account uses a... -
Page 122: Turning Off Account Passwords
8 • Standard Accounting Option Turning Off Account Passwords You can turn off the requirement for all operators to enter passwords (if passwords are set up) when choosing an account . 1. Press Menu. 2. Select "Accounts". If the supervisor password is enabled, you will need NOTE: to enter it to gain access to all of the accounting functions. -
Page 123: Creating New Accounts
8 • Standard Accounting Option Creating New Accounts You need to create an account before you can use the departmental accounting feature to track postage. 1. Press Menu. 2. Select "Accounts". Number of Accounts Created Accounts Accounts In Use: 0/25 Number of Accounts ◄... -
Page 124: Editing Account Names And Passwords
8 • Standard Accounting Option Editing Account Names and Passwords You can edit an account name and establish passwords for each ac- count if you wish. 1. Press Menu. 2. Select "Accounts". If the supervisor password is enabled, you will need NOTE: to enter it to gain access to all of the accounting functions. -
Page 125: Selecting An Account To Track Postage
8 • Standard Accounting Option Selecting an Account to Track Postage You need to select an account to track postage when using Depart- mental Accounting. 1. From Home screen, press the selection key next to Account. The "Select Account" screen displays. Select Account Current: None ... -
Page 126: Displaying Account Totals
8 • Standard Accounting Option Displaying Account Totals You can view your account totals anytime using this option. 1. Press Menu. 2. Select "Accounts". If the supervisor password is enabled, you will need NOTE: to enter it to gain access to all of the accounting functions. 3. -
Page 127: Printing Account Reports
8 • Standard Accounting Option Printing Account Reports Your system allows you to print accounting reports for a specific ac- count or all accounts, and also to print a list of accounts. The reports are accessed by pressing Menu and selecting "Reports". Some reports can be printed on an envelope or tape strip;... -
Page 128: Printing On An Envelope Or Tape Strip
"Mailing Machine" when prompted. • Print on a manually fed envelope (DM300c): Place the en- velope up against the back wall of the sys tem and slide it to the right until the sys tem grasps it. - Page 129 8 • Standard Accounting Option Printing Account Reports (cont'd) Single Accounts Report This report provides the postage amount and number of pieces ap- plied against a single account. It must be printed on an envelope or tape strip. 0011989 Account Name: SALES OCT 05 09 Acct Number: 1 4: 13P...
-
Page 130: Clearing All Account Totals
8 • Standard Accounting Option Clearing All Account Totals You can clear the postage totals on all accounts (for example, at the beginning of a new fiscal year) with this option. IMPORTANT: Make sure you really want to clear an ac count. Once you do, the account in for ma tion is gone. -
Page 131: Deleting Accounts
8 • Standard Accounting Option Deleting Accounts You can delete an account from the system if necessary. IMPORTANT: Make sure your really want to delete an ac count. Once you do, the account in for ma tion is gone. 1. Press Menu. 2. - Page 132 8 • Standard Accounting Option This page was put in as a placeholder so you can print this entire guide in a duplex (double-sided) mode while keeping the proper page positions. 8-18 SV62261 Rev. C...
-
Page 133: Reports
9 • Reports DM475 DM400c DM300c This chapter explains how to take advantage of the reporting capabilities of your system. Overview of Reports ............9-2 Last 5 Refills Report ............9-3 Funds Report ..............9-3 Single Accounts Report ............9-4 Multi-Account Summary Report..........9-4 Account List Report ............9-4 System Setup Report ............9-5... -
Page 134: Overview Of Reports
9 • Reports Overview of Reports Your system allows you to print reports for funds usage, postage refills, postage tracked by account, and other valuable data. The re- ports are accessed by pressing Menu and selecting "Reports". Some reports can be printed on an envelope or tape strip; NOTE: others require an optional attached printer (laser). -
Page 135: Last 5 Refills Report
9 • Reports Last 5 Refills Report This report lists the last five postage refills. It must be printed on an envelope or tape strip. Acct No.: 12345678 Date of Refill: Time: Refill Amount: Meter No.: 0011989 OCT 04 09 4:32P $025.000 Printed: OCT 05 09... -
Page 136: Single Accounts Report
9 • Reports Single Accounts Report This report provides the postage amount and number of pieces ap- plied to all of your accounts (if the Departmental Accounting feature is set up on your system). It must be printed on an envelope or tape strip. -
Page 137: System Setup Report
Error Report This report provides a history of error codes that your machine has encountered. It is generally a report you will not have to access un- less your Pitney Bowes Customer Service Representative requests that you print it out. 0011989... -
Page 138: Configuration Report
D0 . 07 2007/01/08 Printer Ser. #: Software Version Report This report provides system software version information. You may be directed to print this report by a Pitney Bowes agent. OCT 05 09 0011969 Rate Mgr. #: 03.10 PCN: 0000... -
Page 139: Printing A Report
"Mailing Machine" when prompted. • Print on a manually fed envelope (DM300c): Place the en- velope up against the back wall of the sys tem and slide it to the right until the sys tem grasps it. - Page 140 9 • Reports This page was put in as a placeholder so you can print this entire guide in a duplex (double-sided) mode while keeping the proper page positions. SV62261 Rev. C...
-
Page 141: 10 • Text Messages
10 • Text Messages DM475 DM400c DM300c This chapter explains how to create text messages to print on envelopes. Text Messages Overview..........10-2 Text Message Specifications ........10-3 Postal Rules and Guidance ........10-4 Envelope Guidance ............10-4 Creating a Text Message ..........10-5 Viewing/Editing a Text Message ........10-6 Deleting a Text Message ..........10-7... -
Page 142: Text Messages Overview
10 • Text Messages Text Messages Overview IMPORTANT: You should be familiar with the USPS regulations and standards re- lating to custom message printing such as the appropriate content, format, and other usage considerations. The Text Message feature enables you to enter text which can print directly on envelopes as they pass through the mailing system. -
Page 143: Text Message Specifications
10 • Text Messages Text Messages Overview (cont'd) Text Message Specifications Sample: ACME Corp Finance Dept. Building 3 Floor 16 Aberdeen Parkway Charlotte NC 28255 • Print up to five lines of information. • Print a maximum of 16 characters per line (including spaces). •... -
Page 144: Postal Rules And Guidance
10 • Text Messages Text Messages Overview (cont'd) Postal Rules and Guidance IMPORTANT: Any custom message printed by the system must follow USPS guidelines as published in the Domestic Mail Manual (DMM). A reference to proper standards can be found in P030, Section 9.8 Other Matter Printed by Postage Evidencing Systems. -
Page 145: Creating A Text Message
10 • Text Messages Creating a Text Message 1. Press the Menu key. 2. Select “Text Messages.” 3. Select “Create New Messages.” 4. The system indicates that messages must comply with postal rules for ads. Select “Accept & Continue.” See Postal Rules and Guidance in this chapter for NOTE: more information. -
Page 146: Viewing/Editing A Text Message
10 • Text Messages Viewing/Editing a Text Message 1. Press the Menu key. 2. Select “Text Messages.” 3. Select “View/Edit Messages.” 4. Select a message to edit. If necessary, press the green down arrow key to view the next menu screen. View/Edit Messages Txt Msg: ACME Finance ◄... -
Page 147: Deleting A Text Message
10 • Text Messages Viewing/Editing a Text Message (cont'd) 6. Press the Backspace (back arrow) key on the keypad to delete the existing text entry, then type in new text. Select “Edit Options” to move the cursor within the text entry. Edit Line 2 Dept. - Page 148 10 • Text Messages This page was put in as a placeholder so you can print this entire guide in a duplex (double-sided) mode while keeping the proper page positions. 10-8 SV62261 Rev. C...
-
Page 149: 11 • Scale Options
11 • Scale Options DM475 DM400c DM300c This chapter presents system settings you can setup or modi- fy the optional weighing platform (scale). Scale Options Overview ...........11-2 Zeroing the Scale .............11-3 Rate the Mail on Scale .............11-3 Key In Postage ..............11-3 Turning Auto Scale On or Off..........11-4... -
Page 150: Scale Options Overview
11 • Scale Options Scale Options Overview There are various options you can set with your weighing platform. These can be accessed by pressing the Weigh/Rate key. All menu options shown may not be available on your system, NOTE: due to the features/confi guration purchased for your machine. Weigh/Rate Current: 0lb 0.5oz ◄... -
Page 151: Zeroing The Scale
2. Select "Rate Mail on Scale". 3. Process you mail accordingly. – If the Auto Scale feature is turned NOTE for DM300c/DM400c on (see next page), placing a mail piece on the scale acts the same as selecting this option in the menu. -
Page 152: Turning Auto Scale On Or Off
11 • Scale Options Turning Auto Scale On or Off Use the Auto Scale option to determine if you want the system to switch to "scale" mode (using the scale to weigh a mail piece for rat- ing) when the weighing platform is touched. 1. -
Page 153: Setting Weight Change Options
11 • Scale Options Setting Weight Change Options - Change/Retain Class You can set how the weighing platform reacts regarding the class of service or ZIP Code when the weight changes. 1. Press Weigh/Rate. 2. If necessary, press the green down arrow key to scroll through the menu screens. -
Page 154: Setting Destination Change Options
11 • Scale Options Setting Destination Change Options - Change/Retain Destination You can set how the weighing platform reacts regarding the ZIP Code when the class of service changes. 1. Press Weigh/Rate. 2. If necessary, press the green down arrow key to scroll through the menu screens. -
Page 155: Setting The Scale Location Code
11 • Scale Options Setting the Scale Location Code The location code is used to calibrate your scale to your geographic location, based on your latitude coordinates. Normally, you do not need to change the scale location code once your system has been installed. -
Page 156: Managing Intra Bmc Zip Code Groups
11 • Scale Options Managing Intra BMC ZIP Code Groups Intra BMC (Bulk Mail Center) ZIP Code groups are a USPS pre-sort option for bulk mailings in the USA. To qualify for a discount when using Intra BMC ZIP Code groups: •... - Page 157 11 • Scale Options Managing Intra BMC ZIP Code Groups (cont'd) Creating Intra BMC ZIP Code Group (continued) 5. Select "Beginning ZIP". a. Type in the first 3 digits of beginning ZIP. b. Select "Accept". Beginning ZIP Enter First 3 Digits ◄...
-
Page 158: Editing Intra Bmc Zip Code Groups
11 • Scale Options Managing Intra BMC ZIP Code Groups (cont'd) Editing Intra BMC ZIP Code Groups Use this option to edit Intra BMC ZIP Code groups. Acquire all postal ranges eligible for the discount rates, then follow the procedure be- low. - Page 159 11 • Scale Options Managing Intra BMC ZIP Code Groups (cont'd) Editing Intra BMC ZIP Code Groups (continued) 7. Select "Ending ZIP". a. Type in the first 3 digits of last ZIP. b. Select "Accept". Beginning ZIP Enter First 3 Digits ◄...
-
Page 160: Deleting Intra Bmc Zip Code Groups
11 • Scale Options Managing Intra BMC ZIP Code Groups (cont'd) Deleting Intra BMC ZIP Code Groups Use this option to delete Intra BMC ZIP Code groups. IMPORTANT: Make sure your really want to delete a group. Once you do, the group cannot be retrieved. -
Page 161: Wow (Weigh-On-The-Way) And Shape-Based Rating (Dm475)
11 • Scale Options (Weigh-on-the-Way) and Shape-Based Rating ® (DM475) When enabled, the Weigh-on-the Way (WOW ) feature increases ® your productivity because you don't have to presort the mail by weight before loading the pieces onto the machine. The DM475 has a special scale built into its deck that can weigh mail pieces on-the- fly (that is, as they pass along the deck) so the system can deter- mine the correct postage of each item. -
Page 162: Turning On Wow® Mode
11 • Scale Options (Weigh-on-the-Way) and Shape-Based Rating ® (DM475) To rate your mail according to USPS shape-based requirements, ® the system must be in WOW mode and you must select a class that ® has "SBR" in its name (see sample screen below). WOW + SBR $0.44 0lb 1.0oz... -
Page 163: W1P- Weigh First Piece Mode (A Wow® Mode)
11 • Scale Options (Weigh-on-the-Way) and Shape-Based Rating ® (DM475) W1P- Weigh First Piece Mode (a WOW® Mode) In this mode, when processing mail pieces of same weight and size, the machine weighs the first mail piece automatically and processes the remaining mail pieces at the same postage rate. -
Page 164: Wow® (Weigh-On-The-Way) Start Key
11 • Scale Options (Weigh-on-the-Way) and Shape-Based Rating ® (DM475) WOW® (Weigh-on-the-Way) Start Key This option determines whether the system reverts to the WOW ® mode after you rate a mail piece using the top or external scale and print postage. 1. -
Page 165: 12 • Maintenance
Replacing the Print Head ...........12-8 Filling the Moistener (DM300c)........12-10 Filling the Moistener (DM400c/DM475) ......12-11 Maintaining the Moistener ..........12-12 Removing the Moistener (DM300c) ......12-12 Removing the Shield and Wick (DM300c) ....12-14 Cleaning the Stripper Blade/Brush Assembly (DM400c) ..............12-15 Cleaning the Stripper Blade/Brush Assembly (DM475) ..............12-16 Cleaning the Shield and Wick (DM400c/DM475) ..12-18... -
Page 166: Printing A $0.00 Meter Stamp
12 • Maintenance Printing a $0.00 Meter Stamp If you want to check the ink imprint (meter stamp) on your machine, you can generate a $0.00 meter stamp for this purpose. At the Home screen, simply press Zero, then Enter, and slide an envelope (or tape strip) through the machine. -
Page 167: Replacing The Ink Tank Cartridge
12 • Maintenance Replacing the Ink Tank Cartridge 1. If you have an optional scale, simply lift it up and remove it from the top of the machine. 2. Open the ink access cover. At the screen with the red X, select "Replace Ink Tank". - Page 168 12 • Maintenance Replacing the Ink Tank Cartridge (cont'd) 4. Lift up and remove old ink tank cartridge. 5. Remove tape on bottom of new ink tank cartridge. 6. Lower the ink tank cartridge into the cavity. The cartridge should drop in freely - do not push.
- Page 169 12 • Maintenance Replacing the Ink Tank Cartridge (cont'd) 8. Close the ink access cover. The system automatically recognizes the new cartridge. 9. You are prompted to print a test pattern. • Select "Yes, Print Test Pattern" to print a test pattern. See Printing a Test Pattern in this chapter for more information.
-
Page 170: Printer Maintenance
12 • Maintenance Printer Maintenance The system has several replacement procedures and tests that let you replace the ink tank cartridge and/or print head, check print per- formance and help you determine printing problems. These tests and procedures are accessible by pressing Menu, pressing the down arrow key, and selecting "Maintenance", then "Printer Maintenance". -
Page 171: Cleaning The Printer Nozzle
5. Select "Clean Printer Nozzle". 6. You have a choice of four purges to use. Normally selecting "Purge A" is sufficient to purge the system, unless directed by a Pitney Bowes agent to do otherwise. Clean Printer Nozzle Select Purge ◄... -
Page 172: Replacing The Print Head
12 • Maintenance Printer Maintenance (cont'd) Replacing the Print Head 1. If you have an optional scale, simply lift it up and remove it from the top of the machine. 2. Open the ink access cover. At the screen with the red X, select "Replace Print Head". - Page 173 12 • Maintenance Printer Maintenance (cont'd) Replacing the Print Head (continued) 6. Pull up and remove the black cap on the new print head (if present). Also remove the protective tape from the bottom. 7. Squeeze the two gray tabs on either side of the new print head and slightly angle the print head while sliding it back into its holder.
-
Page 174: Filling The Moistener (Dm300C)
1. Check the moist en er tank to see how much sealing so lu tion is left. Fill Here Check Level Here 2. Add enough Pitney Bowes E-Z Seal sealing solution to bring the ® sealant level up to the bottom of the fill hole. We rec om mend E-Z... -
Page 175: Filling The Moistener (Dm400C/Dm475)
DM475 Moistener Bottle DM400c Moistener Bottle 3. Unscrew the moistener bottle cap and fill the moist- ener bottle with Pitney Bowes E-Z Seal sealing solu- ® tion. We rec om mend E-Z Seal be cause it helps keep ®... -
Page 176: Maintaining The Moistener
See Chapter 14, Supplies and Op- tions for instructions on ordering these supplies for your machine. Removing the Moistener (DM300c) 1. Push down on the blue re lease lever on the moistener. Release Lever 2. - Page 177 12 • Maintenance Maintaining the Moistener (cont'd) Removing the Moistener (DM300c) (continued) 5. Clean the moistener brush by running the it under plain water. Blot the excess water from the brush after rinsing it. Replace the assembly if it cannot be cleaned thoroughly.
-
Page 178: Removing The Shield And Wick (Dm300C)
12 • Maintenance Maintaining the Moistener (cont'd) Removing the Shield and Wick (DM300c) This procedure assumes you have already removed the NOTE: moistener (see previous section). 1. Pull up and remove the shield and wick from the moistener. Shield Wick 2. -
Page 179: Cleaning The Stripper Blade/Brush Assembly (Dm400C)
12 • Maintenance Maintaining the Moistener (cont'd) Cleaning the Stripper Blade/Brush Assembly (DM400c) 1. Open cover. 2. Remove the stripper blade/brush assembly by pressing on the light blue lever/button and sliding the assembly straight out to- wards you. Stripper Blade/ Brush Assembly Lever 3. -
Page 180: Cleaning The Stripper Blade/Brush Assembly (Dm475)
12 • Maintenance Maintaining the Moistener (cont'd) Cleaning the Stripper Blade/Brush Assembly (DM475) 1. Open the feeder/WOW cover. Feeder/WOW Cover 2. Raise the moistener clearance lever. Moistener Clearance 90° Lever Blade/Brush Assembly 3. Push down on the blue button and slide the blade/brush assem- bly out of the deck. - Page 181 12 • Maintenance Maintaining the Moistener (cont'd) Cleaning the Stripper Blade/Brush Assembly (DM475) 4. Clean the moistener brush by running the it under plain water. Blot the excess water from the brush after rinsing it. Replace the assembly if it cannot be cleaned thoroughly. NOTE: Stripper Blade and Brush 5.
-
Page 182: Cleaning The Shield And Wick (Dm400C/Dm475)
12 • Maintenance Maintaining the Moistener (cont'd) Cleaning the Shield and Wick (DM400c/DM475) This procedure assumes you have already removed the NOTE: stripper blade/brush assembly (see previous pages). Open the feeder access cover (DM400c) or feeder/WOW cover (DM475), remove the moistener bottle, and place it on the table top with its cap facing up. -
Page 183: Cleaning The Shield And Wick (Dm400C/Dm)
12 • Maintenance Maintaining the Moistener (cont'd) Cleaning the Shield and Wick (DM400c/DM475) Pull up and remove the shield and wick from the moistener tank Separate wick from the shield. Clean the wick in plain water, and rinse thoroughly. Blot the excess water from the wick. Replace the wick and shield if they cannot be cleaned NOTE: thoroughly. -
Page 184: Cleaning The Feeder Exit Sensor (Dm475)
12 • Maintenance Cleaning the Feeder Exit Sensor (DM475) The feeder exit sensor will require cleaning periodically. Lift the cover on the feeder/WOW and locate the sensor (see fi gures below). Use a cotton-tipped swab to clean both the top and bottom surfaces/holes. Cleaning the bottom section of Cleaning the under side of the top feeder exit sensor (the swab must... -
Page 185: 13 • Troubleshooting
13 • Troubleshooting DM475 DM400c DM300c This chapter explains how to troubleshoot your mailing system. Getting Help..............13-2 Messages on the LCD Display .........13-2 Blank Display ..............13-2 Display Difficult to Read ...........13-3 Printing Problems .............13-3 Feeding Problems (stalled envelopes) ......13-4 To avoid stalled envelopes .........13-4 To clear stalled envelope in printer area ....13-4... -
Page 186: Getting Help
There may be times when you need help to solve a prob lem, or you may want more in for ma tion about how your mail ing system works. Pitney Bowes pro vides sev er al in for ma tion resources. See page v for our web and phone support information. -
Page 187: Display Difficult To Read
Perform a print purge in an effort to clogged fix the printing problem See "Clean- ing the Printer Nozzle" in Chapter 12, Maintenance. NOTE: If printer maintenance fails to correct the problem, call Pitney Bowes (see page v). 13-3 SV62261 Rev. C... -
Page 188: Feeding Problems (Stalled Envelopes)
13 • Troubleshooting Feeding Problems (stalled envelopes) To avoid stalled envelopes: • Make sure your envelopes meet Pitney Bowes published spec i fi- ca tions. See Appendix A, Specifications. • Feed envelopes correctly. See the instructions in Chapter 3, Running Mail. Don't try to feed oversize envelopes through the machine. - Page 189 13 • Troubleshooting Feeding Problems (stalled envelopes) (cont'd) To clear a stalled envelope in the feeder area (DM400c): 1. Open the feeder cover and lift the feeder clearance lever two clicks to the fully upright postion remove mail under the feeder rollers.
-
Page 190: To Clear Stalled Envelope In Feeder/Wow Area (Dm475)
13 • Troubleshooting Feeding Problems (stalled envelopes) (cont'd) To clear stalled envelope in the feeder/WOW area (DM475): 1. Open the feeder/WOW cover. Feeder/WOW Cover 2. Raise the moistener clearance lever two clicks to the fully upright postion remove mail under the feeder rollers. Moistener Clearance 90°... - Page 191 13 • Troubleshooting Feeding Problems (stalled envelopes) (cont'd) To clear stalled envelope in the feeder/WOW area (DM475): 4. Raise the feeder/WOW clearance lever. Lift the blue feeder clearance lever IMPORTANT: Do not remove mail without lifting the clearance lever. 5. Lower all levers and close the feeder/WOW cover. 13-7 SV62261 Rev.
-
Page 192: Dm475)
If you don't, the moistener can't ing (DM300c wet the flap. only) DM300c - Check the sealant level in the moistener tank. Low sealant If the sealant level is low, add E-Z Seal solution* until it ®... -
Page 193: Mail Transport Error Messages
13 • Troubleshooting Mail Transport Error Messages Occasionally, an error message may display. In most cases, simply following the on-screen instructions will solve the issue. Screen Title Screen Message Error Action Code Mail Jammed Clear Feeder 372D, Follow screen directions Transport. -
Page 194: Problems Connecting To Data Center Via Lan Network
13 • Troubleshooting Problems Connecting to Data Center via LAN Network Symptom Solution • Make sure you've connected your machine to a Machine may not be work ing LAN Internet connection. Contact your connected to LAN network administrator if you suspect issues with Internet Connection your LAN network. -
Page 195: Problems Refilling Postage Via Pc Meter Connect
13 • Troubleshooting Problems Refilling Postage via PC Meter Connect™ You can access www.pb.com using Internet Explorer but you are having problems refilling postage into the meter (meter er- rors may display) 1. Right click on the PC Meter Connect tray icon and select "Inter- ™... -
Page 196: Problems Connecting To The Data Center Via Pc Meter Connect
13 • Troubleshooting Problems Connecting to the Data Center via PC Meter Connect™ You cannot access www.pb.com from PC using Internet Explorer Contact your IT administrator for any special setup needed to enable your PC and Internet Explorer to access the internet. You can access www.pb.com using Internet Explorer but PC Meter Connect software cannot detect the internet. - Page 197 13 • Troubleshooting Problems Connecting to the Data Center via PC Meter Connect™ (cont'd) You can access www.pb.com using Internet Explorer but PC Meter Connect software cannot detect the internet (continued) ™ Enter your own network's Proxy Address and Au- Solution B thentication settings (if used).
-
Page 198: Problems Connecting To The Data Center Via Analog Line
13 • Troubleshooting Problems Connecting to the Data Center via Analog Line Symptom Solution • Make sure you've connected your meter to a dedi- Improper phone line cated an a log phone line (the same type you con- or phone line not nect your home phone to). -
Page 199: Accidentally Printing The Wrong Postage
13 • Troubleshooting Accidentally Printing the Wrong Postage Once you have printed a meter stamp, the postage funds have been “used up” by the machine, even if the printing is illegible. That’s why it is so important to make sure the correct value is shown on the ma- chine before inserting the mail piece or tape strip, and that you do not let the ink level get too low. - Page 200 13 • Troubleshooting This page was put in as a placeholder so you can print this entire guide in a duplex (double-sided) mode while keeping the proper page positions. 13-16 SV62261 Rev. C...
-
Page 201: 14 • Supplies And Options
This chapter explains how to order supplies and ac ces so ries for your digital mailing system. It also tells you a little about optional equipment that can help you get the most value from your Pitney Bowes equip ment. Supplies and Accessories ..........14-2 Options ................14-2 Weighing Platform ............14-2... -
Page 202: Supplies And Accessories
Contact your Pitney Bowes Sales Rep re sen ta tive or visit the Pitney Bowes web site to order these op- tions. Refer to the Contact Information List at the front of this guide for more information. -
Page 203: Postal Inscriptions/Advertisements
Envelope ads give your mail a professional ap- pear ance and can turn your mailings into a powerful pro mo tion al tool. Pitney Bowes also offers additional envelope ads and inscriptions. Up to a total of 20 ads and 20 inscriptions are available. - Page 204 14 • Supplies and Options This page was put in as a placeholder so you can print this entire guide in a duplex (double-sided) mode while keeping the proper page positions. 14-4 SV62261 Rev. C...
-
Page 205: Appendix A • Specifications
Appendix A • Specifications Equipment Specifications System Dimensions DM300c 19.5" x 17.5" x 12.3" (L x D x H) (495 mm x 445 mm x 312 mm) includes integrated scale, but not stacker DM400c 33" x 19.5" x 12.3" (840 mm x 495 mm x 312 mm) DM475 51.3"... - Page 206 Appendix A • Specifications Equipment Specifications (cont'd) Throughput DM300c up to 65 letters per minute DM400c/DM475 up to 95 or 120 letters per minute, depending on option Actual throughput may vary, depending on what is included in the indicia (e.g., text messages, advertisements, inscriptions), machine usage, and other factors.
- Page 207 3" (72.2 mm) Envelope Flap Depth Minimum: .02" (0.20 mm) Envelope Thickness Maximum (DM300c): 3/8" (9.5 mm) Maximum (DM400c/DM475): 5/16" (8 mm) 3" (76.2 mm) - this is the height of the inner Stack Height for Mail edge of the side guide Minimum: .035 oz.
-
Page 208: Material Specifications
Appendix A • Specifications Material Specifications (cont'd) For a proper seal, the envelope’s minimum flap angle NOTE: must meet the following criteria: • For envelopes with a flap length from 25 to 60mm (1 to 2.36 inches), the minimum flap angle is 18 degrees. •... -
Page 209: Appendix B • Usps
Appendix B • USPS First Class Mail Sizes ® ® USPS First Class Mail Sizes (Domestic) ® ® First-Class Mail Domestic—Retail SHAPE SIZE PRICE Postcards minimum maximum Price 4-1/4" max. $x.xx length 5 inches 6 inches $0.28 3-1/2" height 3-1/2 inches 4-1/4 inches min. -
Page 210: Appendix B • Usps First Class Mail Sizes
Appendix B • USPS First Class Mail Sizes ® ® USPS ® First Class Mail ® Sizes (International) First-Class Mail International—Retail PRICE SHAPE SIZE Postcards minimum maximum Prices $x.xx 4-1/4" length 5-1/2 inches 6 inches Canada $0.75 max. x.xx height 3-1/2 inches 4-1/4 inches Mexico 0.79... -
Page 211: Appendix C • Glossary
Line–a "standard" phone line supplied by the phone company. Analog You can use an analog phone line when you connect to the Pitney Bowes Data Center using your machine's modem phone jack. Analog Fax lines, residential phone lines, analog dial-up computer modems, and analog credit card readers all use analog phone lines. - Page 212 –a small software application you install on your PC PC Meter Connect ™ to allow your meter to connect to the Pitney Bowes Data Center through your PC’s Internet connection rather than over a standard telephone line. —A service available through Pitney Bowes that Postage-By-Phone ®...
-
Page 213: Index
Index 7-15 Meter Withdrawal (Withdrawing About Your Digital Mailing Postage Funds) 7-14 System 1-3 Running Install Mode 7-17 Accidentally Printing the Wrong Advertisement Postage 13-15 Explanation in Glossary C-1 Account Advertisement, Envelope Explanation in Glossary C-1 Downloading 4-9 Accounting Glossary Entry C-1 Account List Report 8-15, 9-4 Printing viii Account Totals, Clearing All... - Page 214 Groups 11-8 Cleaning the Stripper Blade and Creating New Accounts in Brush Assembly (DM400c) Accounting 8-9 12-15, 12-16, 12-17 Custom Presets Clearance Lever (two position) Defi ning 5-6 DM300c 2-5, 2-7 Deleting 5-9 DM400c 2-5, 2-7 Editing 5-8 SV62261 Rev. C...
- Page 215 Index Overwriting 5-8 Dial Selecting 5-5 Method, Selecting the 6-18 Viewing 5-5 Prefi x Setting up the Modem 6-18 Differential Weighing 3-13 Digital Line C-1 Data Center Explanation in Glossary C-1 Connecting to 6-16 Disabling Data Center Distributor Settings Disabling the Lock Code 7-9 6-20 Disabling the Supervisor Problems Connecting via...
- Page 216 Manually (DM300c) 3-6 Password 7-10 Feeding Problems (stalled Entering Weight Manually 3-4, envelopes) 13-4 11-3 Filling Enter Key 2-9 Filling the Moistener (DM300c Envelope Ad, Using and Only) 12-10 Downloading viii Filling the Moistener (DM400c Envelopes Only) 12-11 Envelope Ads/Postal...
- Page 217 Lock/Power Key 2-8 Important Telephone Safety Low Funds Warning, Setting the Instructions 1-9 Ink Access Cover Low Ink, Message 12-2 DM300c 2-5, 2-6 DM400c 2-5, 2-6 Ink Out, Message 12-2 Ink Tank Cartridge Mail Transport Error Messages How to Order 14-2...
- Page 218 12-16 DM300c Location 2-3 Parts of the Machine DM400c Location 2-5 DM300c 2-2 DM475 Location 2-6 DM400c 2-4 fi lling, DM300c 12-10 DM475 2-6 fi lling, DM400c/DM475 12-11 Passwords, Accounting Maintaining 12-12, 12-16, Account, Turning Off 8-8 12-17 Account, Turning On 8-7...
- Page 219 Index How it is stored in your meter Why Should I Use Presets 5-2 Printer Deck Minimum Amount for Adding to DM300c 2-5, 2-7 machine 6-12 DM400c 2-5, 2-7 Postage By Phone® Printer Maintenance Account Balance, Checking Cleaning the Printer Nozzle...
-
Page 220: Manually Feeding Envelopes (Dm300C)
Print Resolution Specification Refill Postage 2-9 Removing Problems Moistener (DM300c) 12-12 Accidentally Printing the Wrong Shield and Wick (DM300c) 12- Postage , xiii, 13-15 14, 12-1, xii, 12-20 Blank Display 13-2 Replacing Connecting to Data Center via Ink Cartridge 12-3... - Page 221 Setting Up (USPS®) Screen Selection Keys 2-8 Confi rmation Services Sealing Envelopes without 7-13 Printing a Meter Stamp Setting Weight Change Options DM300c Only 4-5 11-5 DM400c Only 4-5 Shape-Based Rating (SBR) 3-9, Seal/No Seal Lever, DM400c 11-13 2-5, 2-6...
- Page 222 Index Transport Release (Clearance) Start and Stop Keys 2-9 Lever 2-3 Storage Slot Troubleshooting.See Problems DM300c 2-5, 2-7 DM400c 2-5, 2-7 Supervisor Password. See Password, Supervisor United States Postal Service. Explanation in Glossary C-2 See also Postal (various Supplies and Accessories 14-2...
- Page 223 Index Weighing Differential Weighing 3-13 Platform Description/Location , 2-3, 2-6 Weighing Platform.See Scale Options Weigh/Rate Key 2-9.See also Scale Options What's in this Guide 1-2 Withdrawal of Meter 7-14 WOW® (Weigh-on-the-Way) and Shape Based Rating (DM475) Auto Rate Large Envelope (Flats) 11-16 Overview 3-9, 11-13 Turning On WOW®...
- Page 224 1 Elmcroft Road Stamford, Connecticut 06926-0700 www.pitneybowes.com PB Form SV62261 Rev. C 8/09 © 2009 Pitney Bowes Inc. All Rights Reserved *SV62261RevC*...
Need help?
Do you have a question about the DM300c and is the answer not in the manual?
Questions and answers