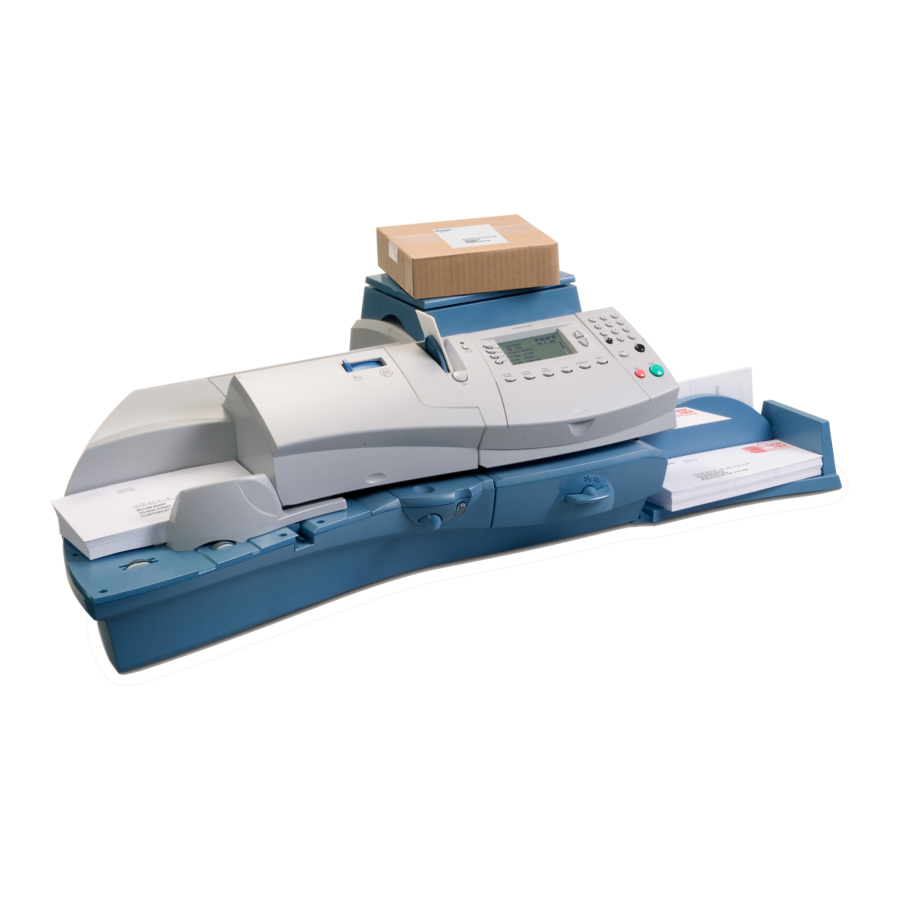
Pitney Bowes DM300c Operator's Manual
Inview accounting for digital mailing systems
Hide thumbs
Also See for DM300c:
- Service manual (227 pages) ,
- Operator's manual (224 pages) ,
- Quick reference manual (9 pages)

Related Manuals for Pitney Bowes DM300c


Summary of Contents for Pitney Bowes DM300c
- Page 1 INVIEW™ Accounting for DM300c/DM400c/DM475 Digital Mailing Systems Operator Guide Canada English Version...
- Page 2 INVIEW, E-Z Seal and Postage By Phone are trademarks or registered trademarks of Pitney Bowes Inc. ENERGY STAR is a registered trademark of the United States Environmental Protection Agency.
- Page 3 Product Name: DM475 Digital Mailing System Model Number: 6C10 Resources For direct questions or support, call the Pitney Bowes Customer Centre 1.800.672.6937 (M-F 8:00 AM to 8:00 PM E.T.) or visit www.pitneybowes.ca. To order Pitney Bowes supplies and accessories, go to: www.pitneybowes.ca...
- Page 4 Pitney Bowes Contact List This page was put in as a placeholder so you can print this entire guide in a duplex (double-sided) mode while keeping the proper page positions. SV62683 Rev. A...
-
Page 5: Table Of Contents
Table of Contents Table of Contents 1 • Read this First What's in this Guide ............1-1 Overview of Accounting .............1-2 INVIEW™ Accounting and INVIEW™ Meter Reporting ..1-3 2 • System Setup for INVIEW™ Accounting INVIEW Acounting Setup ...........2-1 Overview of INVIEW Accounting Setup (high-level steps) 2-2 Activating INVIEW Accounting ...........2-4 Setting Up the Accounting (Fiscal) Periods .......2-5 Establishing a Supervisor Password .........2-7... - Page 6 Table of Contents 3 • Setting Up Operators Operator Options ...............3-1 Enabling/Disabling the Operator Feature ......3-2 Creating Operators ............3-3 Enabling/Disabling the Operator Auto Log Off Feature ..3-4 Viewing and Editing Operators ..........3-5 Deleting Operators ............3-7 4 • Setting Up and Working With Accounts Account Options ..............4-1 INVIEW™...
- Page 7 Table of Contents 7 • Running Reports Accounting Reports Overview ...........7-1 Account Reporting Options ..........7-2 Transaction Log Report .............7-3 Account Summary .............7-4 Quick Profile Report ............7-5 Accounting Setup Report ...........7-6 Account List Report ............7-7 Account Speed Code List Report ........7-8 Operator List ..............7-9 Custom Reports ...............7-10 Creating a Custom Report ........7-11...
- Page 8 Table of Contents This page was put in as a placeholder so you can print this entire guide in a duplex (double-sided) mode while keeping the proper page positions. viii SV62683 Rev. A...
-
Page 9: Read This First
1 • Read This First What's in this Guide Section Description Chapter 1 Provides an overview of INVIEW accounting, as well as the powerful online INVIEW options that can augment Read This First the INVIEW transactions captured in your machine. Explains how to configure your system to use the Chapter 2 System Setup... -
Page 10: Overview Of Accounting
1 • Read This First Overview of INVIEW Accounting ™ The information in this manual describes how to set up the INVIEW ™ Accounting feature. An accounting feature on a mailing system allows you to track your postage costs by categories. These categories can represent whatever makes sense to your organization - departments, people, locations, projects, etc. -
Page 11: Inview™ Accounting And Inview™ Meter Reporting
INVIEW Meter Reporting system whenever ™ you connect your meter to the Pitney Bowes Data Center to refill postage, check on available funds in your Postage By Phone account, or during other inspection or maintenance processes. - Page 12 1 • Read This First INVIEW Accounting and INVIEW Meter Reporting ™ ™ Accounting Reports Option of INVIEW Meter Reporting ™ The Accounting Reports option within the INVIEW Meter Reporting ™ system offers unparalleled flexibility in accessing and presenting in- formation about where, how, and when postage is used within your organization, based on account information.
-
Page 13: System Setup For Inview™ Accounting
You can also create a supervisor password to limit access to setting up accounts and accessing accounts (see later in this chapter). In addition, you can include account information in your custom presets. Refer to of the DM300c/DM400c/DM475 Operator Guide for instructions on setting up custom presets. SV62683 Rev. A... -
Page 14: Overview Of Inview Accounting Setup (High-Level Steps)
2 • System Setup for INVIEW™ Accounting Overview of INVIEW Accounting Setup The table below provides an overview of the process of setting up INVIEW accounting. It also covers the entire life cycle of an account, from creation to deletion. Step Action Description/Procedure Turns on INVIEW Accounting. - Page 15 2 • System Setup for INVIEW™ Accounting Overview of INVIEW Accounting Setup Step Action Description/Procedure Configuration If you are using an accounting system on your mailing system you can set up the scanner so that of Barcode Scanner it knows what field is scanning without using a prefix code.
-
Page 16: Activating Inview Accounting
2 • System Setup for INVIEW™ Accounting Activating INVIEW Accounting To activate the accounting feature on your mailing system and to select INVIEW as your accounting type, follow this procedure. 1. Press the Menu key. 2. Select Accounts. The Accounts screen displays. NOTE 1: If the supervisor password is enabled, you may need to enter it to gain access to all of the accounting functions. -
Page 17: Setting Up The Accounting (Fiscal) Periods
2 • System Setup for INVIEW™ Accounting Setting Up the Accounting (Fiscal) Periods When you enter the start date for the fiscal year, the system automatically determines the end date. (For example, if January 1, 2009 is the beginning of your fiscal year, the system sets the end date as December 31, 2009.) Once the fiscal year is set, you will need to select the number of accounting periods. - Page 18 2 • System Setup for INVIEW™ Accounting Setting Up the Accounting (Fiscal) Periods 5. Select # Periods to change the number of accounting periods during your fiscal year. Select the number periods for your fiscal year from the list (Annual, Twice a year, Quarterly, Monthly, Custom). If necessary, use the green down arrow key to scroll through the list.
-
Page 19: Establishing A Supervisor Password
2 • System Setup for INVIEW™ Accounting Establishing a Supervisor Password A Supervisor password can be used to prevent unauthorized account changes within INVIEW Accounting. If you establish a Supervisor password, a user will need to enter this password to add, edit, or delete accounts;... -
Page 20: Turning On/Off Account Passwords Globally
2 • System Setup for INVIEW™ Accounting Turning ON/OFF Account Passwords Globally You can turn on or off the requirement for all operators to enter passwords when choosing an account. NOTE 1: You need to set up a Supervisor password (see Chapter 7, System Options) before you can enable Account passwords. -
Page 21: Setting Global Surcharges
2 • System Setup for INVIEW™ Accounting Setting Global Surcharges When you select the surcharge method from the Set Up menu, you are setting a global surcharge. A global surcharge is a permanent surcharge that applies to each transaction (or piece) processed by INVIEW™Accounting, unless a batch (temporary) surcharge overrides it. -
Page 22: Turning Surcharges On And Off
2 • System Setup for INVIEW™ Accounting Setting Global Surcharges Turning Surcharges On and Off Follow the steps below to turn the surcharge feature on and off. Turning the surcharge feature on allows you to apply the workstation surcharge to transactions. 1. -
Page 23: Adding Surcharges
2 • System Setup for INVIEW™ Accounting Setting Global Surcharges Adding Surcharges Follow the steps below to set a global surcharge or discount: You must turn the Surcharge feature on before selecting NOTE: a surcharge method. Refer to Turning Surcharges On and Off in this chapter for more information. -
Page 24: Clearing All Surcharges
2 • System Setup for INVIEW™ Accounting Setting Global Surcharges Adding Surcharges 5. To add a surcharge or discount per transaction: a. Select Per Trans. b. Type in the surcharge or discount amount you wish to use for each transaction. c. -
Page 25: Setting A Station Id
2 • System Setup for INVIEW™ Accounting Setting a Station ID The Station ID is printed on accounting reports to identify the mailing system where the reports were generated. This feature is useful when you have several different mailing systems that generate reports. -
Page 26: Selecting A Job Id Requirement
2 • System Setup for INVIEW™ Accounting Selecting a Job ID Requirement Job ID tracking is commonly used for tracking expenses of projects accessed by multiple departments within the organization like client jobs or grants. These entries can be scanned or entered manually by the operator before processing a mail run. -
Page 27: Configuring The Optional Barcode Scanner
2 • System Setup for INVIEW™ Accounting Configuring the Optional Barcode Scanner Setting the Default Scan Type If you are using an accounting system on your mailing system you can set up the scanner so that it knows what field is scanning without using a prefix code. -
Page 28: Setting Auto Enter
2 • System Setup for INVIEW™ Accounting Configuring the Optional Barcode Scanner Setting the Default Scan Type (cont.) 5. Select the appropriate option from the list. If necessary, press the green down arrow key to scroll through the menu screens. •... -
Page 29: Combining Barcodes
2 • System Setup for INVIEW™ Accounting Configuring the Optional Barcode Scanner Combining Barcodes If you need to combine multiple barcode scans into a single barcode, use this setup option. For example, the typical barcode scanner can only accept a maximum of 30 characters. If you want to scan an account name that contains more than 30 characters, say 50 characters, you add a join character at the end of the first 30 characters. - Page 30 2 • System Setup for INVIEW™ Accounting Configuring the Optional Barcode Scanner Combining Barcodes (cont.) The following is an example using a + symbol as a join character. When you scan in these three barcodes, the system will combine them into a single barcode value (e.g., SCANNERTESTBARCODEVALUE).
-
Page 31: Adding Barcode Prefixes
2 • System Setup for INVIEW™ Accounting Configuring the Optional Barcode Scanner Adding Barcode Prefixes If you are going to scan multiple fields, you will need to create barcodes that contain a 1 or 2 digit prefix. This prefix identifies the field you are scanning. - Page 32 2 • System Setup for INVIEW™ Accounting Configuring the Optional Barcode Scanner Adding Barcode Prefixes (cont.) 6. Select the appropriate barcode prefix option. If necessary, press the green down arrow key to scroll through the menu screens. • If the barcode contains a prefix and account name, select Acct Name.
-
Page 33: Setting Up The Optional Pc Transfer Utility
2 • System Setup for INVIEW™ Accounting Setting Up the Optional PC Transfer Utility If you are using the PC Transfer Utility, you may need to enter the Host IP address and TCP Port for the PC. 1. Press the Menu key. 2. - Page 34 2 • System Setup for INVIEW™ Accounting This page was put in as a placeholder so you can print this entire guide in a duplex (double-sided) mode while keeping the proper page positions. 2-22 SV62683 Rev. A...
-
Page 35: Setting Up Operators
3 • Setting Up Operators 3 • Setting Up Operators Operator Options Operator options allow you to set up and manage operators on your mailing system. The operator options are accessed by pressing Menu, selecting Setup, pressing the green down arrow key and then selecting Operator Setup. -
Page 36: Enabling/Disabling The Operator Feature
3 • Setting Up Operators Enabling/Disabling the Operator Feature Follow the steps here to set up your mailing system so that you can assign operators. If operators have already been enabled on your system, then you will need supervisor privileges to complete this operation. 1. -
Page 37: Creating Operators
3 • Setting Up Operators Creating Operators Follow the steps below to create a new operator and assign a 4-digit alphanumeric password for the operator. Operator names cannot exceed 32 characters. NOTE: You must enable the Operator feature before you can create new operators (see topic on previous spage). -
Page 38: Enabling/Disabling The Operator Auto Log Off Feature
3 • Setting Up Operators Creating Operators The Operator Information screen displays. Operator Information ◄ Name : Operator 123 ◄ Status : Active ◄ Password : **** ◄ Done 6. Select Status to toggle an operator active or inactive. 7. Press the green down arrow key and select Level to toggle between the supervisor and operator access level privileges. -
Page 39: Viewing And Editing Operators
3 • Setting Up Operators Viewing and Editing Operators The Viewing/Editing Operators screen allows you to access operator- specific information that has been entered into the INVIEW™ Accounting system. You can view or edit the operator’s name; lock or unlock the operator; enable, disable, or edit a password; enable or disable report printing;... - Page 40 3 • Setting Up Operators Viewing and Editing Operators 7. Select Status to toggle an operator active or inactive. 8. Select Password. The Operator Password screen appears. • Turn the operator password off for this operator by selecting Turn Password Off. •...
-
Page 41: Deleting Operators
3 • Setting Up Operators Deleting Operators If there is transaction data associated with an operator and you delete the operator, the system does not remove the operator from the system until the end of the fiscal year. Instead, the operator becomes inactive, and will not be able to log on to the system. - Page 42 3 • Setting Up Operators This page was put in as a placeholder so you can print this entire guide in a duplex (double-sided) mode while keeping the proper page positions. SV62683 Rev. A...
-
Page 43: Setting Up And Working With Accounts
4 • Setting Up and Working with Accounts Account Options Account options allow you to set up accounting features and customize account settings on your mailing system. The account options are accessed by pressing Menu and selecting Accounts. You can then select your choice from the menu as shown below. - Page 44 4 • Setting Up and Working With Accounts Account Options Accounts Acct in Use: 123/1500 ◄ Job ID Required : OFF ◄ Job ID Auto Clear : OFF ◄ Accounting Password: OFF ◄ Report Account Options NOTE 1: The Connect PC Transfer Util menu option displays only when PC Transfer has been set up on the mailing system.
-
Page 45: Inview™ Accounting Structure
4 • Setting Up and Working with Accounts INVIEW™ Accounting Structure You can use INVIEW™ Accounting to track and account for postage used by departments or individuals within your organization. Your system is set up to accept a total of 74 characters for single level accounts, a total of 73 characters for an account and sub account, and a total of 72 characters for an account, sub account, and subsub account. - Page 46 4 • Setting Up and Working With Accounts INVIEW™ Accounting Structure • If you create subsub accounts for sub accounts, the subsub accounts become the end links and identify the departments that are charged for postage. Examples: Account - Engineering, Sub account - Software, Subsub account - Software Testing Account - Engineering, Sub account - Software, Subsub account - Software Design...
-
Page 47: Creating A New Account (Top Level)
4 • Setting Up and Working with Accounts Creating a New Account (Top Level) Follow the steps below to create a new account. 1. Press the Menu key. 2. Select Accounts. The Accounts screen displays. NOTE 1: If the supervisor password is enabled, you may need to enter it to gain access to all of the accounting functions NOTE 2:... - Page 48 4 • Setting Up and Working With Accounts Creating a New Account (Top Level) 6. Select Spd Code to change the speed code number assigned by the system. Select the appropriate speed code from the list provided. If necessary, use the green down arrow key to scroll through the list.
-
Page 49: Creating A Sub Account Or Subsub Account
4 • Setting Up and Working with Accounts Creating a Sub Account or SubSub Account 1. Press the Menu key. 2. Select Accounts. The Accounts screen displays. NOTE: If the supervisor password is enabled, you may need to enter it to gain access to all of the accounting functions. 3. -
Page 50: Viewing And Editing Accounts
4 • Setting Up and Working With Accounts Viewing and Editing Accounts You can view or edit the account name, password, speed code, description, spending limit, and add or manage subsub accounts and/or sub accounts for all of the accounts entered into INVIEW™ Accounting. -
Page 51: Clearing Account Data
4 • Setting Up and Working with Accounts Clearing Account Data You should clear data only at the end of a period or when the transaction log is full. While you do not need to clear data after each period, it is recommended that you print reports or transfer data to PC Transfer. -
Page 52: Deleting An Account
4 • Setting Up and Working With Accounts Deleting an Account When deleting accounts be advised that: • Deleting an account deletes all of the information for that account. • If there is any information connected to an account (for example, transaction data), the system will not allow you to delete the account until the end of the fiscal year. -
Page 53: Running Mail
3 • Setting Up Operators 5 • Running Mail Home Screen with INVIEW™ Accounting Activated Shown below are typical Home screen(s) when you first log onto your system and INVIEW™ Accounting is activated. These screens reflect the choices you've made for applying postage. Press the green down arrow key to access additional NOTE: postage settings (screens). -
Page 54: Selecting An Account To Track Postage
5 • Running Mail Selecting an Account to Track Postage You can select an account manually by scrolling through the entire list of accounts on your system. If you know part of the account name or the account code, you can use the account name search or the account code search to locate the account you want to use. -
Page 55: Applying Postage
(or fees). When you select a class, only those options available for that selection appear on the Home screen. Refer to the Chapter 3, Running Mail in the DM300c/DM400c/DM475 Operator Guide (SV62261) for more information about selecting a class or special service. -
Page 56: Entering A Batch Surcharge Or Discount
5 • Running Mail Entering a Batch Surcharge or Discount When you select the surcharge method from the Home screen, you are setting a batch surcharge, or a temporary surcharge that will be applied only to the current transaction being processed by the INVIEW™... - Page 57 5 • Running Mail Entering a Batch Surcharge or Discount 4. To add a surcharge or discount per piece: a. Select Per Piece. b. Type in the surcharge or discount amount you wish to use for each individual piece of mail. The minimum amount you can enter is -$1.
-
Page 58: Selecting Job Ids
5 • Running Mail Selecting a Job ID A Job ID field allows you to identify specific tasks within an account. Assigning a Job ID to a transaction allows you to track the amount of money you spend on postage, as well as how frequently you process a given transaction. -
Page 59: Transaction Options
3 • Setting Up Operators 6 • Transaction Options Transaction Options Transaction options allow you to create manual transactions and view transaction data on your mailing system. The transaction options are accessed by pressing Menu, selecting Accounts, pressing the green down arrow key and then selecting Transaction Options. -
Page 60: Printing The Transaction Log
6 • Transaction Options Printing the Transaction Log When you select the Print Transaction Log option on the Transaction Options menu the system directs you to the Transaction Log report. Refer to the Transaction Log Report section in Chapter 7 of this guide for more information. - Page 61 6 • Transaction Options Adding a Manual Transaction 6. Select Job ID to assign a Job ID to the manual transaction. Select Class to set the postage class. Follow the prompts to select the appropriate postage class. 8. If necessary, press the green down arrow key and select Postage to set the actual postage amount for a piece of mail.
-
Page 62: Transferring Transaction Data
6 • Transaction Options Transferring Transaction Data You can use the Transfer a Transaction option to correct transactions that have been processed against with the wrong account. 1. Press the Menu key. 2. Select Accounts. 3. Press the green down arrow key and select Transaction Options. -
Page 63: Clearing The Transaction Log
6 • Transaction Options Clearing the Transaction Log You can manually clear transaction data if you are receiving warnings that the transaction log is full, or near full. Refer to Setting the Condition for the Full Log Warning in this section for more information about transaction log warnings. -
Page 64: Setting The Condition For The Full Log Warning
6 • Transaction Options Setting the Condition for the Full Log Warning You can set the full log warning to notify you when the transaction log is filled to a certain percentage. The default setting is 80%, which means that when the transaction log is 80% full, you will receive a warning. -
Page 65: Defining The Action To Take When The Log Is Full
6 • Transaction Options Defining the Action to Take When the Log is Full The Full Log Action option allows you to select the action you want the system to take when the transaction log is full. You can choose to stop processing mail or to process mail and overwrite the transaction log. - Page 66 6 • Transaction Options This page was put in as a placeholder so you can print this entire guide in a duplex (double-sided) mode while keeping the proper page positions. SV62683 Rev. A...
-
Page 67: Accounting Reports Overview
3 • Setting Up Operators 7 • Reports Accounting Reports Overview With INVIEW™Accounting, you have the ability to create a broad range of accounting reports, many more than you would using the standard accounting reports on your mailing system. The INVIEW™ Accounting reports are accessed by pressing Menu and selecting Reports, and then Accounts. -
Page 68: Account Reporting Options
7 • Reports Account Reporting Options You can choose what type of accounts (active, inactive, and zero dol- lar value) to include in your accounting reports. 1. Press the Menu key. 2. Select Accounts. The Accounts screen displays. 3. Press the green down arrow key to scroll through the menu screens. -
Page 69: Transaction Log Report
7 • Reports Transactions Log Report The Transactions Log report lists the transaction ID, account, pieces, postage, surcharge, and total amount charged for each transaction during the time period specified on the report. 1. Press the Menu key 2. Select Reports. 3. -
Page 70: Account Summary
7 • Reports Account Summary The Account Summary Report lists a summary of pieces, post- age and surcharges for an account or all accounts that have been charged for the time period specified for the report. 1. Press the Menu key 2. -
Page 71: Quick Profile Report
7 • Reports Quick Profile Report The Quick Profile report lists the summary of pieces, postage and surcharges for all of the INVIEW™ Accounting accounts. 1. Press the Menu key 2. Select Reports. 3. Select Accounts. 4. Press the green down arrow key. 5. -
Page 72: Accounting Setup Report
7 • Reports Accounting Setup Report The Accounting Setup report lists the options and settings for the INVIEW™ Accounting. 1. Press the Menu key 2. Select Reports. 3. Select Accounts. 4. Press the green down arrow key. 5. Select Accounting Setup. The report is sent to the printer. Page: Date: 11 01 30... -
Page 73: Account List Report
7 • Reports Account List Report The Account List report lists the accounts that have been defined in the system with speed codes. The accounts are sorted by account name, then by sub account and subsub account. 1. Press the Menu key 2. -
Page 74: Account Speed Code List Report
7 • Reports Account Speed Code List Report The Account Speed Code List Report lists the accounts that have been defined in the system and the account status. The report is sorted by account speed code. Account speed codes refer to charge- able accounts. -
Page 75: Operator List
7 • Reports Operator List The Operator List report lists the operators on the accounting sys- tem. This report contains the operator name, ID, status (enabled/dis- abled), and whether or not report printing is enabled (Y/N). 1. Press the Menu key 2. -
Page 76: Custom Reports
7 • Reports Custom Reports You can design your own report formats using the Custom Reports feature. This tool allows you to select the report format you want (summary or detailed) as well as select the fields of information you want to appear on the report. -
Page 77: Creating A Custom Report
7 • Reports Custom Reports Custom Report Tips: When selecting data to include in the report: • OK displays next to the data name to indicate that it will be used in the report. • Each data selection you make will appear as a column in the report. -
Page 78: Selecting A Custom Report To Print
7 • Reports Custom Reports Creating a Custom Report (cont.) 7. Select the appropriate report format: Detailed - Transaction level data or • • Summary - Consolidated data. 8. Select the data you want to include in your report from the list. If necessary, press the green down arrow key to scroll through the menu screens. - Page 79 7 • Reports Custom Reports Selecting a Custom Report to Print (cont.) 5. Select Select a Report to Print. The Select Custom Report screen displays Select Custom Report ◄ Custom Report A ◄ Custom Report B ◄ Custom Report C ◄...
-
Page 80: Viewing And Editing A Custom Report
7 • Reports Custom Reports Selecting a Custom Report to Print (cont.) 9. If you have selected a summary report, the Period Range to Print screen displays. a. Select Start Date and then select the appropriate period start date from the list. b. -
Page 81: Deleting A Custom Report
7 • Reports Custom Reports Deleting a Custom Report Follow the steps below to delete a custom report from the system: 1. Press the Menu key 2. Select Reports. 3. Select Accounts. 4. Select Custom Reports. 5. Select Delete Report. 6. - Page 82 7 • Reports This page was put in as a placeholder so you can print this entire guide in a duplex (double-sided) mode while keeping the proper page positions. 7-16 SV62683 Rev. A...
-
Page 83: Closing Out Fiscal Periods
8 • Closing Out Fiscal Periods Overview When an accounting period ends (monthly, quarterly, annual, etc.), we recommend you print reports and/or transfer your data. NOTE 1: The system does not display a message at the end of the period, only at the end of a year. NOTE 2: Before sure to print reports and/or transfer data to PC Transfer before clearing any data. -
Page 84: Closing Out A Fiscal Year
8 • Closing Out Fiscal Periods Closing Out a Fiscal Year Standard Accounting Periods At the end of the fiscal year, the following message will appear on the bottom of the Home screen: Acct Period Ended. Accounting data must be cleared and the period must be reset before you can con- tinue processing mail. -
Page 85: Custom Accounting Periods
8 • Closing Out Fiscal Periods Closing Out a Fiscal Year Custom Accounting Periods At the end of each custom accounting period, the following message will appear on the bottom of the Home screen: Acct Period Ended. You must clear the account data, extend the end date, or both before you can continue processing mail. - Page 86 8 • Closing Out Fiscal Periods Closing Out a Fiscal Year Custom Accounting Periods (cont.) 6. Select Account. The End of Accounting Period screen displays. 7. If you want to clear account data, select Clear All Data. The Confirm Clear Account Data screen displays. 8.
-
Page 87: Troubleshooting
Review the problems listed in both chapters. If you are unable to find a solution, refer to the Pitney Bowes Contact List at the front of this guide for the phone number of the Help Desk and the web site addresses. -
Page 88: Troubleshooting Inview™Accounting
9 • Troubleshooting Troubleshooting INVIEW Accounting ™ Error Message/ Take This Action Warning External memory Check the USB and memory device to en- not responding. sure they are properly connected. Please check the • Select Try to Reconnect if you want USB and memory to recheck the device connections. - Page 89 9 • Troubleshooting Troubleshooting INVIEW Accounting ™ Error Message/ Take This Action Warning Format Your To format your flash drive: Flash Drive: While 1. Attach the flash drive to an available troubleshooting USB port on the machine. an issue, a Pitney NOTE: Connect it directly to a port Bowes Customer...
- Page 90 9 • Troubleshooting This page was put in as a placeholder so you can print this entire guide in a duplex (double-sided) mode while keeping the proper page positions. SV62683 Rev. A...
-
Page 91: Index
Index Standard Accounting Periods 4-16 Accounting.See Accounts Structure 4-4 Accounting, Overview on Mailing Turning Surcharges On and Off System 1-2 4-22 Accounting Period, Setting Up Viewing Accounts 4-11 Starting & Ending 4-14 Account Speed Code List Report Accounting Reports.See Reports 7-14 Accounting Reports Option of Account Summary Report 7-10... - Page 92 Index Job ID Quick Profile Report 7-11 autoclearing at end of transaction 4-24 requiring to run mail 4-23 Reports selecting 5-7 Accounting Reports Overview Accounting Setup Report 7-12 Log Full Warning, Transactions Account List Report 7-13 Log 6-7 Account Speed Code List Report 7-14 Account Summary 7-10 Creating a Custom Report 7-4...
- Page 93 Index Station ID, Setting Up 2-3 Supervisor Password, Setting Up 2-2 Surcharges per piece 4-20 per transaction 4-20 per transaction percentage 4-20 Tracking postage using an account 5-3 Transaction Options Adding a Manual Transaction Clearing the Transaction Log Defining the Action to Take When the Log is Full 6-8 Overview 6-2 Printing the Transaction Log...
- Page 94 Index This page was put in as a placeholder so you can print this entire guide in a duplex (double-sided) mode while keeping the proper page positions. SV62683 Rev. A...
- Page 95 5500 Explorer Drive Mississauga, Ontario L4W 5C7 www.pitneybowes.ca For Service or Supplies PB Form SV62683 Rev. A 6/11 © 2011 Pitney Bowes Inc. All Rights Reserved *SV62683RevA*...
Need help?
Do you have a question about the DM300c and is the answer not in the manual?
Questions and answers