Pitney Bowes DM300c series Operator's Manual
Digital mailing system
Hide thumbs
Also See for DM300c series:
- Service manual (227 pages) ,
- Operator's manual (224 pages) ,
- Quick reference manual (9 pages)

Related Manuals for Pitney Bowes DM300c series


Summary of Contents for Pitney Bowes DM300c series
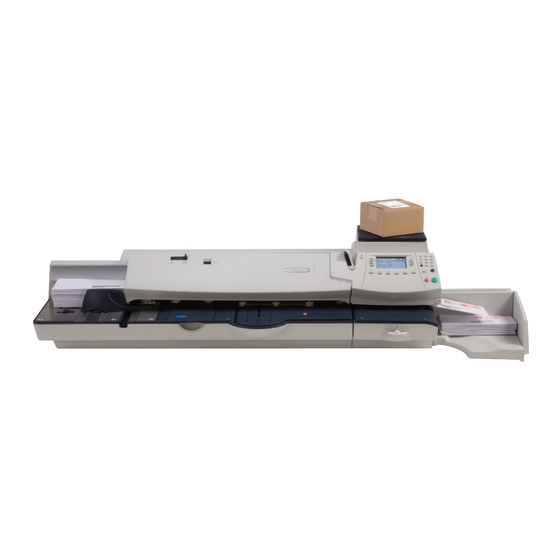
- Page 1 Digital Mailing System DM300c, DM400c & DM475 series Operator Guide UK and ROI Version...
-
Page 3: Table Of Contents
Table of Contents Chapter 1 Introduction About Your Digital Mailing System ........1-2 About IntelliLink™ ..............1-3 Postal Requirements ............1-3 Safety ................1-4 Specifications ..............1-6 Chapter 2 Getting to Know Your Machine Machine Features–Front DM300c ........2-2 Machine Features–Front DM400c ........2-4 Machine Features–Front DM475 ........2-6 Control Panel ..............2-8 Machine Features (DM300c/400c)–Rear ......2-10 Machine Features (DM475)–Rear ........ - Page 4 Table of Contents Automatically Feeding Envelopes DM400c/DM475 . 3-15 Printing Tapes ............3-16 WOW® Mode ............3-18 Printing Options ...............3-19 Seal the Envelope Only ........... 3-19 Printing Date & Time or Envelope Messaging on Incoming Mail ............3-20 Permit Printing ............3-20 Text Messages ..............3-21 What is a Text Message? .........
- Page 5 Table of Contents Preparing to Refill with Postage ........5-3 Phone or LAN Connection? ..........5-3 Connecting Your System to a LAN ........5-4 Connecting Your System to an Analogue Phone Line ..5-4 Checking Funds (Postage) Available in your System ..5-4 Checking Your Postage by Phone® Account Balance ..5-5 Refill Postage ..............5-5 Secure Refill ..............5-6 Printing a Funds (Postage) Report ........5-7...
- Page 6 Table of Contents Setting Postage Limits (Funds Warnings) ....6-8 Setting the High Value Warning ......6-8 Setting the Low Funds Warning ......6-8 Changes to the Lock Code & Password ....6-9 Setting the Lock Code ......... 6-9 Disabling the Lock Code ........6-9 Changing the Lock Code ........
- Page 7 Table of Contents Chapter 7 Maintenance Replacing the Ink Cartridge/Printhead .......7-2 Filling the Moistener (DM400c/DM475) ......7-6 Filling the Moistener (DM300c Only) .........7-7 Maintaining the Moistener (DM400c/DM475) ....7-8 Maintaining the Moistener .......... 7-8 Cleaning the Stripper Blade & Brush Assembly ............7-8 Cleaning the Shield &...
- Page 8 Table of Contents Chapter 10 Reports Overview of Reports ............10-2 Last 5 Refills Report ............10-2 Funds Report ..............10-2 Single Account Report .............10-3 Multi-Account Summary Report ........10-3 Account List Report ............10-4 Upload Summary Report ..........10-4 System Setup Report ............10-4 Error Report ..............10-5 Configuration Report ............10-5 Permit Report ..............10-6 Software Version Report ..........10-6...
- Page 9 Table of Contents Logging Off from INVIEW/ Budget Manager ....12-5 If your system is setup for Operators ....... 12-5 Importing and Backing Up Data Using PC Transfer Utility ............12-6 Uploading Budget Manager/ INVIEW data to Total Meter Reporting ...............12-6 External Memory .............12-7 Setting a Station ID ............12-7 Setting Up the Owner (Budget Manager Only) ....12-8 Setting Up Job IDs/ Job ID 1 and 2 .........12-8...
- Page 10 Table of Contents Entering Manual Transactions ........12-32 Transferring Transaction Data ........12-33 Clearing the Transaction Log .........12-34 Setting the Condition for the Log Full Warning ....12-35 Defining the Log Full Action ...........12-36 INVIEW/ Budget Manager Accounting Reports .....12-37 Printing Reports ............. 12-37 Custom Reports .............
- Page 11 1 • Introduction DM300c DM400c DM475 This chapter lists the key features of your mailing system, tells you what's in this book, and presents important safety information. About Your Digital Mailing System......1-2 About IntelliLink™..........1-3 Postal Requirements ..........1-3 Safety ..............1-4 Specifications ............1-6 SDC755D...
-
Page 12: About Your Digital Mailing System
1 • Introduction About Your Digital Mailing System Your digital mailing system's advanced features include: • Space-saving, compact footprint. • Large, easy-to-read display shows system status and prompts you through setup operations. • Semi-automatic and automatic envelope feeding, transport, and auto-eject. -
Page 13: About Intellilink
1 • Introduction About IntelliLink™ You will require a network connection (LAN) or an analogue phone line in order for you to access services and information from IntelliLink™. Your mailing system takes full advantage of IntelliLink™, your digital gateway to an entire suite of services and information that can move your mail more efficiently and enhance your business performance. -
Page 14: Safety
Safety Follow the normal safety precautions for all office equipment: • Use only Pitney Bowes approved supplies, in particular aerosol dusters. Improper storage and use of aerosol dusters or flammable aerosol dusters can cause an explosive-like condition that could result in personal injury and/or property damage. - Page 15 1 • Introduction • Place the unit in an accessible location to allow for proper venting of the equipment and to facilitate servicing. • The power cord wall plug is the primary means of disconnecting the machine from the AC supply. •...
-
Page 16: Specifications
1 • Introduction Specifications Equipment DM300c DM400c DM475 Size (including 315mm H x 315mm H x 315mm H x Integrated 370mm W x 840mm W x 1296mm W x Weight Platform) 435mm D 500mm D 572mm D Weight 10.4 kg approx 17.6 kg approx 30.4 kg approx Sound Pressure... -
Page 17: Meter Specifications
Up to 8 digits (nonresettable) (nonresettable) All Pitney Bowes postage meters are manufactured in accordance with An Post's and Royal Mail's Franking Machine Standards. This includes ascending register security, which will lock the ascending registers when the first frank takes the most significant digit of the ascending register to 9. - Page 18 1 • Introduction Material Specifications Envelope Size (see Figure Minimum 89 x 127mm Below) Maximum 330 x 381mm (Non WOW) 330 x 356mm (WOW Mode DM475) Envelope Flap Depth 22mm Min - 72mm Max Envelope Thickness Minimum 0.20mm Maximum (DM300c) 9.5mm Maximum (DM400c/DM475) 8mm Stack Height for Mail 60mm...
- Page 19 2 • Getting to Know Your System DM300c DM400c DM475 In this chapter you'll find out where everything is and what it does. Machine Features–Front DM300c ......2-2 Machine Features–Front DM400c ......2-4 Machine Features–Front DM475 ......2-6 Control Panel ............2-8 Machine Features (DM300c/400c)–Rear ...2-10 Machine Features (DM475)–Rear ......
-
Page 20: Machine Features-Front Dm300C
2 • Getting to Know Your System Machine Features- Front DM300c Shown with Weighing Platform SDC755D... - Page 21 2 • Getting to Know Your System Item Part Description Control allows you to enter and setup information on Panel your machine. Tape Feeder holds and feeds tapes for printing. lights green when your system is on; lights orange when your system is in "sleep" mode.
-
Page 22: Machine Features-Front Dm400C
2 • Getting to Know Your System Machine Features- Front DM400c SDC755D... - Page 23 2 • Getting to Know Your System Item Part Description Lift to gain access to the feed and transport Feeder mechanisms. Cover Seal/No Seal Selects whether your envelopes are Lever automatically sealed or not. lights green when your system is on; lights orange when your system is in "sleep"...
-
Page 24: Machine Features-Front Dm475
2 • Getting to Know Your System Machine Features- Front DM475 (shown with optional weighing platform) (shown with cover open) Item Part Description Feeder/WOW Open this cover to gain access to the WOW deck Cover and two clearance levers (items #16 and #17) Seal/No Seal Allows you to turn envelope sealing on and off Lever... - Page 25 2 • Getting to Know Your System Parts of the Machine - DM475 (cont'd) Ink Waste Tank Collects ink waste (in tray under printer section) Stacker Tray Allows you store the Quick Reference Guide, CD, Storage Slot etc. for easy access. Stacker Tray Allows the neat stacking of finished mail pieces Allows you to enter and set up information on...
-
Page 26: Control Panel
2 • Getting to Know Your System Control Panel 1. Tape Key—Press to print tape(s). 2. Lock/Power Key—Dual function. Prevents unauthorised use of your system. If lock feature is setup and machine is in "sleep mode"; entering your four-digit password unlocks (awakens) the machine. - Page 27 2 • Getting to Know Your System 8. Start/Stop Keys—Allow you to start or stop feeding tape or envelopes. 9. Feature Keys—allows you quick access to the most common features on the system. Pressing a Feature key takes you immediately to the top-level screen of the feature for that key. Home—takes you back to the Home (date/postage) screen.
-
Page 28: Machine Features (Dm300C/400C)-Rear
2 • Getting to Know Your System Machine Features (DM300c/400c)- Rear Machine Features—Rear 1. Phone Connector—allows you to connect an analogue phone line, such as one a Fax machine uses. The connector accepts a standard phone plug (supplied). When your system is connected to an analogue phone line, you can add postage any time by pressing Refill Postage and following the prompts. -
Page 29: Machine Features (Dm475)-Rear
2 • Getting to Know Your System Machine Features (DM475)- Rear Machine Features—Rear 1. Phone Connector—allows you to connect an analogue phone line, such as one a Fax machine uses. The connector accepts a standard phone plug (supplied). When your system is connected to an analogue phone line, you can add postage any time by pressing Refill Postage and following the prompts. -
Page 30: Moving The Dm300C/400C
• Cause serious damage to the machine. • Cause the WOW module to go out of calibration. • Void any service warranties. Contact Pitney Bowes to arrange a Service visit for moving the machine (additional charges may apply). 2-12 SDC755D... - Page 31 3 • Running Mail DM300c DM400c DM475 This chapter explains how to run mail, your printing options, and using the weighing platform. Before You Begin ..........3-3 Checklist ...............3-3 Home Screen............3-3 Selecting Postage ..........3-4 Using the Weighing Platform (Scale) .....3-5 Differential Weighing ........3-6 Entering Weight Manually ......3-7 Keying in the Postage Directly .......3-7 WOW®...
- Page 32 3 • Running Mail Checking and Clearing the Batch Count ...3-12 Checking the Batch Count ......3-12 Printing a Record of the Batch Count ..3-12 Clearing the Batch Count ......3-13 Printing Mail ............3-14 Printing Options ..........3-19 Seal the Envelope Only .......3-19 Printing Date &...
-
Page 33: Before You Begin
3 • Running Mail Before You Begin Before you run mail on your system, review the Checklist, Home Screen, and Selecting Postage sections below and on the next page. Checklist • Make sure your mailing system is plugged into a properly grounded power receptacle. -
Page 34: Selecting Postage
3 • Running Mail Selecting Postage There are several ways you can select postage using your mailing system: • Place the mail piece on the weighing platform and have the system calculate the weight and then postage amount using the system's internal rating feature. -
Page 35: Using The Weighing Platform (Scale)
3 • Running Mail Using the Weighing Platform (Scale) ‘Standard’ Operation 1. Make sure scale is activated (you will see “scale weight” and 0g on the display). See Chapter 6, System Options to turn your scale on if necessary. 2. Place mail piece on scale. The weight of the mail piece will appear on the display. -
Page 36: Differential Weighing
3 • Running Mail Differential Weighing Differential weighing is an option that is available on certain models in the DM300c, DM400c and DM475 series. It allows you to process mixed mail using the weighing platform (scale). Put a number of pieces of mail onto the weighing platform. The system calculates the postage for each piece of mail you remove from the weighing platform automatically. -
Page 37: Entering Weight Manually
3 • Running Mail Entering Weight Manually This procedure is used when you already know the weight of a mail piece and you do not wish to use the weighing platform. 1. Press Weigh/Rate. 2. Select “Enter Weight Manually”. 3. Select “Enter Weight in grams/ kilograms” to switch between entering the weight in grammes or kilogrammes, as required. -
Page 38: Proportion (Dm475)
3 • Running Mail WOW® (Weigh-on-the-Way) and Pricing in Proportion (DM475) When enabled, the Weigh-on-the Way (WOW ) feature increases ® your productivity because you don't have to presort the mail by weight before loading the pieces onto the machine. The DM475 has a special scale built into its deck that can weigh mail pieces on-the-fly (that is, as they pass along the deck) so the system can determine the correct postage of each item. - Page 39 3 • Running Mail Miscellaneous Payments (UK Only) Occasionally, your postal authority may need an additional payment (underpayment), etc). To produce a Frank for payment, select “Class”, then select “Misc. Payment”. You can now enter the value you require, confirm the amount and take a Frank in the normal way. Parcelforce FrankPay (UK Only) To enter a value for Parcelforce FrankPay, select “Class”, then “Royal Mail”.
-
Page 40: Selecting An Account To Track Postage
3 • Running Mail Selecting an Account to Track Postage You can select an account to track postage if the departmental accounting feature is available on your machine and is turned on. Departmental accounting may not be available on some models. See Chapter 11, Departmental Accounts, for information on setting up this feature. -
Page 41: Advancing The Date On The Machine
3 • Running Mail Advancing the Date on the Machine The DM300c/DM400c/DM475 Series will automatically advance the date printed at midnight. However, you may want to advance the date printed if it is after normal business hours and you want to prepare outgoing mail for a future day’s mailing. -
Page 42: Checking And Clearing The Batch Count
3 • Running Mail Checking and Clearing the Batch Count You can view the accumulated postage value and piece count information from the batch register and print this for your records. You can also clear or reset the batch count to zero. Checking the Batch Count 1. -
Page 43: Clearing The Batch Count
3 • Running Mail Clearing the Batch Count CAUTION: Make sure you really want to clear the batch register; once you do, you can't restore the data. 1. Press Funds. 2. Press Options and select "Clear batch value". 3. At the "Confirm Clear" prompt, press the "Yes" key to confirm. The batch value and batch piece registers return to zero and the machine returns to the funds screen. -
Page 44: Printing Mail
3 • Running Mail Printing Mail NOTE: To apply postage to large items of mail and parcels that can't be run through the machine, use tape as described on page 3-16. Select the postage required, account (if accounting is on), Envelope Messaging and batch function as described on pages 3-4 to 3-13. -
Page 45: Automatically Feeding Envelopes Dm400C/Dm475
3 • Running Mail Automatically Feeding Envelopes (DM400c/DM475) Start 1. Load envelopes into button the feeder face up with their top edges against the registration wall. 2. Slide the side guide up to the envelopes. NOTE: Allow at least 1.6mm clearance so that envelope feed is not restricted. -
Page 46: Printing Tapes
3 • Running Mail Printing Tapes Use tapes to apply postage to large items of mail and parcels that can not be run through the machine. Printing a Single Tape 1. Push the tape lever to the right and drop tapes down into the slot. - Page 47 3 • Running Mail Printing Multiple Tapes NOTE: Ensure the system is configured to print multiple tapes. See Chapter 6, System Options, Configuring the Tape Button. • If the system is ready to print postage and on the Home screen, simply type in the number of tapes you wish to print and press the Tape button, OR •...
-
Page 48: Wow Mode
3 • Running Mail WOW Mode Press the Weigh/ Rate Key. 1. Select WOW- Weigh on the Way. Weighs each piece, calculates rate before applying postage. Select W1P- Weigh First Piece The first piece is weighed and the rate calculated, all the following pieces are priced at the same rate. -
Page 49: Printing Options
3 • Running Mail Printing Options There are various options available when processing mail through the system. You can: • Seal the envelope only (No Printing) • Print the date and time or Envelope Messaging on incoming mail. • Add a Text Message. NOTE: These may not be available on your model. -
Page 50: Incoming Mail
3 • Running Mail Printing the Date and Time or Envelope Messaging on Incoming Mail You can set up your mailing system to print the date and time, a Graphic Ad or Text Message on incoming pieces of mail. This feature is only available on certain models in the DM300c/DM400c/DM475 series. -
Page 51: Text Messages
3 • Running Mail Text Messages Text Messages are only available on certain models in the DM300c/ DM400c/DM475 series. What is a Text Message? A Text Message is a user defined message typed in via the machine’s keyboard that can be printed on your digital meter stamp. It can be up to 5 lines, each of 20 alpha/numeric characters and prints in a position to the left of the meter stamp. -
Page 52: Creating A Text Message
3 • Running Mail Creating a Text Message To create the first Text Message: 1. From the Home Screen, select "Text Msg". 2. Select "Create New Text Message". 3. Accept the warning regarding the use of Text Messages. 4. Enter the name you want to call this Text Message, then select "OK". -
Page 53: Edit A Text Message
3 • Running Mail Edit a Text Message 1. Press Options, then Page Down. 2. Select "Text Messages". 3. Select "View/Edit Messages". The display lists all messages created on your system. 4. Press Page Down to see additional choices (if available). 5. - Page 54 3 • Running Mail 3-24 SDC755D...
- Page 55 4 • Normal and Custom Presets DM300c DM400c DM475 This chapter discusses the Normal and Custom Presets feature available on your machine. What is a Preset? ..........4-2 Normal Preset ............4-2 Selecting the Normal Preset ......4-3 Viewing the Normal Preset......4-3 Defining New Values for the Normal Preset ...4-3 Custom Presets ...........4-4 Selecting a Custom Preset ......4-4 Viewing a Custom Preset .......4-4...
-
Page 56: What Is A Preset
4 • Normal and Custom Presets What is a Preset? A preset is a setting you can call up at the touch of a button that holds pre-defined values such as Class of Mail, Envelope Messaging, account number (not normal preset), postage amount (ROI only), etc. -
Page 57: Selecting The Normal Preset
4 • Normal and Custom Presets Selecting the Normal Preset The Normal Preset can be selected by simply pressing Normal Preset. The system will always set itself to the Normal Preset values when power is turned on. Viewing the Normal Preset 1. -
Page 58: Custom Presets
4 • Normal and Custom Presets Custom Presets Your system can store up to 10 custom presets. Selecting a Custom Preset 1. Press Custom Presets. 2. The display lists all presets created on your system. Press Page Down to see additional choices (if available). 3. -
Page 59: Defining A New Custom Preset
4 • Normal and Custom Presets Defining a New Custom Preset To define new values or create a new Custom Preset: 1. Establish the proper settings on the machine (such as No Graphic Ad, Class of Mail, a specific departmental account, etc.) that you want the preset to contain. -
Page 60: Editing A Custom Preset Name
4 • Normal and Custom Presets Editing a Custom Preset Name You may change the name of a preset if you want. 1. Press Options. 2. Press Page Down and select "Preset Options". 3. Select "Edit Preset Name" and then Select the preset you want to edit. -
Page 61: Deleting A Custom Preset
4 • Normal and Custom Presets Deleting a Custom Preset Deleting a preset removes all the values assigned to it and removes it from the Presets Menu. CAUTION! Once you delete a preset, its values are gone. You can't recover a deleted preset. 1. - Page 62 4 • Normal and Custom Presets SDC755D...
- Page 63 5 • Adding Postage/Connecting to Data Centre DM300c DM400c DM475 This chapter explains how to add postage to your system using the Postage by Phone Service and ® connecting to the Data Centre. About the Postage by Phone System ....5-3 How does the system operate? ....5-3 When can I refill my meter or check my account balance? ..........5-3...
- Page 64 5 • Adding Postage/Connecting to Data Centre Connecting to the Data Centre (other than for Postage)........5-10 Check for Updates ........5-10 SDC755D...
-
Page 65: About The Postage By Phone System
LAN or an analogue phone line. Phone or LAN Connection? Your Mailing System can connect to Pitney Bowes systems via an Ethernet or LAN port instead of an analogue modem. To do this, you will need the DM IntelliLink™ Constant Connection Kit. -
Page 66: Connecting Your System To A Lan
5 • Adding Postage/Connecting to Data Centre Connecting Your System to a LAN Details of network requirements, connection and configuration of your Mailing System are given in the instructions supplied with the Constant Connection Kit. Connecting Your System to an Analogue Phone Line Plug the telephone line (supplied) into the connector on the back of the machine (see the figure below). -
Page 67: Checking Your Postage By Phone® Account Balance
5 • Adding Postage/Connecting to Data Centre Checking Your Postage by Phone® Account Balance You can check your Postage by Phone® account balance at any time, as long as your system is connected to a LAN or an analogue phone line. 1. -
Page 68: Secure Refill
5 • Adding Postage/Connecting to Data Centre EITHER Press "Print Receipt" and follow the prompts. Select "Continue" to return to Home Screen without printing a receipt. Secure Refill It is possible to set the machine so that only a supervisor may reset postage on the machine. -
Page 69: Printing A Funds (Postage) Report
5 • Adding Postage/Connecting to Data Centre Printing a Funds (Postage) Report A funds report allows you to print a record of how much postage has been used and how much is remaining in the machine. 1. Press Funds. 2. Press Options and select "Print Funds Report" 3. -
Page 70: System Update
5 • Adding Postage/Connecting to Data Centre System Update If there has been a feature enhancement or other non-essential update to the software that runs your machine, you will be notified that a system update is available. Advertisements If there are new advertisements that you ordered available, you will be notified that you can perform a download to obtain these. -
Page 71: Postal Rate Update (Mandatory)
5 • Adding Postage/Connecting to Data Centre To satisfy the inspection requirement, simply: • Connect to the Data Centre as described in the Checking your Postage by Phone account balance. • Add postage (see Add Postage earlier in chapter for procedure). NOTE: You can't use this option for Inspection Required. -
Page 72: Connecting To The Data Centre (Other Than For Postage)
5 • Adding Postage/Connecting to Data Centre Connecting to the Data Centre (other than for Postage) If you need to connect to the Data Centre for purposes other than adding or checking postage, follow these steps. NOTE: Machine must be connected to a LAN or an analogue phone line. - Page 73 6 • System Options DM300c DM400c DM475 This chapter presents system options you can setup or modify, such as setting time, date, passwords, warnings, etc. System Options Introduction ........6-3 Basic Options ............6-4 Advancing the Date/Returning to Today’s Date ..........6-4 Changing the Display Language ....6-4 Adjusting the Contrast of the Display .....6-4 Configuring the Tape Button......6-4 Setting the Time, Timeouts &...
- Page 74 6 • System Options Correct Drift............ Setting Daylight Savings Time......Setting Wait for Envelope (DM400c/DM475) ..6-7 Setting Postage Limits (Funds Warning) ..6-8 Setting the High Value Warning ....6-8 Setting the Low Funds Warning ....6-8 Changes to the Lock Code & Password ..6-9 Setting the Lock Code .......6-9 Disabling the Lock Code ......6-9 Changing the Lock Code ......6-10...
-
Page 75: System Options Introduction
6 • System Options System Options Introduction System options allow you to customise the machine settings for the way you run your mail and add security to those features that are sensitive to your organisation. Because of the many options available, the options are categorised into "Basic", “Scale”, “Data Centre”... -
Page 76: Basic Options
6 • System Options Basic Options Advancing the Date on the Machine/ Returning to Today’s Date See Page 3-11 in "Running Mail". Changing the Display Language This option only appears if more than one language is available. 1. Press Options. 2. -
Page 77: Setting The Time, Timeouts & Auto Date Advance
6 • System Options Setting the Time, Timeouts and Auto Date Advance You can change the system time, set for daylight savings time, change the time at which your system advances the date to the next day, and set the amount of time your system can remain inactive before reverting to the normal preset values. -
Page 78: Setting Auto Date Advance
6 • System Options Setting Auto Date Advance Your system automatically advances the date at a time you specify. The date advance time is factory set to 00:00 (midnight). If your mail is picked up at a certain time each day, you can set the system to advance the date just after the mail pickup time. -
Page 79: Setting Daylight Savings Time
6 • System Options Setting Daylight Savings Time When Daylight Savings Time is enabled, the machine's internal clock is advanced by 1 hour. Daylight Savings Time is also known as 'Summer Time'. 1. Press Options. 2. Select "Setup". 3. Select "Time and Timeouts". 4. -
Page 80: Setting Postage Limits (Funds Warnings)
6 • System Options Setting Postage Limits (Funds Warnings) You can specify values so that when your postage funds drop below a certain level, or if you try to enter a high postage value for a piece of mail, the system displays a warning. Setting the High Value Warning (ROI Only) You can have the system warn you when you manually key in a postage value that is higher than a maximum amount that you... -
Page 81: Changes To The Lock Code & Password
6 • System Options Changes to the Lock Code and Password Setting the Lock Code The Lock Code prevents unauthorised access to your mailing system after the machine has entered sleep mode or it is in a "soft" power- down mode (by pressing the Lock/Power key on upper right corner of the control panel). -
Page 82: Changing The Lock Code
6 • System Options Changing the Lock Code You can change the Lock Code if it has been enabled. 1. Press Options. 2. Select "Setup". 3. Select "LockCode/Password". 4. Select "Change Lock Code". 5. At the prompt, type in the current lock code (4 digits) and select "OK". -
Page 83: Setting Scale Options
6 • System Options Setting Scale Options There are several options you can set with your scale such as zeroing the weight on the scale, turning the scale on/off, WOW operation and selecting weight change options. Zero the Scale 1. Press Weigh/Rate. 2. -
Page 84: Setting Weight Change Options
6 • System Options Setting Weight Change Options You can set how the scale reacts regarding the class of service when the weight changes. 1. Press Weigh/Rate. 2. Press Page Down. 3. Select "Change/Retain Class". 4. Select “Retain Class” when weight changes. The current condition is displayed on the screen. -
Page 85: Connecting To The Data Centre
6 • System Options Connecting to the Data Centre You can modify the phone connection settings on your machine, from basic settings (dial prefix, etc.) to advanced settings such as user ID, password, and server IP address. The Data Centre menu choices are: •... -
Page 86: Phone Settings
6 • System Options Phone Settings This menu option allows you to modify the phone connection settings on your machine (dial prefix, etc.) Selecting Tone/Pulse Use this to tell the system whether your exchange requires tone or pulse dialling. NOTE: In the UK and ROI almost all exchanges are now equipped to handle tone dialling. -
Page 87: Change Postage By Phone (Pbp) Number
6 • System Options Change Postage by Phone (PbP) Number Use this if you need to change the number for Postage by Phone but only if you are directed to by a representative of your machine supplier 1. Press Options. 2. -
Page 88: Change Modem Parameters
6 • System Options Change Modem Parameters Use this if you need to change the modem settings used to dial into the Data Centre but only if you are directed to by a representative of your machine supplier. 1. Press Options. 2. -
Page 89: Distributor Settings
6 • System Options Distributor Settings This option allows you to modify the phone connection parameters that your machine uses to call to the Data Centre. A brief description of each parameter is provided on the next page. CAUTION: Do not change these parameters unless directed to do so by a representative of your machine supplier. -
Page 90: Parameter Descriptions
6 • System Options Parameter Descriptions Account and User ID This is the account number and the user ID that your system uses to dial into the internet service provider (ISP) that allows you to connect to the Data Centre. Global Password This is the password your system uses to dial into your internet service provider. -
Page 91: Network Settings
6 • System Options Network Settings This function is used to set the internet configuration required, if the system is being connected via a LAN. Full details of how to configure these settings are given in the instruction booklet supplied with the Constant Connection Kit. Firewall Settings This function gives control of some firewall settings that may be required if the system is being connected via a LAN. -
Page 92: Advanced Options
6 • System Options Advanced Options Advanced options allow you access to features that are used very infrequently such as meter withdrawal, etc. The Advanced Feature menu includes: • Run Install Mode • Meter Withdrawal (for withdrawing postage funds) Run Install Mode This function can be used to reset machine functions. - Page 93 7 • Maintenance DM300c DM400c DM475 This chapter explains how to maintain your mailing system. Replacing the Ink Cartridge/Printhead....7-2 Filling the Moistener (DM400c/ DM475) ....7-6 Filling the Moistener (DM300c Only) ....7-7 Maintaining the Moistener (DM400c/ DM475) ..7-8 Maintaining the Moistener ......7-8 Cleaning the Stripper Blade &...
-
Page 94: Replacing The Ink Cartridge/Printhead
7 • Maintenance Replacing the Ink Cartridge/Printhead IMPORTANT INFORMATION Pitney Bowes recommends that you only use genuine replacement ink cartridges that are available from Pitney Bowes. If alternative cartridges or refills are obtained, the ink used must be approved by your Postal Authority. - Page 95 7 • Maintenance Replacing the Ink Cartridge/Printhead (continued) Ink Cartridge 3. When prompted to "Install Now", Guard unlatch and flip open the ink cartridge guard. 4. Remove the old ink cartridge. NOTE: If you are NOT changing the printhead, skip to Step 6.
- Page 96 7 • Maintenance Replacing the Ink Cartridge/Printhead (continued) 5B. While squeezing, lift and tilt to the right the printhead. The printhead should come up out of the machine. 5C. Remove the protective tape from the bottom of the new printhead. 5D.
- Page 97 7 • Maintenance Replacing the Ink Cartridge/Printhead (continued) 6. Remove the tape from the bottom of the new ink cartridge. 7. Lower the ink cartridge into the cavity. The ridges on either side of the cartridge will slide into the grooves. Ridge Ridge Groove...
-
Page 98: Filling The Moistener (Dm400C/Dm475)
7 • Maintenance Filling the Moistener (DM400c/ DM475) 1. Check the moistener tank to see how much sealing solution is left. Model Shown DM400c Feeder Cover Check Level Here (DM400c) Check Level Here (DM475) 2. Open the feeder cover and remove the moistener bottle. -
Page 99: Filling The Moistener (Dm300C Only)
7 • Maintenance Filling the Moistener (DM300c Only) 1. Check the moistener tank to see how much sealing solution is left. Fill Here Check Level Here 2. Add enough sealing solution or water to bring the sealant level up to the bottom of the fill hole. We recommend sealing solution because it helps keep your moistener clean and improves sealing efficiency. -
Page 100: Maintaining The Moistener (Dm400C/Dm475)
7 • Maintenance Maintaining the Moistener (DM400c/ DM475) Maintaining the Moistener If you notice incomplete or poor sealing and the moistener tank is full, you may need to clean the moistener brush or wick. If the seal quality doesn’t improve after cleaning you can replace the stripper blade and brush assembly or wick as needed. -
Page 101: Cleaning The Shield & Wick
7 • Maintenance Maintaining the Moistener (DM400c/DM475) Cont. Cleaning the Shield and Wick Open the feeder cover and remove the moistener bottle. Leave the moistener bottle out until instructed to replace it. Remove the stripper blade and brush assembly. Pull the moistener tank straight out towards you. -
Page 102: Maintaining The Moistener (Dm300C Only)
7 • Maintenance Maintaining the Moistener (DM300c Only) If you notice incomplete or poor sealing and the moistener tank is full, you may need to clean the moistener brush or wick. If seal quality doesn't improve after cleaning, you can replace the moistener brush or wick as needed. - Page 103 7 • Maintenance Removing the Moistener Brush (continued) 4. Clean the brush in plain water, and rinse thoroughly. 5. Position the brush as shown so its bottom edge is under the mounting tabs. 6. Slide the brush back towards the rear of the moistener.
-
Page 104: Removing The Shield And Wick
7 • Maintenance Removing the Shield and Wick 1. Remove the moistener Shield as described on page 7-10. 2. Pull up and remove Wick the shield and wick from the moistener tank. 3. Separate wick from the shield. Clean the wick in plain water, and rinse thoroughly. -
Page 105: Running Print Tests
7 • Maintenance Running Print Tests The system has several tests that let you check print performance and help you determine printing problems: Test Print The test print allows you to print a test pattern to see if the printhead is functioning properly and has no blocked printing jets. -
Page 106: Cleaning The Printer Nozzles (Purging)
7 • Maintenance Cleaning the Printer Nozzles (Purging) This function allows you to purge the printheads in an effort to fix a printing problem. IMPORTANT: Always ensure that your prints are clear and complete. Poor prints may be rejected by your Postal Authority. - Page 107 7 • Maintenance 7. The system executes a purge. This may take a few moments. When finished, the Maintenance Complete menu displays. • Select "Print Test Pattern" to print a test pattern. See printing a Test Pattern in this chapter. •...
- Page 108 7 • Maintenance 7-16 SDC755D...
- Page 109 8 • Troubleshooting DM300c DM400c DM475 This chapter explains how to troubleshoot your mailing system. Getting Help............8-2 Power Problems (nothing displays) ......8-2 Error Messages ............8-3 Printing Problems ..........8-4 Feeding Problems ..........8-5 Display Problems..........8-9 Problems with Postage Refill ........8-9 Moistening Problems ..........8-10 Viewing System Configuration Levels ....8-10 SDC755D...
-
Page 110: Getting Help
8 • Troubleshooting Getting Help There may be times when you need help to solve a problem, or you may want more information about how your DM300c/DM400c/ DM475 Series works. lease read the troubleshooting information in this section first. In many cases, it can help you resolve the problem. If you need to contact us, please have the following information at hand: •... -
Page 111: Error Messages
8 • Troubleshooting Error Messages From time-to-time your DM300c/DM400c/DM475 Series may display an alert or error message. An alert tells you that something needs attention; an error message usually tells you about a DM300c/ DM400c/DM475 Series condition you can fix. Message Description Action... -
Page 112: Printing Problems
8 • Troubleshooting Printing Problems Machine won't print Machine is in seal-only mode This mode disables printing. Press Home to return to Home screen and resume printing. Digital meter stamp is incomplete or streaked; poor print quality Print nozzles clogged IMPORTANT: Always ensure that your prints are clear and complete. -
Page 113: Feeding Problems
8 • Troubleshooting Feeding Problems To avoid stalled (jammed) envelopes 1. Make sure your envelopes meet our published specifications. See Chapter 1, Introduction. 2. Feed envelopes correctly. See the instructions in Chapter 3, Running Mail. Don't try to feed oversize envelopes through the machine. - Page 114 8 • Troubleshooting Clearing a Stalled Envelope- Feeder Area (DM400c Only) 1. Raise the Feeder Cover 2. Raise the moistener clearance lever two clicks to the fully upright position remove mail under the feeder rollers. Feeder Clearance Lever 3. If necessary, remove moistener assembly to clear mail between the feeder and the printer area.
- Page 115 8 • Troubleshooting Clearing a Stalled Envelope- Feeder/WOW Area (DM475 Only) 1. Open the feeder/WOW cover. Feeder/WOW Cover 2. Raise the moistener clearance lever two clicks to the fully upright position remove mail under the feeder rollers. Moistener Clearance 90° Lever Moistener Assembly...
- Page 116 8 • Troubleshooting 4. Raise the feeder/WOW clearance lever. Lift the blue feeder clearance lever IMPORTANT: Do not remove mail without lifting the clearance lever. 5. Lower all levers and close the feeder/WOW cover. SDC755D...
-
Page 117: Display Problems
8 • Troubleshooting Display Problems Display hard to read Display contrast needs adjustment (see page 6-4). Problems with Postage Refill The display shows a series of messages during the postage refill process Normal The machine is designed to display the progress of the postage refill. If the procedure fails for any reason, the display tells you why. -
Page 118: Moistening Problems
8 • Troubleshooting Moistening Problems Envelopes don't seal Incorrect feeding Make sure you slide the envelope flap under the blue edge of the feed deck. If you don't, the moistener can't wet the flap. Low sealant level Check the sight glass on the left side of the moistener tank. If the sealant level is low, add sealing solution until it reaches the bottom of the fill hole. -
Page 119: Postal Advertisements (Ads)
9 • Supplies and Options DM300c DM400c DM475 This chapter explains how to order supplies and accessories for your digital mailing system. It also tells you a little about options that can help you get the most value from your equipment Options ..............9-2 Weighing Platforms ........9-2 Moistener ............9-2... -
Page 120: Options
9 • Supplies and Options Options A number of flexible options are available so you can tailor your mailing system to meet your exact needs today, and expand it as your business grows tomorrow. Contact your machine supplier who will advise you about the options available on your model. Weighing Platforms The weighing platform allows you to accurately weigh mail and packages. -
Page 121: How To Order
Sealing Solution (to seal envelope flaps after processing) IMPORTANT INFORMATION Pitney Bowes recommends that you only use genuine replacement ink cartridges that are available from Pitney Bowes. If alternative cartridges or refills are obtained, the ink used must be approved by your Postal Authority. - Page 122 9 • Supplies and Options SDC755D...
- Page 123 10 • Reports DM300c DM400c DM475 This chapter explains how to take advantage of the reports feature of your system. Overview of Reports ...........10-2 Last Five Refills Report ........10-2 Funds Report ............10-2 Single Account Report ........10-3 Multi-Account Summary Report......10-3 Account List Report ..........10-4 Upload Summary Report ........10-4 System Setup Report .........10-4 Error Report ............10-5...
-
Page 124: Overview Of Reports
10 • Reports Overview of Reports Your system allows you to print reports for funds usage, postage refills, postage tracked by account, and other valuable data. The reports are accessed by pressing Options and selecting "Reports". NOTE: The accounting reports described in this chapter are available if the Departmental Accounting feature is turned on. -
Page 125: Single Account Report
10 • Reports Single Account Report This report provides the postage history for a single account (if the Departmental Accounting feature is set up on your system). 1. Press Options. 2. Select "Reports". 3. Select "Accounts". 4. Select "Single Account". 5. -
Page 126: Account List Report
10 • Reports Account List Report This report provides a list of all of the accounts that you have configured on your system (If the Departmental Accounting Feature is set up on your system). It can only be printed if you have an external printer connected to your system. -
Page 127: Error Report
10 • Reports Error Report This report provides a history of error codes that your machine has encountered. 1. Press Options. 2. Select "Reports". 3. Press Page Down (if necessary). 4. Select "Error". 5. When prompted, insert envelope into machine or press Tape. The report is printed. -
Page 128: Permit Report
10 • Reports Permit Report This report lists the activity of each permit print if your system is being used for permit printing. 1. Press Options. 2. Select "Reports". 3. Press Page Down (if necessary). 4. Select "Permit". 5. When prompted, insert envelope into machine, or Press Tape. NOTE: If this is a multi-page report, you will be prompted to insert another envelope/tape sheet. -
Page 129: Rates Summary Report
10 • Reports Rates Summary Report This report lists the versions of rate used in your system. If you have a problem and call your machine supplier, this information may assist in the fault finding process. 1. Press Options. 2. Select "Reports". 3. - Page 130 10 • Reports 10-8 SDC755D...
- Page 131 11 • Departmental (Standard) Accounting DM300c DM400c DM475 This chapter explains how to take advantage of the optional Departmental (Standard) Accounting feature on the system. If your system uses the optional INVIEW accounting feature, refer to Chapter 12 - INVIEW Accounting. Overview of the Accounting Feature....
-
Page 132: Overview Of The Accounting Feature
11 • Departmental (Standard) Accounting Overview of the Accounting Feature If your model has the departmental accounting feature, you can setup your system to track postage costs incurred by individuals or departments in your organisation (e.g., Engineering, Sales, etc.). The number of accounts available on your system is based on the amount purchased or supplied with your model. -
Page 133: Turning Off Accounting
11 • Departmental (Standard) Accounting Turning Off Accounting You can temporarily turn off the Departmental Accounting whenever you wish. NOTE: You will not be tracking postage by account when this feature is turned off. 1. Press Options. 2. Select “Accounts” 3. -
Page 134: Creating An Account
11 • Departmental (Standard) Accounting Creating an Account You need to create an account before you can use the departmental accounting feature to track postage. 1. Press Options. 2. Select "Accounts" 3. If the supervisor password is enabled, you will be prompted to enter it and select “OK”... -
Page 135: Editing An Account/Setting Up Account Passwords
11 • Departmental (Standard) Accounting Editing an Account/Setting Up Account Passwords You can edit an account name and establish passwords for each account if you wish. 1. Press Options. 2. Select "Accounts”. 3. If the supervisor password is enabled, you will be prompted to enter it and select “OK”... -
Page 136: Turning On Account Passwords
11 • Departmental (Standard) Accounting Turning On Account Passwords You can turn on the requirement for all operators to enter passwords (if passwords are set up) when choosing an account. NOTE: The Supervisor Password must be turned on before you can use this feature. -
Page 137: Viewing Account Totals
11 • Departmental (Standard) Accounting Viewing Account Totals You can view your account totals anytime using this option. 1. Press Options. 2. Select “Accounts". 3. If the supervisor password is enabled, you will be prompted to enter it and select “OK” to continue. 4. -
Page 138: Clearing Account Totals
11 • Departmental (Standard) Accounting Clearing Account Totals You can view your account totals anytime using this option. 1. Press Options. 2. Select “Accounts". 3. If the supervisor password is enabled, you will be prompted to enter it and select “OK” to continue. 4. -
Page 139: Clearing All Accounts
11 • Departmental (Standard) Accounting Clearing All Accounts You can clear the postage totals on all accounts when necessary. CAUTION: Make sure your really want to clear all your accounts. Once you do, the information can not be retrieved. 1. Press Options. 2. -
Page 140: Deleting An Account
11 • Departmental (Standard) Accounting Deleting an Account You can delete an account and remove it and its contents from the system. CAUTION: Make sure your really want to delete an account. Once you do, the account information can not be retrieved. 1. - Page 141 12 • Inview/ Budget Manager Accounting DM300c DM400c DM475 This chapter explains how to use the INVIEW or Budget Manager optional Accounting features on the system. If your system uses the Departmental (Standard) accounting feature, refer to Chapter 11 - Departmental (Standard) Accounting.
- Page 142 12 • Inview/ Budget Manager Accounting Uploading Budget Manager/ INVIEW data to Total Meter Reporting .........12-6 External Memory ..........12-7 Setting a Station ID..........12-7 Setting the Owner (Budget Manager Only) ..12-8 Setting Up Job IDs/ Job ID 1 and 2 ....12-8 Configuring the Optional Barcode Scanner ..12-9 Setting the Default Scan Type......12-9 Combining Barcodes ........12-10...
- Page 143 12 • Inview/ Budget Manager Accounting Transferring Transaction Data ......12-33 Clearing the Transaction Log......12-34 Setting the Condition for the Log Full Warning .12-35 Defining the Log Full Action ......12-36 INVIEW/ Budget Manager Accounting Reports 12-37 Printing Reports .........12-37 Custom Reports .........12-38 Creating a Custom Report ......12-39 Viewing and Editing a Custom Report ..12-40 Deleting a Custom Report ......12-41...
-
Page 144: Introduction
12 • Inview/ Budget Manager Accounting Introduction This chapter describes how to set up and use INVIEW or Budget Manager on your mailing system. INVIEW and Budget Manager are optional packages that you can purchase which provide extended accounting features. Budget Manager offers additional features over the INVIEW package. -
Page 145: Logging On To Inview/ Budget Manager
12 • Inview/ Budget Manager Accounting Logging On to INVIEW/ Budget Manager The screen that displays when you start up your mailing system depends on whether or not you have set up operators on your system. For more information on how to set up operators, refer to Setup Operators on page 12-14 of this guide. -
Page 146: Importing And Backing Up Data Using
Uploading Budget Manager/ INVIEW data to Total Meter Reporting (Webservice) If you have access to the Pitney Bowes My Account webservice and have registered with INVIEW for Total Meter Reporting, it is necessary to upload Accounting information periodically from Budget Manager/ INVIEW to the Accounting Server. -
Page 147: External Memory
12 • Inview/ Budget Manager Accounting External Memory To enable INVIEW/ Budget Manager to work, the memory stick supplied must be connected to one of the USB ports on the rear of the mailing system. Setting a Station ID The Station ID is printed on accounting reports to identify the mailing system the reports were generated on. -
Page 148: Setting Up Job Ids/ Job Id 1 And 2
12 • Inview/ Budget Manager Accounting Setting the Owner (Budget Manager Only) Follow the steps below to enter information about the owner of the Budget Manager system. 1. Press the Options key. 2. Select Accounts. NOTE: If the supervisor password is enabled you will be prompted to enter it and select OK to continue. -
Page 149: Configuring The Optional Barcode Scanner
12 • Inview/ Budget Manager Accounting Configuring the Optional Barcode Scanner If you have an optional barcode scanner attached to your system, you can configure it to scan in account names or account codes if you are using the INVIEW/ Budget Manager accounting system. NOTE: You can use a barcode scanner to scan in barcodes for electronic confirmation services regardless of the accounting system you are using. -
Page 150: Combining Barcodes
12 • Inview/ Budget Manager Accounting 5. For use with INVIEW/ Budget Manager, select the appropriate option: • Account Name • Speed Code • Preset • Job ID 6. If you do not want any default account system or preset, select “None”. - Page 151 12 • Inview/ Budget Manager Accounting To select the character to join multiple barcode scans: 1. Press Options. 2. Select “Setup". 3. Page down and select “Configure USB Scanner”. 4. At the USB Barcode Scanner Settings menu, select “Concatenate cbar.”. 5.
-
Page 152: Adding Barcode Prefixes
12 • Inview/ Budget Manager Accounting Adding Barcode Prefixes If you want to create barcodes with a prefix, you can set up your system to recognise this prefix when you scan the barcode. This prefix identifies whether you are scanning in an account name, account code, custom preset or job ID. -
Page 153: Setting Auto-Enter
12 • Inview/ Budget Manager Accounting Setting Auto-Enter You can set up your system so that after it scans in a barcode value and displays it on the display, it requires you to press Enter to accept that value. You can do this if you want to be sure that an operator verifies that the correct barcode has been scanned. -
Page 154: Configuring Operators
12 • Inview/ Budget Manager Accounting Configuring Operators Enabling Operators Follow the steps here to set up your mailing system so that you can assign operators with an ID and 4-digit alphanumeric password. 1. Press Options. 2. Select “Setup". 3. Page down and select “Operator Setup”. a . -
Page 155: Setup Operators
12 • Inview/ Budget Manager Accounting Operator Passwords: Select this option to turn operator passwords on or off on a global basis. i.e. If you wish to use Operator Passwords, this option must be turned on. Auto Log Off: When ON, will log off the operator if the machine has not been used for ‘x’... -
Page 156: Important Notes Regarding Operator Functions
12 • Inview/ Budget Manager Accounting Important Notes Regarding Operator Functions Deleting Operators If there is transaction data associated with an operator and you delete the operator, the system does not actually remove the operator until the end of the fiscal year. Instead, the operator becomes inactive, and will not be able to log on to the system. - Page 157 12 • Inview/ Budget Manager Accounting The following examples demonstrate some of the ways in which you can structure your accounts. • When you create only a top level account, you can charge funds and pieces to that account. This is the working (chargeable) account because at this point it does not have any subordinate accounts: Example:...
-
Page 158: Turning Account Passwords On/Off
12 • Inview/ Budget Manager Accounting Turning Account Passwords On/Off You can turn on the requirement for all operators to enter passwords (if passwords are set up) when choosing an account. NOTE: The Supervisor Password must be turned on before you can use this feature. - Page 159 12 • Inview/ Budget Manager Accounting Password: This option appears only if account passwords are enabled. The account password is a four digit number that you can assign to limit access to an account. As soon as you enter the name of your account, the system will request that you enter the account password if it is enabled.
-
Page 160: Creating A Subaccount Or Subsubaccount
12 • Inview/ Budget Manager Accounting Creating a Subaccount or Subsubaccount Follow the steps below to create accounts: 1. Press Options. 2. Select "Accounts”. 3. If the supervisor password is enabled, you will be prompted to enter it and select “OK” to continue. 4. -
Page 161: Viewing Or Editing Accounts
12 • Inview/ Budget Manager Accounting Viewing or Editing Accounts You can view or edit the name, status and description for all of the accounts, subaccounts or subsubaccounts entered into INVIEW/ Budget Manager (lowest level): 1. Press Options. 2. Select "Accounts”. 3. -
Page 162: Deleting Accounts
12 • Inview/ Budget Manager Accounting Deleting Accounts When deleting accounts be advised that: • If there is no information connected to the account, the system will remove the account when you delete it. • If there is any information connected to an account (for example transaction data), the system will not allow you to delete the account. -
Page 163: Clearing Account Data
12 • Inview/ Budget Manager Accounting Clearing Account Data CAUTION! Clearing the account data permanently erases all transaction data. It is recommended that the supervisor password be active and the accounting protection be turned on. This will prevent unauthorised persons from clearing the accounting data. Follow the steps below to clear the account data: 1. -
Page 164: Selecting The Accounting Period
12 • Inview/ Budget Manager Accounting Selecting the Accounting Period When you enter the start date for the fiscal year, the system automatically determines the end date. (For example, if 1st January, 2010 is the beginning of your fiscal year, the system sets the end date at 31st December, 2010.) Once the fiscal year is set, you will need to select the number of accounting periods. - Page 165 12 • Inview/ Budget Manager Accounting 8. Select "Continue” to return to the Accounting Setup Menu. 9. Press Home to return to the Home Screen. NOTES: Standard Periods When a period in the fiscal year reaches its cut-off date, the system will automatically start the next period and store the existing period.
-
Page 166: Global Surcharge
12 • Inview/ Budget Manager Accounting Global Surcharge A Global Surcharge is a surcharge (or discount) that applies to each transaction (or batch) processed by INVIEW/ Budget Manager, unless a batch surcharge overrides it. You can apply a global surcharge per piece of mail, per transaction, and/or per transaction percentage. -
Page 167: Selecting The Global Surcharge Method
12 • Inview/ Budget Manager Accounting Selecting the Global Surcharge Method Follow the steps below to set a global surcharge or discount: 1. Press Options. 2. Select "Accounts”. 3. If the supervisor password is enabled, you will be prompted to enter it and select “OK”... -
Page 168: Selecting An Account To Print Postage
12 • Inview/ Budget Manager Accounting Selecting an Account to Print Postage You can select an INVIEW/ Budget Manager account in a variety of ways: You can select an account manually by scrolling through the entire list of accounts on your system. If you know part of the account name or the speed code, you can use the account name search or the speed code search to locate the account you want to use. -
Page 169: Selecting An Account By Speed Code
12 • Inview/ Budget Manager Accounting 3. Select the account you want to use: • Press Enter to select the account that most closely matches the characters you searched on; or • If a list of account names appear on the screen, press the screen key that corresponds with the account you want to use. -
Page 170: Entering A Surcharge
12 • Inview/ Budget Manager Accounting Entering a Surcharge When you select the surcharge method from the Home Screen, you are setting a batch surcharge, or a surcharge that will be applied only to the current transaction being processed by INVIEW/ Budget Manager. -
Page 171: Selecting Job Ids/ Job Id 1 And 2
12 • Inview/ Budget Manager Accounting Selecting Job IDs/ Job ID 1 and 2 A Job ID field allows you to identify specific tasks within an account. Assigning a Job ID to a transaction allows you to track the amount of money you spend on postage, as well as how frequently you process a given transaction. -
Page 172: Entering Manual Transactions
12 • Inview/ Budget Manager Accounting Entering Manual Transactions Follow the steps below to create a manual transaction. 1. Press Options. 2. Select "Accounts”. 3. If the supervisor password is enabled, you will be prompted to enter it and select “OK” to continue. 4. -
Page 173: Transferring Transaction Data
12 • Inview/ Budget Manager Accounting Transferring Transaction Data You can use the transfer transaction data option to correct transactions that have been processed against the wrong account. Follow the steps below to select the transaction you want to transfer: 1. -
Page 174: Clearing The Transaction Log
12 • Inview/ Budget Manager Accounting Clearing the Transaction Log When the transaction log reaches full capacity, you can clear out the log to allow the inclusion of new transactions. Follow the steps below to clear the transaction log: 1. Press Options. 2. -
Page 175: Setting The Condition For The Log Full Warning
12 • Inview/ Budget Manager Accounting Setting the Condition for the Log Full Warning You can set the “log full warning” to notify you when the transaction log is filled to a certain percentage. The default setting is 80%, which means that when the transaction log is 80% full, you will receive a warning. -
Page 176: Defining The Log Full Action
12 • Inview/ Budget Manager Accounting Defining the Log Full Action The Action When Full option allows you to select the action you want the system to take when the transaction log is full. You can choose to stop processing mail, or process mail and overwrite the transaction log (see notes below). -
Page 177: Inview/ Budget Manager Accounting Reports
12 • Inview/ Budget Manager Accounting INVIEW/ Budget Manager Accounting Reports With INVIEW/ Budget Manager, you have the ability to create a broader range of accounting reports than you would using the standard accounting reports on your mailing system. The following is a list of INVIEW/ Budget Manager accounting reports: •... -
Page 178: Custom Reports
12 • Inview/ Budget Manager Accounting Custom Reports You can design your own report formats using the Custom Reports Generation feature. This tool allows you to select the report format you want (detailed or summary) as well as select the fields of information you want to appear on the report. -
Page 179: Creating A Custom Report
12 • Inview/ Budget Manager Accounting Creating a Custom Report Follow the steps below to create a custom report. 1. Press Options. 2. Select "Reports”. 3. Select "Accounts”. 4. Select "Custom Reports”. 5. Select "Create Custom Report”. 6. Type in the report name, and select "OK”. 7. -
Page 180: Viewing And Editing A Custom Report
12 • Inview/ Budget Manager Accounting Viewing and Editing a Custom Report Follow the steps below to view and/or edit a custom report. 1. Press Options. 2. Select "Reports”. 3. Select "Accounts”. 4. Select "Custom Reports”. 5. Select "View/Edit Report”. 6. -
Page 181: Deleting A Custom Report
12 • Inview/ Budget Manager Accounting Deleting a Custom Report Follow the steps below to delete a custom report from the system: 1. Press Options. 2. Select "Reports”. 3. Select "Accounts”. 4. Select "Custom Reports”. 5. Select "Delete Report”. 6. Select the custom report you want to delete. The Delete Custom Report screen appears. -
Page 182: Accounting Setup Report
12 • Inview/ Budget Manager Accounting Accounting Setup Report The Accounting Set Up report lists the options and settings for INVIEW/ Budget Manager. Account List Report The Account List report lists the accounts that have been defined in the system. The accounts are sorted by account name, then by subaccount and subsubaccount. -
Page 183: Inview/ Budget Manager Error/Warning Messages
12 • Inview/ Budget Manager Accounting INVIEW/ Budget Manager Error/Warning Messages This section contains a list of problems you may encounter while using INVIEW/ Budget Manager. Refer to Chapter 8 - Troubleshooting for information on problems you may encounter while using the mailing system (e.g. envelope sealing problems, envelope feeding problems, tape feeding problems, etc.). -
Page 184: External Memory Not Responding
12 • Inview/ Budget Manager Accounting External memory not responding. Please check the USB and memory device connections. Run mail without accounting? INVIEW/ Budget Manager uses a memory module attached via one of the USB ports. This module holds all the accounting data. Check that the memory device is properly connected to one of the system’s USB ports. -
Page 185: Glossary
Glossary Account—A department (e.g., “Human Resources”) to which postage is charged. Your machine may allow you to set up and choose a number of different accounts. You can assign a unique name to each. The machine stores the total postage used and the number of mail pieces processed for each account. - Page 186 Glossary Inspection—The process of examining the postage usage through the machine to assure accurate postal funds accounting. Your machine is subject to remote inspection whenever you add postage to it. To do an inspection, simply add postage or connect to the Data Centre as explained in Chapter 5, Adding Postage/Connecting to Data Centre.
- Page 188 Harlow, Essex, CM19 5BD, UK www.pitneybowes.co.uk PB Form SDC755D RevB (03-12) © Pitney Bowes Limited, 2012 We have made every reasonable effort to assure the accuracy and usefulness of this guide, however we cannot assume responsibility for errors or omissions or liability for the misuse or misapplication of our products.
Need help?
Do you have a question about the DM300c series and is the answer not in the manual?
Questions and answers