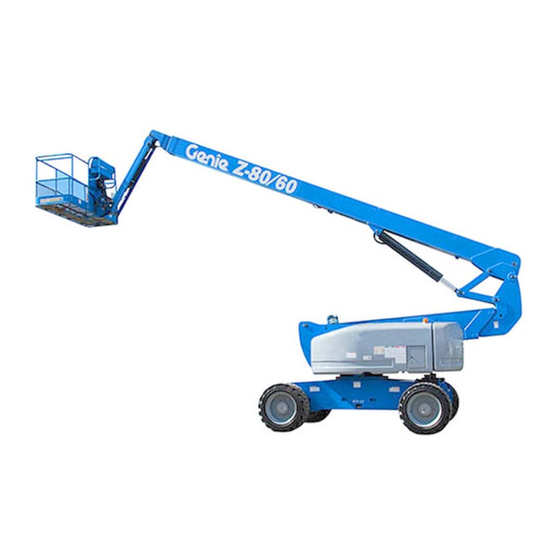
Genie Z80/60 Service Manual
Hide thumbs
Also See for Z80/60:
- Service and repair manual (215 pages) ,
- Operator's manual (66 pages) ,
- Maintenance manual (182 pages)

Related Manuals for Genie Z80/60


Summary of Contents for Genie Z80/60
- Page 1 Service Manual Serial Number Range from Z80-101 to Z8013-4591 Z-80/60 Part No. 88619 Rev F3 February 2015...
- Page 2 Technical Publications Genie Industries has endeavored to deliver the highest degree of accuracy possible. However, continuous improvement of our products is a Genie Copyright © 2003 by Genie Industries policy. Therefore, product specifications are 88619 Rev F June 2011 subject to change without notice.
-
Page 3: Serial Number Legend
60 ft/ 18.28 m Gradeability: Model year Country of manufacture: USA This machine complies with: ANSI A92.5- CAN B.354.4- Genie Industries Serial label (located under cover) 18340 NE 76th Street Serial number (stamped on chassis) Redmond, WA 98052 PN - 77055 Part No. - Page 4 February 2015 This page intentionally left blank. Z-80/60 Part No. 88619...
-
Page 5: Safety Rules
February 2015 Section 1 • Safety Rules Safety Rules Danger Failure to obey the instructions and safety rules in this manual, and the Operator's Manual will result in death or serious injury. Many of the hazards identified in the operator's manual are also safety hazards when maintenance and repair procedures are performed. - Page 6 Section 1 • Safety Rules July 2013 SAFETY RULES Personal Safety Be sure to wear protective eye wear and other protective clothing if the situation Any person working on or around a machine must warrants it. be aware of all known safety hazards. Personal Be aware of potential crushing hazards safety and the continued safe operation of the such as moving parts, free swinging or...
-
Page 7: Table Of Contents
July 2013 Table of Contents Introduction Important Information ....................ii Serial Number Legend ....................iii Section 1 Safety Rules General Safety Rules ....................v Section 2 Specifications Machine Specifications ..................2 - 1 Performance Specifications ................... 2 - 2 Function Speeds Specifications ................2 - 2 Hydraulic Oil Specifications ................... - Page 8 July 2013 TABLE OF CONTENTS Section 3 Scheduled Maintenance Procedures, continued Checklist A Procedures Inspect the Manuals and Decals ..............3 - 7 Perform Pre-operation Inspection ..............3 - 8 Perform Function Tests ................3 - 8 Perform Engine Maintenance ............... 3 - 8 Check the Hydraulic Filter Condition Indicators ..........
- Page 9 July 2013 TABLE OF CONTENTS Section 3 Scheduled Maintenance Procedures, continued B-14 Test the Drive Brakes ................3 - 31 B-15 Test the Drive Speed - Stowed Position ............. 3 - 31 B-16 Test the Drive Speed - Raised or Extended Position ......... 3 - 32 B-17 Test the Alarm and Optional Flashing Beacon ...........
- Page 10 July 2013 TABLE OF CONTENTS Section 3 Scheduled Maintenance Procedures, continued Checklist E Procedures Test or Replace the Hydraulic Oil ............... 3 - 61 Grease the Steer Axle Wheel Bearings, 2WD Models ........ 3 - 63 Perform Engine Maintenance ..............3 - 64 Perform Engine Maintenance - Ford Models ..........
- Page 11 July 2013 TABLE OF CONTENTS Section 4 Repair Procedures, continued Primary Boom Angle Sensor ..............4 - 40 Secondary Boom Cable Track ..............4 - 42 Secondary Boom ..................4 - 43 Secondary Boom Lift Cylinder ..............4 - 45 Secondary Boom Extension Cylinder ............
- Page 12 July 2013 TABLE OF CONTENTS Section 4 Repair Procedures, continued 8-12 Traction Manifold, 2WD ................4 - 100 8-13 Valve Adjustments, 2WD Traction Manifold ..........4 - 102 8-14 Traction Manifold, 4WD ................4 - 104 8-15 Valve Adjustments, 4WD Traction Manifold ..........4 - 106 8-16 Valve Coils ....................
- Page 13 July 2013 TABLE OF CONTENTS Section 6 Schematics, continued Electrical Schematic Legend ................6 - 17 Electrical Schematic - View 1, Drive Chassis Controller (DCON) ......6 - 20 Electrical Schematic - View 2, Platform Controls (PCON) ........6 - 21 (before serial number 1167) Electrical Schematic - View 2, Platform Controls (PCON) ........
- Page 14 July 2013 TABLE OF CONTENTS Section 6 Schematics, continued Electrical Schematic - Continental TME27 Engine ..........6 - 58 (before serial number 2511) Electrical Schematic - Continental TME27 Engine ..........6 - 59 (from serial number 2510) Electrical Schematic - Ford LRG 425 Engine ............6 - 62 Electrical Schematic - GM 3.0L Engine ...............
-
Page 15: G Machine Specifications
Lug nut torque, dry 420 ft-lbs 570 Nm For operational specification, refer to the Operator's Manual. Continuous improvement of our products is a Genie policy. Product specifications are subject to change without notice. Part No. 88619 Z-80/60 2 - 1... -
Page 16: Performance Specifications
114 to 126 seconds Turntable rotate, 360° boom extended 200 to 240 seconds Continuous improvement of our products is a Genie policy. Product specifications are subject to change without notice. 2 - 2 Z-80/60 Part No. 88619... -
Page 17: Hydraulic Oil Specifications
Shell Donax TG (Dexron equipment and special installation instructions for III) oils. the approved optional fluids. Consult the Genie Genie specifications require hydraulic oils which are Industries Service Department before use. designed to give maximum protection to hydraulic... -
Page 18: Hydraulic Component Specifications
Flow rate @ 2300 rpm 5 gpm 19 L/min Oscillate relief pressure (item BE or CH) 800 psi 55.1 bar Continuous improvement of our products is a Genie policy. Product specifications are subject to change without notice. 2 - 4 Z-80/60 Part No. 88619... -
Page 19: Manifold Component Specifications
SAE No. 10 62 ft-lbs / 84.1 Nm SAE No. 12 84 ft-lbs / 113.9 Nm Continuous improvement of our products is a Genie policy. Product specifications are subject to change without notice. Part No. 88619 Z-80/60 2 - 5... -
Page 20: Gm 3.0L Efi Engine
Engine Operator Handbook on your machine. Output 66A, 12V DC Fan belt deflection 0.5 inch 12 mm Continuous improvement of our products is a Genie policy. Product specifications are subject to change without notice. 2 - 6 Z-80/60 Part No. 88619... -
Page 21: Ford Lrg-425 Engine
0.042 to 0.046 in 1.07 to 1.18 mm Spark plug torque 5 to 10 ft-lbs 7 to 14 Nm Continuous improvement of our products is a Genie policy. Product specifications are subject to change without notice. Part No. 88619 Z-80/60 2 - 7... - Page 22 8-18 ft-lbs 11-24 Nm Temperature switch point 230° F 112° C Alternator Output 95A, 13.8V DC Continuous improvement of our products is a Genie policy. Product specifications are subject to change without notice. 2 - 8 Z-80/60 Part No. 88619...
-
Page 23: Continental Tme27 Engine
Extreme operating temperatures my require the use of alternative engine oils. For oil requirements, refer to the Engine Operator Handbook on your machine. Continuous improvement of our products is a Genie policy. Product specifications are subject to change without notice. Part No. 88619 Z-80/60... -
Page 24: Deutz F4L-913 Engine (Before Serial Number 339)
Extreme operating temperatures my require the use of alternative engine oils. For oil requirements, refer to the Engine Operator Handbook on your machine. Continuous improvement of our products is a Genie policy. Product specifications are subject to change without notice. 2 - 10 Z-80/60... -
Page 25: Deutz Bf4L-2011 (From Serial Number 339 To 2177)
Governor centrifugal mechanical Valve clearance, cold Intake 0.012 in 0.3 mm Exhaust 0.020 in 0.5 mm Continuous improvement of our products is a Genie policy. Product specifications are subject to change without notice. Part No. 88619 Z-80/60 2 - 11... - Page 26 200 minutes Alternator output 80A @ 14V DC Fan belt deflection inch 9 to 12 mm Continuous improvement of our products is a Genie policy. Product specifications are subject to change without notice. 2 - 12 Z-80/60 Part No. 88619...
-
Page 27: Deutz Td2011L04I Engine (From Serial Number 2178)
12.8 quarts Starter motor (including filter) 12.1 liters Current draw, normal load 140-200A Cranking speed 250-350 rpm Continuous improvement of our products is a Genie policy. Product specifications are subject to change without notice. Part No. 88619 Z-80/60 2 - 13... - Page 28 200 minutes Alternator output 80A @ 14V DC Fan belt deflection inch 9 to 12 mm Continuous improvement of our products is a Genie policy. Product specifications are subject to change without notice. 2 - 14 Z-80/60 Part No. 88619...
-
Page 29: Perkins 704-30 Engine
Extreme operating temperatures my require the use of alternative engine oils. For oil requirements, refer to the Engine Operator Handbook on your machine. Continuous improvement of our products is a Genie policy. Product specifications are subject to change without notice. Part No. 88619 Z-80/60... -
Page 30: Perkins 804C-33 / 804D-33 Engine
Oil pressure @ 2000 rpm 40-60 psi 2.8-4.1 bar Oil capacity 10.6 quarts (including filter) 10 liters Continuous improvement of our products is a Genie policy. Product specifications are subject to change without notice. 2 - 16 Z-80/60 Part No. 88619... -
Page 31: Machine Torque Specifications
Drive motor mounting bolts, dry 110 ft-lbs 149 Nm Drive hub oil plug, O-ring seal 13 ft-lbs 18 Nm Continuous improvement of our products is a Genie policy. Product specifications are subject to change without notice. Part No. 88619 Z-80/60 2 - 17... -
Page 32: Hydraulic Hose And Fitting Torque Specifications
O-rings. They are not standard SAE size O-rings. They are SAE O-ring Boss Port available in the O-ring field service kit (Genie part number 49612). (tube fitting - installed into Aluminum) SAE Dash size Torque 2 Lubricate the O-ring before installation. - Page 33 February 2015 Section 2 • Specifications REV G SPECIFICATIONS 10.9 12.9 Part No. 88619 Z-80/60 2 - 19...
- Page 34 Section 2 • Specifications February 2015 REV G This page intentionally left blank. 2 - 20 Z-80/60 Part No. 88619...
-
Page 35: Observe And Obey
June 2011 Section 3 • Scheduled Maintenance Procedures Scheduled Maintenance Procedures About This Section This section contains detailed procedures for each scheduled maintenance inspection. Each procedure includes a description, safety warnings and step-by-step instructions. Observe and Obey: Symbols Legend Maintenance inspections shall be completed by a person trained and qualified on the Safety alert symbol—used to alert maintenance of this machine. - Page 36 Section 3 • Scheduled Maintenance Procedures June 2011 SCHEDULED MAINTENANCE PROCEDURES Maintenance Symbols Legend Pre-delivery Preparation Report Note: The following symbols have been used in The pre-delivery preparation report contains this manual to help communicate the intent of the checklists for each type of scheduled inspection. instructions.
- Page 37 June 2011 Section 3 • Scheduled Maintenance Procedures This page intentionally left blank. Part No. 88619 Z-80/60 3 - 3...
-
Page 38: Pre-Delivery Preparation
The Maltings, Wharf Road PO Box 97030 Grantham, Lincolnshire Redmond, WA 98073-9730 NG31- 6BH England (425) 881-1800 (44) 1476-584333 3 - 4 Z-80/60 Part No. 88619 Copyright © 2002 by Genie Industries. Genie® is a registered trademark of Genie Industries. Rev B... -
Page 39: Maintenance Inspection Report
June 2011 June 2012 Section 3 • Scheduled Maintenance Procedures Maintenance Inspection Report Model Checklist A - Rev E Y N R Checklist B - Rev G Y N R A-1 Inspect the manuals B-1 Batteries Serial number and decals B-2 Electrical wiring A-2 Pre-operation B-3 Key switch... - Page 40 Section 3 • Scheduled Maintenance Procedures June 2011 June 2012 MAINTENANCE INSPECTION REPORT REV E Model Checklist C - Rev E Y N R Checklist E - Rev D Y N R C-1 Engine maintenance E-1 Replace hydraulic oil Serial number C-2 Grease platform E-2 Wheel bearings, overload (if equipped)
-
Page 41: Checklist A Procedures
They also Note: Contact your authorized Genie distributor or provide users with operation and maintenance Genie Industries if replacement manuals or decals information. An illegible decal will fail to alert are needed. -
Page 42: Perform Pre-Operation Inspection
June 2011 CHECKLIST A PROCEDURES REV E Perform Pre-operation Inspection Perform Engine Maintenance Genie specifications require that this procedure be performed daily or every 8 hours, whichever comes first. Engine specifications require that this procedure Completing a pre-operation inspection is essential be performed daily or every 8 hours, whichever to safe machine operation. - Page 43 (Ford part number FPP 194-302). Manual (Perkins part number SEBU7853-00) OR the Perkins 804D Operation and Maintenance Manual (Perkins part number SEBU8324-00). Ford LRG-425 EFI Operator Handbook Genie part number 84792 Perkins 704-30 User's Handbook Genie part number 101840 Continental Models:...
-
Page 44: Check The Hydraulic Filter Condition Indicators
Section 3 • Scheduled Maintenance Procedures June 2011 CHECKLIST A PROCEDURES REV E Medium and high pressure filters: Check the Hydraulic Filter Note: The medium and high pressure filters are mounted to the engine side bulkhead. Condition Indicators 4 Inspect the filter condition indicators. Maintaining the hydraulic filters in good condition is essential to good system performance and safe machine operation. -
Page 45: Perform 30 Day Service
A-10 Grease the Turntable Rotation Bearing and Rotate Gear Continental TME27 Owner's Manual · Check the Tires, Wheels and Genie part number 111901 Lug Nut Torque · Check the Drive Hub Oil Level and Fastener Torque To access the engine: ·... -
Page 46: Perform Engine Maintenance - Perkins And Continental Models
Perkins and Continental Models Continental TME27 Owner's Manual (Continental part number WM10303). Continental TME27 Owner's Manual Engine specifications require that this procedure Genie part number 111901 be performed every 50 hours or weekly, whichever comes first. To access the engine:... -
Page 47: A-9 Perform Engine Maintenance
Ford LRG-425 EFI Operator Handbook (Ford part number FPP 194-302). Engine specifications require that this procedure Ford LRG-425 EFI Operator Handbook be performed every 100 hours. Genie part number 84792 GM Models: Required maintenance procedures and additional Continental Models: engine information are available in the GM 3.0L Operator Handbook... -
Page 48: Grease The Turntable Rotation Bearing And Rotate Gear
Inspect the Fuel Filter/Water Bearing and Rotate Gear Separator - Diesel Models Note: Genie specifications require that this Genie specifications require that this procedure be procedure be performed every 100 hours or performed every 100 hours of operation. Perform monthly, whichever comes first. - Page 49 June 2011 Section 3 • Scheduled Maintenance Procedures REV E CHECKLIST A PROCEDURES 4 Loosen the vent plug located on the fuel filter/ 8 Start the engine from the ground controls and water separator head. check the fuel filter/water separator and vent plug for leaks.
-
Page 50: Replace The Drive Hub Oil
Section 3 • Scheduled Maintenance Procedures June 2011 CHECKLIST A PROCEDURES REV E 5 Loosen the drain plug located at the bottom of A-12 the filter. Allow the water to drain into a suitable Replace the Drive Hub Oil container until fuel starts to come out. Immediately tighten the drain plug. - Page 51 June 2011 Section 3 • Scheduled Maintenance Procedures REV E CHECKLIST A PROCEDURES 4 Fill the hub with oil from the top hole until the oil level is even with the bottom of the side hole. Apply pipe thread sealant to the plugs. Install the plugs.
-
Page 52: Perform Engine Maintenance - Gm And Ford Models
Ford LRG-425 EFI Operator Handbook (Ford part number FPP 194-302). Ford LRG-425 EFI Operator Handbook Engine specifications require that this procedure Genie part number 84792 be performed every 200 hours. Proper engine maintenance, following the engine To access the engine: manufacturer's maintenance schedule, is essential to good engine performance and service life. -
Page 53: Checklist B Procedures
6 hours. 6 Remove the battery vent caps and check the specific gravity of each battery cell with a Note: Genie specifications require that this hydrometer. Note the results. procedure be performed every 250 hours or quarterly, whichever comes first. -
Page 54: Inspect The Electrical Wiring
Section 3 • Scheduled Maintenance Procedures June 2011 CHECKLIST B PROCEDURES REV G 10 Check the ambient air temperature and adjust the specific gravity reading for each cell as Inspect the Electrical Wiring follows: • Add 0.004 to the reading of each cell for every 10°... - Page 55 June 2011 Section 3 • Scheduled Maintenance Procedures REV G CHECKLIST B PROCEDURES 4 Install the bolt that was just removed into the 11 Lower the secondary boom to the stowed anchor hole to secure the engine tray from position and turn the engine off. moving.
-
Page 56: Test The Key Switch
Section 3 • Scheduled Maintenance Procedures June 2011 CHECKLIST B PROCEDURES REV G Test the Key Switch Check the Exhaust System Proper key switch action and response is essential to safe machine operation. The machine can be operated from the ground or platform controls and Maintaining the exhaust system is essential to the activation of one or the other is accomplished good engine performance and service life. -
Page 57: Inspect The Engine Air Filter
Crushing hazard. Failure to install Genie requires that this procedure be performed the bolt into the engine tray to every 250 hours or quarterly, whichever comes secure it from moving could result first. - Page 58 Deutz, Perkins and Continental Continental TME27 Owner's Manual Models (Continental part number WM10303). Continental TME27 Owner's Manual Genie part number 111901 Engine specifications require that this procedure be performed every 250 hours. To access the engine: Deutz Models:...
-
Page 59: Check The Tires, Wheels And Lug Nut Torque
June 2011 Section 3 • Scheduled Maintenance Procedures REV G CHECKLIST B PROCEDURES Check the Tires, Wheels Confirm the Proper and Lug Nut Torque Brake Configuration Maintaining the tires and wheels in good Proper brake configuration is essential to safe condition, including proper wheel fastener torque, operation and good machine performance. -
Page 60: Check The Drive Hub Oil Level And Fastener Torque
Section 3 • Scheduled Maintenance Procedures June 2011 CHECKLIST B PROCEDURES REV G 2 Remove the plug located at 90 degrees and check the oil level. Check the Drive Hub Oil Level Result: The oil level should be even with the and Fastener Torque bottom of the side plug hole. -
Page 61: Test The Ground Control Override
June 2011 Section 3 • Scheduled Maintenance Procedures REV G CHECKLIST B PROCEDURES Turntable rotate drive hub: B-10 Test the Ground Control Override 1 Remove the plug located on the side of the hub and check the oil level. A properly functioning ground control override is Result: The oil level should be even with the essential to safe machine operation. -
Page 62: Test The Platform Self-Leveling
Section 3 • Scheduled Maintenance Procedures June 2011 CHECKLIST B PROCEDURES REV G B-11 5 Push and hold a function enable/speed select button and fully raise the primary boom while Test the Platform Self-leveling observing the platform angle shown on the LCD display. -
Page 63: Test The Engine Idle Select Operation
June 2011 Section 3 • Scheduled Maintenance Procedures REV G CHECKLIST B PROCEDURES B-12 6 Turn the key switch to platform controls. Test the Engine Idle Select 7 At the platform controls, press the engine idle select button until high idle (rabbit symbol) is Operation selected. -
Page 64: Test The Fuel Select Operation - Gasoline/Lpg Models
Section 3 • Scheduled Maintenance Procedures June 2011 CHECKLIST B PROCEDURES REV G B-13 6 Release the foot switch and shut the engine off by pushing the red Emergency Stop button in to Test the Fuel Select Operation - the off position. Gasoline/LPG Models 7 Pull the red Emergency Stop button out to the on position at the platform controls. -
Page 65: Test The Drive Brakes
June 2011 Section 3 • Scheduled Maintenance Procedures REV G CHECKLIST B PROCEDURES B-14 B-15 Test the Drive Brakes Test the Drive Speed - Stowed Position Proper brake action is essential to safe machine operation. The drive brake function should operate Proper drive function movement is essential to smoothly, free of hesitation, jerking and unusual safe machine operation. -
Page 66: Test The Drive Speed - Raised Or Extended Position
Section 3 • Scheduled Maintenance Procedures June 2011 CHECKLIST B PROCEDURES REV G B-16 7 Continue at full speed and note the time when the machine reference point crosses the finish Test the Drive Speed - line. Refer to Section 2, Specifications . Raised or Extended Position 8 Lower the boom to the stowed position. -
Page 67: Test The Alarm And Optional Flashing Beacon
June 2011 Section 3 • Scheduled Maintenance Procedures REV G CHECKLIST B PROCEDURES B-17 B-18 Test the Alarm and Optional Perform Hydraulic Oil Analysis Flashing Beacon An alarm and optional flashing beacon are installed to alert operators and ground personnel of Replacement or testing of the hydraulic oil is machine proximity and motion. -
Page 68: Check And Adjust The Engine Rpm
ECM. If rpm adjustment or service is required, primary idle adjustment screw please contact Genie Industries Service secondary idle adjustment screw Department or your local engine dealer. 4 Turn the secondary adjustment screw... - Page 69 June 2011 Section 3 • Scheduled Maintenance Procedures REV G CHECKLIST B PROCEDURES 9 Adjust the secondary adjustment screw until the Skip to step 5 if the low idle rpm is correct. low idle meets specification. Tighten the 3 Loosen the locknut on the low idle adjustment locknut.
- Page 70 Section 3 • Scheduled Maintenance Procedures June 2011 CHECKLIST B PROCEDURES REV G Perkins models: 4 Push and hold the function enable/high speed button. Note the engine rpm on the display. 1 Start the engine from the ground controls. Refer to Section 2, Specifications. 2 Push one of the LCD If high idle rpm is correct, disregard screen buttons shown until...
- Page 71 June 2011 Section 3 • Scheduled Maintenance Procedures REV G CHECKLIST B PROCEDURES B-20 6 Remove the fasteners from the turntable riser cover at the platform end of the secondary Test the Safety Envelope and boom. Remove the cover. Circuits 7 Locate the Deutsch connectors from the secondary safety retract switch (LSS1RS) near the chassis at the platform end of the...
- Page 72 Section 3 • Scheduled Maintenance Procedures June 2011 CHECKLIST B PROCEDURES REV G 11 Press and hold the high speed function enable 15 Turn the service bypass/recovery key switch button and lower the secondary boom. back to run, return the key to the main key switch and start the engine from the ground Result: The secondary boom should lower to controls.
- Page 73 June 2011 Section 3 • Scheduled Maintenance Procedures REV G CHECKLIST B PROCEDURES 22 Install a wire jumper between pins 1 and 2 of the Deutsch connector on the wire harness removed in step 21. Result: The display should show DEGREES 23 Press and hold the low speed function enable button and extend the secondary boom.
-
Page 74: Test The Primary Boom Self-Leveling
Section 3 • Scheduled Maintenance Procedures June 2011 CHECKLIST B PROCEDURES REV G B-21 4 Fully raise the secondary boom while watching the display at the ground controls. Stop when Test the Primary Boom the secondary boom just begins to extend. Self-leveling Result: The primary boom should remain level at all times to within ±2 degrees. -
Page 75: Test The Primary Boom Angle Sensor
June 2011 Section 3 • Scheduled Maintenance Procedures REV G CHECKLIST B PROCEDURES B-22 3 Start the engine from the ground controls. Test the Primary Boom Angle 4 Raise the primary boom. The display will begin showing a boom angle of 40°. Sensor 5 Continue raising the primary boom until the A properly functioning primary boom angle sensor... - Page 76 Result: If air does not pass through the cap, clean or replace the cap. Proceed to step 3. Note: When checking for positive tank cap venting, Genie requires that this procedure be performed air should pass freely through the cap. every 250 hours or quarterly, whichever comes first.
-
Page 77: Perform Engine Maintenance - Gm And Ford Models
Required maintenance procedures and additional engine information are available in the GM 3.0L Operator Handbook (GM part number 36100007). GM 3.0L Operator Handbook Genie part number 77738 Ford Models: Required maintenance procedures and additional engine information are available in the Ford LRG-425 EFI Operator Handbook (Ford part number FPP 194-302). -
Page 78: Checklist C Procedures
Section 3 • Scheduled Maintenance Procedures January 2011 June 2011 Checklist C Procedures REV F REV E Perkins 704-30 User's Handbook Genie part number 101840 Perform Engine Maintenance Perkins 804C-33 Operation and Maintenance Manual Genie part number 111332 Perkins 804D-33 Operation and Maintenance Manual... -
Page 79: Grease The Platform Overload Mechanism (If Equipped)
Test the Platform Overload Mechanism (if equipped) System (if equipped) Genie specifications require that this procedure be Genie specifications require that this procedure be performed every 500 hours or 6 months, whichever performed every 500 hours or 6 months, whichever comes first. - Page 80 Section 3 • Scheduled Maintenance Procedures June 2011 CHECKLIST C PROCEDURES REV E 4 Using a suitable lifting device, place a test 6 Using a suitable lifting device, place an weight equal to that of the available capacity additional 50 lbs / 23 kg of weight onto the one of the locations shown.
-
Page 81: Replace The Engine Air Filter
June 2011 Section 3 • Scheduled Maintenance Procedures REV E CHECKLIST C PROCEDURES 9 Turn the key switch to ground control. Replace the Engine Air Filter 10 Test all machine functions from the ground controls. Result: All ground control functions should not operate. - Page 82 3 Install the fastener that was just removed through the engine tray and into the engine tray anchor hole in the turntable. Genie specifications require that this procedure be performed every 500 hours or annually, whichever Crushing hazard. Failure to install comes first.
- Page 83 June 2011 Section 3 • Scheduled Maintenance Procedures REV E CHECKLIST C PROCEDURES 2 Disconnect and plug the fuel supply hose from 8 Apply a thin layer of oil onto the element gasket. the fuel tank to the fuel filter/water separator Install the filter/bowl assembly onto the filter head.
-
Page 84: Perform Engine Maintenance - Gm And Ford Models
Required maintenance procedures and additional engine information are available in the GM 3.0L Operator Handbook (GM part number 36100007). GM 3.0L Operator Handbook Genie part number 77738 Ford Models: Required maintenance procedures and additional engine information are available in the Ford LRG-425 EFI Operator Handbook (Ford part number FPP 194-302). -
Page 85: Checklist D Procedures
June 2011 June 2012 Section 3 • Scheduled Maintenance Procedures Checklist D Procedures REV D REV E 1 Start the engine from the ground controls. Check the Boom Wear Pads 2 Raise the end of the boom to a comfortable working height (chest high), then extend the boom 1 foot / 30 cm. -
Page 86: Check The Free-Wheel Configuration
Section 3 • Scheduled Maintenance Procedures June 2012 CHECKLIST D PROCEDURES REV E 5 Manually rotate each non-steer wheel. Check the Free-wheel Result: Each non-steer wheel should rotate with minimum effort. Configuration 6 Re-engage the drive hubs by turning over the hub disconnect caps. -
Page 87: Check The Turntable Rotation Bearing Bolts
June 2012 Section 3 • Scheduled Maintenance Procedures REV E CHECKLIST D PROCEDURES 11 Manually rotate each steer wheel. Check the Turntable Rotation Result: Each steer wheel should rotate with minimum effort. Bearing Bolts 12 Re-engage the drive hubs by turning over the drive hub disconnect caps. - Page 88 Section 3 • Scheduled Maintenance Procedures June 2012 CHECKLIST D PROCEDURES REV E 4 Install the bolt that was just removed into the anchor hole to secure the engine tray from moving. Crushing hazard. Failure to install the bolt into the engine tray to secure it from moving could result in death or serious injury.
-
Page 89: Inspect For Turntable Bearing Wear
June 2012 Section 3 • Scheduled Maintenance Procedures REV E CHECKLIST D PROCEDURES Inspect for Turntable Bearing Wear Periodic inspection of turntable bearing wear is essential to safe machine operation, good machine performance and service life. Continued use of a worn turntable bearing could create an unsafe operating condition, resulting in death or serious injury and component damage. -
Page 90: Replace The Drive Hub Oil
Section 3 • Scheduled Maintenance Procedures June 2012 CHECKLIST D PROCEDURES REV E 9 Remove the dial indicator and rotate the turntable 90°. Replace the Drive Hub Oil 10 Repeat steps 4 through 9 until the rotation bearing has been checked in at least four equally spaced areas 90°... - Page 91 June 2012 Section 3 • Scheduled Maintenance Procedures REV E CHECKLIST D PROCEDURES 4 Fill the hub with oil from the top hole until the oil level is even with the bottom of the side hole. Apply pipe thread sealant to the plugs. Install the plugs.
-
Page 92: Perform Engine Maintenance
Section 3 • Scheduled Maintenance Procedures June 2012 CHECKLIST D PROCEDURES REV E Perkins 704-30 User's Handbook Genie part number 101840 Perform Engine Maintenance Perkins 804C-33 Operation and Maintenance Manual Genie part number 111332 Perkins 804D-33 Operation and Maintenance Manual... -
Page 93: Replace The Hydraulic Filter Elements
6 Use a permanent ink marker to write the date and number of hours from the hour meter on the oil filter. Genie requires that this procedure be performed Medium and high pressure filters: annually or every 1000 hours, whichever comes first. - Page 94 Section 3 • Scheduled Maintenance Procedures June 2011 June 2012 CHECKLIST D PROCEDURES REV D REV E 10 Remove the filter element from the housing. 11 Inspect the housing seal and replace it if necessary. 12 Install the new medium and high pressure filter elements into the housings and tighten them securely.
-
Page 95: Checklist E Procedures
June 2011 Section 3 • Scheduled Maintenance Procedures Checklist E Procedures REV D 5 Remove the drain plug from the hydraulic tank and completely drain the tank into a suitable Test or Replace the Hydraulic Oil container. Refer to Section 2, Specifications . 6 Tag, disconnect and plug the two suction hoses and supply hose for the auxiliary pump from the hydraulic tank. - Page 96 Section 3 • Scheduled Maintenance Procedures June 2011 CHECKLIST E PROCEDURES REV D 15 Install the suction strainers using a thread 24 Prime the pump. Refer to Repair Procedure sealant on the threads. 7-2, How to Prime the Pump. 16 Install the drain plug using a thread sealant on Note: Always use pipe thread sealant when the threads.
-
Page 97: Grease The Steer Axle Wheel Bearings, 2Wd Models
7 Tighten the castle nut to 158 ft-lbs / 214 Nm to seat the bearings. Note: Rotate the hub by hand while torqueing the Genie specifications require that this procedure be castle nut to make sure the bearings seat properly. performed every 2000 hours or 2 years, whichever 8 Loosen the castle nut one full turn and then comes first. -
Page 98: Perform Engine Maintenance
23 Install the dust cap, then the tire and wheel Deutz 913 Operation Manual assembly. Torque the wheel lug nuts to Genie part number 62446 specification. Refer to Section 2, Specifications . Deutz BF4L2011 Operation Manual... -
Page 99: Perform Engine Maintenance - Ford Models
Manual (Perkins part number SEBU8324-00). Proper engine maintenance, following the engine Perkins 704-30 User's Handbook manufacturer's maintenance schedule, is essential Genie part number 101840 to good engine performance and service life. Failure to perform the maintenance procedures Perkins 804C-33 Operation and Maintenance Manual... -
Page 100: Perform Engine Maintenance - Deutz And Perkins Models
Manual (Perkins part number SEBU8324-00). Proper engine maintenance, following the engine Perkins 704-30 User's Handbook manufacturer's maintenance schedule, is essential Genie part number 101840 to good engine performance and service life. Failure to perform the maintenance procedures Perkins 804C-33 Operation and Maintenance Manual... - Page 101 Deutz BF4L2011 Operation Manual (Deutz part number 0297 9929) OR the Deutz TD2011 Operation Manual (Deutz part number 0312 3547). Deutz BF4L2011 Operation Manual Genie part number 84794 Deutz TD2011 Operation Manual Genie part number 139320 Part No. 88619...
-
Page 102: Perform Engine Maintenance - Deutz Bf4L2011 Models
(Deutz part number 0297 9929) OR the (Deutz part number 0297 9929). Deutz TD2011 Operation Manual (Deutz part number 0312 3547). Deutz BF4L2011 Operation Manual Genie part number 84794 Deutz BF4L2011 Operation Manual Genie part number 84794 To access the engine:... -
Page 103: Repair Procedures
Be sure that all necessary tools and parts are potentially hazardous situation available and ready for use. which, if not avoided, could result Use only Genie approved replacement parts. in death or serious injury. Read each procedure completely and adhere With safety alert symbol—used to to the instructions. -
Page 104: Display Module
Section 4 • Repair Procedures June 2011 Display Module REV E This table lists the various screens and menu options of the operating software. Some display menus are for informational purpose only, while others can be used to change the machine operating parameters. The key switch must be in the off position before entering the programming mode. - Page 105 June 2011 Section 4 • Repair Procedures REV E DISPLAY MODULE Screen To Enter Information Displayed Range Unit/ With the key Metric/English (measurement units) Use +/- buttons to change Language switch off, Display Language English, German, French, press and Spanish, Portuguese, hold the Italian, Dutch, and button and...
- Page 106 Section 4 • Repair Procedures June 2011 DISPLAY MODULE REV E Screen To Enter Information Displayed Range Boom With the key Primary Boom Up speed Stowed 120% max and 50% min, Functions switch off, 100% (default) Speeds press and Primary Boom Up speed not Stowed 120% max and 50% min, hold the 100% (default)
- Page 107 June 2011 Section 4 • Repair Procedures REV E DISPLAY MODULE Screen To Enter Information Displayed Range Lift With the key Primary Boom Up/Down ramp accel % 150% max and 50% min, Functions switch off, 100% (default) 5% increment Ramps press and Primary Boom Up/Down ramp decel % hold the...
- Page 108 Section 4 • Repair Procedures June 2011 DISPLAY MODULE REV E Screen To Enter Information Displayed Range Valve With the key Reset Drive valve defaults ( calibration switch off, Reset Primary Boom Up/Down valve press and defaults ( hold the Reset Primary Boom Ext/Ret defaults button and turn the key...
- Page 109 June 2011 Section 4 • Repair Procedures REV E DISPLAY MODULE Screen To Enter Information Displayed Range Sensor With the key Set Unit levels to gravity calibration switch off, Unit Level Y-axis Millivolts per degree press and Unit Level X-axis Millivolts per degree hold the button and Set Platform level to gravity...
- Page 110 Section 4 • Repair Procedures June 2011 DISPLAY MODULE REV E Screen To Enter Information Displayed Range Options With the key Boom Length Limit: No Limit ( NO LT switch off, Secondary Extend disabled ( EXT LT press and Secondary Function disabled ( SEC LT hold the AC Generator Options: (...
-
Page 111: Platform Controls
1 2 3 4 5 6 7 8 9 0 1 2 3 4 5 6 7 8 9 0 1 2 3 1 2 3 4 5 6 7 8 9 0 1 2 3 4 5 6 7 8 9 0 1 2 3 June 2011 July 2013 Section 4 •... -
Page 112: Alc-1000 Circuit Board
1 2 3 4 5 6 7 8 9 0 1 2 3 4 5 6 7 8 9 0 1 2 1 2 3 4 5 6 7 8 9 0 1 2 3 4 5 6 7 8 9 0 1 2 Section 4 •... -
Page 113: Membrane Decal
1 2 3 4 5 6 7 8 9 0 1 2 3 4 5 6 7 8 9 0 1 2 3 1 2 3 4 5 6 7 8 9 0 1 2 3 4 5 6 7 8 9 0 1 2 3 June 2011 July 2013 Section 4 •... -
Page 114: Joysticks
1 2 3 4 5 6 7 8 9 0 1 2 3 4 5 6 7 8 9 0 1 2 3 1 2 3 4 5 6 7 8 9 0 1 2 3 4 5 6 7 8 9 0 1 2 3 Section 4 •... -
Page 115: Return To
1 2 3 4 5 6 7 8 9 0 1 2 3 4 5 6 7 8 9 0 1 2 3 1 2 3 4 5 6 7 8 9 0 1 2 3 4 5 6 7 8 9 0 1 2 3 June 2011 July 2013 Section 4 •... - Page 116 1 2 3 4 5 6 7 8 9 0 1 2 3 4 5 6 7 8 9 0 1 2 3 1 2 3 4 5 6 7 8 9 0 1 2 3 4 5 6 7 8 9 0 1 2 3 Section 4 •...
- Page 117 1 2 3 4 5 6 7 8 9 0 1 2 3 4 5 6 7 8 9 0 1 2 1 2 3 4 5 6 7 8 9 0 1 2 3 4 5 6 7 8 9 0 1 2 June 2011 July 2013 Section 4 •...
- Page 118 1 2 3 4 5 6 7 8 9 0 1 2 3 4 5 6 7 8 9 0 1 2 3 1 2 3 4 5 6 7 8 9 0 1 2 3 4 5 6 7 8 9 0 1 2 3 Section 4 •...
- Page 119 1 2 3 4 5 6 7 8 9 0 1 2 3 4 5 6 7 8 9 0 1 2 3 1 2 3 4 5 6 7 8 9 0 1 2 3 4 5 6 7 8 9 0 1 2 3 June 2011 July 2013 Section 4 •...
- Page 120 1 2 3 4 5 6 7 8 9 0 1 2 3 4 5 6 7 8 9 0 1 2 3 1 2 3 4 5 6 7 8 9 0 1 2 3 4 5 6 7 8 9 0 1 2 3 Section 4 •...
-
Page 121: Platform Components
June 2011 Section 4 • Repair Procedures Platform Components 1 2 3 4 5 6 7 8 9 0 1 2 3 4 5 6 7 8 9 0 1 2 3 1 2 3 4 5 6 7 8 9 0 1 2 3 4 5 6 7 8 9 0 1 2 3 REV E REV C 1 2 3 4 5 6 7 8 9 0 1 2 3 4 5 6 7 8 9 0 1 2 3... - Page 122 Section 4 • Repair Procedures June 2011 PLATFORM COMPONENTS REV C 3 Lower the jib boom until the platform is resting 8 Use a soft metal drift to remove the barrel-end on the blocks just enough to support the pivot pin. platform.
-
Page 123: Platform Rotator
June 2011 Section 4 • Repair Procedures REV C PLATFORM COMPONENTS 3 Tag, disconnect and plug the hydraulic hoses from the platform rotator manifold. Cap the Platform Rotator fittings on the manifold. Bodily injury hazard. Spraying The platform rotator is a hydraulically activated hydraulic oil can penetrate and helical gear assembly used to rotate the platform burn skin. - Page 124 Section 4 • Repair Procedures June 2011 PLATFORM COMPONENTS REV C 12 Support the platform rotator. Do not apply 3 Open the top bleed valve, but do not remove it. any lifting pressure. 4 Move the platform rotate switch to the left until 13 Remove the pin retaining fasteners from the jib the platform is fully rotated to the left.
-
Page 125: Calibrate The Platform Overload System (If Equipped)
June 2011 Section 4 • Repair Procedures REV C PLATFORM COMPONENTS How to Calibrate the Platform Platform Overload System Overload System (if equipped) Calibration of the platform overload system is The platform overload system is designed to essential to safe machine operation. Continued prevent the machine from continuing to operate use of an improperly calibrated platform overload when the load in the platform exceeds maximum... - Page 126 Section 4 • Repair Procedures June 2011 PLATFORM COMPONENTS REV C 5 Move the platform up and down by hand, so it 6 Move the platform up and down by hand, so it bounces approximately 2.5 to 5 cm / 1 to 2 bounces approximately 2.5 to 5 cm / 1 to 2 inches.
- Page 127 June 2011 Section 4 • Repair Procedures REV C PLATFORM COMPONENTS 7 Move the platform up and down by hand, so it 11 Test all machine functions from the ground bounces approximately 2.5 to 5 cm / 1 to 2 controls.
-
Page 128: Jib Boom Components
Section 4 • Repair Procedures June 2011 1 2 3 4 5 6 7 8 9 0 1 2 3 1 2 3 4 5 6 7 8 9 0 1 2 3 1 2 3 4 5 6 7 8 9 0 1 2 3 1 2 3 4 5 6 7 8 9 0 1 2 3 REV C REV B... - Page 129 June 2011 Section 4 • Repair Procedures REV B JIB BOOM COMPONENTS 5 Support the barrel end of the jib boom cylinder 13 Remove the pin retaining fasteners from the jib with another suitable lifting device. boom lift cylinder rod-end pivot pin. Do not remove the pin.
-
Page 130: Jib Boom Lift Cylinder
Section 4 • Repair Procedures June 2011 JIB BOOM COMPONENTS REV B 3 Remove the pin retaining fasteners from the jib boom lift cylinder rod-end pivot pin. Do not Jib Boom Lift Cylinder remove the pin. 4 Use a soft metal drift to tap the jib boom lift How to Remove the Jib Boom cylinder rod-end pivot pin half way out and Lift Cylinder... -
Page 131: Boom Components
June 2011 Section 4 • Repair Procedures Boom Components REV D primary boom lift cylinder link arm primary boom hose cover primary boom lift cylinder primary boom link arm pivot pin primary boom primary lift cylinder pivot pin - rod end primary extension boom primary lift cylinder pivot pin - barrel end platform leveling cylinder... -
Page 132: Primary Boom Cable Track
Section 4 • Repair Procedures June 2011 BOOM COMPONENTS REV D 3 Remove the mounting fasteners from the power to platform outlet box. Remove the outlet box Primary Boom Cable Track and lay to the side. 4 Remove the hose clamp from the platform The primary boom cable track guides the cables support. - Page 133 June 2011 Section 4 • Repair Procedures REV D BOOM COMPONENTS 10 Tag, disconnect and plug the slave cylinder 16 Support the end cover from the secondary boom hydraulic hoses from the bulkhead fittings at the at the pivot end of the primary boom. platform end of the primary boom.
- Page 134 Component damage hazard. Note: A cable track repair kit is available through Hoses and cables can be the Genie Industries Service Parts Department. damaged if they are kinked or pinched. 1 Visually inspect the cable track and determine which 4-link section needs to be replaced.
-
Page 135: Primary Boom
June 2011 Section 4 • Repair Procedures REV D BOOM COMPONENTS Wear Pad Specifications Primary Boom Primary boom wear pad specifications Minimum How to Shim the Boom Top, bottom and 1 Measure each wear pad. side wear pads inch (platform end of boom) 15.9 mm Result: Each wear pad meets minimum specification. - Page 136 Section 4 • Repair Procedures June 2011 BOOM COMPONENTS REV D How to Remove the Primary 4 Tag, disconnect and plug the primary boom extension cylinder hydraulic hoses. Cap the Boom fittings on the cylinder. Tag, disconnect and plug the hydraulic hoses routed through the Bodily injury hazard.
- Page 137 June 2011 Section 4 • Repair Procedures REV D BOOM COMPONENTS 11 Use a soft metal drift to remove the upper How to Disassemble the primary boom lift cylinder linkage arm pivot pin. Primary Boom Using a suitable lifting device remove the linkage arm from the machine.
-
Page 138: Primary Boom Lift Cylinder
Section 4 • Repair Procedures June 2011 BOOM COMPONENTS REV D 8 Remove the external snap rings from the extension cylinder rod-end pivot pin at the Primary Boom Lift Cylinder platform end of the extension tube. Crushing hazard. The extension The primary boom lift cylinder raises and lowers cylinder could become unbalanced the primary boom. - Page 139 June 2011 Section 4 • Repair Procedures REV D BOOM COMPONENTS 3 Attach a 5 ton / 5000 kg overhead crane to the 8 Use a soft metal drift to remove the pin. platform end of the primary boom. Support the Crushing hazard.
-
Page 140: Primary Boom Extension Cylinder
Section 4 • Repair Procedures June 2011 BOOM COMPONENTS REV D 4 Place blocks under the barrel end of the primary boom extension cylinder for support. Primary Boom Extension 5 Tag, disconnect and plug the primary boom Cylinder extension cylinder hydraulic hoses. Cap the fittings on the cylinder. -
Page 141: Primary Boom Angle Sensor
June 2011 Section 4 • Repair Procedures REV D BOOM COMPONENTS 10 Working at the pivot end of the boom, support and slide the extension cylinder out of the boom Primary Boom Angle Sensor extension. Crushing hazard. The extension A properly functioning primary boom angle sensor cylinder could fall when removed (PBAS) is essential to safe machine operation. - Page 142 Section 4 • Repair Procedures June 2011 BOOM COMPONENTS REV D 6 Remove the angle sensor and bracket How to Calibrate the Primary assembly. Boom Angle Sensor 7 Remove the sensor retaining fasteners from the Note: Perform this procedure on a firm, level sensor bracket.
- Page 143 June 2011 Section 4 • Repair Procedures REV D BOOM COMPONENTS 6 Loosen the Primary Boom Angle Sensor 14 Enter sensor calibration mode by pressing the (PBAS) assembly bracket fasteners attached to buttons at the ground controls in the following the primary boom.
-
Page 144: Secondary Boom Cable Track
Repeat this procedure A cable track repair kit is available beginning with step 1. through the Genie Industries Tip-over hazard. If the boom does Service Parts Department. not stop at 65°, immediately... -
Page 145: Secondary Boom
June 2011 Section 4 • Repair Procedures REV D BOOM COMPONENTS 3 Carefully remove the snap rings from each end of the damaged section of cable track. Secondary Boom 4 Remove the retaining fasteners from the upper black rollers from the 4-link section of cable How to Disassemble the track to be replaced. - Page 146 Section 4 • Repair Procedures June 2011 BOOM COMPONENTS REV D 2 Tag, disconnect and plug the hydraulic hoses at 8 Tag and disconnect the electrical cables from the primary boom lift cylinder. Cap the fittings the turntable. on the cylinder. 9 Remove the hose protector bracket.
-
Page 147: Secondary Boom Lift Cylinder
June 2011 Section 4 • Repair Procedures REV D BOOM COMPONENTS 3 Remove the retaining fasteners securing the upper and lower turntable covers from the Secondary Boom Lift Cylinder turntable at the platform end. Remove the covers. How to Remove the Secondary 4 Remove the engine tray retaining fastener. - Page 148 Section 4 • Repair Procedures June 2011 BOOM COMPONENTS REV D 8 Using an approved hand-operated pump, drain 12 Remove the fuel tank mounting fasteners. the fuel tank into a suitable container. Refer to Carefully remove the fuel tank from the Section 2, Specifications.
-
Page 149: Secondary Boom Extension Cylinder
June 2011 Section 4 • Repair Procedures REV D BOOM COMPONENTS 18 Use a soft metal drift to remove the pin. Secondary Boom Extension 19 Remove the secondary boom lift cylinder from the machine by pulling it through the platform Cylinder end of the secondary boom. - Page 150 Section 4 • Repair Procedures June 2011 BOOM COMPONENTS REV D 3 Remove the fasteners securing the cable track 11 Tag, disconnect and plug the secondary boom trays and cable track clamps to the secondary extension cylinder hydraulic hoses. Cap the extension boom.
-
Page 151: Rpm Adjustment
June 2011 Section 4 • Repair Procedures Engines 1 2 3 4 5 6 7 8 9 0 1 2 1 2 3 4 5 6 7 8 9 0 1 2 REV D REV C 1 2 3 4 5 6 7 8 9 0 1 2 1 2 3 4 5 6 7 8 9 0 1 2 1 2 3 4 5 6 7 8 9 0 1 2 How to Remove the Flex Plate... - Page 152 Section 4 • Repair Procedures June 2011 ENGINES REV C GM models: 9 Remove the muffler retainer bracket fasteners. 10 Remove the muffler fasteners securing the 7 Remove the fasteners securing the muffler to muffler to the exhaust manifold. Remove the the exhaust manifold.
- Page 153 June 2011 Section 4 • Repair Procedures REV C ENGINES Continental models: Deutz F4L-913 models: 7 Tag and disconnect the wire harness from the 7 Tag and disconnect the wiring from the bell oxygen sensor. housing. 8 Remove the exhaust pipe heat shield fasteners 8 Remove the exhaust tailpipe and air inlet tube from the top of the muffler.
- Page 154 Section 4 • Repair Procedures June 2011 ENGINES REV C Deutz BF4L-2011 models: Perkins 704-30 Models: 7 Tag and disconnect the wiring from the bell 7 Remove the clamp securing the air intake elbow housing. to the air cleaner assembly. Remove the air intake tube from the engine.
- Page 155 June 2011 Section 4 • Repair Procedures REV C ENGINES 13 Carefully pull the pump and bell housing GM models: Torque the flex plate mounting assembly away from the engine and secure it bolts in sequence to 22 ft-lbs / 30 Nm. Then from moving.
- Page 156 Section 4 • Repair Procedures June 2011 ENGINES REV C GM models 6 Install the pump and mounting plate assembly ® onto the engine. Apply Loctite removable thread sealant to the mounting fasteners. Ford, Perkins, Perkins 704 models Deutz BF4L-2011 models and Continental TME27 models Torque the pump mounting plate fasteners in sequence to 14 ft-lbs / 19.1 Nm.
- Page 157 June 2011 Section 4 • Repair Procedures REV C ENGINES Deutz F4L-913 and Perkins 704-30 models Deutz BF4L-2011 models Perkins 804C-33 and Ford models GM models Continental models Part No. 88619 Z-80/60 4 - 55...
-
Page 158: Engine Fault Codes - Gasoline/Lpg Models
Section 4 • Repair Procedures June 2011 ENGINES REV C 5 Continue to hold the run/test toggle switch in the test position and count the blinks. Engine Fault Codes - Note: If any fault codes are present, the ECM will Gasoline/LPG Models blink a three digit code. -
Page 159: Ground Controls
June 2011 Section 4 • Repair Procedures Ground Controls 1 2 3 4 5 6 7 8 9 0 1 2 1 2 3 4 5 6 7 8 9 0 1 2 REV C REV B 1 2 3 4 5 6 7 8 9 0 1 2 1 2 3 4 5 6 7 8 9 0 1 2 1 2 3 4 5 6 7 8 9 0 1 2 How to Use the Service Bypass... - Page 160 Section 4 • Repair Procedures June 2011 GROUND CONTROLS REV B 4 Using auxiliary power, operate the platform The Recovery mode allows the platform to be level toggle switch to level the platform. lowered in the event the operator in the platform is unable to lower the platform using the platform Note: Only the auxiliary power unit can be used to controls, system failure or emergency situations.
-
Page 161: Circuit Boards
(TCON) cannot be replaced by itself. If 3 Carefully disconnect the ribbon cable from the the ECM circuit board is faulty and needs to be LCD display circuit board. replaced, contact the Genie Industries Service Department. 4 Remove the LCD display circuit board retaining fasteners. -
Page 162: Membrane Decal
Section 4 • Repair Procedures June 2011 GROUND CONTROLS REV B 5 Carefully remove the membrane decal from the control box lid while guiding the ribbon cables Membrane Decal out of the control box lid. 6 Remove any decal adhesive from the control The membrane decal is a special decal that box lid with a mild solvent. -
Page 163: Hydraulic Pumps
June 2011 Section 4 • Repair Procedures Hydraulic Pumps REV B 2 Tag, disconnect and plug the hydraulic hoses at the function pump. Cap the fittings on the Function Pump pump. Bodily injury hazard. Spraying How to Remove the Function hydraulic oil can penetrate and Pump burn skin. -
Page 164: Drive Pump
Sauer-Danfoss service center. Contact Component damage hazard. The the Genie Industries Service Department to locate engine must not be started with your local authorized service center. the hydraulic tank shutoff valves in... - Page 165 June 2011 Section 4 • Repair Procedures REV B HYDRAULIC PUMPS 4 Support the pumps with a suitable lifting device 4 Install the bolt removed in step 4 into the anchor and remove the two drive pump mounting hole to secure the engine tray from moving. fasteners.
-
Page 166: Function Manifold - View 1
Section 4 • Repair Procedures June 2011 Manifolds 1 2 3 4 5 6 7 8 9 0 1 2 3 4 5 6 7 8 9 0 1 2 3 1 2 3 4 5 6 7 8 9 0 1 2 3 4 5 6 7 8 9 0 1 2 3 REV D REV E 1 2 3 4 5 6 7 8 9 0 1 2 3 4 5 6 7 8 9 0 1 2 3... - Page 167 June 2011 Section 4 • Repair Procedures 1 2 3 4 5 6 7 8 9 0 1 2 3 4 5 6 7 8 9 0 1 2 1 2 3 4 5 6 7 8 9 0 1 2 3 4 5 6 7 8 9 0 1 2 REV E REV D MANIFOLDS...
-
Page 168: Function Manifold - View 2
Section 4 • Repair Procedures June 2011 1 2 3 4 5 6 7 8 9 0 1 2 3 4 5 6 7 8 9 0 1 2 3 1 2 3 4 5 6 7 8 9 0 1 2 3 4 5 6 7 8 9 0 1 2 3 MANIFOLDS REV D REV E... - Page 169 June 2011 Section 4 • Repair Procedures 1 2 3 4 5 6 7 8 9 0 1 2 3 4 5 6 7 8 9 0 1 2 3 1 2 3 4 5 6 7 8 9 0 1 2 3 4 5 6 7 8 9 0 1 2 3 REV D REV E MANIFOLDS...
-
Page 170: Valve Adjustments - Function Manifold
Section 4 • Repair Procedures June 2011 1 2 3 4 5 6 7 8 9 0 1 2 3 4 5 6 7 8 9 0 1 2 3 1 2 3 4 5 6 7 8 9 0 1 2 3 4 5 6 7 8 9 0 1 2 3 MANIFOLDS REV D REV E... - Page 171 June 2011 Section 4 • Repair Procedures 1 2 3 4 5 6 7 8 9 0 1 2 3 4 5 6 7 8 9 0 1 2 1 2 3 4 5 6 7 8 9 0 1 2 3 4 5 6 7 8 9 0 1 2 REV D REV E MANIFOLDS...
- Page 172 Section 4 • Repair Procedures June 2011 1 2 3 4 5 6 7 8 9 0 1 2 3 4 5 6 7 8 9 0 1 2 3 1 2 3 4 5 6 7 8 9 0 1 2 3 4 5 6 7 8 9 0 1 2 3 MANIFOLDS REV D REV E...
- Page 173 June 2011 Section 4 • Repair Procedures 1 2 3 4 5 6 7 8 9 0 1 2 3 4 5 6 7 8 9 0 1 2 3 1 2 3 4 5 6 7 8 9 0 1 2 3 4 5 6 7 8 9 0 1 2 3 REV D REV E MANIFOLDS...
- Page 174 Section 4 • Repair Procedures June 2011 1 2 3 4 5 6 7 8 9 0 1 2 3 4 5 6 7 8 9 0 1 2 1 2 3 4 5 6 7 8 9 0 1 2 3 4 5 6 7 8 9 0 1 2 MANIFOLDS REV D REV E...
- Page 175 June 2011 Section 4 • Repair Procedures 1 2 3 4 5 6 7 8 9 0 1 2 3 4 5 1 2 3 4 5 6 7 8 9 0 1 2 3 4 5 1 2 3 4 5 6 7 8 9 0 1 2 3 4 5 1 2 3 4 5 6 7 8 9 0 1 2 3 4 5 6 7 8 9 0 1 2 3 1 2 3 4 5 6 7 8 9 0 1 2 3 4 5 1 2 3 4 5 6 7 8 9 0 1 2 3 4 5 6 7 8 9 0 1 2 3...
-
Page 176: Platform Manifold
Section 4 • Repair Procedures June 2011 MANIFOLDS REV E Platform Manifold The platform Manifold is mounted to the platform mounting weldment. Index Schematic Description Item Function Torque Check valve ........GA ..Platform level circuit Proportional solenoid valve, 3 position 4 way ......... GB ..Jib boom up/down —... - Page 177 June 2011 Section 4 • Repair Procedures REV E MANIFOLDS Part No. 88619 Z-80/60 4 - 75...
-
Page 178: Turntable Rotation Manifold
Section 4 • Repair Procedures June 2011 MANIFOLDS REV E Turntable Rotation Manifold The turntable rotation manifold is mounted to the turntable rotation motor located in the boom storage compartment. Index Schematic Description Item Function Torque Shuttle valve, 2 position 3 way ..KK ... Turntable rotation brake release ..10-13 ft-lbs / 14-18 Nm Counterbalance valve ...... -
Page 179: Platform Rotate Manifold
June 2011 Section 4 • Repair Procedures REV E MANIFOLDS Platform Rotate Manifold The platform rotate manifold is mounted on the platform rotator. Index Schematic Description Item Function Torque Counterbalance valve ..... HA ... Turntable rotation brake release ..35-40 ft-lbs / 47-54 Nm Counterbalance valve ..... -
Page 180: Wheel Steer And Oscillate Manifold (Before Serial Number 990)
Section 4 • Repair Procedures June 2011 MANIFOLDS REV E Two Wheel Steer and Oscillate Manifold (before serial number 990) The Two Wheel Steer and Oscillate manifold is mounted inside the drive chassis at the square-end of the machine. Index Schematic Description Item... - Page 181 June 2011 Section 4 • Repair Procedures REV E MANIFOLDS Part No. 88619 Z-80/60 4 - 79...
- Page 182 Section 4 • Repair Procedures June 2011 MANIFOLDS REV E Two Wheel Steer and Oscillate Manifold, continued (before serial number 990) Index Schematic Description Item Function Torque Flow regulator valve, 2.3 gpm / 8.7 L/min ......BK ..Yellow side steer cylinder extend circuit ........
- Page 183 June 2011 Section 4 • Repair Procedures REV E MANIFOLDS Part No. 88619 Z-80/60 4 - 81...
-
Page 184: Wheel Steer And Oscillate Manifold (From Serial Number 990)
Section 4 • Repair Procedures June 2011 MANIFOLDS REV E Two Wheel Steer and Oscillate Manifold (from serial number 990) The Two Wheel Steer and Oscillate manifold is mounted inside the drive chassis at the square-end of the machine. Index Schematic Description Item... - Page 185 June 2011 Section 4 • Repair Procedures REV E MANIFOLDS Part No. 88619 Z-80/60 4 - 83...
- Page 186 Section 4 • Repair Procedures June 2011 MANIFOLDS REV E This list continues on the next page. Two Wheel Steer and Oscillate Manifold, continued (from serial number 990) Index Schematic Description Item Function Torque Flow regulator valve, 1.5 gpm / 5.7 L/min ......JK ..Yellow side steer cylinder extend circuit ........
- Page 187 June 2011 Section 4 • Repair Procedures REV E MANIFOLDS Part No. 88619 Z-80/60 4 - 85...
- Page 188 Section 4 • Repair Procedures June 2011 MANIFOLDS REV E How to Adjust the Oscillate 6 Adjust the internal hex socket. Turn it clockwise to increase the pressure or counterclockwise to Relief Valve decrease the pressure. Install the relief valve cap.
- Page 189 June 2011 Section 4 • Repair Procedures 1 2 3 4 5 6 7 8 9 0 1 2 3 4 5 1 2 3 4 5 6 7 8 9 0 1 2 3 4 5 1 2 3 4 5 6 7 8 9 0 1 2 3 4 5 1 2 3 4 5 6 7 8 9 0 1 2 3 4 5 REV E MANIFOLDS...
- Page 190 Section 4 • Repair Procedures June 2011 MANIFOLDS REV E Four Wheel Steer and Oscillate Manifold (before serial number 990) The Four Wheel Steer and Oscillate manifold is mounted inside the drive chassis at the square-end of the machine. Index Schematic Description Item...
- Page 191 June 2011 Section 4 • Repair Procedures REV E MANIFOLDS Part No. 88619 Z-80/60 4 - 89...
- Page 192 Section 4 • Repair Procedures June 2011 MANIFOLDS REV E Four Wheel Steer and Oscillate Manifold, continued Index Schematic Description Item Function Torque Check valve ........CM ..Load sensing circuit, circle end blue side steer cylinder retract .... 8-10 ft-lbs / 11-14 Nm Check valve ........
- Page 193 June 2011 Section 4 • Repair Procedures REV E MANIFOLDS Part No. 88619 Z-80/60 4 - 91...
- Page 194 Section 4 • Repair Procedures June 2011 MANIFOLDS REV E Four Wheel Steer and Oscillate Manifold, continued Index Schematic Description Item Function Torque Check valve ........CAC ..Load sensing circuit, square end blue side steer cylinder extend ... 8-10 ft-lbs / 11-14 Nm Check valve, 65 psi / 4.5 bar .....
- Page 195 June 2011 Section 4 • Repair Procedures REV E MANIFOLDS Part No. 88619 Z-80/60 4 - 93...
-
Page 196: Wheel Steer And Oscillate Manifold (From Serial Number 990)
Section 4 • Repair Procedures June 2011 MANIFOLDS REV E 8-10 Four Wheel Steer and Oscillate Manifold (from serial number 990) The Four Wheel Steer and Oscillate manifold is mounted inside the drive chassis at the square-end of the machine. Index Schematic Description... - Page 197 June 2011 Section 4 • Repair Procedures REV E MANIFOLDS Part No. 88619 Z-80/60 4 - 95...
- Page 198 Section 4 • Repair Procedures June 2011 MANIFOLDS REV E Four Wheel Steer and Oscillate Manifold, continued Index Schematic Description Item Function Torque Solenoid valve, 3 position 4 way ..KP ..Steer left/right, circle end blue side steer cylinder ..... 26-30 ft-lbs / 35-41 Nm Solenoid valve, 3 position 4 way ..
- Page 199 June 2011 Section 4 • Repair Procedures REV E MANIFOLDS Part No. 88619 Z-80/60 4 - 97...
- Page 200 Section 4 • Repair Procedures June 2011 MANIFOLDS REV E How to Adjust the Oscillate Relief Valve Note: Perform this procedure with the boom in the stowed position. Note: This procedure will require two people. 1 Remove the drive chassis cover from the square-end of the machine.
-
Page 201: Oil Diverter Manifold (Welder Option)
June 2011 Section 4 • Repair Procedures REV E MANIFOLDS 8-11 Oil Diverter Manifold Components (welder option) The oil diverter manifold is mounted to the hydraulic generator located in the engine compartment. Index Schematic Description Item Function Torque Pilot Operated Directional valve, 2 position 3 way ...... -
Page 202: Traction Manifold, 2Wd
Section 4 • Repair Procedures June 2011 MANIFOLDS REV E 8-12 Traction Manifold, 2WD The 2WD traction manifold is mounted inside the drive chassis at the circle-end of the machine. Index Schematic Description Item Function Torque Check valve, 5 psi / 0.34 bar .... EA ..Drive motor anti-cavitation ....30-35 ft-lbs / 41-47 Nm Check valve, 5 psi / 0.34 bar .... - Page 203 June 2011 Section 4 • Repair Procedures REV E MANIFOLDS Part No. 88619 Z-80/60 4 - 101...
-
Page 204: Valve Adjustments, 2Wd Traction Manifold
Section 4 • Repair Procedures June 2011 MANIFOLDS REV E 8-13 10 Press and hold the function enable/high rpm select button (rabbit symbol) position. Valve Adjustments, 2WD 11 Adjust the internal hex socket until the pressure Traction Manifold reading on the gauge is 40 psi / 2.8 bar less than the pressure reading taken in step 5. - Page 205 June 2011 Section 4 • Repair Procedures 1 2 3 4 5 6 7 8 9 0 1 2 3 4 5 1 2 3 4 5 6 7 8 9 0 1 2 3 4 5 1 2 3 4 5 6 7 8 9 0 1 2 3 4 5 1 2 3 4 5 6 7 8 9 0 1 2 3 4 5 REV E MANIFOLDS...
-
Page 206: Traction Manifold, 4Wd
Section 4 • Repair Procedures June 2011 MANIFOLDS REV E 8-14 Traction Manifold, 4WD The 4WD traction manifold is mounted inside the drive chassis at the circle-end of the machine. Index Schematic Description Item Function Torque Check valve, 5 psi / 0.34 bar ..... FA ..Drive motor anti-cavitation ....30-35 ft-lbs / 41-47 Nm Solenoid valve, 2 position 3 way .. - Page 207 June 2011 Section 4 • Repair Procedures REV E MANIFOLDS Part No. 88619 Z-80/60 4 - 105...
-
Page 208: Valve Adjustments, 4Wd Traction Manifold
Section 4 • Repair Procedures June 2011 MANIFOLDS REV E 8-15 10 Press and hold the function enable/high rpm select button (rabbit symbol). Valve Adjustments, 4WD 11 Adjust the internal hex socket until the pressure Traction Manifold reading on the gauge is 40 psi / 2.8 bar less than the pressure reading taken in step 5. -
Page 209: Valve Coils
June 2011 Section 4 • Repair Procedures REV E MANIFOLDS 8-16 Valve Coil Resistance Valve Coils Specifications Note: The following coil resistance specifications How to Test a Coil are at an ambient temperature of 68°F / 20°C. As valve coil resistance is sensitive to changes in air A properly functioning coil provides an temperature, the coil resistance will typically electromagnetic force which operates the solenoid... -
Page 210: Electrocution Hazard. Contact With Electrically Charged Circuits Could Result In Death Or Serious Injury
Note: The multimeter, when set to read DC current, should be capable of reading up to 800 Resistor, 10Ω Ω Ω Ω Ω Genie part number 27287 4 Connect the negative lead to the other terminal on the coil. -
Page 211: Turntable Rotation Components
June 2011 Section 4 • Repair Procedures Turntable Rotation Components 1 2 3 4 5 6 7 8 9 0 1 2 3 4 5 6 7 1 2 3 4 5 6 7 8 9 0 1 2 3 4 5 6 7 1 2 3 4 5 6 7 8 9 0 1 2 3 4 5 6 7 1 2 3 4 5 6 7 8 9 0 1 2 3 4 5 6 7 REV E... - Page 212 Section 4 • Repair Procedures June 2011 TURNTABLE ROTATION COMPONENTS REV B REV B How to Adjust the Turntable 7 Rotate the backlash pivot plate away from the turntable until it contacts the adjustment bolt. Rotation Gear Backlash Torque the mounting fasteners on the backlash pivot plate to specification.
-
Page 213: Axle Components
June 2011 Section 4 • Repair Procedures REV B Axle Components 10-1 4 Measure the distance between the inside of one circle-end tire and the chassis side plate on Steer Sensors both sides of the axle. Result: Both measurements should be the The steer sensor measures steer angle and same to indicate that the tires are parallel with communicates that information to the ground... - Page 214 Section 4 • Repair Procedures June 2011 AXLE COMPONENTS REV B How to Adjust a Steer Sensor Circle-end steer sensors: 10 At the platform controls, press the square-end 1 Start the engine from the platform controls. steer mode button. 2 Press down the foot switch and push the engine 11 Locate the steer sensor on top of the yoke pivot idle select button until the engine switches to pin.
- Page 215 June 2011 Section 4 • Repair Procedures AXLE COMPONENTS REV B How to Calibrate the Steer 9 Use the button to scroll through the menu until the appropriate steer sensor is displayed. Sensors Choose from: If a steer sensor reaches the limit of travel before a RESET BLUE END BLUE SIDE STEER SENSOR tire is adjusted parallel to the chassis, the steer RESET YELLOW END BLUE SIDE STEER SENSOR...
-
Page 216: Hub And Bearings, 2Wd Models
Section 4 • Repair Procedures June 2011 AXLE COMPONENTS REV B 10-2 How to Install the Hub and Hub and Bearings, 2WD Models Bearings, 2WD Models Note: When replacing a wheel bearing, both the How to Remove the inner and outer bearings including the pressed-in Hub and Bearings, 2WD Models races must be replaced. - Page 217 2 Remove the drive chassis cover from the Genie Industries Service Department. circle-end of the machine. 3 Remove the oscillate axle limit switch mounting fasteners. Remove the limit switches.
-
Page 218: Oscillating Axle Cylinders
Section 4 • Repair Procedures June 2011 AXLE COMPONENTS REV B 10-3 2 Tag, disconnect and plug the oscillating axle cylinder hydraulic hoses. Cap the fittings on the Oscillating Axle Cylinders oscillate cylinder. Bodily injury hazard. Spraying The oscillating axle cylinders extend and retract hydraulic oil can penetrate and between the drive chassis and the oscillating axle. -
Page 219: Troubleshooting And Repair Procedures Shall Be Completed By A Person Trained And Qualified On The Repair Of This Machine
June 2011 Section 5 • Fault Codes Fault Codes REV B Before Troubleshooting: Read, understand and obey the safety rules and operating instructions printed in the Operator's Manual on your machine. Be sure that all necessary tools and test equipment are available and ready for use. Observe and Obey: Read each appropriate fault code thoroughly. -
Page 220: Fault Diagnostics Control System
Section 5 • Fault Codes June 2011 1 2 3 4 5 6 7 8 9 0 1 2 3 4 5 6 7 8 9 0 1 2 1 2 3 4 5 6 7 8 9 0 1 2 3 4 5 6 7 8 9 0 1 2 CONTROL SYSTEM FAULT CODES REV B REV C... - Page 221 June 2011 Section 5 • Fault Codes 1 2 3 4 5 6 7 8 9 0 1 2 3 4 5 6 7 8 9 0 1 2 3 1 2 3 4 5 6 7 8 9 0 1 2 3 4 5 6 7 8 9 0 1 2 3 REV B REV C CONTROL SYSTEM FAULT CODES...
- Page 222 Section 5 • Fault Codes June 2011 CONTROL SYSTEM FAULT CODES REV C Error Source Error Type Effects Recovery Actions Range check ENGINE SPEED (underspeed) Power up controller with the problem Range check (low oil Display message on LCD. OIL PRESSURE corrected.
- Page 223 June 2011 Section 5 • Fault Codes REV C CONTROL SYSTEM FAULT CODES Error Source Error Type Effects Recovery Actions Value at 5.0 V Value too high Limited speed and direction frozen at Power up controller with problem zero and neutral, alarm sounds. corrected.
- Page 224 Section 5 • Fault Codes June 2011 CONTROL SYSTEM FAULT CODES REV C Error Source Error Type Effects Recovery Actions Display message on LCD. SAFETY SWITCH P3 P3 SAFETY SWITCH FAULT Display message on LCD. SAFETY SWITCH P6R1 P6R1 SAFETY SWITCH FAULT Display message on LCD.
- Page 225 June 2011 Section 5 • Fault Codes REV C CONTROL SYSTEM FAULT CODES Error Source Error Type Effects Recovery Actions Value at 5.0 V Value too high Limited speed and direction frozen at Power up controller with problem zero and neutral, alarm sounds. corrected.
- Page 226 Section 5 • Fault Codes June 2011 CONTROL SYSTEM FAULT CODES REV C Error Source Error Type Effects Recovery Actions Sound audible warning and flash primary boom down LED at the medium rate and display message on Value at 5.0 V LCD screen PRI BOOM ANG SENSOR Correct problem.
- Page 227 June 2011 Section 5 • Fault Codes REV C CONTROL SYSTEM FAULT CODES Error Source Error Type Effects Recovery Actions MOTOR SPEED VALVE BRAKE VALVE AUX PROPEL VALVE PLAT LEV UP VALVE Limited speed and direction frozen at Power up controller with the problem Fault check PLAT LEV DN VALVE zero and neutral, alarm sounds.
-
Page 228: How To Clear Secopndary Boom Safety Switch Faults
Section 5 • Fault Codes June 2011 CONTROL SYSTEM FAULT CODES REV C Control System Fault Codes Using the TCON LCD Note: Take care when using this method to avoid How to Clear Secondary Boom resetting threshold defaults. Safety Switch Faults 1 With the key switch off, press and hold the button and turn the key switch to the on Note: Beginning with software release 2.0, the... - Page 229 June 2011 Section 5 • Fault Codes REV B ENGINE FAULT CODES Engine Fault Codes - 5 Continue to hold the run/test toggle switch in the test position and count the blinks. Ford and Continental Models Note: Before the fault codes are displayed, the check engine light will blink a code 123 three How to Retrieve Ford and times.
-
Page 230: Ford Engine Ecm Fault Code Chart
Section 5 • Fault Codes June 2011 Ford Engine ECM Fault Code Chart REV B Code Problem Cause Solution Heated Oxygen Sensor wiring and/or connections Repair wiring and/or connections OR replace Closed Loop Multiplier High open or shorted OR sensor is faulty OR there are sensor OR repair vacuum and exhaust (LPG) vacuum leaks or exhaust leaks. - Page 231 June 2011 Section 5 • Fault Codes REV B FORD ECM FAULT CODE CHART Code Problem Cause Solution Engine wire harness may have an intermittent Repair short in engine wire harness OR test Adaptive Learn Low (LPG) short to 5V DC or 12V DC OR fuel system and repair the fuel system components.
- Page 232 Section 5 • Fault Codes June 2011 FORD ECM FAULT CODE CHART REV B Code Problem Cause Solution Camshaft position sensor wiring and/or Be sure system ground connections are in Camshaft Sensor Noise connections open or shorted OR there is a poor place and secure OR repair wiring and/or system ground connection OR sensor is faulty.
- Page 233 #2 OR replace ignition coil #2. If this fault appears on your machine, contact FPP1 High Voltage Not used. Genie Industries Service Department. If this fault appears on your machine, contact FPP1 Low Voltage Not used. Genie Industries Service Department.
- Page 234 Section 5 • Fault Codes June 2011 FORD ECM FAULT CODE CHART REV B Code Problem Cause Solution The throttle position sensor wiring and/or Be sure engine harness wiring and connections for either TPS1 or TPS2 open or connections are in place and secure OR TPS1 Higher than TPS2 shorted OR there is a poor system ground repair wiring and/or connections to one or...
-
Page 235: Continental Engine Ecm Fault Code Chart
June 2011 Section 5 • Fault Codes Continental Engine ECM Fault Code Chart REV B System Code Fault Name Fault Conditions MAP Pressure High MAP pressure > 16 psi and TPS < 10% and RPM > 1800 To Unlatch, MAP pressure must be < 10 MAP Voltage Low MAP voltage <... - Page 236 Section 5 • Fault Codes June 2011 CONTINENTAL ECM FAULT CODE CHART REV B System Code Fault Name Fault Conditions 2122 FPP1 High Voltage FPP1 voltage > 4.8 vdc 2123 FPP1 Low Voltage FPP1 voltage < 0.2 vdc Max Govern Speed Engine RPM >...
- Page 237 June 2011 Section 5 • Fault Codes REV B CONTINENTAL ECM FAULT CODE CHART System Code Fault Name Fault Conditions EGO Open/Lazy Pre-cat 1 EGO cold persistently > 120 seconds Sensors EGO Open/Lazy Post-cat 1 EGO cold persistently > 120 seconds Injectors Injector Loop Open or Injector off-state low-side <...
- Page 238 Section 5 • Fault Codes June 2011 CONTINENTAL ECM FAULT CODE CHART REV B System Code Fault Name Fault Conditions No cam pulse in 4 cycles and RPM > Cam Loss 1000 Crank Crank Loss Cam pulses without crank activity Sensors >...
- Page 239 June 2011 Section 6 • Schematics Schematics About This Section There are two groups of schematics in this section. Electrical Schematics Electrocution hazard. Contact with electrically charged circuits could result in death or serious injury. Observe and Obey: Remove all rings, watches and other jewelry.
-
Page 240: Wire Circuit Legend
Section 6 • Schematics June 2011 Wire Circuit Legend REV B Circuit numbering Circuit suffix 1 Circuit numbers consist of three parts: the circuit Definition Suffix prefix, circuit number and circuit suffix. The AC Generator circuit prefix indicates the type of circuit. The Alternator Field circuit number describes the function of the Angle... - Page 241 June 2011 Section 6 • Schematics REV B WIRE CIRCUIT LEGEND Definition Suffix Definition Suffix Function Enable Pressure Comp Enable Ground Control Pressure Sender Ground Pressure Switches Horn Primary Boom Angle Sensor High RPM Primary Boom Down Hydraulic Generator Primary Boom Ext/Ret Lockout Valve Ignition Primary Boom Extend Jib Bellcrank Down...
- Page 242 Section 6 • Schematics June 2011 WIRE CIRCUIT LEGEND REV B Definition Suffix Wire Coloring Secondary Boom Lockout Valve (Extend) 1 All cylinder extension colors are solid and all Secondary Boom Lockout Valve (Riser Down) SLD retract functions are striped black. When using Sensor black wire, the stripe shall be white.
- Page 243 June 2011 Section 6 • Schematics REV B WIRE CIRCUIT LEGEND Color, Circuit #, and Primary function Color, Circuit #, and Primary function Primary boom up drive WH/BK 31 Reverse/EDC-B RD/BK 2 Primary boom down drive WH/RD 32 Brake RD/WH 3 Primary boom up/dwn FC Start proportional valve drive...
- Page 244 Section 6 • Schematics June 2011 WIRE CIRCUIT LEGEND REV B Color, Circuit #, and Primary function Color, Circuit #, and Primary function OR/BK 64 Power for operational switches J1708 - (low) BL/WH 65 Low fuel indication WH/RD 100 Outrigger lowered Drive enable WH/BK 101 Outrigger raised...
- Page 245 June 2011 Section 6 • Schematics REV B WIRE CIRCUIT LEGEND Color, Circuit #, and Primary function Color, Circuit #, and Primary function RD/BK 129 Descent alarm BL/WH 163 Pri extend/retract signal WH/RD 130 Travel alarm RD/WH 164 Pri up/down signal Motion alarm WH/RD 165 TT Rotate signal...
-
Page 246: Limit Switches And Angle Sensors
Section 6 • Schematics June 2011 Limit Switches and Angle Sensors REV C Types of Limit Switches Limit Switch Numbering There are two types of limit switches, found in LSP1AO Primary boom angle stowed LSP1RO Primary boom length retracted various locations throughout the machine: LSP1EO Primary boom length fully extended mechanical-type operational or safety switches. - Page 247 June 2011 Section 6 • Schematics REV C LIMIT SWITCHES AND ANGLE SENSORS Limit Switch and Angle Sensor Legend PRIMARY BOOM ANGLE SENSOR LSP1RO LSP1EO LSS2AO LSP1AO LSJ1EO LSS1RO PRIMARY BOOM LSS2AS BOOM SECONDARY LSS3AO BOOM TURNTABLE ANGLE SENSOR PLATFORM ANGLE LSS1RS LSA2OS...
-
Page 248: Drive Chassis And Platform Controller Pin Legend
Section 6 • Schematics June 2011 Drive Chassis and Platform Controller Pin Legend REV B REV C 6 - 10 Z-80/60 Part No. 88619... -
Page 249: Engine Relay And Fuse Panel Legend
June 2011 Section 6 • Schematics Engine Relay and Fuse Panel Legend REV B REV D DEUTZ F4L 913 (before serial number 339 LABEL DESCRIPTION GENIE P/N CR17 61225 START RELAY IGNITION/FUEL RELAY 34052 HORN RELAY 34052 34052 CR17 HYDRAULIC OIL COOLER FAN RELAY... - Page 250 Section 6 • Schematics June 2011 ENGINE RELAY AND FUSE PANEL LEGEND REV D REV B DEUTZ 2011 (after serial number 338) GENIE P/N LABEL DESCRIPTION START RELAY 61225 CR28 CR17 34052 CR28 ENGINE RUN/ALTERNATOR FIELD RELAY HORN RELAY 34052...
- Page 251 June 2011 Section 6 • Schematics REV B ENGINE RELAY AND FUSE PANEL LEGEND REV D CONTINENTAL TME27 ENGINE FUSE PANEL STARTER RELAY RELAY (LPG ONLY) POWER RELAY COILS MAIN INJECTORS 02 SENSORS BAT+ POWER FUEL PUMP FUEL PUMP RELAY (LPG) Part No.
-
Page 252: Turntable Controller Pin Legend
Section 6 • Schematics June 2011 Turntable Controller Pin Legend REV B REV C 6 - 14 Z-80/60 Part No. 88619... -
Page 253: Electrical Symbols Legend
June 2011 Section 6 • Schematics Electrical Symbols Legend REV B Foot switch N.O.H.C N.C.H.O Quick disconnect Horn button terminal Limit switch Coil normally open solenoid or relay TB21 WHT #21 PLATFORM OTS2 GROUND N.O. T-circuits connect Emergency Stop at terminal button normally Oil temperature closed... -
Page 254: Hydraulic Symbols Legend
Section 6 • Schematics June 2011 Hydraulic Symbols Legend REV B 25 psi (1.7 bar) Accumulator Differential Directional valve Filter with sensing valve pilot operated .035" bypass valve (0.89 mm) 2 position, 2 way relief setting Orifice with size Solenoid operated Shut off valve proportional valve Solenoid operated 3 position,... - Page 255 June 2011 Section 6 • Schematics REV D Electrical Schematic Layout (before serial number 2511) Part No. 88619 Z-80/60 6 - 17...
- Page 256 June 2011 Section 6 • Schematics Electrical Schematic Layout (before serial number 2511) 6 - 17 6 - 18...
- Page 257 June 2011 Section 6 • Schematics Electrical Schematic - View 1 Drive Chassis Controller (DCON) (before serial number 2511) 6 - 20 6 - 19...
- Page 258 Section 6 • Schematics June 2011 Electrical Schematic - View 1 REV C Drive Chassis Controller (DCON) (before serial number 2511) DCON EN7 Continued on View 2 J32 23 PIN J31 23 PIN DRIVE CHASSIS DRIVE CHASSIS HARNESS HARNESS Continued on View 7 6 - 20 Z-80/60 Part No.
- Page 259 June 2011 Section 6 • Schematics REV D Electrical Schematic - View 2 Platform Controls (PCON) (before serial number 1167) BOOM UP/DWN & PRI BOOM EXT/RET SEC BOOM UP/DWN DRIVE & STEERING PCON TURNTABLE ROTATE JOYSTICK (JC2) JOYSTICK (JC5) JOYSTICK (JC3) E-STOP (P2) PCON PLATFORM...
- Page 260 June 2011 Section 6 • Schematics Electrical Schematic - View 2 Platform Controls (PCON) (before serial number 1167) 6 - 21 6 - 22...
- Page 261 June 2011 Section 6 • Schematics REV A Electrical Schematic - View 2 Platform Controls (PCON) (from serial number 1167 to 2510) Pin1 Pin 1 Pin 2 Pin 2 Pin 3 Pin 3 XOUT Pin 4 Pin 4 YOUT Pin 5 Pin 5 RKOUT Pin 6...
- Page 262 June 2011 Section 6 • Schematics Electrical Schematic - View 2 Platform Controls (PCON) (from serial number 1167 to 2510) 6 - 23 6 - 24...
- Page 263 June 2011 Section 6 • Schematics Electrical Schematic - View 3 Ground Controls (TCON)(before serial number 2511) 6 - 26 6 - 25...
- Page 264 Section 6 • Schematics June 2011 Electrical Schematic - View 3 REV D Ground Controls (TCON) (before serial number 2511) 6 - 26 Z-80/60 Part No. 88619...
- Page 265 June 2011 Section 6 • Schematics REV C Electrical Schematic - View 4 (before serial number 2511) Part No. 88619 Z-80/60 6 - 27...
- Page 266 June 2011 Section 6 • Schematics Electrical Schematic - View 4 (before serial number 2511) 6 - 27 6 - 28...
- Page 267 June 2011 Section 6 • Schematics Electrical Schematic - View 5 (before serial number 2511) 6 - 30 6 - 29...
- Page 268 Section 6 • Schematics June 2011 Electrical Schematic - View 5 REV C (before serial number 2511) AUXILIARY HYD RECOVERY SIGNAL MULTI FUNCTION VLV RECOVERY SIGNAL BOOM RET RECOVERY SIGNAL BOOM DWN RECOVERY SIGNAL BOOM EXT/RET FC RECOVERY SIGNAL BOOM UP/DWN FC RECOVERY SIGNAL (P15)+(ECU POWER) (P15)+(ECU POWER) P_30...
- Page 269 June 2011 Section 6 • Schematics REV C Electrical Schematic - View 6 Ground Controls (TCON) (before serial number 2511) TCON MEMBRANE PANEL AUXILIARY HYD RECOVERY SIGNAL MULTI FUNCTION VLV RECOVERY SIGNAL BOOM RET RECOVERY SIGNAL BOOM DWN RECOVERY SIGNAL BOOM EXT/RET FC RECOVERY SIGNAL BOOM UP/DWN FC RECOVERY SIGNAL P_30...
- Page 270 June 2011 Section 6 • Schematics Electrical Schematic - View 6 Ground Controls (TCON) (before serial number 2511) 6 - 31 6 - 32...
- Page 271 June 2011 Section 6 • Schematics Electrical Schematic - View 7 (before serial number 2511) 6 - 34 6 - 33...
- Page 272 Section 6 • Schematics June 2011 Electrical Schematic - View 7 REV C (before serial number 2511) J32 23 PIN DRIVE J31 23 PIN DRIVE CHASSIS HARNESS CHASSIS HARNESS Continued on View1 J104 J105 4 3 2 1 4 3 2 1 J110 J108 J109...
- Page 273 June 2011 Section 6 • Schematics REV C Electrical Schematic - View 8 (before serial number 2511) ON CIRCUIT BOARD CKT #P DB9 CONNECTOR RS232_RXD RS232_TXD Continued on View 2 RS232_GND J22 WHITE 23 PIN J21 BLACK 23 PIN PCON MANIFOLD BOOM HARN 1.
- Page 274 June 2011 Section 6 • Schematics Electrical Schematic - View 8 (before serial number 2511) 6 - 35 6 - 36...
- Page 275 June 2011 Section 6 • Schematics Electrical Schematic - View 9 (before serial number 2511) 6 - 38 6 - 37...
- Page 276 Section 6 • Schematics June 2011 Electrical Schematic - View 9 REV D (before serial number 2511) Continued on View 3 TCON J11 BLACK 23 PIN BOOM HARN Continued on View 8 B1ENG (12 VOLT) C46HN-WH S56PRV-RD Continued on View 10 P56PRV-RD/WH TO WORK LIGHTS R48LP-WH/RD...
- Page 277 June 2011 Section 6 • Schematics REV C Electrical Schematic - View 10 Limit Switches (before serial number 2511) J12 BLACK 35 PIN LIMIT SWITCH HARN Continued on View 4 GNDDCN-BR P21DCN-WH P53LS-WH/BK S56PRV-RD S12SBL-BL/WH C124SBL RD/WH C68PBD-RD C68PBD-RD C73SBR-BL/RD C66DREN-BL C64LS-OR/BK C64LS-OR/BK...
- Page 278 June 2011 Section 6 • Schematics Electrical Schematic - View 10 Limit Switches (before serial number 2511) 6 - 39 6 - 40...
- Page 279 June 2011 Section 6 • Schematics Electrical Schematic - View 11 Deutz F4L-913 Engine (before serial number 339) 6 - 42 6 - 41...
- Page 280 Section 6 • Schematics Section 6 • Schematics June 2011 Electrical Schematic - View 11 REV B Deutz F4L-913 Engine (before serial number 339) J15 BLACK 4 PIN J13 WHITE 23 PIN Continued on View 5 POWER HARNESS ENGINE HARNESS TURNTABLE TILT SENSOR C84TAY-GN/BK...
- Page 281 June 2011 Section 6 • Schematics Section 6 • Schematics REV C Electrical Schematic - View 11 Deutz BF4L-2011 & TD2011L04i Engine (from serial number 339 to 2316) Continued on View 5 J15 BLACK 4 PIN J13 WHITE 23 PIN POWER HARN ENGINE HARN C84TAY-GN/BK...
- Page 282 June 2011 Section 6 • Schematics Electrical Schematic - View 11 Deutz BF4L-2011 & TD2011L04i (from serial number 339 to 2316) 6 - 43 6 - 44...
- Page 283 June 2011 Section 6 • Schematics Electrical Schematic - View 11 Deutz BF4L-2011 & TD2011L04i Engine (from serial number 2317 to 2510) 6 - 46 6 - 45...
- Page 284 Section 6 • Schematics June 2011 Electrical Schematic - View 11 REV A Deutz BF4L-2011 & TD2011L04i (from serial number 2317 to 2510) Continued on View 5 J15 BLACK 4 PIN J13 WHITE 23 PIN POWER HARN ENGINE HARN C84TAY-GN/BK C84TAY-GN/BK C83TAX-GN/WH C83TAX-GN/WH...
- Page 285 June 2011 Section 6 • Schematics Electrical Schematic - View 12 (before serial number 2511) 6 - 48 6 - 47...
- Page 286 Section 6 • Schematics June 2011 Electrical Schematic - View 12 REV C (before serial number 2511) Continued on View 6 J14 WHITE 35 PIN MANIFOLD HARN P125SBLE-WH/RD P126SBLD-WH/BK Continued on View 11 P125SBLE-WH/RD P126SBLD-WH/BK V125SBLE-WH/RD V126SBLD-WH/BK TO DRIVE LAMPS 2 86 6 - 48 Z-80/60...
- Page 287 June 2011 Section 6 • Schematics Electrical Schematic Perkins 704-30 Engine (before serial number 329) 6 - 50 6 - 49...
- Page 288 Section 6 • Schematics Section 6 • Schematics June 2011 Electrical Schematic REV A Perkins 704-30 Engine (before serial number 329) J15 BLACK 4 PIN J13 WHITE 23 PIN POWER HARNESS ENGINE HARNESS Continued on View 5 TURNTABLE TILT SENSOR C84TAY-GN/BK C83TAX-GN/WH P85TTSR-GR...
- Page 289 June 2011 Section 6 • Schematics REV C Electrical Schematic Perkins 804C-33 & 804D-33 Engine (from serial number 329 to 2316) Continued on View 5 J15 BLACK 4 PIN J13 WHITE 23 PIN POWER HARN ENGINE HARN C84TAY-GN/WH C83TAX-GN/WH P85TTSR-GR RET85TTSR-BR DETAIL "C"...
- Page 290 June 2011 Section 6 • Schematics Electrical Schematic Perkins 804C-33 & 804D-33 Engine (from serial number 329 to 2316) 6 - 51 6 - 52...
- Page 291 June 2011 Section 6 • Schematics Electrical Schematic Perkins 804D-33 Engine (from serial number 2317 to 2510) 6 - 54 6 - 53...
- Page 292 Section 6 • Schematics June 2011 Electrical Schematic REV A Perkins 804D-33 Engine (from serial number 2317 to 2510) 6 - 54 Z-80/60 Part No. 88619...
- Page 293 June 2011 Section 6 • Schematics REV A Electrical Schematic Perkins 804D (from serial number 2511) Part No. 88619 Z-80/60 6 - 55...
- Page 294 June 2011 Section 6 • Schematics Electrical Schematic Perkins 804D (from serial number 2511) 6 - 55 6 - 56...
- Page 295 June 2011 Section 6 • Schematics Electrical Schematic Continental TME27 Engine (before serial number 2511) 6 - 58 6 - 57...
- Page 296 Section 6 • Schematics June 2011 Electrical Schematic REV B Continental TME27 Engine (before serial number 2511) TEST TO TCON SWITCH KEYSWITCH C47OUT-WH/BK C47 OUT C108ESL-BL/WH J113 DEUTSCH 6 PIN 1 KOHM J13 WHITE 23 PIN J15 BLACK 4 PIN TCON-ENGINE ENGINE HARN POWER HARN...
- Page 297 June 2011 Section 6 • Schematics REV A Electrical Schematic - Engine Options Continental TME27 Engine (from serial number 2510) Part No. 88619 Z-80/60 6 - 59...
- Page 298 June 2011 Section 6 • Schematics Electrical Schematic - Engine Options Continental TME27 Engine (from serial number 2510) 6 - 59 6 - 60...
- Page 299 June 2011 Section 6 • Schematics Electrical Schematic Ford LRG 425 Engine 6 - 62 6 - 61...
- Page 300 Section 6 • Schematics June 2011 REV A Electrical Schematic Ford LRG 425 Engine J13 WHITE 23 PIN Continued on View 5 ENGINE HARN C84TAY-GN/BK J15 BLACK 4 PIN C83TAX-GN/WH C35RPM-BK/RD POWER HARN P85TTSR-GR RET85TTSR-BR J31-TILT SNSR DETAIL "C" OPT 120VAC W/REGULATOR P32-GEN HARN B1BAT RD RD/12VDC...
- Page 301 June 2011 Section 6 • Schematics REV C Electrical Schematic GM 3.0L Engine J15 BLACK 4 PIN J13 WHITE 23 PIN POWER HARN ENGINE HARN Continued on View 5 TURNTABLE TILT SENSOR C84TAY-GN/BK C83TAX-GN/WH P85TTSR-GR RET85TTSR-BR 0-20 DEGREE SENSOR ALARM SET AT 4.5 DEGREES J32-ENGINE P32-GENERATOR HARNESS...
- Page 302 June 2011 Section 6 • Schematics Electrical Schematic GM 3.0L Engine 6 - 63 6 - 64...
-
Page 303: Electrical Schematics
June 2011 Section 6 • Schematics REV A Electrical Schematic Safety Circuits Part No. 88619 Z-80/60 6 - 65... - Page 304 June 2011 Section 6 • Schematics Electrical Schematic Safety Circuits 6 - 65 6 - 66...
- Page 305 June 2011 Section 6 • Schematics Electrical Schematic - Generator Options 6 - 68 6 - 67...
- Page 306 Section 6 • Schematics June 2011 Electrical Schematic - Generator Options REV A MTE Hydraulic Generator Option Belt Driven Generator Option 6 - 68 Z-80/60 Part No. 88619...
- Page 307 June 2011 Section 6 • Schematics REV A Electrical Schematic Welder Generator Option Part No. 88619 Z-80/60 6 - 69...
- Page 308 June 2011 Section 6 • Schematics Electrical Schematic Welder Generator Option 6 - 69 6 - 70...
- Page 309 June 2011 Section 6 • Schematics Hydraulic Schematic 2 Wheel Drive (2 and 4 Wheel Steer) (before serial number 990) 6 - 72 6 - 71...
- Page 310 Section 6 • Schematics June 2011 Hydraulic Schematic REV D 2 Wheel Drive (2 and 4 Wheel Steer) (before serial number 990) Note: 'alpha' callouts refer to components shown in the manifold illustrations. Refer to the Repair Section. 6 - 72 Z-80/60 Part No.
- Page 311 June 2011 Section 6 • Schematics Hydraulic Schematic 2 Wheel Drive (2 and 4 Wheel Steer) (from serial number 990 to 2674) 6 - 74 6 - 73...
- Page 312 Section 6 • Schematics June 2011 Hydraulic Schematic REV D 2 Wheel Drive (2 and 4 Wheel Steer) (from serial number 990 to 2674) Note: 'alpha' callouts refer to components shown in the manifold illustrations. Refer to the Repair Section. 6 - 74 Z-80/60 Part No.
- Page 313 June 2011 Section 6 • Schematics REV A Hydraulic Schematic 2 Wheel Drive (2 and 4 Wheel Steer) (serial number 1543 and from serial number 2675) Note: 'alpha' callouts refer to components shown in the manifold illustrations. Refer to the Repair Section. Part No.
- Page 314 June 2011 Section 6 • Schematics Hydraulic Schematic 2 Wheel Drive (2 and 4 Wheel Steer) (serial number 1543 and from serial number 2675) 6 - 75 6 - 76...
- Page 315 June 2011 Section 6 • Schematics Hydraulic Schematic 4 Wheel Drive (2 and 4 Wheel Steer) (before serial number 990) 6 - 78 6 - 77...
- Page 316 Section 6 • Schematics June 2011 Hydraulic Schematic REV D 4 Wheel Drive (2 and 4 Wheel Steer) (before serial number 990) Note: 'alpha' callouts refer to components shown in the manifold illustrations. Refer to the Repair Section. 6 - 78 Z-80/60 Part No.
- Page 317 June 2011 Section 6 • Schematics Hydraulic Schematic 4 Wheel Drive (2 and 4 Wheel Steer) (from serial number 990 to 2674) 6 - 80 6 - 79...
- Page 318 Section 6 • Schematics June 2011 Hydraulic Schematic REV D 4 Wheel Drive (2 and 4 Wheel Steer) (from serial number 990 to 2674) Note: 'alpha' callouts refer to components shown in the manifold illustrations. Refer to the Repair Section. 6 - 80 Z-80/60 Part No.
- Page 319 June 2011 Section 6 • Schematics REV A Hydraulic Schematic 4 Wheel Drive (2 and 4 Wheel Steer) (serial number 1543 and from serial number 2675) Note: 'alpha' callouts refer to components shown in the manifold illustrations. Refer to the Repair Section. Part No.
- Page 320 June 2011 Section 6 • Schematics Hydraulic Schematic 4 Wheel Drive (serial number 1543 and from serial number 2675) 6 - 81 6 - 82...
- Page 321 June 2011 Section 6 • Schematics REV A Hydraulic Schematic Hydraulic Generator Options Continental Engine Only Deutz Engine Perkins Engine Continental Engine Part No. 88619 Z-80/60 6 - 83...
- Page 322 June 2011 Section 6 • Schematics Hydraulic Schematic Hydraulic Generator Options 6 - 83 6 - 84...
- Page 323 (BM STOWED) MICRO MICRO 74HC08 P_6R2 MICRO MICRO BTS650 ES0508 Rev B (OE) ((~SM)+(AH))(OE) Genie Part Number 227794 Rev A )+(AH) ~SLP MODE (~SM) J127 LOADSENSE LED BTS621 AUX HYD (AH) J24A 10PIN J24B 10PIN 74HC08 OUT 1 OUT 2...