Intermec EasyCoder 501 XP Service Manual
Bar code label printer
Hide thumbs
Also See for EasyCoder 501 XP:
- Service manual (210 pages) ,
- User manual (192 pages) ,
- Programmer's reference manual (140 pages)

Related Manuals for Intermec EasyCoder 501 XP


Summary of Contents for Intermec EasyCoder 501 XP
- Page 1 Service Manual P/N 1-960427-03 Edition 4 November 2000 EasyCoder 501 XP Bar Code Label Printer...
-
Page 2: Table Of Contents
8.11 Media Feed Principles................68 9. Liner/Batch Takeup Kit Description....................70 Main Parts....................72 Liner/Batch Takeup Unit................ 73 Intermec EasyCoder 501 XP Service Manual Edition 4, November 2000 Part No. 1-960427-03 Intermec EasyCoder 501 XP – Service Manual Ed. 4... - Page 3 17.11 Sensor Malfunctions................153 - Label Stop Sensor (LSS) ..............153 - Headlift Sensor................... 153 - Ribbon End Sensor ................154 - Ribbon Low Sensor ................154 - Label Taken Sensor (LTS)..............155 Intermec EasyCoder 501 XP – Service Manual Ed. 4...
- Page 4 Information in this manual is subject to change without prior notice and does not represent a commit- ment on the part of Intermec Printer AB. © Copyright Intermec Printer AB 2000. All rights reserved. Published in Sweden. EasyCoder, EasyLAN, Fingerprint, and LabelShop are registered trademarks of Intermec Technologies Corp.
-
Page 5: Preface
0.2 Preface This Service Manual is intended to facilitate installation, trouble- shooting and repair of the Intermec EasyCoder 501 XP in the version delivered at the date of publishing. Thus, all information on the Intermec Fingerprint fi rmware is based on version 7.40. -
Page 6: Notices And Approvals
Le présent appareil numérique n´émet pas de bruits radio-électriques dépassant les limites applicables aux appareils numériques de classe A prescrites dans le règlement sur brouillage radioélectrique édicté par le Ministère des Communications du Canada. Intermec EasyCoder 501 XP – Service Manual Ed. 4... -
Page 7: Declaration Of Conformity
..............Mats Gunnarssom President /. Intermec assumes no responsibility regarding the CE Directive if the printer is handled, modifi ed, or installed in other manners than those described in the manuals. Intermec EasyCoder 501 XP – Service Manual Ed. 4... -
Page 8: Identifi Cation
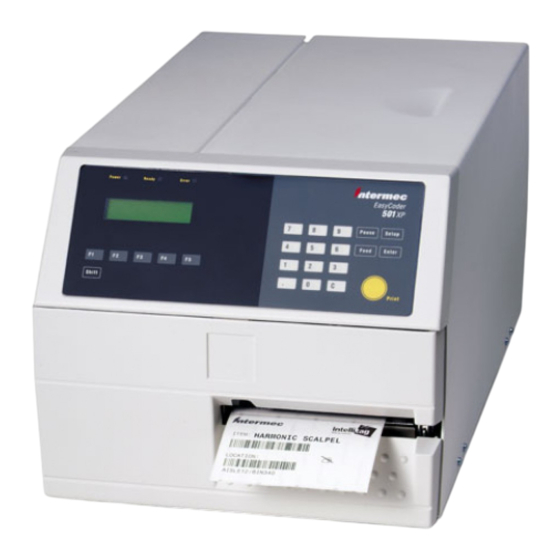
Chapter 1 1. Models and Options 1.1 Identifi cation The EasyCoder 501 XP only comes in one main model: a com- bined direct thermal/thermal transfer printer with a setup keyboard and a 12 dots/mm printhead. The printer can use any 100 to 240 VAC, 50 to 60 Hz voltage. - Page 9 Chapter 1 Models and Options 1.1 Identifi cation, cont. The EasyCoder 501 XP can be fi tted with a number of built-in options: • Paper Cutter (see Chapter 11) • Label Taken Sensor (see Chapter 10) • Liner/Batch Takeup Unit (see Chapter 9) •...
- Page 10 - Check number and size of DRAM SIMMs. • Any optional interface board fi tted? - Check type, straps, and optional circuits. Refer to Chapters 15 and 16 for more information. Intermec EasyCoder 501 XP – Service Manual Ed. 4...
- Page 11 VERSION$ function to check version of the Intermec Finger- print fi rmware. You can read the setup in the Setup Mode or by means of Intermec Shell, which also allows you to print test label #5 containing the present setup values. To enter Shell if a custom-made autoexec-fi le prevents access, lift the printhead and press any key on the printer's keyboard (except the <Shift>...
-
Page 12: Specifi Cations
Std. 1 x 4MB Real-Time Clock 10+ years life Power Supply Mains Voltage >90 to <264 VAC, 45 to 65 Hz PFC Regulation IEC 61000-3-2 Continuous 175W; Peek ≈ 400W Maximum Power Consumption Intermec EasyCoder 501 XP – Service Manual Ed. 4... - Page 13 Option Electronic Keys Option /. The maximum print length is also restricted by the amount of free DRAM memory. /. Latin, Greek, and Cyrillic fonts according to Unicode standard are included. Intermec EasyCoder 501 XP – Service Manual Ed. 4...
-
Page 14: Measures
An optional paper cutter increases the printer’s total length by 28 mm (1.1 inches). At least 90 mm (3.5 inches) of free space behind the printer is required for the connectors, and for inserting and removing a memory card. Intermec EasyCoder 501 XP – Service Manual Ed. 4... -
Page 15: Front
(4-pin female DIN-type) and a slot, that in other printer models using the same front gives access to a memory card adapter. Note that the memory card adapter in EasyCoder 501 XP is fi tted on the CPU board and is accessible through a slot in the rear plate! Keyboard/Display assy. - Page 16 The keyboard is of membrane switch type and is glued to the key- board plate. There are 54 switches, but only 23 of these are used in EasyCoder 501 XP. One switch is a Shift key, that provides a dual functionality to each of the other keys. A resistor ladder gives...
- Page 17 “Error”) is usually used to indicate that an error has occurred. Error LED (red) Ready LED (green) Power On LED (green) LCD Display Keyboard Connection Beeper Slave Processor Cable to CPU Board Intermec EasyCoder 501 XP – Service Manual Ed. 4...
-
Page 18: Components
Chapter 2 Front and Keyboard 1-971604-27 Console pcb. 2.3 Components DISPLAY 1-971704-01 Component Side 1-971604-01 P01 Soldering Side Test Points: C14 Lower soldering GND C14 Upper soldering Intermec EasyCoder 501 XP – Service Manual Ed. 4... -
Page 19: Schematics
GREEN Ain/PA4 Ain/PA5 PB6/ATIn Ain/PA6 PB7/ATOut Ain/PA7 ST6265 GREEN RESET PC0/Ain PC1/Tin/Ain OSCout PC2/Sin/Ain OSCin 8MHz PC3/Sout/Ain IC3B PC4/SCK/Ain TEST 74HC05 IC3C IC2B Beeper 74HC05 RESET 74HC74 IC2A IC3A 74HC05 74HC74 Intermec EasyCoder 501 XP – Service Manual Ed. 4... -
Page 20: Right-Hand Door
Shut the door, loosen the screws slightly and align the door with the front moulding. Tighten the screws and check that the door runs freely and is kept shut by the magnetic lock. Intermec EasyCoder 501 XP – Service Manual Ed. 4... -
Page 21: Front Hatch
Chapter 11. Alignment is performed in the same way as the right-hand door, see previous page. The front hatch can be removed by pushing it to the left when open. Intermec EasyCoder 501 XP – Service Manual Ed. 4... -
Page 22: Left-Hand Cover
#T10 Torx Screws #T10 Torx Screws Intermec EasyCoder 501 XP – Service Manual Ed. 4... -
Page 23: Description
If such problems should occur, especially after transpor- tation, check that the center section is straight. Intermec EasyCoder 501 XP – Service Manual Ed. 4... -
Page 24: Bottom Plate
On/Off Switch Provision for 1 – 2 Electronic Keys AC Power Cord Receptacle RS-232 Serial Interface ("uart1:") Upper External Media Intake Centronics Parallel Interface Memory Card Slot Lower External Media Intake Intermec EasyCoder 501 XP – Service Manual Ed. 4... - Page 25 A large crescent-shaped plate keeps the media roll aligned with the print mechanism. Maximum diameter of an internal media roll is 205 mm (8 inches) and maximum width is 120 mm (4.7 inches.) Media Supply Hub Intermec EasyCoder 501 XP – Service Manual Ed. 4...
-
Page 26: Internal Supply
The brake torque should be 70 ±20 The code disc fi tted at the innermost part of the hub package has no use in EasyCoder 501 XP, but is retained for logistic reasons (common assembly with EasyCoder 501.) Be careful to fi t the studs of the innermost hub module into the holes in the code disc when the package is assembled. - Page 27 An optional media roll retainer can be pressed on the hub package (but not on the adapter) to hold large media rolls and to prevent the media from getting misaligned on the roll. Media Roll Retainer Intermec EasyCoder 501 XP – Service Manual Ed. 4...
-
Page 28: External Supply
Chapter 5 Media Supply 5.2 External Supply Instead of an internal media roll, the EasyCoder 501 XP printer can also use media from an external supply, for example an external roll or a stack of fan-folded tickets. The media is inserted into the printer through either the upper or lower slot in rear plate. - Page 29 Adjust the position of the outer guide to fi t the width of the media. Intermec EasyCoder 501 XP – Service Manual Ed. 4...
- Page 30 Note that if the printer is to be permanently used with an external media supply only, the internal media supply spool, together with the large crescent-shaped guide plate could easily be removed (see Chapter 5.1.) Intermec EasyCoder 501 XP – Service Manual Ed. 4...
-
Page 31: Description
fi tted on the label slack absorber to prevent media misalignment. The guide is included in delivery of the printer, but is not fi tted as standard. Label Slack Absorber Edge Guide (not fi tted as standard) Intermec EasyCoder 501 XP – Service Manual Ed. 4... -
Page 32: Dismantling
The shaft should be screwed into the fl ange with a tightening torque of 5 Nm. #T20 Torx Screws (2x) #T10 Torx Screw Flange Torsion Spring Shaft Grip (green) Edge Guide (green) Intermec EasyCoder 501 XP – Service Manual Ed. 4... -
Page 33: Description
The mechanism consists of three main units: • Ribbon supply unit (see Chapter 7.2) • Ribbon rewind unit (see Chapter 7.3) • Ribbon-end sensor (see Chapter 7.4) Ribbon Rewind Unit Ribbon Supply Unit Ribbon End Sensor Intermec EasyCoder 501 XP – Service Manual Ed. 4... -
Page 34: Ribbon Supply Unit
It is most important for avoiding ribbon wrinkling that the pivoting point of the hub is centered in relation to the ribbon width. There- fore, the shaft is provided with six grooves which correspond to the standard widths of Intermec transfer ribbons (see table to the Ribbon Width Position (groove) left.) The three innermost grooves are used with EasyCoder 501... -
Page 35: Ribbon Supply
Use a 2 mm hexagon wrench to loosen the grub screw. /. Refer to Appendix 2 for a descrip- tion of how to check the brake torque. Intermec EasyCoder 501 XP – Service Manual Ed. 4... -
Page 36: Ribbon Rewind Unit
Adjustment The braking torque can be adjusted by adding or removing wash- ers at the outer end of the shaft and should be adjusted to 160±10 Nmm at 20°C Intermec EasyCoder 501 XP – Service Manual Ed. 4... - Page 37 Hub Plate Ball Bearing Ball Bearing Spring Washer Snap Rings Slide Bearing Flange Washer Carrier Washers Compression Spring Grub Screw 0–4 Torque Adjustment Friction Felt 0–1 Torque Adjustment Shaft #T20 Torx Screw Intermec EasyCoder 501 XP – Service Manual Ed. 4...
-
Page 38: Ribbon End Sensor
Thermal transfer media No ribbon Error 1027 Out of transfer ribbon Direct thermal media No ribbon Direct thermal media Ribbon The ribbon end sensor is connected to P52 on the CPU board. Intermec EasyCoder 501 XP – Service Manual Ed. 4... - Page 39 If that does not help, fi t or remove the jumper on P56. If the sensor refuses to work, consider the possibility that the mirror plate may be bent before discarding the sensor. Intermec EasyCoder 501 XP – Service Manual Ed. 4...
-
Page 40: Description
• The headlift mechanism presses the printhead against the media or transfer ribbon, or raises the printhead to allow media and ribbon load. Intermec EasyCoder 501 XP – Service Manual Ed. 4... - Page 41 Belt to Ribbon Rewind Unit Stepper Motor Headlift Mechanism Ribbon Assist Roller Platen Roller Printhead Tear Bar Liner Drive Roller Label Stop Sensor (hidden) Intermec EasyCoder 501 XP – Service Manual Ed. 4...
- Page 42 fi tted to the center section and the ribbon rewind unit are not included. Note that some of the parts illustrated here are not available as separate spare parts, but must be bought as ready- assembled units. Intermec EasyCoder 501 XP – Service Manual Ed. 4...
-
Page 43: Platen Roller
• Adjust the tension of the belts as described in Chapter 8.5 and put back the cover. Refer to illustration on next page! Intermec EasyCoder 501 XP – Service Manual Ed. 4... -
Page 44: Stepper Motor
Stepper Motor Belt to Ribbon Rewind Unit #T20 Torx Screw Belt to Platen Roller Pulley Ball Bearing Plastic Bearing Spacer Platen Roller Plastic Bearing Ball Bearing Bracket #T20 Torx Screw (1) Intermec EasyCoder 501 XP – Service Manual Ed. 4... - Page 45 • Connect the cable of the stepper motor to P420 on the CPU board (marked “STM1”.) • Adjust the tension of the belts as described in Chapter 8.5 and put back the cover. Refer to illustration on next page! Intermec EasyCoder 501 XP – Service Manual Ed. 4...
- Page 46 #T20 Torx Screw Stepper Motor Bracket Fitted to Center Section Belt (to Platen Roller) Fitted on Ribbon Assist Roller Shaft #T20 Torx Screws (3x) Fitted on Platen Roller Shaft Inner Print Unit Gable Intermec EasyCoder 501 XP – Service Manual Ed. 4...
-
Page 47: Belts
• Adjust the tension of the belts as described in Chapter 8.5 and put back the cover. Refer to illustration on next page! Intermec EasyCoder 501 XP – Service Manual Ed. 4... - Page 48 Belt Stepper Motor #T20 Torx Screw #T20 Torx Screw #T20 Torx Screw Ribbon Rewind Unit #T20 Torx Screw Belt Intermec EasyCoder 501 XP – Service Manual Ed. 4...
-
Page 49: Belt Adjustments
fl ex just a little when you press it with your fi nger. #T20 Torx Screw Stepper Motor Pulley Stepper Motor Belt #T20 Torx Screw Platen Roller Pulley Intermec EasyCoder 501 XP – Service Manual Ed. 4... - Page 50 If the idler roller starts to squeak, lubricate the inside of the belt with a small quantity of grease. Idler Roller #T20 Torx Screw Ribbon Rewind Unit Pulley Ribbon Assist Roller Pulley #T20 Torx Screw Belt Stepper Motor Stepper Motor Pulley Intermec EasyCoder 501 XP – Service Manual Ed. 4...
-
Page 51: Label Stop Sensor
“out-of-paper” condition is assumed. /. For detection of black marks on the top of the media, the cables from the two sensors could be switched on the CPU board. Intermec EasyCoder 501 XP – Service Manual Ed. 4... - Page 52 By default, the media feed data are not specifi ed amount of media feed by means of the LBLCOND state- cleared. Introduced with Intermec Fin- gerprint v7.12. ment, see Intermec Fingerprint v7.xx Reference Manual. Intermec EasyCoder 501 XP – Service Manual Ed. 4...
- Page 53 If using irregularly shaped labels, align the LSS with the front tips of the labels. Upper part of Detection Slot Linear Markings Adjustment Screw Upper part of print unit omitted to improve view. Intermec EasyCoder 501 XP – Service Manual Ed. 4...
- Page 54 Do not use any other type of chemicals. Be care- ful not to scratch the windows. Warning! Isopropyl alcohol [(CH CHOH; CAS 67-63-0] is a highly fl ammable, moderately toxic, and mildly irritating sub- stance. Intermec EasyCoder 501 XP – Service Manual Ed. 4...
- Page 55 Note! The snap-lock is fragile. • Remove the two #T8 Torx screws that hold the defective sensor and replace it. LSS Bracket Upper Sensor Lower Sensor Snap-Lock Carriage Intermec EasyCoder 501 XP – Service Manual Ed. 4...
- Page 56 • Put back the guide plates, the electronics compartment cover, and the power cord. • Adjust the lateral position of the LSS. Connect to P53 on CPU Board Connect to P54 on CPU Board Inner Notch Outer Notch Snap-Lock Intermec EasyCoder 501 XP – Service Manual Ed. 4...
-
Page 57: Printhead
Installation & Operation manual. The basis for all measures and positioning in the Intermec Fin- gerprint programming language is the size of printhead dots. In a12 dots/mm printhead, each dot has a nominal size of 0.083 mm (3.28 mils.) This means that a heated dot under standardized condi-... - Page 58 (3.28 mils) 13.4 mm (0.52 in) 106.6 mm (4.2 in) PRINT PRINT Length WINDOW WINDOW Origin Dot-line on printhead X-start Width FEED Dot 1279 DIRECTION Dot 0 max. 120 mm (4.7 in) Intermec EasyCoder 501 XP – Service Manual Ed. 4...
- Page 59 • The innermost cable (20-p blue fl at cable) is used for data to the printhead and is connected to P41 (marked “TPH”) on the CPU board. Blue Connector (to P41 on CPU Board) “Finger” Bracket Printhead “Finger” White Connector (to X2 on Power Supply) Intermec EasyCoder 501 XP – Service Manual Ed. 4...
- Page 60 Note the snap-lock on the white connector and pull at the con- nectors rather that at the cables! • Connect the cables to the replacement printhead assy, blue con- nector to the left – white connector to the right. Intermec EasyCoder 501 XP – Service Manual Ed. 4...
- Page 61 • Use original Intermec transfer ribbons only. These are opti- mized specifi cally for your printer. Inferior back coating on a non-approved transfer ribbon may cause residue which can completely destroy the printhead.
-
Page 62: Headlift Sensor
• Tighten the screw and check that the arm runs freely inside the fork-shaped sensor. • Put back the cover. #T10 Torx Screw Headlift Shaft Sensor Arm “Printhead Open“ position “Printhead Closed” position Sensor Intermec EasyCoder 501 XP – Service Manual Ed. 4... - Page 63 • Reassemble in reverse order. The sensor's cable should be con- nected to P50 (marked “HEADL”) on the CPU board. • Check that the sensor works properly using a PRSTAT state- ment, see Intemec Fingerprint v7.xx Reference Manual. Intermec EasyCoder 501 XP – Service Manual Ed. 4...
-
Page 64: Headlift Mechanism
fi xed alignment in the other two dimensions. Sensor Arm Return Spring Headlift Shaft Pressure Adjuster Linkage Headlift Sensor Headlift Arm Eccenter Printhead Pressure Grub Screw Printhead Lift Lever (factory-adjustment) Intermec EasyCoder 501 XP – Service Manual Ed. 4... - Page 65 1 kp to a total of 3-4 kp (29.4-39.2 N.) • Fine-adjust by means of test labels and the trial-and-error method (possibly after having loaded the transfer ribbon again.) Adjustment Knob (green) Intermec EasyCoder 501 XP – Service Manual Ed. 4...
- Page 66 • After having centered the arm, lock it by tightening the knob. • Reload the ribbon, if any. Knob Center of Media Tip of Headlift Arm Intermec EasyCoder 501 XP – Service Manual Ed. 4...
-
Page 67: Ribbon Assist Roller
The key will engage cogs in the plate that holds the outer end of the assist roller inside the gable. Ribbon Assist Roller Locking Screw #T20 Torx Screwdriver Intermec EasyCoder 501 XP – Service Manual Ed. 4... - Page 68 • You will need to print several labels before a new adjustment has any noticeable effect. • When you are satisfi ed that the problem is cleared, tighten the locking screw and test again by printing several more labels. Readjust if necessary. Intermec EasyCoder 501 XP – Service Manual Ed. 4...
-
Page 69: Media Feed Principles
(>200 dots), or the media may come loose from platen roller. Tear off (print at top of label): 15.7 mm Start Adjust: -175 Stop Adjust: 0 Dot Line on Printhead Tear Off Edge Label Stop Sensor Intermec EasyCoder 501 XP – Service Manual Ed. 4... - Page 70 If the black mark is placed further down the web, this must be compensated for by a negative Stop Adjust setting. Intermec EasyCoder 501 XP – Service Manual Ed. 4...
-
Page 71: Description
(also see Chap- ter 8.5.) When not used, the guide is fi tted by means of one #T20 Torx screw at the rear of the media compartment. Intermec EasyCoder 501 XP – Service Manual Ed. 4... - Page 72 9.1 Description, cont. The liner takeup unit can accommodate the liner from a full roll of labels. Batch Takeup Operation The batch takeup unit can accommodate approx. of a full label roll. Intermec EasyCoder 501 XP – Service Manual Ed. 4...
-
Page 73: Main Parts
The stepper motor is connected to P421 on the CPU board, see Chapter 15.3. Stepper Motor Motor Support Plate Belt to Liner/Batch Takeup Unit Belt to Liner Drive Roller Tension Roller Liner/Batch Takeup Unit Break Shaft Brace Intermec EasyCoder 501 XP – Service Manual Ed. 4... -
Page 74: Liner/Batch Takeup Unit
Nylon Washer Friction Washer Compression Spring Washer Carrier #T20 Torx Screw Grub Screw Friction Felt /. Refer to Appendix 2 for a descrip- tion of how to check the brake torque. Intermec EasyCoder 501 XP – Service Manual Ed. 4... -
Page 75: Description
Vertical detection range is adjustable from 5 mm (0.2 inches) above the edge of the tear bar to max. 50 mm (2 inches) below the edge (with strap fi tted on P55.) Intermec EasyCoder 501 XP – Service Manual Ed. 4... -
Page 76: Installation
• Open the right-hand door and the front hatch, and remove the left-hand cover. • In not already done before delivery, press the refl ecting sensor assy. into the bracket as illustrated below. Bracket Sensor assy. Intermec EasyCoder 501 XP – Service Manual Ed. 4... - Page 77 • Connect the power cord and switch on the power. WARNING! The electronics compartment contains high voltage wires and components. Use a non-conductive screwdriver to avoid the risk of causing a short-circuit! Intermec EasyCoder 501 XP – Service Manual Ed. 4...
-
Page 78: Adjustments
Adjust the sensitivity of the label taken sensor by means of the potentiometer WR51 (marked “LTS”) on the CPU board: • Start up Intermec Fingerprint and run the program described in Chapter 10.2. Leave the label in the outfeed slot to create a label-not-taken condition. -
Page 79: Description
11. Cutter 11.1 Description The EasyCoder 501 XP can easily be fi tted with an optional cutter unless the printer is not already fi tted with an label taken sensor (see Chapter 10). The cutter unit is fi tted on the same hinges as the front door, which it replaces, and is connected by a single cable to the DIN-connector on the printer’s front. -
Page 80: Control
Switch off the power or disconnect the cutter before cleaning. Keep fi ngers away from cutting parts! Do not force the spring-loaded anvil blade open more than 5-10 mm (.2-.4 inches), or the spring may be damaged. Intermec EasyCoder 501 XP – Service Manual Ed. 4... -
Page 81: Installation
• Connect the cable from the cutter unit to the female DIN con- nector on the printer’s front. DIN Connector Press Sideways Intermec EasyCoder 501 XP – Service Manual Ed. 4... -
Page 82: Spring Replacement
• Remove the right-hand gable of the cutter mechanism (two #T20 Torx screws + three Posidrive screws.) • Replace the spring and assemble in reverse order, making sure to put back all the washers. Intermec EasyCoder 501 XP – Service Manual Ed. 4... -
Page 83: Description
12. Ribbon Low Sensor 12.1 Description As an option, the EasyCoder 501 XP can be fi tted with a sensor, that detect the rotation of the ribbon supply hub and updates a counter. By means of a custom-made application program, the... -
Page 84: Installation
PRINT SYSVAR(13) instruction in Intermec Fingerprint while manually rotating the ribbon supply hub. Ribbon Low Sensor #T10 Torx Screw NOTE! The ribbon supply unit does not need to be dismounted! Intermec EasyCoder 501 XP – Service Manual Ed. 4... -
Page 85: Introduction
When fi tting back the cover plate, press it forcefully inwards against the conductive leaf springs before tightening the screws. Check that the cover is properly aligned with the front and does not interfere with the right-hand door. Intermec EasyCoder 501 XP – Service Manual Ed. 4... -
Page 86: Main Parts
Centronics interface board removed to improve the view of the CPU board. Power Supply Ribbon Supply Unit Ribbon Rewind Unit (hidden) Liner/Batch Takeup Motor CPU Board Print Unit Stepper Motor Intermec EasyCoder 501 XP – Service Manual Ed. 4... -
Page 87: Description
Converter Converter Pulse Width Pulse Width Rectifier 24V Modulator Modulator Forward (w. Power Factor Contr.) Buck Converter (24V ⇒ 5.3V) Temperature Control & Power Fail Interrupt Control Vout (24V & 42V) Intermec EasyCoder 501 XP – Service Manual Ed. 4... - Page 88 fi tted at the bottom of the PSU with four plastic screws and con- nected to X4. If a fuse is blown, do not try to repair the PSU, but replace the entire unit! Intermec EasyCoder 501 XP – Service Manual Ed. 4...
-
Page 89: Components
Chapter 14 Power Supply 1-971601-27 Power Supply Unit; Front Side 14.2 Components Power to CPU Board Low Voltage High Voltage 24 V Trim Potentiometer Intermec EasyCoder 501 XP – Service Manual Ed. 4... - Page 90 Chapter 14 Power Supply 1-971601-27 Power Supply Unit; Back Side 14.2 Components, cont. Intermec EasyCoder 501 XP – Service Manual Ed. 4...
-
Page 91: Schematics
Chapter 14 Power Supply 1-971601-27 Power Supply Unit; Main Schematics 14.3 Schematics Intermec EasyCoder 501 XP – Service Manual Ed. 4... - Page 92 Chapter 14 Power Supply 1-971601-27 Power Supply Unit; Buck Converter 14.3 Schematics, cont. Intermec EasyCoder 501 XP – Service Manual Ed. 4...
-
Page 93: Description
I/O DATA Support Reset Chip & Stepper Watchdog Sensors Logic Driver I2C-BUS Expansion Electronic Slave Processor Key/RTC A/D Converter Flash Bar Code Electronic Electronic Optional DRAM Console Centronics Memory Wand Board Intermec EasyCoder 501 XP – Service Manual Ed. 4... -
Page 94: Circuits And Straps
Manual for a complete list 256K Kernel home page of fi les stored in "c:" and "rom:" by 192K Kernel default. TMP area Media feed info, odometer value Parameters Boot Startup Intermec EasyCoder 501 XP – Service Manual Ed. 4... - Page 95 SIMM containing the boot sector is fi tted in P22 (ROM2) on the other board, or the boot sector will be overwritten. The Intermec Fingerprint fi rmware is stored in four 256K and one 192K sectors. These sectors are called by a common name the “Kernel”.
- Page 96 It is much faster than the fl ash memory. Therefore, at startup the kernel is copied from the Flash memory to the DRAM, where the various Intermec Finger- print instructions are executed. One DRAM SIMM (standard size 4MB) must always be installed in socket P23 (DRAM0).
- Page 97 (also see Chapter 7.4). Debug Strap (P13) This strap is used for debugging and program development and must always be fi tted with a jumper during normal operation. Intermec EasyCoder 501 XP – Service Manual Ed. 4...
-
Page 98: Connectors
P50 Headlift sensor option) P37 Console pcb P58 Cable to cutter interface on printer's front P41 Thermal printhead data P31 Centronics interface board (see Chapter P420 Stepper motor 1 (print unit) 16.3) Intermec EasyCoder 501 XP – Service Manual Ed. 4... -
Page 99: Special Devices
JEIDA-4 PC Memory cards There are two types: • DOS-formatted memory cards Such cards can be both read from and written to. In Intermec Fingerprint they are referred to as device "card1:". • Non DOS-formatted memory cards Such cards are read-only and are referred to as device "rom:" in Intermec Fingerprint. - Page 100 • Storage, which is used to store short fi les of data. Electronic keys for various purposes can be ordered from Inter- mec. Electronic Key Intermec EasyCoder 501 XP – Service Manual Ed. 4...
- Page 101 (max. 16 characters) and read the buffer regularly to avoid overfl ow. For more demanding applications or for reading bar codes other, choose a regular bar code scanner from Intermec's wide product range and connect it to the serial port.
-
Page 102: Test Points
Logic power, 5V ± 5% RESET High level = active printer Feed voltage for P24, 24V ±5% Printhead and cutter voltage, approx. 24V when active Feed voltage for stepper motors, 42V ±10% Intermec EasyCoder 501 XP – Service Manual Ed. 4... -
Page 103: Startup
Chapter 15 CPU Board 15.6 Startup The prerequisite for Intermec Fingerprint to start is that a fl ash memory SIMM with a boot sector is fi tted in P22 (marked “ROM2 Boot-Bank”). A DRAM SIMM must also be installed in P23 (marked “RAM0”). -
Page 104: Components
Chapter 15 CPU Board 1-971600-27 CPU Board 15.7 Components Intermec EasyCoder 501 XP – Service Manual Ed. 4... -
Page 105: Schematics
Chapter 15 CPU Board 1-971600-27 CPU Board; Top Level 15.8 Schematics Intermec EasyCoder 501 XP – Service Manual Ed. 4... - Page 106 Chapter 15 CPU Board 1-971600-27 CPU Board; Core 15.8 Schematics, cont. Intermec EasyCoder 501 XP – Service Manual Ed. 4...
- Page 107 Chapter 15 CPU Board 1-971600-27 CPU Board; Memory 15.8 Schematics, cont. Intermec EasyCoder 501 XP – Service Manual Ed. 4...
- Page 108 Chapter 15 CPU Board 1-971600-27 CPU Board; Peripherals 15.8 Schematics, cont. Intermec EasyCoder 501 XP – Service Manual Ed. 4...
- Page 109 Chapter 15 CPU Board 1-971600-27 CPU Board; Sensors 15.8 Schematics, cont. Intermec EasyCoder 501 XP – Service Manual Ed. 4...
- Page 110 Chapter 15 CPU Board 1-971600-27 CPU Board; Thermal Printhead Interface 15.8 Schematics, cont. Intermec EasyCoder 501 XP – Service Manual Ed. 4...
- Page 111 Chapter 15 CPU Board 1-971600-27 CPU Board; Stepper Motor Drivers 15.8 Schematics, cont. Intermec EasyCoder 501 XP – Service Manual Ed. 4...
-
Page 112: Introduction
OUT port, use an Intermec Fingerprint SETSTDIO state- ment (see Intermec Fingerprint v7.xx, Reference Manual.) Note that many application programs, for example Intermec Shell, con- tains instructions that select the correct std I/O for the application in question. Intermec EasyCoder 501 XP – Service Manual Ed. 4... -
Page 113: Serial Communication Port "Uart1
Chapter 16 Interfaces 16.2 Serial Communi- The EasyCoder 501 XP is as standard always fi tted with one RS-232 communication port. In Intermec Fingerprint, this port is cation Port "uart1:" designated "uart1:" (Universal Asynchronous Receiver and Trans- mitter.) The circuitry is fi tted on the CPU board (see Chapter 15) and has a fi... -
Page 114: Parallel Interface "Centronics
Chapter 16 Interfaces The EasyCoder 501 XP is, as standard, fi tted with a separate Cen- 16.3 Parallel tronics communication board with a one-way parallel port. In Inter- Communication Port mec Fingerprint, this port is designated "centronics:". "centronics:" The Centronics pcb only supports the compatible mode, that is one-way communication only. - Page 115 IOD4 STROBE IOD5 IOD6 IC3B IC3A IC2A IOD7 SYSCLK RESET ‹ BUSY PERR SELECT 74AC244 INIT ERROR IC2B ERROR ‹ 74AC244 INIT CGND IC3C 74HCT04 IC3D 74HCT04 IC3E 74HCT04 IC3F 74HCT04 Intermec EasyCoder 501 XP – Service Manual Ed. 4...
-
Page 116: Fitting An Interface Board
• Insert the interface board with the components side facing right, as seen from behind. Check that the board fi ts into the two square cut-outs on the left side of the slot. Interface Board Intermec EasyCoder 501 XP – Service Manual Ed. 4... - Page 117 • Connect the power cord and switch on the power. • In case of additional serial communication ports, enter the Setup Mode to set the proper communication parameters. Intermec EasyCoder 501 XP – Service Manual Ed. 4...
-
Page 118: Industrial Interface Board
OUT ports can be set be means of PORTOUT ON/OFF statements (see Intermec Fingerprint v7.xx, Reference Manual.) Thus, it is possible to design Intermec Fingerprint programs which control not only the printer but also various external devices in for example a production line. - Page 119 Fit RS 232 circuit on IC2 No circuits on IC3, IC4 or IC18 IC18 Strap on S4 deactivated (fi tted on one pin only) Strap on S1 deactivated (fi tted on one pin only) Intermec EasyCoder 501 XP – Service Manual Ed. 4...
- Page 120 IC16 1-971606-01.P01 IC17 IC10 IC14 IC13 REL1 REL2 REL3 REL4 IC12 IC11 No circuit on IC2 Fit RS-422 circuit on IC3 IC18 Fit strap on S4 Fit strap on S2 only Intermec EasyCoder 501 XP – Service Manual Ed. 4...
- Page 121 5 Volt for external use (max. 200 mA) -RS422I -RS-422 Receive Not connected +RS422O/+RS485 +RS-422 Transmit/+RS-485 RS-232 Data Terminal Ready -RS422O/-RS485 -RS-422 Transmit/-RS-485 RS 232 Ring Indicator Shield Optional shield for RS-422 and RS-485 24–25 Not connected Intermec EasyCoder 501 XP – Service Manual Ed. 4...
- Page 122 The Industrial Interface has no straps or circuits to be fi tted or removed. All signals are available on a female DB-44pin connec- tor and the various ports are controlled by the Intermec Fingerprint instructions PORTIN and PORTOUT ON/OFF (see Intermec Fin- gerprint v7.xx, Reference Manual.)
- Page 123 Out7e Emitter Opto Out Channel 7 Out8c Collector Opto Out Channel 8 228 Out8e Emitter Opto Out Channel 8 IC13A OUT1c OUT1e TIL193B Simplifi ed schematics of a digital OUT port. Intermec EasyCoder 501 XP – Service Manual Ed. 4...
- Page 124 Relay 3 Common REL4nc Relay 4 Normally Closed REL4no Relay 4 Normally Open REL4com Relay 4 Common REL1A REL1nc IC12D REL1B REL1no REL1com ULN2003A Simplifi ed schematics of a relay OUT port. Intermec EasyCoder 501 XP – Service Manual Ed. 4...
- Page 125 Chapter 16 Interfaces 1-971606-25 Industrial Interface pcb.: Components 16.5 Industrial Inter- face Board, cont. 1-971606-01.P01 IC15 IC16 IC14 IC13 IC10 REL1 REL2 REL3 REL4 IC12 IC11 IC18 Intermec EasyCoder 501 XP – Service Manual Ed. 4...
- Page 126 Chapter 16 Interfaces 1-971606-25 Industrial Interface pcb.: Schematics 1 16.5 Industrial Inter- face Board, cont. Intermec EasyCoder 501 XP – Service Manual Ed. 4...
- Page 127 Chapter 16 Interfaces 1-971606-25 Industrial Interface pcb.: Schematics 2 16.5 Industrial Inter- face Board, cont. Intermec EasyCoder 501 XP – Service Manual Ed. 4...
-
Page 128: Double Serial Interface Board
• One fl at cable • One Installation Instruction booklet Circuits for RS-422 non-isolated, RS-422 isolated, RS-485, and 20 mA current loop can be bought separately from Intermec. "uart3:" (DB-25pin male) "uart2:" (DB-25pin female) Intermec EasyCoder 501 XP – Service Manual Ed. 4... - Page 129 RS-232 circuit fi tted on IC2 No circuits on IC3, IC4 or IC18 IC18 Strap on S4 deactivated (fi tted on one pin only) Strap on S1 deactivated (fi tted on one pin only) Intermec EasyCoder 501 XP – Service Manual Ed. 4...
- Page 130 UART2 RS422nonisol.: IC18, S1,S4 IC15 * Term. if end of cable Remove RS-232 circuit on IC2 Fit RS-422 circuit on IC3 IC18 Fit strap on S4 Fit strap on S2 only Intermec EasyCoder 501 XP – Service Manual Ed. 4...
- Page 131 +RS-422 Transmit/+RS-485 RS-232 Data Terminal Ready -RS422O/-RS485 -RS-422 Transmit/-RS-485 RS-232 Ring Indicator Shield Optional shield for RS-422 and RS-485 24–25 Not connected /. The external 5V is automatically switched off at overload. Intermec EasyCoder 501 XP – Service Manual Ed. 4...
- Page 132 IC11 RS485: IC4, S3, S4* RS422isolated: IC3, S2, S4 UART2 Strap on S5/S6 deactivated IC15 RS422nonisol.: IC18, S1,S4 * Term. if end of cable (fi tted on one pin only) IC18 Intermec EasyCoder 501 XP – Service Manual Ed. 4...
- Page 133 No circuit on IC12 RS485: IC4, S3, S4* RS422isolated: IC3, S2, S4 UART2 IC15 RS422nonisol.: IC18, S1,S4 * Term. if end of cable Remove circuit on IC11 Fit strap on S6 IC18 Intermec EasyCoder 501 XP – Service Manual Ed. 4...
- Page 134 RS-232 Data Terminal Ready -RS422O -RS-422 Transmit RS-232 Ring Indicator Shield Optional shield for RS 422 Not connected -RxD -TXD 20 mA current loop /. The external 5V is automatically switched off at overload. Intermec EasyCoder 501 XP – Service Manual Ed. 4...
- Page 135 20mA CL: IC13, IC14, S6 IC14 IC13 IC10 IC12 IC11 RS232: IC2 RS485: IC4, S3, S4* RS422isolated: IC3, S2, S4 UART2 RS422nonisol.: IC18, S1,S4 * Term. if end of cable IC18 Intermec EasyCoder 501 XP – Service Manual Ed. 4...
- Page 136 Chapter 16 Interfaces 1-971613-25 Double Serial Interface pcb.: Schematics 1 16.6 Double Serial Interface Board, cont. Intermec EasyCoder 501 XP – Service Manual Ed. 4...
- Page 137 Chapter 16 Interfaces 1-971613-25 Double Serial Interface pcb.: Schematics 2 16.6 Double Serial Interface Board, cont. Intermec EasyCoder 501 XP – Service Manual Ed. 4...
-
Page 138: Easylan 100I Interface Board
EasyLAN 100i supports SNMP for remote monitoring. The printer must be fi tted with Intermec Fingerprint v7.3 or later. The Ethernet port is addressed as device "net1:" (communication channel #5.) The EasyLAN 100i kit contains: •... - Page 139 S10 - S13 A - POSITION FOR 64 Mbit DRAM S12 - S13 B - POSITION C107 FOR 16 Mbit DRAM C108 C75 C76 C111 C105 C104 C112 C113 C102 C101 C118 C114 Soldering Side Intermec EasyCoder 501 XP – Service Manual Ed. 4...
- Page 140 Chapter 16 Interfaces 1-971614-25 EasyLAN 100i Interface pcb.; Schematics 1 16.7 EasyLAN 100i Interface Board, cont. Intermec EasyCoder 501 XP – Service Manual Ed. 4...
- Page 141 Chapter 16 Interfaces 1-971614-25 EasyLAN 100i Interface pcb.; Schematics 2 16.7 EasyLAN 100i Interface Board, cont. Intermec EasyCoder 501 XP – Service Manual Ed. 4...
- Page 142 Chapter 16 Interfaces 1-971614-25 EasyLAN 100i Interface pcb.; Schematics 3 16.7 EasyLAN 100i Interface Board, cont. Intermec EasyCoder 501 XP – Service Manual Ed. 4...
-
Page 143: Diagnosing The Printer
The procedure of starting up Intermec Shell, regardless what autoexec.bat fi les the printer’s memory contains, will be called the Test Mode. In fact, it is just a convenient way of accessing Intermec Shell and–via Intermec Shell–also the Setup Mode. - Page 144 - Paper feed does not work properly • Transfer ribbon troubles 17.13 - Transfer ribbon gets wrinkled - Transfer ribbon breaks • Liner/batch takeup troubles 17.14 • Cutter troubles 17.15 • Memory card troubles 17.16 Intermec EasyCoder 501 XP – Service Manual Ed. 4...
-
Page 145: No Reaction At Power Up
- A new fan with higher capacity for extreme operating condi- tions is available as a spare part. • Faulty power supply unit. - Refer to Chapter 17.5. • Faulty console unit. - Refer to Chapter 17.6. Intermec EasyCoder 501 XP – Service Manual Ed. 4... -
Page 146: Printer Stops Working After Startup
• Error in the supply of AC power to the printer. - Refer to Chapter 17.2. • Faulty console, power LED, or cabling between CPU board and console. - Refer to Chapter 17.6. Intermec EasyCoder 501 XP – Service Manual Ed. 4... -
Page 147: Cpu Board Failures
- Execution of the initial boot sequence can be checked as described in Chapter 15.6. If the execution stops prematurely, note when it happens and contact our Technical Product Sup- port dept. Intermec EasyCoder 501 XP – Service Manual Ed. 4... -
Page 148: Power Supply Unit Failures
Trim the 5.3V using potentiometer R146 to ≈ 5.3V (only avail- able on power supply unit P/N 1-971601-27 or later.) - Check the voltage P24 (≈24V when active.) Has to be enabled. - Check the voltage V40 (42V ±10%.) Intermec EasyCoder 501 XP – Service Manual Ed. 4... -
Page 149: Console Errors
- If there is no display function in the Test Mode, the display is out of order and the console unit needs to be replaced. Else, check out the custom-made program. Intermec EasyCoder 501 XP – Service Manual Ed. 4... -
Page 150: Error Messages
Firmware Error • In case the CPU is unable to access data on a given address, the internal program will light up the red error LED independently of any error handling program. Intermec EasyCoder 501 XP – Service Manual Ed. 4... -
Page 151: No Communication (General)
- Try connecting the printer to another host computer. • Erroneous data. - Check if the data string contains the correct characters using the Line Analyzer program included in Intermec Shell (see Installation & Operation manual.) Intermec EasyCoder 501 XP – Service Manual Ed. 4... -
Page 152: No Serial Communication
Intermec Direct Protocol, verbosity is disabled by default. Check the program for instructions that may affect the ver- bosity. - Verify that the correct communication port is selected as stan- dard IN/OUT channel. Intermec EasyCoder 501 XP – Service Manual Ed. 4... -
Page 153: No Parallel Communication
Do not attempt to repair a damaged interface board. • Wrong std IN channel selected in custom-made program. - Verify that the Centronics communication port is selected as standard IN channel. Intermec EasyCoder 501 XP – Service Manual Ed. 4... -
Page 154: Sensor Malfunctions
• Bad connection. - Check that the sensor’s cable is connected to P50 on the CPU board. Inspect cable for damage. • Faulty sensor. - Replace as described in Chapter 8.8. Intermec EasyCoder 501 XP – Service Manual Ed. 4... -
Page 155: Ribbon End Sensor
• Bad connection. - Check that the ribbon low sensor is connected to P57 on the CPU board and that the cable is undamaged. Intermec EasyCoder 501 XP – Service Manual Ed. 4... -
Page 156: Label Taken Sensor (Lts)
- The sensitivity of the sensor’s receiver and the light intensity of the sensor’s emitter are adjustable, see Chapter 10.3. • Defective sensor. - If still no reaction, the sensor is probably defective and should be replaced. Intermec EasyCoder 501 XP – Service Manual Ed. 4... -
Page 157: Printing Troubles
- Check that the printhead is completely lowered and pressing against the media with a suffi cient force, see Chapter 8.9. • Headlift sensor out of order. - Check the headlift sensor as described in Chapter 17.11. Intermec EasyCoder 501 XP – Service Manual Ed. 4... -
Page 158: Overall Weak Printout
- Verify that the direct thermal media or receiving face mate- rial and transfer ribbon in use match the paper type options selected in the Setup Mode. • Wrong printhead voltage. - Measure voltages V24 and P24, see Chapter 17.5. Intermec EasyCoder 501 XP – Service Manual Ed. 4... -
Page 159: Weak Or Missing Printout Of Some Dots
- The printhead is most certainly damaged too and will also need to be replaced. Description: Only fi rst part of label printed. Possible Causes and Suggested Remedies: • Bad headlift sensor adjustment. - Adjust as described in Chapter 8.8. Intermec EasyCoder 501 XP – Service Manual Ed. 4... -
Page 160: Media Feed Does Not Work Properly
• Power supply malfunction. - Check the voltage on test point V40 on the CPU board, see Chapter 15.5. If V40 is not +42V ±10%, the power supply unit is probably faulty. Intermec EasyCoder 501 XP – Service Manual Ed. 4... -
Page 161: Transfer Ribbon Troubles
(that is c.w. instead of c.c.w.), the brake springs may break. This typically occurs if the operator uses transfer ribbons with the ink on the wrong side. Replace the damaged unit. Intermec EasyCoder 501 XP – Service Manual Ed. 4... -
Page 162: Liner/Batch Takeup Troubles
• Bad internal rewind of printed labels. - Check that the batch takeup guide plate is fi tted correctly, see Chapter 9.1. - Check that the media is routed correctly as shown in Chapter 9.1. Intermec EasyCoder 501 XP – Service Manual Ed. 4... -
Page 163: Cutter Troubles
• No cause of malfunction could be found. - The cutter motor is probably defective. Replace either the entire cutter or just its mechanism. Intermec EasyCoder 501 XP – Service Manual Ed. 4... -
Page 164: Memory Card Troubles
- If you can communicate with the printer via a PC, you could see what fi les are stored in the memory card and the size of them with the aid of Intermec Fingerprint com- mands FILES "rom:" (non DOS-formatted cards), or FILES "card1:"... -
Page 165: Intermec Shell 4.4 Overview
REBOOT Note! To enter Intermec Shell if a custom-made autoexec-fi le prevents access, lift the printhead and press any key on the printer's keyboard (except the <Shift> key), then switch on the power while continuing to press the key. When the Shell countdown begins, release the key and press <Enter> to start Shell. Do not forget to lower the printhead if you want to print for example test labels. -
Page 166: Easycoder 501 Xp: Setup Mode Overview, Part 1
DATA FROM HOST DISABLE ENABLE SER-COM,UART1: REC BUF: REC BUF [300]: SER-COM,UART1: TRANS BUF: TRANS BUF [300]: STARTADJ: DETECTION: SETUP: FEEDADJ: [0]: FEEDADJ FEEDADJ STARTADJ FEEDADJ: STOPADJ: STOPADJ [0]: Continued on next page! Intermec EasyCoder 501 XP – Service Manual Ed. 4... -
Page 167: Easycoder 501 Xp: Setup Mode Overview, Part 2
If no label is printed, press <F3> for error message. PRINT DEFS: PRINT SPEED: PRINT SPEED [150]: SETUP: NETWORK See Overview Part 5 • Press Setup key to exit the Setup Mode. Intermec EasyCoder 501 XP – Service Manual Ed. 4... -
Page 168: Easycoder 501 Xp: Setup Mode Overview, Part 3
CONNECTED HW RS232 • 422 ISOLATED • RS485 SER-COM,UART2: PROTOCOL ADDR. These menus are only displayed if RS 485 is selected on "uart2:" Enter printer's protocol address (0–31). PROTOCOL ADDR. [1]: Intermec EasyCoder 501 XP – Service Manual Ed. 4... -
Page 169: Easycoder 501 Xp: Setup Mode Overview, Part 4
The selected type of hardware connection on "uart3:" SER-COM,UART3: CONNECTED HW: is displayed as one of the following alternatives (read-only): CONNECTED HW RS232 • RS232 • 422 NON ISOLATED • CURRENT LOOP Intermec EasyCoder 501 XP – Service Manual Ed. 4... -
Page 170: Easycoder 501 Xp: Setup Mode Overview, Part 5
Use C-key to erase. NETMASK 255.255.0.0 NETWORK: DEFAULT ROUTER: Use keys . and 0–9 to enter router. Use C-key to erase. DEFAULT ROUTER 10.1.12.1 • Press Setup key to exit the Setup Mode. Intermec EasyCoder 501 XP – Service Manual Ed. 4... -
Page 171: Measuring The Break Torque
• Fit the end of the ribbon to the dynamometer and pull. • Read the dynamometer. • Calculate the torque using the formula: Torque (Nmm) = Radius (mm) × Force (N) Dynamometer Force Formula: Torque = Force x Radius Intermec EasyCoder 501 XP – Service Manual Ed. 4...
Need help?
Do you have a question about the EasyCoder 501 XP and is the answer not in the manual?
Questions and answers