Fujitsu ETERNUS DX200F Configuration Manual
All flash array
Hide thumbs
Also See for ETERNUS DX200F:
- Operation manual (48 pages) ,
- Setup manual (10 pages) ,
- User manual (1082 pages)

Related Manuals for Fujitsu ETERNUS DX200F


Summary of Contents for Fujitsu ETERNUS DX200F
- Page 1 P3AM-8462-01ENZ0 FUJITSU Storage ETERNUS DX200F All Flash Array Configuration Guide (Basic)
- Page 2 This page is intentionally left blank.
- Page 3 Preface Fujitsu would like to thank you for purchasing our FUJITSU Storage ETERNUS DX200F All Flash Array (herein- after referred to as ETERNUS DX). The ETERNUS DX is designed to be connected to Fujitsu servers (Fujitsu M10, PRIMEQUEST, or PRIMERGY) or non-Fujitsu servers.
- Page 4 2008 R2 HPC Edition ® ® Windows Server 2012 Microsoft Windows Server 2012 Datacenter ® ® Microsoft Windows Server 2012 Standard ® ® Microsoft Windows Server 2012 Essentials FUJITSU Storage ETERNUS DX200F All Flash Array Configuration Guide (Basic) Copyright 2014 FUJITSU LIMITED P3AM-8462-01ENZ0...
- Page 5 This indicates supplementary and reference information. ■ Abbreviations Used in This Manual "ETERNUS DX200F" or "ETERNUS DX" refers to the FUJITSU Storage ETERNUS DX200F All Flash Array. • • "CA" refers to a host interface module that is used in an ETERNUS DX to connect to a server.
- Page 6 The black "Must Do..." circle indicates actions that must be taken. The required ac- tion is both illustrated inside the black disk and written above it (e.g. Unplug). FUJITSU Storage ETERNUS DX200F All Flash Array Configuration Guide (Basic) Copyright 2014 FUJITSU LIMITED...
- Page 7 - Be careful that no liquid seeps into the ETERNUS DX when using cleaners, etc. - Do not use alcohol or other solvents to clean the ETERNUS DX. Warning layout ribbon FUJITSU Storage ETERNUS DX200F All Flash Array Configuration Guide (Basic) Copyright 2014 FUJITSU LIMITED P3AM-8462-01ENZ0...
- Page 8 ETERNUS DX200F Manufacturer’s label The model name and the serial number are listed. Device ID label The model name and the serial number are listed. FUJITSU Storage ETERNUS DX200F All Flash Array Configuration Guide (Basic) Copyright 2014 FUJITSU LIMITED P3AM-8462-01ENZ0...
-
Page 9: Table Of Contents
5.2.1 Switching On and Off the PSU Switch on the Power Supply Unit .................37 5.2.2 Powering On ...............................38 5.3 ETERNUS Web GUI Startup ......................39 5.4 Storage Management (Initial Setup 1)..................40 FUJITSU Storage ETERNUS DX200F All Flash Array Configuration Guide (Basic) Copyright 2014 FUJITSU LIMITED P3AM-8462-01ENZ0... - Page 10 Chapter 8 SAN Connection Settings 8.1 Connection Settings for the ETERNUS DX ..................83 8.1.1 Host Response Settings............................83 8.1.2 Host Affinity Settings ............................84 8.1.3 CA Reset Group Settings............................92 FUJITSU Storage ETERNUS DX200F All Flash Array Configuration Guide (Basic) Copyright 2014 FUJITSU LIMITED P3AM-8462-01ENZ0...
- Page 11 11.1 Continuous Business ........................ 133 11.2 Performance/Tuning......................... 135 11.3 Cloud Platform ......................... 137 11.3.1 Oracle VM Linkage ............................137 11.3.2 VMware Linkage .............................138 11.3.3 Microsoft Linkage ............................139 FUJITSU Storage ETERNUS DX200F All Flash Array Configuration Guide (Basic) Copyright 2014 FUJITSU LIMITED P3AM-8462-01ENZ0...
- Page 12 Solution — Cloud Platform (Oracle VM Linkage)..................137 Figure 11.4 Solution — Cloud Platform (VMware Linkage) ..................138 Figure 11.5 Solution — Cloud Platform (Microsoft Linkage) ..................139 FUJITSU Storage ETERNUS DX200F All Flash Array Configuration Guide (Basic) Copyright 2014 FUJITSU LIMITED P3AM-8462-01ENZ0...
- Page 13 Table 5.2 Operation Volume Creation ........................51 Table 7.1 ETERNUS DX Operation According to the Settings of the Auto Power Function and the Power Resume Function ..............................79 FUJITSU Storage ETERNUS DX200F All Flash Array Configuration Guide (Basic) Copyright 2014 FUJITSU LIMITED P3AM-8462-01ENZ0...
-
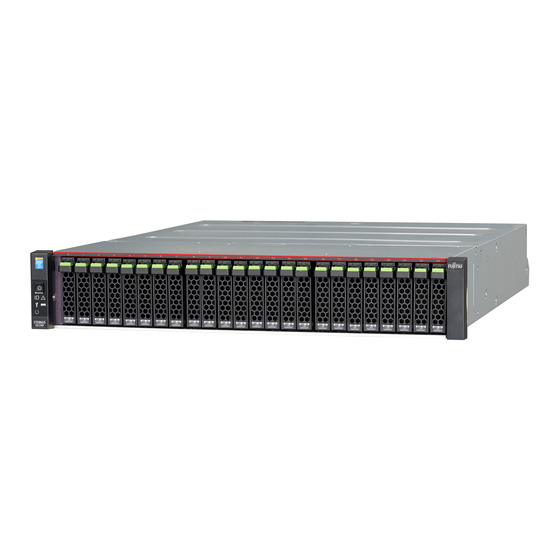
Page 14: Chapter 1 Component Names
This section provides the names of the components in the front of a controller enclosure. Figure 1.1 Front View of a Controller Enclosure Operation panel Flange cover FUJITSU Storage ETERNUS DX200F All Flash Array Configuration Guide (Basic) Copyright 2014 FUJITSU LIMITED P3AM-8462-01ENZ0... -
Page 15: Rear
Controller (CM#0) Controller (CM#1) PWC port Host interface (CA#0) LAN (RMT) port Host interface (CA#1) LAN (MNT) port Power supply unit (PSU#0) Power supply unit (PSU#1) FUJITSU Storage ETERNUS DX200F All Flash Array Configuration Guide (Basic) Copyright 2014 FUJITSU LIMITED P3AM-8462-01ENZ0... -
Page 16: Chapter 2 Rack Installation
Contact your sales representative or maintenance engineer if drives that are instal- led by default need to be uninstalled or moved to another slot. FUJITSU Storage ETERNUS DX200F All Flash Array Configuration Guide (Basic) Copyright 2014 FUJITSU LIMITED P3AM-8462-01ENZ0... - Page 17 To install an enclosure, power synchronized units, and UPS units in a single rack, mount the devices in • the following order (from bottom to top). Rack Controller enclosure Power synchronized unit Installation order FUJITSU Storage ETERNUS DX200F All Flash Array Configuration Guide (Basic) Copyright 2014 FUJITSU LIMITED P3AM-8462-01ENZ0...
-
Page 18: Controller Enclosure Installation (For Regions Other Than Emea&I)
Use the two plates to fasten the rack rails to the front rack pillars. Use the four washers to fasten the rack rails to the rear rack pillars. FUJITSU Storage ETERNUS DX200F All Flash Array Configuration Guide (Basic) Copyright 2014 FUJITSU LIMITED... - Page 19 2nd hole (M5 screw) (M5 screw) Controller enclosure base line Rack rail Tighten the M4 screws of the rack rails that were slightly unscrewed in Step FUJITSU Storage ETERNUS DX200F All Flash Array Configuration Guide (Basic) Copyright 2014 FUJITSU LIMITED P3AM-8462-01ENZ0...
- Page 20 Fasten the controller enclosure in the rack. Use three M5 screws to fasten it in the rack pillar. M5 screw M5 screws Attach the flange cover. FUJITSU Storage ETERNUS DX200F All Flash Array Configuration Guide (Basic) Copyright 2014 FUJITSU LIMITED P3AM-8462-01ENZ0...
-
Page 21: Chapter 3 Checking The Configuration Environment
ETERNUS DX Server Multipath iSCSI SAN Remote support center LAN for Operation Management SNMP manager PC for Operation Management/ PC for setup Mail server Syslog server FUJITSU Storage ETERNUS DX200F All Flash Array Configuration Guide (Basic) Copyright 2014 FUJITSU LIMITED P3AM-8462-01ENZ0... -
Page 22: Server Connection Preparation
Before installing the ETERNUS Multipath Driver, make sure that the server is not • connected to the ETERNUS DX. If the server is connected, shut down the server, re- move the cable, and then restart the server. FUJITSU Storage ETERNUS DX200F All Flash Array Configuration Guide (Basic) Copyright 2014 FUJITSU LIMITED P3AM-8462-01ENZ0... -
Page 23: Driver Installation
To change the installation directory, click the [Browse] button and select the directory to install. To leave the settings unchanged, click the [Next] button. FUJITSU Storage ETERNUS DX200F All Flash Array Configuration Guide (Basic) Copyright 2014 FUJITSU LIMITED P3AM-8462-01ENZ0... -
Page 24: Iscsi Initiator Parameter Settings
For the first startup, the dialog box that are shown below appears. If there is no problem with service startup settings, click the [Yes] button. FUJITSU Storage ETERNUS DX200F All Flash Array Configuration Guide (Basic) Copyright 2014 FUJITSU LIMITED P3AM-8462-01ENZ0... - Page 25 Chapter 3 Checking the Configuration Environment Server Connection Preparation On the [iSCSI Initiator Properties] screen, click the [Configuration] tab. FUJITSU Storage ETERNUS DX200F All Flash Array Configuration Guide (Basic) Copyright 2014 FUJITSU LIMITED P3AM-8462-01ENZ0...
- Page 26 To use the default initiator name, also click the [Change] button. This allows you to continue to use this initiator name even after changing the "server name". FUJITSU Storage ETERNUS DX200F All Flash Array Configuration Guide (Basic) Copyright 2014 FUJITSU LIMITED...
-
Page 27: Preparing The Pc Terminal For Setup
IP address: 192.168.1.2 Subnet mask: 255.255.255.0 Check the settings of the Web browser. For details on the required settings, refer to "Configuration Guide (Web GUI)". FUJITSU Storage ETERNUS DX200F All Flash Array Configuration Guide (Basic) Copyright 2014 FUJITSU LIMITED P3AM-8462-01ENZ0... -
Page 28: Lan Connection Preparation For Operation Management
Enter the IP address for the RMT port of the ETERNUS DX. The RMT port is a LAN port that is used during initial setup and to connect to the remote support center. FUJITSU Storage ETERNUS DX200F All Flash Array Configuration Guide (Basic) Copyright 2014 FUJITSU LIMITED... -
Page 29: Lan Related Specifications
¡ (*2) ¡ (*2) − ´ ´ ´ ETERNUS DX Discov- Unique 9686 from ¡ − protocol ¡: Possible △: Partially possible ´: Not possible FUJITSU Storage ETERNUS DX200F All Flash Array Configuration Guide (Basic) Copyright 2014 FUJITSU LIMITED P3AM-8462-01ENZ0... - Page 30 The default LAN operation mode is "Auto Negotiation" which allows the ETERNUS DX to automatically recog- nize 1000Base-T/100Base-TX/10Base-T and Full/Half-Duplex connections. However, some devices may re- quire that a fixed communication mode be set. FUJITSU Storage ETERNUS DX200F All Flash Array Configuration Guide (Basic) Copyright 2014 FUJITSU LIMITED P3AM-8462-01ENZ0...
-
Page 31: Chapter 4 Connecting Cables
Connect a host interface cable to the ETERNUS DX. Insert the host interface cable connectors in the host interface ports (iSCSI) of Controller 0 (CM#0) and Controller 1 (CM#1). FUJITSU Storage ETERNUS DX200F All Flash Array Configuration Guide (Basic) Copyright 2014 FUJITSU LIMITED P3AM-8462-01ENZ0... -
Page 32: Power Synchronized Unit Connection
The following procedure explains how to connect the power cords. Connect the power cord to the ETERNUS DX. Connect the power cord plugs to the power inlets of the power supply units. FUJITSU Storage ETERNUS DX200F All Flash Array Configuration Guide (Basic) Copyright 2014 FUJITSU LIMITED P3AM-8462-01ENZ0... - Page 33 Connecting two cords to different two power supply facilities improves the availability of the power supply facilities against failures. Do Not Do not use the server service outlet to connect a power cord for the ETERNUS • FUJITSU Storage ETERNUS DX200F All Flash Array Configuration Guide (Basic) Copyright 2014 FUJITSU LIMITED P3AM-8462-01ENZ0...
-
Page 34: Chapter 5 General Settings
Perform the basic settings to use the Advanced Copy function. For details on these settings and performing SnapOPC+, refer to "Chapter 9 Advanced Copy Settings" (page 115). FUJITSU Storage ETERNUS DX200F All Flash Array Configuration Guide (Basic) Copyright 2014 FUJITSU LIMITED P3AM-8462-01ENZ0... -
Page 35: Figure 5.1 Example Of Differential Backup Settings With Snapopc
M : 7th generation Sunday data ETERNUS DX SnapOPC+ By mounting the copy destination volumes, the past data is recognized as drives by the server FUJITSU Storage ETERNUS DX200F All Flash Array Configuration Guide (Basic) Copyright 2014 FUJITSU LIMITED P3AM-8462-01ENZ0... -
Page 36: Pc Terminal Connection
Connect the PC terminal to the RMT port of Controller 0 (CM#0) on the ETERNUS DX directly with the LAN cable (for operation management). For the setup information of the PC terminal, refer to "3.3 Preparing the PC Terminal for Setup" (page 27). FUJITSU Storage ETERNUS DX200F All Flash Array Configuration Guide (Basic) Copyright 2014 FUJITSU LIMITED P3AM-8462-01ENZ0... -
Page 37: Powering On
Make sure all of the PSU switches are in the ON position. Figure 5.4 ON Position (Marked "|") of the PSU Switch on a Power Supply Unit Power supply unit (PSU#0) Power supply unit (PSU#1) FUJITSU Storage ETERNUS DX200F All Flash Array Configuration Guide (Basic) Copyright 2014 FUJITSU LIMITED P3AM-8462-01ENZ0... -
Page 38: Powering On
The POWER LED ( ) on the ETERNUS DX is turned on. After approximately two minutes, check that the READY LED ( ) of the ETERNUS DX is lit up. FUJITSU Storage ETERNUS DX200F All Flash Array Configuration Guide (Basic) Copyright 2014 FUJITSU LIMITED... -
Page 39: Eternus Web Gui Startup
To change the language, click the [Option] button and select [English] or [Japanese] in [Language]. Enter the User ID and Password. User ID: root Password: root (by default) FUJITSU Storage ETERNUS DX200F All Flash Array Configuration Guide (Basic) Copyright 2014 FUJITSU LIMITED P3AM-8462-01ENZ0... -
Page 40: Storage Management (Initial Setup 1)
Register Advanced Copy License • Set Network Environment • The procedure for initial setup is shown below. For details on the settings, refer to "Configuration Guide (Web GUI)". FUJITSU Storage ETERNUS DX200F All Flash Array Configuration Guide (Basic) Copyright 2014 FUJITSU LIMITED P3AM-8462-01ENZ0... - Page 41 Set the required items and click the [Next >>] button. A confirmation screen appears. Click the [OK] button. The name of the ETERNUS DX is set and the setting completion screen appears. FUJITSU Storage ETERNUS DX200F All Flash Array Configuration Guide (Basic) Copyright 2014 FUJITSU LIMITED P3AM-8462-01ENZ0...
- Page 42 Enable or disable the Thin Provisioning function and set the maximum pool capacity. Set the required items and click the [Next >>] button. A confirmation screen appears. FUJITSU Storage ETERNUS DX200F All Flash Array Configuration Guide (Basic) Copyright 2014 FUJITSU LIMITED P3AM-8462-01ENZ0...
- Page 43 IP address of the Master CM. Either or both an IPv4 address and an IPv6 address can be specified for the MNT port and the RMT • port. FUJITSU Storage ETERNUS DX200F All Flash Array Configuration Guide (Basic) Copyright 2014 FUJITSU LIMITED P3AM-8462-01ENZ0...
- Page 44 The [Logout] screen appears. Logout Click the [Close] button. Initial setup 1 is complete and the screen returns to the [Login] screen. Close the Web browser. FUJITSU Storage ETERNUS DX200F All Flash Array Configuration Guide (Basic) Copyright 2014 FUJITSU LIMITED P3AM-8462-01ENZ0...
-
Page 45: Lan Cable Connection (For Operation Management)
When connecting the LAN cables, position them so that they will not obstruct • replacement of the power supply unit or controllers by the maintenance engi- neer. FUJITSU Storage ETERNUS DX200F All Flash Array Configuration Guide (Basic) Copyright 2014 FUJITSU LIMITED P3AM-8462-01ENZ0... -
Page 46: Firewall Settings
"5.4 Storage Management (Initial Setup 1)" (page 40). Click the [System] tab on the navigation of the ETERNUS Web GUI screen. In [Category], click [Network]. The [Network] screen appears. FUJITSU Storage ETERNUS DX200F All Flash Array Configuration Guide (Basic) Copyright 2014 FUJITSU LIMITED P3AM-8462-01ENZ0... - Page 47 This service is enabled when an ETERNUS DX is connected via ETERNUS CLI. Data is encrypted and transferred for Secure SHell (SSH). ICMP • This service is enabled when an ICMP connection is allowed. FUJITSU Storage ETERNUS DX200F All Flash Array Configuration Guide (Basic) Copyright 2014 FUJITSU LIMITED P3AM-8462-01ENZ0...
-
Page 48: Raid Configuration Settings
Create an operation volume (Standard) in RAID1+0(2+2) RAID group. • Backup volume Create a generation management volume (SDV) and temporary work volume (SDPV) in RAID5(4+1) RAID group. FUJITSU Storage ETERNUS DX200F All Flash Array Configuration Guide (Basic) Copyright 2014 FUJITSU LIMITED P3AM-8462-01ENZ0... -
Page 49: Raid Group Creation
The procedure to register a RAID group is as follows: On the navigation of the ETERNUS Web GUI screen, click the [RAID Group] tab. The [RAID Group] screen appears. FUJITSU Storage ETERNUS DX200F All Flash Array Configuration Guide (Basic) Copyright 2014 FUJITSU LIMITED P3AM-8462-01ENZ0... - Page 50 The screen display returns to the [RAID Group] screen. After creating an operation RAID group, repeat Step 1 and later steps to create a backup RAID group. FUJITSU Storage ETERNUS DX200F All Flash Array Configuration Guide (Basic) Copyright 2014 FUJITSU LIMITED P3AM-8462-01ENZ0...
-
Page 51: Operation Volume Creation
The procedure to create an operation volume is as follows: Click the [Volume] tab on the navigation of the ETERNUS Web GUI screen. The [Volumes] screen appears. FUJITSU Storage ETERNUS DX200F All Flash Array Configuration Guide (Basic) Copyright 2014 FUJITSU LIMITED P3AM-8462-01ENZ0... - Page 52 Then, create SDV and SDPV in the backup RAID group (RG1). For the creation procedure, refer to "5.7.3 Generation Management Volume (SDV) Creation" (page 53) "5.7.4 Temporary Work Volume (SDPV) Creation" (page 54). FUJITSU Storage ETERNUS DX200F All Flash Array Configuration Guide (Basic) Copyright 2014 FUJITSU LIMITED P3AM-8462-01ENZ0...
-
Page 53: Generation Management Volume (Sdv) Creation
Set the required items in the [Create Volume] screen and click the [Create] button. Name: sdv Type: Snap Data Volume Capacity: 1TB (*1) RAID Group / TPP Selection: Manual Manual Setting: RG1 Number of Volumes: 7 (*2) FUJITSU Storage ETERNUS DX200F All Flash Array Configuration Guide (Basic) Copyright 2014 FUJITSU LIMITED P3AM-8462-01ENZ0... -
Page 54: Temporary Work Volume (Sdpv) Creation
Figure 5.8 Temporary Work Volume (SDPV) Creation Backup RAID group (RG1) Temporary work volume 1.6TB 1.6TB 500GB 1.6TB 1.6TB 1.6TB sdpv (Snap Data Pool Volume) RAID5 (4+1) FUJITSU Storage ETERNUS DX200F All Flash Array Configuration Guide (Basic) Copyright 2014 FUJITSU LIMITED P3AM-8462-01ENZ0... - Page 55 Click the [OK] button. The volume is created and the registration completion screen appears. Click the [Done] button. The screen display returns to the [Volumes] screen. FUJITSU Storage ETERNUS DX200F All Flash Array Configuration Guide (Basic) Copyright 2014 FUJITSU LIMITED P3AM-8462-01ENZ0...
-
Page 56: Hot Spare Registration
Click the [Component] tab on the navigation of the ETERNUS Web GUI screen. On the [Component] screen, click [Drives] in [Category]. The [Drives] screen appears. FUJITSU Storage ETERNUS DX200F All Flash Array Configuration Guide (Basic) Copyright 2014 FUJITSU LIMITED P3AM-8462-01ENZ0... - Page 57 Select the drive that is to be registered as the Dedicated Hot Spare and click [Assign Dedicated Hot Spare] in [Action]. The [Assign Dedicated Hot Spare] screen appears. FUJITSU Storage ETERNUS DX200F All Flash Array Configuration Guide (Basic) Copyright 2014 FUJITSU LIMITED P3AM-8462-01ENZ0...
- Page 58 Click the [OK] button. The Dedicated Hot Spare is registered and the registration completion screen appears. Click the [Done] button. The screen display returns to the [Drives] screen. FUJITSU Storage ETERNUS DX200F All Flash Array Configuration Guide (Basic) Copyright 2014 FUJITSU LIMITED P3AM-8462-01ENZ0...
-
Page 59: Chapter 6 Monitoring Settings
In the [Setting based on Severity] tab screen, select the required items. On the screens that are displayed by clicking each level tab, select the required items. FUJITSU Storage ETERNUS DX200F All Flash Array Configuration Guide (Basic) Copyright 2014 FUJITSU LIMITED... -
Page 60: Various Notification Settings
IP address and the Allowable IP address (IP address of the monitoring server or the network ad- dress to which the monitoring server belongs) on the [Setup Network Environment] screen of ETERNUS Web GUI. FUJITSU Storage ETERNUS DX200F All Flash Array Configuration Guide (Basic) Copyright 2014 FUJITSU LIMITED P3AM-8462-01ENZ0... - Page 61 Select [Enable] for [SNMP Function], set the required items, and click the [Set] button. Select the LAN port that was set up in Step 1 for "LAN Port used for SNMP". A confirmation screen appears. FUJITSU Storage ETERNUS DX200F All Flash Array Configuration Guide (Basic) Copyright 2014 FUJITSU LIMITED P3AM-8462-01ENZ0...
- Page 62 Click the [OK] button. The SNMP Manager settings are applied. Check the setting completion message and click the [Done] button. The screen display returns to the [Network] screen. FUJITSU Storage ETERNUS DX200F All Flash Array Configuration Guide (Basic) Copyright 2014 FUJITSU LIMITED P3AM-8462-01ENZ0...
- Page 63 Click the [OK] button. The SNMP community settings are applied. Check the setting completion message and click the [Done] button. The screen display returns to the [Network] screen. FUJITSU Storage ETERNUS DX200F All Flash Array Configuration Guide (Basic) Copyright 2014 FUJITSU LIMITED P3AM-8462-01ENZ0...
- Page 64 In [Action], click [Setup SNMP Trap]. The [Setup SNMP Agent Trap] screen appears. In the trap list of the [Setup SNMP Agent Trap] screen, click the [Add] button. FUJITSU Storage ETERNUS DX200F All Flash Array Configuration Guide (Basic) Copyright 2014 FUJITSU LIMITED P3AM-8462-01ENZ0...
- Page 65 Download the MIB file. Download the MIB file that is registered in the ETERNUS DX. In [Action], click [Download MIB File]. The [Download MIB File] screen appears. FUJITSU Storage ETERNUS DX200F All Flash Array Configuration Guide (Basic) Copyright 2014 FUJITSU LIMITED P3AM-8462-01ENZ0...
- Page 66 Click the [Save] button. The MIB file is saved. Check the setting completion message and click the [Done] button. The screen display returns to the [Network] screen. FUJITSU Storage ETERNUS DX200F All Flash Array Configuration Guide (Basic) Copyright 2014 FUJITSU LIMITED P3AM-8462-01ENZ0...
-
Page 67: E-Mail Setup
Enter the destination e-mail address or addresses for the Destination E-Mail Address fields. Click the [E-Mail Server Settings] tab. The [E-Mail Server Settings] tab screen appears. FUJITSU Storage ETERNUS DX200F All Flash Array Configuration Guide (Basic) Copyright 2014 FUJITSU LIMITED P3AM-8462-01ENZ0... - Page 68 This item does not need to be changed from the default value for normal operation. Click the [Set] button to apply the specified settings. A confirmation screen appears. Click the [OK] button. The e-mail notification settings are applied. FUJITSU Storage ETERNUS DX200F All Flash Array Configuration Guide (Basic) Copyright 2014 FUJITSU LIMITED P3AM-8462-01ENZ0...
-
Page 69: Syslog Setup
To send messages in RFC5424 format to a target syslog server that supports RFC5424, select "on (RFC5424)". If this is not the case, select "on (RFC3164)". FUJITSU Storage ETERNUS DX200F All Flash Array Configuration Guide (Basic) Copyright 2014 FUJITSU LIMITED... -
Page 70: Remote Support Setup
AIS Connect and REMCS cannot be used at the same time. AIS Connect function can only be used when REMCS is not specified or is stopped. When REMCS is used, suspend the REMCS function, and then ena- ble the AIS Connect function. FUJITSU Storage ETERNUS DX200F All Flash Array Configuration Guide (Basic) Copyright 2014 FUJITSU LIMITED P3AM-8462-01ENZ0... -
Page 71: Remote Support (By Ais Connect) Setup
(Country Code : Country Name)". Perform the other additional settings that are required. Click the [Set] button. A confirmation screen appears. Click the [OK] button. The AIS Connect settings are applied. FUJITSU Storage ETERNUS DX200F All Flash Array Configuration Guide (Basic) Copyright 2014 FUJITSU LIMITED P3AM-8462-01ENZ0... -
Page 72: Remote Support (By Remcs) Setup
In [Category], click [REMCS] in [Remote Support]. The [Support Information] tab screen of the [Remote Support] screen appears. In [Action], click [Setup Remote Support]. The [Setup Remote Support] screen appears. FUJITSU Storage ETERNUS DX200F All Flash Array Configuration Guide (Basic) Copyright 2014 FUJITSU LIMITED P3AM-8462-01ENZ0... - Page 73 The specified information is sent to the remote support center and the connection of the ETERNUS DX and the remote support center is checked. The connection check result is sent to the e-mail address that is set in "Result notification information". FUJITSU Storage ETERNUS DX200F All Flash Array Configuration Guide (Basic) Copyright 2014 FUJITSU LIMITED P3AM-8462-01ENZ0...
-
Page 74: Audit Log Setup
To send messages in RFC5424 format to a target syslog server that supports RFC5424, select "on (RFC5424)". If this is not the case, select "on (RFC3164)". FUJITSU Storage ETERNUS DX200F All Flash Array Configuration Guide (Basic) Copyright 2014 FUJITSU LIMITED... -
Page 75: Monitoring Server (Snmp Manager) Settings
Register the file that was downloaded in "Download the MIB file" (Step 6) in "6.2.1 SNMP Trap Setup" (page 60) as the MIB definition file for the monitoring software. FUJITSU Storage ETERNUS DX200F All Flash Array Configuration Guide (Basic) Copyright 2014 FUJITSU LIMITED P3AM-8462-01ENZ0... -
Page 76: Transmission Test Execution
The test transmission of the SNMP Trap is performed. Check the test transmission completion message and click the [Done] button. The screen display returns to the [Network] screen. FUJITSU Storage ETERNUS DX200F All Flash Array Configuration Guide (Basic) Copyright 2014 FUJITSU LIMITED P3AM-8462-01ENZ0... -
Page 77: Send Test Mail
On the navigation of the ETERNUS Web GUI screen, click [System]. The [System] screen appears. In [Category], click [Network]. The [Network] screen appears. In [Action], click [Setup E-Mail Notification]. The [Setup E-Mail Notification] screen appears. FUJITSU Storage ETERNUS DX200F All Flash Array Configuration Guide (Basic) Copyright 2014 FUJITSU LIMITED P3AM-8462-01ENZ0... - Page 78 Check that the test mail is sent to the e-mail addresses that are set. For details on the event code and message of the test mail, refer to "Message List". FUJITSU Storage ETERNUS DX200F All Flash Array Configuration Guide (Basic) Copyright 2014 FUJITSU LIMITED...
-
Page 79: Chapter 7 Power Control Setup
Power Resume function is enabled The procedure to enable the Auto Power function and/or the Power Resume function is described below. FUJITSU Storage ETERNUS DX200F All Flash Array Configuration Guide (Basic) Copyright 2014 FUJITSU LIMITED P3AM-8462-01ENZ0... -
Page 80: Connection Setup For Power Synchronized Unit
Connection Setup for Power Synchronized Unit Refer to "Configuration Guide (Power Synchronized Unit)" for the required settings to use power control by connecting power synchronized units to an ETERNUS DX. FUJITSU Storage ETERNUS DX200F All Flash Array Configuration Guide (Basic) Copyright 2014 FUJITSU LIMITED P3AM-8462-01ENZ0... -
Page 81: Wake On Lan Settings
"Gateway" and specify the server IP address or the network address in "Allowable IP Address". Click the [Set] button. A confirmation screen appears. Click the [OK] button. The network environment settings are applied. FUJITSU Storage ETERNUS DX200F All Flash Array Configuration Guide (Basic) Copyright 2014 FUJITSU LIMITED P3AM-8462-01ENZ0... - Page 82 Power Control Setup Wake On LAN Settings Check the setting completion message and click the [Done] button. The screen display returns to the [System Settings] screen. FUJITSU Storage ETERNUS DX200F All Flash Array Configuration Guide (Basic) Copyright 2014 FUJITSU LIMITED P3AM-8462-01ENZ0...
-
Page 83: Chapter 8 San Connection Settings
Click the [Connectivity] tab on the navigation of the ETERNUS Web GUI screen. On the [Connectivity] screen, click [Host Response] in [Category]. In [Action], click [Add Host Response]. FUJITSU Storage ETERNUS DX200F All Flash Array Configuration Guide (Basic) Copyright 2014 FUJITSU LIMITED P3AM-8462-01ENZ0... -
Page 84: Host Affinity Settings
Host affinity creation For the settings for connection using other interfaces, refer to "Configuration Guide (Web GUI)". Also refer to "Configuration Guide -Server Connection-" as required. FUJITSU Storage ETERNUS DX200F All Flash Array Configuration Guide (Basic) Copyright 2014 FUJITSU LIMITED P3AM-8462-01ENZ0... - Page 85 The iSCSI host group is added and the registration completion screen appears. Click the [Done] button. The screen display returns to the [Host Group] screen. FUJITSU Storage ETERNUS DX200F All Flash Array Configuration Guide (Basic) Copyright 2014 FUJITSU LIMITED P3AM-8462-01ENZ0...
- Page 86 For multipath connections, each name must be different. CHAP • Specify [ON] to use unidirectional CHAP authentication or bidirectional CHAP authentication for the target port and [OFF] to use neither of them. FUJITSU Storage ETERNUS DX200F All Flash Array Configuration Guide (Basic) Copyright 2014 FUJITSU LIMITED P3AM-8462-01ENZ0...
- Page 87 The port parameter is set and the setting completion screen appears. Click the [Done] button. The screen display returns to the [iSCSI Port Group] screen. FUJITSU Storage ETERNUS DX200F All Flash Array Configuration Guide (Basic) Copyright 2014 FUJITSU LIMITED P3AM-8462-01ENZ0...
- Page 88 The CA port group is created and the setting completion screen appears. Click the [Done] button. The screen display returns to the [CA Port Group] screen. FUJITSU Storage ETERNUS DX200F All Flash Array Configuration Guide (Basic) Copyright 2014 FUJITSU LIMITED P3AM-8462-01ENZ0...
- Page 89 Enter the number for the first LUN and number of LUNs to allocate to the LUN group in [LUN Setting], select the number for the first volume to be allocated, and click the [OK] button. FUJITSU Storage ETERNUS DX200F All Flash Array Configuration Guide (Basic) Copyright 2014 FUJITSU LIMITED...
- Page 90 Select the "Host Group", the "CA Port Group", and the "LUN Group" that are to be associated. Click the [Browse] button in [Host Group]. A screen to select the host group appears. FUJITSU Storage ETERNUS DX200F All Flash Array Configuration Guide (Basic) Copyright 2014 FUJITSU LIMITED P3AM-8462-01ENZ0...
- Page 91 Connection], and click the [Create] button. A confirmation screen appears. Click the [OK] button. The host affinity is created and the registration completion screen appears. FUJITSU Storage ETERNUS DX200F All Flash Array Configuration Guide (Basic) Copyright 2014 FUJITSU LIMITED P3AM-8462-01ENZ0...
-
Page 92: Ca Reset Group Settings
Set the CA reset group member ports and click the [Set] button. In the confirmation screen, click the [OK] button. Click the [Done] button to return to the [CA Reset Group] screen. FUJITSU Storage ETERNUS DX200F All Flash Array Configuration Guide (Basic) Copyright 2014 FUJITSU LIMITED P3AM-8462-01ENZ0... -
Page 93: Server Connection Setup
After confirming that the ETERNUS DX is in READY status, turn on the server. On the [iSCSI Initiator Properties] screen, click the [Discovery] tab. FUJITSU Storage ETERNUS DX200F All Flash Array Configuration Guide (Basic) Copyright 2014 FUJITSU LIMITED... - Page 94 Figure 8.1) When setting access restrictions, the settings related to CHAP authentication is required. For details on CHAP authentication, refer to "Configuration Guide -Server Connection-". FUJITSU Storage ETERNUS DX200F All Flash Array Configuration Guide (Basic) Copyright 2014 FUJITSU LIMITED P3AM-8462-01ENZ0...
- Page 95 To enable mutual authentication, select [Perform mutual authentication]. Click the [OK] button. The screen display returns to the [Discover Target Portal] screen. Click the [OK] button. FUJITSU Storage ETERNUS DX200F All Flash Array Configuration Guide (Basic) Copyright 2014 FUJITSU LIMITED P3AM-8462-01ENZ0...
- Page 96 On the [iSCSI Initiator Properties] screen, click the [Targets] tab. Confirm that the specified settings are correctly reflected to [The system will look for Targets on follow- ing portals]. FUJITSU Storage ETERNUS DX200F All Flash Array Configuration Guide (Basic) Copyright 2014 FUJITSU LIMITED P3AM-8462-01ENZ0...
- Page 97 On the [iSCSI Initiator Properties] screen, click the [Targets] tab. Confirm whether the specified contents in [The system will look for Targets on following portals] have been applied correctly before checking connection. FUJITSU Storage ETERNUS DX200F All Flash Array Configuration Guide (Basic) Copyright 2014 FUJITSU LIMITED P3AM-8462-01ENZ0...
- Page 98 On the [Advanced Settings] screen, specify the following items under [Connect using] and click the [OK] button. Local adapter: Microsoft iSCSI Initiator Initiator IP: IP address of the server (A in Figure 8.1) FUJITSU Storage ETERNUS DX200F All Flash Array Configuration Guide (Basic) Copyright 2014 FUJITSU LIMITED P3AM-8462-01ENZ0...
- Page 99 Target portal IP: IP address of the ETERNUS DX (C in Figure 8.1) Confirm that the [Add this connection to the list of Favorite Targets.] checkbox is selected and click the [OK] button. FUJITSU Storage ETERNUS DX200F All Flash Array Configuration Guide (Basic) Copyright 2014 FUJITSU LIMITED P3AM-8462-01ENZ0...
- Page 100 Initiator IP: IP address of the server (B in Figure 8.1) Target portal IP: IP address of the ETERNUS DX (D in Figure 8.1) FUJITSU Storage ETERNUS DX200F All Flash Array Configuration Guide (Basic) Copyright 2014 FUJITSU LIMITED P3AM-8462-01ENZ0...
- Page 101 Chapter 8 SAN Connection Settings Server Connection Setup Confirm that [Status] of the two targets has changed to [Connected] and click the [OK] button. FUJITSU Storage ETERNUS DX200F All Flash Array Configuration Guide (Basic) Copyright 2014 FUJITSU LIMITED P3AM-8462-01ENZ0...
-
Page 102: Lun Recognition Check
The following procedure explains how to check LUN using the Windows Device Manager. Open [Device Manager] and expand [Disk drives]. Confirm that the same number of "FUJITSU..." items are displayed as the number of LUNs that are set. If the example is used, eight "FUJITSU..." items are displayed. - Page 103 CM#0 CA#1 Port#0 g CAID = 20 CM#1 CA#1 Port#0 g CAID = 22 CM#0 CA#1 Port#1 g CAID = 21 CM#1 CA#1 Port#1 g CAID = 23 FUJITSU Storage ETERNUS DX200F All Flash Array Configuration Guide (Basic) Copyright 2014 FUJITSU LIMITED P3AM-8462-01ENZ0...
-
Page 104: Disk Partition Settings
Select the checkbox for eight disks in this example. When Windows Server 2008 Enterprise is used, [Initialize Disk] does not appear. Perform the steps from Step 3 onwards. FUJITSU Storage ETERNUS DX200F All Flash Array Configuration Guide (Basic) Copyright 2014 FUJITSU LIMITED P3AM-8462-01ENZ0... - Page 105 Server Connection Setup The LUNs that are set with the ETERNUS DX are recognized as [Offline]. Right-click all the disks displayed as offline, and select [Online]. FUJITSU Storage ETERNUS DX200F All Flash Array Configuration Guide (Basic) Copyright 2014 FUJITSU LIMITED P3AM-8462-01ENZ0...
- Page 106 Chapter 8 SAN Connection Settings Server Connection Setup [Offline] changes to [Not initialized]. Right-click all the disks to be changed to online, and select [Initialize Disk]. FUJITSU Storage ETERNUS DX200F All Flash Array Configuration Guide (Basic) Copyright 2014 FUJITSU LIMITED P3AM-8462-01ENZ0...
- Page 107 When the [Initialize Disk] screen appears, confirm that all the disks are selected and click the [OK] but- ton. Confirm that the initialized disks are displayed as [Online]. FUJITSU Storage ETERNUS DX200F All Flash Array Configuration Guide (Basic) Copyright 2014 FUJITSU LIMITED P3AM-8462-01ENZ0...
- Page 108 The following procedure explains how to set up the operation disk. Select [Disk Management] from [Computer Management]. On the [New Simple Volume Wizard] screen, click the [Next] button. FUJITSU Storage ETERNUS DX200F All Flash Array Configuration Guide (Basic) Copyright 2014 FUJITSU LIMITED P3AM-8462-01ENZ0...
- Page 109 When [Assign Drive Letter or Path] appears, assign a drive letter and click the [Next] button. Perform the settings as shown below. File system Drive that is to be Volume No. Volume name Type Capacity created NTFS main Standard FUJITSU Storage ETERNUS DX200F All Flash Array Configuration Guide (Basic) Copyright 2014 FUJITSU LIMITED P3AM-8462-01ENZ0...
- Page 110 [Format Partition] appears. Click the [Next] button. [Completing the New Simple Volume Wizard] appears. Click the [Finish] button. Check that the specified settings are displayed correctly. FUJITSU Storage ETERNUS DX200F All Flash Array Configuration Guide (Basic) Copyright 2014 FUJITSU LIMITED P3AM-8462-01ENZ0...
- Page 111 Set up the disk created in [Snap Data Volume]. During volume creation, right-click the disk created in [Snap Data Volume] and select [New Simple Vol- ume]. FUJITSU Storage ETERNUS DX200F All Flash Array Configuration Guide (Basic) Copyright 2014 FUJITSU LIMITED P3AM-8462-01ENZ0...
- Page 112 Without changing the default settings of [Specify Volume Size], click the [Next] button. Assign a drive letter in [Assign Drive Letter or Path] and click the [Next] button. FUJITSU Storage ETERNUS DX200F All Flash Array Configuration Guide (Basic) Copyright 2014 FUJITSU LIMITED...
- Page 113 *1: The capacity that is displayed in "( )" is the copy source capacity. Select [Do not format this volume], and click the [Next] button. [Completing the New Simple Volume Wizard] appears. Click the [Finish] button. FUJITSU Storage ETERNUS DX200F All Flash Array Configuration Guide (Basic) Copyright 2014 FUJITSU LIMITED P3AM-8462-01ENZ0...
- Page 114 Step 1 through Step 7 for all the disks created in [Snap Data Volume]. In this case, seven disks are created as [Drive Letter: Assigned, RAW]. FUJITSU Storage ETERNUS DX200F All Flash Array Configuration Guide (Basic) Copyright 2014 FUJITSU LIMITED P3AM-8462-01ENZ0...
-
Page 115: Chapter 9 Advanced Copy Settings
Low Priority mode. • Low Priority This mode reduces the effect on host access. Select this mode when using EC and/or OPC during operation. FUJITSU Storage ETERNUS DX200F All Flash Array Configuration Guide (Basic) Copyright 2014 FUJITSU LIMITED P3AM-8462-01ENZ0... - Page 116 In the confirmation screen, click the [OK] button. EC/OPC priority setting starts. In the setting completion screen, click the [Done] button. The screen display returns to the [Setting (Advanced Copy)] screen. FUJITSU Storage ETERNUS DX200F All Flash Array Configuration Guide (Basic) Copyright 2014 FUJITSU LIMITED P3AM-8462-01ENZ0...
-
Page 117: Copy Table Size Settings
• Specify the copy table size. Specify "512 (MB)" in this example. • Table Size Threshold Select the threshold for the table size usage rate. FUJITSU Storage ETERNUS DX200F All Flash Array Configuration Guide (Basic) Copyright 2014 FUJITSU LIMITED P3AM-8462-01ENZ0... - Page 118 In the confirmation screen, click the [OK] button. Copy table size setting starts. In the setting completion screen, click the [Done] button. The screen display returns to the [Setting (Advanced Copy)] screen. FUJITSU Storage ETERNUS DX200F All Flash Array Configuration Guide (Basic) Copyright 2014 FUJITSU LIMITED P3AM-8462-01ENZ0...
-
Page 119: Copy Parameter Settings
In [Action] on the [Setting] screen, click [Modify Copy Parameter]. Set the required items and click the [Modify] button. In the confirmation screen, click the [OK] button. Copy table size setting starts. FUJITSU Storage ETERNUS DX200F All Flash Array Configuration Guide (Basic) Copyright 2014 FUJITSU LIMITED P3AM-8462-01ENZ0... -
Page 120: Performing A Copy (Snapopc+)
On the navigation of the ETERNUS Web GUI screen, click the [Advanced Copy] tab. In [Action], click [Create SnapOPC+]. Click the [Browse] button of the copy source volume. FUJITSU Storage ETERNUS DX200F All Flash Array Configuration Guide (Basic) Copyright 2014 FUJITSU LIMITED P3AM-8462-01ENZ0... - Page 121 Select the "No.: 0, Name: main" volume. In the same way as the copy source volume, click the [Browse] button of the copy destination volume. FUJITSU Storage ETERNUS DX200F All Flash Array Configuration Guide (Basic) Copyright 2014 FUJITSU LIMITED P3AM-8462-01ENZ0...
- Page 122 Check the displayed information, and then click the [Start] button. In the confirmation screen, click the [OK] button. The SnapOPC+ session starts. Click the [Done] button to return to the [Advanced Copy] screen. FUJITSU Storage ETERNUS DX200F All Flash Array Configuration Guide (Basic) Copyright 2014 FUJITSU LIMITED P3AM-8462-01ENZ0...
- Page 123 In this case, the copy source volume number is "0" and the copy destination volume numbers are from "1" through to "7". Open [Disk Management] from [Computer Management]. FUJITSU Storage ETERNUS DX200F All Flash Array Configuration Guide (Basic) Copyright 2014 FUJITSU LIMITED P3AM-8462-01ENZ0...
- Page 124 Check if the file that was created in Step 8 "■ Operation Disk Settings" (page 108) "8.2.3.2 Disk Settings" (page 108) is displayed for the copy source drive. FUJITSU Storage ETERNUS DX200F All Flash Array Configuration Guide (Basic) Copyright 2014 FUJITSU LIMITED P3AM-8462-01ENZ0...
- Page 125 Step 15 are displayed. Old data can be restored by simply copying and pasting the data files that are to be restored from the server. FUJITSU Storage ETERNUS DX200F All Flash Array Configuration Guide (Basic) Copyright 2014 FUJITSU LIMITED P3AM-8462-01ENZ0...
-
Page 126: Chapter 10 System Status Check
NUS DX. Check the status of each component on the [Storage] screen. If there is a component in Warning or Error status, contact your sales representative or maintenance engi- neer. FUJITSU Storage ETERNUS DX200F All Flash Array Configuration Guide (Basic) Copyright 2014 FUJITSU LIMITED P3AM-8462-01ENZ0... -
Page 127: Raid Group Check
GUI screen. In the [RAID Group (Basic Information)] screen that appears, select which RAID group to check the information for and click the No. or name of this RAID group. FUJITSU Storage ETERNUS DX200F All Flash Array Configuration Guide (Basic) Copyright 2014 FUJITSU LIMITED... -
Page 128: Volume Check
In the [Volume (Basic Information)] screen that appears, select which volume to check the informa- tion for and click the No. or name of this volume. FUJITSU Storage ETERNUS DX200F All Flash Array Configuration Guide (Basic) Copyright 2014 FUJITSU LIMITED... -
Page 129: Checking Copy Sessions
To display the [Advanced Copy] screen, click the [Advanced Copy] tab on the navigation of the ETERNUS Web GUI screen and click the number of sessions in [SnapOPC+ Sessions]. FUJITSU Storage ETERNUS DX200F All Flash Array Configuration Guide (Basic) Copyright 2014 FUJITSU LIMITED... -
Page 130: Checking Luns
Click the [Start] button for Windows, expand [ETERNUS Multipath Driver] from [All Programs], and open [ETERNUS Multipath Manager]. Check that the LUN status is normal (that the signal icon is blue). FUJITSU Storage ETERNUS DX200F All Flash Array Configuration Guide (Basic) Copyright 2014 FUJITSU LIMITED... -
Page 131: Powering Off
This section explains how to use the Power switch and power synchronization unit to turn off the ETERNUS For other procedures, refer to the related manuals. FUJITSU Storage ETERNUS DX200F All Flash Array Configuration Guide (Basic) Copyright 2014 FUJITSU LIMITED... - Page 132 The POWER LED ( ) of the ETERNUS DX is turned off. ■ When a Power Synchronized Unit is Used If the server is turned off, the ETERNUS DX is also turned off. FUJITSU Storage ETERNUS DX200F All Flash Array Configuration Guide (Basic) Copyright 2014 FUJITSU LIMITED P3AM-8462-01ENZ0...
-
Page 133: Chapter 11 Solution Configuration
Register the business server (ACM Agent) and the business volumes that are to be backed up in the opera- tion management server (ACM Manager). REC related settings and connection path settings must be performed in the ETERNUS DX. FUJITSU Storage ETERNUS DX200F All Flash Array Configuration Guide (Basic) Copyright 2014 FUJITSU LIMITED P3AM-8462-01ENZ0... - Page 134 Register the replication source volumes and the replication destination volumes. For more details on the settings for ETERNUS SF AdvancedCopy Manager, refer to "ETERNUS SF AdvancedCopy Manager Operation Guide". FUJITSU Storage ETERNUS DX200F All Flash Array Configuration Guide (Basic) Copyright 2014 FUJITSU LIMITED P3AM-8462-01ENZ0...
-
Page 135: Performance/Tuning
ETERNUS SF Improved and stabilized Storage Cruiser responses for prioritized operations Volumes for Server A Volumes for Server C Volumes for Server B ETERNUS DX FUJITSU Storage ETERNUS DX200F All Flash Array Configuration Guide (Basic) Copyright 2014 FUJITSU LIMITED P3AM-8462-01ENZ0... - Page 136 Specify the target performance value for each volume. For more details on the settings for ETERNUS SF Storage Cruiser, refer to "ETERNUS SF Storage Cruiser Opera- tion Guide". FUJITSU Storage ETERNUS DX200F All Flash Array Configuration Guide (Basic) Copyright 2014 FUJITSU LIMITED P3AM-8462-01ENZ0...
-
Page 137: Cloud Platform
RAID group and Thin Provisioning Pool creation Settings of a LAN for operation management (such as the firewall settings and the SSH connection set- tings) FUJITSU Storage ETERNUS DX200F All Flash Array Configuration Guide (Basic) Copyright 2014 FUJITSU LIMITED P3AM-8462-01ENZ0... -
Page 138: Vmware Linkage
Install ETERNUS vCenter Plug-in and then register the ETERNUS DX as a management target device. Settings for the ETERNUS DX • Enable SSH connections in the firewall settings of the network settings in ETERNUS Web GUI. FUJITSU Storage ETERNUS DX200F All Flash Array Configuration Guide (Basic) Copyright 2014 FUJITSU LIMITED P3AM-8462-01ENZ0... -
Page 139: Microsoft Linkage
2012. Figure 11.5 Solution — Cloud Platform (Microsoft Linkage) SCVMM 2012 management environment SCVMM 2012 Hyper-V Hyper-V management console SMI-S Management server Administrator ETERNUS DX FUJITSU Storage ETERNUS DX200F All Flash Array Configuration Guide (Basic) Copyright 2014 FUJITSU LIMITED P3AM-8462-01ENZ0... - Page 140 Create ODX volumes after enabling the ODX settings for the Advanced Copy function in the ETERNUS DX with ETERNUS Web GUI. For details on the SCVMM2012 settings, refer to the manual of the SCVMM2012. FUJITSU Storage ETERNUS DX200F All Flash Array Configuration Guide (Basic) Copyright 2014 FUJITSU LIMITED P3AM-8462-01ENZ0...
- Page 141 However, Fujitsu shall assume no responsibility for any operational problems as the result of errors, omissions, or the use of information in this manual. Fujitsu assumes no liability for damages to third party copyrights or other rights arising from the use of any information •...
Need help?
Do you have a question about the ETERNUS DX200F and is the answer not in the manual?
Questions and answers