Table of Contents
Advertisement
Quick Links
Advertisement
Table of Contents
Troubleshooting

Related Manuals for Korg microARRANGER


Summary of Contents for Korg microARRANGER
- Page 1 Owner’s Manual...
-
Page 2: Power Supply
Be careful not to let metal objects get into the equip‐ that for which it is intended could be dangerous and could ment. If something does slip into the equipment, invalidate the manufacturer’s or distributor’s warranty. unplug the AC adapter from the wall outlet. Please also retain your receipt as proof of purchase other‐ Then contact your nearest Korg dealer or the store wise your product may be disqualified from the manufac‐ where the equipment was purchased. turer’s or distributor’s warranty. -
Page 3: Lcd Display
DATA HANDLING Data stored in memory may occasionally be lost due to incorrect user action. Be sure to save your important data to a memory card. KORG will not be responsible for damages caused by data loss. LCD DISPLAY Some pages of the manuals show LCD screens along with an explanation of operation and functionality. All sound names, parameter names, and values are merely examples and may not always match the actual display that you are working on. TRADEMARKS Mac, the Mac logo and the Audio Units logo are trade‐ marks of Apple Inc., registered in the U.S. and other ... - Page 4 THE BALANCE SLIDER When turning the instrument on, please be assured the BALANCE slider is set to the cen‐ ter. This sets both Sequencer 1 (SEQ1) and Sequencer 2 (SEQ2) to their maximum level. This will avoid you start a Song without hearing anything.
- Page 5 HOW TO… Keyboard Song Play mode …select a Sound Program …play a Song (Standard MIDI File) …select a Performance …see the Lyrics …play a Sound Program across the …see the Song tracks whole keyboard, as with a piano …start both Sequencers at the same time 18, 80 …split the keyboard in two …add sounds to the right hand...
-
Page 6: Table Of Contents
Start up ........10 Connecting Connecting the AC power adapter . . . . . . . . . . . . . . . 10 microARRANGER to a Master keyboard . . . . . . . . 36 Turning the instrument on and off . . . . . . . . . . . . . . . 10 Connecting ... - Page 7 Style Record mode ......52 Page 8 ‐ Track: Internal/External . . . . . . . . . . . . . . . . . 79 The Style’s structure . . . . . . . . . . . . . . . . . . . . . . . . . . . . 52 Page 9 ‐ Jukebox . . . . . . . . . . . . . . . . . . . . . . . . . . . . . . . 79 Style Import/Export . . . . . . . . . . . . . . . . . . . . . . . . . . . . 53 Page 10 ‐ Preferences . . . . . . . . . . . . . . . . . . . . . . . . . . . 80 Entering the Record mode ...
- Page 8 Program operating mode ....105 Page structure . . . . . . . . . . . . . . . . . . . . . . . . . . . . . . . . 132 Main page . . . . . . . . . . . . . . . . . . . . . . . . . . . . . . . . . . . 105 Navigation tools . . . . . . . . . . . . . . . . . . . . . . . . . . . . . . 132 Sound Programs and Drum Programs . . . . . . . . . . . 105 Menu . . . . . . . . . . . . . . . . . . . . . . . . . . . . . . . . . . . . . . . . 133 Menu . . . . . . . . . . . . . . . . . . . . . . . . . . . . . . . . . . . . . . . 105 Page 1 ‐ Load . . . . . . . . . . . . . . . . . . . . . . . . . . . . . . . . . 133 Edit page structure ...
-
Page 9: Introduction
INTRODUCTION... -
Page 10: Welcome
Programs, Styles, and erate a high‐quality band accompaniment simply by other useful music materials. playing chords, and then you can play the melody Each KORG distributor can supply you with useful yourself to easily create an original song. information. Just give him a call for additional services. In the English‐speaking world, here are the relevant ... -
Page 11: About This Manual
About this manual ABOUT THIS MANUAL LOADING THE OPERATING SYSTEM This manual is divided in three sections: Your microARRANGER can be constantly updated as new versions of the operating system are released by • A Basic Guide, containing an overview of the KORG. You can download the operating system from ... -
Page 12: Start Up
This slider controls the Warning: Use only the supplied adapter, or an adapter volume of the sound going suggested by Korg. Other adapters may look similar, to the internal speakers, the but they may damage your instrument! L/MONO & RIGHT OUT‐ PUTS, and the HEADPHO‐ TURNING THE INSTRUMENT ON AND OFF NES connector. -
Page 13: Audio Outputs
Don’t use the PHONO inputs of Listen to the built‐in Demo Songs to appreciate the your audio system! power of the microARRANGER. There are 16 Demo Mono. Connect a mono cable to the L/MONO OUT‐ Songs to choose from. PUT. Connect the other end of the cable to a mono ... -
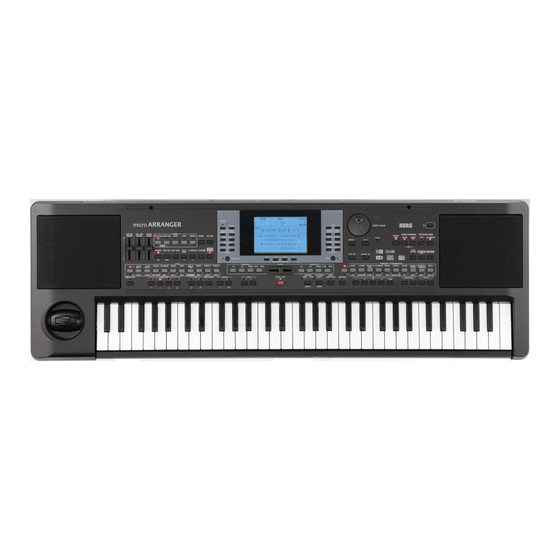
Page 14: Front Panel
(SMF) format directly from the memory This slider controls the overall volume of the instru‐ card. You can also play “.MID” and ment, both of the internal speakers, the L/MONO and “.KAR” files directly from the memory RIGHT outputs, and the HEADPHONES output. card. Since the microARRANGER is Warning: At the maximum level, with rich‐sounding Songs, equipped with two sequencers, you can Styles or Programs, the internal speakers could distort dur‐ even play two Songs at the same time, and ing signal peaks. Should this happen, lower the Master Vol‐... - Page 15 Front panel SD CARD This button doubles as a PREVIOUS EVENT func‐ This button recalls the Card edit environment, where tion for the Backing Sequence and Song modes (see you can execute various operations on files and cards chapters 12 and 13). (Load, ...
- Page 16 Starts or stops the Style that’s running. for the Song mode (see chapter 13). You can reset all ‘frozen’ notes and controllers 18 FILL 1–2 (NOTE LENGTH) buttons on the microARRANGER and any instrument con‐ These two buttons trigger a fill‐in. Press them twice (LED nected to its MIDI OUT, by using the “Panic” key com‐ blinking) to let them play in loop, and select any other bination. Just press SHIFT + START/STOP to stop all ...
- Page 17 Front panel START+STOP LEDs ON See the relevant chapter devoted to each operating mode or edit environment, to see their “maps” in detail. When both LEDs are lit‐up, raising your hand from the keyboard momentarily will 29 PAGE -/+ stop the Style from playing. If you play a After pressing MENU to open a menu, use these but‐ chord again, the Style starts again. tons to browse the edit pages of an operating mode or All Synchro functions are turned off. editing environment. Press EXIT to go back from an ...
- Page 18 Front panel 34 TEMPO/VALUE section VOLUME While you are in the main pages of any operating mode, select a track and use The DIAL and the DOWN/‐ and UP/+ buttons can be these buttons to change the track’s vol‐ used to control the Tempo, assign a different value to ume. Use the left button to decrease it, or ...
- Page 19 Front panel 44 PROGRAM/PERFORMANCE section 39 CHORD SCANNING section In Style Play and Backing Sequence mode, use these buttons to define the way chords are recognized by the Use these buttons to open the Program Select or Perfor‐ arranger. mance Select window, and select a Program or a Perfor‐ mance. See “Selecting a Program” on page 25, or LOWER Chords are detected below the split point. “Selecting a Performance” on page 25. For a list of The ...
- Page 20 Front panel 49 SEQUENCER TRANSPORT CONTROLS - SEQ1 Note: The Master Transpose has no effect on tracks set to and SEQ2 Drum mode (and, even if set in a different status, on the Drum and Percussion tracks). See “Page 14 ‐ Track: Mode” The instrument is equipped with two sequencers on page 46, and “Page 7 ‐ Track: Mode” on page 78.
-
Page 21: Display And User Interface
Display and User Interface Display controls 4. DISPLAY AND USER INTERFACE The display shows the current status of the microAR‐ each page command appearing along the last line RANGER and its performance and editing parameters. using the F‐1–F‐4 buttons. You can vary many of the You can select each parameter by using the VOLUME/ parameter’s values by pressing the left (‐) or right (+) VALUE ... -
Page 22: Interface Structure
Display and User Interface Interface structure Song Play 4 Realtime tracks, 2 x 16 Song Tracks, When opening an edit environment or a selecting page, 4 Pads. the current operating mode is still working in the back‐ ground. Backing Sequence 4 Realtime tracks, 8 Style tracks, 4 Pads. Song 16 Song tracks. You can only see up to 8 tracks in the display. So, use the TRACK SELECT button to switch to the other (hid‐ den) tracks. For example, when in Style Play, you can use this button to switch from the Realtime tracks and the Style tracks. INTERFACE STRUCTURE Thanks to its multitasking operating system, the micro‐ ARRANGER user interface is structured in “overlap‐ ping”, active layers. From the lower level: • operating modes (Style Play, Backing Sequence, Song Play, Song, Program) •... -
Page 23: Message Windows
Display and User Interface Message windows SYMBOLS AND ICONS Edit environment. (See diagram at the bottom of this page). When you press GLOBAL or SD CARD, an edit Many icons and symbols, on the custom display, show environment overlaps the current operating mode. the status of a parameter or the display content. Press EXIT to go back to the current operating mode. Realtime/Keyboard track An edit environment is made up of a menu and a series (Upper 1–3, Lower). of edit pages. Use the MENU and PAGE buttons to browse across the various edit pages. -
Page 24: Rear Panel
SD Card Slot the MASTER VOLUME slider. To insert an SD card (or SDHC card), DAMPER push it into the slot until it clicks into Use this to connect a Damper pedal, like the KORG place. To remove the SD card, push it in; PS1, PS3 or DS1H. To change its polarity, see “Damper the card will pop out slightly, allowing Pol. (Damper Polarity)” on page 126. -
Page 25: Basic Guide
BASIC GUIDE... -
Page 26: Basic Operations
Basic operations Playing on the keyboard 6. BASIC OPERATIONS PLAYING ON THE KEYBOARD SELECTING, MUTING/UNMUTING AND SOLOING A TRACK Just play on the keyboard. You will hear the Realtime tracks playing. There are four Realtime tracks: Upper Selecting. Use the VOLUME/VALUE (A–H) buttons to 1–3 and Lower. They may play all at the same time, or select a track. just one or a few of them, depending on their Mute sta‐ tus. If you cannot hear a track, check the mute status of that part. Tracks can be set in different ways: use the KEY‐ BOARD MODE section to select the way they are con‐... -
Page 27: Select A Performance
Basic operations Selecting a Performance SELECTING A PERFORMANCE The Performance Select window appears. There are 8 Performances for each bank. A Performance is a set of Programs and settings for the Keyboard and Style tracks, that makes selecting com‐ Last selected Performance plex combinations live fast and easy. When the STYLE CHANGE LED is on, a Performance can also select a different Style. It is always advisable to use Performances, rather than single ... -
Page 28: Selecting A Style
Basic operations Selecting a Style Use the leftmost PROGRAM/PERFORMANCE The Style Select window appears. button to select a row of Program banks (upper, lower). Select the PROGRAM/PERFORMANCE bank con‐ taining the Program you are looking for (Program banks are identified by instrument names). There are 2 pages for each bank, each containing 8 Styles. Select a page using the PAGE buttons. As you find the Style you are looking for, select it using the VOLUME/VALUE (A–H) buttons. The Program Select window appears. See “Pro‐ grams (Program Change order)” on page 154 for a Note: The new Style will enter at the next strong beat. list of Factory Programs. If the DISPLAY HOLD LED is on, press EXIT to exit this window. -
Page 29: Tutorial
During your playing, you are free to call a one‐bar break. Try it: PRESS BREAK Do you see? Music stopped for one bar. Then, it is back again. After a while, let’s go for something different… PRESS FILL1 OR FILL2 No silence, this time. microARRANGER plays a com‐ Press one of the A VOLUME/VALUE buttons to plex passage to let you take a breath. FILL1 is the sim‐ select “Jazz Brush”. pler one, where FILL2 is more sophisticated. Usually, you will use FILL1 when playing with Variations 1 and ... -
Page 30: Playing In Realtime (Without Using Automatic Accompaniment)
Tutorial Playing in Realtime (Without using Automatic Accompaniment) PLAYING IN REALTIME Stop it! OK, you could say: “Oh, that’s easy, I know how to do (Without using Automatic Accompaniment) it, I can just press that big red START/STOP button As soon as you turn your microARRANGER on, it is in again”. Style Play mode, and you can play it in realtime. Please Yes, you are perfectly right. But that’s the easy way. Let follow me… us suggest a more colorful way: PRESS ENDING1 OR ENDING2 Play on the keyboard. - Page 31 Tutorial Playing in Realtime (Without using Automatic Accompaniment) Select Performance 1-1 (“Grand Piano”) again. Mute/unmute various tracks. As above: press Performance bank 1, and use the A Press both H VOLUME/VALUE buttons. You will mute VOLUME/VALUE buttons to select Performance 1‐1. the Lower track. Unmute the Upper 2 track. Press both F VOLUME/VALUE but‐ tons. ...
-
Page 32: Recording A Song (Simultaneously Recording The Style And Realtime Performance)
Tutorial Recording a Song (Simultaneously recording the Style and realtime performance) RECORDING A SONG If you think the selected Style is not what you like for your backing tracks, select a different (Simultaneously recording the Style and one. realtime performance) (see ... -
Page 33: Playing A Song From A Card
Tutorial Playing a Song from a card Finish the recording. Press the [F‐1] button to select the SD card (SD). PRESS PLAY/STOP (SEQ1) and the Recording status will be gone. Both Backing Sequence tracks (RT and Ch/Acc) will be set to the PLAY status. 10 Listen to the Song. When back in the Backing Sequence Play page, press PLAY/STOP ... -
Page 34: Editing A Song
You can edit a Song, either a Standard MIDI File bought at the shop, or one of your Songs made in Back‐ ing Sequence mode. What about changing those boring General MIDI sounds with those gorgeous original KORG sounds? You can do it—in Song mode. Press SONG to go to the Song mode. This is the Song garage, where you may find tools to ... - Page 35 Stop command will reset all your changes. Execute as many changes as you like to the other (Not funny, huh?) tracks. Select different Programs. Change the volume. You can replace General MIDI Programs with KORG Yes, this is another obvious change. Press MENU to Programs. It will sound more rich, more lively. open the edit menu. Press TRACK SELECT to see tracks 1–8. The LED turns on. Press one of the A VOLUME/VALUE buttons, to select the Mixer/Tuning item. Suddenly, a Volume edit page ...
-
Page 36: The Arabic Scale
Note: When saving a Song the Song Performance events Lower some note pitches. (initial Program, Volume, Pan, Effect Send settings) are Keep the Quarter tone pedal pressed. The keyboard saved at the beginning of the Standard MIDI File. Effect set‐ will not play at this time. Press the notes you want to tings are saved as microARRANGER SysEx events, ignored lower a quarter of tone. Release the pedal. by other musical instruments. Play with your new scale. Other editings The notes you pressed are now lowered of a quarter of ... -
Page 37: Midi
Note On – This message instructs an instrument to When in Song Play mode, the microARRANGER can play a note on a specific channel. Notes have both a also display SMF lyrics in Solton, M‐Live (Midisoft), name (C4 standing for the center C) and a number (60 ... -
Page 38: The Chord 1 And Chord 2 Channels
Chord 2 channels. RANGER if it transmits over the same channel pro‐ grammed as Global in the microARRANGER. THE CHORD 1 AND CHORD 2 CHANNELS You can set two special Chord channels (see page 128) to send to the microARRANGER notes for the chord recognition. The notes will be combined with the notes that go through the channel set as Global (Global notes are recognized only under the split point, if the SPLIT MIDI IN LED is lit up). ... -
Page 39: Connecting The Microarranger To Amidi Accordion
The sequencer will receive the notes played on the microARRANGER keyboard (Upper 1) and send them Connections and settings to the selected track of the song. The track will transmit In order to connect the microARRANGER to a com‐ the data to the internal sound generation of the micro‐ puter, you need to have a computer with the MIDI ARRANGER. interface. Note: In order to send data to the microARRANGER sound ... -
Page 40: Playing Another Instrument With The Microarranger
The Arranger The Keyboard One of the most interesting aspect of MIDI, is that you microARRANGER’s physical keyboard can drive up to can use your microARRANGER to play an external 4 tracks via the MIDI OUT (Upper 1–3 and Lower). instrument with its onboard arranger. Yes, it’s hard to MIDI output channels are set in Global mode (see beat the audio quality of microARRANGER, but you ... -
Page 41: Reference Guide
REFERENCE GUIDE... -
Page 42: Style Play Operating Mode
Style Play operating mode What’s a Style? 9. STYLE PLAY OPERATING MODE The Style Play mode is the boot‐up operating mode. When in this mode, you can play Styles (i.e. automatic Folder DIRECT SD pages accompaniments), or just play with one to four Real‐ *.SET > ST-YLE > USER01 1, 2 time tracks on the keyboard (Upper 1…3 and Lower). -
Page 43: Main Page
Style Play operating mode Main page MAIN PAGE press both VOLUME/VALUE buttons. To unmute, press both buttons again. To change the volume, select This is the page you see after you turn the instrument the track, then keep one of the buttons pressed. C (Acc.1–5 grouped tracks) To access this page from another operating mode, press Use these buttons to select, mute/unmute or change the the STYLE PLAY button. volume of the instrumental accompaniment tracks Note: When switching from Song Play to Style Play, a Per‐ (tracks 1–5, other than Bass, Drum and Percussion). To formance is automatically selected, and various track param‐ mute these tracks, press both VOLUME/VALUE but‐ eters may change. -
Page 44: The Write Window
Style Play operating mode The Write window THE WRITE WINDOW MENU Open this window by pressing the WRITE button. From any page, press MENU to open the Style Play Here, you can save all track settings into a Perfor‐ edit menu. This menu gives access to the various Style mance, ... -
Page 45: Mixer: Volume
PAGE 3 - MIXER: FX SEND This page lets you set the volume for each of the Real‐ time (Keyboard) or Style tracks. This page lets you set the level of the track’s direct Use the TRACK SELECT button to switch from the Real‐ (uneffected) signal going to the Internal FX processors. time (Keyboard) tracks to the Style tracks, and vice versa. The effect processors included in microARRANGER are connected in parallel, so you can decide which per‐ centage of the direct signal should be effected: Output Track FX Processor There are four Internal FX processors in Style Play ... -
Page 46: Tuning: Detune
Style Play operating mode Page 4 - Tuning: Detune PAGE 4 - TUNING: DETUNE Note Note in edit, to be detuned. This parameter can be This page is the place where you can set the fine tuning accessed when a User Scale is selected. for each track. Detune Use the TRACK SELECT button to switch from the Real‐ Note detune, relative to the standard Equal tuning. This time (Keyboard) tracks to the Style tracks, and vice‐versa. parameter can be accessed when a User Scale is selected. PAGE 6 - TUNING: PITCHBEND SENSITIVITY This page lets you program the Pitch Bend range for the Realtime (Keyboard) tracks. -
Page 47: Fx: C/D Select
Style Play operating mode Page 8 - FX: C/D Select PAGE 8 - FX: C/D SELECT PAGE 12 - FX: D EDITING This page lets you select the C and D effects. Usually, This page contains the editing parameters for the D the C effect is the reverb, and the D effect is the modu‐ effect (usually modulating effect for the Realtime lating effect for the Realtime (Keyboard) tracks. -
Page 48: Track: Mode
Style Play operating mode Page 14 - Track: Mode Vibrato Rate Speed of the Vibrato. Parameters Vibrato Depth Drum This is a Drum/Percussion track. No Mas‐ ter or Octave Transpose applies to this Intensity of the Vibrato. track. You can set a different volume for Vibrato Delay each class of percussive instruments (see Delay time before the Vibrato begins, after “Page 13 ‐ Track: Easy edit” on page 45). the sound starts. -
Page 49: Track: Internal/External
PAGE 15 - TRACK: INTERNAL/EXTERNAL PAGE 16 - R.T. CONTROLS: DAMPER This page lets you set the Internal or External status for This page lets you enable/disable the Damper pedal for each track. It is very useful to let a Style track drive an each of the Realtime (Keyboard) tracks. external expander, or play a digital piano with one of microARRANGER’s Realtime tracks. D (Damper) When you press the Damper pedal and release the keys, the track’s sound is kept sustained. The Damper pedal is not active on any track set to this status. -
Page 50: R.t. Controls: Dynamic Range
Style Play operating mode Page 18 - R.T. controls: Dynamic range Up1…Up3 This enables/disables the left/right movement of the Right‐hand (Upper) tracks. Joystick (Pitch Bend, and sometimes the sound param‐ There is no harmonization on this track. eter’s control). Normal This track is included in the harmoniza‐ tion. Mute This track only plays the Ensemble notes, This enables/disables the front/rear movement of the but not the original note. -
Page 51: Style Controls: Drum/Fill
Style Play operating mode Page 20 - Style controls: Drum/Fill Note value for the Trill, Repeat or Echo Ensemble Inc/Dec The next higher/lower numbered Varia‐ options. This is in sync with the Metronome Tempo. tion is selected. When Variation 4 is reached, an Inc command will select Vari‐ Feedback ation 4 again. When Variation 1 is reached, Note: This parameter only appears when the Echo option is a Dec command will select Variation 1 selected. -
Page 52: Pads
Style Play operating mode Page 22 - Pads PAGE 23 - PREFERENCES: LOCK W (Wrap Around) The wrap‐around point is the highest register limit for You can “lock” various functions, to avoid they can be the backing track. The accompaniment patterns will be changed when selecting a different Performance, Style transposed according to the detected chord. If the or Single Touch Setting. chord is too high, the Style tracks might play in a regis‐ ter that is too high, and therefore unnatural. If, how‐ ever, ... -
Page 53: Preferences: Controls
Style Play operating mode Page 24 - Preferences: controls PAGE 24 - PREFERENCES: CONTROLS Scale Mode This parameter determines which tracks will use the In this page you can set various general parameters for selected alternative scale (see “Scale” on page 44). the Style. Realtime tracks The scale will only affect the Realtime (Keyboard) tracks. Upper tracks The scale will only affect the Upper 1–3 Realtime (Keyboard) tracks. -
Page 54: Style Record Mode
When you play on the chord recognition area (Lower, matically played by the arranger of the microAR‐ Upper or Full, depending on the Chord Scanning sec‐ RANGER. A Style consists of a predefined number of tion on the control panel), the arranger scans the key‐ Style Elements (E) (microARRANGER features ten dif‐ board and determines which chord you are playing. ferent Style Elements: Variation 1–4, Intro 1–2, Fill 1–2, Then, depending on the selected Style Element, it Ending 1–2). When playing, these Style Elements can determines which Chord Variation (CV) should be ... -
Page 55: Style Import/Export
Style. This delay is higher with a Style containing more MIDI events. STYLE IMPORT/EXPORT Note: While in Record mode, all footswitches are dis‐ abled. You can use Korg’s Style To Midi application to exchange Styles between your computer and the micro‐ LISTENING TO THE STYLE WHILE IN ARRANGER, through the Standard MIDI File (SMF) format. The application is freely downloadable from ... -
Page 56: Exit And Save/Abort Style
To delete all changes to the Style, press one of the the Chord Variation. D VOLUME/VALUE buttons to select the Abort Note: Some Control Change messages cannot be recorded command. The “Are you sure message?” will directly using microARRANGER integrated controls. appear. Press ENTER to confirm deletion, or EXIT to return to the Write page. FAST DELETE USING THE CONTROL PANEL Style name Use this parameter to change the Style’s name. Press ... -
Page 57: Main Page
Style Record mode Main page MAIN PAGE Note: When this parameter and the assigned value is in small letters (cv:cv1), the Chord Variation is empty; when it After pressing the RECORD button, and selected the is in capitals (CV:CV1), it is already recorded Style to record/edit, the Main page of the Style Record SE:V1…V4 You can select one of 6 Chord Variations to mode appears. edit. Style Play icon Chord Measure counter SE:I1…E4 You can select one of 2 Chord Variations to edit. - Page 58 “maj7”. Be very careful to play the 7th+ note (i.e., with a “Cmaj7th” key/chord, the B), to avoid the lack of notes, While in the main Style Record page, press TRACK or a bad NTT conversion when playing different chords. SELECT to jump to this page. Here you can see and Note: To conform to Korg specifications, it is advisable to select any Style track. record both the “Major” and “minor” Chord Variations for Style Element-Chord Variation in the Intro 1 and Ending 1 Style Elements.
- Page 59 Style Record mode Step Record page Program name Meter Select a track using the VOLUME/VALUE buttons. Meter of the current measure. This parameter can’t be Select a Program using the PROGRAM/PERFOR‐ edited. You can set the Meter in the Main page of the MANCE section. Style Record mode, before actually starting recording (see step 6 on page 58 for more information). While in this page, you can set the track’s volume using ...
-
Page 60: Style Record Procedure
Style Record mode Style Record procedure STYLE RECORD PROCEDURE At this point, if you want to do a Realtime Record‐ ing go on reading “Realtime Record procedure” There are two different methods for recording a Style: below. Otherwise, if you prefer to do a Step Record, Realtime and Step. jump to “Step Record procedure” on page 59. • Realtime Recording allows you to record Style pat‐ terns in realtime. Realtime Record procedure • Step Recording allows you to create a new Style by 1. When still in the Main page of the Style Record entering the single notes or chords in each track. This ... - Page 61 Style Record mode Style Record procedure very useful to record different percussive instru‐ Press TRK SELECT to switch to the Style Tracks ments at any cycle on a Drum or Percussion track. page. Here you can assign the right Program to each Style track. (For more details, see “Style Note: ...
- Page 62 (continue holding C) (continue holding C) on how to save a Style. Step Time = Step Time = Step Time = Chords and second voices in Step Record mode Press D With microARRANGER, you are not obliged to insert Release G Release D (continue holding C) (continue holding C) single notes in a track. There are several ways to insert (continue holding C) chords and double voices. Lets look at some.
-
Page 63: Menu
Style Record mode Menu MENU EDIT PAGE STRUCTURE From any page of the Style Record mode, press Select an edit section from the Menu, and/or use the MENU to open the Style Record edit menu. This PAGE buttons to reach the desired page. menu gives access to the various Style Record edit Press EXIT to go back to the main page of the Style sections. Record mode. Note: While the Style is in play, you cannot access the Edit ... -
Page 64: Edit: Quantize
Style Record mode Page 1 - Edit: Quantize PAGE 1 - EDIT: QUANTIZE PAGE 2 - EDIT: TRANSPOSE The quantize function may be used to correct any In this page you can transpose the selected track(s). rhythm error after recording, or to give the pattern a Note: After transposing, please don’t forget to readjust the “groovy” feeling. “Original ... -
Page 65: Edit: Velocity
Style Record mode Page 3 - Edit: Velocity PAGE 3 - EDIT: VELOCITY PAGE 4 - EVENT EDIT In this page you can change the velocity (dynamics) The Event Edit page allows you to edit each event in a value of notes in the selected track. single track. See “Event Edit procedure” on page 65 for more information on the event editing procedure. After setting the various parameters, press ENTER to Event Type First value Second value execute. ... -
Page 66: Event Filter
Style Record mode Page 5 - Event Filter PAGE 5 - EVENT FILTER Length Length of the selected Note event. The value format is This page is where you can select the event types to be the same as the Position value. shown in the Event Edit page. You can access this page Note: If you change a length of “000.00.000” to a different by pressing the PAGE+ button, while you are in the value, you can’t go back to the original value. This rather Event Edit page. -
Page 67: Event Edit Procedure
Style Record mode Event Edit procedure EVENT EDIT PROCEDURE Press PAGE‐ to go back to the Event Edit page. Press the A VOLUME/VALUE button (Trk), to The Event Edit is the page where you can edit each sin‐ select the track to edit. The Go To Track window gle MIDI event of the selected Style Element. You can, appears. for example, replace a note with a different one, or change its playing strength (i.e., velocity value). Here is ... -
Page 68: Edit: Delete
Style Record mode Page 6 - Edit: Delete PAGE 6 - EDIT: DELETE the same buttons, or the TEMPO/VALUE controls, to change the event’s length. This page is where you can delete single elements or MIDI events out of the Style. Measure Beat Tick • After having modified the shown event, you may scroll to the next event with the H VOLUME/ VALUE buttons (Scroll to next), or to the previous event with the E/F VOLUME/VALUE buttons (Scroll to previous). -
Page 69: Edit: Delete All
Style Record mode Page 7 - Edit: Delete All PAGE 8 - EDIT: COPY S / E (Start/End) Use these parameters to set the starting (S) and ending Here you can copy a track, Chord Variation or Style (E) points of the range to delete. Element inside the same Style, or from a different one. If a Chord Variation is four measures long, and you Furthermore, you can copy a whole Style. -
Page 70: Style Element Controls: Programs
Style Record mode Page 9 - Style Element Controls: Programs PAGE 10 - STYLE ELEMENT CONTROLS: Copying on a Chord Variation with a different length EXPRESSION You can copy a Chord Element on a different Chord In this page you can modify the Expression (CC#11) Element with a different length. Just keep in mind the ... -
Page 71: Style Element Controls: Chord Variation Table
Style Record mode Page 12 - Style Element Controls: Chord Variation Table PAGE 13 - STYLE CONTROLS: To copy the settings of this page to another Style Ele‐ ment, keep the SHIFT button pressed, and press the MODE/TENSION button of the target Style Element. In ... -
Page 72: Song Play Operating Mode
PROGRESSIVE NUMBER with the Song on the four Realtime (Keyboard) tracks (Upper 1–3, Lower). Since the microARRANGER is Each Song on a card (up to 9,999) has a progressive equipped with two onboard sequencers, you can play number assigned. You can see this number before the ... -
Page 73: Master Volume, Sequencer Volume, Balance
Sequencer 2. Move it to the center for the maxi‐ selecting a different Song. mum volume of both sequencers. NStart (Note Start) Enables/disables the quantization of the Note On event EFFECTS IN SONG PLAY MODE (i.e. beginning of the note). The microARRANGER is equipped with four effect NDurat (Note Duration) processors, or DSPs (Digital Signal Processors). In Song Enables/disables the quantization of the Note Off event Play mode you can have two or four effects at the same (i.e. the length of the note). time, depending on the midifile you are reading. Res (Resolution) Note: When playing back a Song that makes use of all four ... -
Page 74: The Write Window
• Globally setting the Internal FX parameters allows Swng=50 you, for example, to assign to all Songs a Reverb suitable for the venue where you are performing, without having to modify any of the Songs. (This Swng=25 is true only for non‐microARRANGER/80 Songs). • Globally setting the Internal/External status allows you, for example, to send the Piano track of all Swng=75 Songs to a dedicated expander (just set globally the Piano track to the External mode). Window •... -
Page 75: See The Song Tracks
Open the Lyrics page (see “The Lyrics page” on Realtime (Keyboard) tracks page 74). Lyrics will be shown only if included into the Song Play icon selected Song, and compatible with a standard format When on, this icon shows that the instrument is in Song that microARRANGER can recognize. Play mode. E (Upper 1 Program), F (Upper 2 Program), G (Upper 3 Page header Program), H (Lower) This line shows the currently selected sequencer, and ... -
Page 76: Playing A Jukebox File
Song Play operating mode Tracks 9–16 page TRACKS 9–16 PAGE F-1 (SD) Press this button after replacing a card in the card slot. To see and edit tracks 9–16, press TRACK SELECT once The new card will be read, and the file list shown on from the Tracks 1–8 page, or twice from the main page. the display will be updated. The TRACK SELECT LED begins flashing. F-2 (SELECT) Press the TRACK SELECT button again, to go back to Selects the item on the first line in the display (Song or the main page. Jukebox file). If a Song is already playing, it stops, and the new Song starts playing. You are returned to the Main page. -
Page 77: Menu
Song Play operating mode Menu This lets you play a list of Songs without multiple selec‐ Each item of this menu corresponds to an edit section. tions. Each edit section groups many edit pages. EDIT PAGE STRUCTURE Select an edit section from the Menu, and/or use the PAGE buttons to reach the desired page. Press EXIT to go back to the main page of the Song Play mode. All edit pages share the same structure. Selected Sequencer Song Play icon Page header Page number Note: The Jukebox file can be assigned to the Sequencer 1 only. Note: To create a Jukebox file, go to the Jukebox page (see page 79). -
Page 78: Mixer: Volume
Song Play operating mode Page 1 - Mixer: Volume PAGE 1 - MIXER: VOLUME PAGE 2 - MIXER: PAN Here you can adjust the volume for each of the 16 Here you can adjust the pan for each Song track. sequencer tracks. Press both VOLUME/VALUE button Use the TRACK SELECT button to switch between to mute/unmute the corresponding track. -
Page 79: Mixer: Fx Send C/D
Song Play operating mode Page 3 - Mixer: FX send C/D PAGE 4 - FX: A/B SELECT Note: When you stop the Song, or select a different Song, the default effects are selected again. You can, however, stop the This page lets you select the A and B effects. Usually, Song, change the effects, then start the Song again. Edit the the A effect is a reverb, while the B effect is a modulat‐ Song in Song mode to permanently change the effects. ing effect. Here is the edit procedure: Effects A and B are usually reserved to Sequencer 1. 1. ... -
Page 80: Fx: A Editing
Song Play operating mode Page 5 - FX: A editing PAGE 5 - FX: C EDITING Note: When playing back a Song that makes use of all four effects (A–D), you can’t edit any effect parameter. These This page contains the editing parameters for the C parameters appear greyed out in the display. effect. You can access this page only when the “S2 FX Note: When you stop the Song, or select a different Song, the Mode” parameter is set to C/D (see “S2 FX Mode” on default effects are selected again. You can, however, stop the page 80). For more details, see “Page 5 ‐ FX: A editing” ... -
Page 81: Track: Internal/External
Song Play operating mode Page 8 - Track: Internal/External PAGE 8 - TRACK: INTERNAL/EXTERNAL PAGE 9 - JUKEBOX This page lets you set the Internal or External status for The Jukebox function lets you play a list of Songs (127 each track. It is very useful to let a Song track drive an max), at the simple touch of a button. You can play a external expander. Jukebox file by selecting it in the Song Select page (see “Playing a Jukebox file” on page 74), just as if it was a Use the TRACK SELECT button to switch from tracks normal Song. 1–8 to tracks 9–16. In this page, you can create, edit and save a Jukebox file. ... -
Page 82: Preferences
Song Play operating mode Page 10 - Preferences character at the cursor position by pressing the Link Measure INSERT button. Delete a character at the cursor The two sequencers Tempo are linked position by pressing the DELETE button. together. The Tempo data written into the When you have finished writing a name, press F‐2 Songs are ignored. Adjust the Tempo (SAVE) ... -
Page 83: Saving A List Of Songs
Song Play operating mode Saving a list of Songs SAVING A LIST OF SONGS How to save a list of Songs contained in a Jukebox file How to save a list of Songs contained in a 1. Press SONG PLAY to select the Song Play opera‐ folder tive mode. -
Page 84: Backing Sequence Operating Mode
Backing Sequence operating mode Transport controls 12. BACKING SEQUENCE OPERATING MODE REALTIME RECORDING MODE The Backing Sequence mode lets you record a live per‐ formance with the Styles. The front panel controls While in Backing Sequence mode, you can record a work mostly as in Style Play mode, but here you are new ... -
Page 85: Chord/Acc Step Recording
Backing Sequence operating mode Chord/Acc Step recording Play a solo intro, or start the auto‐accompaniment Press one of the B (Chord/Acc Step Mode) VOL‐ with the START/STOP button. To start with the UME/VALUE buttons to enter the Step Mode. The Style playing right from bar 1, keep the chord Chord/Acc Step mode page appears (see “Chord/ pressed ... -
Page 86: Load Song Page
Backing Sequence operating mode Load Song page The new card will be read, and the file list shown on the C (Save Song) display will be updated. This command saves the recorded Song as a Standard MIDI File. The file is automatically added the “.MID” F-2 (LOAD) extension. After pressing this command, the Save Song Load the Song at the first line of the display. page appears (see “Save Song page” on page 84). F-3 (OPEN) D (Select Tempo) Opens the selected folder (file whose name begins with Select ... -
Page 87: Realtime Recording Page
Backing Sequence operating mode Realtime Recording page REALTIME RECORDING PAGE Metro (Metronome) This parameter sets the metronome mode during While you are in Backing Sequence mode, press recording. RECORD, then one of the A VOLUME/VALUE but‐ The metronome can be heard only during tons, to access the Realtime Recording mode. The the precount. - Page 88 Backing Sequence operating mode Chord/Acc Step Recording page Side arrow ( ) the current position – appears next to it, press DELETE to delete the Tempo The small arrow next to a parameter means that its Change at the current position. value is effective at the current position. For example, if Note: If the side arrow doesn’t appear, the you ...
-
Page 89: How To Delete A Whole Song
Backing Sequence operating mode How to delete a whole Song selecting a Performance automatically selects the Style mem‐ Use the TEMPO/VALUE controls to modify the orized into the Performance. selected parameter. You can also play a chord, and it will be automatically recognized. While recognizing a The SINGLE TOUCH and STS buttons are automatically chord, the status of the BASS INV. button will be con‐... -
Page 90: Song Operating Mode
Song icon THE SONGS AND THE STANDARD MIDI FILE When on, this icon shows that the instrument is in Song mode. FORMAT Page header The native Song format for microARRANGER is the This line shows the selected Song name. Standard MIDI File. See “The Songs and the Standard Bar number MIDI File format” on page 70. This counter shows the current bar number position of When saving a Song as a SMF, an empty measure in ... -
Page 91: Tracks 1–8 Page
Song operating mode Tracks 1–8 page SONG SELECT PAGE Man(ual) When the cursor is on the “D (Select Tempo)” parameter, you can change the This page appears when you press PAGE+ or either the Tempo using the TEMPO/VALUE section B (Load Song) buttons while you are in the main page. controls. The Song will be played back Press EXIT to go back to the Main page of the Song using the manually selected tempo. -
Page 92: Save Song Page
Song operating mode Save Song page SAVE SONG PAGE Master Transpose saved with the Song When saving a Song, the Master Transpose value is The new or edited Song is contained in RAM, and is saved with the Song. Since this value is saved as Sys‐ lost when turning the instrument off. The Song is also ... -
Page 93: Step Record Procedure
Song operating mode Step Record procedure STEP RECORD PROCEDURE Press TRK SELECT to switch to the Song Tracks 1– 8 page. The Step Record allows you to create a new Song by entering the single notes or chords in each track. This is very useful when transcribing an existing score, or needing a higher grade of detail, and is particularly suitable to create drum and percussion tracks. -
Page 94: Song Record Page
8 page” on page 89 and “Tracks 9–16 page” on page 89). Chords and second voices S/E (Start/End) These parameters appear only when the “Auto Punch” With microARRANGER, you are not obliged to insert recording mode is selected. They set the starting and single notes in a track. There are several ways to insert ending points of the Punch recording. chords and double voices. For more information, see Metro (Metronome) the “Chords and second voices in Step Record mode” ... -
Page 95: Step Record Page
Song operating mode Step Record page STEP RECORD PAGE Resol (Resolution) Use this parameter to set the quantization during Access this page from the Main page of the Song recording. Quantization is a way of correcting tim‐ Record mode, by selecting the “StepDub” or “Ste‐ ing ... -
Page 96: Menu
Song operating mode Menu MENU 1…127 Velocity value. The event will be inserted with this velocity value, and the actual While in any page, press MENU to open the Song edit playing strength of the note played on the menu. This menu gives access to the various Song edit keyboard will be ignored. sections. D (Duration) When in the menu, select an edit section using the Relative duration of the inserted note. The percentage VOLUME/VALUE (A–H) buttons, select an edit page is always referred to the step value. using PAGE +, or press EXIT to exit the menu. -
Page 97: Mixer: Volume
Song operating mode Page 1 - Mixer: Volume PAGE 2 - MIXER: PAN A–H Each pair of VOLUME/VALUE buttons select a differ‐ Here you can adjust the pan for each Song track. ent track, parameter of command, depending on the Use the TRACK SELECT button to switch between edit page. Song tracks 1–8, Song tracks 9–16, and back again. Track status icons A series of icons near each track show the track’s status. Selected track or parameter. When this symbol ... -
Page 98: Mixer: Fx Send A/B (Or C/D)
Song operating mode Page 4 - Mixer: FX Send A/B (or C/D) PAGE 4 - MIXER: FX SEND A/B (OR C/D) PAGE 5 - TUNING: DETUNE This page lets you set the level of the track’s direct This page is where you can set the fine tuning for each (uneffected) signal going to the A and B, or C and D track. -
Page 99: Tuning: Pitchbend/Scale
Song operating mode Page 7 - Tuning: PitchBend/Scale PAGE 7 - TUNING: PITCHBEND/SCALE Note: When you stop the Song, or select a different Song, the default effects are selected again. You can, however, stop the This page lets you program the Pitch Bend range for Song, change the effects, then start the Song again. Save the the Song tracks. Furthermore, it lets you activate/deac‐ Song to permanently change the effects. tivate the alternative scale for each track. A, B Use the TRACK SELECT button to switch between Effects assigned to the A and B effect processors. Usu‐ Song tracks 1–8, Song tracks 9–16, and back again. -
Page 100: Fx: A Editing
Song operating mode Page 10 - FX: A editing PAGE 10 - FX: A EDITING PAGE 14 - TRACK: EASY EDIT This page contains the editing parameters for the A In this page you can edit the main parameters of the effect (usually a reverb). -
Page 101: Track: Mode
Song operating mode Page 15 - Track: Mode Drum tracks Poly Tracks of this kind are polyphonic, i.e. they can play more than one note at the When a track is set in Drum Mode (like the Drum and same time. Percussion tracks), you can adjust the volume for each Mono Tracks of this kind are monophonic, i.e. of the Drum and Percussion categories. each new note stops the previous note. Kick V Kick drums volume. -
Page 102: Edit: Quantize
Song operating mode Page 17 - Edit: Quantize PAGE 17 - EDIT: QUANTIZE PAGE 18 - EDIT: TRANSPOSE The quantize function corrects any rhythm error after Here you can transpose the Song, a track or a part of a recording. track. After setting the various parameters, press ENTER to After setting the various parameters, press ENTER to execute. ... -
Page 103: Edit: Delete
Song operating mode Page 20 - Edit: Delete S / E (Start/End) If you wish to select a four‐measure sequence starting Use these parameters to set the starting (S) and ending at the beginning of the Song, the Start will be posi‐ (E) points of the range to edit. tioned at 1.01.000, and the End at 5.01.000. If you wish to select a four‐measure sequence starting Bottom / Top at the beginning of the Song, the Start will be posi‐ Use these parameters to set the bottom and top of the ... -
Page 104: Edit: Copy
Song operating mode Page 23 - Edit: Copy PAGE 23 - EDIT: COPY PAGE 24 - EVENT EDIT Here you can copy tracks or phrases. Enter this page from the Menu of the Song mode. The Event Edit page allows you to edit each event in a sin‐ gle track. See “Event Edit procedure” on page 104 for more information on the event editing procedure. After setting the various parameters, press ENTER to execute. The “Are you sure?” message will appear. Press ENTER to confirm, EXIT to abort. -
Page 105: Event Filter
Song operating mode Page 25 - Event Filter SHIFT + << or >> And here are the events contained in the Master track. Keep the SHIFT button pressed and press the << or >> button to open the Go to Measure window. Event First value Second value Tempo Tempo change – Volume Master Volume value – Meter – Meter change Use the TEMPO/VALUE controls to select a measure, Scale One of the available pre- Root note for the... -
Page 106: Event Edit Procedure
Song operating mode Event Edit procedure EVENT EDIT PROCEDURE For more information on the event types and their values, see “Page 24 ‐ Event Edit” below. The Event Edit is the page where you can edit each sin‐ Use the B VOLUME/VALUE buttons to select the gle MIDI event of the selected track. You can, for exam‐ Position line. Use these buttons or the TEMPO/ ple, replace a note with a different one, or change its VALUE controls to change the event’s position. -
Page 107: Program Operating Mode
The Program operating mode is where you can lis‐ gram. Values are in the standard 0–127 MIDI number‐ ing format. ten to individual Programs, and edit them. Note: Some manufacturers could use the 1–128 numbering To select a Program, see the “Basic operations” chapter. system; when connecting your microARRANGER to an In this mode, the selected Program can always be instrument of this kind, increment the PC value by 1 unit. played across the full keyboard range. To automatically select the Program to be assigned Effects to ... -
Page 108: Edit Page Structure
Program operating mode Edit page structure EDIT PAGE STRUCTURE ERASE PROGRAM/OSCILLATOR You can initialize any parameter value, by using one Select an edit section from the Menu, and/or use the PAGE buttons to reach the desired page. of the following shortcuts: Press EXIT to go back to the main page of the Program • While in the Basic page, keep the SHIFT button mode. pressed, and press the DELETE button to initialize All edit pages share the same structure. the whole Program to a default status. • While ... -
Page 109: Basic
Program operating mode Page 1 - Basic PAGE 1 - BASIC oscillator sound, envelope, and LFO will be reset (and retriggered) according to the Here you can make basic settings for the Program, such settings of the Program. as basic oscillator settings, the oscillator count, and the Note: If “Legato” is On, certain multisamples or keyboard polyphonic mode. locations may produce an incorrect pitch. Priority This parameter is available when the “Mode” parame‐ ter is set to Mono. It specifies which note will be given priority to play when two or more notes are played simultaneously. -
Page 110: Dk Samples (Drum Programs)
Program operating mode Page 2 - DK Samples (Drum Programs) PAGE 2 - DK SAMPLES (DRUM PROGRAMS) [H/L] Use Offset These parameters specify the point where the multi‐ This page appears when you edit a Drum Program. sample(s) will begin to play. For some multisamples Here ... -
Page 111: Pitch
Program operating mode Page 3 - Pitch PAGE 3 - PITCH [H/L] Decay These parameters are an offset to the selected sample’s Here you can make pitch settings for each oscillator. EG Decay. These settings specify how keyboard location will affect Velocity Switch the pitch of each oscillator, and select the controllers that This is the velocity value dividing the High and Low will affect the oscillator pitch and specify the depth of layers for the selected sample/key. Notes stricken harder ... -
Page 112: Pitch Lfo1
Program operating mode Page 4 - Pitch LFO1 Pitch modulation Portamento Time This parameter sets the portamento time. Increasing AMS (Alternate Modulation Source) the value will produce a slower change in pitch. This parameter selects the source that will modulate 000…127 Portamento time in MIDI value. the pitch of the selected oscillator. See “AMS (Alternate Modulation Source) list” on page 123. PAGE 4 - PITCH LFO1 Intensity This parameter specifies the depth and direction of the ... -
Page 113: Pitch Lfo2
Program operating mode Page 5 - Pitch LFO2 Attack Level The “LFO1 Intensity”, “JS+Y” and “AMS” settings will be added to determine the depth and direction of the Specifies the amount of pitch change when the attack pitch modulation applied by LFO1. time has elapsed. ‐12.00…+12.00 Release Level Parameter value. Specifies the amount of pitch change when the release time has elapsed. PAGE 5 - PITCH LFO2 Attack/Decay/Release Time These parameters specify the time over which the pitch ... -
Page 114: Filter
Program operating mode Page 7 - Filter PAGE 7 - FILTER Start Level Swing This parameter specifies the direction of change in Here you can make settings for the filters that will be “Start Level” caused by “AMS1/2”. If “Intensity” is a used by the oscillators. You can select either a 24 dB/ positive (+) value, a setting of + will raise the EG level, ... -
Page 115: Filter Modulation
Program operating mode Page 8 - Filter Modulation Resonance modulation Selected Use this parameter to select an oscillator to put in edit. The effect of resonance Alternatively, you can select oscillators using the F‐1–F‐ Low Pass Level 4 buttons. Filter keyboard tracking Tracking Low/High Low resonance value High resonance value These settings specify keyboard tracking for the cutoff frequency of the filter for the selected oscillator. The AMS (Alternate Modulation Source) way ... -
Page 116: Filter Lfo1
Program operating mode Page 9 - Filter LFO1 Filter EG modulation Intensity to B Specifies the depth and direction of the effect that Changes in cutoff frequency “AMS” will have on filter B. For details on how this will Note-on Note-on Note-on Note-off Note-off Note-off apply, refer to “EG Intensity to A”. Note: The sum of the settings for “Velocity to A/B”, “Inten‐ sity to A/B”, and “(AMS) Intensity to A/B” will determine the depth and direction of the effect produced by the filter EG. Softly played Strongly played Strongly played Filter A/B modulation... -
Page 117: Filter Lfo2
Program operating mode Page 10 - Filter LFO2 PAGE 11 - FILTER EG Intensity to B Specify the depth and direction of the modulation that Here you can make settings for the EG that will pro‐ LFO1 will have on the cutoff frequency of filter B (see duce time‐varying changes in the cutoff frequency of “Intensity to A”). filters A and B for the selected oscillator. The depth of Change in cutoff the effect that these settings will have on the filter cut‐... - Page 118 Program operating mode Page 11 - Filter EG Filter EG ‘Time’ modulation Attack Time This parameter specifies the time over which the level Filter 1 EG changes (Time) (AMS = Velocity, Intensity = a positive (+) value) will change from note‐on until the attack level is reached. Note-on Note-on Note-on Note-off Note-off...
-
Page 119: Amp
Program operating mode Page 12 - Amp PAGE 12 - AMP PAGE 13 - AMP MODULATION These parameters control the volume and pan of the These settings allow you to apply modulation to amp selected oscillator. (for each oscillator) to modulate the volume. Selected Selected Use this parameter to select an oscillator to put in edit. Use this parameter to select an oscillator to put in edit. Alternatively, you can select oscillators using the F‐1–F‐ Alternatively, you can select oscillators using the F‐1–F‐ 4 buttons. 4 buttons. Level Amplifier keyboard tracking Volume of the selected oscillator. -
Page 120: Amp Lfo1
Program operating mode Page 14 - Amp LFO1 Amplifier Modulation Intensity This parameter specifies the depth and direction of the These parameters specify how the volume of the effect that “LFO1” will have on the volume of the selected oscillator will be affected by velocity. selected oscillator. Negative (–) values will invert the Velocity Intensity LFO waveform. -
Page 121: Amp Envelope
Program operating mode Page 16 - Amp EG Amp envelope Amp EG ‘Level’ modulation Amplifier EG Note-off Amp 1 EG changes (Level) (AMS=Velocity, Intensity = a positive (+) value) Attack Level Note-on Note-on Note-on Note-on Break Point Note-off Note-off Note-off Volume Sustain Level... -
Page 122: Lfo1
Program operating mode Page 17 - LFO1 Amp EG ‘Time’ modulation Slope Time Swing This parameter specifies the direction of the effect that These parameters let you use an alternate modulation “AMS1” will have on “Slope Time”. With positive (+) source to modify the amp EG times that were specified values of “Intensity”, setting this parameter to + will in “Attack/Decay/Slope/Release Time” on page 119. allow AMS1 to lengthen the time, and setting it to – Amp 1 EG changes (Time) will allow AMS1 to shorten the time. With a setting of 0 ... - Page 123 Program operating mode Page 17 - LFO1 Key Sync Base Note/Times This parameter specifies if the LFO is synchronized to When “MIDI/Tempo Sync” is On, these parameters set key strokes. a note length relative to “ (Tempo)” and the multiple (“Times”) that will be applied to it. These parameters The LFO will start each time you play a will determine the frequency of the LFO1. For example note, and an independent LFO will oper‐ if “Base Note” is ...
-
Page 124: Lfo2
Program operating mode Page 18 - LFO2 PAGE 18 - LFO2 Drum samples have their own send level settings (see “Send FX1” and “Send FX2” on page 109). Use this Here you can make settings for the LFO2, which is the parameter to adjust the general offset of the Drum Pro‐ second LFO that can be applied to the selected oscilla‐ gram. tor. See “Page 17 ‐ LFO1” for more information on the 000…127 Effect level. parameters value. Chain 2>1 However in “Frequency modulation”, the LFO cannot Use this parameter to send the output of effect 2 to the ... -
Page 125: Ams (Alternate Modulation Source) List
Note Number Note number Velocity Velocity Poly AT (Poly After Touch) Polyphonic After Touch (transmitted from the microARRANGER only as sequence data) Channel AT (Channel After Touch) After Touch (Channel After Touch) Joystick X Joystick X (horizontal) axis Joystick +Y Joystick +Y (vertical upward) direction (CC#01) Joystick –Y... - Page 126 Program operating mode AMS (Alternate Modulation Source) list JS +Y & AT/2 (Joy Stick +Y & After Touch/2) The sign of the “Ramp Low” setting will determine the direction of its effect. The effect will be controlled by the joystick +Y (verti‐ “Ramp High” will have no AMS effect.
-
Page 127: Global Edit Environment
Global edit environment The Write window 15. GLOBAL EDIT ENVIRONMENT PAGE 1 - GENERAL CONTROLS The Global edit environment is the place where you can set most of the microARRANGER global functions, This page contains various general parameters, setting i.e. functions overriding any operating mode. This edit the status of the keyboard, the speakers and the metro‐ environment overlaps the current operating mode nome. (Style, Song Play, Song, Backing Sequence). THE WRITE WINDOW Open this window by pressing the WRITE button ... -
Page 128: Master Transpose
Global edit environment Page 2 - Master Transpose PAGE 2 - MASTER TRANSPOSE Pre‐OSC When this option is selected, all notes are transposed immediately before they enter This page is where you can turn the Master Transpose the internal tone generator. Therefore, the on or off. Scale will be applied before transposition. For example, if you altered an E, and then set the Master Transpose to +1, the altered key will still be E (that will play an altered Tone Scale Transpose generator PAGE 3 - ASSIGNABLE PEDAL/ Style/Realtime FOOTSWITCH, ASSIGNABLE SLIDER This is a flag to turn the Master Transpose on or off on This page lets you program the Assignable Pedal/Foot‐ the Style and Realtime (Keyboard) tracks. switch, and the Assignable Slider. No ... -
Page 129: Midi Controls
PAGE 5 - MIDI CONTROLS Start/Stop and Play/Stop commands. Con‐ nect the other instrument to the microAR‐ This page lets you program general MIDI parameters. RANGER MIDI OUT port. PAGE 6 - MIDI IN CHANNELS In this page, you can assign the microARRANGER tracks to any of the MIDI IN channels. Use the TRACK SELECT button to switch from channels 1–8 to chan‐ nels 9–16. Local The Local parameter turns the keyboard on or off. Note: The Local parameter is always turned on again each ... -
Page 130: Midi In Controls (1)
Octave Transposition is +1, a received C4 Use this parameter to set a fixed velocity (dynamics) will still play a C4. value for all MIDI notes entering. This is useful when playing the microARRANGER with an organ or a Mute In MIDI Accordion. Use this parameter to determine if a muted track can Normal Normal velocity values are received. -
Page 131: Midi In Filters
Control Change message #0…127. See “MIDI Controllers” on page 228 for a list of available Control Change messages. PAGE 10 - MIDI OUT CHANNELS In this page, you can assign to any MIDI OUT channel one of microARRANGER’s tracks. Use the TRACK SELECT button to switch from channels 1–8 to chan‐ nels 9–16. Filters Selected MIDI OUT filters. No filter. -
Page 132: Card Edit Environment
MicroSD with an SD adapter • MiniSD with an SD adapter Inserting/exchanging cards Note: Before you can use the SD/MMC card, you must format it on the microARRANGER. Don’t use your computer or digi‐ Inserting a card tal camera to format (initialize) a card you plan to use with the Insert the card, making sure that it is oriented correctly. microARRANGER. If the card was formatted on a different The gold contacts should be facing down, and the device, it may not work correctly with the microARRANGER angled corner to your right. Note: The SD/MMC card is not included. It must be purchased separately. Note: The microARRANGER supports SD cards with a power SD card slot supply voltage of 2.7–3.6V. SD and MMC card handling • Do ... -
Page 133: Loading Data Created With The Pa80/ Pa60/Pa50
1-1 Grand Piano PA60/PA50 … 1-8 Full Strings microARRANGER data is perfectly interchangeable with its Pa80, Pa60 and Pa50 counterparts. The only BANK02.PRF data microARRANGER can’t load from Pa80/Pa60 is 2-1 Jazz Brass … the following: 2-8 Jazz Strings • Digital Drawbar Programs BANK….PRF... -
Page 134: File And Folder Size Display
Card Edit environment File and folder size display FILE AND FOLDER SIZE DISPLAY Page header This line shows the Card page you are in. The size of any file and folder in the card can be seen in Card content the display. These lines show the content of the current folder. The single file size is always shown on the right of the Move the item to select to the first line, using the E–F file: (Scroll Up) and G–H (Scroll Down) VOLUME/VALUE buttons, or the TEMPO/VALUE controls. Use the Page commands (F‐1–F‐4) on the last line to execute an operation on the selected file or folder. -
Page 135: Menu
Card Edit environment Menu MENU Note: Data loaded from card, and data already in mem‐ ory is merged. For example, if there is data in all three From any page, press MENU to open the Card Edit USER Style banks in memory (USER01, USER02, menu. This menu gives access to the various Card Edit USER03), and there is only the USER01 Style bank on pages. the card, the USER01 bank is overwritten, while When in this menu, select a section using the VOL‐ USER02 and USER03 banks are left unchanged. - Page 136 Card Edit environment Page 1 - Load Loading a single bank Scroll the available locations in memory, using the E–H (Scroll) buttons (or the TEMPO/VALUE con‐ You can load a single bank of User data (User Pro‐ trols). grams, User Styles, Performances) with a single opera‐ 10. When the target bank is selected (i.e., it is in the tion. A bank corresponds to a STYLE or PROGRAM/ first line of the display), press F‐2 (LOAD) to load ...
-
Page 137: Save
Card Edit environment Page 2 - Save PAGE 2 - SAVE Press F‐3 (OPEN) to open the selected bank. A list of User items appears. In this page, you can save User data from the internal memory to a card. You can save files, banks, or all the User files of the internal memory. Press SD CARD and use the MENU or PAGE buttons to reach this page. Use the E–H (Scroll) buttons (or the TEMPO/ VALUE controls) to move the desired item to the first line of the display. 10. Press F‐2 (LOAD) to confirm the file selection. The internal memory file list appears. If you are load‐ Here are the various types of files contained in mem‐ ing a single file or bank of Styles, Programs or Per‐... - Page 138 Card Edit environment Page 2 - Save Once the target folder is selected, press F‐2 (SAVE) the display, and you may perform further saving to save the files. The “Are you sure?” message will operations. appear. Press ENTER to confirm, or EXIT to abort. Saving a single bank Warning: After confirming, all data in the target folder is deleted. You can save a single User bank with a single opera‐ When the operation is completed (the “Wait” indi‐ tion. A bank corresponds to a button on the control cator ...
- Page 139 Card Edit environment Page 2 - Save using the E–H (Scroll) buttons (or the TEMPO/ Once you have selected the bank, press F‐3 VALUE controls). (OPEN) to gain access to the single files. Press F‐2 (SAVE) to confirm. A list of banks on the target card appears. Only banks of the selected type are shown. 10. Use the E–H (Scroll) buttons (or the TEMPO/ VALUE ...
-
Page 140: Copy
Card Edit environment Page 3 - Copy PAGE 3 - COPY Creating a new “.SET” folder When saving data (Save operations), you can save onto In this page you can copy single files (i.e., midifiles of existing folders, or you can create a new “.SET” folder. Jukebox files), whole folders (generic or “.SET” fold‐ Here is how to do it. ers), or a generic folder’s content. Note that you can 1. When the file list of the target card is in the dis‐ copy data only inside the same card. -
Page 141: Erase
Card Edit environment Page 4 - Erase Once the target is selected, press F‐2 (COPY). The Once the target is selected, press F‐2 (COPY). The “Overwrite?” message appears: “Overwrite?” message appears: Press ENTER to confirm overwriting, EXIT to Press ENTER to confirm overwriting, EXIT to avoid it. avoid it. When you decide to overwrite, the data you are When you decide to overwrite, the data you are copying ... -
Page 142: Format
Card Edit environment Page 5 - Format PAGE 5 - FORMAT Press one of the A VOLUME/VALUE buttons. You are prompted to assign a name to the new folder: The Format function lets you initialize a card. Press SD CARD and use the MENU or PAGE buttons to reach this page. Move the cursor using the DOWN/‐ and UP/+ but‐ tons. Select a character using the DIAL. Insert a character at the cursor position by pressing the INSERT button. Delete a character at the cursor position by pressing the DELETE button. -
Page 143: Utilities 1
1. Select the Backup Data command. The “Are you sure?” message appears. Press ENTER to continue, EXIT to abort. If the card is not formatted, microARRANGER asks if you want to format it: SD info Select this command to see the name of the inserted card, and the free space on it. If pressed without a card inserted, the “No card / ... -
Page 144: Utilities 2
Note: This parameter is automatically set to On when turn‐ loaded data. All Global parameters are therefore left ing the instrument off. unchanged. Note: Should your accidentally delete some Factory Data, When loading a single “.GLB” file, this parameter is reload the Backup data, contact your KORG dealer or service ignored, and the Global is overwritten by the loaded center, or download the data from http://www.korgpa.com/. data. -
Page 145: Appendix
APPENDIX... -
Page 146: Factory Data
Factory Data Styles 17. FACTORY DATA STYLES Note: You can remotely select Styles on the microARRANGER, by sending it Bank Select MSB (CC#0), Bank Select LSB (CC#32) and Program Change messages on the Control channel (see page 128). CC#0 CC#32 Bank: 8/16 Beat 1 CC#0 CC#32 Bank: 8/16 Beat 2 CC#0 CC#32... - Page 147 Factory Data Styles CC#0 CC#32 Bank: World 3 CC#0 CC#32 Bank: Latin 1 CC#0 CC#32 Bank: Latin 2 Hora UnplugBossa Engl. Tango Sevillana 1 Basic Bossa Orch. Tango Sevillana 2 L.A. Bossa Tango.it Jota New Bossa Habanera 1 Copla Miss Bossa Habanera 2 Classic 3/4 Lite Bossa...
-
Page 148: Style Elements
Jazz Funk 2 Blues 6/8 Swing The Avalon 6/8 R & B Groovin' 90's Funk Party Funk 6/8 Blues Fusion Funk STYLE ELEMENTS Note: You can remotely select the various Style Elements on the microARRANGER, by sending it Program Change messages on the Control channel (see page 128). Style Element Style Element Style Element Style Element Style Element Var.1 Var.2 Var.3 Var.4 Intro 1... -
Page 149: Programs (Bank Order)
Factory Data Programs (bank order) PROGRAMS (BANK ORDER) Name CC00 CC32 ThinElPiano The following table enlists all microARRANGER Fac‐ tory Programs in the same order as they appear by DW8000 EP pressing the PROGRAM/PERFORMANCE bank but‐ El.Piano 1 tons. El.Piano 2 DetunedEP 1 Legend: The table also includes MIDI data used to remotely ... - Page 150 Factory Data Programs (bank order) Name CC00 CC32 Name CC00 CC32 Akordeon DistortionG Accordion 2 Nylon Bossa Arab.Accord NylonKeyOff Steel Gtr 2 Bank: Organ 1 AcGtrKeyOff Jimmy Organ Club J.Gtr2 BX3 Velo Sw Vintage S. ClassiClick CleanMutGtr M1 Organ Stereo Dist Jazz Organ Nylon Gtr 2 Dist.
- Page 151 Factory Data Programs (bank order) Name CC00 CC32 Name CC00 CC32 GtrHarmonic Odissey Sitar Grand Choir Sitar 2 Slow Choir SitarTambou Symph. Bows IndianStars Cyber Choir Choir Light Kanun Vocalesque Kanun Trem. Synth Voice Kanun Mix Voice Lead Shamisen Choir Pad Koto Halo Pad Taisho Koto...
- Page 152 Factory Data Programs (bank order) Name CC00 CC32 Name CC00 CC32 BrassSect.1 Bank: Woodwind Fat Brass Jazz Flute Trumpet Ens Old Shaku Glen & Boys FluteSwitch MutEnsembl2 FluteDyn5th French Horn Flute Frull Syn Brass 2 Pan Flute Brass Hit Jazz Clarin AttackBrass Flute 2 BrassSect.2...
- Page 153 Factory Data Programs (bank order) Name CC00 CC32 Name CC00 CC32 Super Sweep Mega Synth Wave Sweep TecnoPhonic Cross Sweep DarkElement Digi IcePad Band Passed Crimson5ths Cat Lead Freedom Pad Pan Reso Noble Pad Square Rez Mellow Pad Rezbo Lonely Spin Auto Pilot Cinema Pad MetallicRez...
- Page 154 Factory Data Programs (bank order) Name CC00 CC32 Name CC00 CC32 Fretless Sw SFX Kit Thumb Bass Percus.Kit1 Finger Slap Latin P.Kit Attack Bass TRI-Per.KIT Rubber Bass ArabianKit1 FingElBass3 ArabianKit2 DarkR&BBass Timpani Sweet Fret Agogo Dyna Bass Log Drum Stick Bass Woodblock Gtr Bass Taiko Drum...
- Page 155 Factory Data Programs (bank order) Name CC00 CC32 Jetplane Starship Burst Noise Laughing Screaming Punch Heart Beat Footsteps Machine Gun Lasergun Explosion Ice Rain Jaw Harp HitInIndia Stadium...
-
Page 156: Programs (Program Change Order)
Factory Data Programs (Program Change order) PROGRAMS (PROGRAM CHANGE ORDER) microARRANGER CC00 CC32 Name Bank The following table enlists all microARRANGER Fac‐ Harpsi Oct. Piano tory Programs in order of Bank Select‐Program Change Harpsi Wide Piano number. HarpsiK.Off Piano Legend: The table also includes MIDI data used to remotely Harpsi Korg Piano select the Programs. CC00: Control Change 0, or Bank Select ... - Page 157 Factory Data Programs (Program Change order) microARRANGER microARRANGER CC00 CC32 Name CC00 CC32 Name Bank Bank SuperBXPerc Organ 1 CleanGuitar Guitar DirtyJazOrg Organ 1 DetCleanGtr Guitar PercShorDec Organ 1 MidToneGtr Guitar Perc.Wheels Organ 1 Chorus Gtr Guitar...
- Page 158 Factory Data Programs (Program Change order) microARRANGER microARRANGER CC00 CC32 Name CC00 CC32 Name Bank Bank SuperSwBas2 Bass StringsEns2 Strings & Vocals Slap Bass 2 Bass SweeperStr. Strings & Vocals Thumb Bass Bass SynStrings1 Strings & Vocals ...
- Page 159 Factory Data Programs (Program Change order) microARRANGER microARRANGER CC00 CC32 Name CC00 CC32 Name Bank Bank Dynabone Trp & Trbn TenorBreath Muted Trp Trp & Trbn Tenor Growl Muted Trp 2 Trp & Trbn Folk Sax Wha Trumpet Trp &...
- Page 160 Factory Data Programs (Program Change order) microARRANGER microARRANGER CC00 CC32 Name CC00 CC32 Name Bank Bank Seq. Analog Synth 2 Itopia Pad Synth 1 Power Saw Synth 2 Fresh Air Strings & Vocals Octo Lead Synth 2 Heaven...
- Page 161 Factory Data Programs (Program Change order) microARRANGER microARRANGER CC00 CC32 Name CC00 CC32 Name Bank Bank Tambra Guitar Thunder Banjo Guitar Wind BanjoKeyOff Guitar Stream Guitar Bubble Jaw Harp Bird Tweet Shamisen Guitar ...
-
Page 162: Drum Kits
Factory Data Drum Kits DRUM KITS CC00 CC32 Name House Kit2 The following table enlists all microARRANGER Fac‐ tory Drum Kit Programs in order of Bank Select‐Pro‐ House Kit3 gram Change number. House Kit4 30–31: (remap to 24) Legend: The table also includes MIDI data used to remotely Jazz Kit select the Programs. CC00: Control Change 0, or Bank Select ... -
Page 163: Drum Kit Instruments
Factory Data Drum Kit instruments DRUM KIT INSTRUMENTS Legend: In the Drum 120-0-0: Std. Kit1 120-0-1: Std. Kit2 120-0-2: Std. Kit3 Note Sample Excl. Sample Excl. Sample Excl. Kit tables, the numer G#-1 BD-Dry 1 120‐x‐x before each BD-House 1 BD-House 1 BD-House 1 A#-1... - Page 164 Factory Data Drum Kit instruments 120-0-3: AcousticKit 120-0-4: Std. Kit4 120-0-8: Room Kit1 120-0-9: HipHop Kit1 Note Sample Excl. Sample Excl. Sample Excl. Sample Excl. BD-House 1 BD-House 1 BD-Squash BD-Squash A#-1 99-SD 99-SD SD-Hip 6 SD-Hip 6 88-BD 88-BD 88-BD 88-BD 88-SD...
- Page 165 Factory Data Drum Kit instruments 120-0-10: Jungle Kit 120-0-11: Techno Kit1 120-0-12: Room Kit2 120-0-13: HipHop Kit2 Note Sample Excl. Sample Excl. Sample Excl. Sample Excl. BD-Squash BD-Hip 3 BD-Squash BD-Squash A#-1 SD-Hip 6 SD-Hip 6 SD-Hip 6 SD-Hip 6 88-BD 88-BD 88-BD...
- Page 166 Factory Data Drum Kit instruments 120-0-14: Techno Kit2 120-0-15: Techno Kit3 120-0-16: Power Kit1 120-0-17: Power Kit2 Note Sample Excl. Sample Excl. Sample Excl. Sample Excl. BD-Squash BD-Squash BD-Dance 99 BD-Dance 99 A#-1 SD-Hip 6 SD-Hip 6 99-SD 99-SD 88-BD 88-BD 88-BD 88-BD...
- Page 167 Factory Data Drum Kit instruments 120-0-24: Electro Kit 120-0-25: Analog Kit 120-0-26: House Kit1 120-0-27: House Kit2 Note Sample Excl. Sample Excl. Sample Excl. Sample Excl. BD-Hip 1 Explosion BD-Pop Kick BD-Pop Kick A#-1 99-SD SD-Hip 6 SD-Vintage6 99-SD 88-BD BD-Normal BD-Deep 88 BD-Deep 88...
- Page 168 Factory Data Drum Kit instruments 120-0-28: House Kit3 120-0-29: House Kit4 120-0-32: Jazz Kit 120-0-40: Brush Kit1 Note Sample Excl. Sample Excl. Sample Excl. Sample Excl. BD-Pop Kick BD-Pop Kick BD-House 1 Tom 2-Floor A#-1 99-SD 99-SD 99-SD Tom 2-Floor BD-Deep 88 BD-Deep 88 BD-Deep 88...
- Page 169 Factory Data Drum Kit instruments 120-0-41: Brush V.S.2 120-0-48: OrchestraK 120-0-116: Arabian Kit 1 120-0-117: Arabian Kit 2 Note Sample Excl. Sample Excl. Sample Excl. Sample Excl. Tom 2-Floor BD-House 1 BD-House 1 A#-1 Tom 2-Floor 99-SD 99-SD Tom 2-Floor 88-BD 88-BD Tom 2-Lo...
- Page 170 Factory Data Drum Kit instruments (continued) 120-0-41: Brush V.S.2 120-0-48: OrchestraK 120-0-116: Arabian Kit 1 120-0-117: Arabian Kit 2 Note Sample Excl. Sample Excl. Sample Excl. Sample Excl. Ramazan DVL1 Djembe-Open Ramazan DVL3 Dbk-Tky-Open Kup 2 Bells Open Tom Jazz Hi Sagat-HalfOpen Kup 2 Sagat-Close...
- Page 171 Factory Data Drum Kit instruments 120-0-50: Bdrum & Sdrum 120-0-56: SFX Kit 120-0-64: Percus.Kit1 120-0-65: Latin P.Kit Note Sample Excl. Sample Excl. Sample Excl. Sample Excl. Tribe C#-1 Zap1 88-Tom D#-1 88-BD 88-BD BD-Hip 4 F#-1 BD-Pop Kick BD-Hip 1 G#-1 BD-House 2 BD-Pop 99...
- Page 172 Factory Data Drum Kit instruments (continued) 120-0-50: Bdrum & Sdrum 120-0-56: SFX Kit 120-0-64: Percus.Kit1 120-0-65: Latin P.Kit Note Sample Excl. Sample Excl. Sample Excl. Sample Excl. 88-SD Wind Taiko Open Cabasa-Down 99-SD Noise White Zap2 Tambourin-Mute2 SD-Hip 2 Stream SD-Orch.Roll Tambourin-Open SD-BrushTap2...
- Page 173 Factory Data Drum Kit instruments 120-0-66: TRI-Per.KIT 120-0-67: i30 Perc.Kit Note Sample Excl. Sample Excl. C#-1 D#-1 F#-1 G#-1 A#-1 Rik3 Rik2 Rik1 Rek-Jingle Rek-dom-ak Djembe-Bass Taiko Open Pand-Pattern4 Pand-Pattern3 Pand-Pattern2 Tambourin-Push Pand-Pattern1 Tambourin-Acc2 Pand-Open Tabla-Na 196195 Taiko RimTaiko Open Flexatone TsuzumiTsuzumi Finger Cymbal...
- Page 174 Factory Data Drum Kit instruments (continued) 120-0-66: TRI-Per.KIT 120-0-67: i30 Perc.Kit Note Sample Excl. Sample Excl. Agogo-Bell SD-Orch.Roll 183182 MaracasPullMaracasPush SD-Orch. 217217 Shaker1Shaker1 Orch Cymb 218218 Shaker2Shaker2 Orch Cymb 221220 Cabasa-TapCabasa-Down Udu-f-open 219221 Cabasa-UpCabasa-Tap Orchestra Hit 222223 Caxixi-HardCaxixi-Soft Orchestra Hit Tambourin-Push Orchestra Hit 211211 Tambourin-Acc1Tambourin-Acc1...
-
Page 175: Performances
Factory Data Performances PERFORMANCES All Performances are user‐editable. Use the following table as a model for your own Perfomance lists. Note: You can remotely select Performances on the microARRANGER, by sending it Bank Select MSB (CC#0), Bank Select LSB (CC#32) and Program Change messages on the Control channel (see page 128). CC#0 CC#32 Bank: 1 CC#0 CC#32 Bank: 2 CC#0 CC#32 Bank: 3 CC#0 CC#32 Bank: 4 CC#0 CC#32 Bank: 5 CC#0 CC#32 Bank: 6 CC#0 CC#32 Bank: 7 CC#0 CC#32 Bank: 8 CC#0 CC#32... -
Page 176: Midi Setup
Factory Data MIDI Setup MIDI SETUP DEFAULT Master Kbd Sequencer1 Sequencer 2 Accordion 1 Accordion 2 Accordion 3 Ext. Seq S1_Tr 1 Global S1_Tr 1 S2_Tr 1 Global Upp1 Upp1 S1_Tr 1 S1_Tr 2 S1_Tr 2 S2_Tr 2 Lower Lower Lower S1_Tr 2 S1_Tr 3... -
Page 177: Effects
Effects Diagrams 18. EFFECTS microARRANGER is equipped with four powerful Modulation source Note Effect Processors (A, B, C, D). You can send them the internal tracks. MIDI(CC#19) MIDI(CC#20) DIAGRAMS MIDI(CC#21) The following instructions show the signal path dia‐ Damper: #64 gram for each of the effect types. The signal coming ... -
Page 178: Stereo Compressor
Effects Filter/Dynamic 002: Compressor 003: Limiter (Stereo Compressor) (Stereo Limiter) This effect compresses the input signal to regulate the The Limiter regulates the input signal level. It is similar level and give a “punchy” effect. It is useful for guitar, to the Compressor, except that the Limiter compresses piano, and drum sounds. This is a stereo compressor. only signals that exceed the specified level to lower You can link left and right channels, or use each chan‐ unnecessary peak signals. The Limiter applies a peak‐ nel separately. ing‐type EQ to the trigger signal (which controls the degree ... -
Page 179: Multiband Limiter
Effects Filter/Dynamic 004: MBandLimit Adjust the output level using the “Gain Adjust” parameter, since compression causes the entire level to be reduced. (Multiband Limiter) Limiter - Threshold / Ratio This effect applies the Limiter to the low range, mid Ratio=1.0 : 1 Output Level range, and high range of the input signal. You can con‐... -
Page 180: Stereo Gate
Effects Filter/Dynamic 005: Gate The Attack and Release parameters set the Gate attack time and release time. (Stereo Gate) Gate - Threshold This effect mutes the input signal if its level is lower Output Level than the specified level. It also reverses the on and off Threshold operation of the gate, and uses Note On and Off mes‐ sages to turn the gate on and off. Louder Stereo In - Stereo Out Input Level... - Page 181 Effects Filter/Dynamic 007: Param.4B Eq Low Cutoff [Hz] 20...1.0kHz Sets the center frequency for Low EQ (shelving type) (Stereo Parametric 4-Band EQ) Gain [dB] –18...+18dB This is a stereo 4‐band parametric equalizer. You can Table , “Sets the gain of Low EQ,” on page 176 select peaking type or shelving type for Band 1 and 4. ...
- Page 182 Effects Filter/Dynamic d: Band2 Dynamic Gain Src, d: Amt [dB], f: Gain [dB] You can configure a 21-Band Graphic EQ ranging from 80Hz You can control the gain of Band 2 using the modulation to 18kHz if you route three Graphic 7Band EQ effects in source.
-
Page 183: Stereo Random Filter
Effects Filter/Dynamic 010: Random Filt a: Frequency Bottom, a: Frequency Top The sweep width and direction of the wah filter are deter- (Stereo Random Filter) mined by the “Frequency Top” and “Frequency Bottom” set- This stereo band pass filter uses a step‐shape waveform tings. and random LFO for modulation. You can create a spe‐ Sweep Mode=D-mod Frequency Frequency cial effect from filter oscillation. - Page 184 Effects Filter/Dynamic 011: Excit/Enhan When “LFO Waveform” is set to Random, the “LFO Step Freq” parameter uses a random LFO cycle. (Stereo Exciter/Enhancer) Random Filter LFO LFO Frequency This effect is a combination of the Exciter, which adds a punch to the sound and the Enhancer, which adds spread and presence. LFO Step Freq LFO Step Freq Stereo In - Stereo Out...
-
Page 185: Stereo Sub Oscillator
Effects Filter/Dynamic 012: Sub Oscill 013: Talking Mod (Stereo Sub Oscillator) (Talking Modulator) This effect adds very low frequencies to the input sig‐ This effect adds an unusual character, like a human nal. It is very useful when simulating a roaring drum voice, to the input signal. Modulating the tone via sound or emphasizing powerful low range. This effect ... -
Page 186: Stereo Decimator
Effects Filter/Dynamic 014: Decimator If Sweep Mode is set to LFO, the sound will change cyclically from “a” to “i,” “u,” “i,” then “a.” (Stereo Decimator) Talking Modulator Control This effect creates a rough sound like a cheap sampler Voice Center Voice Bottom Voice Top by lowering the sampling frequency and data bit length. You can also simulate noise unique to a sampler ... -
Page 187: Pitch/Phase Mod
Effects Pitch/Phase Mod. 015: Analog Rec PITCH/PHASE MOD. (Stereo Analog Record) Pitch/phase modulation effects This effect simulates the noise caused by scratches and dust on analog records. It also reproduces some of the modulation caused by a warped turntable. 016: Chorus (Stereo Chorus) Stereo In - Stereo Out Left This effect adds thickness and warmth to the sound by Wet / Dry EQ Trim Pre EQ Analog Record modulating the delay time of the input signal. You can Simulation add spread to the sound by offsetting the phase of the ... -
Page 188: Stereo Harmonic Chorus
Effects Pitch/Phase Mod. 017: Harm.Chorus h: Feedback Sets the feedback amount of the chorus block. Increasing the (Stereo Harmonic Chorus) feedback will allow you to use the effect as a flanger. This effect applies chorus only to higher frequencies. This ... -
Page 189: Stereo Flanger
Effects Pitch/Phase Mod. 019: Ensemble 020: Flanger (Stereo Flanger) This Ensemble effect has three chorus blocks that use LFO to create subtle shimmering, and gives three This effect gives a significant swell and movement of dimensional depth and spread to the sound, because pitch to the sound. It is more effective when applied to ... -
Page 190: Stereo Envelope Flanger
Effects Pitch/Phase Mod. 022: Envel.Flang tive value for both “Feedback” and “Wet/Dry”, and if you set a negative value for both “Feedback” and “Wet/Dry”. (Stereo Envelope Flanger) g: High Damp [%] This Flanger uses an envelope generator for modula‐ This parameter sets the amount of damping of the feedback tion. You will obtain the same pattern of flanging each ... -
Page 191: Stereo Phaser
Effects Pitch/Phase Mod. 023: Phaser 024: RandomPhser (Stereo Phaser) (Stereo Random Phaser) This effect creates a swell by shifting the phase. It is This is a stereo phaser. The effect uses a step‐shape very effective on electric piano sounds. You can add waveform and random LFO for modulation, creating a ... -
Page 192: Stereo Envelope Phaser
Effects Pitch/Phase Mod. 025: Envel.Phser 026: BiphaseMod. (Stereo Envelope Phaser) (Stereo Biphase Modulation) This stereo phaser uses an envelope generator for mod‐ This stereo chorus effect adds two different LFOs ulation. You will obtain the same pattern of phasing together. You can set the Frequency and Depth parame‐ each time you play. You can also control the Phaser ters ... -
Page 193: Stereo Vibrato
Effects Pitch/Phase Mod. 027: Vibrato d: LFO Frequency Mod, a: AUTOFADE Src, a: Fade-In Rate (Stereo Vibrato) b: Fade-In Delay [msec] This effect causes the pitch of the input signal to shim‐ When “LFO Frequency Mod” is set to AUTOFADE, you can mer. Using the AutoFade allows you to increase or use the modulation source selected in “AUTO FADE Src”... - Page 194 Effects Pitch/Phase Mod. 028: AutoFadeMod. 029: 2Voice Res (Stereo Auto Fade Modulation) This effect resonates the input signal at a specified pitch. You can set the pitch, output level, and pan set‐ This stereo chorus/flanger effect enables you to control tings for two resonators individually. You can control the LFO speed and effect balance using auto fade, and the resonance intensity via an LFO. you can spread the sound by offsetting the phase of the left and right LFOs from each other. Wet: Mono In - Stereo Out / Dry: Stereo In - Stereo Out Left Wet / Dry Stereo In - Stereo Out...
- Page 195 Effects Pitch/Phase Mod. When “Control Mode” = LFO, the intensity of resonance var- Pitch Depth 0...100 ies according to the LFO. The LFO sways between positive , Sets the pitch variation of the moving sound and negative values, causing resonance to occur between Off...Tempo Selects the modulation source of pitch variation specified pitches an octave apart in turn.
- Page 196 Effects Pitch/Phase Mod. 031: Scratch a: Scratch Source, b: Response The Scratch Source parameter enables you to select the This effect is applied by recording the input signal and modulation source that controls simulation. The value of the moving the modulation source. It simulates the sound modulation source corresponds to the playback position. The of scratches you can make using a turntable. Response parameter enables you to set the speed of the response to the modulation source.
-
Page 197: Mod./P.shift
Effects Mod./P.Shift b: LFO Phase [degree] MOD./P.SHIFT This parameter determines the difference between the left and right LFO phases. A higher value will simulate the auto- Other modulation and pitch shift effects pan effect in which the sound is panned between left and right. -
Page 198: Stereo Auto Pan
Effects Mod./P.Shift “Depth”=100, “Envelope Amount”=–100 Depth 0...100 Sets the depth of LFO modulation Shimmer Level Dry Envelope Off...Tempo LFO Frequency[Hz]=8.0 Envelope Amount[Hz]= –7.0Hz Selects the modulation source of the depth of modulation Depth=100 Envelope Amount= –100 –100...+100 Sets the modulation amount of the depth of modula- tion Time Wet/Dry... -
Page 199: Stereo Ring Modulator
Effects Mod./P.Shift 035: Phaser/Trem offset the timing of the phaser peak and control a subtle movement and rotation of the sound. (Stereo Phaser + Tremolo) f: Phaser WetDry, i: Wet/Dry This effect has a stereo phaser and tremolo LFOs linked The “Phaser Wet/Dry” parameter sets the balance between together. ... - Page 200 Effects Mod./P.Shift 037: Detune Wet/Dry Dry, 1:99...99:1, Wet Table , “Sets the balance between the effect and dry sounds,” on page 175 Using this effect, you can obtain a detune effect that offsets the pitch of the effect sound slightly from the Off...Tempo Table , “Selects the modulation source of the effect balance,”...
-
Page 201: Pitch Shifter
Effects Mod./P.Shift 038: PitchShift a: Mode This parameter switches the pitch shifter operating mode. (Pitch Shifter) With Slow, tonal quality will not be changed too much. With This effect changes the pitch of the input signal. You Fast, the effect becomes a Pitch Shifter that has a quick can ... -
Page 202: Rotary Speaker
Effects Mod./P.Shift 039: PitShiftMod. 040: RotarySpeak (Pitch Shift Modulation) (Rotary Speaker) This effect modulates the detuned pitch shift amount This effect simulates a rotary speaker, and obtains a using an LFO, adding a clear spread and width to the more realistic sound by simulating the rotor in the low sound by panning the effect sound and dry sound to range ... - Page 203 Effects Mod./P.Shift Rotation will occur when the value of the modulation source is less source in the “Manual Speed Ctrl” field. If manual control is than 64, and will stop when the value is 64 or greater. not necessary, set this field to Off. d: Horn Acceleration, e: Rotor Acceleration b: Sw On a real rotary speaker, the rotation speed is accelerated or...
-
Page 204: Er/Delay
Effects ER/Delay 042: AutoReverse ER/DELAY (Auto Reverse) Early reflection and delay effects This effect records the input signal and automatically plays it in reverse (the effect is similar to a tape reverse 041: Early Refl sound). (Early Reflections) Wet: Mono In - Mono Out / Dry: Stereo In - Stereo Out Left Wet / Dry This effect is only the early reflection part of a reverber‐... - Page 205 Effects ER/Delay c: Envelope Select, c: Src, d: Threshold e: High Damp [%], e: Low Damp [%] These parameters select the source to control the start and These parameters set the damping amount of high range and end of recording. low range.
-
Page 206: Stereo Multitap Delay
Effects ER/Delay 045: M.Tap Delay 046: Modul.Delay (Stereo Multitap Delay) (Stereo Modulation Delay) The left and right Multitap Delays have two taps This stereo delay uses an LFO to sweep the delay time. respectively. Changing the routing of feedback and tap The pitch also varies. You will obtain a delay sound output allows you to create various patterns of com‐ with ... -
Page 207: Stereo Dynamic Delay
Effects ER/Delay source so that the sweep always starts from the specified High Damp [%] 0...100% point. Fx:043 Sets the damping amount in the high range “L LFO Phase” and “R LFO Phase” set the phase obtained Low Damp [%] 0...100% Fx:043 Sets the damping amount in the low range... -
Page 208: Stereo Auto Panning Delay
Effects ER/Delay 048: AutoPan Dly 049: LCR BPM Dly (Stereo Auto Panning Delay) The L/C/R delay enables you to match the delay time with the song tempo. You can also synchronize the This stereo delay effect pans the delay sound left and delay ... -
Page 209: Stereo Bpm Delay
Effects ER/Delay 051: Seq. Delay a: BPM, b: L Delay Base Note, b: Times, c: C Delay Base Note, (Sequential Delay) c: Times, d: R Delay Base Note, d: Times This four‐tap delay enables you to select a tempo and The delay time is the length of the note obtained by multiply- rhythm pattern to set up each tap. ... -
Page 210: Reverb
Effects Reverb 056: Rev. Room REVERB This room‐type reverb emphasizes the early reflections that make the sound tighter. Changing the balance Reverb effects between the early reflections and reverb sound allows These effects simulate the ambience of reverberation in you to simulate nuances, such as the type of walls of a concert halls. room. 052: Rev. Hall 057: R.BriteRoom This hall‐type reverb simulates the reverberation of This room‐type reverb emphasizes the early reflections mid‐size concert halls or ensemble halls. that make the sound brighter. See 056: Reverb Room. 053: RevSmthHall Wet: Mono In - Stereo Out / Dry: Stereo In - Stereo Out Left (Smooth Hall) -
Page 211: Mono - Mono Chain
Effects Mono – Mono Chain 059: Par4Eq-Wah MONO – MONO CHAIN (Parametric 4-Band EQ – Wah/Auto Wah) Effects that combine two mono effects connected in This effect combines a mono‐type four‐band paramet‐ series ric equalizer and a wah. You can change the order of the connection. - Page 212 Effects Mono – Mono Chain 060: 4EqPhsrChFl However, if a mono-input type effect is connected after this effect, the left and right sounds may cancel each other, elimi- (Parametric 4-Band EQ – Chorus/Flanger) nating the chorus/flanger effects. This effect combines a mono‐type four‐band paramet‐ ric equalizer and a chorus/flanger. ...
- Page 213 Effects Mono – Mono Chain 062: P4Eq-TapDly 063: Cmp-AutoWah (Parametric 4-Band EQ – Multitap Delay) (Compressor – Wah/Auto Wah) This effect combines a mono‐type four‐band paramet‐ This effect combines a mono‐type compressor and a ric equalizer and a multitap delay. wah. You can change the order of the connection. Wet: Mono In - Mono Out / Dry: Stereo In - Stereo Out Wet: Mono In - Mono Out / Dry: Stereo In - Stereo Out Left Left...
- Page 214 Effects Mono – Mono Chain 064: Cmp-AmpSim 065: Cmp-OD/HiG (Compressor – Amp Simulation) (Compressor – Overdrive/Hi.Gain) This effect combines a mono‐type compressor and an This effect combines a mono‐type compressor and an amp simulation. You can change the order of the effect overdrive/high‐gain distortion. You can change the connection.
- Page 215 Effects Mono – Mono Chain 066: Cmp-Par.4Eq 067: Cmp-ChorFlg (Compressor – Parametric 4-Band EQ) (Compressor – Chorus/Flanger) This effect combines a mono‐type compressor and a This effect combines a mono‐type compressor and a four‐band parametric equalizer. You can change the chorus/flanger. ...
- Page 216 Effects Mono – Mono Chain 068: Cmp-Phaser 069: Cmp-MTapDly (Compressor – Phaser) (Compressor – Multitap Delay) This effect combines a mono‐type compressor and a This effect combines a mono‐type compressor and a phaser. You can change the order of the effect connec‐ multitap delay. You can change the order of the effect tion. connection. Wet: Mono In - Stereo Out / Dry: Stereo In - Stereo Out Wet: Mono In - Mono Out / Dry: Stereo In - Stereo Out Left Left...
- Page 217 Effects Mono – Mono Chain 070: Lim-Par.4Eq 071: Lim-ChorFlg (Limiter – Parametric 4-Band EQ) (Limiter – Chorus/Flanger) This effect combines a mono‐type limiter and a four‐ This effect combines a mono‐type limiter and a chorus/ band parametric equalizer. You can change the order of flanger. You can change the order of the effect connec‐ the effect connection. tion. Wet: Mono In - Mono Out / Dry: Stereo In - Stereo Out Wet: Mono In - Stereo Out / Dry: Stereo In - Stereo Out Left Left...
- Page 218 Effects Mono – Mono Chain 072: Lim-Phaser 073: Lim-MTapDly (Limiter – Multitap Delay) This effect combines a mono‐type limiter and a phaser. You can change the order of the effect connection. This effect combines a mono‐type limiter and a multi‐ tap delay. You can change the order of the effect con‐ Wet: Mono In - Stereo Out / Dry: Stereo In - Stereo Out nection.
- Page 219 Effects Mono – Mono Chain 074: Exc-Compr 075: Exc-Limiter (Exciter – Compressor) (Exciter – Limiter) This effect combines a mono‐type exciter and a com‐ This effect combines a mono‐type exciter and a limiter. pressor. You can change the order of the effect connec‐ You can change the order of the effect connection. tion. Wet: Mono In - Mono Out / Dry: Stereo In - Stereo Out Left Wet / Dry Wet: Mono In - Mono Out / Dry: Stereo In - Stereo Out...
- Page 220 Effects Mono – Mono Chain 076: Exc-ChorFlg 077: Exc-Phaser (Exciter – Chorus/Flanger) (Exciter – Phaser) This effect combines a mono‐type limiter and a chorus/ This effect combines a mono‐type limiter and a phaser. flanger. Wet: Mono In - Stereo Out / Dry: Stereo In - Stereo Out Left Wet / Dry Wet: Mono In - Stereo Out / Dry: Stereo In - Stereo Out Exciter Phaser Left...
- Page 221 Effects Mono – Mono Chain 078: Exc-MTapDly 079: OD/HG-Amp S (Exciter – Multitap Delay) (Overdrive/Hi.Gain – Amp Simulation) This effect combines a mono‐type exciter and a multi‐ This effect combines a mono‐type overdrive/high‐gain tap delay. distortion and an amp simulation. You can change the order of the effect connection. Wet: Mono In - Mono Out / Dry: Stereo In - Stereo Out Left Wet / Dry Wet: Mono In - Mono Out / Dry: Stereo In - Stereo Out Exciter Multitap Delay...
- Page 222 Effects Mono – Mono Chain 080: OD/HG-ChoFl 081: OD/HG-Phser (Overdrive/Hi.Gain – Chorus/Flanger) (Overdrive/Hi.Gain – Phaser) This effect combines a mono‐type overdrive/high‐gain This effect combines a mono‐type overdrive/high‐gain distortion and a chorus/flanger. You can change the distortion and a phaser. You can change the order of order of the effect connection. the effect connection. Wet: Mono In - Stereo Out / Dry: Stereo In - Stereo Out Wet: Mono In - Stereo Out / Dry: Stereo In - Stereo Out Left Left...
- Page 223 Effects Mono – Mono Chain 082: OD/HG-MTDly 083: Wah-AmpSim (Overdrive/Hi.Gain – Multitap Delay) (Wah/Auto Wah – Amp Simulation) This effect combines a mono‐type overdrive/high‐gain This effect combines a mono‐type wah and an amp distortion and a multitap delay. simulation. You can change the order of the effect con‐ nection. Wet: Mono In - Mono Out / Dry: Stereo In - Stereo Out Left Wet / Dry Wet: Mono In - Mono Out / Dry: Stereo In - Stereo Out...
- Page 224 Effects Mono – Mono Chain 084: Decim-Amp S [D] Output Level 0...100 Fx:014 Sets the decimator output level (Decimator – Amp Simulation) [C] Sensitivity 1...100 This effect combines a mono‐type decimator and an Fx:002 Sets the sensitivity amp simulation. You can change the order of the effect [C] Attack 1...100 Fx:002 Table , “Sets the attack level,”...
- Page 225 Effects Mono – Mono Chain 087: Ch/Fl-MTDly 088: Phser-ChoFl (Chorus/Flanger – Multitap Delay) (Phaser – Chorus/Flanger) This effect combines a mono‐type chorus/flanger and a This effect combines a mono‐type phaser and a chorus/ multitap delay. flanger. Wet: Mono In - Mono Out / Dry: Stereo In - Stereo Out Wet: Mono In - Stereo Out / Dry: Stereo In - Stereo Out Left Left Wet / Dry...
- Page 226 Effects Mono – Mono Chain 089: Rev-Gate [G] Input Reverb Mix Dry, 1:99...99:1, Wet Sets the balance between the dry and reverb sounds of the gate control sig- (Reverb – Gate) nal. Threshold 0...100 This effect combines a mono‐type reverb and a gate. Sets the gate threshold level [G] Polarity +, –...
-
Page 227: Assignable Parameters
Assignable parameters List of functions assignable to the Footswitch 19. ASSIGNABLE PARAMETERS LIST OF FUNCTIONS ASSIGNABLE TO THE Function Meaning FOOTSWITCH Style Change Same functions of the control panel buttons with the same name Single Touch The following functions can be assigned to a foot‐ Style Up Selects the next Style switch. -
Page 228: List Of Functions Assignable To The Pedal Or Assignable Slider
Assignable parameters List of functions assignable to the Pedal or Assignable Slider LIST OF FUNCTIONS ASSIGNABLE TO THE Function Meaning PEDAL OR ASSIGNABLE SLIDER Joystick +X Joystick right Joystick -X Joystick left The following functions can be assigned to a continu‐ Joystick +Y Joystick forward ous pedal or to the Assignable Slider. -
Page 229: List Of Functions Assignable To The Pads
Assignable parameters List of functions assignable to the Pads LIST OF FUNCTIONS ASSIGNABLE TO THE SCALES PADS The following is a list of scales (or tunings) you can select in Style Play (“Scale” on page 44) and Global You can assign the following functions to the Pads, and (“Scale” on page 125) modes. use them as switch controls. Equal Equal tuning, the standard scale for mod‐... -
Page 230: Midi Controllers
MIDI Controllers 20. MIDI CONTROLLERS The following is a table including all Control Change CC Name microARRANGER Function messages, and their effect on various microAR‐ Release Release time RANGER functions. Attack Attack time CC Name microARRANGER Function F.CutOff Filter cutoff (Brilliance) Decay T. -
Page 231: Midi Implementation Chart
MIDI Controllers MIDI Implementation Chart KORG microARRANGER MIDI IMPLEMENTATION CHART OS Version 1.0 - Aug. 10, 2011 Function Transmitted Recognized Remarks Default 1–16 1–16 Memorized Basic Channel Changed 1–16 1–16 Default Messages Mode Altered **************** 0–127 0–127 Note Number: True Voice **************** 0–127... -
Page 232: Parameters
Parameters 21. PARAMETERS Control panel and operating modes parameters The following table shows the parameters you can save to memory when pressing the WRITE button in the various operating modes and edit environments. Single Touch Style Seq1+Seq2 Page Parameter Performance Global Note Setting (STS) Performance Setup Control Panel – Master Volume (Slider) – – – – – Acc./Seq Volume (Slider) – – –... - Page 233 Parameters Single Touch Style Seq1+Seq2 Page Parameter Performance Global Note Setting (STS) Performance Setup Pad 1–4 – – – Volume – – – – – – C Send Level – – – ...
- Page 234 Parameters Style and Song parameters The following table is a list of data saved (to memory or card) when editing a Style or a Song. Note: When saving a Song to card as a Standard MIDI File (SMF), all parameters are converted to ordinary track parameters. Pa80 exclusive data are converted to SysEx or Meta‐Events, that will be ignored when reading the SMF on a different keyboard or sequencer. Style Song Parameter Header Tracks Master Track Header Tracks Master Track – – – – Volume (GM Master Volume) Tempo – – – – Meter (Time Signature) –...
-
Page 235: Recognized Chords
Recognized chords 22. RECOGNIZED CHORDS The following pages show the most important chords recognized by the Korg Pa80, when the selected Chord Recog‐ nition mode is Fingered 2 (see “Chord Recognition Mode” on page 51). Recognized chords may vary with a differ‐ ent Chord Recognition modes. Major 6th Major 3-note 2-note 4-note 2-note Major 7th 4-note 3-note 2-note Sus 4 Sus 2 2-note 3-note 3-note Dominant 7th 4-note 3-note 2-note Dominant 7th Sus 4 Dominant 7th 5 4-note... - Page 236 Recognized chords Minor Minor 6th 3-note 2-note 4-note Minor 7th Minor-Major 7th 3-note 4-note 3-note 4-note Diminished Diminished Major 7th 3-note 4-note Minor 7th 5 4-note Augmented Augmented 7th Augmented Major 7th 3-note 4-note 4-note No 3rd No 3rd, no 5th 2-note 1-note = constituent notes of the chord...
-
Page 237: Error Messages & Troubleshooting
Song Play and Song mode microARRANGER was not able to complete the Delete Cannot load Jukebox file on Seq.2 operation. You can load a Jukebox file only on Sequencer 1. Style Save Failed (Press Exit) Damaged Standard Midi File microARRANGER was not able to complete the Save operation. The Standard MIDI File you are trying to load is dam‐ aged, and cannot be played back. Style Select Failed (Press Exit) microARRANGER was not able to complete the selec‐ tion. - Page 238 An error occurred during Erase. Erase operation already occupied by a Program. Press ENTER to over‐ aborted. write it, or EXIT to abort. Error while converting (Press Exit) While trying to load Korg i‐series data, some errors Card mode occurred. The original file is probably corrupted, or its Can’t Read Card! (Press Exit) structure is too different from microARRANGER or Pa‐ The card is probably damaged. Try again. If the mes‐...
- Page 239 Memory full Unformatted medium This message appears in Backing Sequence mode, You have selected a medium (card) that is not yet for‐ when the memory for recording a Song is full. matted, or is in a format that microARRANGER can’t No Card/Unformatted. (Sh+Enter to Format) recognize. Format the medium using the Format proce‐ Either there is no card in the drive, or the card is unfor‐ dure (see “Page 5 ‐ Format” on page 140). matted. Insert a card, and try again, or press ...
-
Page 240: Troubleshooting
Make sure that the external device is transmitting through MIDI channels enabled to receive in the microAR- RANGER. Make sure that the MIDI IN Filters of the microARRANGER do not prevent the reception of messages. Percussive instruments are not Make sure that the Percussion and Drum Track is set to Drum Mode and the played correctly external device has not transposition applied. -
Page 241: Technical Specifications
24. TECHNICAL SPECIFICATIONS Model: KORG microARRANGER Keyboard 61 keys (C2–C7), natural-touch mini-keyboard with velocity Operating System KORG OPOS (Objective Portable Operating System). Multitasking, Load-While-Play feature. SSD (Solid State Disk)-resident. Upgradable from SD card. Display Backlit custom LCD Data storage 8MB (>20MB equivalent) Internal Solid State Disk (SSD), SD/MMC card slot. -
Page 242: Alphabetical Index
Alphabetical Index 25. ALPHABETICAL INDEX 10, 12 21 Acc/Seq Volume Edit Environment Level AMS (Alternate Modulation Program Effects 95, 97 Trim 112 Source) Song mode 112 71, 76 Resonance Song Play mode 43, 44 34 Style Play mode Arabic Scale Wa veform, LFO waveform 14 126 Ending Assignable Slider 48 119 37, 127 Ensemble Attack Local Off 50 Attack Level Lock 119... - Page 243 Alphabetical Index 25 Style Change 40–51 Style Play mode 17, 50 Pads Sync. 50 Lock 121 Key Sync., LFO 15, 19 Page 121 MIDI/Tempo, LFO 126 Pedal 14 Synchro Start/Stop 40 Performance 17, 25 Selecting 44, 97 Pitch Bend Portamento 15 Tap Tempo 123 40 Tempo Program 16 Tempo/Value section 45, 98 Editing 16, 73, 74 Track Select 17, 25 Selecting Tracks...
- Page 244 4015-2 Yanokuchi, Inagi-city, Tokyo 206-0812 Japan © 2011 KORG INC.
Need help?
Do you have a question about the microARRANGER and is the answer not in the manual?
Questions and answers