Table of Contents
Advertisement
Quick Links
Advertisement
Table of Contents

Related Manuals for Korg DIGITAL PIANO LP-350


Summary of Contents for Korg DIGITAL PIANO LP-350
- Page 2 Be careful not to let metal objects get into the equipment. If something does slip into the equipment, unplug the AC adapter from the wall outlet. Then contact your nearest Korg dealer or the store where the equipment was purchased.
- Page 3 THE FCC REGULATION WARNING (for USA) This equipment has been tested and found to comply with the limits for a Class B digital device, pursuant to Part 15 of the FCC Rules. These limits are designed to provide reasonable protection against harmful interference in a residential instal- lation.
-
Page 4: Table Of Contents
Main features ... 6 Chapter 1 ... 7 Chapter 2 ... 10 Chapter 3 ... 15 Chapter 4 ... 21 Contents Front, top, and rear panels ... 7 Front panel ... 7 Top panel ... 8 Rear panel ... 9 Before you begin ... - Page 5 Chapter 5 ... 25 MIDI ... 25 What's MIDI? ... 25 What can you do using MIDI? ...25 MIDI connections ... 25 Basic MIDI settings ...26 Changing the transmit channel ...26 Using the LP-350 as a multi-timbral sound module ...27 Local on/off ...
-
Page 6: Main Features
30 different high-quality sounds Thirty richly expressive high-quality sounds are built in, including a stereo concert grand. In addition to playing one sound at a time, the LP-350 will allow you to layer two sounds together. Effects The LP-350 provides both Reverb, which simulates the natural ambience of a con- cert hall;... -
Page 7: Chapter 1
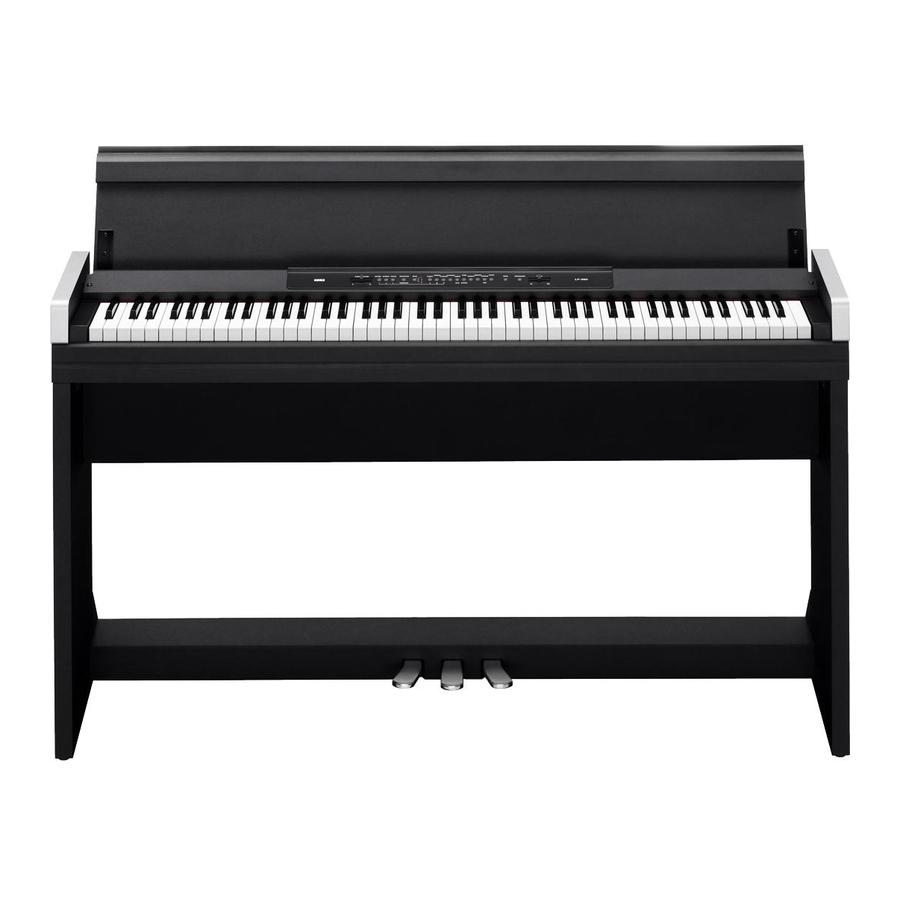
Front, top, and rear panels Front panel Power switch Headphone jacks 1. Power switch: Turns the LP-350 on/off. 2. Headphone jacks: Up to two headphones can be connected here. The jacks accommodate stereo phone (1/4") jacks. Use the MASTER VOLUME slider to adjust the volume. When headphones are connected, the LP-350’s internal speakers are silenced. -
Page 8: Top Panel
Top panel 1. Music rack: This provides a convenient place to rest your sheet music and scores. Do not apply excessive pressure to the key cover when securing a music book in an opened posi- tion. 2. MASTER VOLUME slider: Controls the volume of the internal speakers, head- phone jacks, and line output jacks. -
Page 9: Rear Panel
Rear panel 1. MIDI (IN, OUT) connectors: These jacks allow you to connect the LP-350 to other MIDI devices (e.g., computer, synthesizer, ). This receives MIDI messages (connect it to the MIDI OUT of an external MIDI device that’s controlling the LP-350). OUT: This transmits MIDI messages (connect it to the MIDI IN of an external MIDI device that’s being controlled by the LP-350). -
Page 10: Chapter 2
Before you begin Connect the AC adapter 1. Make sure that the LP-350 is turnedoff. 2. Connect the AC adapter cable to the included AC adapter. You must use the included AC adapter and AC adapter power cable. Using a different AC adapter or cable may cause malfunctions. Power cable for AC adapter 3. -
Page 11: Opening Or Closing The Key Cover
Opening or closing the key cover The key cover can be easily opened or closed. Opening the key cover 1. Using both hands, gently lift the key cover to open it. Closing the key cover 1. Raise the edge, and gently pull the key cover toward yourself. 2. -
Page 12: Using Headphones
Using headphones If you’re using headphones, connect them to the headphone jack. If your head- phones have a mini (1/8") jack, you’ll need to use a 1/8" → 1/4" adapter. Grasp the plug (or adapter), not the cable, when connecting or disconnect- ing headphones. -
Page 13: Listening To The Demo Songs
Cool “B” F. Mendelssohn Wedding March J.S. Bach Air on the G String Korg original Voice Texture * Korg original compositions and performances: M. Tempia Group 3 C. Debussy Arabesque no.1 J.S. Bach Two-part Invention no.13 F. Chopin Fantaisie-Impromptu op.66 J.S. -
Page 14: Playing A Specific Demo Song
2. During playback, you can switch to a different demo song within that group by pressing the sound select button to which that song is assigned. For example if the first demo song in group 1 is playing, and you want to switch to the last demo song (10) in that group, press the [CHOIR] sound button. -
Page 15: Chapter 3
Playing the LP-350 Selecting a sound (Single mode) The LP-350 gives you a choice of thirty (10 x 3 banks) high-quality sounds. SOUND button Bank 1 [PIANO 1/L] Grand piano [PIANO 2/M] Honky-tonk piano [E.PIANO 1/H] Club electric piano [E.PIANO 2] 80’s electric piano [HARPSI/CLAV] Harpsichord... -
Page 16: Effects (Reverb And Chorus)
The LP-350 will be in Layer mode, and the indicators above the two sound select buttons will light. Layering sounds in different banks 1. While still in Single mode, select the bank that you want to use for each sound. For example if you want to layer Mellow Piano with Jazz Organ 2, press the [PIANO 1/L] sound select button and choose bank 3 (Mellow Piano), and then press the [ORGAN 1] sound select button and choose bank 2 (Jazz Organ 2). -
Page 17: Using The Pedals
When you turn off the power, the effect settings will return to their factory settings. You can use the Data Dump function to save your effect mode set- tings on an external MIDI data filer (“MIDI data dump” on page 29). You can’t change the effect (reverb, chorus) settings while a demo song is playing. -
Page 18: Sostenuto Pedal
Sostenuto pedal The damper effect will be applied only to the notes that were already being held down when you pressed this pedal, and those notes will be sustained while you continue holding down the pedal. The damper effect will not be applied to notes that were played after you pressed this pedal. -
Page 19: Adjusting The Tempo
To return to the standard volume, hold down the METRONOME button and press the [STRINGS/PAD] and [CHOIR] sound select buttons (or the B5 and C6 keys) simultaneously. Button (key) [STRINGS/PAD] (B5) Lower the volume Adjusting the tempo You can adjust the tempo in a range of = 40 – 200. Inputting a numerical tempo value The TEMPO slider lets you set an approximate tempo. -
Page 20: Setting The Time Signature
Setting the time signature An accent will be added to the first beat of each measure. 1. Hold down the METRONOME button, and press the sound select button for the desired time signature. An accent will be added at the beginning of each measure. 2. -
Page 21: Chapter 4
Other functions Keyboard touch control setting You can change the way in which the sound will respond to the dynamics of your playing. To change the setting, hold down the TOUCH button and press one of the [PIANO 1/L], [PIANO 2/M], or [E.PIANO 1/H] sound select buttons. -
Page 22: Pitch Control
1. While holding down the TRANSPOSE/FUNCTION button, press one of the F#6–F7 keys to specify the desired transposition. If you press a key other than C7, the TRANSPOSE/FUNCTION button indicator will light, and pitch of the entire keyboard will be shifted. 2. -
Page 23: Selecting A Temperament
3. To return to the standard pitch, hold down the TRANSPOSE/FUNCTION but- ton and press the B5 and C6 keys simultaneously. B5+C6 Selecting a temperament Many compositions of classical music were created with a specific historical temper- ament (tuning method) in mind. In order to reproduce the original beauty of these compositions, the LP-350 lets you choose from three temperaments: Kirnberger, Werckmeister, and the equal temperament most widely used for keyboard instru- ments used today. - Page 24 About stretched tuning The [PIANO 1/L] and [PIANO 2/M] sounds use stretched tuning. In order to obtain a more natural sound, stretched tuning tunes the lower notes slightly flatter and the higher notes slightly sharper than the equal tempered pitches. Acoustic pianos are normally tuned using stretched tuning.
-
Page 25: Chapter 5
MIDI What’s MIDI? MIDI (Musical Instrument Digital Interface) is a world-wide standard for transfer- ring performance-related information between electronic musical instruments and computers. What can you do using MIDI? By using MIDI, you can control another MIDI device from the LP-350 or play the LP-350’s sound generator from another MIDI device. -
Page 26: Basic Midi Settings
Basic MIDI settings When you turn on the power, the LP-350’s MIDI parameters are set as follows. * The metronome sound (D5 , E5) is assigned to be received on channel 10. For this reason, channel 10 will not receive program change messages. Changing the transmit channel MIDI has sixteen channels (1–16) on which data can be transmitted and received. -
Page 27: Using The Lp-350 As A Multi-Timbral Sound Module
Using the LP-350 as a multi-timbral sound module By using an external MIDI device to control the LP-350’s internal sound generator, you can use the LP-350 as a 16-part multi-timbral sound module. 1. Use a MIDI cable to connect the LP-350’s MIDI IN connector to the MIDI OUT connector of your sequencer or other MIDI device. - Page 28 Program change transmission When you select a sound on the LP-350 using the sound select buttons and BANK button, a MIDI program change message of the corresponding number 0–29 will be transmitted. Program change reception When the LP-350 receives a program change number 0–29, it will switch to the cor- responding sound.
-
Page 29: Control Changes
Enabling/disabling program changes Enable this setting if you want program change messages to be transmitted and received, or disable it if you don’t want these messages to be transmitted or received. To enable or disable program changes, hold down the TRANSPOSE/FUNCTION button and press the [PIANO 2/M] sound select button. - Page 30 The following table shows the data that will be saved by a data dump. Type Single mode Layer mode Saving data on your data filer 1. Use a MIDI cable to connect the LP-350’s MIDI OUT connector to your data filer’s MIDI IN connector.
-
Page 31: Chapter 6
Appendix Troubleshooting If you experience a problem, please check these points first. If the LP-350 still does not operate correctly, contact a Korg service center. Problem Power does not turn on. No sound. Notes are interrupted. Something is wrong with the pitch or tone of the piano sound in a specific range. -
Page 32: Specifications
Sound Processed with INFINITY (60 – 10) ÷ 2 = 25 (maximum usable polyphony is 25) (60 – 3) ÷ 1 = 57 (maximum usable polyphony is 57) 88-note, velocity sensitive with Korg RH3, Real weighted hammer action 3 Light, normal, heavy... -
Page 33: Assembling The Stand
Assembling the stand At least one other person must help you assemble the stand. Caution during assembly In order to assemble the stand safely, please observe the following points. • Make sure that you have the correct part in the correct orientation, and per- form the assembly in the order given. - Page 34 2. Using screws (M6), attach the left and right side panels, the speaker box, and the pedal box. Position the speaker box with its speaker cable upward (the speakers facing yourself). You will re-tighten all the screws after the entire piano is assembled. Screws You must attach the anti-tipping blocks to the rear edge of the left and right side panels unless you will be placing the LP-350 against a wall.
- Page 35 If you’ve attached the anti-tipping blocks to the left and right side panels, you’ll have the option of moving the pedal box toward the rear if desired. Attach the pedal box in the position that’s most comfortable for your height, build and playing style.
- Page 36 4. Make sure that there are no gaps or misalignments in the stand, and securely tighten all of the screws. 5. Attach the caps to the screw holes of the left and right side panels. 6. Unscrew the adjuster until it firmly contacts the floor. If the adjuster is not in firm contact with the floor, you may hear buzzes in the sound, or malfunctions may occur.
-
Page 37: Check Following Assembly
7. Connect the pedal cable and speaker cable to the connectors on the LP-350’s rear panel. Then use the cable holder to secure the pedal cable. Pay attention to the orientation of the connectors when connecting the pedal cable and speaker cable. 8. -
Page 38: Other Cautions
Other cautions Please check the following points after assembly. • Loosened screws The screws may loosen as time passes after assembly. You should periodically check whether any screws have become loose. If you feel that the stand vibrates excessively, it is possible that screws have come loose. If so, re- tighten them. -
Page 39: Sound Select Button Function List
Sound select button function list By pressing a sound select button while holding down the REVERB, CHORUS, TOUCH, METRONOME, or TRANSPOSE/FUNCTION buttons, you can adjust the parameters shown in the following table. [PIANO [PIANO Sound switch 1/L] 2/M] Light Medium REVERB Light CHORUS... -
Page 40: Midi Implementation Chart
[Digital Piano] MIDI Implementation Chart Function ... Default Basic channel: Changed Default Mode Messages Altered Note numbers: True voice Note ON Velocity: Note OFF Polyphonic After Touch: Channel Pitch Bender Control Change Transmitted Received 1–16 1–16 15–113 0–127 21–108 9n, V=1–127 9n, V=1–127 Remarks Volume... - Page 41 *4: Transmitted when returning from Layer mode to Single mode, and when Local is turned Off. Mode 1: OMNI ON, POLY Mode 3: OMNI OFF, POLY Consult your local Korg distributor for more information on MIDI implementation. 0–29 0–29 0–29...
- Page 44 Please also retain your receipt as proof of purchase otherwise your product may be disqualified from the manufacturer’s or distributor’s warranty. 4015-2 Yanokuchi, Inagi-city, Tokyo 206-0812 Japan ©2008 KORG INC.
Need help?
Do you have a question about the DIGITAL PIANO LP-350 and is the answer not in the manual?
Questions and answers