Waters ACQUITY UPLC Operator's, Overview And Maintenance Manual
Photodiode array and egphotodiode array detector
Hide thumbs
Also See for ACQUITY UPLC:
- Operator's manual (514 pages) ,
- Operator's, overview and maintenance manual (144 pages) ,
- Overview and maintenance manual (141 pages)

Related Manuals for Waters ACQUITY UPLC


Summary of Contents for Waters ACQUITY UPLC
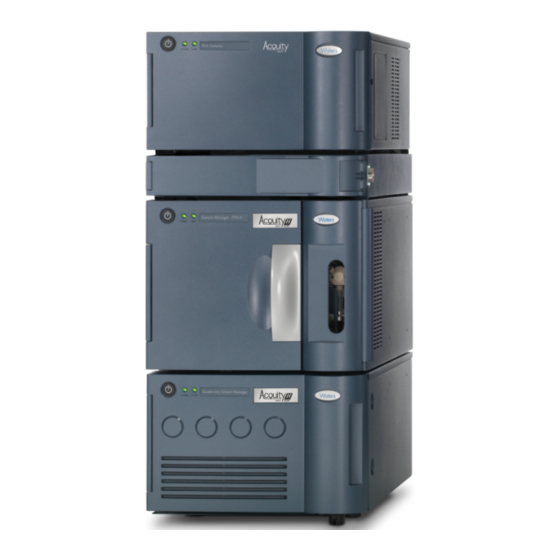
- Page 1 ACQUITY UPLC Photodiode Array and eλPhotodiode Array Detector Operator’s Overview and Maintenance Guide Revision A Copyright © Waters Corporation 2010 All rights reserved...
-
Page 2: Copyright Notice
Corporation assumes no responsibility for any errors that may appear in this document. This document is believed to be complete and accurate at the time of publication. In no event shall Waters Corporation be liable for incidental or consequential damages in connection with, or arising from, its use. -
Page 3: Customer Comments
Contacting Waters ® Contact Waters with enhancement requests or technical questions regarding the use, transportation, removal, or disposal of any Waters product. You can reach us via the Internet, telephone, or conventional mail. Waters contact information Contacting medium Information... -
Page 4: Considerations Specific To The Acquity Pda/Eλpda Detector
Good Laboratory Practice, and consult your organization’s safety representative for guidance. Considerations specific to the ACQUITY PDA/eλPDA detector High voltage hazard To avoid electric shock, do not remove the PDA/eλPDA Warning: detector’s protective panels. The components within are not user-serviceable. Safety advisories Consult the Safety Advisories section on page 80... -
Page 5: Operating The Acquity Pda/Eλpda Detector
This guide is intended for personnel who install, operate, and maintain ACQUITY PDA/eλPDA detectors. It gives an overview of the instrument’s technology and operation. Intended use of the ACQUITY PDA/eλPDA detector The Waters ACQUITY PDA/eλPDA detector is for research use only and is not intended for use in diagnostic applications. -
Page 6: Calibrating
Calibrating To calibrate LC systems, follow acceptable calibration methods using at least five standards to generate a standard curve. The concentration range for standards must include the entire range of QC samples, typical specimens, and atypical specimens. When calibrating mass spectrometers, consult the calibration section of the operator’s guide for the instrument you are calibrating. -
Page 7: Ec Authorized Representative
EC authorized representative Waters Corporation (Micromass UK Ltd.) Floats Road Wythenshawe Manchester M23 9LZ United Kingdom Telephone: +44-161-946-2400 Fax: +44-161-946-2480 Contact: Quality manager... - Page 8 viii...
-
Page 9: Table Of Contents
Table of Contents Copyright notice ....................ii Trademarks ......................ii Customer comments .................... iii Contacting Waters ....................iii Safety considerations ..................iii Considerations specific to the ACQUITY PDA/eλPDA detector ...... iv Safety advisories ....................iv Operating the ACQUITY PDA/eλPDA detector ..........v Applicable symbols .................... - Page 10 Shutting down for less than 24 hours............... 34 Shutting down for more than 24 hours............. 34 Maintaining the detector ................. 36 Contacting Waters technical service..............36 Maintenance considerations................37 Proper operating procedures ................37 Maintaining the leak sensor ................39 Replacing the detector’s leak sensor ..............
- Page 11 Detector troubleshooting ................... 77 Safety advisories ....................80 Warning symbols ....................80 Caution symbol ....................83 Warnings that apply to all Waters instruments ..........84 Electrical and handling symbols ............... 90 Specifications ...................... 92 ACQUITY UPLC PDA detector specifications ..........92 ACQUITY UPLC eλPDA detector specifications ..........
- Page 12 Table of Contents...
-
Page 13: Overview
(UV/Vis) spectrophotometers designed for use in the family of ACQUITY ® UPLC Systems, such ACQUITY UPLC H-Class or bioACQUITY. The detectors, controlled by Empower™, MassLynx™, or third-party software for both LC/MS and LC applications, operate as integral parts of the system. - Page 14 Optics assembly light path Grating 500 nm (PDA) 800 nm (eλPDA) Order filter Photodiode array 190 nm Thermal 100-µm slit (PDA) switch 50-µm slit (eλPDA) M1 mirror Spectrograph mirror and mask TP02522 Lamp and Window Filter Flag Flow cell lamp optics The following table describes the optics assembly components.
- Page 15 Optics assembly components (Continued) Component Function Filter flag Influences the light entering the flow cell. These are the flag settings: • Shutter – Prevents light from entering the flow cell. In the shutter position, dark counts are measured at each pixel and subsequently subtracted from observed signal counts to give true signal counts.
-
Page 16: Calculating Absorbance
Optics assembly components (Continued) Component Function Photodiode array An array of 512-pixel photodiodes arranged linearly. The diode width (50-µm), together with a 100-µm slit (for the PDA) or 50-µm slit (for the eλPDA), yield single wavelength resolution of 1.2 nm. Calculating absorbance The detector computes absorbance by subtracting the dark current (see “Dark... -
Page 17: Operating Principles Of The Light-Guiding Flow Cell
Absorbance as a function of concentration Ideal Actual Working range Background absorbance Concentration Operating principles of the light-guiding flow cell Small-bore, high-capacity columns like those used in UPLC produce small-volume peaks. To avoid bandspreading and maintain concentration, the volume of a detector’s flow cell must be correspondingly small. A good rule of thumb is to hold the volume to 1/10 or less than the peak volume. - Page 18 In the ACQUITY UPLC PDA detector, this angle is mechanically controlled by components external to the flow cell so that the variation in refractive index arising from different mobile phases does not materially influence the efficiency of the transmitted energy.
- Page 19 Light-guiding portion of flow cell Window Fluid out Light out Light in Fluid in Teflon AF The sample fluid is introduced and removed from the flow cell via PEEK™ tubing. Probe radiation from the lamp housing is focused onto the input face of the optical fiber that forms one end of the flow cell.
-
Page 20: Resolving Spectral Data
Resolving spectral data Together with photodiode spacing, the detector’s 100-µm-wide slit (50-µm-wide slit for eλPDA) determines the intensity and bandwidth of the light that strikes the photodiode array. Variations in intensity and bandwidth provide the means to distinguish among similar spectra. The grating images the slit onto the photodiode array. -
Page 21: Measuring Light At The Photodiode Array
Measuring light at the photodiode array The photodiode array detector measures the amount of light striking the photodiode array to determine the absorbance of the sample in the flow cell. The array consists of 512 photodiodes arranged in a row. Each photodiode acts as a capacitor by holding a fixed amount of charge. - Page 22 For example, if an exposure time is set to 50 milliseconds, the detector performs as follows: Recharges diode 1 and reads the current required to recharge diode 1 Recharges diode 2 and reads the current required to recharge diode 2 Sequentially recharges and reads the current required to recharge all the remaining 510 photodiodes Waits approximately 45 msec before beginning the...
- Page 23 For certain combinations of sampling rates, wavelength ranges, or filter-time constants, the Auto Exposure time setting does not always optimize performance. If this is the case, you can set the exposure time manually, in the instrument editor. Using Exposure Time Use the Exposure Time function to manually set the length of time the photodiodes are exposed to light before they are read.
-
Page 24: Computing Absorbance Data Points
right-click anywhere in the table, and then click Table Properties. Click the Columns tab, and then scroll down to find the Points Across Peak field. Clear the check box, and then click OK. If the Points Across Peak value for the narrowest peak of interest is less than 15, you must specify a higher sampling rate in the instrument method. - Page 25 reference spectrum is a measure of lamp intensity and mobile phase absorbance. With the shutter open, the reference spectrum is determined over the interval specified in the exposure time. Tips: • For best results, the reference spectrum should represent the initial mobile phase.
- Page 26 Filtering data In the General tab of the PDA Instrument Method Editor (for details, refer to the Empower or MassLynx online Help or the ACQUITY UPLC Console online Help) you can apply an optional noise filter (via the Digital Filtering parameter) to the data acquired.
- Page 27 Filtering noise The detector uses a Hamming filter to minimize noise. The Hamming filter is a digital finite-impulse-response filter that creates peak-height degradation and enhances the filtering of high frequency noise. The behavior of the filter depends on the filtering-time constant, or “filter-time”...
- Page 28 Filter-time constant comparison 0 sec 1 sec 2 sec Time (minutes) Although the peak shape shows some distortion and the signal output is Tip: delayed with different filter-time constants, the peak area remains the same. Median baseline filter The median baseline filter enhances the detector's baseline stability by decreasing the baseline's curvature, facilitating the development of integration methods.
-
Page 29: Flow Cell Options
In the ACQUITY UPLC PDA detector, the filter works with 2D channels only. It cannot be applied to 3D or extracted 2D channels. When the MBF data mode is selected for a channel, the presentation of the data in the real-time data display plot is delayed by a percentage (~25%) of the run time. -
Page 30: Before You Begin
To install the detector, you must generally know how to set up Requirement: and operate laboratory instruments and computer-controlled devices and how to safely handle solvents. Refer to this guide in conjunction with the ACQUITY UPLC system Tip: documentation and online Help. Before installing the detector, ensure that •... -
Page 31: Installing The Detector
Installing the detector To install the ACQUITY UPLC PDA/eλPDA detector When installing the detector unassisted by another Warning: person, use a mechanical lift to avoid lifting injuries. Place the detector atop the column manager, ensuring that the feet are properly positioned in the indentations of the column manager. - Page 32 Place the solvent tray module atop the detector. ACQUITY UPLC PDA/eλPDA detector in an ACQUITY UPLC H-Class system Bottle tray Detector Column heater Sample manager - flow through needle Quaternary solvent manager...
-
Page 33: Plumbing The Detector
To avoid particulate contamination in the flow cell, flush Recommendation: any columns you are connecting to the detector before connecting them. ACQUITY UPLC System Documentation CD or ACQUITY UPLC See also: H-Class System Documentation CD. Plumbing the detector... - Page 34 To plumb the detector If the detector is already powered on, in the console, select Recommendation: PDA/eλPDA Detector from the system tree and click (Lamp Off) to extinguish the lamp. Open the detector’s front door, and install the flow cell assembly, holding it squarely with respect to the opening and then inserting it slowly so that the guides on the front part of the flow cell flange engage the rails in the sample cell compartment.
- Page 35 Hand tighten the thumbscrews and confirm they are secure using a screw driver. Lamp Outlet tubing Flow cell ID connector Thumbscrews Lamp ID Handle Flow cell assembly TP03272 Leak sensor Backpressure Inlet tubing regulator Remove the protective cover from the PEEK cell inlet tubing, and connect the tubing to the flow cell inlet, confirming that the label on the tubing matches the type of detector and flow cell in your system.
- Page 36 Attach the short length of outlet tubing from the backpressure regulator to the outlet of the flow cell. Backpressure regulator Direction of flow from detector outlet To waste TP03260 Route the long end of the outlet tubing from the backpressure regulator, through the channel clips along the front right side of the system, and into a suitable waste container.
-
Page 37: Installing The Multi-Detector Drip Tray
Installing the multi-detector drip tray If your ACQUITY UPLC system has more than one detector, you must install the multi-detector drip tray. ACQUITY UPLC PDA/eλPDA detector in a split ACQUITY UPLC H-Class system Column heater Sample manager - flow through needle ACQUITY UPLC PDA/eλPDA... - Page 38 Installing the multi-detector drip tray (bottom view) Screws Extended Plastic plastic feet rivets Return the ACQUITY PDA/eλPDA detector to its original position atop the other detector.
-
Page 39: Making Ethernet Connections
PDA/eλPDA I/O signal connector Inject Start – Event Out – Analog Out – ACQUITY UPLC PDA/eλPDA detector analog/event connections Signal connections Description Inject Start Start injection Event Out Output switch to trigger external devices Analog Out... -
Page 40: Connecting To The Electricity Source
• Power-off and unplug the detector before performing any maintenance on the instrument. • Connect all components of the ACQUITY UPLC system to a common ground. To connect to the electricity source Use a line conditioner and uninterruptible power supply Recommendation: (UPS) for optimum long-term input voltage stability. -
Page 41: Starting The Detector
Inlet Editor window. • In the console, select PDA/eλPDA Detector from the system tree and click (Lamp Off). ACQUITY UPLC System Documentation CD or ACQUITY UPLC See also: H-Class System Documentation CD. To start the detector Power-on the workstation. - Page 42 Each system instrument “beeps” and runs a series of startup Result: tests. The power and lamp LEDs change as follows: • Each system instrument’s power LED shows green. • During initialization, each system instrument’s status LED flashes green. • After the instruments are successfully powered-on, all LEDs show steady green.
-
Page 43: Monitoring Detector Leds
Indicates a detector failure that prevents further operation. Power-off the detector, and then power-on. If the LED is still steady red, contact your Waters service representative. About the detector control panel If Empower software controls the system, the detector’s control panel appears at the bottom of the Run Samples window. - Page 44 Detector control panel Lamp On/Off LED Status Shutter Turn detector position lamp On/Off The detector control panel displays the acquisition status (if the detector is running) and shutter position. You cannot edit detector parameters while the system is processing samples. The following table lists the items in the detector control panel.
- Page 45 You can access additional functions by right-clicking anywhere in the detector control panel. Additional functions in the detector control panel Control panel function Description Autozero Resets the detector offsets. Reset PDA or Resets the detector, when present, Reset eλPDA after an error condition. Help Displays the console Help.
-
Page 46: Shutting Down The Detector
Shutting down the detector Shutting down for less than 24 hours For short-term idle times (less than 24 hours), maintain the Requirement: solvent flow to preserve flow cell cleanliness. If a few hours will pass before the next injection, slow the flow rate in the interim to a few tenths of a mL/min to conserve solvent. - Page 47 Waters ACQUITY UPLC BEH Column Care and Use See also: Instructions or ACQUITY UPLC HSS Column Care and Use Instructions. Risk of electric shock. The power switch on each system Warning: instrument controls the basic operational state of that instrument.
-
Page 48: Maintaining The Detector
Contacting Waters technical service If you are located in the USA or Canada, report malfunctions or other problems to Waters Technical Service (800 252-4752). If you are located elsewhere, phone the Waters corporate headquarters in Milford, Massachusetts (USA), or contact your local Waters subsidiary. Our Web site includes phone numbers and e-mail addresses for Waters locations worldwide. -
Page 49: Maintenance Considerations
“Starting the detector” on page Spare parts Replace only parts mentioned in this document. For spare parts details, see the Waters Quality Parts Locator on the Waters Web site’s Services & Support page. Recommendations: • For optimal baseline stability, keep the detector door closed at all times. - Page 50 • To conserve lamp life, extinguish the lamp while leaving the detector running but idle. Note, however, that you should do so only when the lamp will remain extinguished more than 4 hours. • If you use buffered mobile phase, flush it from the detector before powering-off to prevent these adverse conditions: –...
-
Page 51: Maintaining The Leak Sensor
Nonabrasive, lint-free wipes To resolve a detector leak sensor error View the Leak Sensors dialog box in the ACQUITY UPLC Console to verify that the leak sensor detected a leak. If a leak is detected, a “Leak Detected” error message appears. - Page 52 To avoid damaging the leak sensor, do not grasp it by the Caution: ribbon cable. Remove the leak sensor from its reservoir by grasping it by its serrations and pulling upward on it. Serrations If you cannot easily manipulate the leak sensor after removing it Tip: from its reservoir, detach the leak sensor connector from the front of the instrument (see...
- Page 53 Roll up a nonabrasive, lint-free wipe, and use it to absorb the liquid from the leak sensor reservoir and its surrounding area. Rolled up lint-free wipe Leak sensor reservoir With a cotton swab, absorb any remaining liquid from the corners of the leak sensor reservoir and its surrounding area.
- Page 54 If you detached the leak sensor connector from the front of the instrument, reattach it. 10. In the ACQUITY UPLC Console, select your detector from the system tree. 11. In the detector information window, click Control > Reset to reset the...
-
Page 55: Replacing The Detector's Leak Sensor
Replacing the detector’s leak sensor The leak sensor and its reservoir can be contaminated Warning: with biohazardous and/or toxic materials. Always wear clean, chemical-resistant, powder-free gloves when performing this procedure. Required materials • Clean, chemical-resistant, powder-free gloves • Leak sensor To replace the detector leak sensor Open the detector door, gently pulling its right-hand edge toward you. - Page 56 Remove the leak sensor from its reservoir by grasping it by its serrations and pulling upward on it. Serrations Unpack the new leak sensor.
-
Page 57: Maintaining The Flow Cell
Leak sensor installed in reservoir Plug the leak sensor connector into the front of the instrument. In the ACQUITY UPLC Console, select your detector from the system tree. In the detector information window, click Control > Reset to reset the detector. - Page 58 Light transmission through a light guiding flow cell Light path Teflon AF α Mobile phase Teflon AF Teflon AF In the figure above, the light path through the cell is depicted by a pair of rays (dashed lines) that bounce off the cell wall. The energy carried by each ray is conserved after each bounce.
- Page 59 finish (which is never 100% reflective), or the slow build-up of contaminants. The Teflon AF surface, however, is mirror-like, and the relatively slight RI-dependence associated with a well-maintained cell is negligible. Surface contamination, depicted by the red, irregularly shaped object in the next figure can lead to undesirable beam effects like scattering (dashed arrows) or absorption (gray, thick arrow), both of which decrease energy relative to the incident ray (black, thick arrow).
- Page 60 (see “Performing a system, acid-cleansing flush” on page 50). If you still observe no improvement, call Waters Technical Service. To prevent flow cell failure, do not connect any tubing or device Caution: that can create backpressure exceeding the flow cell’s maximum rating of 6895 kPa (69 bar, 1000 psi).
- Page 61 If another instrument is downstream of the flow cell outlet, break the connection at the other instrument, and route the outlet tubing to waste while flushing. Do not flush while connected to a mass spectrometer. Caution: Lamp Outlet tubing Flow cell ID connector Thumbscrews Lamp ID Handle...
- Page 62 If you are running a mass spectrometer, do not perform the Caution: system, acid-cleansing flush. Instead, call Waters Technical Service. General system contamination can spread to the flow cell. If the system becomes contaminated, perform a system, acid-cleansing flush, which cleans the solvent manager, sample manager, and flow cell.
- Page 63 To perform the system, acid-cleansing flush Failure to remove the bottle filters contaminates the flow Caution: path. Remove the sample and solvent manager bottle filters. Place all lines A1, A2, B1, B2 seal wash, weak needle wash and strong needles in 50:50 methanol:water. Prime the solvent lines for 5 minutes each.
- Page 64 • To avoid damaging the flow cell, handle it with care. Do not disassemble the flow cell. Controlling Contamination in Ultra Performance LC/MS and See also: HPLC/MS Systems (part number 715001307), available on the Waters web site (www.waters.com). Required materials •...
- Page 65 Disconnect the detector’s inlet and outlet tubing from the main column connection. Flow cell ID connector Lamp Outlet tubing Thumbscrews Handle Lamp ID Flow cell assembly TP03272 Leak sensor Backpressure Inlet tubing regulator Disconnect the flow cell ID connector (if present). Remove the flow cell: •...
- Page 66 • Grasp the handle, and gently pull the assembly toward you. Handle Thumbscrews TP03272 To avoid damaging the capillary tubing, do not touch it. Caution: Unpack and inspect the new flow cell, ensuring the flow-cell type is correct for your application. When replacing the flow cell, replace the flow cell inlet tubing with Tip: the tubing included with the new flow cell (see...
- Page 67 Square the flow cell assembly in front of the opening, and then insert it slowly so that the guides on the front part of the cell flange engage the rails in the sample cell compartment. Rail Dowel pin Guide Flow cell handle After the flange and rails are engaged, continue inserting the flow cell until the dowel pins on the instrument engage the corresponding holes on the cell holder.
-
Page 68: Replacing The Lamp
Waters warrants 2000 hours of lamp life, or one year since date of purchase, whichever comes first. To prevent burn injuries, allow the lamp to cool for 30 minutes Warning: before removing it. - Page 69 To remove the lamp Power-off the lamp: • To power-off the lamp manually, click PDA/eλPDA Detector in the left-hand pane of the console, and then click . The green LED on the console darkens as does the Lamp LED on the door. •...
- Page 70 Detach the lamp power connector from the detector. Captive screws Lamp power connector TP03272 Alignment pin Lamp base Lamp gas is under slight negative pressure. To prevent Warning: shattering the glass, use care when disposing of the lamp. Do not touch the glass bulb of the new lamp. Dirt or Caution: fingerprints adversely affect detector operation.
-
Page 71: Replacing The Fuses
Position the lamp so that the cut-out on the lamp base plate is at the 1 o’clock position, in line with the alignment pin on the lamp housing, and then gently push the lamp forward until it bottoms into position. Ensure that it is flush against the optics bench. -
Page 72: Cleaning The Instrument's Exterior
To replace the fuses Replace both fuses, even when only one is open or otherwise Requirement: defective. Power-off the detector, and disconnect the power cord from the power entry module. Pinch the sides of the spring-loaded fuse holder, which is above the power entry module on the rear panel of the detector. -
Page 73: Spectral Contrast Theory
Spectral contrast theory The spectral contrast algorithm compares the UV/Vis absorbance spectra of samples the detector collects. This chapter describes the theory on which the algorithm is based, explaining how it exploits differences in the shapes of the absorbance spectra. It also explains how spectral contrast represents those spectra as vectors, determining whether differences among them arise from the presence of multiple compounds in the same peaks (coelution) or from nonideal conditions such as noise, photometric error, or solvent effects. -
Page 74: Representing Spectra As Vectors
Comparing spectra of two compounds Compound A: -------------- - Compound B: -------------- - 0.40 245 nm 257 nm Compound A 0.20 Compound B 0.00 220.00 240.00 260.00 280.00 300.00 320.00 340.00 344.5063 nm, 0.4595 AU Representing spectra as vectors The spectral contrast algorithm uses vectors to quantify differences in the shapes of spectra, converting baseline-corrected spectra to vectors and then comparing the vectors. - Page 75 To prevent detector noise, don’t include wavelengths where there is little Tip: or no analyte absorption. Vectors derived from two wavelengths The spectral contrast algorithm uses vectors to characterize spectra. To understand the vector principle, consider two vectors, in the figure below, which are based on the spectra depicted in the previous figure.
-
Page 76: Spectral Contrast Angles
Vectors derived from multiple wavelengths When absorbance ratios are limited to two wavelengths, the chance that two different spectra share the same absorbance ratio is greater than if comparison is made using absorbance ratios at many wavelengths. Therefore, the spectral contrast algorithm uses absorbances from multiple wavelengths to form a vector in an n-dimensional vector space, where n is the number of wavelengths from the spectrum. - Page 77 Spectra that produce a large spectral contrast angle Spectral contrast angle: 62.3° Compound A Compound B Wavelength (nm) Spectra with similar shapes In the following figure, the absorbance spectra of two compounds, A and B, are similar. They therefore produce a small spectral contrast angle (3.0°). Spectral contrast theory...
- Page 78 Spectra with a small spectral contrast angle Spectral contrast angle: 3.0° Compound A Compound B Wavelength (nm) Differences between spectra of the same compound Small but significant differences between absorbance spectra can occur because of factors other than those due to the absorbance properties of different compounds.
-
Page 79: Undesirable Effects
Absorbance spectra of a compound at two concentrations Normalized spectra of a compound at different concentrations Spectral contrast angle: 3.4° Region of little or no analyte absorption Wavelength (nm) Undesirable effects Shape differences between absorbance spectra can be caused by one or more of the following undesirable effects: •... - Page 80 Detector noise Statistical and thermal variations add electronic noise to the detector’s absorbance measurements. The noise, which manifests itself as fluctuations in the baseline, is known as baseline noise. The magnitude of any absorbance differences caused by statistical and thermal variations can be predicted from the instrument noise in the baseline region of a chromatogram.
- Page 81 shape differences are attributable to nonideal phenomena alone and that no evidence exists for genuine differences between the spectra. A spectral contrast angle greater than its threshold angle indicates that the shape differences arise from genuine differences between the spectra. When automating the spectral contrast comparison, the maximum absorbance of the spectra must not exceed 1 AU.
- Page 82 Effects of solvent concentration on the absorbance spectrum of p-aminobenzoic acid Effect of concentration Note that position of maxima can be shifted. Wavelength (nm)
-
Page 83: Error Messages And Troubleshooting
Messages requiring you to perform corrective action including messages encountered at startup and during operation. • Messages requiring you to cycle power, and then contact Waters Technical Service personnel if an error persists (see “Contacting Waters technical service” on page 36). - Page 84 Electronic 1. Cycle power to the failed communication with detector. the digital signal 2. If problem persists, processor failed. contact Waters Technical Service to replace the personality card. Command received Data system 1. Close the data system while initializing. (Empower, and wait until both front Unable to process.
- Page 85 Energy level low. 1. Clear the flow cell and establish flow. 2. If step 1 does not work, replace the lamp. 3. If problem persists, contact Waters Technical Service. Lamp hours counter Lamp hour usage Replace lamp. exceeded threshold exceeded.
-
Page 86: Error Messages Preventing Operation
When you encounter such an error, ensure that • the flow cell is clean. • the front door is shut securely. Cycle power to the detector. If the terminating error persists, contact Waters Technical Service. Instrument error messages Error Message Description... - Page 87 Leak in detector Follow the procedure to resolve a detector leak sensor error on page Leak Detector not Leak detector is not 1. Connect the leak present present or is not detector. connected. 2. Contact Waters Technical Service. Error messages and troubleshooting...
- Page 88 Shutter failed to home Shutter could not home. 1. Flush the flow cell. 2. Establish flow. 3. Reset communications from the control panel or console. 4. Contact Waters Technical Service Temperature controller Personality card Contact Waters A/D failed electronic error.
-
Page 89: Detector Troubleshooting
Detector troubleshooting Detector troubleshooting Symptom Possible cause Corrective action Both LEDs unlit No power 1. Inspect line cord connections. 2. Test electrical outlet for power. Open (spent) or Replace fuse (see defective fuse page 59). Change in reference Mobile phase contains Prepare fresh mobile spectrum gas or is contaminated... - Page 90 Detector troubleshooting (Continued) Symptom Possible cause Corrective action Detector not Bad or disconnected Inspect cable responding to cable connections, tighten ACQUITY UPLC connectors, or replace Console cable. Configuration problem Check Ethernet or MassLynx configuration. For details, see Empower or MassLynx online Help.
- Page 91 Detector troubleshooting (Continued) Symptom Possible cause Corrective action Status light blinks and Failed startup • Reseat and check lamp light is on diagnostic tests alignment of flow cell (see page 45). • Flush the flow cell (see page 47). Dirty flow cell causing Flush the flow cell (see shutter diagnostic test page...
-
Page 92: Safety Advisories
Heed all warnings when you install, repair, and operate Waters instruments. Waters assumes no liability for the failure of those who install, repair, or operate its instruments to comply with any safety precaution. - Page 93 The following warnings can appear in the user manuals of particular instruments and on labels affixed to them or their component parts. Burst warning This warning applies to Waters instruments fitted with nonmetallic tubing. Pressurized nonmetallic, or polymer, tubing can burst. Warning: Observe these precautions when working around such tubing: •...
- Page 94 Also ensure a gas-fail connection is connected to the LC system so that the LC solvent flow stops if the nitrogen supply fails. Mass spectrometer shock hazard This warning applies to all Waters mass spectrometers. To avoid electric shock, do not remove the mass spectrometer’s Warning: protective panels.
-
Page 95: Caution Symbol
Biohazard warning This warning applies to Waters instruments that can be used to process material that might contain biohazards: substances that contain biological agents capable of producing harmful effects in humans. Waters instruments and software can be used to analyze or... -
Page 96: Warnings That Apply To All Waters Instruments
Warnings that apply to all Waters instruments When operating this device, follow standard quality control procedures and the equipment guidelines in this section. Attention: Changes or modifications to this unit not expressly approved by the party responsible for compliance could void the user’s authority to operate the equipment. - Page 97 Warning: Use caution when working with any polymer tubing under pressure: • Always wear eye protection when near pressurized polymer tubing. • Extinguish all nearby flames. • Do not use tubing that has been severely stressed or kinked. • Do not use nonmetallic tubing with tetrahydrofuran (THF) or concentrated nitric or sulfuric acids.
- Page 98 Attenzione: fare attenzione quando si utilizzano tubi in materiale polimerico sotto pressione: • Indossare sempre occhiali da lavoro protettivi nei pressi di tubi di polimero pressurizzati. • Spegnere tutte le fiamme vive nell'ambiente circostante. • Non utilizzare tubi eccessivamente logorati o piegati. •...
- Page 99 警告:当有压力的情况下使用管线时,小心注意以下几点: • 当接近有压力的聚合物管线时一定要戴防护眼镜。 • 熄灭附近所有的火焰。 • 不要使用已经被压瘪或严重弯曲的管线。 • 不要在非金属管线中使用四氢呋喃或浓硝酸或浓硫酸。 • 要了解使用二氯甲烷及二甲基亚枫会导致非金属管线膨胀,大大降低管线的耐压能力。 경고: 가압 폴리머 튜브로 작업할 경우에는 주의하십시오. • 가압 폴리머 튜브 근처에서는 항상 보호 안경을 착용하십시오. • 근처의 화기를 모두 끄십시오. • 심하게 변형되거나 꼬인 튜브는 사용하지 마십시오. • 비금속(Nonmetallic) 튜브를 테트라히드로푸란(Tetrahydrofuran: THF) 또는 농축...
- Page 100 Warning: The user shall be made aware that if the equipment is used in a manner not specified by the manufacturer, the protection provided by the equipment may be impaired. Attention: L’utilisateur doit être informé que si le matériel est utilisé d’une façon non spécifiée par le fabricant, la protection assurée par le matériel risque d’être défectueuses.
- Page 101 To protect against fire, replace fuses with those of the type Warning: and rating printed on panels adjacent to instrument fuse covers. Attention: pour éviter tout risque d'incendie, remplacez toujours les fusibles par d'autres du type et de la puissance indiqués sur le panneau à...
-
Page 102: Electrical And Handling Symbols
Electrical and handling symbols Electrical symbols These can appear in instrument user manuals and on the instrument’s front or rear panels. Electrical power on Electrical power off Standby Direct current Alternating current Protective conductor terminal Frame, or chassis, terminal Fuse Recycle symbol: Do not dispose in municipal waste. - Page 103 Handling symbols These handling symbols and their associated text can appear on labels affixed to the outer packaging of Waters instrument and component shipments. Keep upright! Keep dry! Fragile! Use no hooks! Safety advisories...
-
Page 104: Specifications
Specifications This section lists individual specifications for the ACQUITY UPLC PDA Detector and the ACQUITY UPLC eλPDA Detector. ACQUITY UPLC PDA detector specifications Physical specifications Attribute Specification Height 20.6 cm (8.1 inches) Depth 61.0 cm (24.0 inches) Width 34.3 cm (13.5 inches) Weight 13.6 kg (30.0 pounds) - Page 105 Electrical specifications (Continued) Attribute Specification Grounded AC Line voltages, nominal Voltage range 100 to 240 VAC nominal Frequency 50 to 60 Hz Fuse 100 to 240 VAC, 50 to 60 Hz, F 3.15-A, 250-V FAST BLO, 5 × 20 mm (IEC) Power consumption 185 VA nominal a.
- Page 106 Performance specifications (Continued) Item Specification Nitrogen purge Purge fitting present on optics bench and rear panel 9 µAU, peak to peak, 1 sec time constant, 30 sec Noise (3D channel; interval at 230 nm, 3.6 nm digital resolution, 2 Hz, 10 mm analytical flow 0.4 mL/min, 10/90 Acetonitrile/water, 120 minute cell)
-
Page 107: Acquity Uplc Eλpda Detector Specifications
ACQUITY UPLC eλPDA detector specifications Physical specifications Attribute Specification Height 20.6 cm (8.1 inches) Depth 61.0 cm (24.0 inches) Width 34.3 cm (13.5 inches) Weight 13.6 kg (30.0 pounds) Environmental specifications Attribute Specification Operating temperature 4 to 40 °C (39.2 to 104 °F) Operating humidity <90%, noncondensing... - Page 108 Electrical specifications (Continued) Attribute Specification Fuse 100 to 240 VAC, 50 to 60 Hz, F 3.15-A, 250-V FAST BLO, 5 × 20 mm (IEC) Power consumption 185 VA nominal a. Protection Class I – The insulating scheme used in the instrument to protect from electri- cal shock.
- Page 109 Performance specifications (Continued) Attribute Specification 9 µAU, peak to peak, 1 sec time constant, 30 sec Noise (3D channel; interval at 230 nm, 3.6 nm digital resolution, 2 Hz, 10 mm analytical flow 0.4 mL/min, 10/90 Acetonitrile/water, 120 minute cell) warm-up time 6 µAU, peak to peak, 2 sec time constant, 30 sec Noise...
-
Page 110: Solvent Considerations
Preventing contamination For information on preventing contamination, refer to Controlling Contamination in Ultra Performance LC/MS and HPLC/MS Systems (part number 715001307), available on the Waters web site (www.waters.com) Clean solvents Clean solvents provide reproducible results and permit you to operate with minimal instrument maintenance. - Page 111 Use water only from a high-quality water purification system. If the water system does not deliver filtered water, filter it through a 0.45-µm membrane filter before use. Using 100% water can cause microbial growth. Waters Caution: recommends changing 100% water solutions daily. Adding a small amount of an organic solvent (~10%) prevents microbial growth.
-
Page 112: Solvent Miscibility
Solvent miscibility Before you change solvents, refer to the table below to determine the miscibility of the solvents to be used. When you change solvents, be aware that • changes involving two miscible solvents may be made directly. Changes involving two solvents that are not totally miscible (for example, from chloroform to water), require an intermediate solvent (such as isopropanol). - Page 113 Solvent miscibility (Continued) Boiling Miscibility λ Cutoff Polarity Viscosity Solvent point °C number index CP, 20 °C (nm) (1 atm) Butanol 3.01 177.7 –– Tetrahydrofuran 0.55 66.0 Ethyl acetate 0.47 77.1 1-propanol 2.30 97.2 2-propanol 2.35 117.7 ––- Methyl acetate 0.45 56.3 15, 17...
-
Page 114: Wavelength Selection
How to use miscibility numbers Use miscibility numbers (M-numbers) to predict the miscibility of a liquid with a standard solvent (see “Solvent miscibility” on page 100.) To predict the miscibility of two liquids, subtract the smaller M-number value from the larger M-number value. •... - Page 115 UV cutoffs for common solvents The table below shows the UV cutoff (the wavelength at which the absorbance of the solvent is equal to 1 AU) for some common chromatographic solvents. Operating at a wavelength near or below the cutoff increases baseline noise because of the absorbance of the solvent.
- Page 116 Triton-X™ 100, 0.1% Hydrochloric acid, 0.1% ® Waters PIC Reagent A, 1 vial/liter MES, 10 mM, pH 6.0 Waters PIC Reagent B-6, 1 vial/liter Potassium phosphate, Waters PIC Reagent B-6, monobasic, 10 mM low UV, 1 vial/liter dibasic, 10 mM...
-
Page 117: Mobile Phase Absorbance
These groups, known as chromophores, and their behavior can be used to categorize the detection of sample molecules. Because of the diversity possible within a given sample, Waters recommends scanning over a range of wavelengths to determine the optimal wavelength for a particular analysis. - Page 118 Mobile phase absorbance measured against air or water (Continued) Absorbance at specified wavelength (nm) Unstabi- 2.44 2.57 2.31 1.80 1.54 0.94 0.42 0.21 0.09 0.05 lized tetrahydro- furan (THF, fresh) Unstabi- >2.5 >2.5 >2.5 >2.5 >2.5 >2.5 >2.5 >2.5 1.45 lized tetrahydro- furan (THF,...
- Page 119 Mobile phase absorbance measured against air or water (Continued) Absorbance at specified wavelength (nm) EDTA, 0.11 0.07 0.06 0.04 0.03 0.03 0.02 0.02 0.02 0.02 disodium, 1 mM HEPES, 10 2.45 2.50 2.37 2.08 1.50 0.29 0.03 <0.01 — — pH 7.6 MES, 10 2.42...
- Page 120 7.0 Tris HCl, 20 1.80 1.90 1.11 0.43 0.13 <0.01 — — — — mM, pH 8.0 ® ® Waters reagents PIC A, 0.67 0.29 0.13 0.05 0.03 0.02 0.02 0.02 0.02 <0.01 1 vial/L PIC B6, 1 2.46...
- Page 121 LED electricity source reference spectrum Ethernet, making signal connector contacting Waters Technical Service specifications operational contamination, preventing starting Index-1...
- Page 122 troubleshooting – detergents I/O signal connector, detector diagnostic tests installing failure detector dirty flow cell lamp drain routing hole multi-detector drip tray drip management system, proper instrument method placement for auto exposure parameter exposure time parameter electrical specifications electrical symbols lamp electricity source, connections installing...
- Page 123 more than 24 hours solvent noise effects general considerations – noise filtering miscibility – UV cutoff – operational specifications solvent angle, photometric error effects overview detector solvent changes solvents buffered performance specifications preparation photodiode array quality guidelines photometric error spare parts physical specifications specifications plumbing...
- Page 124 – threshold angle troubleshooting detector – undesirable effects, shape differences vectors derived from multiple wavelengths spectra, representing spectral contrast warning symbols Waters Technical Service, contacting wavelength derived vectors mobile phase absorbances selection – Index-4...
Need help?
Do you have a question about the ACQUITY UPLC and is the answer not in the manual?
Questions and answers