
Related Manuals for Waters ACQUITY QDa


Summary of Contents for Waters ACQUITY QDa
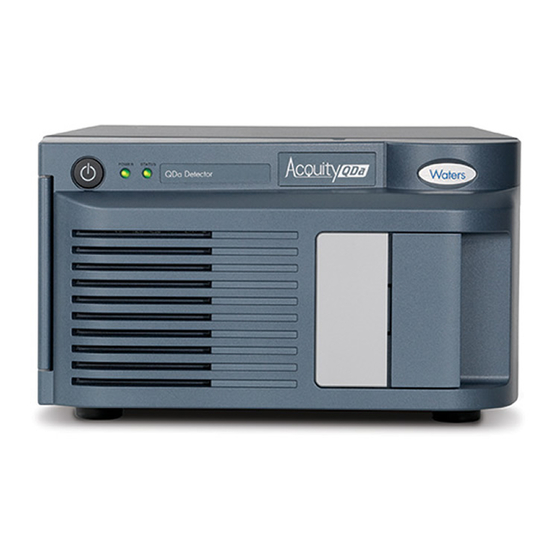
- Page 1 ACQUITY QDa Detector Overview and Maintenance Guide Copyright © Waters Corporation 715003956 2016 All rights reserved Revision C...
- Page 2 June 28, 2016, 715003956 Rev. C Page ii...
-
Page 3: Trademarks
This document is believed to be complete and accurate at the time of publication. In no event shall Waters Corporation be liable for incidental or consequential damages in connection with, or arising from, its use. For the most recent revision of this document, consult the Waters Web site (waters.com). -
Page 4: Contacting Waters
Contacting Waters Contact Waters with enhancement requests or technical questions regarding the use, transportation, removal, or disposal of any Waters product. You can reach us via the Internet, telephone, or conventional mail. Table 1–1: Waters contact information Contacting medium Information... -
Page 5: Considerations Specific To The Acquity Qda Detector
Waters distributor. Solvent leakage hazard The source exhaust system is designed to be robust and leak-tight. Waters recommends you perform a hazard analysis, assuming a maximum leak into the laboratory atmosphere of 10% LC eluate, with an additional 0.5% leak for the Standard instrument. - Page 6 Figure 1–1: Mass spectrometer high temperature hazard Source enclosure Source components High voltage hazard Warning: • To avoid electric shock, do not remove the mass spectrometer’s protective panels. The components they cover are not user-serviceable. • To avoid nonlethal electric shock when the instrument is switched on, avoid touching the areas marked with the high voltage warning symbol.
-
Page 7: Fcc Radiation Emissions Notice
Do not dispose of the instrument or return it to Waters for repair until the authority responsible for approving its removal from the premises specifies the extent of decontamination required and the level of residual contamination permissible. -
Page 8: Operating This Instrument
Electrical and electronic equipment with this symbol may contain hazardous substances and should not be disposed of as general waste. For compliance with the Waste Electrical and Electronic Equipment Directive (WEEE) 2012/19/EU, contact Waters Corporation for the correct disposal and recycling instructions. Serial number Part number catalog number June 28, 2016, 715003956 Rev. -
Page 9: Audience And Purpose
Intended use of the ACQUITY QDa Detector Waters designed the ACQUITY QDa Detector for use as an ion confirmation and quantitation tool, as part of an ACQUITY UPLC or UPC system, Alliance, and LC and SFC prep systems. The ACQUITY QDa Detector is not intended for use in diagnostic applications. -
Page 10: Ec Authorized Representative
This equipment complies with the emission and immunity requirements described in the relevant parts of IEC/EN 61326: Electrical equipment for measurement, control and laboratory use — EMC requirements. EC authorized representative Waters Corporation Stamford Avenue Altrincham Road Wilmslow SK9 4AX... -
Page 11: Table Of Contents
Safety advisories ......................vii Operating this instrument ......................viii Applicable symbols ..................... viii Audience and purpose....................ix Intended use of the ACQUITY QDa Detector .............. ix Calibrating........................ix Quality-control......................ix EMC considerations ........................ix Canada spectrum management emissions notice............ix ISM Classifickation: ISM Group 1 Class A.............. - Page 12 1 Instrument Features and Operating Modes ............17 1.1 Operating modes ........................17 1.2 Ion optics ........................... 17 1.3 Auto setup ..........................17 1.4 Sample inlet ..........................18 1.5 Vacuum system ......................... 18 1.6 Identifying your instrument version .................... 19 2 Preparing for Operation ..................
- Page 13 A.3 Bottles Prohibited symbol ......................58 A.4 Required protection ........................58 A.5 Warnings that apply to all Waters instruments and devices ............58 A.6 Warnings that address the replacing of fuses ................62 A.7 Electrical and handling symbols ....................63 A.7.1 Electrical symbols......................
- Page 14 C Materials of Construction and Compatible Solvents ........71 C.1 Preventing contamination ......................71 C.2 Running Hexane and THF with the ACQUITY QDa Detector ........... 71 C.3 QDa solvent compatibility (KAD) ....................72 C.3.1 Items exposed to solvent ....................72 C.3.2 Solvents used to prepare mobile phases ..............
- Page 15 D.8 Connecting the nitrogen exhaust line ..................97 D.8.1 Connecting the exhaust solenoid cable ................ 99 D.9 Connecting the workstation ..................... 100 D.10 Connecting ethernet cables ....................101 D.11 Input/output signal connectors ....................101 D.11.1 Signal connections ....................102 D.12 Connecting to the power supply ................... 103 June 28, 2016, 715003956 Rev.
- Page 16 June 28, 2016, 715003956 Rev. C Page xvi...
-
Page 17: Instrument Features And Operating Modes
Instrument Features and Operating Modes ® ® To effectively use the ACQUITY Detector, you must familiarize yourself with its features and operating modes. Operating modes You can acquire data using any of these operating modes: • Scanning, where the instrument scans across a user-defined span of mass-to-charge (m/z) ratios to produce a mass spectrum. -
Page 18: Sample Inlet
You can introduce sample into the QDa detector from a ACQUITY LC system, or from a syringe pump. If you are using an LC system, connect the ACQUITY QDa to the preceding instrument in your system using the supplied probe assembly. You can use 250-mm or 500-mm probe assemblies, whichever best suits your configuration. -
Page 19: Identifying Your Instrument Version
Identifying your instrument version The information and procedures in this guide include variations based on the model of the QDa that you are operating and maintaining. The following table and figures, include some basic details to help you identify your instrument and to refer to the appropriate information for your version and model. - Page 20 Figure 1–2: QDa with external, source exhaust (KAB version) External, source exhaust valve assembly Note: In the figure, the assembly cover is depicted as transparent, to reveal the tubing connections. See also: • Maintenance Procedures, on page • External Connections, on page June 28, 2016, 715003956 Rev.
-
Page 21: Preparing For Operation
For details of supported inlet system configurations, contact Waters Technical Service. Connecting to the electricity source The ACQUITY QDa requires a separate, grounded (earthed) electricity source. The ground connection in the electrical outlet must be common and connected near the system. -
Page 22: Connecting The Probe
Connecting the probe Warning: To avoid puncture injuries from the sharp probe capillary, use care when inserting it into the source enclosure. Notice: • To avoid damaging the fragile probe capillary, where the instrument is situated above eye level, disconnect the instrument’s external connections and place it on a bench top or other surface so that you can exercise due caution when inserting the probe (see page 28). -
Page 23: Starting The Instrument
Figure 2–1: Inserting the probe PEEK fitting Probe assembly Probe fitting Capillary Secure the probe tubing to the side of the source enclosure using the clip. Starting the instrument Warning: To avoid electric shock and burn injuries, follow these guidelines: •... - Page 24 To start the instrument: Warning: To avoid igniting flammable solvents, never let the nitrogen supply pressure fall below 600 kPa (6.0 bar, 87 psi). On the rear panel, ensure the nitrogen supply is connected to the instrument’s nitrogen inlet connection (see page 21).
-
Page 25: Maintenance Procedures
Replace the ion block heater If the heater fails to heat This task must be cartridge. when the instrument is performed by a Waters pumped down (evacuated). service engineer. See Waters contact information on page June 28, 2016, 715003956 Rev. C... -
Page 26: Spare Parts
Connections INSIGHT is an “intelligent” device management (IDM) Web service that enables Waters to provide proactive service and support for the ACQUITY UPLC system. To use Connections INSIGHT, you must install its service agent software on your workstation. In a client/server system, the service agent must also be installed on the computer from which you June 28, 2016, 715003956 Rev. -
Page 27: Safety And Handling
If you encounter a performance issue when using the Instrument Console, you can manually submit a Connections INSIGHT request to Waters customer support. Alternatively, you can use Remote Desktop, a real-time collaboration option that controls the two-way connection with the ACQUITY UPLC system by enabling the Connections INSIGHT iAssist service level. -
Page 28: Removing And Refitting The Source Enclosure
Warning: To avoid electric shock, • do not remove the instrument’s panels. There are no user-serviceable items inside the instrument. • ensure that the instrument is in Standby mode before commencing any maintenance. Warning: The probe and source can be hot. To avoid burn injuries, take great care while working with these components. - Page 29 Warning: To avoid burn injuries, allow the source enclosure to cool before touching the metal interior. Figure 3–1: Removing the source enclosure Probe entrance Cable screws Source enclosure thumbscrews To remove the source enclosure, pull it away from the instrument using both hands. Warning: To avoid puncture injuries from the sharp probe tip, use care when inserting and removing the probe from the source enclosure.
-
Page 30: Fitting The Source Enclosure To The Instrument
3.6.2 Fitting the source enclosure to the instrument Required material Chemical-resistant, powder-free gloves Warning: To avoid personal contamination with biohazards or toxic materials, wear chemical-resistant, powder-free gloves while performing this procedure. To fit the source enclosure: Using both hands, slide the source enclosure onto the instrument’s supporting rods. To secure the enclosure against the instrument, tighten the 2 thumbscrews on the front of the source enclosure. - Page 31 Warning: To avoid burn injuries, allow the ion block to cool before performing this procedure. To remove the source components from the ion block: Remove the source enclosure (see page 28). To remove the gas cone and PEEK cone clamp, pull the cone clamp away from the instrument.
-
Page 32: Replacing The Entrance-Aperture Seal And Disc
Figure 3–3: Removing the sample cone assembly Calibration pin Ion block Sample cone assembly Figure 3–4: Sample cone assembly components Sample cone Entrance-aperture carrier Disc aperture assembly 3.7.2 Replacing the entrance-aperture seal and disc Replace the entrance seal aperture when these conditions apply: •... -
Page 33: Removing The Ion Block
Required materials: • New entrance-aperture seal and entrance-aperture disc. • Chemical-resistant, powder-free gloves. Warning: To avoid personal contamination with biohazards or toxic materials, always wear chemical-resistant, powder-free gloves while performing this procedure. To replace the entrance-aperture seal: Dispose of the old entrance-aperture seal and disc according to your local environmental regulations. - Page 34 Figure 3–5: Removing the ion block Ion block Securing screws If your ion block includes the slot on the right-hand side near the top, insert the short end of the Allen wrench and, using the long end, lever the wrench from side to side to break the seal between the ion block and the source housing (see the figure below).
-
Page 35: Cleaning The Source Components
Remove the ion block from the source housing. 3.7.4 Cleaning the source components Required materials: • Chemical-resistant, powder-free gloves. • Appropriately sized glass vessels in which to completely immerse components when cleaning. Use only glassware not previously cleaned with surfactants. •... - Page 36 Figure 3–6: Ion block and calibration pin Calibration pin Ion block Immerse the sample cone, entrance-aperture carrier, and ion block in separate glass vessels containing 1:1 methanol/water. Note: Do not clean the consumable components of the aperture assembly such as the entrance-aperture seal and entrance-aperture disc.
-
Page 37: Refitting The Source Components
3.7.5 Refitting the source components Required materials: • Chemical-resistant, powder-free gloves • 2.5-mm Allen wrench To refit the source components: Requirement: Wear clean, chemical-resistant, powder-free gloves when connecting the source exhaust valve assembly. If you removed the O-rings from the source components, refit them. Insert the rubber entrance-aperture seal into the sample cone. -
Page 38: Removing The Ion Guide Assembly From The Source Assembly
3.9.1 Removing the ion guide assembly from the source assembly Required materials: • Chemical-resistant, powder-free gloves • 3-mm Allen wrench • 2.5-mm Allen wrench • Flat-blade screwdriver Warning: To avoid personal contamination with biohazards or toxic materials, always wear chemical-resistant, powder-free gloves while performing this procedure. Warning: To avoid puncture injuries from the sharp calibration pin, use care when removing it from and replacing it in the ion block. - Page 39 Figure 3–7: Removing the pumping block and ion guide Securing screws Pumping block Remove the 3 slotted screws securing the differential aperture to the ion guide housing using the flat-blade screwdriver, and then remove the differential aperture (see page 40). Recommendation: Clean the differential aperture (see page...
- Page 40 Figure 3–8: Removing the differential aperture Ion guide support rods Electrical connectors Differential aperture support Differential aperture support screws O-ring Ion guide Differential aperture Differential aperture securing screws Disconnect the four electrical connectors from the ion guide, leaving them attached to the pumping block.
-
Page 41: Cleaning The Differential Aperture
Suitable glass vessel in which to completely immerse the differential aperture when cleaning. • HPLC-grade deionized water. • Waters MS Cleaning Solution (part number 186006846) or HPLC-grade (or better) 1:1 methanol/water. • Holding container for used cleaning solution. • Ultrasonic bath. -
Page 42: Cleaning The Ion Guide Assembly
To clean the differential aperture: Place the differential aperture in the glass vessel. Add Waters MS Cleaning Solution or 1:1 methanol/water to the vessel until the differential aperture is immersed completely. Place the vessel containing the differential aperture in the ultrasonic bath for 20 minutes. - Page 43 Figure 3–11: Cleaning the ion guide Ion guide Add Waters MS Cleaning Solution or 1:1 methanol/water to the glass vessel until the ion guide is immersed completely. Place the vessel containing the ion guide in the ultrasonic bath for 20 minutes.
-
Page 44: Fitting The Ion Guide Assembly To The Instrument
3.9.4 Fitting the ion guide assembly to the instrument Required materials: • Chemical-resistant, powder-free gloves • 2.5-mm Allen wrench Warning: To avoid personal contamination with biohazards or toxic materials, always wear chemical-resistant, powder-free gloves while performing this procedure. To fit the ion guide assembly to the instrument: Fit the differential aperture O-ring to the differential aperture support (see the figure on page 39). - Page 45 Figure 3–13: Orientating the pumping block Alignment marks Ion guide Pumping block Secure the pumping block to the instrument using the 4 pumping block securing screws, and tighten them using the 3-mm Allen wrench. June 28, 2016, 715003956 Rev. C Page 45...
- Page 46 Figure 3–14: Securing the pumping block Securing screws Pumping block Fit the ion block and source components to the instrument (see page 37). Fit the source enclosure to the instrument (see page 30). June 28, 2016, 715003956 Rev. C Page 46...
-
Page 47: 3.10 Emptying The Nitrogen Exhaust Trap
3.10 Emptying the nitrogen exhaust trap Inspect the nitrogen exhaust trap in the instrument’s exhaust line daily, and empty it before it is more than 10% full. Figure 3–15: Nitrogen exhaust trap To laboratory exhaust port (12-mm O.D.) Exhaust solenoid cable From instrument exhaust connection... -
Page 48: 3.11 Emptying The Liquid-Trap Bottle
Warning: To avoid personal contamination with biohazards or toxic materials that may be present in the exhaust trap bottle’s waste liquid, always wear chemical-resistant, powder-free gloves while handling the nitrogen exhaust trap. Unscrew and remove the nitrogen exhaust trap from its cap and associated fittings. Warning: The waste liquid can be contaminated with biohazards or toxic materials. - Page 49 Required materials: • Chemical-resistant, powder-free gloves • Tray on which to place the pump • Container to catch used oil • Suitable pump oil Warning: To avoid personal contamination with biohazards or toxic materials in used pump oil, always wear chemical-resistant, powder-free gloves while performing this procedure. Warning: To avoid burn injuries, allow the pump to cool before touching surfaces displaying the burn warning symbol.
- Page 50 Figure 3–16: Backing-pump rear panel Oil drain plug Oil level sight glass Tilt the pump slightly, and catch the oil in a suitable container. Dispose of the oil according to local environmental regulations. Insert the oil-drain plug into the pump’s rear panel. To flush the pump, pour 50-mL of fresh oil into the pump inlet, on the pump’s top side.
-
Page 51: 3.13 Gas Ballasting The Rotary Backing Pump
For information about replacing the backing pump’s demister element, see “Troubleshooting” in the VACUUBRAND Technology for Vaccum Systems Instructions for Use (VACUUBRAND part number 99139 / 11/20/2013). For ordering parts, contact Waters (see page iv). 3.15 Replacing the internal, source exhaust valve (KAD) Replace the source exhaust valve annually or when a source-pressure test fails and all other causes of failure have been investigated. -
Page 52: Removing The Source Exhaust Valve
Figure 3–17: Internal, source exhaust valve—rear configuration Exhaust hose brackets Valve grip panel PTFE exhaust tubing Exhaust trap bottle Source exhaust tube elbow connector Waste liquid drain port 3.15.1 Removing the source exhaust valve Before removing the source exhaust valve, ensure that a replacement valve (part number 289010426) is available to install. -
Page 53: Fitting The Source Exhaust Valve
Figure 3–18: Removing the source exhaust valve Source valve enclosure Alignment key and grip panel keyway Valve grip panel Retaining screws Source exhaust tube elbow Source exhaust connector valve Dispose of the source exhaust valve in accordance with local environmental regulations. 3.15.2 Fitting the source exhaust valve Perform the following procedure to fit the source exhaust valve into the enclosure. - Page 54 Figure 3–19: Inserting the source exhaust valve Source valve enclosure Alignment key and grip panel keyway Valve grip panel Retaining screws Source exhaust tube elbow Source exhaust connector valve Ensure that the valve is firmly in place so that the panel is flush with the outer edge of the enclosure.
-
Page 55: A Safety Advisories
Heed all warnings when you install, repair, or operate any Waters instrument or device. Waters accepts no liability in cases of injury or property damage resulting from the failure of individuals to comply with any safety precaution when installing, repairing, or operating any of its instruments or devices. -
Page 56: Specific Warnings
The following warnings (both symbols and text) can appear in the user manuals of particular instruments and devices and on labels affixed to them or their component parts. Burst warning This warning applies to Waters instruments and devices fitted with nonmetallic tubing. Warning: To avoid injury from bursting, nonmetallic tubing, heed these precautions when working in the vicinity of such tubing when it is pressurized: •... - Page 57 LC solvent should the nitrogen supply fail. Biohazard warning The following warning applies to Waters instruments and devices that can process material containing biohazards, which are substances that contain biological agents capable of producing harmful effects in humans.
-
Page 58: Notices
Use eye protection when refilling or replacing solvent bottles. Requirement: Wear clean, chemical-resistant, powder-free gloves when handling samples. Warnings that apply to all Waters instruments and devices When operating this device, follow standard quality-control procedures and the equipment guidelines in this section. - Page 59 Achtung: Jedwede Änderungen oder Modifikationen an dem Gerät ohne die ausdrückliche Genehmigung der für die ordnungsgemäße Funktionstüchtigkeit verantwortlichen Personen kann zum Entzug der Bedienungsbefugnis des Systems führen. Avvertenza: qualsiasi modifica o alterazione apportata a questa unità e non espressamente autorizzata dai responsabili per la conformità fa decadere il diritto all'utilizzo dell'apparecchiatura da parte dell'utente.
- Page 60 Vorsicht: Bei der Arbeit mit Polymerschläuchen unter Druck ist besondere Vorsicht angebracht: • In der Nähe von unter Druck stehenden Polymerschläuchen stets Schutzbrille tragen. • Alle offenen Flammen in der Nähe löschen. • Keine Schläuche verwenden, die stark geknickt oder überbeansprucht sind. •...
- Page 61 경고: 가압 폴리머 튜브로 작업할 경우에는 주의하십시오. • 가압 폴리머 튜브 근처에서는 항상 보호 안경을 착용하십시오. • 근처의 화기를 모두 끄십시오. • 심하게 변형되거나 꼬인 튜브는 사용하지 마십시오. • 비금속(Nonmetallic) 튜브를 테트라히드로푸란(Tetrahydrofuran: THF) 또는 농축 질산 또는 황산과 함께 사용하지 마십시오. 염화...
-
Page 62: Warnings That Address The Replacing Of Fuses
Warnings that address the replacing of fuses The following warnings pertain to instruments and devices equipped with user-replaceable fuses. Information describing fuse types and ratings sometimes, but not always, appears on the instrument or device. Finding fuse types and ratings when that information appears on the instrument or device Warning: To protect against fire, replace fuses with those of the type and rating printed on panels adjacent to instrument fuse covers. -
Page 63: Electrical And Handling Symbols
Vorsicht: Zum Schutz gegen Feuer die Sicherungen nur mit Sicherungen ersetzen, deren Typ und Nennwert im Abschnitt "Sicherungen ersetzen" des Kapitels "Wartungsverfahren" angegeben sind. Attenzione: per garantire protezione contro gli incendi, sostituire i fusibili con altri dello stesso tipo aventi le caratteristiche indicate nel paragrafo "Sostituzione dei fusibili" del capitolo "Procedure di manutenzione". -
Page 64: Handling Symbols
Table A–1: Symbol Description Frame, or chassis, terminal Fuse Functional ground Input Output A.7.2 Handling symbols The following handling symbols and their associated statements can appear on labels affixed to the packaging in which instruments, devices, and component parts are shipped. Table A–2: Symbol Description... - Page 65 Table A–2: Symbol Description Upper limit of temperature Lower limit of temperature Temperature limitation June 28, 2016, 715003956 Rev. C Page 65...
- Page 66 June 28, 2016, 715003956 Rev. C Page 66...
-
Page 67: B Specifications
Specifications The applicability of the following specifications depends on the conditions in individual laboratories. Refer to the ACQUITY QDa Detector System Site Preparation Guide, or contact the ® Waters Technical Service organization for additional information about the specifications. Physical specifications The following table lists the physical specifications for the ACQUITY QDa Detector. -
Page 68: Electrical Specifications
4. Moisture Protection – Normal (IPX0) – IPX0 means that no Ingress Protection against any type of dripping or sprayed water exists. The “X” is a placeholder that identifies protection against dust, if applicable. Input/output specifications The following table lists the input and output specifications for the ACQUITY QDa Detector. Table B–4: Input and output specifications... - Page 69 Table B–4: Input and output specifications (Continued) Attribute Specification Analogue Out Maximum output: +10 V Minimum output: -10 V Output current: 10 mA June 28, 2016, 715003956 Rev. C Page 69...
- Page 70 June 28, 2016, 715003956 Rev. C Page 70...
-
Page 71: C Materials Of Construction And Compatible Solvents
The lists of solvents presented in this appendix are not comprehensive. Some solvents might be chemically compatible with the ACQUITY QDa Detector though they are not referenced in the lists. Some solvents that are referenced in the lists but used at higher concentrations than specified might also be compatible with the instrument. -
Page 72: Qda Solvent Compatibility (Kad)
QDa solvent compatibility (KAD) Note: The solvent compatibility information in this section refers to the KAD version of the QDa detector, shown in the following figure: Figure C–1: QDa Detector (KAD) PTFE exhaust tubing Exhaust trap bottle Source exhaust tube elbow connector Waste liquid drip port... -
Page 73: Solvents Used To Prepare Mobile Phases
Table C–1: Items exposed to solvent (KAD) (Continued) Item Material O-rings ® Viton PTFE (polytetrafluoroethylene)- encapsulated Viton Solvent waste/leak management Fluorinated ethyline polymer (FEP) tubing Source enclosure Aluminium Waste bottle Polypropylene Pumping Block gaskets FEPM Waste bottle push-in fittings NBR (nitrile butadiene rubber), SST (stainless steel), PBT (polybutylene terephthalate), and POM (polyoxymethylene) C.3.2... -
Page 74: Solvents Used Infrequently
Table C–2: Solvents used to prepare mobile phases (KAD) (Continued) Solution Concentration Ammonium hydroxide ≤1% Ammonium formate ≤50 mM Ammonium acetate ≤50 mM Ammonium bicarbonate ≤50 mM Tetrahydrofuran (THF) ≤15% C.3.3 Solvents used infrequently The following reagents are used less frequently with electrospray ionization than those listed in the previous table, because they decrease sensitivity. -
Page 75: Qda Solvent Compatibility (Kab)
QDa solvent compatibility (KAB) Note: The solvent compatibility information in this section refers to the KAB version of the QDa detector, shown in the following figure: Figure C–2: QDa Detector (KAB) Exhaust tubing API gas connection Unused source Source exhaust exhaust connection connection... -
Page 76: Solvents Used To Prepare Mobile Phases
The solvents shown in the table below do not comprise a comprehensive listing. Some solvents might be chemically compatible with the ACQUITY QDa Detector though they are not referenced in the lists. Some solvents that are referenced in the lists but used at higher concentrations than specified might also be compatible with the instrument. - Page 77 Table C–6: Solvents used to prepare mobile phases (KAB) (Continued) Solution Concentration ≤ Ammonium formate 10 mM ≤ Ammonium acetate 10 mM ≤ Ammonium bicarbonate 10 mM June 28, 2016, 715003956 Rev. C Page 77...
- Page 78 June 28, 2016, 715003956 Rev. C Page 78...
-
Page 79: D External Connections
To avoid equipment damage caused by lifting, do not use the source drain manifold to lift the instrument. Notice: If you must remove the instrument from service, contact Waters Technical Service for recommended cleaning, flushing, and packaging procedures (see “Contacting Waters”). -
Page 80: Connecting The Standard Instrument's Backing Pump
Diaphragm pump Power cable securing screw Waste bottle solenoid connection For details of supported system configurations, contact Waters Technical Service. Connecting the Standard instrument’s backing pump The Standard instrument uses a diaphragm pump attached to the back of the instrument. Note: To connect the Performance instrument’s backing pump, see... - Page 81 Warning: To avoid personal contamination with biohazards or toxic materials in used pump oil, always wear chemical-resistant, powder-free gloves while performing this procedure. To connect the diaphragm pump: Hook the pump on to the 3 diaphragm pump supports on the rear of the instrument, shown in the figure on page Secure the pump to the instrument using the 2 screws, and tighten them using the Phillips...
-
Page 82: Connecting The Performance Instrument's Backing Pump
Connecting the Performance instrument’s backing pump Note: To connect the Standard instrument’s backing pump, see page Figure D–2: Connecting the backing pump Vacuum hose assembly Exhaust port Power cable Required materials • Chemical-resistant, powder-free gloves • 7-mm nut driver • 8-mm Allen wrench •... - Page 83 Warning: The pump and its connections can be contaminated with biohazardous and/or toxic materials. Always wear chemical-resistant, powder-free gloves when performing this procedure. Notice: • To ensure the correct operation of the backing pump, it must be installed within 1 degree of horizontal.
-
Page 84: Making The Electrical Connections To The Rotary Backing Pump
Notice: The instrument requires two separate exhaust systems: one for nitrogen, the other for the backing pump. Vent them to atmosphere through separate exhaust lines. Oil mist can severely damage the instrument if the nitrogen exhaust line connects with the backing pump exhaust line. Your warranty does not cover damage caused by routing exhaust lines incorrectly. -
Page 85: Connecting To The Nitrogen Gas Supply
To make the electrical connections to the rotarybacking pump: Connect the pump control cable from the pump switching box to the backing pump connector on the instrument’s rear panel. Connect the rotarybacking pump power cord to the pump switching box. Connect the pump switching box power cord to the main power source, and use the power switch on the pump to power it on. -
Page 86: Connecting And Disconnecting The External, Source Exhaust Valve Assembly (Kab)
Connecting and disconnecting the external, source exhaust valve assembly (KAB) The following procedures apply to instruments fitted with the external, source exhaust valve assembly (serial number suffix “KAB”). page 19 for guidance on identifying your QDa version and page 88 for details about replacing the internal, source exhaust valve (serial number suffix “KAD”). - Page 87 Figure D–5: External, source exhaust valve assembly—rear configuration Exhaust tubing API gas connection Unused source Source exhaust exhaust connection connection Blanking Convoluted liquid Holding screw fitting waste tubing Note: In the figure, the assembly cover is depicted as transparent, to reveal the tubing connections.
-
Page 88: Disconnecting The External, Source Exhaust Valve Assembly
D.5.2 Disconnecting the external, source exhaust valve assembly Notice: To prevent damage to the instrument, do not use the valve assembly to lift the instrument. When moving the QDa Detector, you must remove the source exhaust valve assembly. Perform the following procedure to disconnect the assembly. Required materials: •... - Page 89 Note: For a front configuration, see the figure on page Thread the PTFE waste-tubing alongside the instrument through the two hose brackets, from the back end toward the elbow connector. Notes: • Routing the exhaust tubing through the hose brackets positions the tubing at a downward gradient.
-
Page 90: Disconnecting The Internal, Source Exhaust Valve
Figure D–8: Internal, source exhaust valve—front configuration Source exhaust tube elbow connector Waste liquid drain port PTFE source exhaust tube and elbow connector (ensure a downward gradient) Exhaust trap bottle D.6.2 Disconnecting the internal, source exhaust valve When moving the QDa Detector, you must disconnect the source exhaust valve tubing. Perform the following procedure to disconnect the tubing. -
Page 91: Source Exhaust Tubing
To connect the exhaust-trap bottle: Place the exhaust-trap bottle in the protective bottle stand, and then position the assembly in a readily accessible location below the ACQUITY QDa. Cut the 12-mm PTFE tubing into three lengths (see the figure on page 87). - Page 92 (see the figure on page 87, for a complete exhaust configuration). Figure D–9: Rear configuration without LC stack or bottom of stack To laboratory exhaust system Source ACQUITY QDa exhaust valve 90-degree elbow assembly PTFE tubing Convoluted liquid waste tubing Exhaust-trap bottle...
-
Page 93: Alternate Configurations
Figure D–10: Rear configuration with LC stack ACQUITY QDa Source exhaust valve assembly 90-degree elbow To laboratory exhaust system PTFE tubing Convoluted liquid waste tubing Exhaust-trap bottle Liquid waste container Exhaust solenoid cable PTFE tubing (ensure downward gradient) Tip: This figure shows a QDa Detector fitted with the external, source exhaust valve assembly (serial number suffix "KAB"). - Page 94 Figure D–11: Front configuration without LC stack or bottom of stack ACQUITY QDa Front exhaust connection Source exhaust valve assembly 90-degree elbow To laboratory exhaust system PTFE tubing Convoluted liquid waste tubing Exhaust-trap bottle Liquid waste container Exhaust solenoid cable...
-
Page 95: Connecting The 2.5-L Waste Container
Figure D–12: Front configuration with LC stack ACQUITY QDa Front exhaust connection Source exhaust valve assembly 90-degree elbow To laboratory exhaust PTFE tubing (ensure system downward gradient) PTFE tubing Convoluted liquid waste tubing Exhaust-trap bottle Liquid waste container Exhaust solenoid cable... - Page 96 If you are using a Standard QDa Detector, connect the 6-mm O.D. tube from the bottle-stopper assembly to the diaphragm pump’s 6-mm elbow (as shown in the following figure). Figure D–13: Waste connections ACQUITY QDa Detector 6-mm elbow Diaphragm pump (Standard QDa only)
-
Page 97: Connecting The Nitrogen Exhaust Line
Required materials • Chemical-resistant, powder-free gloves • Sharp knife • 12-mm PTFE tubing (included in the Waters Rough Pump Connect Kit) • 12-mm right-angle elbow connectors (included in the Waters Start-Up Kit) June 28, 2016, 715003956 Rev. C Page 97... - Page 98 Warning: • Biohazards or toxic LC solvents and analytes can be carried in the nitrogen exhaust, which must be vented via the nitrogen exhaust trap bottle and laboratory exhaust system. The laboratory exhaust system must provide a minimum vacuum of 0.20 kPa (2 mbar, 0.03 psi) below atmospheric pressure (negative pressure).
-
Page 99: Connecting The Exhaust Solenoid Cable
Warning: To avoid electric shock, ensure the instrument is powered off when connecting the exhaust solenoid cable. Figure D–15: Exhaust trap bottle To laboratory exhaust port (12-mm OD) From instrument Exhaust solenoid exhaust connection cable (12-mm OD) D.8.1 Connecting the exhaust solenoid cable To connect the exhaust solenoid cable: Connect the exhaust solenoid cable to the port on the exhaust trap bottle. -
Page 100: Connecting The Workstation
Connecting the workstation Warning: To avoid injury from electrical shock or fire, and damage to the equipment, do not place vessels containing liquid atop the workstation or ancillary equipment or otherwise expose those units to dripping or splashing liquids. Prohibited: Do not place vessels containing liquid—such as solvent bottles—atop the workstation or ancillary equipment or otherwise expose those units to dripping or splashing liquids. -
Page 101: D.10 Connecting Ethernet Cables
D.10 Connecting ethernet cables Requirement: Use shielded Ethernet cables with the instrument to ensure compliance with FCC, and other, limits. To make Ethernet connections: Connect one end of one shielded ethernet cable to the network switch, and then connect ® the other end to the Ethernet card on the preconfigured ACQUITY workstation. -
Page 102: D.11.1 Signal Connections
Figure D–17: I/O signal connector Stop Flow (Out) − Stop Flow (Out) Switch (Out) − Switch (Out) Inject Start (In) − Inject Start (In) Event (In) – Event (In) − Analog (Out) Analog (Out) D.11.1 Signal connections Table D–1: Instrument analog-out/event-in connections Signal connections Description Analog (Out) -
Page 103: D.12 Connecting To The Power Supply
To make the signal connections, attach the positive and negative leads of the signal cable to the connector. Connector Signal cable TP02585 Place the second connection cover over the first cover, and snap it into place. Signal connector Connection cover TP02588 D.12 Connecting to the power supply To connect the instrument to the power supply, refer to... - Page 104 June 28, 2016, 715003956 Rev. C Page 104...
Need help?
Do you have a question about the ACQUITY QDa and is the answer not in the manual?
Questions and answers