Page 1
User Guide DS8000-R Series Digital Oscilloscope Nov. 2020 RIGOL TECHNOLOGIES CO., LTD.
Page 3
Notices RIGOL products are covered by P.R.C. and foreign patents, issued and pending. ⚫ RIGOL reserves the right to modify or change parts of or all the specifications ⚫ and pricing policies at the company’s sole decision. Information in this publication replaces all previously released materials.
RIGOL Safety Requirement General Safety Summary Please review the following safety precautions carefully before putting the instrument into operation so as to avoid any personal injury or damage to the instrument and any product connected to it. To prevent potential hazards, please follow the instructions specified in this manual to use the instrument properly.
Page 5
Do Not Operate with Suspected Failures. If you suspect that any damage may occur to the instrument, have it inspected by RIGOL authorized personnel before further operations. Any maintenance, adjustment or replacement especially to circuits or accessories must be performed by RIGOL authorized personnel.
RIGOL Safety Notices and Symbols Safety Notices in this Manual: WARNING Indicates a potentially hazardous situation or practice which, if not avoided, will result in serious injury or death. CAUTION Indicates a potentially hazardous situation or practice which, if not avoided, could result in damage to the product or loss of important data.
RIGOL Measurement Category Measurement Category DS8000-R series digital oscilloscopes can make measurements in Measurement Category I. WARNING This oscilloscope can only be used for measurements within its specified measurement categories. Measurement Category Definitions Measurement category I is for measurements performed on circuits not directly connected to MAINS.
RIGOL Working Environment Temperature Operating: -40℃ to +50℃ (for a single instrument) -40℃ to +30℃ (for instruments in the cabinet) Non-operating: -50℃ to +70℃ Humidity Operating: Below +30℃: ≤90%RH (without condensation) +30℃ to +40℃: ≤75%RH (without condensation) +40℃ to +50℃: ≤45%RH (without condensation) Non-operating: Below 65℃: ≤90% RH (without condensation)
RIGOL Pollution Degree Definition Pollution Degree 1: No pollution or only dry, nonconductive pollution occurs. The pollution has no effect. For example, a clean room or air-conditioned office environment. Pollution Degree 2: Normally only nonconductive pollution occurs. Temporary conductivity caused by condensation is to be expected. For example, indoor environment.
RIGOL Environmental Considerations The following symbol indicates that this product complies with the WEEE Directive 2002/96/EC. Product End-of-Life Handling The equipment may contain substances that could be harmful to the environment or human health. To avoid the release of such substances into the environment and avoid harm to human health, we recommend you to recycle this product appropriately to ensure that most materials are reused or recycled properly.
RIGOL DS8000-R Series Overview DS8000-R series is a medium and high-end digital oscilloscope with a compact size designed on the basis of the ASIC chip (RIGOL self-owns its intellectual property right) and UltraVision II technical platform developed by RIGOL. It is compact and thin in design.
RIGOL Document Overview Main Topics of this Manual: Chapter 1 Quick Start Introduces the preparations before using the oscilloscope and provides a basic introduction of the instrument. Chapter 2 To Set the Vertical System Introduces the vertical system functions of the oscilloscope.
Page 13
RIGOL Chapter 13 Pass/Fail Test Introduces how to monitor the input signal by using the Pass/Fail test. Chapter 14 Waveform Recording & Playing Introduces the waveform recording & playing function. Chapter 15 Search and Navigation Function Introduces the navigation function and how to quickly search the relevant events.
Page 14
DS8204-R 2 GHz 1, Opt DS8034-R 350 MHz 1, Opt Manuals of this Product: Quick Guide, User Guide, Programming Guide, Data sheet, etc. For the latest version of this manual, download it from the official website of RIGOL (www.rigol.com). DS8000-R User Guide...
Measurement Category ................V Ventilation Requirement ................V Working Environment ................VI Care and Cleaning .................. VII Environmental Considerations ..............VIII DS8000-R Series Overview ..............IX Document Overview ................. X Chapter 1 Quick Start ................. 1-1 General Inspection ................1-2 Appearance and Dimensions ..............
Page 16
Contents RIGOL Probe Ratio ................... 2-5 Input Impedance ................... 2-6 Waveform Invert ..................2-7 To Set the Probe ..................2-7 Passive Probe .................. 2-8 Active Probe ..................2-8 Amplitude Unit ..................2-9 Channel Delay ..................2-9 Offset Cal .................... 2-10 Channel Label ..................
Page 18
Contents RIGOL All Measurement ................6-36 Cursor Measurement ................6-36 Manual Mode ................6-37 Track Mode ................... 6-41 XY Mode ..................6-43 Measure Mode ................6-44 Chapter 7 Digital Voltmeter (DVM) and Frequency Counter ....7-1 Digital Voltmeter (DVM) ................7-2 To Enable or Disable DVM Measurement ..........
Page 19
Contents RIGOL Chapter 10 Real-time Eye Diagram and Jitter Analysis (Option) ..10-1 Real-time Eye Analysis ................10-2 To Enable or Disable the Eye Analysis Function ......... 10-2 To Select the Eye Source ..............10-2 To Set the Threshold ..............10-2 To Set Clock Recovery ..............
Page 20
Contents RIGOL To Start or Stop the Pass/Fail Test Operation ........... 13-2 To Select the Source ................13-2 To Create a Mask ................. 13-3 To Save a Mask ..................13-3 To Load a Mask ..................13-3 To Set the Output Form of the Test Results ..........13-4 To Enable or Disable the Display of the Statistics of the Test Results ..
Page 21
Contents RIGOL Haversine ..................17-7 To Output the Arbitrary Waveform ............17-8 To Load the Channel and Waveform ..........17-8 To Create the Waveform ..............17-9 To Edit Waveforms ............... 17-10 Modulation ..................17-11 AM ..................... 17-12 FM ..................... 17-13 FSK ....................
Page 22
Contents RIGOL Auto Config ................. 19-11 Print Setting ................19-11 Email ..................19-13 Key Locker .................. 19-14 Quick Operation ................19-14 Screen Saver ................19-17 Self-check ................... 19-17 System Time ................19-18 Default Option ................19-18 Chapter 20 Remote Control ............... 20-1 Remote Control via USB ................
Chapter 1 Quick Start RIGOL Chapter 1 Quick Start This chapter introduces the precautions when using the oscilloscope for the first time, the user interface, and how to use the built-in help system. Contents in this chapter: General Inspection ◼...
The consigner or carrier shall be liable for the damage to the instrument resulting from shipment. RIGOL would not be responsible for free maintenance/rework or replacement of the instrument. 2. Inspect the instrument In case of any mechanical damage, missing parts, or failure in passing the electrical and mechanical tests, contact your RIGOL sales representative.
To avoid electric shock, ensure that the instrument is correctly grounded. To Connect to the Display and the Control Device DS8000-R series does not have an LCD display or monitor. To set the parameters and view the measurement results, you need to connect it to an external control and display device.
PC or any mobile devices. The RIGOL web control interface is displayed. Click Web Control at the left section to enter the web control page. Then you can view the display of the real-time interface of oscilloscope.
To Connect the Probe RIGOL provides the passive probe and the active probe (required to be purchased by yourself if necessary) for DS8000-R series. For specific probe models, please refer DS8000-R Series Datasheet . For detailed technical information of the probes, please refer to the specified Probe User Guide.
Page 29
Chapter 1 Quick Start RIGOL Figure 1-5 To Connect the Passive Probe After you connect the passive probe, check the probe function and probe compensation adjustment before making measurements. For detailed procedures, refer to "Function Inspection" and "Probe Compensation". Connect the active probe: Take RP7150 (active differential probe head) as an example.
Chapter 1 Quick Start RIGOL voltage adjustment if necessary. For detailed procedures, refer to the "Active Probe" section. Function Inspection This section takes RP3500A passive high-impedance probe as an example to illustrate the steps of function inspection for the oscilloscope.
Chapter 1 Quick Start RIGOL Use the same method to test the other channels. If the square waveforms actually shown do not match that in the figure above, please perform "Probe Compensation" introduced in the next section. WARNING To avoid electric shock when using the probe, please make sure that the insulated wire of the probe is in good condition.
Chapter 1 Quick Start RIGOL 
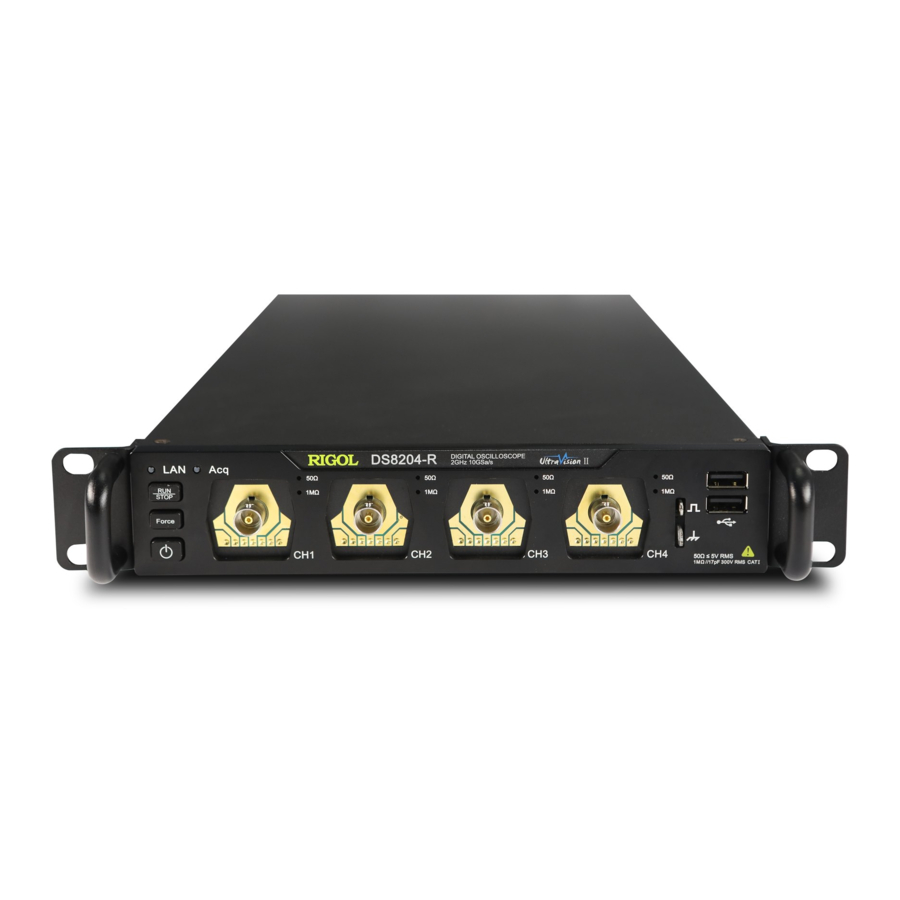
Front Panel Overview 10 9 Figure 1-11 Front Panel Table 1-1 Front Panel Description Description Description RUN/STOP Key LAN Interface Indicator Acq Indicator 50 Ω Indicator Probe Compensation Signal Output USB HOST Interface Terminal/Ground Terminal 1 MΩ...
Page 33
, and then the "Help" menu is displayed on the screen. Click Online upgrade, then a "System Update Information" window is displayed, requesting you whether to accept or cancel "RIGOL PRODUCT ONLINE UPGRADE SERVICE TERMS". Click "Accept" to start online upgrade. Click "Cancel" to cancel the online upgrade.
Page 34
Chapter 1 Quick Start RIGOL 3. SFP+ Interface SFP (Small Form-factor Pluggable) module electrical interface. It is an optical transceiver and supports hot plugging. Through this interface, the oscilloscope can support 10 Gbit/s data transmission rate. 4. HDMI Video Output Through this interface, you can connect the instrument to an external display (e.g.
Page 35
Chapter 1 Quick Start RIGOL Hz~440 Hz. Please use the power cord provided in the accessories to connect the oscilloscope to the AC power source. DS8000-R User Guide 1-13...
Chapter 1 Quick Start RIGOL User Interface DS8000-R series does not have an LCD display. You can operate the oscilloscope and configure parameters with the externally connected mouse via the USB interface on the oscilloscope; observe acquired waveforms, the setting information, and the measurement results on the user interface through the monitor externally connected via the HDMI interface.
Page 37
Chapter 1 Quick Start RIGOL 3. Horizontal Time Base Represents the time length per grid in the horizontal axis of the screen. 4. Sample Rate/Memory Depth Displays the current sample rate and memory depth of the analog channel. ⚫ The sample rate and the memory depth will change along with the ⚫...
Page 38
Chapter 1 Quick Start RIGOL The trigger level label is displayed at the left section of the screen, and ⚫ the trigger level value is displayed at the upper-right corner of the screen. When you modify the trigger level, the trigger level value will change with ⚫...
Chapter 1 Quick Start RIGOL Displays the status of CH3. ⚫ Displays the vertical scale of CH3. That is, the voltage value per grid of CH3 ⚫ in the vertical axis. Displays the offset of CH3, i.g. the vertical offset of CH3 waveform.
Chapter 1 Quick Start RIGOL Click the close button at the upper-right corner of the message box to close ⚫ the prompt window. Click other windows on the externally connected screen and operate on the ⚫ windows. Double-click the left mouse button to stop the recording/playing of the ⚫...
Page 41
Chapter 1 Quick Start RIGOL Select "Trigger zone A": ⚫ Draw the region for Trigger zone A; ➢ Open Trigger zone A; ➢ Open the "Zone Trigger" menu. ➢ Select "Trigger zone B": ⚫ Draw the region for Trigger zone B;...
Page 42
Chapter 1 Quick Start RIGOL All the mouse dragging operation. ⚫ All the mouse scrolling operation. ⚫ Rectangle drawing operation. ⚫ In this manual, descriptions on menu operation through externally connected screen are illustrated in details. For details about menu operation through Web Control, we will illustrate it in relevant chapters if necessary.
Chapter 1 Quick Start RIGOL Parameter Setting Method You can set the parameters of DS8000-R series through the Web Control or the externally connected display device/mouse/keyboard. The common parameter setting method is shown as follows: Parameter Input Field Delete key Max.
Chapter 1 Quick Start RIGOL To Use the Built-in Help System The help system of this oscilloscope provides instructions for all the function keys and their corresponding menu keys. The steps for viewing the help information are as follows: Click the function navigation icon at the lower-left corner of the screen to open the function navigation.
To View the Option Information and the Option Installation DS8000-R series oscilloscope provides multiple options to fulfill your measurement requirements. If you need any of these options, order them according to the Order No. available in "Appendix A: Accessories and Options", and then install the options according to this section.
Page 46
Chapter 1 Quick Start RIGOL (2) The Option install key is activated, and click this menu item to start installing the option. (3) After installation, a prompt message "Option activated successfully" is displayed. Note: After the option has been installed, you are recommended to restart the instrument.
RIGOL Chapter 2 To Set the Vertical System DS8000-R series provides four analog input channels (CH1-CH4), and each channel is equipped with an independent vertical control system. The setting methods for the vertical systems of the four channels are the same. This chapter takes CH1 as an example to introduce the setting method for the vertical system.
Chapter 2 To Set the Vertical System RIGOL To Enable or Disable the Analog Channel Enable the analog channel: Connect a signal to the channel connector of CH1, and then click the CH1 label at the bottom part of the screen to enable CH1. Then, CH1 label is illuminated in yellow. At this point, the channel setting menu is displayed at the right section of the screen and the channel is activated.
Chapter 2 To Set the Vertical System RIGOL would change accordingly. Vertical Scale The adjustable range of the vertical scale is related to the currently set probe ratio and input impedance. By default, the probe ratio is 1X and the input impedance is 1 MΩ.
Chapter 2 To Set the Vertical System RIGOL The adjustable range of the vertical offset is related to the current input impedance, probe ratio, and vertical scale. When CH1 is turned on, you can adjust the vertical offset with the following method: Click the channel status label at the bottom of the screen.
Probe Ratio DS8000-R series allows you to set the probe attenuation manually. To obtain the correct measurement results, you must set the probe ratio properly. By default, the probe ratio is 1X.
Chapter 2 To Set the Vertical System RIGOL as shown in Table 2-2. Table 2-2 Probe Ratio Attenuation Ratio Menu (display amplitude of the signal: actual amplitude of the signal) 0.0001X 0.0001:1 0.0002X 0.0002:1 0.0005X 0.0005:1 0.001X 0.001:1 0.002X 0.002:1 0.005X...
Chapter 2 To Set the Vertical System RIGOL Click the CH1 channel status label to open the setting menu of CH1. Then, click Impedance continuously to select the input impedance of the oscilloscope. If you select "50 Ω", the channel status label at the bottom of the screen will display the...
If not recognized, please refer to "Probe Ratio" to set the probe ratio. Active Probe If an active probe is connected, for example, when RIGOL's RP7150 probe model is connected to the oscilloscope, click Probe to open the probe menu, and you can operate on the menu item.
Chapter 2 To Set the Vertical System RIGOL integrity of the signal under test. Click Bias, and use the pop-up numeric keypad or scroll with the mouse to set the DC bias voltage. Probe Information ⚫ Click About to view information about the probe currently connected, such as the manufacturer, model, serial number, and the last calibration date.
Chapter 2 To Set the Vertical System RIGOL Figure 2-2 Zero Offset Click the CH1 channel status label to open the CH1 setting menu. Click More → Ch-Ch Skew, then use the pop-up numeric keypad or scroll with the mouse to set the desired delay calibration time.
Chapter 2 To Set the Vertical System RIGOL Channel Label The instrument uses the channel number to mark the corresponding channel by default. For ease of use, you can also set a label for each channel. For example, " ".
Page 58
Chapter 2 To Set the Vertical System RIGOL The "Input Selection Area" is only available when you select the Chinese input method. 2-12 DS8000-R User Guide...
Chapter 3 To Set the Horizontal System RIGOL Chapter 3 To Set the Horizontal System Contents in this chapter: To Adjust the Horizontal Time Base ◼ To Adjust the Horizontal Position ◼ Delayed Sweep ◼ DS8000-R User Guide...
Chapter 3 To Set the Horizontal System RIGOL To Adjust the Horizontal Time Base Horizontal time base, also called the horizontal scale, refers to the time of each grid in the horizontal direction of the screen. It is usually expressed in s/div. The adjustable range of the horizontal time base is from 200 ps/div to 1 ks/div.
Chapter 3 To Set the Horizontal System RIGOL horizontal position is a positive (negative) value. While you change the horizontal position, the waveform trigger points and the displayed waveforms of all channels are moved left and right. The horizontal position at the right-upper corner of the screen changes accordingly, as shown in the figure below.
Page 62
Chapter 3 To Set the Horizontal System RIGOL Waveform Before Enlargement Main Time Base Time Base of Delayed Sweep Waveform After Enlargement Figure 3-1 Delayed Sweep Mode Waveform before enlargement: The waveform in the area that is not covered by subtransparent blue in the upper part of the screen is the waveform before enlargement.
Chapter 4 To Set the Sample System RIGOL Chapter 4 To Set the Sample System Contents in this chapter: Timebase Mode ◼ Acquisition Mode ◼ Sampling Mode ◼ Sample Rate ◼ Memory Depth ◼ Anti-Aliasing ◼ Horizontal Expansion ◼ DS8000-R User Guide...
Chapter 4 To Set the Sample System RIGOL Timebase Mode DS8000-R series supports three available time base modes: YT mode, XY mode, and ROLL mode. By default, the time base mode is YT. Click the function navigation icon at the lower-left corner of the externally connected screen to open the function navigation menu.
Page 65
Chapter 4 To Set the Sample System RIGOL channels. The definitions of A, B, C, and D are shown in the above figure. The phase deviation angle is obtained, that is: =arcsin(A/B) or arcsin(C/D) If the principal axis of the ellipse is within Quadrant I and III, the phase deviation angle obtained should be within Quadrant I and IV, namely within (0 to π/2) or (3π/2...
Chapter 4 To Set the Sample System RIGOL signals is =arcsin1=90°. Note: The maximum sample rate in XY mode is 2.5 GSa/s. In this mode, CH1 and CH2 ⚫ are forced to be enabled; CH3 and CH4 are forced to be disabled. Generally, a longer sample waveform can ensure better display effect of Lissajous figure.
Chapter 4 To Set the Sample System RIGOL Acquisition Mode The acquisition mode is used to control how to generate waveform points from the sample points. DS8000-R supports the following four acquisition modes: Normal, Average, Peak, and High Resolution. By default, the acquisition mode is Normal.
Chapter 4 To Set the Sample System RIGOL Figure 4-2 Waveforms before Averaging Figure 4-3 Waveforms after 128 Times of Averaging Peak In this mode, the oscilloscope acquires the maximum and minimum values of the signal within the sample interval to get the envelope of the signal or the narrow pulse that might be lost.
Chapter 4 To Set the Sample System RIGOL much smoother waveform on the screen. This is generally used when the sample rate of the digital converter is greater than the storage rate of the acquisition memory. Note: The "Average" and "High Res" modes use different averaging methods. The ⚫...
Page 70
Chapter 4 To Set the Sample System RIGOL Single-channel mode: only one of the four channels (CH1/CH2/CH3/CH4) is enabled. Dual-channel mode: either CH1 or CH2 is enabled; and either CH3 or CH4 is enabled. 4-channel mode: CH1/CH2 are both enabled or CH3/CH4 are both enabled.
Chapter 4 To Set the Sample System RIGOL Pulse disappeared Memory Depth Memory depth refers to the number of points of the oscilloscope that can store in one trigger acquisition. It reflects the storage capability of the acquisition storage. This oscilloscope is equipped with a standard memory depth of up to 500 Mpts.
Chapter 4 To Set the Sample System RIGOL ― In single-channel mode, the memory depths available include Auto, 1 Kpts, 10 Kpts, 100 Kpts, 1 Mpts, 10 Mpts, 25 Mpts, 50 Mpts, 100 Mpts, 125 Mpts, 250 Mpts, and 500 Mpts.
Page 73
Chapter 4 To Set the Sample System RIGOL expanded or compressed horizontally relative to the user-defined reference position. Note: This function is unavailable in YT mode with the delayed sweep being enabled, XY mode, and ROLL mode. DS8000-R User Guide...
Chapter 5 To Trigger the Oscilloscope RIGOL Chapter 5 To Trigger the Oscilloscope As for trigger, you set certain trigger condition according to the requirement and when a waveform in the waveform stream meets this condition, the oscilloscope captures this waveform as well as the neighboring part, and displays them on the screen.
Chapter 5 To Trigger the Oscilloscope RIGOL Trigger Source Click on the function navigation icon at the lower-left corner of the screen to open the function navigation. Click on the trigger icon to open the trigger setting menu. Click Source to select the desired source.
Chapter 5 To Trigger the Oscilloscope RIGOL Trigger Level The adjustment of the trigger level is related to the type of the trigger source. When the trigger source is selected from CH1 to CH4, click on the trigger setting ⚫...
Chapter 5 To Trigger the Oscilloscope RIGOL Trigger Mode The following is the schematic diagram of the acquisition memory. To easily understand the trigger event, we classify the acquisition memory into the pre-trigger buffer and post-trigger buffer. Trigger Event Pre-trigger Buffer...
Chapter 5 To Trigger the Oscilloscope RIGOL Click on the trigger setting label at the upper-right corner of the screen. Then the following window is displayed. Click to select "Auto", "Normal", or "Single" as the trigger mode. Note: In "Normal" and "Single" trigger modes, press Force on the front panel to generate a trigger signal forcibly.
Chapter 5 To Trigger the Oscilloscope RIGOL For example, to stably trigger the repetitive pulse series as shown in the figure below, the holdoff time should be set to a value that is greater than t1 and smaller than t2.
Chapter 5 To Trigger the Oscilloscope RIGOL Edge Trigger Triggers on the trigger level of the specified edge of the input signal. Trigger Type: Click on the function navigation icon at the lower-left corner of the screen. Click the trigger icon and select Type in the trigger setting menu. Select "Edge", and then...
Chapter 5 To Trigger the Oscilloscope RIGOL Pulse Trigger Triggers on the positive or negative pulse with a specified width. In this mode, the oscilloscope will trigger when the pulse width of the input signal satisfies the specified pulse width condition.
Page 84
Chapter 5 To Trigger the Oscilloscope RIGOL triggers when the positive pulse width of the input signal is greater than the specified pulse width. When you select "Positive" for polarity, "<" for trigger condition, the oscilloscope ⚫ triggers when the positive pulse width of the input signal is smaller than the specified pulse width.
Chapter 5 To Trigger the Oscilloscope RIGOL Slope Trigger In Slope trigger, the oscilloscope triggers on the positive or negative slope of the specified time. This trigger mode is applicable to ramp and triangle waveforms. In this oscilloscope, positive slope time is defined as the time difference between the two crossing points of trigger level line A and B with the rising edge;...
Page 86
Chapter 5 To Trigger the Oscilloscope RIGOL oscilloscope triggers when the positive slope time of the input signal is smaller than the specified time. When you select "Rising" for the edge type, "<>" for trigger condition, the ⚫ oscilloscope triggers when the positive slope time of the input signal is greater than the specified lower limit time and smaller than the specified upper limit time.
Page 87
Chapter 5 To Trigger the Oscilloscope RIGOL real-time trigger level information is displayed at the lower-left corner of the screen (as shown in the figure below, H indicates the upper limit of the trigger level, L indicates the lower limit of the trigger level, and △ indicates the trigger level deviation).
Video Trigger The video signal can include image information and timing information, which adopts different standards and formats. DS8000-R series can trigger on the standard video signal field or line of NTSC (National Television Standards Committee), PAL (Phase Alternating Line), or SECAM (Sequential Couleur A Memoire).
Page 89
In the trigger debugging process of video signals, the frequency in different ⚫ part of the signal can be reflected by a different brightness, as RIGOL digital oscilloscope provides the intensity graded color display function. Experienced users can quickly judge the signal quality and discover abnormalities during the debugging process.
Chapter 5 To Trigger the Oscilloscope RIGOL Pattern Trigger Identifies a trigger condition by searching for a specified pattern. This pattern is a logical "AND" combination of channels. Each channel can be set to H (high), L (low), or X (don't care). A rising or falling edge (you can only specify a single edge) can be specified for one channel included in the pattern.
Page 91
Chapter 5 To Trigger the Oscilloscope RIGOL Falling: sets the pattern to the falling edge ( ) of the channel selected. ⚫ The corresponding pattern is displayed at the bottom of the screen. The patterns of channels CH1-CH4 are presented from left to right, as shown in the figure below.
Chapter 5 To Trigger the Oscilloscope RIGOL Duration Trigger In duration trigger, the instrument identifies a trigger condition by searching for the duration of a specified pattern. This pattern is a logical "AND" combination of the channels. Each channel can be set to H (high), L (low), or X (don't care). When the duration (△T) of this pattern meets the preset time, the oscilloscope initiates a...
Page 93
Chapter 5 To Trigger the Oscilloscope RIGOL H: sets the pattern of the channel selected to "H", i.g. the voltage level is higher ⚫ than the trigger level of the channel. L: sets the pattern of the channel selected to "L", i.g. the voltage level is lower ⚫...
Chapter 5 To Trigger the Oscilloscope RIGOL Timeout Trigger In Timeout trigger, the oscilloscope triggers when the time interval (△T) (the time from when the rising edge (or falling edge) of the input signal passes through the trigger level to the time from when the neighboring falling edge (or rising edge) passes through the trigger level) is greater than the preset timeout value, as shown in the figure below.
Page 95
Chapter 5 To Trigger the Oscilloscope RIGOL keypad or scroll with the mouse to set the timeout value of Timeout trigger. The available range is from 16 ns to 10 s. Trigger Mode: For details, refer to descriptions in "Trigger Mode".
Chapter 5 To Trigger the Oscilloscope RIGOL Runt Trigger This trigger mode is used to trigger pulses that pass through one trigger level but fail to pass through another trigger level, as shown in the figure below. Positive Runt Pulse...
Page 97
Chapter 5 To Trigger the Oscilloscope RIGOL Note: The lower limit of the pulse width must be smaller than the upper limit. Level Selection and Adjustment of Trigger Level: After the trigger condition setting is completed, you need to adjust the trigger level to correctly trigger the signal and obtain a stable waveform.
Chapter 5 To Trigger the Oscilloscope RIGOL Window Trigger Window trigger provides a high trigger level and a low trigger level. The instrument triggers when the input signal passes through the high trigger level or the low trigger level. Trigger Type: Click Type to select "Window".
Page 99
Chapter 5 To Trigger the Oscilloscope RIGOL the trigger level remains unchanged. Level AB: adjusts the upper and lower limits of the trigger level at the same time, ⚫ and the trigger level deviation (the difference between the upper limit and lower limit of the trigger level) remains unchanged.
Chapter 5 To Trigger the Oscilloscope RIGOL Delay Trigger In Delay trigger, you need to set Source A and Source B. The oscilloscope triggers when the time difference (△T) between the specified edges of Source A (Edge A) and Source B (Edge B) meets the preset time limit, as shown in the figure below.
Page 101
Chapter 5 To Trigger the Oscilloscope RIGOL It can be set to "Rising" or "Falling" Trigger Condition: Click When to set the time limit condition of Delay trigger. >: triggers when the time difference (△T) between the specified edges of ⚫...
Chapter 5 To Trigger the Oscilloscope RIGOL Setup/Hold Trigger In Setup/Hold trigger, you need to set the clock source and data source. The setup time starts when the data signal passes the trigger level and ends at the coming of the specified clock edge;...
Page 103
Chapter 5 To Trigger the Oscilloscope RIGOL Data Type: Click Data Type continuously to set the effective pattern of the data signal. It can be set to H (high level) or L (low level). Trigger Condition: Click When to select the trigger condition of Setup/Hold trigger.
Chapter 5 To Trigger the Oscilloscope RIGOL Nth Edge Trigger Triggers on the Nth edge that appears after the specified idle time. For example, in the waveform shown in the figure below, the instrument should trigger on the second rising edge after the specified idle time (the time between two neighboring rising edges), and the idle time should be within the range between P and M (P<Idle...
Page 105
Chapter 5 To Trigger the Oscilloscope RIGOL Edge Count: Click Edges to set the value of "N" in Nth edge trigger. Use the pop-up numeric keypad or scroll with the mouse to set the edge count. Its available range is from 1 to 65535.
The frame consists of 1 start bit, 5-8 data bits, 1 check bit, and 1-2 stop bits. Its format is as shown in the figure below. DS8000-R series oscilloscope triggers when the start frame, error frame, check error, or the specified data of the RS232 signal is detected.
Page 107
Chapter 5 To Trigger the Oscilloscope RIGOL Parity: Used to verify whether data are properly transmitted. Click More → Parity to select the desired parity. The available parity include "None", "Even", and "Odd". Polarity: Click Polarity continuously to select the polarity of data transmission. It can be set to "Pos"...
Chapter 5 To Trigger the Oscilloscope RIGOL I2C Trigger (Option) I2C is a 2-wire serial bus used to connect the microcontroller and its peripheral device. It is a bus standard widely used in the microelectronic communication control field. The I2C serial bus consists of SCL and SDA. Its transmission rate is determined by SCL, and its transmission data is determined by SDA, as shown in the figure below.
Page 109
Chapter 5 To Trigger the Oscilloscope RIGOL of SCL clock position. Address: the trigger searches for the specified address value. When this event ⚫ occurs, the oscilloscope will trigger on the read/write bit. After this trigger condition is selected: Click AddrBits to select the desired address bits. The available address bits ➢...
Page 110
Chapter 5 To Trigger the Oscilloscope RIGOL in "Address" and "Data" trigger conditions. Trigger Mode: For details, refer to descriptions in "Trigger Mode". Trigger Parameter Setting: Set the trigger parameter (noise rejection) under this trigger type. For details, refer to descriptions in "Noise Rejection".
Chapter 5 To Trigger the Oscilloscope RIGOL SPI Trigger (Option) In SPI trigger, after the CS or timeout condition is satisfied, the oscilloscope triggers when the specified data is found. When using SPI trigger, you need to specify the SCL clock sources and SDA data sources. Below is the sequential chart of SPI bus.
Page 112
Chapter 5 To Trigger the Oscilloscope RIGOL satisfying the trigger conditions is found. Click CS to select the chip selection signal line. The available channels are ➢ CH1-CH4. For details, refer to descriptions in "Trigger Source". The current trigger source is displayed at the upper-right corner of the screen.
Chapter 5 To Trigger the Oscilloscope RIGOL CAN Trigger (Option) DS8000-R can trigger on the start of a frame, end of a frame, frame of the specified type (e.g. Remote, Overload, Data, etc.), or error frame of the specified type (e.g.
Page 114
Chapter 5 To Trigger the Oscilloscope RIGOL parameters: Click Bit X to set the data bit that needs to be operated on. For setting ➢ methods, refer to descriptions in "I2C Trigger (Option)". Click Bytes, then use the numeric keypad or scroll with the mouse to set ➢...
Page 115
Chapter 5 To Trigger the Oscilloscope RIGOL One Bit Figure 5-18 Sample Position Click More → Sample Position, then use the pop-up numeric keypad or scroll with the mouse to set the sample position. The settable range is from 10% to 90%.
Chapter 5 To Trigger the Oscilloscope RIGOL FlexRay Trigger (Option) DS8000-R can trigger on the specified frame, symbol, error, or position of the FlexRay bus. FlexRay is a type of differential serial bus configured with three consecutive segments (i.g. header, payload, and trailer). Its data transmission rate is up to 10 Mb/s.
Page 117
Chapter 5 To Trigger the Oscilloscope RIGOL Frame: triggers on the frame of FlexRay bus. ⚫ Click Frame to select the frame type. The types of frames include null, Sync, ➢ Start, and All. Click More → Define to select "ID" or "Cyc Count".
Chapter 5 To Trigger the Oscilloscope RIGOL LIN Trigger (Option) DS8000-R can trigger on the sync field of LIN signal, and can also trigger on the specified identifier, data, or frame. The data frame format of the LIN bus is as shown in the figure below.
Page 119
Chapter 5 To Trigger the Oscilloscope RIGOL the desired error type: Sync, Even Odd, or Check Sum. Protocol Version: Click More → Version to select the protocol version that matches the signal under test. The available versions include 1.X, 2.X, and Both.
Chapter 5 To Trigger the Oscilloscope RIGOL I2S Trigger (Option) In I2S trigger, the oscilloscope searches for the specified data value and take it as the condition for identifying the trigger. You need to specify the serial clock line (SCLK, 1...
Page 121
Chapter 5 To Trigger the Oscilloscope RIGOL Trigger Condition: Click When to select the desired trigger condition. =: triggers when the channel's data equal the set data value. Click Data to set ⚫ the data bit. For setting methods, refer to descriptions in "I2C Trigger (Option)".
Page 122
Chapter 5 To Trigger the Oscilloscope RIGOL Trigger Level: Refer to "Trigger Level". The current trigger level value is displayed at the upper-right corner of the screen. 5-48 DS8000-R User Guide...
Chapter 5 To Trigger the Oscilloscope RIGOL MIL-STD-1553 Trigger (Option) 1553B is the abbreviation for the MIL-STD-1553 bus. DS8000-R can trigger on the sync field of 1553B bus, and can also trigger on the specified data word, command word, status word, or error type.
Page 124
Chapter 5 To Trigger the Oscilloscope RIGOL Trigger Condition: Click When to select the desired trigger condition. Sync: triggers on the specified sync type. After the trigger condition is selected, ⚫ click Sync to select the desired sync type: Data Sync, Cmd/Status Sync, or All Sync.
Page 125
Chapter 5 To Trigger the Oscilloscope RIGOL to correctly trigger the signal and obtain a stable waveform. Click Level Select (when "Data" is selected for the trigger condition, click More → Level Select), then select the desired level type for adjustment.
RIGOL Zone Trigger DS8000-R series oscilloscope supports the zone trigger and provides two rectangle areas: Trigger zone A and Trigger zone B. You can set the trigger conditions to "Intersect" or "Not intersect". Refer to "Rectangle Drawing" to select "Trigger zone A"...
Page 127
Chapter 5 To Trigger the Oscilloscope RIGOL If you enable both Trigger zone A and Trigger zone B, then perform the "A&&B" operation, and it will become the final trigger condition. DS8000-R User Guide 5-53...
Chapter 5 To Trigger the Oscilloscope RIGOL Trigger Output Connector The trigger output connector ([TRIG OUT]) on the rear panel of DS8000-R series can output trigger signals (hardware trigger) determined by the current setting. Trigger Output Connector Figure 5-24 Trigger Output Connector Click on the function navigation icon to open the navigation menu.
Chapter 6 Operations and Measurements RIGOL Chapter 6 Operations and Measurements DS8000-R can perform math operations, auto measurements, and cursor measurements on sampled and displayed data. Contents in this chapter: Math Operation ◼ Auto Measurement ◼ Cursor Measurement ◼ DS8000-R User Guide...
The results of the math operation can be further measured. This oscilloscope supports enabling the four math operations at the same time, as shown in the figure below. DS8000-R series can realize multiple math operations between waveforms of different channels, including arithmetic operations (A+B, A-B, A× B, and A/B) ⚫...
Chapter 6 Operations and Measurements RIGOL of Math3 can be CH1-CH4, Ref1-Ref10, Math1, or Math2; the source of Math4 can be CH1-CH4, Ref1-Ref10, Math1, Math2, or Math3; only the channels that have been enabled currently can be selected. Click Offset to set the vertical offset of the operation results. For setting ⚫...
Chapter 6 Operations and Measurements RIGOL Click More → AutoSetting to adjust the vertical scale and offset of the ⚫ operation results to the optimal value according to the current configuration, so as to better observe. Click More → Invert to enable or disable the inverted display function of the ⚫...
Chapter 6 Operations and Measurements RIGOL Click More → Label to set the label for math operation results. For details, refer ⚫ to descriptions in "Math Operation Label". Click More → Color Grade to enable or disable the color grade display of the ⚫...
Chapter 6 Operations and Measurements RIGOL the color grade again. FFT (Fast Fourier Transform) is used to transform time-domain signals to frequency-domain components (frequency spectrum). DS8000-R oscilloscope provides FFT operation function which enables you to observe the time-domain waveform and spectrum of the signal at the same time. FFT operation can facilitate the following works: Measure harmonic components and distortion in the system;...
Page 135
Chapter 6 Operations and Measurements RIGOL Click More → X continuously to select "Span-Center" (frequency range to ⚫ center frequency) or "Start-End" (start frequency to stop frequency). "Span-Center" (frequency range to center frequency): the frequency range ➢ refers to the screen width, and you can divide the frequency range by 10 to obtain the frequency per division.
Page 136
Chapter 6 Operations and Measurements RIGOL Spectral leakage can be considerably decreased when a window function is used. DS8000-R provides 6 FFT window functions (as shown in Table 6-1) which have different characteristics and are applicable to measuring different waveforms.
Chapter 6 Operations and Measurements RIGOL display the color grade again. FFT shortcut operation: click the function navigation icon at the lower-left corner of the screen to open the function navigation. Then, click the "FFT" icon to open the FFT menu. This oscilloscope supports 4 FFTs: FFT1, FFT2, FFT3, and FFT4.
Chapter 6 Operations and Measurements RIGOL Click Offset to adjust the vertical offset of the operation results with the ⚫ displayed numeric keypad or by scrolling with the mouse. Click Size to select the waveform size. The available sizes include "Small", ⚫...
Chapter 6 Operations and Measurements RIGOL threshold of Source A (or Source B) in logic operation. For setting methods, refer to descriptions in "Parameter Setting Method". Click Offset to adjust the vertical offset of the operation results. ⚫ Click Size to select the waveform size. The available sizes include "Small", ⚫...
Chapter 6 Operations and Measurements RIGOL If Source A (or Source B) selects CH4, click More → Thre.CH4 to set the ➢ threshold of Source A (or Source B) in logic operation. For setting methods, refer to descriptions in "Parameter Setting Method".
Chapter 6 Operations and Measurements RIGOL threshold of Source A (or Source B) in logic operation. For setting methods, refer to descriptions in "Parameter Setting Method". Click Offset to adjust the vertical offset of the operation results. ⚫ Click Size to select the waveform size. The available sizes include "Small", ⚫...
Chapter 6 Operations and Measurements RIGOL Diff Calculates the discrete time derivative of the selected source. For example, you can use differentiate to measure the instantaneous slope of a waveform. Click Math → Math1 → Operator to select "Diff": Click Operation continuously to enable or disable the "Diff" operation function.
Chapter 6 Operations and Measurements RIGOL Calculates the square root of the selected source point by point and displays the results. Click Math → Math1 → Operator to select "Sqrt": Click Operation continuously to enable or disable the "Sqrt" operation function.
Page 144
Chapter 6 Operations and Measurements RIGOL Click Scale to set the vertical scale of the operation results. For setting methods, ⚫ refer to the descriptions in "Parameter Setting Method". Click AutoSetting to adjust the vertical scale and offset of the operation results ⚫...
Chapter 6 Operations and Measurements RIGOL the color grade again. Calculates the exponential of the selected source point by point and displays the results. Click Math → Math1 → Operator to select "Exp": Click Operation continuously to enable or disable the "Exp" operation function.
Chapter 6 Operations and Measurements RIGOL of Math3 can be CH1-CH4, Ref1-Ref10, Math1, or Math2; the source of Math4 can be CH1-CH4, Ref1-Ref10, Math1, Math2, or Math3; only the channels that have been enabled currently can be selected. Click Offset to set the vertical offset of the operation results. For setting ⚫...
Chapter 6 Operations and Measurements RIGOL enabled). The sample rate of the analog channel or the changes of the memory depth can affect the Math sample rate. Click More → AutoSetting to adjust the vertical scale and offset of the ⚫...
Chapter 6 Operations and Measurements RIGOL Click More → Invert to enable or disable the inverted display function of the ⚫ waveform. Click More → Label to set the label for math operation results. For details, refer ⚫ to descriptions in "Math Operation Label".
Chapter 6 Operations and Measurements RIGOL Click More → Color Grade to enable or disable the color grade display of the ⚫ operation results. When enabled, different colors are displayed on the screen to indicate the times of data acquisition or acquisition probability.
Chapter 6 Operations and Measurements RIGOL the color grade again. AX+B Applies a linear function to the selected source, and displays the results. Click Math → Math1 → Operator to select "AX+B": Click Operation continuously to enable or disable the "AX+B" operation ⚫...
Page 151
Chapter 6 Operations and Measurements RIGOL waveform. Click Library to select the preset waveform label, including ADD, SUB, MUL, DIV, ⚫ FFT, AND, OR, XOR, NOT, Intg, Diff, Sqrt, Lg, Ln, Exp, Abs, LPas, HPas, BPas, BStop, and AX+B. Click Label, and the label editing interface is automatically displayed. You can ⚫...
Chapter 6 Operations and Measurements RIGOL Auto Measurement DS8000-R provides auto measurements for 41 waveform parameters, as well as the statistics and analysis of the measurement results. Quick Measurement after AUTO When the oscilloscope is correctly connected and has detected a valid input signal, click Auto in the Web Control mode to enable the waveform auto setting function and open the auto setting function menu.
Page 153
Chapter 6 Operations and Measurements RIGOL If you lock the Auto function and then exit the auto setting function menu, you can click on the function navigation icon to open the function navigation, and click Utility → More → Auto Config to enter the auto setting function menu again to unlock the Auto function.
Chapter 6 Operations and Measurements RIGOL Measurement Parameter Click on the function navigation icon to open the function navigation. Then click on the Measure icon to enter the measurement setting menu. You can set the measurement source, enable or disable the all measurement function, the statistical analysis function, and etc.
Page 155
Chapter 6 Operations and Measurements RIGOL to the threshold middle value of the next falling edge. 6. -Width: indicates the time between the threshold middle value of a falling edge to the threshold middle value of the next rising edge.
Page 156
Chapter 6 Operations and Measurements RIGOL Rising Edge Count = n Threshold Upper Limit Threshold Lower Limit 4. Falling Edge Count: The number of falling edges that fall from above the threshold upper limit to below the threshold lower limit.
Page 157
Chapter 6 Operations and Measurements RIGOL 3. Delay A →B : indicates the time difference between the threshold middle values of the rising edge of Source A and the falling edge of Source B. Negative delay indicates that the rising edge of Source A occurred after the falling edge of Source B.
Page 158
Chapter 6 Operations and Measurements RIGOL Note: Source A and Source B can be any channel selected from CH1-CH4 and ⚫ Math1-Math4. You can click Measure → Add to enter the sub-menu to set the parameters. The default threshold middle value is 50%. You can click Measure in the ⚫...
Page 159
Chapter 6 Operations and Measurements RIGOL 10. Vavg: indicates the arithmetic average value on the whole waveform or in the gating area. The formula is shown as follows: ∑ Average Wherein, is the measurement result of the i th point, and n is the number of points being measured.
Chapter 6 Operations and Measurements RIGOL 4. Period Area: indicates the area of the first period of waveform on the screen. The unit is V*s. The area of the waveform above the zero reference (namely the vertical offset) is positive, and the area of the waveform below the zero reference is negative.
Page 161
Chapter 6 Operations and Measurements RIGOL In the measurement category area, click to select "Analyze". The following figure is displayed. Select "Counter", "DVM", "Histogram", "Power" (required to install the option DS8000-R-PWR), "Eye", or "Jitter" (required to install the option DS8000-R-JITTER) to enter the corresponding function setting menu.
Page 162
Chapter 6 Operations and Measurements RIGOL --Click Upper to select "Upper(%)" or "Upper(Abs)" first, and then click the key to set the upper limit of the measurement. For details, refer to descriptions in "Parameter Setting Method". When the upper limit is set to be smaller than or equal to the current middle value, a prompt message "Set at lower limit"...
Chapter 6 Operations and Measurements RIGOL Modifying the threshold will affect the measurement results of ⚫ the time, delay and phase parameters. If you select "Manual" under Amp Method, the measurement ⚫ results of other parameters may be affected. "Histogram" and "Max-Min" are the internal measurement ⚫...
Chapter 6 Operations and Measurements RIGOL Click Measure → Statistic to enter the sub-menu of "Statistic". Click Statistic to enable or disable the statistical function. ⚫ Click Reset Stat. to clear the history statistics data and makes statistics again. ⚫...
Chapter 6 Operations and Measurements RIGOL ratio (%). Cursor A is a vertical solid line ( is displayed at the bottom of the screen), ➢ and Cursor B is a vertical dotted line ( is displayed at the bottom of the screen).
Page 166
Chapter 6 Operations and Measurements RIGOL AX: indicates the X value at Cursor A. ⚫ AY: indicates the Y value at Cursor A. ⚫ BX: indicates the X value at Cursor B. ⚫ BY: indicates the Y value at Cursor B.
Page 167
Chapter 6 Operations and Measurements RIGOL vertical spacing between Cursor A and Cursor B (Y cursors) remains unchanged. 4. Select Screen Region When the delayed sweep function is disabled, click More, and "Main" is ⚫ automatically selected under Region and cannot be modified.
Page 168
Chapter 6 Operations and Measurements RIGOL click Set Reference to take the current cursor position as the reference. The current positions of Cursor A and Cursor B are respectively defined as "0%" and "100%". Meanwhile, two cursors (in blue) that cannot be moved are displayed on the screen as the ratio reference position (the ratio position at "0%"...
Chapter 6 Operations and Measurements RIGOL Cursor Measurement Auto Measurement Figure 6-3 Manual Cursor Measurement Example Track Mode In this mode, you can adjust the two pairs of cursors (Cursor A and Cursor B) to measure the X and Y values on two different sources respectively. The points being measured on Cursor A and Cursor B are marked by respectively.
Page 170
Chapter 6 Operations and Measurements RIGOL BY: indicates the Y value at Cursor B. ⚫ △X: indicates the horizontal spacing between Cursor A and Cursor B. ⚫ △Y: indicates the vertical spacing between Cursor A and Cursor B. ⚫ 1/△X: indicates the reciprocal of the horizontal spacing between Cursor A and ⚫...
Chapter 6 Operations and Measurements RIGOL respectively. Then, expand the waveforms horizontally, and you will find that the cursor will track the point that has been marked, as shown in the following figure. Track Measurement (before Horizontal Expansion): Track Measurement (after Horizontal Expansion): XY Mode XY mode is only available when the horizontal time base mode is "XY"...
Chapter 6 Operations and Measurements RIGOL AX: indicates the X value at Cursor A. ⚫ AY: indicates the Y value at Cursor A. ⚫ BX: indicates the X value at Cursor B. ⚫ BY: indicates the Y value at Cursor B.
Page 173
Chapter 6 Operations and Measurements RIGOL Click Indicator continuously to enable or disable the indicator. If it is enabled, one or multiple cursors are displayed on the screen. Before enabling the indicator, you need to enable at least one parameter for auto measurement. The number of cursors will change along with the enabled measurement parameters.
RIGOL Chapter 7 Digital Voltmeter (DVM) and Frequency Counter DS8000-R series oscilloscope provides a built-in digital voltmeter (DVM) and frequency counter, which enable you to perform an accurate measurement, improving user experience in counter and frequency measurement. Contents in this chapter: Digital Voltmeter (DVM) ◼...
Chapter 7 Digital Voltmeter (DVM) and Frequency Counter RIGOL Digital Voltmeter (DVM) The built-in DVM of this oscilloscope provides 3-digit voltage measurements on any analog channel. DVM measurements are asynchronous from the oscilloscope’s acquisition system and are always acquiring. The following methods are available for you to enter the DVM setting menu:...
Chapter 7 Digital Voltmeter (DVM) and Frequency Counter RIGOL To Select the Measurement Source Click Source in the "DVM" setting menu to select the desired source. The analog channel (CH1-CH4) can be selected to be the measurement source. Note: Even if the analog channel (CH1-CH4) is not enabled, you can still perform the DVM measurement.
Chapter 7 Digital Voltmeter (DVM) and Frequency Counter RIGOL Frequency Counter The frequency counter analysis function provides frequency, period, or edge event counter measurements on any analog channel. The following methods are available for you to enter the frequency counter setting...
Chapter 7 Digital Voltmeter (DVM) and Frequency Counter RIGOL To Set Resolution For Period and Frequency measurements, you need to set the readout resolution. Click Resolution, then use the pop-up numeric keypad or scroll with the mouse to set the resolution. The range of resolution is from 3 bits to 6 bits. By default, it is 5 bits.
RIGOL Chapter 8 Power Analysis (Option) DS8000-R series oscilloscope provides an optional power analysis function, which can help you easily analyze the efficiency and reliability of the switch-mode power supplies. With the power analysis function, you can analyze the power quality and output ripple noise of the input power.
Chapter 8 Power Analysis (Option) RIGOL Power Quality By analyzing the power quality, you can test the quality of AC input lines. The specific measurement parameters for power quality analysis include V_RMS, I_RMS, real power, apparent power, reactive power, power factor, reference frequency, phase angle, impedance, voltage crest factor, and current crest factor.
Chapter 8 Power Analysis (Option) RIGOL Click Default, and then the upper value, middle value, and lower value will be ⚫ restored to the defaults. To Set Count Click Count, then use the pop-up numeric keypad to set the number of statistical times for power quality analysis.
Chapter 8 Power Analysis (Option) RIGOL Figure 8-1 Connection Diagram of Power Quality Analysis Ripple Power ripple is an important parameter for evaluating DC power supply, which indicates the ripple quantity of the output DC voltage. The ripple analysis can measure the current value, average value, minimum value, maximum value, standard deviation, and count value of the ripples on the power output terminal.
Chapter 8 Power Analysis (Option) RIGOL To Open or Close the Results Display Window Click Display continuously to enable or disable the display of the results. When enabled, the statistical results will be displayed on the screen, as shown in the figure below.
Chapter 9 Histogram Analysis RIGOL Chapter 9 Histogram Analysis DS8000-R series oscilloscope supports the histogram analysis function, enabling you to judge the trend of waveforms, and quickly locate the potential problems of the signal. Contents in this chapter: To Enable or Disable the Histogram Function ◼...
RIGOL To Enable or Disable the Histogram Function The histogram analysis function supported by the DS8000-R series is available to provide a statistical view of waveforms or measurement results. It can be classified into horizontal histogram, vertical histogram, measurement histogram, and jitter histogram (available only when the sub-menu Histogram under Measure in the Jitter menu is enabled).
Chapter 9 Histogram Analysis RIGOL Jitter: displays the number of times for statistics of the jitter measurement ⚫ results in the forms of columns in the histogram bar graph at the bottom of the graticule. The parameters for the jitter histogram are required to be set in the Jitter menu.
Chapter 9 Histogram Analysis RIGOL Note: The adjustment for the horizontal time base and vertical scale will not affect the time base of the histogram range, but only shows variation with the scale. To Enable or Disable the Statistical Function Click Statistic to enable or disable the statistical function.
Chapter 10 Real-time Eye Diagram and Jitter Analysis (Option) The DS8000-R series oscilloscope provides the real-time eye plot and measurement with the clock recovery function. The flexible and convenient jitter measurement and analysis enable the users to instinctively understand the strong and weak Inter-Symbol Interference in the system, so as to accurately and quickly make deterministic jitter measurement for high-speed serial signal.
Chapter 10 Real-time Eye Diagram and Jitter Analysis (Option) RIGOL Real-time Eye Analysis An eye diagram is a view of a signal. A real- time eye accomplishes this by acquiring data, performing clock recovery, and then superimposing (folding) successive unit intervals within a single plot.
Chapter 10 Real-time Eye Diagram and Jitter Analysis (Option) RIGOL Set the high threshold ⚫ Click HighThres, then use the pop-up numeric keypad to set the high threshold. Note: If you reduce the high threshold to a value below the set middle threshold, the oscilloscope will automatically adjust the high threshold to make it greater than the middle threshold.
Chapter 10 Real-time Eye Diagram and Jitter Analysis (Option) RIGOL 2. Setting method for phase-locked loop (PLL) Click RecoveryType to select "PLL". Set the data rate ⚫ Click Data Rate, then use the pop-up numeric keypad to set the data rate.
Chapter 10 Real-time Eye Diagram and Jitter Analysis (Option) RIGOL Wherein, One: indicates "1" level. Zero: indicates "0" level. Eye Width: indicates the width of an eye diagram. Eye Height: indicates the height of an eye diagram. Eye Amp: indicates the amplitude of an eye diagram.
Chapter 10 Real-time Eye Diagram and Jitter Analysis (Option) RIGOL When disabled, the overlaying plots of waveforms will not be displayed, but only display the updated plots of waveforms for the eye diagram. Jitter Analysis The jitter analysis function is mainly used to analyze the integrity of the high-speed serial signal and measure the variance of a measurement over time.
Chapter 10 Real-time Eye Diagram and Jitter Analysis (Option) RIGOL To Set the Threshold For the threshold setting methods of the jitter, please refer to descriptions in "To Set the Threshold" in the "Real-time Eye Analysis" section. To Set Clock Recovery For setting methods of the clock recovery in the jitter, refer to descriptions in "To Set...
Page 198
Chapter 10 Real-time Eye Diagram and Jitter Analysis (Option) RIGOL Cycle1 Cycle2 1st Measurement = Cycle2 - Cycle1 Cycle3 Cycle4 2nd Measurement = Cycle4 – Cycle3 +Width to +Width ➢ The +Width to +Width jitter measurement subtracts the first cycle's positive pulse width from the second cycle's positive pulse width for the first measurement result.
Chapter 10 Real-time Eye Diagram and Jitter Analysis (Option) RIGOL Jitter trend graph ⚫ The trend graph can display the trend of the jitter measurement results. The data obtained from the waveforms of the same frame are generated to form a curve, which enables users to find out the cause for jitter.
Chapter 10 Real-time Eye Diagram and Jitter Analysis (Option) RIGOL measurement data results to any place for view. To Reset In the jitter setting menu, click Reset to reset the statistics of the jitter measurement result. 10-10 DS8000-R User Guide...
Chapter 11 Protocol Decoding RIGOL Chapter 11 Protocol Decoding You can use the protocol analysis to discover errors, debug hardware, and accelerate development easily, ensuring you to accomplish the projects with high speed and good quality. Protocol decoding is the basis of protocol analysis. Only protocol analyses with correct protocol decoding are acceptable, and only correct protocol decoding can identify more error information.
Chapter 11 Protocol Decoding RIGOL Parallel Decoding Parallel bus consists of clock line and data line. As shown in the figure below, CLK is the clock line, whereas Bit0 and Bit1 are the 0 bit and 1st bit on the data line respectively.
Page 203
Chapter 11 Protocol Decoding RIGOL Click Threshold, then use the pop-up numeric keypad or scroll with the mouse to set the threshold. 3. Bus setting Click Bus to enter the bus setting menu. Set the bus ⚫ Click BUS to select the digital bus for Parallel decoding, as shown in the following table.
Page 204
Chapter 11 Protocol Decoding RIGOL greater than the preset threshold, it is judged as logic "1"; otherwise logic "0". Click Threshold, then use the pop-up numeric keypad or scroll with the mouse to set the threshold. Channel Signal Amplitude Threshold Level...
Page 205
Chapter 11 Protocol Decoding RIGOL click on the icon at the upper-right corner of the table to close the event table. Line Number Time Decode Name Decoded Data Event Table Parallel Bus Figure 11-2 Parallel Decoding Event Table Note: When you adjust the horizontal time base, the waveform displayed ⚫...
Chapter 11 Protocol Decoding RIGOL oscilloscope to "STOP". You can export time and the corresponding decoded data. Click Export, the save setting menu is displayed. You can export the data table of the packets to the internal or external USB storage device (when detected) in CSV format.
Page 207
Chapter 11 Protocol Decoding RIGOL stop bit for each frame of data. Data Bit Start Bit: indicates when to output data. Data Bit: indicates the number of data bits actually contained in each frame of data. Check Bit: used to check whether the data are properly transmitted.
Page 208
Chapter 11 Protocol Decoding RIGOL Use the same method to select the Rx source and set the threshold (only when the Rx source channel is set to an analog channel (CH1-CH4)). Note: The Tx and Rx source channels cannot be set to "OFF" at the same time.
Page 209
Chapter 11 Protocol Decoding RIGOL Package ⚫ Click Package to enable or disable the package display in data transmission. When enabled, several data blocks will be combined based on the separator. Separator ⚫ Click Separator to select the desired package separator in data transmission.
Page 210
Chapter 11 Protocol Decoding RIGOL when the operating status is "STOP", you can select a specified line and view the corresponding decoding information. Note: When you adjust the horizontal time base, the waveform displayed ⚫ on the screen will also change, and the total number of lines containing the decoding information in the event table will also be changed.
Page 211
Chapter 11 Protocol Decoding RIGOL Parity Error ⚫ When a parity error is detected during the decoding, red error report information will be displayed. For example, when "none" is chosen for the parity on the transmitter and "odd" is chosen for the parity on the decoder,...
Chapter 11 Protocol Decoding RIGOL I2C Decoding (Option) I2C serial bus consists of the clock line (SCL) and the data line (SDA). SCL: samples SDA on the rising or falling edge of the clock. SDA: indicates the data channel. Figure 11-5 I2C Serial Bus In the decode setting menu, click Decode1 →...
Page 213
Chapter 11 Protocol Decoding RIGOL about 2 s after you stop modifying the threshold. Set the data channel source and the threshold ⚫ Click SDA to select the desired source of the clock channel. The ➢ available channels include CH1-CH4.
Page 214
Chapter 11 Protocol Decoding RIGOL Open or close the event table: Click Event Table continuously to ➢ enable or disable the event table. When you enable the event table, the following figure is displayed, as shown in Figure 11-6. Click on the icon at the upper-right corner of the table to close the event table.
Page 215
Chapter 11 Protocol Decoding RIGOL fully displayed. At this time, you can view the details in the "Packets" view. If you select "Payload", all data in the specified column will be displayed in the event table. If "…" appears in the specified column of data, it indicates that the decoded data are not fully displayed.
Chapter 11 Protocol Decoding RIGOL related to the value of the horizontal time base) is dispalyed. The detected ACK is 1 SPI Decoding (Option) SPI bus is based on the master-slave configuration and usually consists of chip select line (CS), clock line (CLK), and data line (SDA). Wherein, the data lines include the master input/slave output (MISO) data line and master output/slave input (MOSI) data line.
Page 217
Chapter 11 Protocol Decoding RIGOL 2. Quickly apply SPI trigger settings to SPI decoding Click Copy Trig to copy the SPI trigger settings and apply them to SPI decoding function (set the corresponding SPI decoding parameters automatically). The settings available for copy include CS/Timeout mode, CLK, MISO, Slope, and etc.
Page 218
Chapter 11 Protocol Decoding RIGOL set the threshold of the MOSI data channel. Note: MISO and MOSI source channels cannot be both set to "OFF" at the same time. 5. Data setting Click Settings to enter the data setting menu.
Page 219
Chapter 11 Protocol Decoding RIGOL corresponding line number, time, and error information (MISO and/or MOSI). Note: When the source channel of MISO or MOSI is set to "OFF", information of the data line is not displayed in the data table.
Chapter 11 Protocol Decoding RIGOL indicates that the decoded data are not fully displayed. At this time, you can view the details in the "Packets" view. If you select "Payload", all data in the specified column will be displayed in the event table. If "…"...
Page 221
Chapter 11 Protocol Decoding RIGOL level is displayed on the screen. The dotted line disappears in about 2 s after you stop modifying the threshold. 4. Signal setting Click Settings to enter the signal setting menu. Set baud rate ⚫...
Page 222
Chapter 11 Protocol Decoding RIGOL frame ID, CRC, and error information. Open or close the event table: Click Event Table continuously to ➢ enable or disable the event table. When you enable the event table, the following figure is displayed, as shown in Figure 11-9. You can click...
Page 223
Chapter 11 Protocol Decoding RIGOL column of data, it indicates that the decoded data are not fully displayed. At this time, you can view the details in the "Packets" view. Export: If you select "Packets", then set the operating status of the ➢...
Page 224
Chapter 11 Protocol Decoding RIGOL Parity Error Checksum Error ⚫ If the checksum error is detected, CRC is displayed in red, as shown in the figure below. Checksum Error Sync Error ⚫ If the sync error is detected, SYNC is displayed in red, as shown in the figure below.
Chapter 11 Protocol Decoding RIGOL Sync Error CAN Decoding (Option) The oscilloscope samples the CAN signal at the specified sample position. The oscilloscope will also judge each data point (logic "1" or logic "0") according to the preset threshold level. You need to specify the CAN signal type and sample position for CAN decoding.
Page 226
Chapter 11 Protocol Decoding RIGOL Click Settings to enter the signal setting menu. Set the signal type ⚫ Click Signal to select a signal type that matches the CAN bus signal. The available signal types include CAN_H, CAN_L, Rx, Tx, and Diff.
Page 227
Chapter 11 Protocol Decoding RIGOL Set the display format ⚫ Click Format to select the display format of the bus data. The available display formats of the bus data are "Hex", "Dec", "Bin", and "ASCII". Adjust the vertical position of the bus ⚫...
Page 228
Chapter 11 Protocol Decoding RIGOL Note: When you adjust the horizontal time base, the waveform displayed ⚫ on the screen will also change, and the total number of lines containing the decoding information in the event table will also be changed.
Chapter 11 Protocol Decoding RIGOL or ASCII), displayed as a green patch. CRC (Cyclic Redundancy Check): expressed in Hex, displayed in ⚫ yellow-green. When errors occur, it is displayed as a red patch. ACK (Acknowledgement): when effective, displayed as a light yellow-green ⚫...
Page 230
Chapter 11 Protocol Decoding RIGOL Click Threshold, then use the pop-up numeric keypad or scroll with the ⚫ mouse to set the threshold of the source channel. When you modify the threshold of the channel, a dotted line displaying the current threshold level is displayed on the screen.
Page 231
Chapter 11 Protocol Decoding RIGOL display formats of the bus data are "Hex", "Dec", "Bin", and "ASCII". Adjust the vertical position of the bus ⚫ Click Position, and then place the mouse cursor over the menu to scroll with the mouse or drag the decode label at the left side of the screen to adjust the vertical display position of the bus.
Page 232
Chapter 11 Protocol Decoding RIGOL on the screen will also change, and the total number of lines containing the decoding information in the event table will also be changed. The displayed decoded data information in the bus is related to the ⚫...
Chapter 11 Protocol Decoding RIGOL TCRC (Tail Cyclic Redundancy Check): expressed in Hex, displayed as a ⚫ yellow-green patch. When CRC errors occur, it is displayed as a red patch. TSS Sync Frame Frame PL HCRC CYC Data TCRC I2S Decoding (Option) The oscilloscope samples the I2S signal and judges each data point as logic "1"...
Page 234
Chapter 11 Protocol Decoding RIGOL CH1-CH4. Click WS Thre below WS, then use the pop-up numeric keypad or ➢ scroll with the mouse to set the threshold of the WS signal. When you modify the WS threshold, a dotted line displaying the current threshold level is displayed on the screen.
Page 235
Chapter 11 Protocol Decoding RIGOL Set the display format ⚫ Click Format to select the display format of the bus data. The available display formats of the bus data are "Hex", "Dec", "Bin", and "ASCII". Adjust the vertical position of the bus ⚫...
Chapter 11 Protocol Decoding RIGOL on the screen will also change, and the total number of lines containing the decoding information in the event table will also be changed. The displayed decoded data information in the bus is related to the ⚫...
Page 237
Chapter 11 Protocol Decoding RIGOL 1. Enable or disable the bus Click Bus Status continuously to enable or disable the decoding function. 2. Quickly apply 1553B trigger settings to 1553B decoding Click Copy Trig to copy the 1553B trigger settings and apply them to 1553B decoding function (set the corresponding 1553B decoding parameters automatically).
Page 238
Chapter 11 Protocol Decoding RIGOL click on the icon at the upper-right corner of the table to close the event table. Besides, when the operating status is "STOP", select a specified line and view the corresponding decoding information. Line Number Time Word Type Data...
Page 239
Chapter 11 Protocol Decoding RIGOL Export: If you select "Packets", you can export time and the ➢ corresponding decoded data. Set the operating status of the oscilloscope to "STOP". Click Export, the save setting menu is displayed. You can export the data table of the packets to the internal or external USB storage device (when detected) in CSV format.
Chapter 12 Reference Waveform RIGOL Chapter 12 Reference Waveform DS8000-R series oscilloscope provides 10 reference waveform positions (Ref1-Ref10). In the actual test process, you can compare the signal waveform with the reference waveform to locate the failure. Contents in this chapter: To Enable Ref Function ◼...
Chapter 12 Reference Waveform RIGOL To Enable Ref Function Click on the function navigation icon at the lower-left corner of the screen to open the function navigation. Then click on the "Ref" icon to enable the reference waveform function. When the Ref function is enabled, you can select a different color for each reference...
Chapter 12 Reference Waveform RIGOL To Save to Internal Memory Click SaveToRef to save the displayed waveform for the specified source to the internal memory as the reference waveform. Note: This operation only saves the reference waveform to the volatile memory, and the waveform will be cleared at power-off.
Chapter 12 Reference Waveform RIGOL Color Setting DS8000-R series oscilloscope provides five colors (gray, green, blue, red, and orange) to mark the reference waveforms of different channels in order to distinguish the reference waveforms of different reference waveform channels. Click Color to select the color of the reference waveform of the channel. The GND icon and the label at the left side of the waveform of the currently selected channel will be filled with the specified color.
"Store and Load" to import the reference waveform to the instrument and display it on the screen. Note: DS8000-R series oscilloscope only supports the flash memory USB storage device of FAT32 format. Binary Data Format (.bin) Binary data format stores waveform data in binary format and provides data headers that describe these data.
Page 246
Chapter 12 Reference Waveform RIGOL 2. Waveform Header It is possible to store several waveforms in the file. Each stored waveform has a waveform header. When several channels are stored, each channel can be considered as a separate waveform. The waveform header contains the information about the type of waveform data that are stored following the waveform data header.
Page 247
A 2-byte short integer, indicating the number of bytes per data point. Buffer Size A 4-byte integer, indicating the size of the buffer required to hold the data points. Note: DS8000-R series does not support the digital channel. DS8000-R User Guide 12-7...
During the product design and manufacturing process, you usually need to monitor the variations of the signal or judge whether the product is up to standard. The pass/fail test function of DS8000-R series oscilloscope can accomplish this task perfectly. Contents in this chapter: To Enable or Disable the Pass/Fail Test ◼...
Chapter 13 Pass/Fail Test RIGOL To Enable or Disable the Pass/Fail Test Function Click on the function navigation icon at the lower-left corner of the screen to open the function navigation. Then, click on the "Pass/Fail" icon to open the pass/fail test setting menu.
Chapter 13 Pass/Fail Test RIGOL To Create a Mask Click Mask → Create to self-define the mask of the pass/fail test. Click Range to select the mask range. You can select "Screen" or "Cursor" as the mask region. The default is "Screen".
Chapter 13 Pass/Fail Test RIGOL To Set the Output Form of the Test Results Click Option to enter the "Option" menu. You can set what the oscilloscope will execute when test results are detected according to your needs. Set the output event and Aux output ⚫...
Chapter 13 Pass/Fail Test RIGOL Statistics Reset Click Reset to clear the current test results and execute statistics on the test results again. DS8000-R User Guide 13-5...
Chapter 14 Waveform Recording & Playing RIGOL Chapter 14 Waveform Recording & Playing Waveform recording & playing function can play the recorded waveforms of the analog input channels (CH1-CH4), enabling you to analyze the waveforms better. Note: The horizontal time base must be set to "YT" mode during waveform recording.
Chapter 14 Waveform Recording & Playing RIGOL Common Settings Click on the function navigation icon at the lower-left corner of the screen to open the function navigation. Then, click on the "Record" icon to open the waveform recording function setting menu.
Chapter 14 Waveform Recording & Playing RIGOL 4. Set Transition Click Jump To continuously to select to jump to the recorded end frame ( Last) or the recorded start frame ( First). For settings of the start and end frames, refer to descriptions in "Play Options".
Chapter 14 Waveform Recording & Playing RIGOL Horizontal Direction. Therefore, the maximum number of frames of waveform recording is also related to the "Sample Rate" and "Horizontal Time Base". This oscilloscope provides ceaseless recording for a maximum of 450,000 frames of real-time waveforms.
Chapter 15 Search and Navigation Function RIGOL Chapter 15 Search and Navigation Function The search function allows you to search for relevant events based on the search condition that you set. The navigation function includes the recording & playing navigation, time navigation, and event navigation.
Chapter 15 Search and Navigation Function RIGOL Search Function The search function enables you to search the channel edge, Pulse trigger, Runt trigger, Slope trigger, RS232 trigger, I2C trigger, or SPI trigger. Click on the function navigation icon at the lower-left corner of the screen to open the function navigation.
Chapter 15 Search and Navigation Function RIGOL SPI: Click Type to select "SPI" as the search type. For SPI Set menu settings, ⚫ refer to descriptions in "SPI Trigger (Option)". Click Threshold to enter the threshold setting menu. Use the pop-up numeric keypad or scroll with the mouse to set the thresholds of CLK, MISO, and CS.
Chapter 15 Search and Navigation Function RIGOL To Navigate Click Navigation, then use the pop-up numeric keypad or scroll with the mouse to set the event No. to navigate the event. You can also use the Web Control method to make navigations at a step of 1.
Page 263
Chapter 15 Search and Navigation Function RIGOL Event Navigation ⚫ When you enable the navigation function and complete the event search, you can use the navigation combination keys to quickly navigate the specific event in the event mark table. Click the Pre key to navigate to the previous event (the serial number in the mark table decreases);...
Chapter 16 Display Control RIGOL Chapter 16 Display Control In the display control setting menu, you can set the parameters such as the waveform display type, persistence time, intensity, grid type, grid brightness, and etc. Contents in this chapter: To Select the Display Type ◼...
Chapter 16 Display Control RIGOL To Select the Display Type Click on the function navigation icon at the lower-left corner of the screen to open the function navigation. Then, click on the "Display" icon to open the display setting menu. Click Type continuously to set the waveform display mode to "Vector"...
Chapter 16 Display Control RIGOL To Set the Screen Grid Click Grid to set the grid type. You can select "FULL", "HALF", "NONE", or "IRE". FULL: turns the background grid and coordinate on. ⚫ HALF: turns the background grid off.
Chapter 16 Display Control RIGOL Color Grade Click More → Color Grade to enable or disable the color grade display of the analog channel waveforms on the screen. By default, it is set to "OFF". When enabled, different colors are displayed on the screen to indicate the times of data acquisition or acquisition probability.
Chapter 17 Function/Arbitrary Waveform Generator (Option) DS8000-R series has an optional built-in single-channel, 25 MHz signal source, which integrates the signal source and the oscilloscope into one, providing great convenience for engineers who need to use the signal source and oscilloscope at the same time.
[GEN] connector on the rear panel, and enter the Function/Arbitrary Waveform Generator setting interface. DS8000-R series' built-in Function/Arbitrary Waveform Generator can output a variety of basic waveforms, including Sine, Square, Ramp, Pulse, DC, Noise, Sinc, Exp.Rise, Exp.Fall, ECG, Gauss, Lorentz, Haversine, and Arb.
Chapter 17 Function/Arbitrary Waveform Generator (Option) RIGOL 4. Set the start phase Click Start Phase, then use the pop-up numeric keypad or scroll with the mouse to set the start phase of the current signal. Its available range is from 0° to 360°.
Chapter 17 Function/Arbitrary Waveform Generator (Option) RIGOL Click Settings → Symmetry, then use the pop-up numeric keypad or scroll with the mouse to set the symmetry of the ramp waveform. The settable range is from 1% to 100%. To Output Pulse Click Wave to select "Pulse".
Chapter 17 Function/Arbitrary Waveform Generator (Option) RIGOL To Output Noise Click Wave to select "Noise". At this time, you can set the amplitude/high level, offset/low level, and impedance of the noise signal. For detailed setting methods, refer to relevant contents in "To Output Sine".
Chapter 17 Function/Arbitrary Waveform Generator (Option) RIGOL Exp.Fall Click Wave to select "Exp.Fall". At this time, you can set the parameters for the Exp.Fall waveform (as shown in the figure below). For setting methods, refer to descriptions in "To Output Sine".
Chapter 17 Function/Arbitrary Waveform Generator (Option) RIGOL Figure 17-7 Gauss Lorentz Click Wave to select "Lorentz". At this time, you can set the parameters for the Lorentz waveform (as shown in the figure below). For setting methods, refer to descriptions in "To Output Sine".
Figure 17-9 Haversine To Output the Arbitrary Waveform DS8000-R series oscilloscope allows you to define the arbitrary waveform and save it to the internal or external memory. The user-defined waveform can contain 2 to 16,384 data points (i.g. 2 pts to 16 kpts).
Chapter 17 Function/Arbitrary Waveform Generator (Option) RIGOL management interface, select the waveform from the internal memory or the external memory. The waveform file is suffixed with "*.arb". Then, click Load to load the selected waveform. For details, refer to descriptions in "Store and Load".
Chapter 17 Function/Arbitrary Waveform Generator (Option) RIGOL number of initial points. Voltage ➢ Click Voltage, then use the pop-up numeric keypad or scroll with the mouse to set the voltage value of the current point. Its available range is from -2.5 V to +2.5 V.
"*.arb" format (you can overwrite the original file or save the currently edited waveform again). Modulation The built-in Function/Arbitrary Waveform Generator of DS8000-R series oscilloscope supports amplitude modulation (AM), frequency modulation (FM), and frequency-shift keying modulation (FSK). A modulated waveform consists of a carrier...
Page 280
Chapter 17 Function/Arbitrary Waveform Generator (Option) RIGOL waveform and a modulating waveform. The carrier waveform is the waveform output from the Function/Arbitrary Waveform Generator, and the modulating signal can be the built-in sine, square, triangle waveform, or noise signal. Click Settings → Type to select "Modulation".
Page 281
Chapter 17 Function/Arbitrary Waveform Generator (Option) RIGOL percentage. Click AM Depth, then use the pop-up numeric keypad or scroll with the mouse to set the AM depth of the modulating waveform. The available range is from 0% to 120%. When it is set to 0%, the output amplitude is half of the carrier amplitude.
Generator outputs from the start frequency to the end frequency at a specified sweep time. DS8000-R series supports 3 sweep modes: Linear, Log, and Step. You are allowed to set the parameters such as Start Keep, End Keep, and Return Time.
Page 283
Chapter 17 Function/Arbitrary Waveform Generator (Option) RIGOL Set start frequency and end frequency ⚫ Start frequency and end frequency indicate the upper and lower limits of the sweep frequency. The Function/Arbitrary Waveform Generator always sweeps from the start frequency to the end frequency, and then returns back to the start frequency.
By default, it is 0 s. Its available range is from 0 s to 500 s. Burst The built-in Function/Arbitrary Waveform Generator of DS8000-R series oscilloscope supports outputting the burst waveforms with a specified number of cycles. It supports using internal and manual trigger sources to control the output of the burst waveforms.
Page 285
Chapter 17 Function/Arbitrary Waveform Generator (Option) RIGOL 2. Set the Number of Cycles When the burst type is set to "N Cycle", you need to set the number of cycles. Click Cycles, then use the pop-up numeric keypad or scroll with the mouse to set the number of cycles.
Chapter 18 Store and Load RIGOL Chapter 18 Store and Load You can save the current settings, waveforms, screen image, and parameters of the oscilloscope in internal memory or external storage device (such as USB storage device) in various formats and load the stored settings or waveforms when needed.
Chapter 18 Store and Load RIGOL Storage System Click on the function navigation icon at the lower-left corner of the screen to open the function navigation. Then click on the "Storage" icon to enter the store and load setting interface. It provides two USB interfaces on the front panel and two USB HOST interfaces on the rear panel, which can all be connected to the USB storage device for external storage.
Page 289
Chapter 18 Store and Load RIGOL After a USB storage device (FAT32 format, flash memory) is connected, you can control the instrument through the Web Control page. Click Quick at the right section of the operation interface to save the file. You can select to save to the internal memory or the external USB storage device.
Chapter 18 Store and Load RIGOL refer to descriptions in "To Create a Folder". Click Storage → More → Auto Name to select "ON", then the filename is generated automatically. If the filename that you input is the same as the existing filename, a prompt message will be displayed, reminding you that the existing file will be overwritten and asking you whether to continue or not.
Page 291
Chapter 18 Store and Load RIGOL folder. For details, refer to descriptions in "To Create a Folder". 5) Click File Name to name the setup file for storage. For details, refer to descriptions in "To Create a Folder". Click Storage → More → Auto Name to select "ON", then the filename is generated automatically.
Chapter 18 Store and Load RIGOL External Storage and Load Before external storage and recall, ensure that the USB disk is properly connected. The external memory supports image saving, waveform saving, setup saving, waveform loading, and setup loading. 1. Save the Specified Type of File to the External USB Storage Device...
Chapter 18 Store and Load RIGOL Figure 18-1 Disk Management Interface Execute the following operations through the disk management menu: To Select a File Type ⚫ To Create a Folder ⚫ To Delete a File or Folder ⚫ To Copy and Paste a File or Folder ⚫...
Page 294
Chapter 18 Store and Load RIGOL Figure 18-2 To Create a Folder This oscilloscope supports Chinese/English input method. The length of the folder name is limited to 22 bytes (one Chinese character occupies two bytes). The following part introduces how to input a folder name using Chinese/English input method.
Page 295
Chapter 18 Store and Load RIGOL 2. Clear the Name Input Area If there is no character in the "Name Input Area", please go to Step 3. If there are characters in the "Name Input Area", click the Delete key to delete all the characters in the name input area in order.
Page 296
Chapter 18 Store and Load RIGOL Name Input Area Chinese Character Selection Area Pinyin Input Area Virtual Keypad Go to Previous Go to Page Next Page Upper/Lower Case Switch Input Method Switch 1. Chinese Input Method If the current input method is "中/繁/En", please go to Step 2. If the current input method is "En/中/繁"...
Chapter 18 Store and Load RIGOL the "Pinyin Input Area". To delete the input characters, select and click the delete key in the virtual keypad. To modify the input characters, delete the unwanted characters and input the desired characters again. If the character to...
Chapter 18 Store and Load RIGOL If the destination directory has the same file or folder that you want to paste, then a prompt message " File or directory exists" is displayed. You are not allowed to execute the copy and paste operation.
Page 299
Chapter 18 Store and Load RIGOL Table 18-1 Factory Settings Parameter Factory Settings Horizontal Vertical Acquire Trigger Display AWG (Gen) Cursor Storage Utility Math Protocol Decoding (Decode) Horizontal Horizontal Time 1 μs Base Horizontal Position Delayed Sweep Timebase Mode Fine...
Page 300
Chapter 18 Store and Load RIGOL Anti-Aliasing Trigger Trigger Type Edge Trigger Source Selection Edge Type Rising Trigger Mode Auto Trigger Coupling Trigger Holdoff 8 ns Noise Rejection Display Display Type Vector Persistence Time Intensity Grid FULL Brightness Show Scale...
Page 301
Chapter 18 Store and Load RIGOL Track AX Source BX Source -1 μs 1 μs Track -233.3 mV 100 mV -233.3 mV -100 mV Measure Indicator Storage Auto Name Header Save Image Format *.png Invert Color Color Window Show Save Wave...
Page 302
Chapter 18 Store and Load RIGOL Y Mask 0.48 div Load File Type *.pf Save File Type *.pf File Name RigolDS0 Window Show Information Aux Output Output Event Fail Polarity Positive Pulse 1 μs Err Action None Record Record Record...
Page 303
Chapter 18 Store and Load RIGOL Ink Saver Printer HP/Laserjet Email Attachment Screen Quick Settings Operation Save Image Format *.png Invert Color Color Math Invert Expand Display Label Library Label Editing Operation SourceA SourceB Offset Scale 500 mV Operation SourceA...
Page 304
Chapter 18 Store and Load RIGOL Scale 2 dBV Unit dBm/dBV Start-End Start Freq 0 Hz Stop Freq 10 MHz Window Function Hanning Peak Search Peak Number Threshold 5.5 dBV Excursion 1.8 dBV Table Order Amp Order A&&B Operation SourceA...
Page 306
Chapter 18 Store and Load RIGOL Operation Source Offset Scale 500 mU Invert Low Pass Operation Source Offset Scale 500 mV ωc 50 MHz Invert High Pass Operation Source Offset Scale 500 mV ωc 50 MHz Invert Band Pass Operation...
Page 307
Chapter 18 Store and Load RIGOL Protocol Decoding (Decode) Bus Type Parallel Bus Status Format Label Event Table Noise Reject RS232 Bus Status Baud 9.6 kbps Threshold Polarity Endian Data 8 bits Stop Bit 1 bit Parity None Package Separator...
Page 308
Chapter 18 Store and Load RIGOL Source Threshold Baud 19.2 kbps Parity Without Version Both Bus Status Source Threshold Signal CAN_L Baud 1 Mbps Sample Position FlexRay Bus Status Source Threshold Channel Baud 10 Mbps Signal Sample Position Bus Status...
Page 309
Chapter 18 Store and Load RIGOL VOffset Color Orange Label Display Library Default Label REF1 Note : This function is only available for the model installed with the DS8000-R-AWG option. DS8000-R User Guide 18-23...
Chapter 19 System Utility Function Setting RIGOL Chapter 19 System Utility Function Setting In the system function setting menu, you can set the parameters for the remote interface and the system-related parameters. Contents in this chapter: Remote Interface Configuration ◼...
Chapter 19 System Utility Function Setting RIGOL Remote Interface Configuration DS8000-R series can communicate with the PC via the USB, LAN, or GPIB (requiring to work with RIGOL's USB-GPIB interface converter) interface. Before using the remote interfaces, configure the corresponding interface according to the introductions in the following section.
Page 313
Chapter 19 System Utility Function Setting RIGOL Disconnected! ⚫ DHCP Config Failed! ⚫ Read Status Fail! ⚫ Connected! ⚫ Invalid IP! ⚫ IP lost! ⚫ Please wait... ⚫ IP Configuration Type The configuration type of the IP address can be DHCP, Auto IP, or Static IP. For different IP configuration types, the configurations for IP address and other network parameters are different.
Page 314
Chapter 19 System Utility Function Setting RIGOL 2. Set the Subnet Mask The format of the subnet mask is nnn.nnn.nnn.nnn; wherein, the range of "nnn" is from 0 to 255. You are recommended to ask your network administrator for a subnet mask available.
Chapter 19 System Utility Function Setting RIGOL MAC Address For each oscilloscope, the MAC address is unique. When assigning the IP address for the oscilloscope, the system uses the MAC address to identify the instrument. VISA Address Displays the VISA address currently used by the oscilloscope.
Chapter 19 System Utility Function Setting RIGOL To Set HDMI Sets the status and parameters of the HDMI video output interface on the rear panel. Note that only when the HDMI interface is connected, can this menu be enabled. Click HDMI to enter the HDMI setting menu.
Chapter 19 System Utility Function Setting RIGOL 3. To Set the Local Port Click Local Port, and then the numeric keypad is displayed. Use the numeric keys to input the local port. The range of the port number is from 1 to 65535.
Chapter 19 System Utility Function Setting RIGOL System-related Beeper When the beeper is enabled, you can hear the sound of the beeper when the following conditions occur: Press a key on the front panel ⚫ Use the mouse to operate on the screen ⚫...
Chapter 19 System Utility Function Setting RIGOL Power Status Use the power line to connect the oscilloscope to the AC power and then turn on the power switch to power on the instrument. You can set the power status after it is powered on.
If you connect the oscilloscope to the network via the LAN interface, every Monday you power on the instrument, the oscilloscope will check whether the latest version of the upgrade software is available on the RIGOL official website. If yes, a red spot appears at the upper-left corner of the Online upgrade menu, prompting you that the latest upgrade version is available and you can perform online upgrade.
Chapter 19 System Utility Function Setting RIGOL Figure 19-3 Self-calibration Interface Click Start, and then the oscilloscope will start to execute the self-calibration ⚫ program. After the self-calibration program is launched, the Exit menu does not function. ⚫ You can double-click any place on the screen to stop the self-calibration.
Page 322
Chapter 19 System Utility Function Setting RIGOL DS8000-R series supports printing the whole screen to the network printer. You can connect the oscilloscope to the printer directly via the USB DEVICE interface on the rear panel. Then, you can set the print parameters on the oscilloscope to control the printer to output the corresponding picture.
Chapter 19 System Utility Function Setting RIGOL Click Ink Saver continuously to enable or disable the ink saver setting. If disabled, you need to set Color. Click Color continuously to select "Gray" or "Color". Email This oscilloscope supports sending files via emails. Click Utility → More → Email to enter the email setting menu.
Chapter 19 System Utility Function Setting RIGOL Click Default to restore the settings of receiver and mail settings to defaults. 2. Set the Receiver Click Receiver to display the receiver input interface, and you can edit the email address of the receiver. For detailed input methods of the receiver email address, refer to descriptions in "To Create a Folder".
Page 325
Chapter 19 System Utility Function Setting RIGOL Click Operation to select "Save Image". Image Format ⚫ Click Format to select the image format. The image formats include "*.png", "*.bmp", "*.jpg", and "*.tif". Invert ⚫ Click Invert continuously to enable or disable the invert function.
Page 326
Chapter 19 System Utility Function Setting RIGOL Operation Type ⚫ Click Operation to select "All Measure". All Measurement ⚫ Click All Measure to select the desired measurement channel. The available measurement channels include OFF and CH1-CH4. 5. Statistics Reset When the Quick shortcut key is set to "Stat Reset", click Quick at the right section of the operation interface in the Web Control page to make statistics reset of measurement or pass/fail test reset.
The file types include "*.png", "*.bmp", "*.jpg", and "*.tif". If you select "Text" under Screen Saver, click Text, and then the filename ⚫ input interface is displayed, e.g. inputting "RIGOL Scope". For details, refer to descriptions in "To Create a Folder". 2. Set the Wait Time Click Time to Start to set the screen saver time.
Chapter 19 System Utility Function Setting RIGOL System Time The system time is displayed at the lower-right side of the screen in "hh:mm (hour:minute)" format. When you save the waveform, the output file will contain the time information. Click Utility → More → More → Time to open the time setting menu.
Page 329
Chapter 19 System Utility Function Setting RIGOL menu. Click Keep Impedance continuously to enable or disable the impedance keep function. If you select ON, after you click Default, the impedance value that you set remains unchanged and other settings will be restored to the default settings.
Remote Control via GPIB ◼ This chapter will illustrate how to use RIGOL's Ultra Sigma software to remotely control the oscilloscope via various interfaces. Note: When communicating with the PC via GPIB, the oscilloscope does not support large data transmission operation such as screen shot and waveform reading.
Chapter 20 Remote Control RIGOL Remote Control via USB 1. Connect the device Use a USB cable to connect the oscilloscope (USB DEVICE interface) with the PC (USB HOST interface). 2. Install the USB driver This oscilloscope is a USB-TMC device. After you connect the oscilloscope to the PC properly and power it on for the first time (the oscilloscope will be automatically configured with the USB interface).
Page 333
Chapter 20 Remote Control RIGOL DS8000-R User Guide 20-3...
Page 334
PC via the USB interface. You can also click to search for the resource. 4. View the device resource The searched instrument resource will be under the directory of "RIGOL Online Resource", with the model of the instrument and the USB interface information being displayed as follows.
Page 335
Chapter 20 Remote Control RIGOL 5. Control the instrument remotely Right-click the resource name "DS8204-R (USB0::0x1AB1::0x0516::DS8R820400003::INSTR)" and select "SCPI Panel Control" to turn on the remote command control panel, through which you can send commands and read data. DS8000-R User Guide...
4. View the device resource The resources found will appear under the "RIGOL Online Resource" directory. For example, DS8204-R (TCPIP::172.16.3.14::INSTR). 5. Control the instrument remotely Right-click the resource name "DS8204-R (TCPIP::172.16.3.14::INSTR)"...
Chapter 20 Remote Control RIGOL select "LXI-Web"). Various important information about the instrument (including the model, manufacturer, serial number, description, MAC address, and IP address) will be displayed on the webpage. You can also directly input the IP address of the oscilloscope in the address bar of the PC browser to load the LXI webpage.
Page 338
5. View the device resource The searched instrument resource will be under the directory of "RIGOL Online Resource", as shown in the following figure. 6. Control the instrument remotely Right-click the resource name "DS8204-R (GPIB0::18::INSTR)", and select...
The commonly encountered failures of the oscilloscope and their solutions are listed below. If the following problems occur, locate and resolve the problems according to the following steps. If the problems still persist, contact RIGOL and provide your instrument information to us.
10 GE Communication Option High-speed data communication option DS8000-R HSDC Software Tool Software development kit (open source, available to —— download from RIGOL official website) Bundle Option Function and application bundle option, including DS8000-R-COMP, DS8000-R-EMBD, DS8000-R-AUTO, DS8000-R-BND DS8000-R-FLEX, DS8000-R-AUDIO, DS8000-R-AERO,...
Page 342
Built-in power analysis (required to purchase the RPA246 DS8000-R-PWR phase deviation correction jig) Real-time eye diagram and jitter analysis (option, only DS8000-R-JITTER available for DS8104-R and DS8204-R) Note: For all the accessories and options, please contact the local office of RIGOL. 22-2 DS8000-R User Guide...
If a product proves defective within the warranty period, RIGOL guarantees free replacement or repair for the defective product. To get repair service, please contact with your nearest RIGOL sales or service office. There is no other warranty, expressed or implied, except such as is expressly set forth herein or other applicable warranty card.
Need help?
Do you have a question about the DS8000-R Series and is the answer not in the manual?
Questions and answers