Table of Contents
Advertisement
Quick Links
Advertisement
Table of Contents

Related Manuals for Teledyne T3SP Series


Summary of Contents for Teledyne T3SP Series
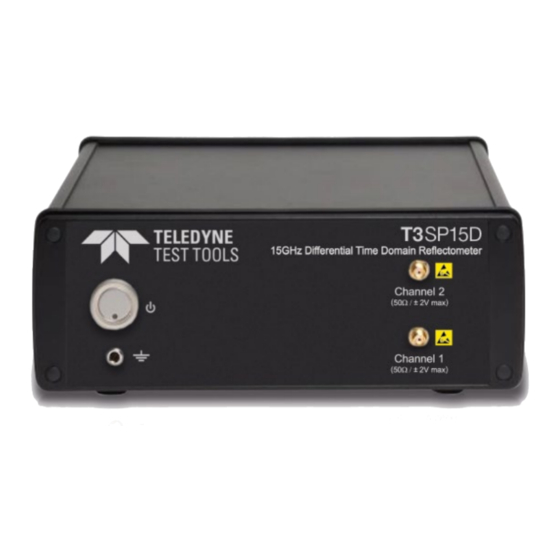
- Page 1 Operator’s Manual T3SP-Series Time Domain Reflectometer...
- Page 2 Relating to the following release versions: Software Version Rev. 1.6.0 © 2018 Teledyne Test Tools is a brand and trademark of Teledyne LeCroy Inc. All rights reserved. Specifications, prices, availability and delivery subject to change without notice. Product brand or brand names are trademarks or requested trademarks of their respective holders.
-
Page 3: Table Of Contents
T3SP-Series Operator’s Manual Contents 1 General Information about the T3SP Series 1.1 Intended Application ..... . 1.2 Disclaimer ...... - Page 4 T3SP-Series Operator’s Manual 5 Measurement Modes 5.1 Impedance Measurements (Modes TDR & DTDR) ..35 5.1.1 General Recommendations ....35 5.1.2 Reference Measurement ....38 5.1.3 Impedance Measurement Properties Window .
- Page 5 T3SP-Series Operator’s Manual 12 Safety Instructions 12.1 Operating Environment ....67 12.2 Power ......67 12.3 Safety Symbols &...
-
Page 6: General Information About The T3Sp Series
T3SP-Series Operator’s Manual 1. General Information about the T3SP Series The T3SP series is developed to perform true differential TDR measurement. Complementary step signals with an ultra-wide bandwidth are emitted and acquired by the instrument. The signals are applicable to external compo- nents via the coaxial connectors. - Page 7 T3SP-Series Operator’s Manual • USB 2.0 cable, Mini USB-B to USB-A • External power supply: input 100-240VAC, output 24VDC, max. 3A • Seunis installation program • Integrated ESD-protection module • Metal or plastic storage and transport case (optional) • ESD-protection kit •...
-
Page 8: Commissioning
T3SP-Series Operator’s Manual 2. Commissioning Before the first start of operation you have to install the provided software (on old Windows XP systems also the USB-driver has to be installed). Please follow the installation instructions given by the software. 2.1 General Remarks The Seunis measurement software was designed to make series measure- ments and therefore the central element of the main window is a spreadsheet- like table. -
Page 9: Software Startup
The device must be turned on to operate the device, because the software queries the device for available measurement modes. Alternatively the soft- ware can be started with the Teledyne Viewer Key. 2.4 Power Supply & USB Connection To enable measurements, connect the USB port of the instrument to a com- puter. -
Page 10: Description Of The Application Windows
T3SP-Series Operator’s Manual CTRL-U or via the menu Extras. If you are not able to establish a con- nection, check the USB-drivers in your device manager. • Like other RF-measurement systems, the device needs some time to warm-up for performing stable and accurate measurements. During the warm-up phase, measurements are prohibited. -
Page 11: Oscilloscope Window
T3SP-Series Operator’s Manual The Main Window (see Fig. 1) allows the user to organize the measurement campaigns. The spreadsheet format is used to prepare sample lists which can be worked off accordingly. The main functionality for organizing the data, results and further common tasks (e.g. saving, loading, exporting of data) can be controlled via the main menu. - Page 12 T3SP-Series Operator’s Manual General Remark The Oscilloscope Window gives the user an overview over the current device setting (average, time base settings) and shows the real-time (”live”) TDR trace(s), similar to an oscilloscopes screen. If a measured sample is selected in the main window additionally the corresponding uncorrected TDR trace(s) is/are displayed.
-
Page 13: Result Visualization Window
T3SP-Series Operator’s Manual Zooming Zooming functions are available via Position, Zoom & Fit buttons. The zoom can be changed via the mouse (use mouse-wheel or hold left mouse button pressed down while dragging). A ”fit-to-screen” is applied by a double right- click in the diagram. - Page 14 T3SP-Series Operator’s Manual General Remark Most measurement modes yield more information than can be displayed in the yellow result field of the Main Window. To display the specific results more in detail the Result Visualization Window can be used. The different kinds of visualizations depend on the currently selected measurement mode and are therefore described in the specific sections.
- Page 15 T3SP-Series Operator’s Manual diagram in the cursor value field. If two cursors are set up for a trace the delta value is displayed as well. The cursor value field can be double-clicked to open an overview tabular. Pressing the CTRL key and clicking a cursor again deletes the cursor. Alter- natively all cursors can be cleared by pressing the CLR button in the toolbar.
- Page 16 T3SP-Series Operator’s Manual Please note: the Touchstone export is available for S-parameter modes only. Data can be saved to the widely spread touchstone format. Each selected sample is ex- ported into an individual file. The frequency data points are exported in MHz, the scattering parameter values as magnitudes and degrees.
-
Page 17: Options Dialog
T3SP-Series Operator’s Manual Change x/y-mask Change the tolerance mask x- and y-limits to current axis for all displayed traces (TDR/DTDR mode only) Set reference manually Change the reference position (point in time to be indicated in nanoseconds) to a user-defined value. Make sure the current reference measurement is not empty (see section 5.1.2). - Page 18 T3SP-Series Operator’s Manual Fig. 4: The Common tab in the Options Dialog Device tab: • In most cases the software is started with a connected device and it is intended to connect automatically. However if the software shall be started with a Viewer Key it is possible to deactivate the Auto-Connect on Startup.
- Page 19 T3SP-Series Operator’s Manual box can be checked. Usually this option should be unchecked. • The last valid TTC is loaded automatically in case the corresponding box is checked. • In the ESD auto-protection field the number of seconds is set after which the device switches on the ESD-protection automatically.
-
Page 20: Software Operation Modes
Seunis program is closed. Use the ALT-P shortcut to reactivate it immediately. In case you have lost your password please contact Teledyne LeCroy support. 2.6 Software Operation Modes The software provides three different operation modes; sample list mode (default), macro mode and quick mode. - Page 21 T3SP-Series Operator’s Manual and over again, the macro mode can be used. Activate this operation mode by clicking the macro mode item in the toolbar. Please note: this mode can only be activated if valid macros are defined, ei- ther by double-clicking the add-macro item or by loading a macro definition file.
-
Page 22: Quick Operation Mode
T3SP-Series Operator’s Manual Macro Properties: Select a Measurement Mode (see chapter 5) for the currently selected item. In case the selected mode requires impe- dance property settings, the Impedance Measurement Properties Win- dow is opened (cp. section 5.1.3). When performing measurements in macro operating mode, a descriptor in- put dialog is raised after completion of the first macro measurement. -
Page 23: Login With Limited User Privileges
T3SP-Series Operator’s Manual Please note: the quick-measurements are volatile and there is no possibil- ity to store quick-measurements by pushing them into the sample-list or to export the data. 2.7 Login with limited User Privileges It is possible to deny a full access to all features of the software. ”Limited” users can only perform basic actions (e.g. -
Page 24: Quick Start Guide
T3SP-Series Operator’s Manual 3. Quick Start Guide This chapter is intended to enable the user to quickly perform a standard single-ended TDR measurement. Although the standard TDR-measurement mode is probably not always the first choice for engineers, it is highly recom- mended to work through this chapter, because a great deal of functionality described here is applicable to other measurement modes as well. - Page 25 T3SP-Series Operator’s Manual CTRL-ALT-W can be used. Any user-defined setting can be saved as default via View Set default Arrangement. The shortcut ALT-W now can be used to restore the default arrangement (also available after a software restart). Click the toolbar button to make sure you are in the Sample-List Operation Mode.
- Page 26 T3SP-Series Operator’s Manual The Repetition rate of the device is selectable via the corresponding pull-down menu. By default the instrument is shipped with 10 MHz, 5 MHz, 2 MHz and 1 MHz repetition rates. Recommendation: For most measurements (e.g. for line impedance mea- surements on PCBs) an interval of 4096 points in combination with a repeti- tion rate of 10 MHz is suitable.
- Page 27 T3SP-Series Operator’s Manual checked. Make sure the first row is still highlighted. The highlighted sample will actually be measured. Best practice is to click the row number in this first column. Measure the sample either by clicking the measure button in the right-lower corner of the Main Window or by using the F5-key.
- Page 28 T3SP-Series Operator’s Manual In the Result Visualization Window the averaged TDR trace (step re- sponse) or the impedance trace can be displayed. To switch the view between the step response and the impedance trace use the View TDR submenus Impedance and Step Response(+/-). Alternatively, the shortcut CTRL-SHIFT-F11/F12 can be used.
- Page 29 T3SP-Series Operator’s Manual Please note: for displaying traces of multiple measurements in the result vi- sualization window, highlight these in the spread sheet of the main window by holding the CTRL-key pressed. The legend shows the colored sample indi- cators accordingly. For zooming use the mouse and/or the toolbar buttons.
-
Page 30: Three-Term & 12-Term Correction
(e.g. MY_CALKIT.ckd) must be located in the Config subfolder of the software (e.g. c: Program Files (X86) seunis Config). Please contact Teledyne LeCroy for further information about how to cre- ate the CKD-file for your specific calibration kit. If a calibration kit is shipped with the device, the CKD-file will be pre-installed with the software. -
Page 31: Calibration Wizard
T3SP-Series Operator’s Manual 4.3 Calibration Wizard For the user’s convenience a TTC/12TC-wizard is included in the software. To start the wizard, please use the magic wand from the Main Window’s toolbar or select Extras Three-Term Correction from the main menu. A selection dialog appears and lets the user choose between: Differential TTC (DTTC, available with differential measurement mod- ules) -
Page 32: General Remarks On Reloading Ttc/12Tc Data
T3SP-Series Operator’s Manual • If a new TTC/12TC calibration shall be performed, the wizard asks for the calibration kit to be used. • In the following steps the standards Open, Short and Load (50 Ω ) have to be measured. The wizard automatically jumps to the next step. The user can use the Back button to redo a measurement. - Page 33 T3SP-Series Operator’s Manual • The last available TTC/12TC can easily be reloaded by opening the TTC- Wizard and pressing the Reload button. • The software shows a warning, if the loaded TTC/12TC is older than 14 days. This value can be changed in the Seunis.config (see section 2.2) file by editing the "Old TTC warning after <N>...
-
Page 34: Status Indicators For Ttc & 12Tc
T3SP-Series Operator’s Manual 4.5 Status Indicators for TTC & 12TC In the left-lower corner of the Main Window the TTC status indicator LEDs are located (see section 2.5.1). The meanings of the colors of the LEDs are described in the table below. Please note: a further LED displays whether a reference measurement has been performed (yellow) or not (grey). -
Page 35: Measurement Modes
T3SP-Series Operator’s Manual 5. Measurement Modes In this chapter the specific measurement modes of the T3SP-series devices are described. The availability of measurement modules can be checked by pressing the Main Windows toolbar button MODE. A dialog showing all available measurement modes is raised. 5.1 Impedance Measurements (Modes TDR &... - Page 36 T3SP-Series Operator’s Manual with the unit, otherwise the full performance cannot be guaranteed. • Prepare your samples in the sample list according to point of the quick start chapter. • The results of the impedance measurements are displayed in the Re- sult Visualization Window (see Fig.
- Page 37 T3SP-Series Operator’s Manual • The green check-mark in the upper-right corner (PASS indicator) of the Main Window indicates whether the measurement passed the toler- ance check. Otherwise the cross (FAIL indicator) indicates that the tolerance check failed. Additional LEDs (green/red) are located in the status bar of the Result Visualization Window (only if exactly one sam- ple selected in list).
-
Page 38: Reference Measurement
T3SP-Series Operator’s Manual box or via the menu View Auto Zoom. • In time domain measurement modes (e.g. TDR, DTDR) the zoom can be locked to the Oscilloscope Window zoom by pressing the toolbar button with the lock symbol. • The impedance tolerance mask can be set via the Extra Set…... -
Page 39: Impedance Measurement Properties Window
T3SP-Series Operator’s Manual Please note: • The time axis is fixed and will not be affected by this. • If no Reference Measurement is available but the TTC/12TC is active the start value equals the reference plane of the ”Open” calibration measurement. - Page 40 T3SP-Series Operator’s Manual Remark: the software displays the x-axis of the impedance trace vs. the travel- ing time t[ns] or versus a spatial resolution L[cm]. The optional PDF-export of the results always shows a spatial [mm] resolution. The software needs some of the in- formation (explicitly the velocity or alternatively line-type and geometry) to convert the traveling-time into spatial information.
- Page 41 T3SP-Series Operator’s Manual defined as fraction of speed of light. Otherwise it is calculated based on the Line Type and the defined geometry. In the Line Type selection box the user can chose between Air- line, Microstrip, Stripline, Coaxial Line and Other. The selection affects the propagation velocity.
- Page 42 T3SP-Series Operator’s Manual Click the menu entry Extra Calculate Impedance Slopes. A dialog is raised, showing a table with calculated impe- dance slopes of selected samples. The mean value can now be applied to the selected samples. Please note: another suitable method for determining reasonable val- ues for Ohmic Losses is to measure the same line from both ends and to adjust the value until the measured wave impedance of the beginning of the first measurement matches to the end of the second.
- Page 43 T3SP-Series Operator’s Manual By typing the values in [ns] into the specific fields. By capturing the current zoom of the oscilloscope window: zoom- ing into the TDR-curve and pressing Extra Capture x-axis in the menu of the Impedance Measurement Properties Window. By using the marker positions of the Oscilloscope Window: Ex- Capture Markers in the menu of the Impedance Measure- ment Properties Window.
-
Page 44: User-Defined Impedance Masks
T3SP-Series Operator’s Manual Press the Open Template button and select the itx-file with the pre-definitions. Press the Apply to Selection button. 5.1.4 User-defined Impedance Masks Fig. 7: User-defined (segmented) tolerance mask The software supports user-defined (also called segmented) impedance masks as shown in Fig. -
Page 45: D)S11 - Measurement Mode
T3SP-Series Operator’s Manual • saved via the button Save segmented Tolerance Mask to an XML file, • cleared via the button Clear segmented Tolerance Mask (in this case the standard rectangular tolerance mask becomes active again). Another option to generate a user defined (segmented) tolerance mask is to use the integrated mask generator. - Page 46 T3SP-Series Operator’s Manual • Right-click an existing sample and select S measurement mode. • TTC must be activated for measuring S -parameters, indicated by a green LED in the Main Window. • Measurements can be performed either on channel 1 or 2 (only on a channel where TTC is activated).
-
Page 47: Full 2-Port S-Parameter Measurements (F2P, Optional)
• Right-click an existing sample and select S measurement mode. In case the S mode is not available, please Teledyne LeCroy support further information. • A 12TC calibration must be activated for measuring S -Parameters, indicated by three green LEDs in the Main Window. - Page 48 T3SP-Series Operator’s Manual • Switching between the different S -parameters can be achieved via the menu item View S-Parameters Select Parameter or by pressing the hotkey combination CTRL-SHIFT-F9/F10. • A special function to reduce asymmetry effects of the non-ideal mea- surement system is to equalize the S -parameters.
-
Page 49: Import & Export Modules
T3SP-Series Operator’s Manual 6. Import & Export Modules The software is capable of exporting data to various formats. Currently the following ImExModules are available: • PDF-Export • CSV-Export • Touchstone 1.0 Export • Matlab-Export Please note: all software ImExModules (DLLs) have to be located in the Seunis binary subfolder (usually this is c: Program Files (X86) seunis bin) in order to be found at startup. -
Page 50: Csv-Export Module
T3SP-Series Operator’s Manual Summary table: List showing the results for the individual measure- ments. Diagrams: Impedance traces (incl. tolerance masks) for individual measurements and additional details in side-tables. Group statistics: The user can specify criterions (dialog appears). The software groups the measurements respectively and shows additional information for these groups (mean/min./max. -
Page 51: Touchstone-Export
T3SP-Series Operator’s Manual 6.3 Touchstone-Export S-parameter data can be exported to the widely spread Touchstone format. Each selected sample is exported into an individual file. The frequency data points are exported in MHz, the scattering parameter values as magnitudes and degrees. Please use the Export button in the Result Visualization Win- dow. -
Page 52: Workshop Files
T3SP-Series Operator’s Manual 7. Workshop Files The workshop files are intended to enable a quick start of measurements with a (frequently used) base setup. By means of the main menu entries File Save Workshop File and File Load Workshop File the current state of the software can easily be saved and restored in the workshop file (*.swsf). -
Page 53: Esd-Protection Module
T3SP-Series Operator’s Manual 8. ESD-Protection Module High-frequency measurement devices can severely and permanently be dam- aged by electrostatic discharge (ESD) impacts. In many laboratories spe- cial ESD precautions are taken to avoid damages of electronic equipment. To provide a higher degree of protection, the TDR device is equipped with an ESD-protection module based on high-performance coaxial RF-switches. -
Page 54: Additional Information
T3SP-Series Operator’s Manual 9. Additional Information 9.1 Description of the Toolbar Items in the Main Window Save your project (SQC-file) at any time by clicking the disk symbol in the toolbar or by using the File menu entry File Save (as…). Load projects by clicking the toolbar’s folder button or using the menu entry File Open. -
Page 55: Description Of The Toolbar Items In The Result Window
T3SP-Series Operator’s Manual Switches the ESD-protection on and off. Sample list operation mode (default). Macro operation mode, for performing recurring measure- ments with different measurement modes or settings. Quick operation mode allows for performing quick- measurements without using the sample list. Trigger a reference measurement. -
Page 56: Description Of The Main Window Menu Items
T3SP-Series Operator’s Manual Zoom into or out of the diagram, can also be done with mouse wheel. Automatic zoom adjusts the axes to the currently shown data range. If impedance traces with activated tolerance mask are shown, the area around the mask is focused. Lock the Result Visualization Window zoom to the Oscillo- scope Window axes for time domain results. - Page 57 T3SP-Series Operator’s Manual Save As: Saves the current sample list. A question di- alog appears, if the file name already exists. Recent Files: Open one of the recently used files. Load Workshop File Open a workshop file for restoring a macro list, sample list and the last valid TTC/12TC.
- Page 58 T3SP-Series Operator’s Manual Edit: New Sample: Creates a new sample in the list. Insert Sample: Inserts a new sample into the list at the se- lected row. Delete Sample(s): Deletes the selected sample(s). Delete Avg. Meas.: Deletes all repetition measurements all se- lected samples.
- Page 59 T3SP-Series Operator’s Manual Properties: Opens the impedance measurement prop- erty window. View: TDR Curves: Opens the TDR oscilloscope window. Result Visualization: Opens the result visualization window. Save default Saves current window settings to user- Arrangement: specific default arrangement. Arrange Windows Arranges the windows to the user-default (user-default): settings.
- Page 60 T3SP-Series Operator’s Manual Three-Term Correction: Open the TTC/12TC wizard. Change Sample Change a particular setting for one or multi- Settings: ple samples. Calculate Impedance Calculates (and modifies) the impedance Slopes: slopes of selected samples. Create Impedance Create a user-defined (segmented) impe- Mask: dance tolerance mask, based on an existing sample.
-
Page 61: Keyboard Shortcuts
T3SP-Series Operator’s Manual 9.4 Keyboard Shortcuts Function CTRL-N New project CTRL-O Open project CTRL-S Save project ALT-CTRL-S Save project as... CTRL-E Export CTRL-I Install (calibration kit data, company logo) CTRL-P Print CTRL-ALT-P Print preview CTRL-Q Exit Seunis CTRL-SPACE New sample Insert sample Delete sample(s) CTRL-D... - Page 62 T3SP-Series Operator’s Manual ALT-W Arrange windows according to user-defined set- ting CTRL-ALT-W Reset default window arrangement to factory de- fault ALT-L Open log window Measure Reference measurement (yellow LED) ALT-T Open three term correction (TTC) wizard CTRL-U Fill table downwards with clones of currently se- lected sample ALT-P Reactivate password protection for advanced op-...
-
Page 63: Technical Specifications
T3SP-Series Operator’s Manual 10. Technical Specifications 10.1 T3SP-Series Mainframes 931776 RevB... -
Page 64: T3Sp-Dprobe
T3SP-Series Operator’s Manual 10.2 T3SP-DPROBE 10.3 T3SP-DPROBE-F 931776 RevB... -
Page 65: Troubleshooting
T3SP-Series Operator’s Manual 11. Troubleshooting Problem Approach After starting the software The measurement modes are read from the following warning the device. Possibly the connection is not appears: ”No valid established correctly. Make sure the measurement modes device is turned on (check if ON/OFF found!”... - Page 66 T3SP-Series Operator’s Manual When pressing the The internal device temperature must be measurement button, the stable for ensuring the internal message ”Temperature not temperature compensation to work stable” appears. properly. This message appears when the device is exposed to extreme temperature changes or at startup.
-
Page 67: Safety Instructions
T3SP-Series Operator’s Manual 12. Safety Instructions 12.1 Operating Environment Temperature 0°C to 40°C Direct sunlight, radiators, and other heat sources should be avoided and have to be taken into account when assessing the ambient temperature. Humidity 5% to 90% RH (non condensing) up to 31°C decreasing linearly to 50% RH at 40°C Altitude Up to 3000m at or below 30°C... -
Page 68: Safety Symbols & Terms
12.4 Safety Requirements This safety instruction section contains information and warnings that must be observed to keep the Teledyne LeCroy T3SP High Differential Time Do- main Reflectometers (T3SP15D & T3SP10D) operating in a correct and safe condition. You are required to follow generally accepted safety procedures in addition to the safety precautions specified in this section. - Page 69 T3SP-Series Operator’s Manual b. MAINTAIN GROUND: The power supply is grounded through the power cord grounding con- ductor. To avoid electric shock, connect only to a grounded mating outlet. c. OBSERVE ALL TERMINAL RATINGS: Do not apply a voltage to any input that exceeds the maximum rating of that input.
-
Page 70: Maintenance
T3SP-Series Operator’s Manual 13. Maintenance • Do not use abrasive cleaning agents. To remove tenacious contami- nations use a commercial, non-abrasive cleaning agent. • If necessary, clean the T3SP carefully by wiping it with a humid cloth. • Keep the instrument in the provided casing, while not being used. 931776 RevB...
Need help?
Do you have a question about the T3SP Series and is the answer not in the manual?
Questions and answers