Steinberg AXR4T Operation Manual
Hide thumbs
Also See for AXR4T:
- Getting started (24 pages) ,
- Operation manual (95 pages) ,
- Getting started (20 pages)
Table of Contents
Advertisement
Quick Links
Advertisement
Table of Contents

Related Manuals for Steinberg AXR4T


Summary of Contents for Steinberg AXR4T
- Page 1 Operation Manual...
-
Page 2: Table Of Contents
“Bookmarks” tab on the top left to display it Show/Hide Channels Window......49 again.) Settings Window ..........50 Building a Monitoring Environment....53 Menu names and display positions may vary depending Stacking the AXR4T ........55 on the version of Adobe Reader in use. AXR4 Operation Manual... -
Page 3: Introduction
The Steinberg Hardware Development Team AXR4 Operation Manual... -
Page 4: Panel Controls And Functions (Main Panel)
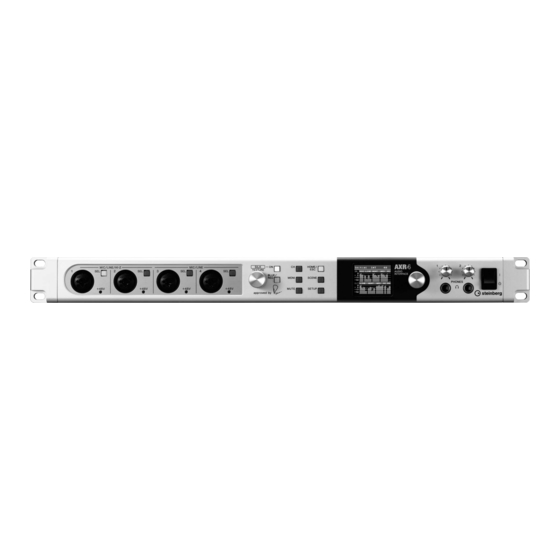
Panel Controls and Functions (Main Panel) Panel Controls and Functions (Main Panel) Front Panel & 1 MIC/LINE/HI-Z [1]/[2] jacks 4 [+48V] indicators For connecting to a microphone, digital Lights up in red when the phantom power instrument, electric guitar, or electric bass. is turned on. - Page 5 Panel Controls and Functions (Main Panel) 5 SILK [ON] key $ Display Turns Silk on and off for the channel Displays information needed to use and selected with the [SEL] key. This lights up configure the AXR4 device. white when turned on. % Multi-function knob Silk Used to operate the screen in the display.
-
Page 6: Rear Panel
For connecting external word clock signals. The WORD CLOCK [IN] jack 2 [ ] (Thunderbolt2) connector terminates internally at 75Ω. For connecting the AXR4T to a computer. 4 MIDI [OUT] jack NOTICE For connecting to the MIDI IN jack on MIDI devices. - Page 7 Panel Controls and Functions (Main Panel) 7 OPTICAL B [IN]/[OUT] connector Supports both S/PDIF and ADAT formats. If you use the OPTICAL B [IN]/[OUT] connector, you can select whether to use the connector in S/PDIF format or ADAT format on the DIGITAL I/O MODE screen on the AXR4 device or on the Settings screen on the dspMixFx AXR.
-
Page 8: Connection Example
Panel Controls and Functions (Main Panel) Connection Example Refer to the following connection example to connect speakers, microphones, or instruments. Guitar Microphone Headphones Computer Monitor Synthesizer Speakers Word Clock Microphone Sound Module Outboard Effects Generator Preamp Cautions for Rack-mounting the rear of the rack may help improve heat loss. -
Page 9: Display
Panel Controls and Functions (Main Panel) Display Screen Configuration TOOL BAR display area The display screen is split into the TOOL BAR area on the top, and the MAIN area on the bottom. TOOL BAR area 1 Scene name Displays the name of the most recent scene recalled. -
Page 10: Scene Screen
Panel Controls and Functions (Main Panel) 6 LINE OUT meter SCENE Screen 7 ADAT A or S/PDIF A OUT meter This screen is used to store and recall scenes. 8 ADAT B or S/PDIF B or AES/EBU OUT meter 9 Output meter to computer ) PHONES OUT meter 3 ADAT A or S/PDIF A IN meter 4 ADAT B or S/PDIF B or AES/EBU IN meter... -
Page 11: System Setup Screen
Panel Controls and Functions (Main Panel) How to use the SCENE screen SYSTEM SETUP Screen This screen is used to perform system setup Turn the multi-function knob to focus on a for the AXR4 device. scene name. Press the multi-function knob to display the confirmation dialog. - Page 12 Panel Controls and Functions (Main Panel) MAIN display area How to open the CH LINK screen This area displays options in a list. On the SYSTEM SETUP screen, turn the multi-function knob to select “CH LINK.” CH LINK For setting channel links for each channel on or off Press the multi-function knob to confirm.
- Page 13 Panel Controls and Functions (Main Panel) CLOCK screen • MASTER Allows you to set the clock source from the list. This screen is used to configure word clock- related items such as clock source and sample rate. Available options are as follows. INTERNAL The internal AXR4 clock How to open the CLOCK screen...
- Page 14 Panel Controls and Functions (Main Panel) How to configure the MASTER When the SAMPLE RATE screen appears, turn the multi-function knob to select a Navigate from the SYSTEM SETUP screen sample rate. to the CLOCK screen, and then turn the Press the multi-function knob to confirm.
- Page 15 Panel Controls and Functions (Main Panel) DIGITAL I/O MODE screen PEAK HOLD screen This screen is used to set whether to use the This screen sets the peak level display for the connector in S/PDIF format or ADAT format level meter on or off. when using the OPTICAL A [IN]/[OUT] connector.
- Page 16 Panel Controls and Functions (Main Panel) CONVERSION MODE screen BRIGHTNESS screen This screen is used to set the filter for the AD/ This screen is used to set the brightness of the DA converter. display and LED colors. The AD/DA converter has two filter setting options available: LINEAR PHASE and SHORT DELAY.
- Page 17 Panel Controls and Functions (Main Panel) PANEL LOCK screen STACK ID screen This screen is used to lock operations from This screen is used to assign an ID to the panel switches and encoder. Attempting to AXR4 device to identify the device when use locked switches and encoder operations multiple AXR4 devices are connected.
- Page 18 Panel Controls and Functions (Main Panel) INFO/INITIALIZE screen When the INITIALIZE screen appears, turn the multi-function knob to select either This screen is used to display information “CURRENT DATA” or “SCENE MEMORY.” pertinent to the AXR4 device such as firmware information.
-
Page 19: Monitor Setup Screen
Panel Controls and Functions (Main Panel) MONITOR SETUP Screen How to open the PHONES PATCH screen This screen is used to configure monitor output settings. On the MONITOR SETUP screen, turn the multi-function knob to select “PHONES PATCH.” Press the multi-function knob to confirm. MAIN display area The names of each output jack appear on the left, and the names of the currently set mix bus... - Page 20 Panel Controls and Functions (Main Panel) OUTPUT PATCH screen This screen is used to set the mix bus to be WARNING assigned to the output jack. To avoid loud sounds unintentionally coming through speakers and headphones, check that the volume of powered speakers, amps, and headphones (the PHONES [1]/[2] knob for the AXR4 device) is set to the minimum level before configuring output patch settings.
-
Page 21: Ch Setup Screen
Panel Controls and Functions (Main Panel) CH SETUP Screen ANALOG SETUP screen (MIC) This screen is used to configure audio This screen is used to configure AXR4 controls for signal inputs through the MIC/ hardware inputs. LINE/HI-Z [1]/[2] jack and the MIC/LINE [3]/[4] jack. - Page 22 Panel Controls and Functions (Main Panel) MAIN display area • GAIN This area displays options in a list. The current setting value is displayed to the right of each field. How to configure On the ANALOG SETUP (MIC) screen, turn the multi-function knob to select “GAIN.”...
- Page 23 Panel Controls and Functions (Main Panel) • PAD • +48V How to configure NOTICE When connecting devices or when switching the On the ANALOG SETUP (MIC) screen, turn routing structure, observe the following cautions to the multi-function knob to select “PAD.” avoid damage and noise being introduced to the product and peripheral devices.
- Page 24 Panel Controls and Functions (Main Panel) • PHASE • HPF (FREQ) How to configure How to configure On the ANALOG SETUP (MIC) screen, turn On the ANALOG SETUP (MIC) screen, turn the multi-function knob to select the multi-function knob to select “PHASE.” “HPF (FREQ).”...
- Page 25 Panel Controls and Functions (Main Panel) ANALOG SETUP screen (LINE) • RANGE This screen is used to configure audio controls for signal inputs through the LINE INPUT [5] – [12] jacks. How to open the ANALOG SETUP screen (LINE) On the CH SETUP screen, turn the multi- function knob to select “TOOL BAR Display Area.”...
- Page 26 Panel Controls and Functions (Main Panel) • HPF SILK SETUP screen This screen is used to configure Silk settings. How to open the SILK SETUP screen On the CH SETUP screen, turn the multi- function knob to select “TOOL BAR Display Area.”...
- Page 27 Panel Controls and Functions (Main Panel) • SILK • TEXTURE How to configure How to configure On the SILK SETUP screen, turn the multi- On the SILK SETUP screen, turn the multi- function knob to select “SILK.” function knob to select “TEXTURE.” Press the multi-function knob to select.
-
Page 28: Panel Controls And Functions (Software)
“Steinberg AXR4 2TR” can be 1 Device selection tabs used by other applications. Used to switch to the AXR4T which you want to configure settings for in the Control Panel when multiple AXR4Ts are connected together in a stack. - Page 29 “Studio” “Studio Setup” The open method of the settings window will vary depending on the application. In the “Yamaha Steinberg Thunderbolt” or “Yamaha Steinberg Thunderbolt (High Precision)” menu on the left of the window, click “Control Panel” to change the buffer size.
-
Page 30: Dspmixfx Axr
Panel Controls and Functions (Software) dspMixFx AXR This software is used to operate the DSP mixer and DSP effects installed on the AXR4 device. Window Examples and How to Open the Window Window configuration dspMixFx AXR is composed of five windows including the Mixer window. Mixer window Matrix Mixer window Meter window... -
Page 31: Mixer Window
Panel Controls and Functions (Software) How to open dspMixFx AXR “Applications” “dspMixFx AXR” Mixer Window This window is used to control the mixer. 1 Input Channels area (page 2 Output Channels area (page 3 Right side bar (page 4 Left side bar (page 5 Menu (page... -
Page 32: Input Channels Area
Panel Controls and Functions (Software) Input Channels Area Channel label *Red box section This area is used to configure input channel settings. If you are unable to display all channels due to the window size, use the scroll bar to display the intended channels. You can switch between stereo and mono for all input channels. - Page 33 Panel Controls and Functions (Software) 7 [ϕ] button Input Settings area — Head amp Switches phase inversion on and off. When channels are stereo linked, the [ϕ] button will appear for both left and right channels. • Double click the input gain control knob to minimize input gain.
- Page 34 Panel Controls and Functions (Software) 5 FX Bypass button (SLOT 2) SILK (Display all) Bypass switch for the inserted effect. 6 FX Edit button (SLOT 2) Configures inserted effect settings. 7 Select FX (SLOT 2) Used to select an effect and display the currently selected effect.
- Page 35 Panel Controls and Functions (Software) PAN/FADER area How to use the Mix Bus (Send Destination) option and the drop down menu Click the mix bus (send destination) to display a list of mix buses available for routing. Click a mix bus from the list displayed for routing. •...
-
Page 36: Output Channels Area
Panel Controls and Functions (Software) Output Channels Area Insert FX (Display all) This area is used to configure output channel settings. This area is fixed to display four channels (eight stereo channels), regardless of window size. You can switch between stereo and mono for all input channels. - Page 37 Panel Controls and Functions (Software) Reverb Return (Display all) PAN/FADER area 1 Reverb Return knob Adjusts the reverb return amount. 2 Reverb Return amount Used to display and edit the reverb return amount. • Double click the Reverb Return knob to minimize the return amount.
-
Page 38: Right Side Bar
Panel Controls and Functions (Software) Right Side Bar REV-X This is used to open and close, and show and hide areas on the channel strip, and configure REV-X settings. 1 INPUT meter Displays reverb input signal levels. 2 OUTPUT meter Displays reverb output signal levels. -
Page 39: Left Side Bar
Panel Controls and Functions (Software) Left Side Bar Switch between Display all/ Reduced display This is used to switch between display all/ reduced display, or to show/hide functions in the input channels area and the output channels area. 1 INPUT Switches between display all/reduced display for input settings. - Page 40 Panel Controls and Functions (Software) Filtering buttons 1 [Analog] button Shows/hides analog input channels (MIC and LINE channels for hardware inputs). 2 [Digital] button Shows/hides digital input channels (ADAT, S/PDIF, AES/EBU channels for hardware inputs). 3 [DAW] button Shows/hides DAW input channels. AXR4 Operation Manual...
-
Page 41: Relational Tables
Panel Controls and Functions (Software) Relational Tables Information on available operations by channel type, and display all mode and reduced display mode correspondence is provided in the tables below. Item Description HARDWARE ANALOG DIGITAL 1 – 2 CH 3 – 4 CH 5 –... -
Page 42: Menu
Panel Controls and Functions (Software) Menu For further information on menu items, see descriptions on each function. 1 File (page File Used to open and save sessions. This menu is used to open and saves sessions. 2 Edit (page Used to configure system-wide settings at Open once. - Page 43 Panel Controls and Functions (Software) Set Default Channel Names Scene Sets all channel names to their default This menu is used to store and recall AXR4 settings. device scenes. Set Default Routing Sets DAW outputs directly to hardware output audio routing without mixing at nominal levels.
- Page 44 Device This menu is used to select and display devices controlled with dspMixFx AXR. When a device is selected, the AXR4T to be edited will be changed on all windows other than the Meter window. This displays the DSP resource use rate. The number of effects available for use is intended as a guide.
-
Page 45: Matrix Mixer Window
Panel Controls and Functions (Software) Matrix Mixer Window This window is used for signal routing. How to open the window “Window” menu “Matrix Mixer” Matrix Mixer display The Matrix Mixer window is composed of two areas, an area for routing inputs to a mix bus, and an area for routing DAW or PC/Mac system sounds to a mix bus. - Page 46 Panel Controls and Functions (Software) How to use the grid Turns routing off. Mouse over Edit… Used to highlight vertical and horizontal lines, Opens the settings dialog box. including the grid area itself. Settings dialog Click Used to select an area on the grid. 1 Send amount Used to display and edit the send amount.
- Page 47 Panel Controls and Functions (Software) <command> key + left click If the pan setting is moved to the leftmost in this state, the signal being sent to the right will stop and the Used to select multiple individual grid cells by equivalent grid area on the right will automatically be clicking on grid cells while holding down the turned off.
-
Page 48: Meter Window
Panel Controls and Functions (Software) Meter Window This window is used to display all meters. Hardware Input Channels area DAW Channels area Mix Buses area How to open the window Filtering display channels “Window” menu “Meter” You can show/hide items on the Meter window. -
Page 49: Show/Hide Channels Window
Panel Controls and Functions (Software) Show/Hide Channels Window This window is used to show/hide each channel. Hardware Input Channels DAW Channels Hardware Output Channels How to open the window “Window” menu “Show/Hide Channels” How to use the Show/Hide Channels window Turn boxes with a signal name on (green) or off (gray) to show/hide the corresponding channel. -
Page 50: Settings Window
Panel Controls and Functions (Software) Settings Window This window is used to configure general settings and device-specific settings. General Settings Device Settings Output Routing 1 Interface How to open the window Used to select the interface standard “Window” menu “Settings” connecting the AXR4 with the computer. - Page 51 Panel Controls and Functions (Software) 4 Knob Mouse Control 4 Post Fader Send for Reverb Used to select the means of controlling Used to select which mix bus post fader to dspMixFx AXR knobs with the mouse. send for reverb. The relationship between each setting and the These settings will be applied at once to all mix corresponding knob action is described below.
- Page 52 Panel Controls and Functions (Software) Output Routing This area is used to configure routing settings from mix buses to output connector. Output connector will appear from top to bottom to the right of Output Routing, and mix buses will appear from left to right above Output Routing.
-
Page 53: Building A Monitoring Environment
Panel Controls and Functions (Software) Building a Monitoring Environment Configuring settings on the Matrix Mixer window This section describes the process used to build a monitoring environment for a vocalist On the Matrix Mixer window (page 45), and an engineer when recording vocals. double click each corresponding grid cell to route input from the microphone to the The example used in this section assumes the... - Page 54 Panel Controls and Functions (Software) Configuring settings on the DAW Set the MIC 1 channel and DAW channel mix bus (send destination) to LINE 3/4. Set the output from the DAW to the AXR4. Adjust MIC 1 channel faders, DAW channel faders, LINE 3/4 output faders and the Configuring settings on the Mixer headphone 2 knob controls to create a mix...
-
Page 55: Stacking The Axr4T
• Your computer maybe equipped with multiple Thunderbolt2-certified compatible cable jacks; To monitor input signals without latency from however, you will need to connect one AXR4T to a an additional AXR4T using headphones or Thunderbolt2-certified compatible cable jack and then monitor speakers connected to the first AXR4T connect the other AXR4Ts through a daisy-chain. -
Page 56: Configuring Axr4 Settings In Cubase (Axr Extension)
Panel Controls and Functions (Software) Configuring AXR4 Edit parameters function The edit parameters function is used to control Settings in Cubase (AXR hardware input/headphone assignments for Extension) the connected AXR4 device from the audio track selected in the Cubase project. Window Configuration Using AXR Extension allows you to operate AXR4 devices connected to a computer with a... - Page 57 Panel Controls and Functions (Software) 7 Input meter Header area Displays input levels. The right side of the input meter will be displayed in red when clipping occurs. Click this to stop this display. 1 Inspector tab label 8 HPF button Displays the model name in use.
- Page 58 Panel Controls and Functions (Software) Effect Settings area Outputs area This area is used to set parameters related to This area is used to set parameters related to AXR4 input/output port effects. hardware outputs. 1 Name label Displays the name of the hardware output. 1 Pre/Post Switch button 2 Output meter Used to select the insertion point for the...
-
Page 59: Hardware Setup
Panel Controls and Functions (Software) Hardware Setup DAW-linked function settings area The hardware setup is displayed in Studio Setup dialog in Cubase. This displays information on the hardware setup, and allows you to configure general hardware settings and Cubase-linked function settings. Scene Automatically applies scene information to the How to open Studio Setup... -
Page 60: Plug-Ins
Panel Controls and Functions (Software) Plug-ins Equalizer 601 Equalizer 601 emulates the distortion characteristics found in analog equalizers used in the 70s. This provides the audio with a musical drive and saturated distortion effect. This plug-in can be used in both mono or stereo modes based on the channel configuration of the audio track. - Page 61 Panel Controls and Functions (Software) 5 FLAT EQ settings When turning the FLAT button on, You can set the EQ on the right side of the parameters are set as follows. plug-ins panel. • Turns the gain for each frequency band Low band Mid-bands High band...
-
Page 62: Compressor 276
Panel Controls and Functions (Software) Compressor 276 Compressor 276 emulates the characteristics of an analog compressor used to apply standard audio effects in a recording studio. This results in a more solid sound, making it ideal for drum and bass sounds. This plug-in can be used in both mono or stereo modes based on the channel configuration of the audio track. -
Page 63: Rev-X
Panel Controls and Functions (Software) REV-X How to open the window REV-X is a digital reverb effect developed by From dspMixFx AXR Yamaha for pro audio applications. “Mixer window” “Reverb Edit button” One REV-X effect is included in the AXR4 (page device. - Page 64 Panel Controls and Functions (Software) 2 Initial Delay ) Low Freq Adjusts the time that elapses between the Adjusts the frequency of the Low Ratio. direct, original sound and the initial Range: 22.0 Hz – 18.0 kHz reflections that follow it. ! OPEN/CLOSE Range: 0.1 msec –...
-
Page 65: Sweet Spot Morphing Channel Strip
Panel Controls and Functions (Software) Sweet Spot Morphing Channel How to open the window Strip From dspMixFx AXR “Mixer window” “FX Edit button” The Sweet Spot Morphing Channel Strip (page (“Channel Strip” for short) is a multi-effect that From the dedicated Cubase series combines compressor and equalizer. - Page 66 Panel Controls and Functions (Software) 8 COMPRESSOR On/Off Compressor Turns the compressor on (lit) and off (dark). 9 Compressor Curve Indicates the approximate compressor response. The vertical axis indicates the output signal level, and the horizontal axis indicates the input signal level. ) Gain Reduction Meter Displays the gain reduction amount of the compressor.
- Page 67 Panel Controls and Functions (Software) 4 MID Q Adjusts the band width of the middle band. Range: 0.50 – 16.00 5 MID F Adjusts the center frequency of the middle band. Range: 20.0 Hz – 20.0 kHz 6 MID G Adjusts the gain of the middle band.
-
Page 68: Operation Correspondence Table
Operation Correspondence Table Operation Correspondence Table Maximum number of I/O channels by sample rate for each digital format ADAT S/PDIF AES/EBU 44.1/48 kHz 88.2/96 kHz 176.4/192 kHz 352.8/384 kHz Resource restrictions by sample rate Ch.Strip REV-X Mono Stereo 44.1 kHz – 96 kHz 176.4/192 kHz 352.8/384 kHz AXR4 Operation Manual... -
Page 69: Troubleshooting
Troubleshooting Troubleshooting When an error message appears Sound distortion • See the list of error messages (page 74). AXR4 settings, connections with external devices No sound, or sound is played at low • Has the audio data been recorded at an volumes appropriate level? •... - Page 70 Try removing and reinserting the cable. • If a Thunderbolt device other than the AXR4T is connected to the computer, try connecting only the one AXR4T to the computer. • Even if your computer is equipped with...
- Page 71 Troubleshooting Computer settings • Check that the correct version of TOOLS for AXR4 has been installed. • Is “Yamaha Steinberg Thunderbolt (High Precision)” used with Cubase? When “Yamaha Steinberg Thunderbolt (High Precision)” is selected, Cubase will exclusively use a driver. “Yamaha Steinberg Thunderbolt”...
-
Page 72: Technical Specifications
Technical Specifications Technical Specifications MIC/LINE INPUT 1-4 (Balanced) Frequency Response +0.1/-0.1dB, 10Hz to 22kHz @48kHz +0.1/-0.2dB, 10Hz to 44kHz @96kHz +0.1/-0.5dB, 10Hz to 88kHz @192kHz +0.1/-3dB, 10Hz to 100kHz @384kHz Dynamic Range 119dB, A-Weighted THD+N 0.0004%, 1kHz, 22Hz/20kHz BPF Maximum Input Level +24dBu Input Impedance 3.3k Ohm... - Page 73 Technical Specifications Digital B I/O Interface ADAT ADAT, Optical, 24-bit S/PDIF IEC-60958, Optical, 24-bit AES/EBU AES/EBU Professional use, RS422, 24-bit PHONES 1, 2 Maximum Output Level 75mW+75mW, 40 Ohm Thunderbolt Specification Thunderbolt 2, 32-bit, 44.1kHz/48kHz/88.2kHz/96kHz/176.4kHz/192kHz/ 352.8kHz/384kHz MIDI MIDI IN, OUT DIN 5pin WORD CLOCK WORD CLOCK IN, OUT...
-
Page 74: Error Messages
Error Messages Error Messages Error Message Display Area Cause Solution Too Many Devices Driver (Control Panel) Four or more AXR4s are Reduce the number of connected to the computer connected devices to dspMixFx AXR three or less Duplicated STACK ID Display Duplicate STACK IDs are Change the STACK ID so... -
Page 75: Block Diagram
Block Diagram Block Diagram AXR4 Operation Manual... - Page 76 Block Diagram AXR4 Operation Manual...
- Page 77 Block Diagram AXR4 Operation Manual...
- Page 78 Block Diagram AXR4 Operation Manual...
-
Page 79: Index
Index Index +48V ..............22, 23 DSP .............. 42, 44 DSP resource use rate ........44 dspMixFx AXR ............ 30 ABOUT ............18, 44 AD/DA converter ..........12 ADAT ...............7, 13 Edit ..............42 AES/EBU ............6, 13 Effect Bypass ............. 58 AES/EBU CH ..........13, 14 Effect Settings ............ - Page 80 Index InsFx ..............58 PEAK HOLD ..........12, 15 Interface ..............50 Peak Hold ............51 Internal AXR4 clock ..........13 Peak level ............12 Phantom power ......4, 22, 23, 33, 57 PHASE ............ 22, 24, 25 Phase ............33, 57 Knob Mouse Control ...........51 PHONES knobs ............
- Page 81 Index Specifications ............72 STACK ID ............12, 17 Stacking the AXR4T ..........55 Standby/On switch ..........5 Steinberg AXR4 2TR ...........28 Store ..............11, 43 Sweet Spot Morphing Channel Strip ....65 SYSTEM SETUP Screen ........11 TEXTURE ...........26, 27, 34, 57 Thunderbolt2 connector ........6 Troubleshooting ..........69 TYPE ..............26, 27...
- Page 82 Steinberg Website http://www.steinberg.net/ Manual Development Group © 2018 Yamaha Corporation Published 07/2018 MW-A0...
Need help?
Do you have a question about the AXR4T and is the answer not in the manual?
Questions and answers