Table of Contents
Advertisement
Advertisement
Table of Contents

Related Manuals for Sagem RT3000


Summary of Contents for Sagem RT3000
- Page 1 User Manual GSM/GPRS Network Termination SAGEM RT3000...
- Page 2 © by SAGEM SA, 2004 All trade marks and product names are trade marks, registered trade marks or product names of the respective title holders. The contents of this manual and technical specifications can be changed without notice. The description of specifications in this manual does not constitute a contract.
- Page 3 FCC part 15.21 Modifications not expressly approved by this company could void the user's authority to operate the equipment. Installation by You may only use the SAGEM RT3000 with the antenna delivered qualified together with the RT3000. personnel only The installation of the RT3000 and the antenna as well as servicing is to be performed by qualified technical personnel only.
- Page 4 Before opening the device, always make sure that the cables have been disconnected and the power supply has been directly disconnected at the RT3000, since otherwise dangerous voltages may be present in the device. After the installation remount the cover and fasten it with the supplied screw.
-
Page 5: Table Of Contents
Call Barring international outgoing (To block all outgoing international calls): ..............29 8.3.8 Change Password for Call Barring ..........29 8.3.9 Call waiting ................30 8.3.10 Check status for call forwarding, call barring and call waiting ..30 SAGEM RT3000... - Page 6 Flash signal detection (used to manage two calls simultaneously) ................ 37 8.7.4 Enable / Disable SMS Configuration ......... 38 9 Installing the RT3000 modem driver on a Windows-PC........39 10 Operation: Internet via GPRS with a PC ............52 10.1 Installing the Windows dial-up network connection........52 10.2...
- Page 7 16.38 Sample File .....................106 17 Configuration of Tones ..................112 17.1 How to program a new timing ..............114 17.2 Example-File: ..................115 18 Logfile....................... 117 19 Update the firmware..................118 20 Connection sockets ..................119 21 Technical data ....................120 SAGEM RT3000...
-
Page 8: Introduction
Introduction Introduction The SAGEM RT3000 is a GSM/GPRS Network Termination, a Purpose of the kind of wireless telephone socket. The following devices can be device connected to the SAGEM RT3000: • one or more analogue telephone devices to make telephone calls •... -
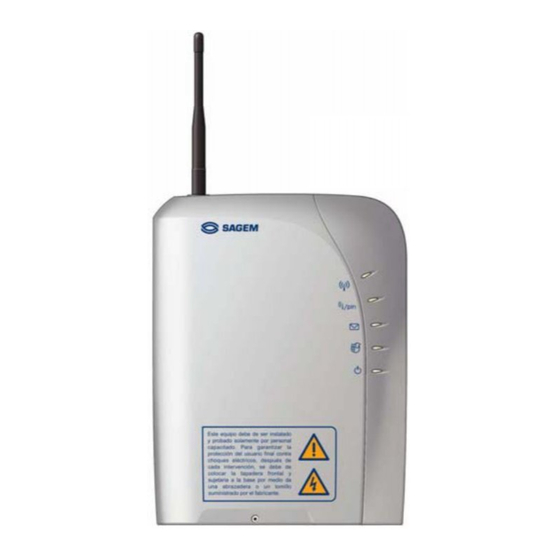
Page 9: The Leds On The Device
Search Net or Low Signal Quality Medium or High Signal Quality No Signal RAPID Flash FAX Warning, please check the fax machine connected to the SAGEM RT3000 SLOW Flash SMS Received Offhook on Phone, Fax/Modem/Phone or PC port RAPID Flash... -
Page 10: Putting The Device Into Operation
Enter the PIN number so that the device can communicate via the GSM network. Option: If you have connected a Personal Computer to the SAGEM RT3000, install the corresponding driver on the computer. Now the SAGEM RT3000 is ready to be used. -
Page 11: Connecting The Telecomms Equipment
If you want to connect your computer via its USB interface USB (optional) instead of its COM port to the SAGEM RT3000, please first install the drivers and then plug in the USB cable. You can connect here analogue telephones. -
Page 12: Enter The Pin Number
If the power supply adapter is disconnected, the SAGEM RT3000 is shut down. Even if the RT3000 is powered by the internal battery (in case of a mains failure), the power supply adapter shall be connected to the SAGEM RT3000. -
Page 13: Autopin Option
Be careful, you can enter only once a wrong PIN (instead of two times as in section 3.4). If the SAGEM RT3000 restarts again with this same SIM card, you will no more have to enter the PIN: the SAGEM RT3000 will use its secret value. -
Page 14: Wall-Mounting
This will ensure best signal quality. The SAGEM RT3000 is intended to be mounted on the wall. You can fix it to the wall with screws. Before mounting the SAGEM RT3000 make sure that you have a good signal quality at the chosen position. -
Page 15: Call A Remote Party
If an active connection (GPRS, GSM data, Fax or another ..speak... voice connection) has already been established using the SAGEM RT3000 and you try to make a call, you will hear a busy signal since another device is currently using the only "wireless" line. -
Page 16: Option: Having Two Calls At The Same Time
- the duration depends on the network - the second call is transferred to the voice mail box (Call Forwarding on No Reply - CFNRy), if this feature is enabled. Otherwise the calling party will hang-up, because his call is not answered. SAGEM RT3000... - Page 17 The active call will change to Call Hold state and vice versa. ⇒ • Transform the two calls in a 3 parties call (multi party call): • Press the following keys in sequence: You can configure the telephone functions according your needs. See Configuration page 22. SAGEM RT3000...
-
Page 18: Operation: Send And Receive Fax With A Facsimile Device
(see below In case of a FAX Warning, page 18). To receive a Test Fax To check if your facsimile device can receive a fax from the SAGEM RT3000 correctly, you can make a test:... -
Page 19: In Case Of A Fax Warning
Operation: Send and receive fax with a facsimile device In case of a FAX Warning If both FAX Warning LEDs are rapidly flashing, the SAGEM RT3000 is indicating that it could not transfer a received fax to the connected facsimile device completely (see above). -
Page 20: Operation: Analogue Modem Connections
Operation: Analogue Modem connections With an analogue modem connected to the Fax/Modem/Phone port of the SAGEM RT3000 you can send and receive data to/from a remote modem being connected to an analogue telephone line. Please install and operate the modem in accordance to its user manual and the manual of the software you run on the computer connected to the modem. -
Page 21: Operation: Send And Receive Fixed Network Sms
SMS (see note), you can use the fixed network SMS (SMS = Short Message Service). The RT3000 is a SMS centre for fixed network SMS. It can receive fixed network SMS from a connected telecomms equipment and forward it through the GSM network to the final recipient. - Page 22 (see Select port to receive SMS, page 33), so that this device will ring, receive the SMS and display it. When the Sagem RT3000 is not successful to transfer the SMS it will retry to repeat the transmission 2 times.
-
Page 23: Configuration
Configuration Configuration Your SAGEM RT3000 is a sophisticated device with a wide range of modes of operation. You have to decide which operation modes are appropriate for your needs and then enable them by configuring the SAGEM RT3000. The configuration... -
Page 24: Ports For Incoming Calls; Volume Of Voice Signal
To change the setting enter the following sequence: Telephone port: Description: 000000 Default access code: *5 ACCESS 001 VV # Volume sent to remote party *5 ACCESS 002 VV # Volume of voice signals received from remote party SAGEM RT3000... -
Page 25: Configuration Of Network Services
Configuration of network services Your SAGEM RT3000 is a sophisticated device with a wide range of modes of operation. You have to decide which operation modes are appropriate for your needs and then enable them by configuring the SAGEM RT3000. -
Page 26: Call Forwarding Unconditional (Cfu)
: Incoming phone calls will be forwarded. <call_type> = : Incoming fax calls will be forwarded. <call_type> = : Incoming data calls will be forwarded. Both prefix commands are supported to activate the service. Both prefix commands are supported to deactivate the service. SAGEM RT3000... -
Page 27: Call Forwarding If Busy (Cfb)
If Call forwarding if busy is activated, incoming calls will be forwarded to the configured telephone number, if the SAGEM RT3000 is just busy in performing a telephone, fax or data call when calls come in. You can configure this for each type of call (voice, data, fax) independently. -
Page 28: Call Forwarding If Not Accessible (Cfna)
If call forwarding if not accessible is activated, incoming calls will be forwarded to the configured telephone number, if your SAGEM RT3000 is not accessible in the GSM network so that the call can not be answered by telephone, fax or data device. You can configure this for each type of call (voice, data, fax) independently. -
Page 29: Call Barring All Of Outgoing (To Block All Outgoing Calls)
<password > <call_type> types (see below) Deactivates call barring #35* <password> incoming for all call types Deactivates for selected #35* <password > <call_type> call types Checks the status (see p. *#35# Checks the status (see p. *#35** <call_type> SAGEM RT3000... -
Page 30: Call Barring International Outgoing (To Block All Outgoing International Calls)
: Configuration is related to data calls only. 8.3.8 Change Password for Call Barring Description: Change **03* <old pw> <new pw> <new pw> password Meaning: <old pw> = recently active password for call barring <new pw> = new password for call baring: any number SAGEM RT3000... -
Page 31: Call Waiting
Description: Status on / DTMF code correct ___ Beep ____ Beep Status off / DTMF code correct ___ Beep _ Beep____ Beep DTMF code not correct or service not provided ___ Beep_ Beep by the network SAGEM RT3000... -
Page 32: Fax-Configuration
So in the case of faulty fax transmission the SAGEM RT3000 will send an error message report to your facsimile device to correct this problem. Only if you are not receiving such an error message report, you can be sure, that the fax was transmitted successfully. -
Page 33: Disable Modem/Phone On Fax/Modem/Phone Port
To change the setting enter the following sequence: Description: 000000 Default access code: *5 ACCESS 010 02 # Receive data call on the Fax/Modem/Phone port (Default) *5 ACCESS 010 03 # Receive data call on the PC port: RS-232 or USB SAGEM RT3000... -
Page 34: Sms Configuration
Your fixed network SMS telephone needs the telephone number of the SMS centre. Choose any number and configure this number in both, your telephone and the RT3000. For the configuration of the RT3000 please enter the sequence below: 000000 Default access code: *5 ACCESS 024 <SMS_... -
Page 35: Configuration For Fixed Network Sms Protocol 2
SMS centre. One number to send SMS and one number to receive SMS. Choose any number and configure two numbers in both, your telephone and the RT3000. First configure the SMS centre number for sending SMS by entering the following sequence:... -
Page 36: Enable/Disable Error Report
8.6.4 Enable/Disable error report If the SAGEM RT3000 cannot deliver a SMS to the remote station, there it can send an error report to the telecomms equipment you have used to send the SMS. You can activate or deactivate this function. -
Page 37: Additional Configuration
8.7.2 Dialling Timeout The SAGEM RT3000 must wait until you have dialled the complete telephone number before it will establish the connection to the remote station. To detect the end of your dialling it waits for a certain duration of time (the dial timeout) after each entered digit. -
Page 38: Flash Signal Detection (Used To Manage Two Calls Simultaneously)
Flash signal of a telephone differs from the standard the SAGEM RT3000 is configured for by default. If the SAGEM RT3000 does not detect the Flash signal of your telephone in the right way please adjust the setting of the... -
Page 39: Enable / Disable Sms Configuration
Configuration 8.7.4 Enable / Disable SMS Configuration Remote configuration of you SAGEM RT3000 is possible by sending special SMS (SMS = Short Message Service) to the device. This function can be enabled/disabled: Description: 000000 Default access code: *5 ACCESS 018 0 #... -
Page 40: Installing The Rt3000 Modem Driver On A Windows-Pc
Installing the RT3000 modem driver on a Windows-PC Installing the RT3000 modem driver on a Windows-PC If you connect your PC to the SAGEM RT3000 via the RS-232 interface or via the USB interface you have the following facilities: •... - Page 41 Installing the RT3000 modem driver on a Windows-PC computer. Start your computer. 2. Insert the provided CD-ROM into the CD-ROM drive of your computer. 3. Click Start, Execute... In the Execute dialogue click Browse and switch to the CD- ROM drive.
- Page 42 Installing the RT3000 modem driver on a Windows-PC Click Next (remember the Destination Folder) After copying the following dialogue is displayed. Click Finish 4. Now connect the SAGEM RT3000 to an USB plug of your computer. SAGEM RT3000...
- Page 43 Installing the RT3000 modem driver on a Windows-PC 5. When Windows detects the new device it prompts for a driver via the Found New Hardware Wizard: Select Install from a list or specific location (Advanced), then click Next >. Select the drive / folder: Drive:\Program Files\Texas Instruments\TI TUSB3410 WinXX.
- Page 44 Installing the RT3000 modem driver on a Windows-PC Click Finish. SAGEM RT3000...
- Page 45 Installing the RT3000 modem driver on a Windows-PC Select Install from a list or specific location Select Install from a list or specific location (Advanced), (Advanced) then click Next >. Select the folder the installation program has created in step 5:...
- Page 46 Installing the RT3000 modem driver on a Windows-PC 10. The serial port driver for the USB interface will be installed. 11. When this dialogue is displayed: Click Continue Anyway. SAGEM RT3000...
- Page 47 13. Find out what number the new COM port has. Explanation: Afterwards you have to install the modem driver of the SAGEM RT3000. When doing so you have to select the COM port the modem driver shall use. So you have to know: Is it COM3, COM4, COM5...?
- Page 48 Installing the RT3000 modem driver on a Windows-PC Click the +-sign next to Ports, if necessary. Look for TIUMP USB Serial Port (COM...) Is ist COM3, COM4, COM5 ...? SAGEM RT3000...
- Page 49 Installing the RT3000 modem driver on a Windows-PC You want to connect the SAGEM RT3000 • to an USB plug of your computer, then install # 1. the USB driver (page 39) 2. the modem driver • to a COM port of your computer, then install...
- Page 50 Installing the RT3000 modem driver on a Windows-PC 4. The Hardware Wizard will be displayed to install a new modem. When this dialog is displayed... Select Don't detect my modem; I will detect it from a list Select Don't detect my modem; I will detect it from a list and then click on Next>.
- Page 51 COM port # page 45. When you are asked to choose the COM port, select the COM port of your coputer that is connected to the SAGEM RT3000. 8. When this dialog is displayed... SAGEM RT3000...
- Page 52 Installing the RT3000 modem driver on a Windows-PC Click on Continue Anyway Click Finish. 10. When the installation is finished the installed modem driver ist listed in the Phone and Modem Options dialogue: Example Click OK to close the window.
-
Page 53: Operation: Internet Via Gprs With A Pc
• Your GSM provider must provide the GPRS service. While you are using the GPRS function of the SAGEM RT3000 for example to surf in the Internet, incoming telephone calls will not be indicated. The telephone number to dial-up the GPRS network is always: *99***1# The APN (Access Point Name) of your GSM provider to the Internet should be predefined in the SAGEM RT3000. - Page 54 Operation: Internet via GPRS with a PC The New Connection Wizard is started. Click Next >. Select Connect to Internet Select Connect to Internet and click Next >. SAGEM RT3000...
- Page 55 Select Set up my connection manually and click Next >. Select Connect using a dial-up modem Select Connect using a dial-up modem and click Next >. If prompted to select the modem select: Dr. Neuhaus RT3000. SAGEM RT3000...
- Page 56 Operation: Internet via GPRS with a PC Write any name that describes the purpose of the Dial-up connection. Then click Next >. *99***1# Enter the phone number for access to the Internet: *99***1# Then click Next >. SAGEM RT3000...
- Page 57 Operation: Internet via GPRS with a PC Enter your user name and password. Look them up in your subscription. Or ask your GSM telephone company. Click Next >. Click Finish. The installation of the dial-up network connection to the Internet is done. SAGEM RT3000...
- Page 58 In the Dial-up Network dialogue (Double-click the icon My Computer, then the icon Dial-up Network) the installed Dial- up network connection via the SAGEM RT3000 is represented by an icon. 1. a) Click on the icon with the right mouse button.
-
Page 59: To Connect And Disconnect To/From The Gprs / Internet
E-Mail program. 1. Click on the icon representing the active connection (down on To disconnect the right side of the screen) with the right mouse button to open the context menu. 2. In the context menu click Disconnect. SAGEM RT3000... -
Page 60: Operation: Using A Pc To Send And Receive Fax
Your Personal Computer is directly connected to the SAGEM RT3000 via its RS- 232 port or its USB port. Make sure that you have installed the modem driver of the SAGEM RT3000 (see, page 18). When you connect your PC to the USB port, then the RS-232 port is switched off. -
Page 61: Operation: Using A Pc To Transmit And Receive Data
By default an incoming data call comes in at the Fax/Modem/Phone port of the SAGEM RT3000, so that a device connected to this port gets the call. If you want to receive data calls by the PC connected to the SAGEM RT3000, you have to make the corresponding setting. -
Page 62: Operation: Using A Pc To Send And Receive Sms
By default an incoming SMS enters like any data call at the PC-port of the SAGEM RT3000. So you can receive SMS by the PC connected at the RS-232 or USB port of the SAGEM RT3000. If you want you can change this setting. See Select port to receive SMS, page 32. -
Page 63: For Experienced Users: At Commands
14 For experienced Users: AT commands 14.1 AT Command Interface The SAGEM RT3000 has an AT command interface. Using a terminal program like HyperTerminal (belongs to Windows) on your PC you can • communicate with a remote party (see Operation: Using a PC to transmit and receive data, page 60) and •... - Page 64 0: Terminate call ATI[n] Output product code ‘RT-3000 DNT8115’ ‘Firmware Version: 1.004’ ‘GSM-Module-Firmware: SAGEM JE3,7D’ Output supported operating modes (see ATB) Identification of the modem and the mobile phone Specifies whether or not the device transmits any result code to ATQ[n] the connected TE.
- Page 65 Displays current configuration AT&W Save configuration Repeat previous command line AT+FCLASS=n Setting the Faxclass Parameters: n = 0: normal operation 1: PC Fax enabled PS attach or detach AT+CGATT=n Parameters: n = 0 detached 1 attached AT+CGDCONT= Define PDP context. SAGEM RT3000...
- Page 66 <ci>: string type; two byte cell ID in hexadecimal format AT+CCFC=reas, Call forwarding number and conditions control reas = mode 0: unconditional [,number 1: mobile busy [,type 2: no reply [,class 3: not reachable [,subaddr 4: all call forwarding [,satype SAGEM RT3000...
- Page 67 99 not known or not detectable ber = (in percent) 0...7 as RXQUAL values in the table in GSM 05.08 [20] subclause 8.2.4 99 not known or not detectable AT+CNUM Displays Subscriber Number AT+CIMI Request international mobile subscriber identity SAGEM RT3000...
- Page 68 2: Normal priority Service commitments shall be maintained ahead of precedence class 3 3: Low priority delay = numeric parameter for the delay class reliability = numeric parameter for the reliability class 0: network subscribed value 1: Non real-time traffic, error-sensitive application that cannot SAGEM RT3000...
- Page 69 4800 bps (V.110 or X.31 flag stuffing) 9600 bps (V.110 or X.31 flag stuffing) name = 0 data circuit asynchronous (UDI or 3.1 kHz modem) 1 data circuit synchronous (UDI or 3.1 kHz modem) ce = transparent non-transparent SAGEM RT3000...
-
Page 70: At Command Interface (Sms)
1 – n n depends on SIM card capacity AT+CMGF – Setting Text / PDU mode: Sets the mode AT+CMGF=[<mode>] Calls up the current mode AT+CMGF? Lists the modes supported AT+CMGF=? <mode> Values for: PDU mode Text mode SAGEM RT3000... - Page 71 <length> Value for: AT+CMGW – Writing a message into memory: Text Mode activated (AT+CMGF=1) AT+CMGW=<oa/da><CR> <Txt> <CTRL Z> Writes the message into the memory “Recipient's telephone number” Value for: <oa/da> The text to be sent <Txt> Value for: SAGEM RT3000...
- Page 72 TA-TE link is reserved (e. g. in online data mode) and flush them to the TE after reservation. Otherwise forward them directly to the TE. Not supported <mt> Values for: No SMS-DELIVER indications are routed to the TE. If SMS-DELIVER Not supported Not supported SAGEM RT3000...
- Page 73 AT+CSCA – Setting the Service Center address: Sets the Service Center address AT+CSCA=<sca>[,<tosca>] Displays the address currently set AT+CSCA? Lists the characters allowed for the AT+CSCA=? telephone number “Service Center telephone number” Value for:: <sca> 129, 145 Value for: <tosca> SAGEM RT3000...
-
Page 74: At Command Interface (Sim Application Toolkit)
+KSTV See below In addition to the listed AT commands, in this operating mode the GSM-Adapter recognises, accepts and acknowledges a series of AT commands which are, however, not executed. These commands are: , ATM ATXn, ATP, ATT SAGEM RT3000... - Page 75 Is sent to the module when a command has been received with an incorrect or unmanageable type. Response: OK Values for: <type> Type of command received as the payload of the unsolicited code +KSTC <details> Command details in HEX format SAGEM RT3000...
- Page 76 <size> AT+KSTIR – Get a data block of an icon instance Sets the parameters AT+KSTIR=<num> Response: +KSTIR:<data>,<checksum> Integer type; block number <num> Values for: string type (in HEX format); data block <data> string type (in HEX format) <checksum> SAGEM RT3000...
- Page 77 AT+KSTP=? Test command Response: +KSTP:<support>,<setup profile> AT+KSTP? Read command Response: +KSTP:<current profile>,<default profile> AT+KSTP=<support>[,<DTE profile>] Write command Response: <support> Values for: 0 No SIM Application Toolkit support 1 SIM Application Toolkit support <xxx profile> Profile in HEX format SAGEM RT3000...
- Page 78 Write command Response: Values for: <type of response> 0 final response (other values will be added later) <TLVs> TLVs in HEX format AT+KSTV – Envelope command AT+KSTV=<envelope> Sets the parameter. Response: Values for: <envelope> TLVs in HEX format SAGEM RT3000...
-
Page 79: Configuration Methods
Configuration methods 15 Configuration methods The complete configuration of the SAGEM RT3000 is written in a parameter file called para.ini which is stored in the non-volatile memory of the device. When configuring the SAGEM RT3000, the parameter file para.ini will be modified. The SAGEM RT3000 can be configured by following methods: •... - Page 80 Port B is the configuration name for the Fax/Modem/Phone port. Port C is the configuration name for the PC port (through USB or RS232). Power Supply Fax machine, Modem or Telephone PC via RS232 PC via USB Telephone SAGEM RT3000...
-
Page 81: Configuration By Dtmf
ID that is to be entered when using the telephone in order to set the according parameter value. The table shows also the section and the name of the parameters so that you can change the parameter settings by sending an SMS to the SAGEM RT3000 or by editing the para.ini file SAGEM RT3000... - Page 82 FLASH CHB_FLASH_MAX *10[ms] DEVICE_ACCESS SMS_CONFIG NO/YES DEVICE_ACCESS SMS_PORT P1/P2 SYSTEM_TIME 235959 hh:mm:ss MOBILE_CONFIG SIMPIN DELETE MOBILE_CONFIG SIMSTATE DELETE DEVICE_ACCESS DTMF_PASSWORD 000000 999999 PSTN_SMS PSTN_SMS_CENTER Phone number Number PSTN_SMS ERROR_REPORT NO/YES PSTN_SMS LOCAL_NUMBER Phone number Number PSTN_SMS SMS_PROTOCOL Protocol SAGEM RT3000...
-
Page 83: Remote Configuration By Sms
You may change the file para.ini with a configuration SMS. You have to send a SMS to the SAGEM RT3000 from a remote location. You can configure up to 5 remote stations that are allowed to send a configuration SMS (see Settings for the configuration access via SMS and FTP, page 85). -
Page 84: Configuration By Ftp (Local And Remote)
15.3 Configuration by FTP (Local and Remote) The configuration of the SAGEM RT3000 is written in the file para.ini that is stored in the memory of the device. You can edit this file with a text editor (capable of writing plain text). - Page 85 (CLIR deactivated). So the SAGEM RT3000 can check if the calling station is allowed to configure by comparing the signalled telephone number with the numbers in the para.ini.
-
Page 86: Parameters In The File Para.ini: Advanced Configuration
16.2 Settings for the configuration access via SMS and FTP The SAGEM RT3000 must know the remote stations that should be allowed to do remote service or configuration calls by FTP. For SMS remote configuration you can configure if the CLIP is checked or not. You can configure up to 5 stations for SMS and FTP access each. -
Page 87: Power-Missing Sms
Can be configured by SMS (see page 82) Can be configured by FTP (see page 83) If the mains power fails, the SAGEM RT3000 can send an SMS to a GSM telephone number, which has to be pre-configured in the parameter file. -
Page 88: Select Port For Incoming Sms
The baudrate of the Debug-Interface can be configured. The Debug-Interface is not part of a standard product. [SERVICE_IF] BAUDRATE=57600 Section: SERVICE_IF Meaning Parameter Permitted Values Factory Setting Baudrate for debug BAUDRATE 300, 600, 1200, 57600 RS232 2400, 4800, 9600, 19200, 38400, 57600, 115200 SAGEM RT3000... -
Page 89: Pre-Selection
“00”. Some countries are using different digits. You can select with the parameter [INTERNATIONAL], which two digit prefix should be converted into the “+” prefix. Section: CALL_MUX Meaning Parameter Permitted Values Factory Setting Conversion to + INTERNATIONAL 00 to 99 SAGEM RT3000... -
Page 90: Prefix For Analogue Data And Fax Calls
If your Analogue modem or fax machine dials either the fax or data prefix before the telephone number, the RT3000 detects that it is an Analogue data or fax call and switches in the correct mode. You can change these prefixes. Please ensure that your chosen prefix differs from all DTMF configuration code. -
Page 91: Port Allocation
Success fax after FAX_SUCCESS_REPORT YES, NO completed MOC Section: Meaning Parameter Permitted Factory Values Setting Fax Identification IDENT 20 chars RT3000 (if remote identification is not available, yet) Disconnect on AC AC_DOWN_DISCONNECT YES,NO power fail SAGEM RT3000... - Page 92 FAX_ACCEPT_TIMEOUT=20 Maximum retries for local fax [Can be configured by SMS, FTP] If the SAGEM RT3000 has stored a part of a received fax because the connection to the local fax has been interrupted, the SAGEM RT3000 will try to resend the stored part of the fax document to the local fax machine automatically.
-
Page 93: Billing Tone Configuration
16.12 Billing Tone configuration Can be configured by SMS (see page 82) Can be configured by FTP (see page 83) The SAGEM RT3000 can generate billing pulses on the Telephone port and on the Fax/Modem/Phone port. Enable/Disable This feature can be activated or deactivated for both ports separately [CHA_BIILING_ENABLED, CHB_BIILING_ENABLED]. -
Page 94: Clip Function Configuration
Can be configured by FTP (see page 83) Can be configured by DTMF (see page 80) When a call comes in and it is ringing the SAGEM RT3000 can transmit the telephone number of the calling party to the equipment connected to the Telephone port or the Fax/Modem/Phone port. -
Page 95: Configuration Of The Flash Signal
Permitted Factory Setting Values The minimum flash CHA_FLASH_MIN 4 - 55 duration. Shorter pulses may be interpreted as parts of pulse-dial! (10ms) The maximum flash CHA_FLASH_MAX 12 - 65 duration. Longer pulses may be interpreted an onhook/offhook! (10ms) SAGEM RT3000... -
Page 96: Ring Frequency
Normally you must enter the telephone number completely before the SAGEM RT3000 can start dialling. The SAGEM RT3000 starts dialling until you do not press any more key on the telephone and after the dial timeout is expired - the duration the SAGEM RT3000 waits for any new key stroke. -
Page 97: Call Wait Tone On/Off
By default this tone will be generated by the network. If you want that the Ringback tone is generated by the SAGEM RT3000 set the following parameter to YES: CHx_LOCAL_CALL_CTRL=YES. -
Page 98: Voice Signal Volume On Telephone And Fax/Modem/Phone Port
You can adjust the input impedance of the Telephone and Fax/Modem/Phone port separately. You can select 600R, 900R or a complex matching. Section: DIALING Parameter Permitted Values Factory Setting Input Impedance CHA_INPUT_IMPEDANCE REAL600, COMPLEX Port A REAL900, COMPLEX Input Impedance CHB_INPUT_IMPEDANCE REAL600, COMPLEX Port B REAL900, COMPLEX SAGEM RT3000... -
Page 99: Gprs Configuration
If you enter the APN by the AT command AT+CGDCONT=<APN>, this will overwrite temporarily the parameter value of PROVIDER. Section: GPRS_CONFIG Meaning Parameter Permitted Values Factory Setting Provider section PROVIDER existing section name name (predefined and (e.g.: T-D1) new) Reserved SPECIAL_CGATT=NO SAGEM RT3000... -
Page 100: Clir On/Off
Can be configured by SMS (see page 82) Can be configured by FTP (see page 83) Can be configured by DTMF (see page 80) The PIN number is stored in the parameter SIMPIN=<Pinnumber>. Section: MOBILE_CONFIG Meaning Parameter Permitted Values Factroy Setting SIM PIN SIMPIN empty SAGEM RT3000... -
Page 101: At Command Parameter
Hang-up delay by parameter. Section: DIALLING Meaning Parameter Permitted Factory Setting Values Hang-up delay CHA_MTC_HOOK_DELAY YES, NO on/off port A Hang-up delay port CHA_MTC_HOOK_TIMEOUT 0..30000 6000 = 1min Hang-up delay CHB_MTC_HOOK_DELAY YES, NO on/off port B SAGEM RT3000... -
Page 102: Mnp Flow Control
Can be configured by SMS (see page 82) Can be configured by FTP (see page 83) This parameter sets the lowest speed accepted during baudrate negotiation. Section: MODEM Meaning Parameter Permitted Values Factory Setting min. local speed MIN_SPEED 300, 1200, 2400, 4800, 9600, 14400 SAGEM RT3000... -
Page 103: Gsm Speed
These parameters force data calls for special numbers on outgoing calls (for modems without correct calling tone) Section: MODEM Meaning Parameter Permitted Values Factory Setting This number forces DATA_NUM_1 Number 090 (Spain) a data call DATA_NUM_2 (max 30 digits) DATA_NUM_3 SAGEM RT3000... -
Page 104: Gsm Baudrate Depending On Dialled Number (Number)
Parameter Permitted Values Factory Setting This number forces SPEED_FOR_NUM_1 2400, 4800, 9600 automatic a data call This number forces SPEED_FOR_NUM_2 2400, 4800, 9600 automatic a data call This number forces SPEED_FOR_NUM_3 2400, 4800, 9600 automatic a data call SAGEM RT3000... -
Page 105: Fixed Network Sms
SMS can not be delivered Protocol parameter ACK_INFO Reserved Reserved Protocol parameter ACK_PAYLOAD Reserved Reserved Protocol parameter ALL_SG_AT_ONCE Reserved Reserved Telephone number LOCAL_NUMBER Phone number of the PSTN-SMS- Center for RX (Can be configured by DTMF (see page 80)) SAGEM RT3000... -
Page 106: Frequency Band Selection Gsm 900, Dcs 1800, Pcs 1900
900 MHz or 1800 MHz DUAL_US Autoselect 900/1900 MHz networks. Autoselect 900/1800/1900 MHz The RT3000 with 1900 MHz antenna should only be used in 1900 MHz networks. If you do not know, if your GSM networks operates at... -
Page 107: Sample File
KS_EX_2=41 KS_EX_3=50 KS_EX_4=51 KS_EX_5=71 KS_EX_6=80 KS_EX_7=81 KS_EX_8=90 KS_EX_9=91 ; up to KS_EX_24 [REMOTE_ACCESS] SERVICE_CLIP_0=- SERVICE_CLIP_1=- SERVICE_CLIP_2=- SERVICE_CLIP_3=- SERVICE_CLIP_4=- ; number of service centers: MAX_SRV_CALLERS in project_defs.h ; SMS / DTMF [DEVICE_ACCESS] DEVICE_PASSWORD=000000 DTMF_PASSWORD=000000 SERVICE_CLIP_0= SERVICE_CLIP_1= SERVICE_CLIP_2= SERVICE_CLIP_3= SERVICE_CLIP_4= SAGEM RT3000... - Page 108 ; count of retries to deliver local fax FAX_RETRY_DELAY=30 ; time in seconds, to wait for next retry INTERNATIONAL=00 FAX_SUCCESS_REPORT=NO EMERGENCY_1=112 EMERGENCY_2=112 EMERGENCY_3=112 ; prefix to force data/fax call (do NOT use DTMF config sequences) DATA_PREFIX=*** FAX_PREFIX=### [FAX] IDENT=RT3000 ;FAXAPP_DEBUG=COM ;T30_DEBUG=COM SAGEM RT3000...
- Page 109 CHA_BILLING_ENABLED=NO CHA_PULSE_DURATION=20 CHA_PULSE_DELAY=100 CHA_PULSE_LEVEL=1 ;12kHz and 16kHz. default: 16kHz CHA_16KHZ_BURST=YES ;settings for channel b CHB_BILLING_ENABLED=NO CHB_PULSE_DURATION=20 CHB_PULSE_DELAY=100 CHB_PULSE_LEVEL=1 ;12kHz and 16kHz. default: 16kHz CHB_16KHZ_BURST=YES [CLIP] ;settings for channel a CHA_CLIP_ENABLED=YES CHA_RING_CLIP_DELAY=50 CHA_SEIZURE_BITS=300 CHA_MARK_BITS=180 ;settings for channel b CHB_CLIP_ENABLED=YES SAGEM RT3000...
- Page 110 ;settings for channel b, 25Hz and 50Hz available, default: 25Hz CHB_HIGH_RING_FREQ=NO [DIALING] ;settings for channel a ;AUTO, REAL600, REAL900, COMPLEX CHA_INPUT_IMPEDANCE=COMPLEX CHA_POLARITY_REV=NO CHA_MTC_HOOK_DELAY=NO CHA_MTC_HOOK_TIMEOUT=6000 CHA_FAST_DIAL=NO CHA_DIAL_TIMEOUT=600 CHA_LOCAL_CALL_WAIT=NO CHA_LOCAL_CALL_CTRL=NO CHA_TX_VOICE_LEVEL=-7 CHA_RX_VOICE_LEVEL=-7 ;settings for channel b CHB_INPUT_IMPEDANCE=COMPLEX CHB_POLARITY_REV=NO CHB_MTC_HOOK_DELAY=NO CHB_MTC_HOOK_TIMEOUT=6000 CHB_FAST_DIAL=NO CHB_DIAL_TIMEOUT=600 CHB_LOCAL_CALL_WAIT=NO CHB_LOCAL_CALL_CTRL=NO CHB_TX_VOICE_LEVEL=-7 CHB_RX_VOICE_LEVEL=-7 SAGEM RT3000...
- Page 111 Parameters in the file para.ini: advanced configuration [GPRS_CONFIG] PROVIDER= SPECIAL_CGATT=NO [T-D1] PDP_CONTEXT=1,"IP","internet.t-d1.de","0.0.0.0",0,0 [D2] PDP_CONTEXT=1,"IP","volume.d2gprs.de","0.0.0.0",0,0 [EPLUS] PDP_CONTEXT=1,"IP","internet.eplus.de","0.0.0.0",0,0 [VIAG] PDP_CONTEXT=1,"IP","internet","0.0.0.0",0,0 [AMENA] PDP_CONTEXT=1,"IP","internet","0.0.0.0",0,0 [MOVISTAR-PLUS] PDP_CONTEXT=1,"IP","movistar.es","0.0.0.0",0,0 [MOVISTAR-ACTIVA] PDP_CONTEXT=1,"IP","p.movistar.es","0.0.0.0",0,0 [VODAFONE_SPAIN] PDP_CONTEXT=1,"IP","airtelnet.es","0.0.0.0",0,0 [MOBILE_CONFIG] CLIR=YES BAND=ALL BEARER_SERVICE=7 SIMPIN= SIMSTATE= [GENERAL] PRODUCT_CODE=DNT8115 VERSION_PARA_INI=1.026 ;MOB_DEBUG_TO_LOG=NO [MODEM] ;; MNP: YES or NO; default YES SAGEM RT3000...
- Page 112 ;DP_DEBUG=COM ;; special numbers DATA_NUM_1=090 DATA_NUM_2= DATA_NUM_3= [SPECIAL_MODEM] ; if uncommented: for SPEED_NUM GSM-speed is set as defined in SPEED_FOR_NUM ;SPEED_NUM=090 ;SPEED_FOR_NUM=4800 ;SPEED_NUM_2= ;SPEED_FOR_NUM_2= ;SPEED_NUM_3= ;SPEED_FOR_NUM_3= [AT_PARSER] ECHO=YES VERBOSE=YES QUIET=NO FLOW_CONTROL=YES DCD_CONTROL=YES DTR_CONTROL=YES ANSWER_RING=0 BAUDRATE=57600 PDP_CONTEXT=1,"IP","volume.d2gprs.de","0.0.0.0",0,0 CNMI_SETTING=0,0,0,0,0 SMS_TEXT_MODE=NO SAGEM RT3000...
-
Page 113: Configuration Of Tones
Configuration of Tones 17 Configuration of Tones Tones generated by the RT3000 can be configured by editing the parameter file tone.ini. You can access this file in the same way as the parameter file para.ini. Refer to page 83. In the section TONES The frequencies of all available slic TONES generated tones can be defined. - Page 114 RING signal CHB_RING Dial tone CHB_DIAL Ring back tone CHB_CALL_CTRL Busy tone CHB_BUSY_TONE Call wait tone CHB_CALLWAIT Programming CHB_ACPT_ -100 acceptance tone PROG Programming non- CHB_NACPT_ -100 acceptance tone PROG PIN last try tone CHB_LAST_PIN SIM missing tone CHB_SIM_MISS SAGEM RT3000...
-
Page 115: How To Program A New Timing
% 16 = tone off for 16*10ms = 160ms % 16 = tone on for 16*10ms = 160ms % -4 = timing sequence terminator. Go 4 steps back in timing sequence -> next timimng is the tone off for 800*10ms SAGEM RT3000... -
Page 116: Example-File
After changes have been made, a reset of the device must been done, to use them. 17.2 Example-File: ;RT-XNG Tone-Parameter File [TONES] ;settings for channel a CHA_DIAL_TONE=425 CHA_CALL_CTRL=440 CHA_BUSY_TONE=425 CHA_CALL_WAIT=440 CHA_ACPT_PROG=950 CHA_NACPT_PROG=300 CHA_PIN_LAST=600 CHA_SIM_MISS=950 ;settings for channel b CHB_DIAL_TONE=425 CHB_CALL_CTRL=440 CHB_BUSY_TONE=425 CHB_CALL_WAIT=440 CHB_ACPT_PROG=950 CHB_NACPT_PROG=300 CHB_PIN_LAST=600 CHB_SIM_MISS=950 [TONE_LEVEL] SAGEM RT3000... - Page 117 ;timing-sequence-terminators: -100 -> end of sequence; -2 -> 2 steps back; -4 -> 4 steps back ... ;settings for channel a CHA_RING=100,400,-2 CHA_DIAL=100,0,-2 CHA_CALL_CTRL=150,350,-2 CHA_BUSY=50,50,-2 CHA_CALLWAIT=40,800,16,16,16,-4 CHA_ACPT_PROG=10,10,-100 CHA_NON_ACPT_PROG=10,50,10,50,-100 CHA_LAST_PIN=50,50,10,50,-4 CHA_MISS_SIM=10,50,-2 ;settings for channel b CHB_RING=100,400,-2 CHB_DIAL=100,0,-2 CHB_CALL_CTRL=150,350,-2 CHB_BUSY=50,50,-2 CHB_CALLWAIT=40,800,16,16,16,-4 CHB_ACPT_PROG=10,10,-100 CHB_NON_ACPT_PROG=10,50,10,50,-100 CHB_LAST_PIN=50,50,10,50,-4 CHB_MISS_SIM=10,50,-2 [GENERAL] VERSION_TONE_INI=1.018 SAGEM RT3000...
-
Page 118: Logfile
Logfile 18 Logfile Relevant events of the RT3000 are reported in a Logfile. You can access this Logfile in the same way as the parameter file para.ini. Refer to page 83. The name of the Logfile is: logfile.$rf Close the FTP connection after the Logfile is copied to your PC. You can open the Logfile using a standard text editor. -
Page 119: Update The Firmware
The firmware of the RT3000 can be updated using a local connected PC (connected to the USB or RS-232 port) or from remote. The approach is just as if you want to configure the SAGEM RT3000 by uploading the edited configuration file para.ini by FTP - see 15.3 Configuration by FTP (Local and Remote), page 83. -
Page 120: Connection Sockets
Operating Ground Modem Ready Request To Send Modem Ready to Send Incoming Call The serial interface is operated at a data rate of 57600 bps. The data format is 8-N-1 (8 data bits, no parity bit, 1 stop bit). SAGEM RT3000... -
Page 121: Technical Data
Analogue interfaces 2 interfaces RJ11 (a/b-lead), one for analogue telephones, one for analogue telephones, fax machine, modem. max. 5 REN for all telecomms equipment connected to the RT3000 Digital interfaces USB (Client); RS-232 (ITU V.24/V.28); Data rates: 300 – 115.200 bit/s;...
Need help?
Do you have a question about the RT3000 and is the answer not in the manual?
Questions and answers