Table of Contents
Advertisement
Advertisement
Table of Contents

Related Manuals for Quasar CB-6204

Summary of Contents for Quasar CB-6204
- Page 1 DVTEL INC. 65 Challenger Road Ridgefield Park, NJ 07660 Quasar CB-6204 Quasar CB-6208 IP Bullet Camera User and Installation Guide The contents of this guide may not be reproduced or reprinted in whole or in part without the express written permission of DVTEL, Inc.
-
Page 2: Table Of Contents
5.5.3 Installing the Camera ....................17 Using the DNA Utility to Search and Access the Camera ..........19 Configuring Communication Settings on the Quasar Camera ........... 21 Adjusting and Framing-Up the Camera View ..............25 Configuration and Operation ..................27 Browser-Based Viewer Introduction ................ - Page 3 Quasar CB-6204/CB-6208 User and Installation Guide 9.3.7 Schedule ........................75 9.3.8 File Location ......................76 9.3.9 Maintenance ......................77 9.3.10 Import/Export ......................85 Streaming Settings ......................86 9.4.1 Video Format ......................87 9.4.2 Video Compression ....................96 9.4.3 Video ROI Encoding ....................98 9.4.4...
- Page 4 Document Information List of Figures Figure 1: Package Contents........................3 Figure 2: CB-620x Series Camera ......................4 Figure 3: CB-620x Series Camera Dimensions ..................4 Figure 4: MicroSD Card Drive and Reset Button ..................5 Figure 5: CB-620x Camera Input/Output Connections ................5 Figure 6: Camera Cables ........................
- Page 5 Figure 85: Import/Export Screen ......................85 Figure 86: File Download Screen ......................85 Figure 87: Streaming Section Tabs ...................... 86 Figure 88: CB-6204 Video Format Screen .................... 87 Figure 89: CB-6208 Video Format Screen .................... 88 Figure 90: View-1 (Source) ........................94 Figure 91: View-2 Image Rotated Vertically (Reversed) ...............
-
Page 6: Document Information
Document Information Document Information Document Conventions Conventions relatives au document WARNING and CAUTION notes are Les remarques AVERTISSEMENT et ATTENTION distributed throughout this document, sont réparties dans l'ensemble du document, en whenever applicable, to alert you of fonction des besoins, afin de vous avertir des potentially hazardous situations. - Page 7 DVTEL, Inc. Trademarks and Copyrights DVTEL, the DVTEL logo, Quasar Gen II, CB-6204, and Latitude are trademarks of DVTEL, Inc. Products and trademarks mentioned herein are for identification purposes only and may be registered trademarks of their respective companies. DVTEL, Inc. makes no representations whatsoever about any other products or trademarks mentioned in the manual.
- Page 8 Document Information Disclaimer Avis de non-responsabilité Users of DVTEL products accept full Il incombe aux utilisateurs des produits DVTEL de responsibility for ensuring the suitability and vérifier que ces produits sont adaptés et d'étudier considering the role of the product detection le rôle des capacités et limites de détection du capabilities and their limitation as they apply produit appliqués aux exigences uniques de leur...
- Page 9 Quasar CB-6204/CB-6208 User and Installation Guide General Cautions and Warnings Précautions et avertissements d'ordre général This section contains information that indicates a procedure or condition where Cette section contient des informations indiquant there are potential hazards. These may be qu'une procédure ou condition présente des hazards associated with a task or procedure a risques potentiels.
- Page 10 Document Information Warning: 1. The camera covers is an essential part of the product. Do not open or remove it. 2. Never operate the camera without the cover in place. Operating the camera without the cover poses a risk of fire and shock hazards. 3.
- Page 11 Quasar CB-6204/CB-6208 User and Installation Guide Electrical Safety Notice and Warnings Warning: 1. Read the installation instructions before you connect the unit to a power source. 2. Electrical safety should always be observed. All electrical connections must be performed by a certified electrician.
- Page 12 Document Information Avis et avertissements relatifs à la sécurité électrique Avertissement: 1. Lisez les instructions d'installation avant de brancher l'unité à une source d'alimentation électrique. 2. Les consignes de sécurité électrique doivent toujours être respectées. Toutes les connexions électriques doivent être effectuées par un électricien qualifié. 3.
- Page 13 Quasar CB-6204/CB-6208 User and Installation Guide Minimizing EMI and RFI Minimisation des IEM et des IRF When wires run for a significant distance in Lorsque des câbles parcourent une distance an electromagnetic field, electromagnetic importante dans un champ électromagnétique, interference (EMI) can occur. Strong EMI (e.g.
-
Page 14: Overview
Overview 2 Overview The DVTEL Quasar Gen II CB-620x series consists of two camera families: CB-6204 and CB-6208. The Quasar CB-6204 is an indoor/outdoor, vandal-proof, IP bullet camera. The camera provides real- time, QHD H.264 multi-streaming with the highest quality image, supporting three simultaneous video streams at QHD 1440p, HD 720p, and D1 resolutions. -
Page 15: Features
Quasar CB-6204/CB-6208 User and Installation Guide 2.1 Features H.264 and MJPEG HTTP streaming MJPEG Progressive scan CMOS sensor compression Edge motion detection Motion detection with Historical motion detection region of interest masking levels detected/recorded at frame levels ... -
Page 16: Package Contents
Overview 2.2 Package Contents Before proceeding, check that the box contains the items listed here. If any item is missing or has defects, do not install or operate the product. Contact your dealer for assistance. Bullet IP Camera Power Terminal Block (Includes system cable) M4 Inner Hex Wrench (x1) Alarm Terminal Block (x1) -
Page 17: Introduction To The Cb-620X Ip Bullet Camera
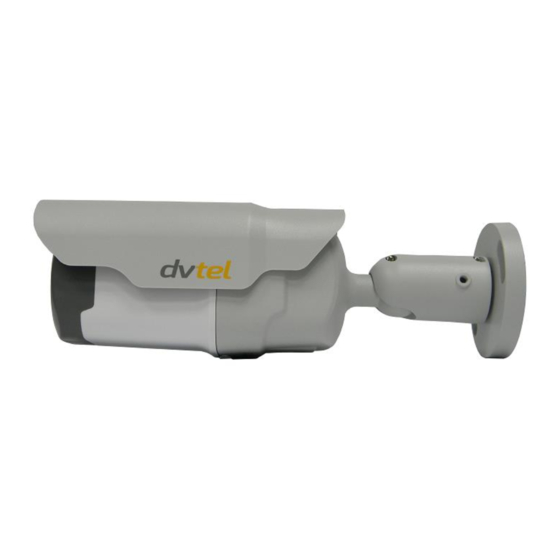
Introduction to the CB-620x IP Bullet Camera 3 Introduction to the CB-620x IP Bullet Camera This chapter provides information about the camera hardware for reference before installation. The connectors included on the camera’s system cable are described. Typical CB-620x Camera ... -
Page 18: Internal Connectors
Introduction to the CB-620x IP Bullet Camera 3.3 Internal Connectors The camera’s microSD card drive and reset button are inside the camera housing. Figure 4: MicroSD Card Drive and Reset Button Note: 1. Desiccant is included inside the camera housing and must be replaced every time the housing is opened. -
Page 19: Waterproofing The Camera Cable Connectors
Quasar CB-6204/CB-6208 User and Installation Guide No. Cable Definition Remarks For network and PoE RJ45 connections DC 12V − AC 24V 1 Power (DC 12V*/AC 24V) Reserved Power connection (3-pin Terminal Block) DC 12V + AC 24V 2 Alarm In −... -
Page 20: Figure 8: System Cable Hose And Wiring
Introduction to the CB-620x IP Bullet Camera 3. Seal the end of the rubber coating of the system cable as indicated in the figure below. Use enough silicone gel to fill in the hose and wrap around each wire in order to properly waterproof the cable. -
Page 21: Connecting The Unit To The Network
Quasar CB-6204/CB-6208 User and Installation Guide 3. Thread the Ethernet cable through the thread-lock sealing nut and the IP66-rated RJ45 plug. If the Ethernet cable is already attached to a connector, remove it first. Figure 12: RJ45 Connector and Thread-Lock Sealing Nut 4. -
Page 22: Input And Output Connectors
Introduction to the CB-620x IP Bullet Camera 3.4.4 Input and Output Connectors The alarm input and output connectors are shown below. Pin No. Designation Input (-) Input (+) Output (-) Output (+) -
Page 24: System Requirements
System Requirements 4 System Requirements To access the camera via a web browser, ensure that your PC has the proper network connection and meets system requirements as described below. Item Minimum System Requirement Personal Computer Minimum: Intel® Core™ i5-2430M @ 2.4 GHz, 4GB RAM Recommended: Intel®... -
Page 26: Installation
Installation 5 Installation Follow the instructions below for indoor and outdoor installation of the camera. Related Links Indoor Installation Outdoor Installation Power and Ethernet Cable Connection Initial Camera Configuration Mounting Instructions 5.1 Indoor Installation Read the instructions provided in this chapter thoroughly before installing the camera. Following are additional considerations for indoor installation: ... -
Page 27: Power And Ethernet Cable Connection
Quasar CB-6204/CB-6208 User and Installation Guide 5.3 Power and Ethernet Cable Connection Make sure the camera’s power cable is properly connected. Refer to System Cable Connectors. If using Power over Ethernet (PoE), make sure Power Sourcing Equipment (PSE) is available on the connected network. -
Page 28: Mounting Instructions
Installation Figure 15: DNA Assign IP Dialog Box g. Disconnect the Ethernet cable. The camera is ready for deployment (mounting) in a site installation. Note: 1. The camera can be connected to a PC for bench installation via an Ethernet cross-cable. 2. -
Page 29: Mounting The Camera
Quasar CB-6204/CB-6208 User and Installation Guide 5.5.2 Mounting the Camera To mount the camera, follow one of these procedures: For indoor/outdoor installations: a. On the ceiling/wall/flat surface, install a security camera wall mount bracket stand that is sturdy enough to hold the camera in a fixed position for the field of view required. -
Page 30: Installing The Camera
Installation 5.5.3 Installing the Camera To install the camera 1. Place the camera at the installation location. 2. Place the supplied template on the surface where you will install the camera. 3. On the ceiling or wall, mark the position of the two screw holes on the base of the mounting bracket. -
Page 31: Figure 18: Repositioning The Camera
Quasar CB-6204/CB-6208 User and Installation Guide 12. Loosen the two screws circled in the picture below in order to manipulate the camera positioning at the ball joint. The camera can be twisted and moved up and down at the ball joint. -
Page 32: Using The Dna Utility To Search And Access The Camera
Using the DNA Utility to Search and Access the Camera 6 Using the DNA Utility to Search and Access the Camera The DVTEL Network Assistant (DNA) is a user-friendly utility that is designed to easily discover and configure DVTEL edge devices on a network. The DNA tool has a simple user interface and does not require any installation. -
Page 34: Configuring Communication Settings On The Quasar Camera
Configuring Communication Settings on the Quasar Camera 7 Configuring Communication Settings on the Quasar Camera To configure communication settings on the camera 1. Connect the camera to the network on the same VLAN/LAN as the workstation. 2. If the network supports the default, open the DNA utility by running dna.exe which can be... -
Page 35: Figure 21: Dna Assign Ip - Use Dhcp Dialog Box
Quasar CB-6204/CB-6208 User and Installation Guide 7. Right-click the camera whose network property is to be changed. From the context menu that opens, select Assign IP. The Assign IP dialog is displayed. Figure 21: DNA Assign IP – Use DHCP Dialog Box Tip: Record the camera’s MAC address for future reference. -
Page 36: Figure 23: Installing The Activex Control
Note: If the password is changed and DVTEL Latitude AdminCenter Discovery feature is in use, deselect all other proprietary types. Select DVTEL Quasar Gen II Series so that the new password can be configured in the Discovery tab settings. Additionally, you can change the camera’s network properties (either DHCP or Static IP) directly from the camera’s web interface on the... -
Page 38: Adjusting And Framing-Up The Camera View
Adjusting and Framing-Up the Camera View 8 Adjusting and Framing-Up the Camera View After the camera is connected to the network and running, it is necessary to frame-up the scene and adjust the camera settings to optimize the picture for the individual scenes. If Latitude is being used, consider scheduling different settings for changing ambient conditions throughout the day, week, month or seasons. -
Page 40: Configuration And Operation
Configuration and Operation 9 Configuration and Operation The Quasar Gen II CB series camera is provided with a browser-based configuration interface for video playback and recording. In this chapter, information about main page introduction, system related settings and camera settings are described in detail. - Page 41 Quasar CB-6204/CB-6208 User and Installation Guide The user interface displays the following information: 1. The Navigation Bar is displayed in the center of the screen containing Live and Settings buttons. Live Button The Live screen opens by default when the camera logs on. It is used to monitor live...
-
Page 42: Live Screen
Configuration and Operation 9.2 Live Screen The camera’s Live screen is used to monitor live video. Figure 26: Live View Screen Right-clicking the Live window opens the Info dialog box, which displays key details about the video stream: Figure 27: Live Video Info Dialog Box The View Mode area in the Live screen includes the following function buttons: Snapshot Click this button to automatically save the JPEG snapshots in the specified location. - Page 43 Quasar CB-6204/CB-6208 User and Installation Guide Video Streaming Restart/Stop Press the Stop button to disable video streaming and to display the live video as black. Press Restart to show the live video again. The Microphone button allows the local site to talk to the remote site. Click the button to switch it on/off.
-
Page 44: System Settings
Configuration and Operation Step: Near/Far Press the Near Step or Far Step button to alternate the focus between near and far views within a user-defined range, which can be selected from the drop-down menu. Step Range Select from a user-defined range of steps, which can be selected from the drop-down list. AF: Push Click the Push button once to adjust zoom or focus. -
Page 45: Figure 29: System Screen
Quasar CB-6204/CB-6208 User and Installation Guide Click the System tab in the sidebar. The System screen is displayed. Figure 29: System Screen The System screen includes the following fields: Host Name The host name is for camera identification. If the alarm function is enabled and is set to send an alarm message by Mail or FTP, the host name entered here is displayed in the alarm message. -
Page 46: Security
Configuration and Operation Sync with NTP Server Network Time Protocol (NTP) is an alternate way to synchronize the camera’s clock with an NTP server. Enter the network time server host name or IP address to synchronize in the text box. Then select an update interval (every hour, day or week) from the drop-down menu. -
Page 47: Figure 31: Edit User Account Dialog Box
Quasar CB-6204/CB-6208 User and Installation Guide To add a new user 1. Type the new user name and password in the respective fields. 2. Select the appropriate check boxes to give the user Camera Control, Talk and Listen permissions. ... -
Page 48: Figure 32: Https Screen - Create Self-Signed Certificate
Configuration and Operation 9.3.2.2 HTTPS To use HTTPS on the camera, an HTTPS certificate must be installed. The HTTPS certificate can be obtained either by creating and sending a certificate request to a Certificate Authority (CA) or by creating a self-signed HTTPS certificate as described below. Note: The self-signed certificate does not provide the same level of security as a CA-issued certificate. -
Page 49: Figure 33: Create Self-Signed Certificate Dialog Box
Quasar CB-6204/CB-6208 User and Installation Guide 1. On the HTTPS page, click CREATE under Create Self-Signed Certificate. The Create Self- Signed Certificate dialog box opens. Figure 33: Create Self-Signed Certificate Dialog Box 2. Enter the information in the appropriate field. A definition of each of the required fields follows. -
Page 50: Figure 35: Certificate Properties
Configuration and Operation 4. To view the details of the Installed Certificate, click PROPERTIES. The details are displayed in the Certificate Properties dialog box. If you want to remove the certificate, click REMOVE. Figure 35: Certificate Properties 5. When the signed certificate is returned from the CA, click Browse in the Install Signed Certificate section to locate the file. -
Page 51: Figure 37: Https Screen - Install Signed Certificate
Quasar CB-6204/CB-6208 User and Installation Guide To create a certificate request 1. Click CREATE CERTIFICATE REQUEST to create and submit a certificate request in order to obtain a signed certificate from a CA. Figure 37: HTTPS Screen – Install Signed Certificate The Create Certificate Request dialog box opens. -
Page 52: Figure 39: Created Request Subject
Configuration and Operation 2. Enter the information in the appropriate field. A definition of each of the required fields follows. Country – Enter a two-letter combination code to indicate the specific country in which the certificate will be used. For instance, type “US” to indicate United States. ... -
Page 53: Figure 41: Ip Filter Screen
Quasar CB-6204/CB-6208 User and Installation Guide 5. Copy the PEM-formatted request and send it to your CA. Note: The self-signed certificate does not provide the same high level of security as a certificate issued by a Certificate Authority (CA). 9.3.2.3 IP Filter The IP filter restricts access to the camera by denying/allowing specific IP addresses. -
Page 54: Figure 42: Ieee 802.1X/Eap-Tls Screen
Configuration and Operation 9.3.2.4 IEEE 802.1X The camera is allowed to access a network protected by 802.1X/EAPOL (Extensible Authentication Protocol over LAN). Users must contact the network administrator to obtain certificates, user IDs, and passwords. Figure 42: IEEE 802.1X/EAP-TLS Screen CA Certificate The CA certificate is created by the Certificate Authority for the purpose of validating itself. -
Page 55: Network
Quasar CB-6204/CB-6208 User and Installation Guide 9.3.3 Network From the System screen, click the Network tab. The following screens are available from the Network tab: Basic SNMP UPnP DDNS Mail HTTP 9.3.3.1 Basic The Basic screen is used to configure the camera’s basic network settings. - Page 56 Configuration and Operation Get IP address automatically If you select Get IP address automatically, you can use the DNA utility, which is provided in the supplied CD, to obtain the IP address from a DHCP server on the network. See Using the DNA Utility to Search and Access the Camera.
-
Page 57: Figure 44: Qos Screen
Quasar CB-6204/CB-6208 User and Installation Guide Note: Be sure to assign a different port number for each service mentioned above. Click SAVE to save the settings. 3. IPv6 Address Configuration IPv6 is not supported. 9.3.3.2 QoS QoS (Quality of Service) provides differentiated service levels for different types of traffic packets and guarantees delivery of priority services during periods of network congestion. -
Page 58: Figure 45: Snmp Settings Screen
Configuration and Operation 9.3.3.3 SNMP Settings The Simple Network Management Protocol (SNMP) enables the camera to be monitored and managed remotely by the network management system. SNMP configuration settings are entered in the System > Network > SNMP screen. Figure 45: SNMP Settings Screen SNMP v1/v2 ... - Page 59 Quasar CB-6204/CB-6208 User and Installation Guide To enable the SNMP v3 protocol, enter the appropriate data and passwords requested: Enable SNMP v3 – Select the checkbox. Security Name – See note below. Authentication Type – Select MD5 or SHA from the drop-down list. See note below.
-
Page 60: Figure 46: Upnp Screen
Configuration and Operation 9.3.3.4 UPnP The System > Network > UPnP screen enables the Universal Plug-and-Play protocol on your network devices. Figure 46: UPnP Screen UPnP Settings Enable UPnP – If UPnP is enabled and a camera is discovered on the LAN, the icon of the connected camera appears in My Network Places, allowing direct access, as seen below. -
Page 61: Figure 48: Ddns Screen
Quasar CB-6204/CB-6208 User and Installation Guide Enable UPnP port forwarding – When UPnP port forwarding is enabled, the camera is allowed to open the web server port on the router automatically. Note: To enable this function, make sure that your router supports UPnP and that it is activated. -
Page 62: Figure 49: Mail Screen - Smtp
Configuration and Operation 9.3.3.6 Mail Simple Mail Transfer Protocol (SMTP) is a protocol for sending e-mail messages between servers. It is a relatively simple, text-based protocol, where a text message is transferred to one or more specified recipients. The Administrator can send an e-mail via Simple Mail Transfer Protocol (SMTP) when an alarm is triggered. -
Page 63: Figure 50: Ftp Screen
Quasar CB-6204/CB-6208 User and Installation Guide action on the IO, Network Failure Detection, Tampering, Periodic Event, Manual trigger, and Motion Detection screens. For each server, enter the server IP address, server port number, user name, password, and remote folder path. Settings are entered in the System > Network > FTP screen:... -
Page 64: Figure 51: Http Screen
Configuration and Operation 9.3.3.8 HTTP An HTTP notification server detects notification messages of triggered events sent from cameras. HTTP notifications are set by selecting the Send HTTP notification checkbox on the IO, Tampering, Manual trigger, and Motion Detection screens. Two notification server accounts (Alarm Triggered and Motion Detection) can be set up and sent to the specified HTTP servers. -
Page 65: Events Setup
Quasar CB-6204/CB-6208 User and Installation Guide 9.3.4 Events Setup The Events Setup tab includes the following screens: Network Tampering Day/Night Trigger Periodic Event Manual Trigger Failure Detection 9.3.4.1 IO The IO screen is used to control input and output alarms and messages, which are generated when an event is recognized by the system. -
Page 66: Figure 53: Upload Image By Ftp
Configuration and Operation 9.3.4.1.2 Alarm Type Select an alarm type (Normal close or Normal open) that corresponds to the alarm application. Normal open is the default setting. Click SAVE after configuring the settings. 9.3.4.1.3 Alarm Output Define the normal alarm output signal as Output high or Output low, according to the current alarm application. -
Page 67: Figure 54: Send Http Notification
Quasar CB-6204/CB-6208 User and Installation Guide notifications by the IO event triggered. When an alarm is triggered, the notification will be sent to one of two specified HTTP servers. See figure below. Figure 54: Send HTTP Notification Record video clip – Select this box in order to save the alarm-triggered recording to your microSDXC card or to the NAS. - Page 68 Configuration and Operation In the Image Frequency text box, from the drop-down list select the number of frames per seconds from 1-15 for the upload. Note: Make sure that SMTP configuration has been completed. See Mail for details. Click SAVE after configuring the settings. 9.3.4.1.5 File Name ...
-
Page 69: Figure 57: Network Failure Detection Screen
Quasar CB-6204/CB-6208 User and Installation Guide 9.3.4.2 Network Failure Detection Settings on the Network Failure Detection screen enable the camera to periodically ping another IP device within the network to detect a network failure, for example, if a video server is disconnected. -
Page 70: Figure 58: Tampering Screen
Configuration and Operation 9.3.4.2.3 Triggered Action The Administrator can specify various alarm actions to be taken when an alarm is triggered. The options are listed below. Enable alarm output – Check this box and select the predefined type of alarm output (low or high) to enable alarm relay when a network failure is detected. - Page 71 Quasar CB-6204/CB-6208 User and Installation Guide 9.3.4.3.1 Tampering Alarm The Administrator can select from the following options: Select Off to disable the tampering alarm (default setting). Select On to enable the tampering alarm. Select By Schedule to set a schedule. Then click Please Select to select up to 10 schedules from the drop-down list that opens.
- Page 72 Configuration and Operation Record video clip – Select this box in order to save the alarm-triggered recording into a microSDXC card. Enter the number of seconds for the pre-trigger buffer. Select the first radial button to upload for a specified length of time and enter the number of seconds. Alternatively, select the second radial button to upload during the active trigger.
-
Page 73: Figure 59: Day/Night Trigger Screen
Quasar CB-6204/CB-6208 User and Installation Guide Overwrite The original image in the FTP site will be overwritten by the new uploaded file with a static filename. Click SAVE after configuring the settings. 9.3.4.4 Day/Night Trigger The Day/Night Trigger screen is used to enable the camera to trigger a device connected to the camera’s alarm output when the camera switches to Day or Night mode, which is set on the... -
Page 74: Figure 60: Periodic Event Screen
Configuration and Operation 9.3.4.5 Periodic Event The Periodic Event screen is used to specify an alarm to be triggered at a specified time interval. Figure 60: Periodic Event Screen 9.3.4.5.1 Periodic Event Select Off or On to activate this function. The default is Off. 9.3.4.5.2 Time Interval In the Minimum interval text box, enter the number of seconds for the minimum interval between alarms. - Page 75 Quasar CB-6204/CB-6208 User and Installation Guide Upload Image by E-Mail – Selecting this option enables you to assign an e-mail address and configure various parameters, as shown in Figure 56: Upload Image by E-Mail. When an alarm is triggered, event images will be sent to the designated e-mail address.
-
Page 76: Figure 61: Manual Trigger Screen
Configuration and Operation 9.3.4.6 Manual Trigger The Manual Trigger screen is used to specify an alarm to be manually triggered. You can define action to take when an alarm occurs from the System > Events Setup > IO screen. Figure 61: Manual Trigger Screen 9.3.4.6.1 Manual Trigger Select Off or On to activate this function. - Page 77 Quasar CB-6204/CB-6208 User and Installation Guide Finally, select the number of frames per second from the drop-down menu next to Image frequency. Send HTTP notification – Check this option, select the destination HTTP address, and specify the parameters for HTTP notifications. When an alarm is triggered, the HTTP notifications can be sent to the specified HTTP server.
-
Page 78: Edge Recording
Configuration and Operation Add sequence number suffix (no maximum value) File name: imageXXXXXXX.jpg X: Sequence Number Add sequence number suffix (limited value) File Name: imageXX.jpg X: Sequence Number The file name suffix ends at the number being set. For example, if the setting is up to “10,” the file name will start from 00, end at 10, and then start over again. -
Page 79: Figure 63: Video File Recording List
Quasar CB-6204/CB-6208 User and Installation Guide Note: Format the microSDXC card when using it for the first time. Formatting is also required when a memory card has been used on one camera and is then transferred to a camera that uses a different software platform. -
Page 80: Figure 64: Selected File Window
Configuration and Operation Download – To open/download a video clip, first select the file and then click DOWNLOAD. The selected file window pops up as shown below. Click the AVI file to play the video in the player or download it to a specified location. Figure 64: Selected File Window 9.3.5.2 Network Share The Network Share screen shows the capacity information of the Network Attached Storage (NAS) -
Page 81: Figure 66: Video File Recording List
Quasar CB-6204/CB-6208 User and Installation Guide Device Information Upon connecting to the NAS, the following information about the disk is displayed: Device type – Displays Network Share Free space – Displays the amount of available storage space in GB ... -
Page 82: Figure 67: Selected File Window
Configuration and Operation Note: The capital letters: R, N, A, (A0), M, (M0) followed by an underscore, appear at the beginning of the file name. They denote the type of recording. R - Regular (always or schedule) N - Network failure ... -
Page 83: Figure 68: Recording Screen
Quasar CB-6204/CB-6208 User and Installation Guide In the Recording Schedule section, specify the recording schedule. Select one of three options: Disable – Disable this function Always – Always use this function Only during time frame – Records only during a specified time frame... -
Page 84: Motion Detection
Configuration and Operation 9.3.6 Motion Detection The motion detection function detects suspicious motion and triggers alarms when motion volume in the detected area reaches or exceeds the determined sensitivity threshold value. Figure 69: Motion Detection Screen Within the Live View pane on the Motion Detection screen, there is a frame (Motion Detection window) which is used for defining the motion detection area. -
Page 85: Figure 70: Motion Detection Screen - With Schedule Drop-Down Menu
Quasar CB-6204/CB-6208 User and Installation Guide For instructions how to set a schedule for motion detection, refer to Schedule. Below is a screen showing the Schedule drop-down menu with selected schedules. Figure 70: Motion Detection Screen – with Schedule Drop-Down Menu Motion Detection Windows Up to 10 Motion Detection windows can be set. -
Page 86: Figure 72: Motion Window With Detection
Configuration and Operation When motion is detected, the signals are displayed in the Motion window shown below. Figure 72: Motion Window with Detection Detailed settings for motion detection are as follows: Sampling pixel interval [1-10] – Select a number from 1-10. The default value is 1. If the value is set as 3, within the detection region, the system will take one sampling pixel for every 3 pixels by each row and each column (see the figure below). - Page 87 Quasar CB-6204/CB-6208 User and Installation Guide Upload image by FTP – Select this box in order to upload an image to a designated FTP site when motion is detected according to various parameters, as seen in Figure 53: Upload Image by FTP.
-
Page 88: Schedule
Configuration and Operation 9.3.7 Schedule The Schedule screen is used by the network failure detection, tampering and motion detection functions. To access the schedule function, open the Main window, select the System tab, and click the Schedule tab. The functions in this tab allow administrators to create customized schedules for the camera. -
Page 89: File Location
Quasar CB-6204/CB-6208 User and Installation Guide 9.3.8 File Location From the File Location page, specify a storage location for snapshots and web recordings. The default setting is: C:\. After confirming the setting, click SAVE to save the snapshots and recordings in the designated location. -
Page 90: Maintenance
Configuration and Operation 9.3.9 Maintenance Clicking the Maintenance tab in the System screen opens a drop-down menu with the following tabs: Log File User Factory Software Software Parameters Information Default Version Upgrade 9.3.9.1 Log File Click Log file to view the system log file. -
Page 91: Figure 77: User Information Screen - Get User Information
Quasar CB-6204/CB-6208 User and Installation Guide 9.3.9.2 User Information The Administrator can view each user’s login information and privileges in the User information screen shown below. Note: User credentials and privileges are set in the User screen (page 33). View User Login Information Click GET USER INFORMATION to see each user’s details. -
Page 92: Figure 78: User Information - Get User Privacy
Configuration and Operation View User Privilege Click GET USER PRIVACY to view each user’s privileges. Figure 78: User Information – Get User Privacy In the screen above, both Admin and User are granted privileges of I/O access, Camera control, Talk and Listen, which are the maximum privileges that can be granted. -
Page 93: Figure 79: Factory Default Screen
Quasar CB-6204/CB-6208 User and Installation Guide 9.3.9.3 Factory Default The Factory default page is shown below. Follow the instructions to reset the camera to factory default settings if needed. Figure 79: Factory Default Screen Full Restore Click FULL RESTORE to restore the factory default settings. The system restarts in 30 seconds. -
Page 94: Figure 80: Partial Restore Screen
Configuration and Operation Partial Restore Click PARTIAL RESTORE to restore the factory default settings, but save the network settings. The system restarts in 30 seconds. Figure 80: Partial Restore Screen Reboot Click REBOOT to restart the system without changing current settings. -
Page 95: Figure 81: Software Version Screen
Quasar CB-6204/CB-6208 User and Installation Guide 9.3.9.4 Software Version The current version of the software is displayed in the Software Version screen. Figure 81: Software Version Screen 9.3.9.5 Software Upgrade The Software Upgrade screen enables you to select a software file to upload. -
Page 96: Figure 83: Software Upgrade - In Process
Configuration and Operation Note: Make sure that the software upgrade file is available before performing a software upgrade. To upgrade the software 1. In the Step 1 text box, click Browse and select the binary file to be uploaded, for example, uImage+userland.img. -
Page 97: Figure 84: Parameter Screen
Quasar CB-6204/CB-6208 User and Installation Guide 9.3.9.6 Parameters The Parameters screen displays all of the system’s parameter settings. Figure 84: Parameter Screen Note: Slide the sidebar located on the right of the screen to view the entire list of parameters. -
Page 98: Import/Export
Configuration and Operation 9.3.10 Import/Export From the Import/Export screen you can export configuration files to a specified location and retrieve data by uploading an existing configuration file to the camera. Figure 85: Import/Export Screen Export You can save system settings by exporting the configuration file (.bin) to a specified location for future use. -
Page 99: Streaming Settings
Quasar CB-6204/CB-6208 User and Installation Guide 9.4 Streaming Settings Select the Streaming tab in the navigation bar at the top of the page to display the configurable video and audio selections in the sidebar. From the Streaming sidebar, the Administrator can configure a specific video resolution, video compression mode, video protocol, audio transmission mode, etc. -
Page 100: Video Format
From the Video Format screen, you can configure the following settings: Video Resolution Settings Text Overlay Settings Video Rotate Type GOV Settings H.264 Profile CB-6204 cameras support three video streams. Figure 88: CB-6204 Video Format Screen... -
Page 101: Figure 89: Cb-6208 Video Format Screen
Quasar CB-6204/CB-6208 User and Installation Guide CB-6208 cameras support four video streams. Figure 89: CB-6208 Video Format Screen 9.4.1.1 CB-6204 Video Resolution Settings The following video resolutions are supported: H.264-Only MJPEG-Only H.264 + H.264 and H.264 + MJPEG ... - Page 102 Configuration and Operation 9.4.1.1.2 MJPEG-Only MJPEG-Only System Stream 1 Support WDR2/3 1920 x 1080 (25/30 fps) WDR2/3 1280 x 720 (25/30 fps) 720 x 576 (25 fps) WDR2/3 720 x 480 (30 fps) 9.4.1.1.3 H.264 + H.264 and H.264 + MJPEG H.264 + H.264/MJPEG System Stream 1...
- Page 103 Quasar CB-6204/CB-6208 User and Installation Guide 9.4.1.2 CB-6208 Video Resolution Settings The following video resolutions are supported: H.264-Only MJPEG-Only H.264 + H.264 H.264 + MJPEG H.264 + H.264 + H.264 and H.264 + H.264 + MJPEG ...
- Page 104 Configuration and Operation H.264 + H.264/MJPEG (NTSC @ 30 FPS) Stream 1 Stream 2 Support 3840 x 2160 (15 fps) 1920 x 1080 (15 fps) 1280 x 720 (20 fps) 3840 x 2160 (20 fps) 720 x 480 (20 fps) 1920 x 1080 (30 fps) 1920 x 1080 (30 fps) 1280 x 720 (30 fps)
- Page 105 Quasar CB-6204/CB-6208 User and Installation Guide H.264 + H.264 + H.264/MJPEG (NTSC @ 30 FPS) Stream 1 Stream 2 Stream 3 3840 x 2160 (15 fps) 1920 x 1080 (15 fps) 720 x 480 (15 fps) 1280 x 720 (30 fps)
- Page 106 Configuration and Operation H.264 + H.264 + H.264 + H.264/MJPEG (NTSC @ 30 FPS) Stream 1 Stream 2 Stream 3 Stream 4 1280 x 720 (15 fps) 1920 x 1080 (15 fps) 720 x 480 (15 fps) 3840 x 2160 (15 fps) 1280 x 720 (15 fps) 720 x 480 (15 fps) 1280 x 720 (15 fps)
-
Page 107: Figure 90: View-1 (Source)
Quasar CB-6204/CB-6208 User and Installation Guide 9.4.1.4 Video Rotate Type You can change video display type if necessary. Selectable video rotate types include Normal video, Flip video, Mirror video, and 180 degree rotate. Differences among these types are illustrated below. - Page 108 High Profile is the primary profile for HD broadcast applications. It can save 10-12% of the storage cost over Main Profile. However, it may also increase video latency, depending on the stream structure. Quasar Gen II models default to the Main Profile to provide the best trade-off between storage size and video latency.
-
Page 109: Video Compression
Quasar CB-6204/CB-6208 User and Installation Guide 9.4.2 Video Compression From the Video Compression page, you can specify MJPEG and H.264 compression settings. CB-6204 cameras support three video streams. Figure 92: CB-6204 Video Compression Screen... -
Page 110: Figure 93: Video Compression Screen
Configuration and Operation CB-6208 cameras support four video streams. Figure 93: Video Compression Screen MJPEG Compression Setting A higher value implies higher bit rates and higher visual quality. The default setting of the MJPEG Q factor is 35. The setting range is from 1 to 70. Click SAVE to confirm the setting. H.264 Compression Setting The default setting of H.264-1 is 4096. -
Page 111: Video Roi Encoding
Quasar CB-6204/CB-6208 User and Installation Guide 9.4.3 Video ROI Encoding It is possible to configure Region of Interest settings for three (CB-6204) or four (CB-6208) H.264 streams on the Video ROI Encoding screen. The image displayed within the ROI box can be displayed with a higher bit rate and quality than the image outside of the box. -
Page 112: Video Ocx Protocol
From the Video OCX Protocol page, you can select various protocols for streaming media over the network. In the case of multicast networking, select Multicast mode. Three streams are available on CB-6204 cameras. Four streams are available on CB-6208 cameras. Figure 95: Video OCX Protocol Screen Video OCX protocol setting options include: ... -
Page 113: Video Frame Rate
9.4.5 Video Frame Rate From the Video Frame Rate screen, you can specify the frames per second (fps) for each video compression format. CB-6204 includes three streams. CB-6208 includes four streams. Figure 96: Video Frame Rate Screen MJPEG/H.264 Frame Rate Setting When operating the unit in H.264-only mode, the default frame is 30 fps in NTSC and 25 fps in PAL. -
Page 114: Video Mask
Configuration and Operation 9.4.6 Video Mask From the Mask screen, you may select up to five rectangular portions of the View Area to ‘Mask.’ Below is an illustration with the maximum five masks displayed in the View Area, the last (fifth) one selected being highlighted in red. -
Page 115: Audio
Quasar CB-6204/CB-6208 User and Installation Guide 9.4.7 Audio From the Audio screen you can select the Transmission Mode, Server Gain, Bit Rate, and enable or disable storage of the audio recording. Figure 98: Audio Screen Transmission Mode Full-duplex (Talk and listen simultaneously) – In the Full-duplex mode, the local and remote sites can communicate with each other simultaneously, i.e. -
Page 116: Camera Settings
Configuration and Operation Note: Latitude does not support G.726. Click SAVE to confirm the settings. Recording to Storage This function enables recording of the audio on the SD card and NAS. The Recording to Storage function may be enabled or disabled in the Audio screen. The default setting is Disabled. Note: This function works only if the Recording to Storage option has been selected or if the Schedule option has been set. -
Page 117: Exposure
Quasar CB-6204/CB-6208 User and Installation Guide Every screen in the Camera section includes the following pushbuttons to the left of the Live View window: Zoom Click the Wide or Tele Zoom button to implement continuous zoom adjustment. Click Reset to return the zoom to the default setting. -
Page 118: Figure 100: Cb-6204 Exposure Screen
The bottom section of the screen enables you to select one of three exposure modes: P-Iris Priority, Auto P-Iris (default), or Manual Mode. Administrators may either allow the camera to automatically select an exposure level using a programmed algorithm or choose the level themselves. Figure 100: CB-6204 Exposure Screen... - Page 119 Quasar CB-6204/CB-6208 User and Installation Guide P-Iris Priority Mode In P-iris Priority mode, the iris does not adjust, regardless of the light level. If, however, the light level goes below the P-iris setting, the iris will fully open in a single step if the Auto Adjustment option is turned on.
- Page 120 Configuration and Operation Auto P-Iris Mode Auto-P iris is the default mode. It automatically and smoothly adjusts the iris when the light level drops to a point where it is insufficient to support the P-iris setting. A Minimum Shutter Speed may be set from the drop-down menu to ensure a maximum level of exposure.
- Page 121 Quasar CB-6204/CB-6208 User and Installation Guide Shutter Speed – The fixed shutter speed is selectable from 1/4 to 1/10000 sec (NTSC) and 1/3 to 1/10000 sec (PAL). Users should select the suitable shutter speed according to the environmental luminance. The following table lists the options.
-
Page 122: Figure 101: Cb-6208 Exposure Screen
Configuration and Operation 9.5.1.2 CB-6208 Exposure Screen The CB-6208 Exposure screen supports two exposure modes: Auto Mode and Manual Mode. Figure 101: CB-6208 Exposure Screen Auto Mode There are three settings within Auto Mode: Auto Iris Min Shutter Speed – When selecting this mode, the shutter is completely open and the exposure priority is given to the iris. - Page 123 Quasar CB-6204/CB-6208 User and Installation Guide Auto Shutter Min Shutter Speed – When selecting this mode, the camera’s shutter speed works automatically to achieve a consistent video output level. Users can select a suitable shutter speed according to the environmental luminance.
- Page 124 Configuration and Operation Manual Mode (Fixed Shutter) Manual Mode opens the iris completely with a fixed gain. Users can select a suitable shutter speed according to the environmental luminance. The fixed shutter speed is selected from 1 to 1/10000 sec (NTSC) and 1/1.5 to 1/10000 sec (PAL).
-
Page 125: Picture Adjustment
Quasar CB-6204/CB-6208 User and Installation Guide 9.5.2 Picture Adjustment Adjustment of some qualities of the video is made possible by selecting Picture Adjustment in the Camera tab. Brightness, Sharpness, Contrast, Saturation and Hue may all be adjusted via drop-down menus from this window, as shown below. -
Page 126: Advanced Picture Settings
Configuration and Operation 9.5.2.5 Hue Camera image hue level is adjustable: select from a range of -12 to +13. Click SET to confirm the new setting. 9.5.3 Advanced Picture Settings 9.5.3.1 White Balance Options for controlling the camera’s white balance (color balance) are shown below. Figure 103: Advanced Picture Settings Screen –... -
Page 127: Figure 104: Advanced Picture Settings Screen - Backlight
Quasar CB-6204/CB-6208 User and Installation Guide Four white balance modes are available: Auto – The Auto Balance White mode computes the white balance value output using color information from the entire screen. It is suitable for an environment with a light source color temperature in the range of approximately 2,700 ~ 7,500K. -
Page 128: Figure 105: Advanced Picture Settings Screen - Wdr Function
Selecting Off disables this function. This is the default setting. Click SET to confirm the new settings. Note: Shutter WDR is available only on the CB-6204 model. Figure 105: Advanced Picture Settings Screen – WDR Function... -
Page 129: Figure 106: Advanced Picture Settings Screen - Noise Reduction
Quasar CB-6204/CB-6208 User and Installation Guide 9.5.3.4 Noise Reduction Different level options for 3D Noise Reduction (3DNR) include Low, Mid and High. A higher level of 3DNR generates relatively enhanced noise reduction. The proprietary Smart Picture Quality (SPQ) video processing method can drastically minimize motion blur and provides clear images even in low-light environment. -
Page 130: Ir Function
Configuration and Operation 9.5.4 IR Function The IR Function setting activates two functions. It activates the IR LED illuminator for use in low-light conditions or at night and activates IR mode, which is the IR Cut (IRC) filter for electronic day/night operation. - Page 131 Quasar CB-6204/CB-6208 User and Installation Guide 9.5.4.2 IR LED Illuminator This setting is used in low-light conditions or at night. IR LED lights are turned On or Off, depending on the light sensor. The default mode is Auto. Two settings are available: ...
-
Page 132: Miscellaneous
IP address again in your browser in order to use the unit with the new settings. 9.5.5.2.1 CB-6204 TV System Settings Select one of two WDR settings according to your TV standard: WDR 2 shutter (NTSC), WDR 2 shutter (PAL), WDR 3 shutter (NTSC), or WDR 3 shutter (PAL). -
Page 133: Log Out
Quasar CB-6204/CB-6208 User and Installation Guide Click SET to confirm the setting. 9.5.5.2.2 CB-6208 TV System Settings Select the video system and WDR setting according to the desired frame rate and the TV standard: 25 fps (PAL), 30 fps (NTSC), 50 fps (PAL), or 60 fps (NTSC). -
Page 134: Appendices
CB-6204 Technical Specifications 10 Appendices CB-6204 Technical Specifications CB-6208 Technical Specifications Device Search Software Internet Security Settings Install UPnP Components Deleting Existing DVPlayer Deleting Temporary Internet Files Connecting Leads to a Spring Clamp Terminal Block ... -
Page 135: Cb-6204 Technical Specifications
Quasar CB-6204/CB-6208 User and Installation Guide A.1. CB-6204 Technical Specifications Camera Image Sensor 1/3” 2688 x 1520 Progressive Scan BSI CMOS Effective Pixels 2560 x 1440 (H x V) Shutter Speed 1.0 to 1/10,000 (auto) Digital Slow Shutter (DSS) 1/1 to 1/25 or 1/30 with ≤ 32x sensitivity boost in day/night mode 0.3 Lux @F1.4 in color mode;... - Page 136 CB-6204 Technical Specifications Operation English, German, Spanish, French, Italian, Japanese, Korean, Languages Portuguese, Russian, Simplified Chinese, and Traditional Chinese Analytics On/Off, plus sampling pixel interval, detection level, sensitivity Motion Detection level, and time interval settings. Web interface: Configurable up to 10 ROI masks.
- Page 137 Quasar CB-6204/CB-6208 User and Installation Guide Physical 268 x 99 mm (10.55 x 3.89 in.) including mounting flange with mount set to 90° Dimensions (L x W) 285 x 99 mm (11.22 x 3.89 in.) including mounting flange with mount set to 180°...
-
Page 138: Cb-6208 Technical Specifications
CB-6208 Technical Specifications A.2. CB-6208 Technical Specifications Camera Image Sensor 1/1.7” 4072 x 3076 (12 MP) Progressive Scan BSI CMOS Effective Pixels 3840 x 2160 (H x V) Shutter Speed 1.0 to 1/10,000 (auto) Digital Slow Shutter (DSS) 1/1 to 1/25 or 1/30 with ≤ 32x sensitivity boost in day/night mode 0.3 Lux @F1.4 in color mode;... - Page 139 Quasar CB-6204/CB-6208 User and Installation Guide Operation English, German, Spanish, French, Italian, Japanese, Korean, Languages Portuguese, Russian, Simplified Chinese, and Traditional Chinese Analytics On/Off, plus sampling pixel interval, detection level, sensitivity level, Motion Detection and time interval settings. Web interface: Configurable up to 10 ROI masks.
- Page 140 CB-6208 Technical Specifications Electrical Indoor Power Consumption Outdoor 13W with heater and IR Power Source 12VDC (± 10%), 24VAC (± 10%), PoE (802.3af Class 0) Environmental -40° to 50°C (-40° to 122°F) with heater Operating Temperature -25°C to 50°C (-13° to 122°F) for cold start with POE Humidity 10-95% non-condensing General...
-
Page 141: Internet Security Settings
Quasar CB-6204/CB-6208 User and Installation Guide A.3. Internet Security Settings If ActiveX control installation is blocked, either set Internet security level to default or change ActiveX controls and plug-in settings. To set the default Internet security level 1. Start Internet Explorer (IE). -
Page 142: Figure 113: Command Bar Toolbar - Internet Options
Internet Security Settings ActiveX Controls and Plug-in Settings To create a custom level 1. Start Internet Explorer (IE). 2. From the Command Bar toolbar, select Tools and select Internet Options from the menu that appears. Figure 113: Command Bar Toolbar – Internet Options 3. -
Page 143: Install Upnp Components
Quasar CB-6204/CB-6208 User and Installation Guide A.4. Install UPnP Components Follow the instructions below to enable UPnP so that the camera can be discovered and displayed in Network locations under Other Devices: To enable UPnP discovery in Windows 7, 8, and 8.1 1. - Page 144 Install UPnP Components 5. Expand the Home or Work node, select Turn on network discovery. 6. Click Save Changes. Note: Network discovery requires that the DNS Client, Function Discovery Resource Publication, SSDP Discovery, and UPnP Device Host services are started, that network discovery is allowed to communicate through Windows Firewall, and that other firewalls are not interfering with network discovery.
-
Page 145: Deleting The Existing Dvplayer
Quasar CB-6204/CB-6208 User and Installation Guide A.5. Deleting the Existing DVPlayer Users who have previously installed the DVPlayer in the PC should first delete the existing DVPlayer from the PC before accessing the camera. To delete a legacy DVPlayer 1. Click Start and select Control Panel. -
Page 146: Deleting Temporary Internet Files
Deleting Temporary Internet Files A.6. Deleting Temporary Internet Files To improve browser performance, it is recommended to clean up all of the temporary Internet files. To delete temporary Internet files 1. In Internet Explorer (IE), from the Command Bar toolbar, click Tools and select Internet Options from the menu that appears. -
Page 147: Mounting Accessories
Quasar CB-6204/CB-6208 User and Installation Guide A.7. Mounting Accessories The following mounting accessories are available from DVTEL for installation of your Quasar Gen II CB-6204 Series Bullet IP Camera. For more information on available options, contact your DVTEL sales representative or visit www.DVTEL.com to request details on where to get the accessories you need. -
Page 148: Contacting Dvtel
Contacting DVTEL Contacting DVTEL DVTEL Inc. is a multiple award-winning market leader in the development and delivery of intelligent security solutions over IP networks. DVTEL provides unified solutions that leverage existing network infrastructure, while providing unmatched levels of flexibility, scalability and cost-effectiveness - all backed by superior customer support.
Need help?
Do you have a question about the CB-6204 and is the answer not in the manual?
Questions and answers