
Subscribe to Our Youtube Channel
Related Manuals for Fuji Xerox DocuCentre S2010


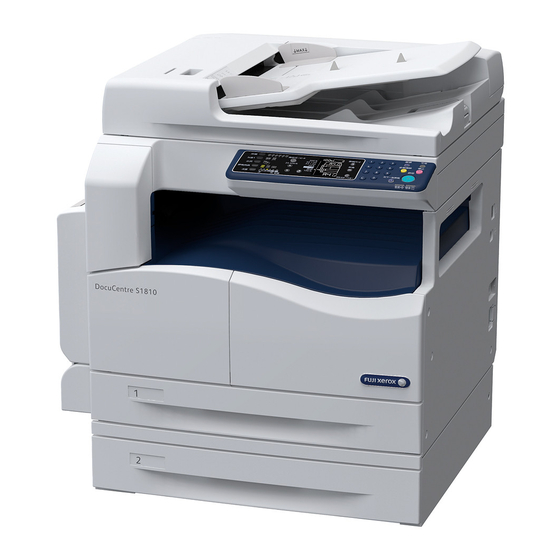
Summary of Contents for Fuji Xerox DocuCentre S2010
- Page 1 FUJI XEROX INTERNAL USE ONLY 開示範囲 : プログラムメンバー 指定期間 : 販売開始まで 取り扱い : 禁複写 作成責任者 : DE 部 2012.4.12 作成日 : DocuCentre S2010 DocuCentre S1810...
- Page 2 The data saved in the hard disk of the machine may be lost if there is any problem in the hard disk. Fuji Xerox is not responsible for any direct and indirect damages arising from or caused by such data loss.
-
Page 3: Table Of Contents
Table of Contents Table of Contents Table of Contents ......................3 Before Using the Machine ..................9 Preface ........................10 Types of Manuals ...................... 11 Using This Guide ....................... 12 Organization of This Guide ................... 12 Conventions ......................13 Safety Notes ......................14 Electrical Safety .................... - Page 4 [Properties] Tab .....................36 [Support] Tab ......................44 Installing the Print Driver/Scan Driver ................45 Installing the Print Driver..................45 Installing the Scan Driver..................45 Uninstalling ......................46 Product Overview.....................47 Machine Components ....................48 Front, Left Side ......................48 Right Side, Rear ....................49 Inside ........................50 Duplex Automatic Document Feeder (Optional) ............51 Power Source......................52 Switching the Power On ..................52 Switching the Power Off ..................52...
- Page 5 Table of Contents Placing the Document................... 84 Setting Advanced Settings..................86 Entering the Number of Copies................87 Starting the Copy Job ................... 87 Operations during Copying..................89 Stopping the Copy Job..................89 Advanced Copy Settings ................... 90 Paper Supply ......................90 Collate........................
- Page 6 Account Mode Settings..................119 Network Settings....................122 Feature Settings ....................126 Machine Status .......................131 Printing Reports......................132 Checking the Job Counter ...................133 Checking Consumables..................133 Checking the Total Number of Impressions Copied..........135 10 Maintenance......................137 Replacing Consumables ..................138 Replacing the Toner Cartridge................139 Replacing the Drum Cartridge ................142 Cleaning the Machine....................144 Cleaning the Exterior ...................144 Cleaning Document Cover and Document Glass ..........144...
- Page 7 Table of Contents E-4: Paper Jams in Tray 2 .................. 182 E-5: Paper Jams in Bypass Tray ................ 183 Document Jams....................... 184 12 Appendix ........................ 187 Specifications ......................188 Printable Area......................192 Optional Components....................193 Notes and Restrictions .................... 194 Notes and Restrictions on the Use of the Machine..........
-
Page 9: Before Using The Machine
1 Before Using the Machine This chapter describes how to use this guide, as well as safety notes and legal notice you should read before using the machine. Preface .......................10 Types of Manuals ..................11 Using This Guide ..................12 Safety Notes ....................14 Regulations....................21 Environment....................21 About License .....................22... -
Page 10: Preface
1 Before Using the Machine Preface Thank you for selecting the DocuCentre S2010/S1810 (hereafter referred to as "the machine"). This guide describes how to operate the machine and the precautions you should follow during operation. To get the most out of the machine and to use it effectively, be sure to read this guide before use. -
Page 11: Types Of Manuals
Types of Manuals Types of Manuals The following guides are provided with the machine. Accompanying Manuals User Guide (this guide) (Driver CD Kit) The guide describes how to use the copy, print, and scan features as well as how to set the paper, perform everyday maintenance, make machine status settings, perform troubleshooting, and set up a network. -
Page 12: Using This Guide
1 Before Using the Machine Using This Guide This guide is intended for first time users of the machine. It describes the basic operations for the copy, print, and scan features. Organization of This Guide This guide consists of the following chapters: 1 Before Using the Machine Describes how to use this guide and provides license information. -
Page 13: Conventions
Using This Guide Conventions The screen shots and illustrations used in this guide vary depending on the machine configuration and optional components installed. Some of the items in the screen shots may not be displayed or available depending on your machine configuration. The procedures in this guide may vary depending on the driver and utility software being used due to the upgrades. -
Page 14: Safety Notes
1 Before Using the Machine Safety Notes Before using this product, read "Safety Notes" carefully for safety use. This product and recommended supplies have been tested and found to comply with strict safety requirements including safety agency approvals and compliance with environmental standards. -
Page 15: Electrical Safety
If the power cord is damaged or insulated wires are exposed, contact your local Fuji Xerox representative for its replacement. Do not use a damaged or uninsulated cord to avoid the risk of electric shock and a fire accident. -
Page 16: Machine Installation
Once you notice any unusual condition, switch off and unplug this product first and contact your local Fuji Xerox representative. Machine Installation Do not locate this product where people might step on or trip over the power cord. - Page 17 Safety Notes With Duplex Automatic Document Feeder 1100.9 325.9 (Unit: mm) Do not incline the product at more than 10 degree angle. Otherwise, it may fall over and cause injuries. front right left front back right left back 10 ° 10 °...
-
Page 18: Operational Safety
Other cleaning materials may result in poor performance of the product. Never use aerosol cleaners to avoid catching fire and explosion. If you need to pull out a tray to remove paper jam, contact your local Fuji Xerox representative. Do not pull out a tray, otherwise it may cause injuries. -
Page 19: Consumable
Otherwise, it may cause injuries or burns. Switch off the product immediately and contact your local Fuji Xerox representative. Do not apply excessive force to hold thick document on the document glass. It may break the glass and cause injuries. -
Page 20: Location Of Warning And Caution Labels
1 Before Using the Machine If toner spills onto your skin or clothing, wash it off with soap and water. If you get toner particles in your eyes, wash it out with plenty of water for at least 15 minutes until irritation is gone. Consult a physician if necessary. If you inhale toner particles, move to a fresh air location and rinse your mouth with water. -
Page 21: Regulations
Changes and modifications to this product not specifically approved by Fuji Xerox may void the user's authority to operate this equipment. Product Safety Certification (UL, CB) This product is certified by the following agency using the safety standards listed. -
Page 22: About License
1 Before Using the Machine About License This section describes information about licenses. Be sure to read through it. Libcurl COPYRIGHT AND PERMISSION NOTICE Copyright (c) 1996 - 2006, Daniel Stenberg, <daniel@haxx.se>. All rights reserved. Permission to use, copy, modify, and distribute this software for any purpose with or without fee is hereby granted, provided that the above copyright notice and this permission notice appear in all copies. -
Page 23: Wide Dhcp Client
About License PROJECT OR CONTRIBUTORS BE LIABLE FOR ANY DIRECT, INDIRECT, INCIDENTAL, SPECIAL, EXEMPLARY, OR CONSEQUENTIAL DAMAGES (INCLUDING, BUT NOT LIMITED TO, PROCUREMENT OF SUBSTITUTE GOODS OR SERVICES; LOSS OF USE, DATA, OR PROFITS; OR BUSINESS INTERRUPTION) HOWEVER CAUSED AND ON ANY THEORY OF LIABILITY, WHETHER IN CONTRACT, STRICT LIABILITY, OR TORT (INCLUDING NEGLIGENCE OR OTHERWISE) ARISING IN ANY WAY OUT OF THE USE OF THIS SOFTWARE, EVEN IF ADVISED OF THE POSSIBILITY OF SUCH DAMAGE. -
Page 24: Md5
1 Before Using the Machine Copyright (C) 1991-2, RSA Data Security, Inc. Created 1991. All rights reserved. License to copy and use this software is granted provided that it is identified as the "RSA Data Security, Inc. MD5 Message-Digest Algorithm" in all material mentioning or referencing this software or this function. -
Page 25: Legal Notice
Legal Notice Legal Notice Copying or printing certain documents may be illegal in your country. Penalties of fines or imprisonment may be imposed on those found guilty. The following are examples of items that may be illegal to copy or print in your country. Currency Banknotes and checks Bank and government bonds and securities... - Page 26 1 Before Using the Machine...
-
Page 27: Environment Settings
2 Environment Settings This chapter describes the machine's operating environment. Note • You may not need to make the environment settings described here on some models. Make them when you have mounted an option requiring them. For more information, contact our Customer Support Center. Supported Environment ................28 Interface Cables..................29 Setting the Network Environment ...............31... -
Page 28: Supported Environment
2 Environment Settings Supported Environment This section describes the environment settings needed to use the machine's print and scan features. Print Feature The machine can be connected directly to a computer for use as a local printer, or can be connected to a network for use as a network printer. Local Connection Network Connection LPD / Port9100... -
Page 29: Interface Cables
Interface Cables Interface Cables When connecting the machine directly to a computer, use the USB interface. When connecting the machine to a network, use the Ethernet interface. Using the USB Interface The machine supports the USB 1.1/2.0 interface. To connect the USB cable: Press the power switch to the [ ] position to turn the power OFF. -
Page 30: Using The Ethernet Interface
2 Environment Settings Using the Ethernet Interface The machine supports 100BASE-TX and 10BASE-T Ethernet interfaces. Note • The Ethernet interface is available when the Simple Network Print Kit is installed on the machine. To connect the Ethernet interface: Press the power switch to the [ ] position to turn the power OFF. -
Page 31: Setting The Network Environment
Setting the Network Environment Setting the Network Environment This section describes how to make the settings needed to use the TCP/IP protocol. Note • The machine supports IPv6 addresses in an IPv6 network environment. For more information, refer to "Setting the Machine's IP Address (IPv6)" (P.31). Setting the Machine's IP Address (IPv4) To use the TCP/IP protocol, you must set the machine's IP address. -
Page 32: Activating The Communication Port To Use
2 Environment Settings Activating the Communication Port To Use Use CentreWare Internet Services to activate the communication port you want to use. You can activate the following ports: Port Description SNMP Activate this port when using the SNMP protocol (used for operations such as loading the machine's information to the print driver). - Page 33 Activating the Communication Port To Use Click [Port Settings], and check the checkbox of the desired port. Click [Apply]. Note • Restart the machine to enable the new settings.
-
Page 34: Using Centreware Internet Services
2 Environment Settings Using CentreWare Internet Services CentreWare Internet Services CentreWare Internet Services provides services such as changing settings using a web browser on a computer connected to a TCP/IP network environment. Note • The Simple Network Print Kit is required to use this feature. The IP address of the machine also needs to be set. -
Page 35: Starting Centreware Internet Services
Using CentreWare Internet Services The following procedure is based on the Internet Explorer 6.0. From the [Tools] menu, select [Internet Options]. In the [General] tab, click [Settings] under [Temporary Internet Files]. In the [Settings] dialog box, select [Check for newer versions of stored pages:]. Select [Every visit to the page] or [Every time you start Internet Explorer]. -
Page 36: Setting Items On Centreware Internet Services
2 Environment Settings Setting Items on CentreWare Internet Services The table below lists the menu items on the CentreWare Internet Services screen. Note • You must have a user name and passcode to change the settings. The user ID "11111" and passcode "x-admin"... - Page 37 Using CentreWare Internet Services Machine Name You can enter the printer name (between 1 and 32 ASCII code characters excluding colons (:), equal signs (=), at symbols (@), or asterisks (*), which are not valid). Location You can enter the machine's location (up to 255 ASCII code characters). Contact Person You can enter the contact person's information (up to 255 ASCII code characters).
- Page 38 2 Environment Settings Ethernet (Connectivity > Physical Connections) Rated Speed You can set the Ethernet port speed. You can select from Auto, 10 Mbps Half-Duplex, 10 Mbps Full-Duplex, 100 Mbps Half-Duplex or 100 Mbps Full-Duplex. (Default: Auto) MAC Address The machine's MAC address is displayed. Apply button You can apply changes by pressing this button.
- Page 39 Using CentreWare Internet Services - Automatically Configured Address 1: The IPv6 address set automatically is displayed. - Link-Local Address: The link-local address set automatically is displayed. - Gateway Address: You can enter the gateway address when the [Enable Manual Address] checkbox is checked.
- Page 40 2 Environment Settings - Trap to be Received: You can set whether to send notification of [Print], [Cold Start] and [Authentication Failure] events. Add UDP IPv6 Address button You can add a recipient address for UDP IPv6 trap notification by pressing this button.
- Page 41 Using CentreWare Internet Services Apply button You can apply changes by pressing this button. Note • Reboot machine to enable new settings. Port9100 (Connectivity > Protocol) You can set Port9100. General Port9100 Port Status You can check [Enabled] to use Port9100. (Default: On) Physical Connection [Ethernet] is displayed.
- Page 42 2 Environment Settings Apply button You can apply changes by pressing this button. Note • Reboot machine to enable new settings. IP Filtering (Security) You can restrict the supported IP addresses. IPv4 Filtering IP Filtering You can check [Enabled] to enable IP Filtering. (Default: Off) Edit/Delete selection checkbox You can select the IP Filter to edit/delete.
- Page 43 Using CentreWare Internet Services - Source IP Mask: You can set the prefix length of the IP address that is allowed from access. (Default: 0) Edit button The Edit IP Filter Rule - IPv6 screen is displayed. Edits the IPv6 address that is allowed from access.
-
Page 44: [Support] Tab
2 Environment Settings [Support] Tab The links to support information is displayed. Link settings can be changed. Support Change Settings button You can change a link to support information by pressing this button. Name You can enter the link name (between 1 and 63 ASCII code characters). You can enter the link address (between 1 and 63 alphanumeric characters including the at symbol (@), percent sign (%), period (.), colon (:), forward slash (/), hyphen (-), tilde (~), question mark (?), and ampersand (&), which are valid). -
Page 45: Installing The Print Driver/Scan Driver
Installing the Print Driver/Scan Driver Installing the Print Driver/Scan Driver Installing the Print Driver To enable the machine to print, you must first install a print driver from the Driver CD Kit CD-ROM. The CD-ROM contains the following print driver. Print Driver Name Description FX DocuCentre XXXXX... -
Page 46: Uninstalling
2 Environment Settings Uninstalling Uninstalling the Print Driver To uninstall the print driver, use the uninstallation tool on the Driver CD Kit CD-ROM. Follow the instructions provided in the CD-ROM Documentation (HTML) included on the CD-ROM. Uninstalling Other Software To uninstall other software installed from the Driver CD Kit CD-ROM, see the application's Readme file. -
Page 47: Product Overview
3 Product Overview This chapter lists the name of each machine component, and describes basic operations such as how to turn the power ON/OFF and use the control panel. Machine Components.................48 Power Source .....................52 Energy Saver Modes ..................54 Control Panel ....................56 Machine Status ...................59 Account Modes ...................62 Setting the Options Configuration...............67... -
Page 48: Machine Components
3 Product Overview Machine Components This section describes the machine components and their features. Front, Left Side Component Description Document cover Holds the document in place. Document glass Place the document in the machine. Control panel Contains the buttons, LED indicators, and status machine diagram used for operations. -
Page 49: Right Side, Rear
Machine Components Component Description Left cover [A] Open this cover to remove any jammed paper. Note • When the machine works properly, this cover is locked. To open this cover, make sure to exit Sleep mode and turn the machine's power OFF. -
Page 50: Inside
3 Product Overview Inside Component Description Toner cartridge Contains toner (the powder used to form the image). Drum cartridge Contains photoconductors. Fusing unit Fuses toner on paper. Important • Do not touch this unit as it is extremely hot. -
Page 51: Duplex Automatic Document Feeder (Optional)
Machine Components Duplex Automatic Document Feeder (Optional) Component Description Document feeder cover Open this cover to remove any jammed paper. Inner cover Open this cover to remove any jammed paper. Document guides Aligns the edges of documents. Document feeder tray Load documents here. -
Page 52: Power Source
3 Product Overview Power Source Switching the Power On The following describes how to switch the power on. The machine takes approximately 30 seconds to warm up and to be ready to copy or print after the power is turned on. It may take slightly longer than normal depending on the device configuration. - Page 53 Power Source Press the power switch to the [ ] position to switch the power off.
-
Page 54: Energy Saver Modes
3 Product Overview Energy Saver Modes The machine is installed with the energy saver feature that will automatically cut off the electricity to the machine if no copy or print data is received for a certain duration. There are two energy saver modes: Low Power mode and Sleep mode. Low Power Mode The machine's power is not turned OFF completely in Low Power mode. -
Page 55: Exiting Energy Saver Modes
Energy Saver Modes Exiting Energy Saver Modes The following describes how to deactivate an energy saver mode. The energy saver mode is exited and the <Energy Saver> button light is turned off in the following instances: Exiting Low Power mode Receiving a job Pressing the "Energy Saver"... -
Page 56: Control Panel
3 Product Overview Control Panel The names and functions of the control panel's components are described below. Component Description <2 Sided> button Press this button to select 1 Sided or 2 Sided copying. Normally, the icon is off (1 Sided → 1 Sided). The selection moves to the right from [Off] (1 Sided →... - Page 57 Control Panel Component Description <Clear All> button Press this button to reset the displayed settings of each feature to default values or clear the entered numbers. The setting is returned to the same condition as the machine is powered on. <Start>...
- Page 58 3 Product Overview Component Description <Collated> button Press this button to set collate when copying multiple copies. The selection switches between sorting and stacking every time that the button is pressed. When documents are set in the document feeder, this feature is automatically enabled.
-
Page 59: Machine Status
Machine Status Machine Status The Status Machine Diagram (mimic) consists of the following contents to display the machine status. This section provides detailed description of each indicator on the status machine diagram (mimic). Component Description Reduce/Enlarge indicator Indicates the selected zoom ratio. Document indicator This indicator is lit when a document is placed in the document feeder or a document jam occurs. -
Page 60: Icons
3 Product Overview Icons This section describes icons that may appear in the status machine diagram. Toner Cartridge This icon is lit when the toner cartridge needs to be replaced in the near future. Prepare a new toner cartridge. No error code is displayed at this point. - Page 61 Machine Status Area - blinking When a paper/document jam occurs or any cover is open, the notification area blinks as shown below. One tray module Front cover Left cover [A] Tray 1 cover [B] Tray 2 Bypass tray Document feeder When any paper or document jam occurs, [ ] will also appear.
-
Page 62: Account Modes
3 Product Overview Account Modes This section describes three different account modes that the machine offers to manage accounts effectively for copy jobs, and how to log in to the machine. Types of Account Modes You can select one of the following account modes in the system settings: No Account Mode, Single Account Mode, or Multiple Account Mode. -
Page 63: Logging In The Machine In The Single Account Mode
Account Modes Logging In the Machine in the Single Account Mode The following procedure describes how to log in to the machine when the machine is in Single Account Mode. When the machine is in Single Account Mode, [_ _ _ _ _ _] appears in the status machine diagram. -
Page 64: Logging In The Machine In The Multiple Account Mode
3 Product Overview If the entered password is correct, the machine enters Copy Mode, and [1] appears in the display. The <Log In/Out> button is lit while you are <Log In/Out> button logged in to the machine. Note • You do not need to log in to the machine for a scan job or print job. - Page 65 Account Modes The account number that you enter appears in the display. Press the <Start> button to confirm the <Start> button entered account number. [_ _ _ _ _ _] appears in the status machine diagram. Enter a password which corresponds to the Numeric keypad account number that you just entered, using the numeric keypad.
- Page 66 3 Product Overview Press the <Start> button to confirm the <Start> button entered password. If the entered password is correct, the machine enters Copy Mode, and [1] appears in the display. The <Log In/Out> button is lit while you are <Log In/Out>...
-
Page 67: Setting The Options Configuration
Setting the Options Configuration Setting the Options Configuration When the optional Simple Network Print Kit is installed, you can retrieve the information of machine configuration into the print driver. Update the information of machine configuration when an optional component is changed. - Page 68 3 Product Overview If [Printer Searching Method] is displayed The machine's information is not loaded onto the print driver. Complete the following operations. 1) Select [Specify Address], and click [Next]. 2) Enter the printer name or IP Address in the [Printer Name or IP Address] field.
-
Page 69: Loading Paper
4 Loading Paper This chapter describes the paper that can be used with the machine, precautions when handling paper, and how to load paper in trays. Paper Types ....................70 Loading Paper ....................75 Changing Paper Size..................78 Setting the Paper Size ................80 Setting the Paper Type ................81... -
Page 70: Paper Types
Use of non-recommended paper types may result in paper jams, lower print quality, malfunctions, or damage to the machine. To achieve optimum machine performance, use only paper types recommended by Fuji Xerox. If you desire to use paper other than the paper recommended by Fuji Xerox, contact our Customer Support Center. WARNING Do not use conductive paper such as origami paper, carbonic paper or conductively-coated paper. -
Page 71: Supported Paper Type
Paper Types Duplexing (2 Sided printing) The following paper types are supported for automatic duplexing: Paper Type (gsm) Lightweight (60 to 63 gsm) Plain (64 to 90 gsm) Heavyweight (91 to 110 gsm) *Bypass tray only Supported Paper Type Standard Paper When printing or copying on commonly used paper (plain paper), use paper meeting the standards described below. - Page 72 4 Loading Paper Basis Weight Paper Paper Name Notes/Countermeasure (gsm) Type Professional Plain — Colotech Idol Plain — Premier Plain — Xplore Plain Before copying or printing, fan the paper well and reload it in the tray. Xcite Plain Before copying or printing, fan the paper well and reload it in the tray.
- Page 73 Paper Types Usable Paper In addition to the standard/semi-standard paper, the following paper also can be used. Basis Weight Paper Paper Name Notes/Countermeasure (gsm) Type DocuPaper Black Plain — Laserprint Plain — Green Wrap (Recycle) Plain — Recycled Pure+ (Recycle) Plain —...
-
Page 74: Unusable Paper
4 Loading Paper Unusable Paper Using paper not recommended by Fuji Xerox may cause a paper jam or machine malfunction. Use paper recommended by Fuji Xerox. Damp or wet paper Paper pre-printed with other printer or copying machine Wrinkled, creased, or ripped paper... -
Page 75: Loading Paper
Loading Paper Loading Paper This section describes how to load paper in a tray. Automatic Tray Selection When processing a print job, specify the settings in the print driver s screen by selecting [Auto Paper Select] under [Paper Tray] in the [Paper/Output] tab. The machine automatically selects a tray to match the specified document size and orientation. -
Page 76: Loading Paper In Bypass Tray
4 Loading Paper For Tray 1, push down the metal plate to the bottom of the tray. Load the paper with the side to copy or print on facing up. Align the leading edge of the paper with the left side of the tray. Important •... - Page 77 Loading Paper Load paper with the side to be copied or printed on facing down, inserting the paper until its edge lightly touches against the paper feed entrance. Important • Do not load mixed paper types in a tray. • Do not load paper above the maximum fill line.
-
Page 78: Changing Paper Size
4 Loading Paper Changing Paper Size This section describes how to change paper size in Trays 1 and 2. Important • Do not load mixed paper sizes into a tray. Note • When you change the size and orientation of paper in a tray, change the paper size setting to match the paper size. - Page 79 Changing Paper Size Push the tray in gently until it stops. Important • When pushing the tray in, do it slowly. If the tray is pushed with too much force, it might cause machine malfunctions. Note • Affix the paper size label to the front of the tray. Set the paper size setting.
-
Page 80: Setting The Paper Size
4 Loading Paper Setting the Paper Size This section describes how to set the paper size and orientation for Trays 1 and 2. After you load paper, make sure to set the size and orientation of the paper loaded into the tray. -
Page 81: Setting The Paper Type
Setting the Paper Type Setting the Paper Type This section describes how to set the type of paper loaded in tray. The paper type is set to standard type as default. When loading a different type of paper into a tray, change the paper type setting according to the type of paper loaded in the tray to keep the print quality. - Page 82 4 Loading Paper After you confirm the setting, press the <Log In/Out> button and exit the System Administration mode. Note • When you exit the System Administration mode, the <Log In/Out> button light is turned off.
-
Page 83: Copy
5 Copy This chapter describes the Copy features and operations. Copying Procedure ..................84 Operations during Copying .................89 Advanced Copy Settings ................90 Managing the Copy Paper with Accounting..........99... -
Page 84: Copying Procedure
Bound documents, such as book Note • The document feeder is not available for some models. An optional component is required. Contact your local Fuji Xerox representative. Document Feeder Supported document sizes You can place documents of the standard sizes in the document feeder. -
Page 85: Document Glass
Copying Procedure Follow the steps below to place documents in the document feeder. You can place single or multiple sheet documents. Remove any paper clips or staples from the document before placing it in the document feeder. Place the document in the center of the document feeder, with the side to copy (or the front surface of a 2 Sided document) facing Note... -
Page 86: Setting Advanced Settings
5 Copy CAUTION Do not apply excessive force to hold thick document on the document glass. It may break the glass and cause injuries. Follow the steps below to place a document on the document glass. You can place a single sheet document or bound document such as book on the document glass. -
Page 87: Entering The Number Of Copies
Copying Procedure Entering the Number of Copies You can enter a value between 1 and 999 for the number of copies. Use the numeric keypad to enter the desired Numeric keypad number of copies. The entered value appears in the status machine diagram. - Page 88 5 Copy Placing a document on the document glass Copying multiple sets of documents If any of the following features are set, a copy job may not be started after loading a document due to the blinking <Last Original> button. Collate: On 2 Sided: 1 →...
-
Page 89: Operations During Copying
Operations during Copying Operations during Copying You can stop the currently copying job. Stopping the Copy Job To cancel the currently copying job: Press the <Stop> button. <Stop> button... -
Page 90: Advanced Copy Settings
5 Copy Advanced Copy Settings This section describes all the settings you can set for the copy feature. Setting Item Description Page: Paper Supply Sets the tray to use. P.90 Collate Sets the output method to use when making P.91 multiple sets of copies. -
Page 91: Collate
Advanced Copy Settings Tray 1, Tray 2, and Bypass tray Select one of the selectable trays. The indicator moves to the selected tray every time that the <Paper Supply> button is pressed. Note • Tray 2 is an optional component. Collate You can set the output method for copying sets of multiple documents. -
Page 92: Original Size
5 Copy Aut (Automatic zoom ratio) The machine automatically sets an appropriate zoom ratio by calculating the document size and the specified paper size to enable the document to fit on the page. Note • When using the automatic zoom ratio, you cannot select the automatic paper selection. Fixed zoom ratio You can set the zoom ratio by selecting from the fixed zoom ratios. -
Page 93: Original Type
Advanced Copy Settings Press the <Original Size> button to select a <Original Size> button document size. In the status machine diagram, the selected document size and the orientation are displayed on the original size display. Fixed document size (Preset) You can set the document size of the placed document by selecting from the preset document sizes. -
Page 94: Lighten/Darken
5 Copy Lighten/Darken You can set the density from five levels. The farther left the position of , the darker the copy; the farther right, the lighter. You can also set the toner saver mode. Press the <Lighten/Darken> button to select a <Lighten/Darken>... - Page 95 Advanced Copy Settings Important • Place an ID card in the upright position. Note • Setting [ID Card Copy] to [On] automatically sets [Reduce/Enlarge] to [100%]. You can change the zoom ratio manually. Follow the steps below to use the ID Card Copy feature. Place an ID card face down slightly away from the top left corner of the document glass, and then close the document cover.
-
Page 96: Sided
5 Copy 2 Sided You can set to scan a 1 Sided or 2 Sided or copy on one or both sides of paper. Note • This feature is available when the Duplex Output Unit is installed on the machine. Press the <2 Sided>... -
Page 97: Sharpness
Advanced Copy Settings Press the <Pages per Side> button to select <Pages per Side> button the desired copy method. Disables the Pages per Side feature. 2 Pages Copies 2 documents on a single page. 4 Pages Copies 4 documents on a single page. When using the document glass and all <Last Original>... -
Page 98: Auto Rotation
5 Copy Note • The value set for erase frame applies to all four edges of the document. • For ID card copy, the erase frame is set separately. You can set the erase frame in the System Administration mode. For more information, refer to "Feature Settings"... -
Page 99: Managing The Copy Paper With Accounting
Managing the Copy Paper with Accounting Managing the Copy Paper with Accounting You can manage the copy paper usage for up to 10 users. You can set the password and maximum number of copied impressions permitted for each user. A list of items available with Accounting is given below. Display/set the password. - Page 100 5 Copy...
-
Page 101: Scan
6 Scan This chapter describes the Scan feature. Scanning Procedure .................102 Loading Scan Data Using a PC-Based Application ........106 Operations during Scanning ..............107... -
Page 102: Scanning Procedure
Bound documents, such as book Note • The document feeder is not available for some models. An optional component is required. Contact your local Fuji Xerox representative. Document Feeder Supported document sizes You can place documents of the standard sizes in the document feeder. - Page 103 Scanning Procedure The document feeder accepts the following number of sheets. Document Type (gsm) Number of Sheets Lightweight (38 to 49 gsm) 110 sheets Plain (50 to 80 gsm) 110 sheets Heavyweight (81 to 128 gsm) 75 sheets (Bypass tray only) Important •...
- Page 104 6 Scan Open the document stopper. Document Glass Supported document sizes The maximum size is 297 × 432 mm. Selectable document sizes in the scan driver A3 (297 × 420 mm), A4 (210 × 297 mm), A5 (148 × 210 mm), B4 (257 × 364 mm), B5 (182 ×...
-
Page 105: Using The Scan Feature
Scanning Procedure Close the document cover. Using the Scan Feature The scan feature is available using an application. Scan Feature Details See Page Using an application Scan data is loaded into the computer using an P.106 application. Important • The machine supports the scan feature using the USB connection. Scanning using a network is not supported. -
Page 106: Loading Scan Data Using A Pc-Based Application
6 Scan Loading Scan Data Using a PC-Based Application This feature can be used to load scan data from a TWAIN-compatible or WIA- compatible application installed on a computer. You can set the document load conditions from the PC display to enable you to load the document while checking the scan results on the Preview screen. -
Page 107: Operations During Scanning
Operations during Scanning Operations during Scanning You can stop the currently scanning job. Stopping the Scan Job To cancel the currently scanning job: On the machine Press the <Stop> button. <Stop> button On the computer Press [Cancel] on the screen displayed while scanning. - Page 108 6 Scan...
-
Page 109: Print
7 Print This chapter describes how to print using the print driver. Major Print Driver Functions ..............110 Printing......................111 Operations during Printing ................112... -
Page 110: Major Print Driver Functions
7 Print Major Print Driver Functions This section describes the major print driver functions used for printing. The print driver must be installed before use. For information on how to install the print driver, refer to "Installing the Print Driver/Scan Driver" (P.45). -
Page 111: Printing
The procedure used to print will vary according to the application you are using. See your application's manual for the specific procedure. The steps below are the operation used in the [FX DocuCentre S2010] print driver screen. Select [Print] from the application's [File] menu. -
Page 112: Operations During Printing
7 Print Operations during Printing You can stop the currently printing job. Stopping the Print Job To cancel the currently printing job: On the machine Press the <Stop> button. <Stop> button On the computer Double-click the printer icon located on the task bar in the lower right corner of the screen. -
Page 113: Tools
8 Tools Each feature of the machine is set to the factory default (initial) settings, but you can customize these settings to match your operating environment. You can change the settings in the System Administration mode. Note • Some settings cannot be displayed on some models. An optional component is required. -
Page 114: System Settings Procedure
8 Tools System Settings Procedure This section describes the overview of how to change the machine's default settings and check the machine information. Important • If there are any current or pending jobs, you cannot enter the System Administration mode. •... -
Page 115: Change Settings
System Settings Procedure Change Settings Enter a program number using the numeric Numeric keypad keypad. For more information, refer to "System Administrator Program List" (P.116). Press the <Start> button to confirm the entered value. Exit the System Administration Mode Press the <Log In/Out> button. <Log In/Out>... -
Page 116: System Administrator Program List
8 Tools System Administrator Program List This section describes the programmable system settings on the machine. Clock Settings Note • These settings are available when the Simple Network Print Kit is installed. • When setting the system clock at the first time, set the [Date Format] and the [Time Format] as well. - Page 117 System Administrator Program List Program Values Menu Items Descriptions Numbers (*: Default setting) Sleep Mode Set the amount of time that 1* - 239 minutes Timer the machine enters Sleep mode from Low Power mode. You can set a value between 1 and 239 minutes (in 1 minute increments).
- Page 118 8 Tools Program Values Menu Items Descriptions Numbers (*: Default setting) Paper Class Set the paper size series to 2: Inch Series be used. 3: AB Series (8 × 13") 4: AB Series (18K/16K)* 5: AB Series (8 × 13"/8 × 14") 0: Do not display Error Display of...
-
Page 119: Account Mode Settings
System Administrator Program List Program Values Menu Items Descriptions Numbers (*: Default setting) 5th digit of the Set the 5th digit of the system 0 - 10 (When the password System administrator password. is 4-digit, enter 10.) Administrator (Default:1) Password 6th digit of the Set the 6th digit of the system 0 - 10 (When the password... - Page 120 8 Tools Program Values Menu Items Descriptions Numbers (*: Default setting) Account Number Specify the account number 4 - 6 digit numbers 3 Password 3's password using three (Default: 0003) digits. Account Number Specify the account number 4 - 6 digit numbers 4 Password 4's password using three (Default: 0004)
- Page 121 System Administrator Program List Program Values Menu Items Descriptions Numbers (*: Default setting) Account Number Specify the maximum 0 (No Limit)* - 255 7 Copy Job Limit number of pages allowed to (1 = 1,000) copy for the account number Account Number Specify the maximum 0 (No Limit)* - 255...
-
Page 122: Network Settings
8 Tools Network Settings Note • These settings are available when the Simple Network Print Kit is installed. Program Values Menu Items Descriptions Numbers (*: Default setting) 1006 Ethernet Speed Set the communication 17: 10BASE-T Half speed. 18: 100BASE-TX Half 33: 10BASE-T Full 34: 100BASE-TX Full 127: Auto*... - Page 123 System Administrator Program List Program Values Menu Items Descriptions Numbers (*: Default setting) 1019 Manual Set the 3rd 8-bit of the 0* - 255 Gateway machine's gateway address Address3 on using the IPv4. IPv4 1020 Manual Set the 4th 8-bit of the 0* - 255 Gateway machine's gateway address...
- Page 124 8 Tools Program Values Menu Items Descriptions Numbers (*: Default setting) 1041 Allowed IPv4 IP Set the 4th 8 bit of the 0* - 255 Address (3) - 4 Allowed IPv4 IP Address (3) - 1042 IPv4 Access Set the bit length (3) of 0* - 32 Control Mask bit Access Control Mask for...
- Page 125 System Administrator Program List Program Values Menu Items Descriptions Numbers (*: Default setting) 1066 IPv4 Access Set the bit length (6) of 0* - 32 Control Mask bit Access Control Mask for length (6) IPv4. 1070 Allowed IPv4 IP Set the 1st 8 bit of the 0* - 255 Address (7) - 1 Allowed IPv4 IP Address (7) -...
-
Page 126: Feature Settings
8 Tools Program Values Menu Items Descriptions Numbers (*: Default setting) 1094 Allowed IPv4 IP Set the 1st 8 bit of the 0* - 255 Address (10) - 1 Allowed IPv4 IP Address (10) - 1. 1095 Allowed IPv4 IP Set the 1st 8 bit of the 0* - 255 Address (10) - 2... - Page 127 System Administrator Program List Program Values Menu Items Descriptions Numbers (*: Default setting) 3005 Lighten/Darken Set the default setting of 0: Light +2 (Copying) [Lighten/Darken]. 1: Light +1 2: Normal* 3: Dark +1 4: Dark +2 5: Toner Saver 3006 Sharpness Set the value of the 0: Soft +2...
- Page 128 8 Tools Program Values Menu Items Descriptions Numbers (*: Default setting) 3008 Document Size Set the default document size 1: 11 × 17" (Continued) (Copying) when the program number 2: A3 206 is set to 4. 3: 8K 5: B4 6: 8.5 ×...
- Page 129 System Administrator Program List Program Values Menu Items Descriptions Numbers (*: Default setting) 3014 Binding side for Set the binding side when the 3: Long side binding* 2 Sided copying document and paper 4: Short side binding are set. When the "Pages per Side"...
- Page 130 8 Tools...
-
Page 131: Machine Status
9 Machine Status This chapter describes the features provided for checking machine statuses. Printing Reports ..................132 Checking the Total Number of Impressions Copied .........135... -
Page 132: Printing Reports
9 Machine Status Printing Reports The machine can print the following reports: Report Description System Settings Report Prints the machine's hardware configuration, version information, status of consumables, number of pages printed by each feature, the items that can be set by CentreWare Internet Services, and their values. -
Page 133: Checking The Job Counter
Printing Reports Note • To stop the current printing job, press the <Stop> button. When the print job is completed, the status machine diagram displays as shown in the right image. When you finish printing, press the <Log In/Out> button to exit the System Administration mode. - Page 134 9 Machine Status [Replace Soon] Replacement is needed soon. Drum Status Shows the drum cartridge status. [OK] Replacement is not currently needed. [Reorder] Replacement is currently not needed, but the cartridge will need to be replaced soon. Have a new drum cartridge on hand. [Replace Soon] Replacement is needed soon.
-
Page 135: Checking The Total Number Of Impressions Copied
Checking the Total Number of Impressions Copied Checking the Total Number of Impressions Copied The machine can display the total number of impressions each user has copied and the maximum number of impressions each user is permitted to copy. This feature can be used in Multiple Account mode to manage the copy paper. Accounting for copy paper: "Managing the Copy Paper with Accounting"... - Page 136 9 Machine Status Check the value displayed. Note • You can see the next value by pressing the <Start> button when the triangle appears. • To return to the program number input screen, press the <Stop> button. When you finish checking, press the <Log In/Out> button, and exit the System Administration mode.
-
Page 137: 10 Maintenance
10 Maintenance This chapter describes how to replace consumables and clean the machine. Replacing Consumables................138 Cleaning the Machine ................144... -
Page 138: Replacing Consumables
Toner Cartridge CT201911 1unit/box Drum Cartridge CT350972 1unit/box Important • Our service representatives will replace the drum cartridge. Contact your local Fuji Xerox representative or sales representative. Note • We recommend that you always keep spare consumables/periodic replacement parts available. WARNING Use a broom or a wet cloth to wipe off spilled toner. -
Page 139: Replacing The Toner Cartridge
When calling our Customer Support Center to order consumables/periodical replacement parts, have the product codes ready. The use of consumables/periodic replacement parts not recommended by Fuji Xerox could impair machine quality and performance. Use only consumables/periodic replacement parts recommended by Fuji Xerox. - Page 140 Important • When you replace a toner cartridge, toner may spill and soil the floor. We recommend laying paper on the floor beforehand. • The use of toner cartridges not recommended by Fuji Xerox may degrade image quality and performance. Use only toner cartridges recommended by Fuji Xerox.
- Page 141 Replacing Consumables Unpack a new toner cartridge, and shake it lightly up/down, and left/right 10 times. Important • Do not touch the shutter. Orient the toner cartridge with the arrow ( ) facing up, and insert it as far as it will go. Close the front cover.
-
Page 142: Replacing The Drum Cartridge
The following error codes and icons are displayed in the status machine diagram when the drum cartridge is near the end of its service life. Contact your local Fuji Xerox representative or sales representative to have your drum cartridge replaced. - Page 143 Important • The use of drum cartridges not recommended by Fuji Xerox may degrade image quality and performance. Use only drum cartridges recommended by Fuji Xerox.
-
Page 144: Cleaning The Machine
10 Maintenance Cleaning the Machine This section describes how to clean the machine such as the outer casing, document cover, document feeder and document glass. WARNING When cleaning this product, use the designated cleaning materials exclusive to it. Other cleaning materials may result in poor performance of the product. Never use aerosol cleaners to avoid catching fire and explosion. -
Page 145: Cleaning Document Presser And Narrow Glass Strip
Cleaning the Machine Wipe the document cover with a soft cloth moistened with water to remove any dirt, and then wipe it with a soft, dry cloth. Important • Do not use cleaning agents other than water or neutral detergent. Note •... -
Page 146: Cleaning Document Feeder Rollers
10 Maintenance Cleaning Document Feeder Rollers If the document feeder rollers become soiled, smudges may appear on copies, or scanned documents and paper jams may occur. To ensure clean copies at all times, clean the document feeder rollers about once a month. -
Page 147: 11 Problem Solving
11 Problem Solving This chapter provides possible solutions to various problems you may encounter with the machine. Troubleshooting ..................148 Machine Problems ..................149 Image Quality Problems ................153 Copying Problems ..................159 Printer Problems ..................162 Scan Problems ..................164 Network Related Problems ...............167 Error Code ....................172 Paper Jams....................179 Document Jams..................184... -
Page 148: Troubleshooting
11 Problem Solving Troubleshooting This section describes troubles that may occur with the machine and their solutions. Follow the troubleshooting procedure below to solve the problems. The machine does not work properly. Action Refer to "Machine Problems" (P.149). An error code is displayed. Cause Is there a paper or document jam? For information on paper jams, refer to "Paper Action... -
Page 149: Machine Problems
Machine Problems Machine Problems Check the machine's status again if you suspect a malfunction. Symptom Possible Cause Remedy The machine is Is the power switched ON? Switch the power ON. not powered on. Refer to "Power Source" (P.52). Is the power cord plugged Switch the power OFF and make sure the into the power outlet? power plug is inserted securely. - Page 150 11 Problem Solving Symptom Possible Cause Remedy The print quality An image quality problem Take the required action described in is poor. may have occurred. "Image Quality Problems". Refer to "Image Quality Problems" (P.153). Unable to insert Did you open a cover or Do not forcibly insert or remove the tray.
- Page 151 Machine Problems Symptom Possible Cause Remedy Paper is often Is paper loaded correctly in Load paper correctly. jammed or the tray? Refer to "Loading Paper in Trays 1 and 2 wrinkled. (Optional)" (P.75). Is the tray inserted Correctly insert the tray by firmly pushing it correctly? until it stops.
- Page 152 11 Problem Solving Symptom Possible Cause Remedy Documents often Are suitable types of Correctly load the documents suitable for jam. documents being used? the document feeder. Refer to "Placing the Document" (P.84). Are you using the irregular shaped documents, business cards, transparencies, or thin documents? Remove any sticky tags, paper clips or...
-
Page 153: Image Quality Problems
Image Quality Problems Image Quality Problems If the image quality of the printout is poor, use the table below to find our most likely cause, and take the action required. If the image quality remains poor after taking the required action, contact our Customer Support Center. - Page 154 11 Problem Solving Symptom Possible Cause Remedy Copies are out of Have you placed the Place the document correctly. position or document correctly? Refer to "Placing the Document" (P.84). crooked. Is the paper loaded Load the paper correctly. correctly in the tray? Refer to "Loading Paper in Trays 1 and 2 (Optional)"...
- Page 155 Image Quality Problems Symptom Possible Cause Remedy The printout is The paper is damp. Replace the paper with new paper. light (faded, The drum cartridge has Replace the drum cartridge with a new unclear). deteriorated or been one. damaged. Refer to "Replacing the Drum Cartridge" (P.142).
- Page 156 11 Problem Solving Symptom Possible Cause Remedy White spots The paper is unsuitable. Load the correct type of paper. appear in areas The drum cartridge has Replace the drum cartridge with a new of black fill. deteriorated or been one. damaged.
- Page 157 Image Quality Problems Symptom Possible Cause Remedy The printout The paper is damp. Replace the paper with new paper. contains white The paper is unsuitable. Load the correct type of paper. areas, or white or colored stripes. The printout is When using the Bypass tray Load paper of the correct type and size in faint overall.
- Page 158 11 Problem Solving Symptom Possible Cause Remedy The printout is The paper cassette's paper Align the horizontal and vertical paper slanted. guides are not aligned to the guides properly. correct position. Refer to "Loading Paper in Trays 1 and 2 (Optional)"...
-
Page 159: Copying Problems
Copying Problems Copying Problems This section provides possible solutions to various problems you may encounter when using the Copy features. Unable to Copy The table below lists possible solutions when you are unable to copy. Symptom Possible Cause Remedy The document is The document size is too The minimum size of document that can be not fed properly... -
Page 160: Copy Output Problems
11 Problem Solving Copy Output Problems The table below lists possible solutions to problems with the copy output. Symptom Possible Cause Remedy Copies are dirty. The document cover or Clean the document cover or document document glass is dirty. glass. Refer to "Cleaning Document Cover and Document Glass"... - Page 161 Copying Problems Symptom Possible Cause Remedy Striped patterns The document's When making enlarged copies, some appear in copies. enlargement factor is too enlargement factors can create striped large. patterns. Adjust the copy enlargement factor. Refer to "Reduce/Enlarge" (P.91). Copies are out of You have not placed the Place the document correctly.
-
Page 162: Printer Problems
11 Problem Solving Printer Problems This section provides possible solutions to various problems you may encounter when using the Print features. Unable to Print The table below lists possible solutions when you are unable to print. Symptom Possible Cause Remedy Data remains in The machine's power is not Switch the machine's power ON. -
Page 163: Print Output Problems
Printer Problems Print Output Problems The table below lists possible solutions to print output problems. Symptom Possible Cause Remedy The printout is on The wrong size paper was Change the size of the paper loaded in the the wrong paper loaded in the specified tray. -
Page 164: Scan Problems
11 Problem Solving Scan Problems This section provides possible solutions to various problems you may encounter when using the Scan feature. Unable to Scan The table below lists possible solutions when you are unable to scan. Symptom Possible Cause Remedy The document is The document size is too The minimum size of document that can be... -
Page 165: Unable To Load Scan Data To A Pc
Scan Problems Unable to Load Scan Data to a PC The table below lists possible solutions when you are unable to load a scanned document to a computer. Symptom Possible Cause Remedy Unable to find The machine's power is not Switch the machine's power ON. -
Page 166: Scan Image Quality Problems
11 Problem Solving Scan Image Quality Problems This table below lists possible solutions to problems with the image quality of scan data. Symptom Possible Cause Remedy The scanned The document cover or Clean the document cover or document glass. image is dirty. document glass is dirty. -
Page 167: Network Related Problems
Network Related Problems Network Related Problems This section provides possible solutions to network problems. Problems Using TCP/IP (LPD/Port9100) The table below lists possible causes for problems that occur when using TCP/IP (LPD/ Port9100), the methods to check, and the required actions to take. Unable to Print Possible Cause How to Check... -
Page 168: Problems Using Centreware Internet Services
11 Problem Solving Problems Using CentreWare Internet Services The table below lists possible solutions to problems you may encounter when using CentreWare Internet Services. Symptom Remedy Unable to connect to Is the machine operating normally? CentreWare Internet Check whether the machine's power is ON. Services. -
Page 169: Internet/Intranet Connection Problems
Network Related Problems Internet/Intranet Connection Problems The table below lists possible causes and solutions for problems that might occur when connecting to the Internet or an intranet. Unable to Connect to the Internet or an Intranet Possible Cause Remedy The IP address has not been Check the IP address setting. - Page 170 11 Problem Solving Possible Cause Remedy Unable to connect due to an Types of access restrictions are listed below. Check the set access restriction set in the access restriction. proxy server, firewall or web Address (port) restriction server. SSL restriction User access (or access authority level) restriction Content block Scheme restriction (such as restriction on use of HTTP)
-
Page 171: Ipv4 Or Ipv6 Connection Problems
Network Related Problems IPv4 or IPv6 Connection Problems The table below lists possible solutions to problems that might occur when connecting to an IPv4 or IPv6 address. Unable to Connect to an IPv4 Address Symptom Remedy When entering an IPv4 Do not add 0 to the head of address values. -
Page 172: Error Code
11 Problem Solving Error Code This section describes error codes. An error code (X-X) or (XXX-XXX) blinks if printing terminated abnormally because of an error, or a malfunction occurred in the machine. Display Example of Error Code Refer to the error codes in the following table to resolve problems. Important •... -
Page 173: Error Codes
Error Code Error code (X-X) Error Code Cause Remedy Documents jammed in the document Remove the jammed document. feeder. Refer to "Document Jams" (P.184). The size of documents that are Place the document on the loaded in the document feeder is not document glass. - Page 174 11 Problem Solving Error Code Cause Remedy The size and orientation of paper Confirm that the size and orientation loaded in Tray 1 do not match the of paper loaded in Tray 1 match the settings of the machine. settings displayed in the paper size display area, and reload paper adjusting with the paper guides.
- Page 175 Error Code Error Code Cause Remedy Papers jammed in Tray 1. Remove the jammed paper. Refer to "E-3: Paper Jams in Tray 1" (P.182). Papers jammed in Tray 2. Remove the jammed paper. Refer to "E-4: Paper Jams in Tray 2" (P.182).
- Page 176 11 Problem Solving Error Code Cause Remedy The drum cartridge is defective. Replace the drum cartridge immediately. Otherwise, the machine will be damaged. Refer to "Replacing the Drum Cartridge" (P.142). Reached the maximum copy limit Press the <Stop> button, and while the limit is set.
- Page 177 Error Code Error Code Cause Remedy 010-311 An error occurred. Switch off the machine power, make sure that the display is blank, and 010-312 then switch on the machine power. If 010-320 the same error code is displayed 010-327 again, contact our Customer 010-392 Support Center.
- Page 178 11 Problem Solving Error Code Cause Remedy 092-660 ATC SNR (in drum cartridge) value Switch off the machine power, make is out of range. sure that the display is blank, and 092-668 then switch on the machine power. If 092-661 Temperature SNR (in drum the same message is displayed cartridge) value is out of range.
-
Page 179: Paper Jams
WARNING If you need to pull out a tray to remove paper jam, contact your local Fuji Xerox representative. Do not pull out a tray, otherwise it may cause injuries. -
Page 180: E-1: Paper Jam In Left Cover [A]
11 Problem Solving E-1: Paper Jam in Left Cover [A] Follow the steps below to clear paper jams inside the machine's left cover. Important • When removing paper, there may be an image on the machine's Transfer Belt (the black film belt) inside the left cover. -
Page 181: E-2: Paper Jam In One Tray Module Cover [B]
Paper Jams 2) If the paper is jammed in the location shown in the diagram, remove the jammed paper pulling upwards. Push on the center of the left cover, close it slowly, and raise the Bypass tray. E-2: Paper Jam in One Tray Module Cover [B] Follow the steps below to clear paper jams inside the machine's one tray module cover. -
Page 182: E-3: Paper Jams In Tray 1
11 Problem Solving E-3: Paper Jams in Tray 1 Follow the steps below to clear paper jams in Tray 1. Remove the jammed paper by referring to "E-1: Paper Jam in Left Cover [A]" (P.180). If the jammed paper cannot be removed, pull out the tray. -
Page 183: E-5: Paper Jams In Bypass Tray
Paper Jams Remove the jammed paper. If the tray is empty, load paper. Note • If the paper tears, check to make sure there are no remaining shreds in the machine. Push the tray in gently until it stops. E-5: Paper Jams in Bypass Tray Follow the steps below to clear a paper jam in the Bypass tray. -
Page 184: Document Jams
11 Problem Solving Document Jams If a document jams in the document feeder, the machine stops, and an error code [A- 1], [A-2], [A-3] appears in the display. A document indicator and the Paper/Document Jam icon on the status machine diagram (mimic) light up. The following procedure describes how to remove the jammed documents in the document feeder. - Page 185 Document Jams Carefully move the document feeder tray back into position. Make sure that the document is not torn, wrinkled, or folded, and then reload the documents that have not been copied or scanned. Note • Torn, wrinkled or folded document pages can cause document jams or damage.
- Page 186 11 Problem Solving...
-
Page 187: 12 Appendix
12 Appendix This chapter describes the machine specifications, notes and restrictions optional components, and cautions and restrictions. Specifications....................188 Printable Area ...................192 Optional Components ................193 Notes and Restrictions................194... -
Page 188: Specifications
Tray 1 (standard) and 2 (optional):60 - 90 gsm Bypass tray: 60 - 110 gsm Important • Use paper recommended by Fuji Xerox. Copying may not be performed correctly depending on the conditions. First Copy Output Time Document glass: 7.5 sec. or less (A4 ) Document feeder: 14 sec. - Page 189 Maximum: 850 sheets (Standard + Optional) Important • * : When using 80 gsm paper • * : When using Fuji Xerox standard paper Continuous Copy 999 sheets Important • The machine may pause temporarily to perform image stabilization. Output Tray Capacity 250 sheets (A4) Important •...
-
Page 190: Print Functions
300 × 300 dpi, 200 × 200 dpi Scanning Halftone Monochrome 8-bit input/output Scanning Speed Monochrome: 18 sheets/minute With standard Fuji Xerox document (A4 ), at 200 dpi, using TWAIN driver (USB). Important • The scanning speed varies depending on documents. Connectivity... - Page 191 ® ® Microsoft Windows Server 2008 R2 Important • For information about the latest supported OS, refer to the Fuji Xerox Web site. Duplex Automatic Document Feeder (Optional) Type Duplex automatic document feeder Original Paper Size Maximum: A3, 11 × 17"...
-
Page 192: Printable Area
12 Appendix Printable Area The standard printable area is the area of the page within 4.0 mm from the top, bottom, left and right edges of the paper. The actual printable area may vary depending on the printer (plotter) and control language. 4 mm Unprintable area Printable area/... -
Page 193: Optional Components
Optional Components Optional Components The following table shows the optional components available. To purchase these options, contact our Customer Support Center. Product Name Description Duplex Automatic Automatically feeds multiple-page documents. Document Feeder Duplex Output Unit A unit for 2 Sided printing. Simple Network Print Kit A kit for using this machine in a network environment. -
Page 194: Notes And Restrictions
12 Appendix Notes and Restrictions This section describes the notes and restrictions to observe when using the machine. Notes and Restrictions on the Use of the Machine Notes on Switching Off the Power After the power is switched off, the machine performs internal power off processes for a while. -
Page 195: Notes And Restrictions On The Use Of The Copy Feature
Notes and Restrictions Notes and Restrictions on the Use of the Copy Feature Copy Feature The machine does not offer the Improves Fit function. ID Card Copy The front and back side of the placed ID card are printed on each half sheet of a paper in center except the following cases: When the size of the ID card is larger than the standard printable size of the ID Card Copy feature, the image is not printed in center. -
Page 196: Notes And Restrictions On The Use Of The Scan Feature
Notes and Restrictions when Operating from Computers Supported OS The supported OS may vary depending on the functions. For more information, refer to "Specifications" (P.188). Important • For information about the latest supported OS, refer to the Fuji Xerox Web site. -
Page 197: Notes And Restrictions For Using Tcp/Ip (Lpd/Port9100)
Notes and Restrictions Notes and Restrictions for Using TCP/IP (LPD/Port9100) This section describes notes and restrictions to observe when using TCP/IP (LPD/ Port9100). Configuration on the Machine IP addresses are managed for the entire system. Configure the settings only after consulting your network administrator. - Page 198 12 Appendix IPv4 DNS information can sometimes be used directly after machine startup if the IP operation mode is Dual Stack, DNS information has been set for both IPv4 and IPv6, and the machine is communicating with a device specified using an FQDN. The address displayed as the machine's IP address may change.
-
Page 199: Index
Index Index Numerics Copying problems ..........159 10BASE-T/100BASE-TX interface ...... 49 2 Sided ..............96 Data indicator ............57 2 Sided button ............. 56 Dimensions ............189 Document cover ..........48 Document feeder ......... 84, 102 Account Modes ........... 62 Document feeder cover ........ - Page 200 Halftone .............188 Narrow glass strip ..........51 No account mode ..........62 Numeric keypad ..........56 Icons ..............60 ID Card Copy ............94 ID Card Copy button ..........56 One Tray Module ......... 48, 193 Image quality problems ........153 One Tray Module Cover ........48 Inner cover ............51 Operating System ..........
- Page 201 Index Uninstalling ............ 46 Drum cartridge icon ........60 Error icon ............60 Print Resolution ..........190 Original Size display area ......59 Printable area ............ 192 Paper Size display area ......... 59 Paper tray empty icon ........60 Printer Problems ..........162 Paper/Document jam icon ......
- Page 202 DocuCentre S2010/S1810 User Guide ME5517E2-2 (Edition 1) April 2012 Fuji Xerox Co., Ltd. Copyright © 2012 by Fuji Xerox Co., Ltd.
Need help?
Do you have a question about the DocuCentre S2010 and is the answer not in the manual?
Questions and answers