Sign In
Upload
Manuals
Brands
Lexmark Manuals
All in One Printer
MS911
Lexmark MS911 Manuals
Manuals and User Guides for Lexmark MS911. We have
7
Lexmark MS911 manuals available for free PDF download: Service Manual, User Manual, Technical Reference, Quick Reference Manual
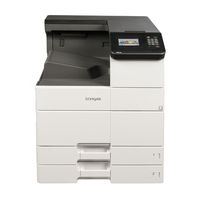
Lexmark MS911 Service Manual (719 pages)
Brand:
Lexmark
| Category:
All in One Printer
| Size: 49.57 MB
Table of Contents
Finisher Service Manual
1
Product Information
2
Edition Notice
2
June
2
Table of Contents
3
Notices and Safety Information
21
Safety Information
21
Preface
25
Service Manual Conventions
25
General Information
27
Media Guidelines
27
Paper Guidelines
27
Paper Characteristics
27
Selecting Paper
28
Selecting Preprinted Forms and Letterhead
28
Storing Paper
29
Using Specialty Media
29
Tips on Using Card Stock
29
Tips on Using Envelopes
29
Tips on Using Labels
30
Tips on Using Letterhead
30
Tips on Using Transparencies
31
Paper Sizes, Types, and Weights Supported by the Finishers
31
Supported Paper Types
32
Tools Required for Service
33
Diagnostic Information
35
Troubleshooting Overview
35
Performing the Initial Troubleshooting Check
35
Understanding the Printer Messages
35
Cartridge Low [88.Xy]
35
Cartridge Nearly Low [88.Xy]
36
Change [Paper Source] to [Custom String] Load [Orientation]
36
Change [Paper Source] to [Custom Type Name] Load [Orientation]
36
Change [Paper Source] to [Paper Size] Load [Orientation]
36
Change [Paper Source] to [Paper Type] [Paper Size] Load [Orientation]
36
Close Door [X]
36
Complex Page, some Data May Not Have Printed [39]
37
Configuration Change, some Held Jobs Were Not Restored [57]
37
Defective Flash Detected [51]
37
Disk Full [62]
37
Disk Full, Scan Job Canceled
37
Disk Must be Formatted for Use in this Device
37
Disk Near Full. Securely Clearing Disk Space
38
Empty the Hole Punch Box
38
Error Reading USB Drive. Remove USB
38
Error Reading USB Hub. Remove Hub
38
Fax Memory Full
38
Fax Partition Inoperative. Contact System Administrator
38
Fax Server 'To Format' Not Set Up. Contact System Administrator
38
Fax Station Name Not Set Up. Contact System Administrator
39
Fax Station Number Not Set Up. Contact System Administrator
39
Incorrect Paper Size, Open [Paper Source] [34]
39
Insert Hole Punch Box
39
Insert Tray [X]
39
Insufficient Memory for Flash Memory Defragment Operation [37]
39
Insufficient Memory to Collate Job [37]
40
Insufficient Memory to Support Resource Save Feature [35]
40
Insufficient Memory, some Held Jobs Were Deleted [37]
40
Insufficient Memory, some Held Jobs will Not be Restored [37]
40
Insufficient Space between Paper Stacks in Tray 3
40
Load [Paper Source] with [Custom String] [Paper Orientation]
40
Load [Paper Source] with [Custom Type Name] [Paper Orientation]
40
Load [Paper Source] with [Paper Size] [Paper Orientation]
41
Load [Paper Source] with [Paper Type] [Paper Size] [Paper Orientation]
41
Load Multipurpose Feeder with [Custom String] [Paper Orientation]
41
Load Multipurpose Feeder with [Custom Type Name] [Paper Orientation]
41
Load Multipurpose Feeder with [Paper Size] [Paper Orientation]
41
Load Multipurpose Feeder with [Paper Type] [Paper Size] [Paper Orientation]
42
Load Staples
42
Load Staples [G11, G12]
42
[X] Maintenance Kit very Low [80.Xy]
42
Memory Full [38]
42
Memory Full, Cannot Print Faxes
43
Memory Full, Cannot Send Faxes
43
No Analog Phone Line Connected to Modem, Fax Is Disabled
43
Network [X] Software Error [54]
43
Not Enough Free Space in Flash Memory for Resources [52]
43
Open Door H and Remove Paper from Beneath Area H10
43
Paper Changes Needed
43
Parallel Port [X] Disabled [56]
44
Photoconductor Low [84.Xy]
44
Photoconductor very Low [84.Xy]
44
Printer Had to Restart. Last Job May be Incomplete
44
Reinstall Missing or Unresponsive Cartridge [31.Xy]
44
Reinstall Missing or Unresponsive Photoconductor [31.Xy]
44
Remove Defective Disk [61]
44
Remove Packaging Material, [Area Name]
45
Remove Packaging Material, Open Door C, Remove Metal Clips, Remove All Screws from Scanner Carriage
45
Remove Paper from All Bins
45
Remove Paper from bin [X]
45
Remove Paper from [Linked Set bin Name]
45
Remove Paper from Standard Output bin
45
Replace All Originals if Restarting Job
45
Replace Cartridge, 0 Estimated Pages Remain [88.Xy]
45
Replace Cartridge, Printer Region Mismatch [42.Xy]
46
Replace Jammed Originals if Restarting Job
46
Replace [X] Maintenance Kit, 0 Estimated Pages Remain [80.Xy]
46
Replace Missing Photoconductor [31.Xy]
46
Replace Missing Waste Toner Bottle [82.Xy]
47
Replace Missing Cartridge [31.Xy]
47
Replace Paper Pick Rollers in [Paper Source], Use Parts and Instructions in Tray 1 or Tray 2 Compartment [80]
47
Replace Photoconductor, 0 Pages Remain [84.Xy]
47
Replace Unsupported Cartridge [32.Xy]
47
Replace Unsupported Photoconductor [32.Xy]
47
Replace Waste Toner Bottle [82.Xy]
47
Restore Held Jobs
47
Scanner Disabled by Admin [840.01]
48
Scanner Disabled. Contact System Administrator if Problem Persists. [840.02]
48
Scanner Jam, Remove Jammed Originals from the Scanner [2Yy.XX]
48
Scanner Maintenance Required, Use ADF Kit [80]
48
Scanner Maintenance Required Soon, Use ADF Kit [80]
48
Serial Port [X] Disabled [56]
48
Some Held Jobs Were Not Restored
48
SMTP Server Not Set Up. Contact System Administrator
48
Standard Network Software Error [54]
49
Standard USB Port Disabled [56]
49
Supply Needed to Complete Job
49
The Device Is Operating in Safe Mode. some Print Options May be Disabled or Provide Unexpected Results
49
Too Many Flash Options Installed [58]
49
Too Many Trays Attached [58]
49
Tray [X] Paper Size Unsupported
50
Unformatted Flash Detected [53]
50
Unsupported Disk
50
Unsupported Option in Slot [X] [55]
50
Waste Toner Bottle Nearly Full [82.Xy]
50
Weblink Server Not Set Up. Contact System Administrator
50
Jams
51
Avoiding Jams
51
Understanding Jam Messages and Locations
51
200 Paper Jams
53
SHPF Paper Jam Service Check
53
40Y Paper Jam Messages
55
40Y Paper Jams
55
[X]-Page Jam, Press Latch to Access Area G. Leave Paper in Bin. [40Y.XX]
55
[X]-Page Jam, Press Latch to Access Area G and Clear Jammed Staples. Leave Paper in Bin. [402.93]
58
Staple Finisher Paper Feed Jam Service Check
61
42Y Paper Jam Messages
63
42Y Paper Jams
63
[X]-Page Jam, Open Doors G, H, and J and Clear Jammed Paper. Leave Paper in Bin. [4Yy.XX]
64
[X]-Page Jam, Open Door H and Rotate Knob H6 Clockwise. Leave Paper in Bin. [426.XX-428.XX]
67
HPT Feed Jam Service Check
73
Booklet Maker Transport Section Paper Jam Service Check
75
Booklet Maker Feed Jam Service Check
79
Bifold Exit Jam Service Check
83
SHPF Transport Paper Jam Service Check
86
SHPF Top bin Exit Jam Service Check
89
SHPF Compiler Feed Jam Service Check
91
SHPF Booklet Gate Jam Service Check
94
Booklet Maker Tamper Paper Jam Service Check
96
430 Jam Messages
98
430 Jams
98
Hardware Errors
98
30Y Error Messages
98
30Y Errors
98
Motor (Staple Finisher Front Tamper) Failure Service Check
98
Motor (Staple Finisher Rear Tamper) Failure Service Check
101
Staple Finisher Staple Unit Failure Service Check
103
Motor (Staple Finisher Elevator) Failure Service Check
106
32Y Error Messages
108
32Y Errors
108
SHPF Paper Feed Failure Service Check
109
Motor (SHPF Compiler Feed Roller Release) Failure Service Check
111
Motor (SHPF Paddle) Failure Service Check
114
Motor (SHPF Aligner) Failure Service Check
116
Motor (SHPF Front Tamper) Failure Service Check
119
Motor (SHPF Rear Tamper) Failure Service Check
121
SHPF Pre-Eject Failure Service Check
123
SHPF Ejector Failure Service Check
125
33Y Error Messages
128
33Y Errors
128
Booklet Maker Decurl Assembly Failure Service Check
129
Motor (Booklet Maker Tamper) Failure Service Check
131
Motor (Booklet Maker Aligner) Failure Service Check
133
SHPF Elevator bin Failure Service Check
135
SHPF Elevator bin Stack Height Assembly Failure Service Check
137
SHPF Staple Unit Failure Service Check
140
Punch Unit Failure Service Check
142
34Y Error Messages
143
34Y Errors
143
Motor (Bifold Guide) Failure Service Check
144
Booklet Maker Paddle Assembly Failure Service Check
146
Motor (Trifold Guide) Failure Service Check
149
Motor (Bifold Knife) Failure Service Check
151
Booklet Maker Staple Unit Failure Service Check
153
911 Error Messages
154
911 Errors
154
Staple Finisher Upper Exit Roller Failure Service Check
154
Symptoms
157
Staple Finisher Locks Service Check
157
Staple Finisher Symptoms
157
Staple Finisher bin Stack Height Assembly Failure Service Check
158
Staple Finisher Stapling Failure Service Check
161
HPT Door Service Check
164
SHPF Symptoms
164
SHPF Front Door Service Check
166
SHPF Top Door Service Check
167
Hole Punch Box Service Check
169
SHPF Top bin Full Service Check
170
SHPF Staple Unit Noise Service Check
172
SHPF Elevator bin Movement Service Check
173
Booklet Maker Symptoms
177
HPBF bin Service Check
178
Bifold Edge Alignment Service Check
179
Service Menus
183
Understanding the Printer Control Panel
183
Using the Control Panel
183
Understanding the Colors of the Sleep Button and Indicator Lights
183
Understanding the Home Screen
184
Using the Touch-Screen Buttons
186
Menus List
187
Diagnostics Menu
188
Entering the Diagnostics Menu
188
Reset Separator Roll and Pick Assembly Counter
188
Reset Maintenance Counter
188
Reset Fuser Counter
188
Registration
189
Scanner Calibration
189
Reset Flatbed, ADF Front, and ADF Back Calibration Values
190
Print Tests
190
Print Quality Pages
190
Hardware Tests
191
Button Test
191
DRAM Test
191
Panel Test
191
Serial 1 Wrap
192
USB HS Test Mode
192
Duplex Tests
192
Quick Test
192
Top Margin
193
Input Tray Tests
193
Feed Tests
193
Output bin Tests
193
Sensor Tests
194
2500-Sheet Tray Sensor Tests
194
Printer Sensor Tests
194
X 500-Sheet Tray Sensor Tests
194
Hole Punch Booklet Finisher Sensor Tests
195
Staple and Hole Punch Finisher Sensor Tests
195
Staple Finisher Sensor Tests
195
Motor Tests
195
Printer Motor Tests
195
2500-Sheet Tray Motor Tests
196
2X500-Sheet Tray Motor Tests
196
Staple and Hole Punch Finisher Motor Tests
196
Staple Finisher Motor Tests
196
Booklet Maker Motor Tests
197
Device Tests
197
Disk Test/Clean
197
Flash Test
197
Quick Disk Test
197
Printer Setup
198
Defaults
198
Permanent Page Count (Perm
198
Printed Page Count
198
Processor ID
198
Edge to Edge
199
Enable Edge to Edge Copy
199
Parallel Strobe Adjustment (Par 1 Strobe Adj)
199
Reset Engine Service Error
199
Restore Backup Data
199
Reset Fuser Counter
200
Reports
200
Installed Licenses
200
Menu Settings Page
200
Event Log
200
Display Log
200
Print Log
200
Clear Log
201
Print Log Summary
201
Scanner Tests
201
ADF Back Magnification
201
ADF Front Magnification
201
FB Magnification
201
ASIC Test
202
Feed Test
202
Scanner Calibration Reset
202
Sensor Tests
202
Exit Diags
202
Configuration Menu
203
Entering the Configuration Menu
203
Hole Punch Configuration
203
Reset Maintenance Counter
203
USB Scan to Local
203
Print Quality Pages
203
Reports
204
Event Log
204
Menu Settings Page
204
Size Sensing
204
Tray Linking
204
Panel Menus
204
PPDS Emulation
205
Download Emuls
205
Safe Mode
205
Energy Conserve
205
Fax Low Power Support
205
Min Copy Memory
206
Numpad Job Assist
206
Format Fax Storage
206
Fax Storage Location
206
ADF Edge Erase
206
FB Edge Erase
207
Scanner Manual Registration
207
Disable Scanner
207
Paper Prompts
207
Envelope Prompts
207
Action for Prompts
208
Jobs on Disk
208
Disk Encryption
208
Font Sharpening
208
Require Standby
208
UI Automation
209
LES Applications
209
Key Repeat Initial Delay
209
Key Repeat Rate
209
Clear Supply Usage History
209
Clear Custom Status
209
USB Speed
210
Automatically Display Error Screens
210
Restore Factory Defaults
210
Erase Hard Disk
210
Erase Printer Memory
210
Restore Settings
210
Out of Service Erase
211
Exit Config
211
Entering Invalid Engine Mode
211
Entering Recovery Mode
211
Entering Safe Mode (Everready Mode)
212
Accessing the Network SE Menu
212
Service Engineer Menu
212
Accessing the Service Engineer (SE) Menu
212
Service Engineer (SE) Menu
212
Fax Service Engineer (SE) Menu
213
Advertisement
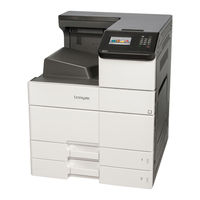
Lexmark MS911 Service Manual (655 pages)
Brand:
Lexmark
| Category:
Copier
| Size: 47.09 MB
Table of Contents
Product Information
2
Edition Notice
2
June
2
Table of Contents
3
Notices and Safety Information
19
Laser Notices
19
Safety Information
22
Preface
25
Service Manual Conventions
25
General Information
27
Paper and Specialty Media Guide
27
Using Specialty Media
27
Paper Guidelines
29
Moisture Content
30
Storing Paper
32
Supported Paper Sizes, Types, and Weights
33
Data Security Notice
37
Tools Required for Service
38
Diagnostic Information
39
Troubleshooting Overview
39
Performing the Initial Troubleshooting Check
39
Fixing Print Quality Issues
39
Initial Print Quality Check
40
Gray Background Check
40
Blank Pages Check
43
Solid Black Pages Check
44
Shadow Images Check
46
Skewed Print Check
48
Streaked Horizontal or Vertical Lines Check
49
Toner Smear Check
51
Toner Specks Check
52
Paper Jams
53
Avoiding Jams
53
Understanding Jam Messages and Locations
54
200 Paper Jams
56
Paper Jams
63
23Y Paper Jams
71
Paper Jams
74
243-245 Paper Jams
85
Understanding the Printer Messages
99
Cartridge Low [88.Xy]
99
Cartridge Nearly Low [88.Xy]
99
Cartridge very Low [88.Xy]
99
Change [Paper Source] to [Custom String] Load [Orientation]
100
Change [Paper Source] to [Custom Type Name] Load [Orientation]
100
Change [Paper Source] to [Paper Size] Load [Orientation]
100
Change [Paper Source] to [Paper Type] [Paper Size] Load [Orientation]
100
Close Door [X]
100
Complex Page, some Data May Not Have Printed [39]
100
Configuration Change, some Held Jobs Were Not Restored [57]
101
Defective Flash Detected [51]
101
Disk Full [62]
101
Disk Must be Formatted for Use in this Device
101
Disk Near Full. Securely Clearing Disk Space
101
Empty the Hole Punch Box
102
Error Reading USB Drive. Remove USB
102
Error Reading USB Hub. Remove Hub
102
Incorrect Paper Size, Open [Paper Source] [34]
102
Insert Hole Punch Box
102
Insert Tray [X]
102
Insufficient Memory for Flash Memory Defragment Operation [37]
102
Insufficient Memory to Collate Job [37]
103
Insufficient Memory to Support Resource Save Feature [35]
103
Insufficient Memory, some Held Jobs Were Deleted [37]
103
Insufficient Memory, some Held Jobs will Not be Restored [37]
103
Insufficient Space between Paper Stacks in Tray 3
103
Load [Paper Source] with [Custom String] [Paper Orientation]
103
Load [Paper Source] with [Custom Type Name] [Paper Orientation]
103
Load [Paper Source] with [Paper Size] [Paper Orientation]
104
Load [Paper Source] with [Paper Type] [Paper Size] [Paper Orientation]
104
Load Multipurpose Feeder with [Custom String] [Paper Orientation]
104
Load Multipurpose Feeder with [Custom Type Name] [Paper Orientation]
104
Load Multipurpose Feeder with [Paper Size] [Paper Orientation]
104
Load Multipurpose Feeder with [Paper Type] [Paper Size] [Paper Orientation]
105
Load Staples
105
Load Staples [G11, G12]
105
[X] Maintenance Kit very Low [80.Xy]
105
Memory Full [38]
105
Network [X] Software Error [54]
106
Not Enough Free Space in Flash Memory for Resources [52]
106
Open Door H and Remove Paper from Beneath Area H10
106
Paper Changes Needed
106
Parallel Port [X] Disabled [56]
106
Photoconductor Low [84.Xy]
106
Photoconductor very Low [84.Xy]
106
Printer Had to Restart. Last Job May be Incomplete
107
Reinstall Missing or Unresponsive Cartridge [31.Xy]
107
Reinstall Missing or Unresponsive Photoconductor [31.Xy]
107
Remove Defective Disk [61]
107
Remove Packaging Material, [Area Name]
107
Remove Packaging Material, Open Door C, Remove Metal Clips
107
Remove Paper from All Bins
107
Remove Paper from bin [X]
108
Remove Paper from [Linked Set bin Name]
108
Remove Paper from Standard Output bin
108
Replace Cartridge, 0 Estimated Pages Remain [88.Xy]
108
Replace Cartridge, Printer Region Mismatch [42.Xy]
108
Replace [X] Maintenance Kit, 0 Estimated Pages Remain [80.Xy]
109
Replace Missing Photoconductor [31.Xy]
109
Replace Missing Waste Toner Bottle [82.Xy]
109
Replace Missing Cartridge [31.Xy]
109
Replace Paper Pick Rollers in [Paper Source], Use Parts and Instructions in Tray 1 or Tray 2 Compartment [80]
109
Replace Photoconductor, 0 Pages Remain [84.Xy]
109
Replace Unsupported Cartridge [32.Xy]
109
Replace Unsupported Photoconductor [32.Xy]
109
Replace Waste Toner Bottle [82.Xy]
109
Restore Held Jobs
110
Serial Port [X] Disabled [56]
110
Some Held Jobs Were Not Restored
110
SMTP Server Not Set Up. Contact System Administrator
110
Standard Network Software Error [54]
110
Standard USB Port Disabled [56]
110
Supply Needed to Complete Job
111
The Device Is Operating in Safe Mode. some Print Options May be Disabled or Provide Unexpected Results
111
Too Many Flash Options Installed [58]
111
Too Many Trays Attached [58]
111
Tray [X] Paper Size Unsupported
111
Unformatted Flash Detected [53]
111
Unsupported Disk
112
Unsupported Option in Slot [X] [55]
112
Waste Toner Bottle Nearly Full [82.Xy]
112
Weblink Server Not Set Up. Contact System Administrator
112
User Attendance Messages
112
User Attendance Messages (0-99)
112
Cartridge or Photoconductor Error Service Check
113
Mismatched Paper Size Service Check
114
Insufficient Memory Service Check
115
Complex Page Service Check
115
PPDS Font Error Service Check
116
Flash Memory Failure Service Check
116
Insufficient Flash Memory Service Check
117
Network Service Check
118
Unsupported Internal Option Service Check
120
Disabled Port Service Check
121
Unrestored Held Jobs Service Check
121
Excess Options Service Check
122
Incompatible Hardware Option Service Check
123
Hard Disk Failure Service Check
123
Maintenance Kit Service Check
124
Printer Hardware Errors
124
111 Errors
125
12Y Errors
126
13Y Errors
131
153 Errors
134
16Y Errors
135
171-182 Errors
141
189 Errors
142
19Y Errors
144
600 Errors
158
Steps before Starting the 9Yy Service Checks
159
900 Errors
161
911-963 Errors
166
Symptoms
168
3000-Sheet Tray Tray Set Failure Service Check
168
Service Menus
171
Understanding the Printer Control Panel
171
Using the Control Panel
171
Understanding the Colors of the Sleep Button and Indicator Lights
171
Understanding the Home Screen
172
Using the Touch-Screen Buttons
173
Menus List
175
Diagnostics Menu
175
Entering the Diagnostics Menu
175
Reset Separator Roll and Pick Assembly Counter
175
Reset Maintenance Counter
176
Reset Fuser Counter
176
Registration
176
Print Tests
176
Print Quality Pages
177
Hardware Tests
177
Duplex Tests
179
Input Tray Tests
179
Output bin Tests
180
Sensor Tests
180
Motor Tests
182
Device Tests
183
Printer Setup
184
Reports
186
Event Log
187
Exit Diags
187
Configuration Menu
188
Entering the Configuration Menu
188
Hole Punch Configuration
188
Reset Maintenance Counter
188
USB Scan to Local
188
Print Quality Pages
188
Reports
189
Size Sensing
189
Tray Linking
189
Panel Menus
189
PPDS Emulation
190
Download Emuls
190
Safe Mode
190
Energy Conserve
190
Min Copy Memory
190
Numpad Job Assist
191
Paper Prompts
191
Envelope Prompts
191
Action for Prompts
191
Jobs on Disk
191
Disk Encryption
192
Font Sharpening
192
Require Standby
192
UI Automation
192
LES Applications
192
Key Repeat Initial Delay
193
Key Repeat Rate
193
Clear Supply Usage History
193
Clear Custom Status
193
USB Speed
193
Automatically Display Error Screens
193
Restore Factory Defaults
194
Exit Config
194
Entering Invalid Engine Mode
195
Entering Recovery Mode
195
Entering Safe Mode (Everready Mode)
195
Accessing the Network SE Menu
195
Service Engineer Menu
195
Accessing the Service Engineer (SE) Menu
195
Service Engineer (SE) Menu
195
Repair Information
197
Removal Precautions
197
Data Security Notice
197
Handling ESD-Sensitive Parts
197
Restoring the Printer Configuration after Replacing the Controller Board
198
Restoring Solutions, Licenses, and Configuration Settings
201
Updating the Printer Firmware
202
Backing up Esf Solutions and Settings
203
Understanding the Marked or Colored Screws
204
Ribbon Cable Connectors
204
Zero Insertion Force (ZIF) Connectors
204
Horizontal Top Contact Connector
205
Horizontal Bottom Contact Connector
207
Vertical Mount Contact Connector
209
Horizontal Sliding Contact Connector
211
Low Insertion Force (LIF) Connector
213
Adjustments
214
Fuser Alignment Adjustment
214
Pick Roller Pressure Adjustment
215
MPF Separator Roller Pressure Adjustment
217
3000-Sheet Tray Pick Roller Pressure Adjustment
219
2500-Sheet Tray Transfer Guide Belt Adjustment
221
Removal Procedures
222
Left Side Removals
223
Left Cover Removal
223
Rear Left Cover Removal
224
Main Power Supply Shield Removal
224
Main Power Supply Fan Removal
225
Main Power Supply Removal
226
Printhead Removal
226
Right Side Removals
228
Port Access Door Removal
228
Fuser Connector Cover Removal
229
Fuser Removal
230
Induction Heater Removal
230
Registration Transport Assembly
231
Top Side Cover Removal
232
Upper Right Cover Removal
233
Redrive Belt Cover Removal
233
Redrive Belt Removal
234
Transfer Roller Removal
234
Duplex Transport Assembly Removal
235
Duplex Transport Jam Removal Knob Removal
236
Duplex Transport Diverter Assembly Removal
237
Sensor (Fuser Exit) Removal
238
Fuser Exit Sensor Actuator Removal
238
Sensor (Duplex Pass through 1) Removal
239
Duplex Pass through 1 Actuator Removal
240
Duplex Transport Belt Removal
242
Duplex Transport Gears Removal
242
Motor (Duplex Transport) Removal
243
Right Door Lock Removal
245
Tray 2 Transport Guide
246
MPF Removal
247
MPF Tray Removal
248
Sensor (MPF Paper Length) Removal
249
MPF Feed Clutch Removal
250
MPF Lift Plate Solenoid Removal
251
MPF Gears Removal
252
Sensor (MPF Lift Plate) Removal
253
Sensor (MPF Empty) Removal
255
MPF Feed/Separator Assembly
256
MPF Lift Plate Assembly Removal
258
MPF Empty Actuator Removal
259
Duplex Transport Guide Removal
260
Registration Unit Latch Assembly Removal
260
Right Door Switch Actuator Removal
262
Right Door Removal
262
Registration Unit Assembly Removal
263
Registration Unit Sub-Assembly Removal
265
Sensor (Fusing Speed) Removal
267
Fusing Speed Actuator Removal
267
Sensor (Duplex Pass through 2) Removal
268
Registration Unit Belt Removal
269
Registration Unit Gears Removal
270
Registration Unit Lock Removal
271
Front Side Removals
273
Top Front Door Removal
273
Bottom Front Door Removal
274
Front Inner Cover Removal
274
Waste Toner Door Mount Removal
275
Image Controller Board Removal
275
Door Switch Removal
276
Main Power Switch Removal
277
Sensor (Top Front Door) Removal
278
Motor (Toner Supply) Removal
279
Waste Toner Drive Removal
280
Sensor (Toner Cartridge Present) Removal
281
Toner Agitator Removal
282
Developer Unit Removal
283
Right Door Switch Removal
284
Speaker Cover Removal
284
Rear Side Removals
286
Scanner Interface Cable Cover Removal
286
Controller Board Access Cover Removal
287
Input Options Interface Cover Removal
288
Engine Board Cover Removal
289
Upper Rear Cover Removal
289
IHPS Shield Removal
290
Induction Heater Magnetic Erase Board (IHMEB) Removal
291
Induction Heater Power Supply (IHPS) Removal
293
Noise Filter Board Removal
293
Expansion Controller Board Removal
294
Power-Saving Board Removal
295
Engine Controller Board Removal
296
Hard Drive Removal
297
Controller Board Removal
298
Motor (Fuser Pressure) Removal
298
Paper Exit Fan Duct Removal
299
Paper Exit Fan Removal
300
IHPS Frame Removal
300
Fuser Power Supply Fan Removal
301
Motor (Toner Cartridge) Removal
302
Motor (Redrive) Removal
304
Controller Board Frame Removal
305
Controller Board Fan Removal
306
Motor (Transport) Removal
307
Motor (Developer) Removal
308
High Voltage Board Removal
309
Motor (Registration) Removal
310
Motor (Feed) Removal
312
Tray 2 Transport Drive Removal
313
Motor (Tray 2 Transport) Removal
314
Feed Drive Assembly Removal
315
Sensor (Tray 1 and 2 Paper Temperature) Removal
316
Ozone Fan Removal
316
Ozone Fan Duct Removal
318
Main Drive Assembly Removal
319
Center Cable Guide Bracket Removal
321
Toner Cartridge Drive Assembly Removal
322
Duplex Transport Clutch Removal
323
Motor (Fuser) Removal
324
Fuser Drive Gearbox Removal
325
Toner Suction Fan Removal
327
Top Side Removals
329
Standard bin Base Removal
329
Transfer Belt Fan Removal
329
Bin Side Cover Removal
330
2500-Sheet Tray Removals
331
2500-Sheet Tray Caster Wheel Removal
331
2500-Sheet Tray Controller Board Removal
332
2500-Sheet Tray LED Cover Removal
332
2500-Sheet Tray Front Right Cover Removal
333
2500-Sheet Tray Left Cover Removal
333
2500-Sheet Tray Lower Right Cover Removal
334
2500-Sheet Tray Empty LED Removal
334
2500-Sheet Tray Rear Cover Removal
335
2500-Sheet Tray Rear Right Cover Removal
335
2500-Sheet Tray Division Board Removal
336
2500-Sheet Tray Empty Sensor Actuator Removal
337
2500-Sheet Tray Elevator Home Sensor Actuator Removal
338
2500-Sheet Tray Transfer Guide Stop Removal
339
2500-Sheet Reserve Tray Paper Limit Sensor Actuator Removal
340
2500-Sheet Tray Vertical Media Transport Guide Assembly Removal
340
2500-Sheet Tray Transport Roller Removal
341
2500-Sheet Tray Jam Access Cover Removal
343
2500-Sheet Tray Jam Access Door Strap Removal
344
2500-Sheet Tray Paper Feed Assembly Removal
344
2500-Sheet Tray Pick Assembly Removal
345
2500-Sheet Tray Paper Stack Transfer Guide Removal
346
2500-Sheet Reserve Tray Empty Sensor Actuator Removal
347
2500-Sheet Tray Stopper Removal
348
Motor (2500-Sheet Tray Elevator) Removal
349
Motor (2500-Sheet Tray Feed) Removal
349
Motor (2500-Sheet Tray Transfer Guide) Removal
350
Motor (2500-Sheet Tray Transport) Removal
351
Sensor (2500-Sheet Tray Jam Access Door) Removal
352
Sensor (2500-Sheet Paper Stack Transfer) Removal
353
Sensor (2500-Sheet Tray Elevator Home) Removal
353
Sensor (2500-Sheet Tray Main Tray Empty, Bottom) Removal
354
Sensor (2500-Sheet Tray Main Tray Near Empty) Removal
355
Sensor (2500-Sheet Tray Main Tray Paper Empty, Top) Removal
355
Sensor (2500-Sheet Tray Main Tray Elevator Limit) Removal
356
Sensor (2500-Sheet Tray Feed) Removal
356
Sensor (2500-Sheet Tray Reserve Tray Empty) Removal
357
Sensor (2500-Sheet Tray Reserve Tray Paper Limit) Removal
358
Sensor (2500-Sheet Tray Transport) Removal
359
X 500-Sheet Tray Removals
360
Sensor (2 X 500-Sheet Tray Jam Access Door) Removal
360
X 500-Sheet Tray Caster Wheel Removal
361
Printer Rubber Stopper Removal
361
Tray Insert Paper Length Guide Removal
362
Tray Lock Removal
364
X 500-Sheet Tray Rollers Removal
366
Sensor (2 X 500-Sheet Tray Paper Length) Removal
366
X 500-Sheet Tray Left Cover Removal
368
X 500-Sheet Tray Empty LED Cover Removal
368
X 500-Sheet Tray Empty LED Removal
369
X 500-Sheet Tray Empty LED Mount Removal
369
X 500-Sheet Tray Rear Cover Removal
370
Motor (2 X 500-Sheet Tray Lift) Removal
370
Sensor (2 X 500-Sheet Tray Near Empty) Removal
371
Sensor (2 X 500-Sheet Tray Paper Width) Removal
372
X 500-Sheet Tray Feed and Transport Motors Removal
373
X 500-Sheet Tray Controller Board Removal
374
X 500-Sheet Tray Jam Access Door Removal
375
X 500-Sheet Tray Rear Right Cover Removal
376
X 500-Sheet Tray Bottom Right Cover Removal
377
X 500-Sheet Tray 3 Transport Assembly Removal
377
X 500-Sheet Tray 4 Transport Assembly Removal
378
X 500-Sheet Tray Transport Assembly Sensors Removal
379
X 500-Sheet Tray Tray Set Actuator Removal
380
Sensor (2 X 500-Sheet Tray Transport) Removal
381
X 500-Sheet Tray 3 Transport Belts and Gears Removal
382
X 500-Sheet Tray 4 Transport Belts and Gears Removal
383
3000-Sheet Tray Removals
385
3000-Sheet Tray Rollers Removal
385
3000-Sheet Tray Feed and Pick Belt Removal
387
3000-Sheet Tray Caster Wheel Removal
389
3000-Sheet Tray Release Handle Removal
390
3000-Sheet Tray Left Cover Removal
391
3000-Sheet Tray Right Cover Removal
392
3000-Sheet Tray Front Cover Removal
392
3000-Sheet Tray Rear Cover Removal
393
3000-Sheet Tray Door Removal
394
3000-Sheet Tray Left Top Cover Removal
395
Dehumidifier Removal
396
3000-Sheet Tray Empty LED Removal
397
Sensor (3000-Sheet Tray Empty) Removal
397
Sensor (3000-Sheet Tray Elevator Level) Removal
398
Sensor (3000-Sheet Tray Feed) Removal
399
3000-Sheet Tray Elevator Spring Removal
400
3000-Sheet Tray Controller Board Removal
400
3000-Sheet Tray Door Switch Removal
401
Motor (3000-Sheet Tray Elevator) Removal
402
3000-Sheet Tray Set Sensor Actuator Removal
402
Sensor (3000-Sheet Tray Set) Removal
403
Sensor (3000-Sheet Tray Near Empty) Removal
404
Motor Bracket Removal
406
3000-Sheet Tray Feed and Transport Motors Removal
406
3000-Sheet Tray Feed Roller Assembly Removal
407
3000-Sheet Tray Pick Roller Assembly Removal
410
Lexmark MS911 User Manual (260 pages)
Brand:
Lexmark
| Category:
Printer
| Size: 8.46 MB
Table of Contents
Table of Contents
2
Safety Information
6
Learning about the Printer
8
Finding Information about the Printer
8
Connecting the Printer to an Outlet
9
Selecting a Location for the Printer
9
Printer Configurations
10
Understanding the Printer Control Panel
13
Using the Control Panel
13
Understanding the Colors of the Sleep Button and Indicator Lights
13
Understanding the Home Screen
14
Using the Touch-Screen Buttons
15
Setting up and Using the Home Screen Applications
17
Finding the IP Address of the Printer
17
Finding the IP Address of the Computer
17
Accessing the Embedded Web Server
17
Activating the Home Screen Applications
18
Showing or Hiding Icons on the Home Screen
18
Using Background and Idle Screen
18
Setting up Forms and Favorites
18
Understanding Eco-Settings
19
Setting up Remote Operator Panel
20
Exporting and Importing a Configuration
20
Additional Printer Setup
21
Installing Internal Options
21
Installing Hardware Options
33
Attaching Cables
39
Setting up the Printer Software
40
Networking
40
Verifying Printer Setup
45
Loading Paper and Specialty Media
46
Setting the Paper Size and Type
46
Configuring Universal Paper Settings
46
Loading Trays
46
Loading the Multipurpose Feeder
48
Linking and Unlinking Trays
51
Paper and Specialty Media Guide
53
Using Specialty Media
53
Paper Guidelines
55
Supported Paper Sizes, Types, and Weights
58
Printing
64
Printing Forms and a Document
64
Printing from a Flash Drive or Mobile Device
65
Printing Confidential and Other Held Jobs
67
Printing Information Pages
68
Canceling a Print Job
69
Understanding the Printer Menus
70
Menus List
70
Paper Menu
71
Reports Menu
80
Network/Ports Menu
81
Security Menu
94
Settings Menu
99
Help Menu
121
Saving Money and the Environment
123
Saving Paper and Toner
123
Saving Energy
124
Recycling
125
Securing the Printer
127
Using the Security Lock Feature
127
Statement of Volatility
127
Erasing Volatile Memory
128
Erasing Non-Volatile Memory
128
Erasing Printer Hard Disk Memory
128
Advertisement
Lexmark MS911 Service Manual (153 pages)
Brand:
Lexmark
| Category:
Scanner
| Size: 17.97 MB
Table of Contents
Parts Catalog
2
Assembly 1: Covers
3
Assembly 4: Inner Covers
9
Assembly 5: Control Panel
11
Assembly 6: Printhead
13
Assembly 9: Waste Toner
19
Assembly 10: Developer
21
Assembly 11: Photoconductor Lock
23
Assembly 12: Transfer Belt
25
Assembly 13: Tray 1 and 2 Transport
27
Assembly 14: Tray 1 Feed
29
Assembly 15: Tray 1 Separator
31
Assembly 16: Tray 2 Feed
33
Assembly 17: Tray 2 Separator
35
Assembly 18: Tray Rail
37
Assembly 19: Tray Paper Detection
39
Assembly 23: Registration Transport
47
Assembly 24: Transfer
49
Assembly 25: Registration Unit
51
Assembly 26: Right Door Transport
53
Assembly 31: Fuser
63
Assembly 34: Main and Feed Drive
69
Assembly 35: Toner Cartridge Drive
71
Assembly 38: Ozone Duct
77
Assembly 39: High Voltage
79
Assembly 40: Main Power Supply
81
Assembly 43: 2 X 500-Sheet Tray-Covers
87
Assembly 44: 2 X 500-Sheet Tray-Frame
89
Assembly 45: 2 X 500-Sheet Tray-Paper Feed
91
Assembly 46: 2 X 500-Sheet Tray-Paper Size Detection
93
Assembly 47: 2 X 500-Sheet Tray-Paper Transport
95
Assembly 53: 2 X 500-Sheet Tray-Tray 3 or Tray 4 Frame
107
Assembly 54: 3000-Sheet Tray-Covers
109
Assembly 57: 3000-Sheet Tray-Elevator Front Section
115
Assembly 60: 3000-Sheet Tray-Paper Transport
121
Assembly 61: 3000-Sheet Tray-Elevator Rear Section
123
Assembly 62: 3000-Sheet Tray-Drive Section
125
Assembly 63: 3000-Sheet Tray-Wiring
127
Assembly 64: 2500-Sheet Tray Covers
129
Assembly 65: 2500-Sheet Tray Frame
131
Assembly 66: 2500-Sheet Tray Paper Feed
133
Assembly 67: 2500-Sheet Tray Paper Transport
135
Assembly 75: Maintenance Kits
151
Assembly 76: Miscellaneous
153
Lexmark MS911 Technical Reference (102 pages)
Brand:
Lexmark
| Category:
All in One Printer
| Size: 3.06 MB
Table of Contents
Table of Contents
3
Introduction
5
Understanding Letters after Model Numbers
5
Learning about the Printer
6
Finding Information about the Printer
6
Printer Control Language (PCL) Page Formatting
7
Printable Areas
7
Supported Paper and Envelope Dimensions
7
Printer Job Language (PJL)
10
PJL Commands Information
10
Postscript (PS) Emulation
11
Supported Paper Sizes
11
Postscript Paper Tray Support
12
Postscript Envelope Size Support
13
Postscript Envelope Tray Support
14
Printer Specifications
16
Airflow Requirement
16
Noise Emission Levels
16
Electrical Specifications
16
Power Requirements
16
Physical Specifications
17
Clearance Requirements
18
Environmental Conditions
18
Appendix A: PCL Support
19
PCL Emulation Commands
19
GL/2 Commands
24
Appendix B: PJL Support
28
Common Variables for both Printer Languages
28
Lexmark-Unique PJL Variables for both Printer Languages
30
Common Variables for PCL Emulation
39
Lexmark-Unique Variables for PCL Emulation
40
Common Variables for Postscript Emulation
40
Lexmark-Unique Variables for Postscript Emulation
40
Lexmark-Unique LRESOURCE Variables
41
Status Readback Commands
41
USTATUS Unsolicited Status Variables
41
PJL Messages for Auto-Continuable Conditions
42
PJL Messages for Attendance Conditions
49
PJL Messages for Paper Handling
69
PJL Messages for Paper Jams
72
Service Errors
78
Device Attendance Messages
78
Lexmark-Unique PJL Commands
78
Appendix C: Postscript Support
80
Supplemental Operators
80
Page Device Parameters
83
User Interpreter Parameters
87
System Interpreter Parameters
88
Devices Supported
90
Device Parameters
92
Postscript Message Keys Commands
100
Index
101
Lexmark MS911 Service Manual (89 pages)
Brand:
Lexmark
| Category:
Printer
| Size: 11.13 MB
Lexmark MS911 Quick Reference Manual (18 pages)
Brand:
Lexmark
| Category:
Printer
| Size: 2.74 MB
Table of Contents
Quick Reference
1
Learning about the Printer
1
Using the Control Panel
1
Understanding the Colors of the Sleep Button and Indicator Lights
1
Loading the Multipurpose Feeder
2
Loading Letterhead
3
Loading Prepunched Paper
3
Linking and Unlinking Trays
3
Printing a Document
4
Adjusting Toner Darkness
4
Printing from a Flash Drive
4
Supported Flash Drives and File Types
5
Clearing Jams
5
Canceling a Print Job
5
Avoiding Jams
5
Use Recommended Paper
6
Understanding Jam Messages and Locations
6
X]-Page Jam, Clear Jammed Paper from Multipurpose Feeder. [200.XX]
6
X]-Page Jam, Open Door C and Clear All Jammed Paper. [2Yy.XX]
7
X]-Page Jam, Slide the 3000-Sheet Tray and Open Door C. [2Yy.XX]
8
X]-Page Jam, Slide the 3000-Sheet Tray and Open Door D. [24Y.XX]
9
X]-Page Jam, Open Door D and Clear All Jammed Paper. [24Y.XX]
9
X]-Page Jam, Slide the 3000-Sheet Tray and Open Door F. [24Y.XX]
10
X]-Page Jam, Open Doors G, H, and J and Clear Jammed Paper. Leave Paper in Bin. [4Yy.XX]
11
X]-Page Jam, Press Latch to Access Area G and Clear Jammed Staples. Leave Paper in Bin. [402.93]
14
Advertisement
Related Products
Lexmark MS910 Series
Lexmark MS410 series
Lexmark MS510 Series
Lexmark MS610 Series
Lexmark MS711
Lexmark MS810 Series
Lexmark MS812de
Lexmark MS310d
Lexmark MS310dn
Lexmark MS610dte
Lexmark Categories
Printer
All in One Printer
Printer Accessories
Software
Print Server
More Lexmark Manuals
Login
Sign In
OR
Sign in with Facebook
Sign in with Google
Upload manual
Upload from disk
Upload from URL