Sign In
Upload
Manuals
Brands
Waters Manuals
Laboratory Equipment
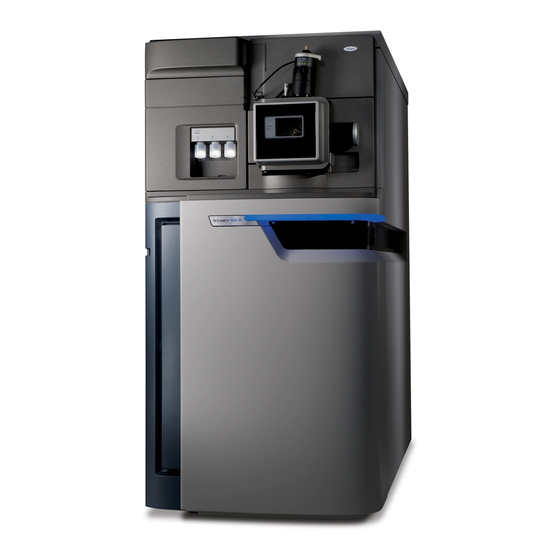
SYNAPT G2
User Manuals: Waters SYNAPT G2 Mass Spectrometry
Manuals and User Guides for Waters SYNAPT G2 Mass Spectrometry. We have
2
Waters SYNAPT G2 Mass Spectrometry manuals available for free PDF download: Operator's, Overview And Maintenance Manual, Quick Start Manual
Waters SYNAPT G2 Operator's, Overview And Maintenance Manual (236 pages)
Brand:
Waters
| Category:
Laboratory Equipment
| Size: 2 MB
Table of Contents
Copyright Notice
2
Trademarks
2
Customer Comments
3
Contacting Waters
4
Safety Considerations
4
Considerations Specific to the SYNAPT G2 MS System
5
Safety Advisories
7
Operating this Instrument
8
Applicable Symbols
8
Audience and Purpose
8
Intended Use
8
Calibrating
9
Quality Control
9
EC Authorized Representative
10
Table of Contents
11
1 System Overview
19
Waters SYNAPT G2 MS
20
SYNAPT G2 MS UPLC/MS/MS Systems
20
ACQUITY UPLC SYNAPT G2 MS UPLC/MS/MS System
20
Nanoacquity UPLC SYNAPT G2 MS Nanouplc/Ms/Ms System
21
Software
21
Intellistart
21
Masslynx
22
Instrument Console
22
Instrument Sources
23
Lockspray Source and Ionization Modes
23
Nanolockspray Source
25
Dual-Mode Ionization Source
27
Matrix-Assisted Laser Desorption Ionization
27
Intellistart Fluidics System
27
Overview
27
Intellistart Fluidics Physical Layout
28
System Operation
29
Ion Optics
30
Analyzers
31
Quadrupole
31
Triwave Technology
32
TOF Analyzer
33
Mass Spectrometer Configuration
35
Triwave Device
35
Tof
35
Leak Sensors
36
Vacuum System
36
Controls on the Instrument's Rear Panel
37
2 Starting up and Shutting down the Mass Spectrometer
40
Starting the Mass Spectrometer
40
Calibration Information
41
Flow Rates for the ACQUITY UPLC SYNAPT G2 MS UPLC/MS/MS System
41
Preparing the Intellistart Fluidics System
42
Installing the Vials
42
Purging the Pump
43
Shutting down the Mass Spectrometer
44
Putting the Mass Spectrometer in Standby Mode
44
Fully Shutting down the Mass Spectrometer
44
Rebooting the Embedded PC
45
3 Configuring the Lockspray Source
48
Configuring for ESI Mode
48
Installing the ESI Probe
48
Removing the ESI Probe
53
Installing the ESI Small Bore Capillary Option
54
Configuring for APCI Mode
60
Installing the APCI Probe
60
Installing the Corona Pin in the Source
64
Removing the Corona Pin from the Source
64
Removing the APCI Probe
64
Configuring for Esci Mode
65
Optimizing the ESI Probe for Esci Operation
65
Installing the Corona Pin in the Source
65
Removing the Corona Pin from the Source
65
4 Configuring the Nanolockspray Source
68
Overview of the Nanolockspray Source
68
Sample Sprayer
69
Lockspray Sprayer
69
Nanoflow Gas Supply
70
Purge Gas
70
Sprayer Platform Adjuster Assembly
70
Selecting and Configuring the Nanolockspray Source
70
Deploying the Sprayer Platform Adjuster Assembly
71
Adjusting the Sprayer Tip Position
72
Setting up the Camera
73
Optional Glass Capillary Sprayer
74
Installing the Glass Capillary Sprayer
74
Fitting and Loading the Glass Capillary
75
5 Maintenance Procedures
79
Maintenance Schedule
81
Spare Parts
82
Troubleshooting Using Connections Insight
83
Safety and Handling
84
Preparing the Instrument for Work Performed on Its Source
85
Removal and Refitting of the Source Enclosure
86
Removing the Source Enclosure from the Instrument
86
Fitting the Source Enclosure to the Instrument
89
Installing and Removing the Corona Pin
90
Installing the Corona Pin in the Source
90
Removing the Corona Pin from the Source
92
Operating the Source Isolation Valve
93
Removing O-Rings and Seals
95
Cleaning the Mass Spectrometer Case
96
Emptying the Nitrogen Exhaust Trap Bottle
97
Cleaning the Source Components
99
Cleaning the Sampling Cone Assembly
99
Removing the Sampling Cone Assembly from the Source
99
Disassembling the Sampling Cone Assembly
101
Cleaning the Sample Cone and Cone Gas Nozzle
104
Assembling the Sampling Cone Assembly
106
Fitting the Sampling Cone Assembly to the Source
107
Cleaning the Extraction Cone
109
Removing the Ion Block Assembly from the Source Assembly
109
Removing the Extraction Cone from the Ion Block
111
Cleaning the Extraction Cone
112
Fitting the Extraction Cone to the Ion Block
114
Fitting the Ion Block Assembly to the Source Assembly
115
Cleaning the Ion Block Assembly
116
Disassembling the Source Ion Block Assembly
116
Cleaning the Ion Block Components
123
Assembling the Source Ion Block Assembly
125
Cleaning the Source T-Wave Ion Guide Assembly
127
Removing the T-Wave Ion Guide Assembly from the Source Assembly
127
Disassembling the T-Wave Ion Guide Assembly
129
Cleaning the T-Wave Ion Guide Assembly Aperture Plate
130
Cleaning the T-Wave Ion Guide
130
Assembling the T-Wave Ion Guide Assembly
132
Fitting the T-Wave Ion Guide Assembly, PEEK Ion Block Support, and Ion Block Assembly to the Source Assembly
132
Replacing the ESI Probe Tip and Gasket
133
Removing the ESI Probe Tip and Gasket
134
Fitting the ESI Probe Tip and Gasket
136
Replacing the ESI Probe Sample Capillary
137
Removing the Existing Capillary
137
Installing the New Capillary
142
Cleaning the APCI Probe Tip
145
Replacing the APCI Probe Sample Capillary
146
Removing the Existing Capillary
146
Installing the New Capillary
149
Replacing the Lockspray Probe Capillary
152
Removing the Existing Capillary
152
Installing the New Capillary
155
Replacing the Nanolockspray Reference Probe Capillary
156
Removing the Nanolockspray Reference Probe
156
Installing the New Tapertip and Capillary
158
Cleaning or Replacing the Corona Pin
161
Replacing the APCI Probe Heater
162
Removing the APCI Probe Heater
162
Fitting the New APCI Probe Heater
164
Replacing the Ion Block Source Heater
165
Replacing the Lockspray Source Assembly Seals
169
Removing the Probe Adjuster Assembly Probe and Source Enclosure Seals
169
Fitting the New Source Enclosure Seals
171
Replacing the Mass Spectrometer's Air Filter
173
Replacing the Air Filter
173
Replacing the Intellistart Fluidics Tubing
176
Removing the Intellistart Fluidics Tubing
177
Plumbing the Intellistart Fluidics Lockspray System
177
Plumbing the Intellistart Fluidics Sample Delivery System
186
A Safety Advisories
194
Warning Symbols
194
Task-Specific Hazard Warnings
194
Specific Warnings
195
Caution Symbol
197
Warnings that Apply to All Waters Instruments
198
Electrical and Handling Symbols
203
Electrical Symbols
203
Handling Symbols
204
B External Connections
206
Mass Spectrometer External Wiring and Vacuum Connections
206
Connecting the Edwards Oil-Free Roughing Pump
207
Making the Electrical Connections to the Edwards Oil-Free Roughing Pump
211
Connecting to the Nitrogen Gas Supply
211
Connecting to the Collision Cell Gas Supply
213
Connecting the Nitrogen Exhaust Line
214
Connecting the Liquid Waste Line
217
Input/Output Signal Connectors
219
Signal Connections
222
Connecting the Workstation (System Without ACQUITY UPLC
225
Connecting Ethernet Cables (System with ACQUITY UPLC
225
Connecting to the Electricity Source
226
Connecting the Nanolockspray Source Camera
227
Installing the Camera Driver Software
227
C Materials of Construction and Compliant Solvents
230
Preventing Contamination
230
Items Exposed to Solvent
230
Solvents Used to Prepare Mobile Phases
231
Index
233
Advertisement
Waters SYNAPT G2 Quick Start Manual (2 pages)
No flow from fluidics
Brand:
Waters
| Category:
Laboratory Equipment
| Size: 0 MB
Table of Contents
Symptoms
1
Environment
1
Cause
2
FIX or WORKAROUND
2
Additional Information
2
Advertisement
Related Products
Waters SFC Column Oven
Waters SQ Detector
Waters 2707
Waters 717plus
Waters Categories
Laboratory Equipment
Security Sensors
Measuring Instruments
Control Unit
Water Pump
More Waters Manuals
Login
Sign In
OR
Sign in with Facebook
Sign in with Google
Upload manual
Upload from disk
Upload from URL