Sign In
Upload
Manuals
Brands
PoolCop Manuals
Lighting Equipment
Evolution
PoolCop Evolution Manuals
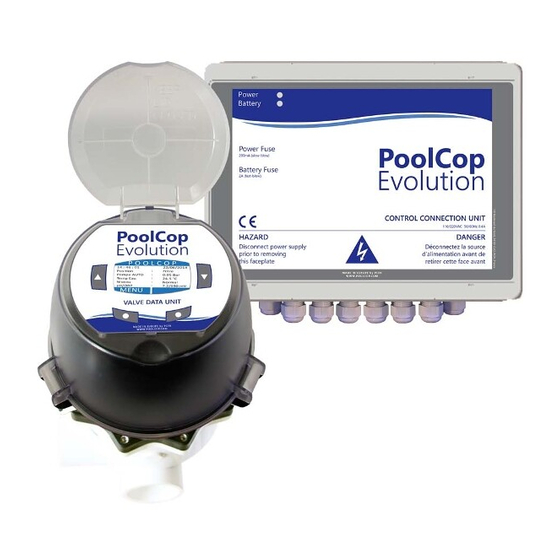
Manuals and User Guides for PoolCop Evolution. We have
2
PoolCop Evolution manuals available for free PDF download: Installer And User Manual
PoolCop Evolution Installer And User Manual (133 pages)
Brand:
PoolCop
| Category:
Water Filtration Systems
| Size: 5 MB
Table of Contents
Table of Contents
3
Notes, Cautions, Warnings and Definitions
6
Section 1 Introduction
6
Foreword
6
Important Information, Safety Notices and Precautions
7
Useful Conversions
9
Poolcop Warranty Registration Card
10
Figure 1 - Serial Number Location
10
Section 2 Warranty, Records
10
Poolcop Warranty
11
Routine Maintenance
12
First Installation
14
I Gnstallationuide Section 3
16
Section 3 Installation Guide
16
Figure 2 - VDU on Filter
17
Figure 3 - CCU
17
Figure 4 - Air Temperature Sensor
17
General
17
Pre-Installation Preparation and Inspection
17
Figure 5 - Flow Switch
18
Figure 6- Valve Data Unit
19
Figure 7 - 1.5" Valve O-Ring
19
Installing the Valve Data Unit
19
Mounting the Valve Data Unit
19
Valve Housing Mounting on Filter
19
Figure 10 - 1.5" VDU Alignment
20
Figure 11 - 2.0" VDU Alignment
20
Figure 8 - 2.0" Valve O-Ring
20
Figure 9 - Gasket and Housing Lubrication
20
Cables Selection and Connection
21
Electrical Connection
21
Installing the CCU
21
Mounting the CCU
21
Figure 12 - Cover Opening and Cables Entries
22
Figure 13 - Relay Terminals
22
Connecting a Single Speed Pump
24
Figure 14 - Single (or Two) Phase Pump Connection
24
Figure 15 - Three-Phase Pump Connection
24
Connecting a Variable Speed Pump
25
Figure 16 - Pentair Intelliflo VSD/VSF with Intellicomm or Intellicomm II
25
Figure 17 - Pentair Intelliflo3 VSF
26
Figure 18 - Pentair Superflo VS/VS2
26
Figure 19 - Hayward Eco Star
27
Figure 20 - Hayward VSTD Series
27
Figure 21 - Zodiac Flopro VS
28
Figure 22 - Binary Combination
28
Air Temperature Sensor
29
Circulation Flow Detection Sensor
29
Flow Sensor Type
30
Figure 23 - Air Temperature Sensor on J27
29
Installing Standard Features
29
Figure 24 - Flow Switch
30
Figure 25 - PVC Saddle
30
Figure 26 - Connecting Flow Switch to Input (1)
30
Figure 27 - Flow Switch Paddle Length Adjustment
30
Figure 28 - Flow Switch
31
Figure 29 - Drill Hole Ø 20Mm (¾")
31
Figure 30 - Connecting Flow Switch to Input (1)
31
Connecting Auxiliary Relays
32
Connection Instructions
32
Figure 31 - Auxiliary Relay Connection
32
Figure 32 - Single Phase 120/230VAC Auxiliary
32
Figure 33 - Three-Phase Auxiliary Connection
32
Figure 34 -Connection 24VAC Auxiliary
32
Connecting Inputs
33
Figure 35 - Connecting Inputs in CCU
33
Figure 36 - Connecting Inputs in XM8
33
Figure 37 - External Thermostat
34
Figure 38 - Thermostat Connection
34
Figure 39 - Chemical Low Level Detection
34
Figure 40 - Consumables Low Level Detection Connection
34
Figure 41 - Ph+Orp Sensor with Transport Cap
35
Figure 42 - Ph+Orp Sensor and Housing
35
Figure 43 - Sensor Housing Plug
35
Figure 44 - Sensor Connection
35
General
35
Installing the Water Condition Sensor
35
Installing Water Treatment
35
Figure 45 - SO4902 Spacing, Grab Ring Adjustment
36
Figure 46 - SO4903 Spacing, Grab Ring Adjustment
36
Figure 47 - Connecting Ph/Orp Sensor
36
Ph Control
37
Ph Feeder Pump Connection Direct Control Figure 49 - Ph Feeder Pump Connection with Coil
38
Disinfection
39
Figure 50 - Connecting Disinfection Equipment or Feeder Pump to Aux6, 24VAC Coil
40
Figure 51 - Connecting Disinfection Equipment or Feeder Pump to Aux6, 120VAC/2320VAC Coil
40
Figure 52 - Salt System Connection
41
Free Available Chlorine Sensor
41
Installing Options
42
Water Level Control
42
Figure 53 - Water Line Level Sensor
43
Figure 54 - Buffer Tank Water Level Sensors
43
Water Supply
44
Figure 55 - Connecting Water Level
44
Figure 56 - Refill Valve and Fittings
44
Figure 57 - Cables Entries
45
Figure 58 - Terminals
45
Installing XM8
45
Connecting an Automatic Backup Valve on Waste Line
47
Connecting Equipment
47
Figure 59 - Connecting Waste Valve
47
Figure 60 - Pool Cover Connection (Control and Position Indication)
47
Figure 61 - Jet Stream Connection
48
Commissioning Poolcop
49
Completing the Installation
49
Post Installation Documentation
50
Post Installation Inspection
50
Post Installation Inspection, Documentation, Procedures
50
Post Installation Procedures
50
U Gseruide Section 4
51
4.1 Poolcop Configuration
51
Figure 62 - CCU Display and Keypad
51
Keypad and Display Layout
51
Section 4 User Guide
51
Menus
52
Manual Control
53
Filtration Modes
54
Auxiliaries
55
Water and Treatment
56
Configuration
57
Maintenance
57
Circulation Mode (if Suction Valve Is Present)
58
Poolcop Cloud
58
Set PIN Code
58
Illuminate the Backlight
59
Navigate the Menu
59
Return to Main Display
59
Using and Settings
59
Filtration and Pump Control
60
Start the Pump
60
Stop the Pump
61
Antifreeze Protection
67
Water Level Control
68
Auxiliary Control
69
Water Treatment
69
Equipment Control (Requires XM8 Extension Module)
70
Service Mode
71
General Troubleshooting
72
Troubleshooting and Alerts
72
Alerts and System Messages
73
Electrical Power Failure
73
P Grogramminguide Section 5
75
Section 5 Programming Guide
75
Check Water Level
76
Clean the Filter
76
Figure 63 - Pressure Setting Parameters
76
Prior to Commencing Programming
76
Test and Balance Water
76
Understanding Pressure Parameters
76
Filtration Mode Menu
77
Mode
77
Cycle 1 Times
78
Cycle 2 Times
78
Auxiliaries Menu
79
Auxiliary ID
79
" a U X " M O de
80
Aux" Heating Temperature (Filtration/Priority/Schedule Modes)
80
Aux" Time and Duration (Pulse Mode)
80
Aux" Times (Timer Mode)
80
" a U X " S la Ve
81
Aux Days of the Week
81
Ph Control
82
Maximum Duration
83
Water and Treatment Menu
82
Water Level
82
ORP Control
87
Polarity Inversion
88
Remnant Injection
89
Temperature Adjustment
89
Extra Adjustment
89
ACO Injection
90
Free Available CL
90
Maintenance
91
Measure Ph
91
Pressure Inhibition
91
Service Mode
91
Calibrate Conductivity)
92
Calibrate FAC
92
Calibrate Ph
92
Value FAC
92
Adjust Water Temperature
93
Air Anti-Freeze
93
Stop Water Treatment
93
Configuration Menu
94
Freezing Protection
94
Pool Data
94
Pump Data
96
Filter Data
98
Digital Inputs
101
Input Name
101
Analog Inputs
104
Factory Settings
105
Network Menu
105
Time/Date Menu
105
Language Menu
106
Units Menu
106
Factory Reset
106
Equipment
107
Connected
110
OTP Code
110
Poolcop Cloud
110
Registered
110
Uuid
110
Set PIN Code
111
Circulation Modes
112
I Cnternetonnection Section 6
113
Introduction
113
Section 6 Internet Connection
113
Check the Network Connection
114
Figure 64 - Power Line Adaptors
114
Figure 65 - RJ45 Connector for Ethernet
114
How to Get Internet to Poolcop
114
Poolcop Connection to the Web
114
Server Connection and Pool Setup
114
Creating a User Account
115
Adding a Pool and Poolcopilot Module "Manually
116
Adding Your First Pool and Poolcopilot Module Automatically
116
Your Preferences
116
Access Pool or Pools
117
Error Messages
118
No Data Displayed
118
No Graphs Displayed in "History
118
Poolcop will Not Connect to the Server
118
Poolcopilot Functions
118
Troubleshooting
118
User Interface Options
118
Section 7 Spare Parts and Diagrams
119
UF1100-H Control Connection Unit CCU NA
119
CF1220-H Kit VDU Upper Part NA
120
UF1210-W1 Kit VDU Lower Part Version UF White
121
CF1580-W1 Kit Valve 1.5" S80 White
122
CF2080 Kit Valve 2.0" S80 White
123
So490X Ph+Orp SE Sensor Kit
124
Decal and Markings Location Diagrams
125
Figure 66 - CCU Decals and Markings
125
Figure 67 - VDU Decals and Markings
126
Section 8 Technical Specifications
127
CE Conformity
128
UKCA Conformity
128
UL/FCC Conformity
129
Poolcop Evolution
130
Air Temperature Sensor
131
Backup Waste Valve
131
Free Available Chlorine Sensor
131
Ph+Orp Sensors
131
Flow Switch
132
Water Level Control
132
XM8 Extension Module
132
Advertisement
PoolCop Evolution Installer And User Manual (114 pages)
Brand:
PoolCop
| Category:
Lighting Equipment
| Size: 4 MB
Table of Contents
Table of Contents
3
Introduction
5
Notes, Cautions, Warnings and Other Definitions
6
Declaration of Conformity CE
7
Important Information, Safety Notices and Precautions
7
Norms and Connexions
7
Location and Handling
8
W , Rarrantyecords Section 2
9
Warranty, Records
9
Poolcop Warranty Registration Card
10
Figure 1 - Serial Number Location in VDU
10
Poolcop Warranty
11
Poolcop Configuration Card
12
Routine Maintenance
13
Routine Pool Maintenance
13
Poolcop Maintenance
13
Closing the Pool for the Winter (Winterise)
16
Re-Commissioning the Poolcop for the Season
16
I Gnstallationuide Section 3
17
Installation Guide
17
General
18
Pre-Installation Preparation and Inspection
18
Figure 2 - VDU on Filter
18
Figure 3 - Control Connection Unit
18
Installing the Valve Data Unit
20
Figure 4- Valve Data Unit
20
Figure 5 - Filter Connection Kit Sample
20
Figure 6 - 1.5" Valve O-Ring
20
Mounting the Valve Data Unit
20
Valve Housing Mounting on Filter
20
Figure 7 - 2.0" Valve O-Ring
21
Figure 8 - Wagon Wheel Gasket
21
Figure 9 - Orientation Viewed from the Top of
21
Installing the Control Connection Unit
22
Figure 10 - Cables Entries
22
Electrical Connection
22
Figure 11 - Terminals
23
Connecting a Single Speed Pump
24
Figure 12 - Single Phase Pump Connection
24
Figure 13 - Three-Phase Pump Connection
24
Connecting a Variable Speed Pump
25
Figure 14 - Pentair Intelliflo VSD with Intellicomm
25
Figure 15 - Pentair Superflo VS/VS2
25
Figure 16 - Hayward Ecostar
26
Figure 17 - Hayward VSTD Series
26
Figure 18 - Speck Badu Eco-Touch
27
Figure 19 - Speck Badu Eco Motion
27
Figure 20 - Zodiac Flopro VS
28
Figure 21 - Invertek Optidrive E2 Inverter
28
Figure 22 - Binary Combination
29
Figure 23 - Davey Promaster VSD400
29
Water Treatment
30
Figure 24 - Poolcop Water Analysis Sensor
30
Figure 25 - Sensor and Housing
30
Figure 26 - Sensor Housing Plug
30
Figure 27 - Sensor Connection
30
General
30
Installing the Water Condition Sensor
30
Ph Control
32
Figure 28 - Ph Dosing Pump Connexion
33
Disinfection
34
Figure 29 - Example of Connecting Dosing Pump to Aux6
34
Figure 30 - Example of Solenoid Valve Connection for Flow Control Via Aux3
35
Figure 31 - Salt Sytem Connection
36
Installing Options
38
Figure 32 - Air Temperature Sensor J27
38
Air Temperature Sensor
38
Figure 33 -Water Line Level Sensor
39
Figure 34 - Buffer Tank Water Level Sensors
39
Water Level Control
39
Figure 35 - Connecting Water Level
40
Figure 36 - Cables Entries
41
Figure 37 - Terminals
41
Installing XM8 Extension Module
41
Connecting Auxiliary Relays
43
Figure 38 - Auxiliaries Connection Terminal in CCU (Left) and in XM8 Extension Module (Right)
43
Figure 39 - Single Phase 230VAC Auxiliary
44
Figure 40 - Three-Phase 380VAC Auxiliary Connection
44
Figure 41 - Connection 24VAC Auxiliary
44
Connecting an Automatic Valve on Waste Line
45
Figure 42 - Additonal Relays
45
Figure 43 - Waste Valve Connexion
45
Connecting Inputs
46
Figure 44 - Connecting Inputs in CCU
46
Figure 45 - Connecting Inputs in XM8
46
Figure 46 - External Thermostat
47
Figure 47 - Example of External Thermostat Connection
47
Figure 48 - Suction Wand with Low Level Detection
47
Figure 49 - Example of Consumables Low Level Detection
47
Connecting Equipment
48
Figure 50 - Pool Cover Connexion (Control and Position)
48
Figure 51 - Connection Example with Mecateccenter Cover
48
Figure 52 - Connection Example with Astral Roussillon Cover
49
Figure 53 - Connection Example with SWIMSAFE Cover
49
Figure 54 - Jetstream Connection
50
Completing the Installation
51
Commissioning Poolcop
51
Post Installation Inspection, Documentation, Procedures
52
Post Installation Inspection
52
Post Installation Documentation
52
Post Installation Procedures
52
U Gseruide Section 4
53
User Guide
53
4.1 Your Poolcop Configuration
54
Keypad and Display Layout
54
Figure 56 - Valve Data Unit Display and Keyboard
54
Menus
55
Manual Control
56
Filtration Modes
57
Auxiliaries
58
Water and Treament
59
Configuration
60
Maintenance
60
Using and Settings
61
Illuminate the Backlight
61
Navigate the Poolcop Menu
61
Return to Main Poolcop Display
61
Filtration and Pump Control
62
Water Level Control
70
Auxilairy Control
71
Water Treatment
71
Equipment Control (Requires XM8 Extension Module)
72
Service Mode
73
Troubleshooting and Alerts
74
General Troubleshooting
74
Electrical Power Failure
75
Alerts and System Messages
76
P Grogramminguide Section 5
77
Programming Guide
77
Prior to Commencing Programming
78
Clean the Filter
78
Check Pool Level
78
Test and Balance Water
78
Filtration Mode Menu
79
Mode
79
Cycle 1 Times
80
Cycle 2 Times
80
Auxiliaries Menu
81
Auxiliary ID
81
"Aux " M Ode
81
?Aux” Set on Time and Duration (Pulse Mode)
82
Aux" Times (Timer Mode)
82
Aux" Set on Time and Duration (Pulse Mode)
82
Aux" Heating Temperature (Filtration/Priority/Schedule Modes)
82
"Aux " Sla Ve
82
Aux Days of the Week
82
?Aux” Slave
82
?Aux” Heating Temperature (Filtration/Priority/Schedule Modes)
82
Water and Treatment Menu
83
Water Level
83
Ph Control
85
ORP Control
86
Remnant Injection
87
Maintenance
88
Adjust Water Temperature
88
Air Anti-Freeze
88
Measure Ph
88
Service Mode
88
Stop Water Treatment
88
Calibrate Ph
89
Configuration Menu
90
Pool Data
90
Pump Data
92
Filter Data
94
Inputs
96
Factory Settings
98
Equipment
100
Internet Connection Section 6
103
Internet Connection
103
Introduction
103
Poolcop Connection to the Web
104
Figure 57 - Power Line Adaptors
104
Figure 58 - RJ45 Connector for Ethernet
104
Check the Connection
104
How to Get Internet into Poolcop
104
Server Connection and Pool Setup
105
Compatible Browser Versions
105
Creating a User Account
105
Adding a Pool and Poolcopilot Module “Manually”
106
Adding Your First Pool and Poolcopilot Module Automatically
106
Adding a Pool and Poolcopilot Module "Manually
106
Your Preferences
106
Access Pool or Pools
107
Troubleshooting
108
User Interface Options
108
Error Messages
108
No Data Displayed
108
No Graphs Displayed in "History
108
Poolcop will Not Connect to the Server
108
Poolcopilot Functions
108
Technical Specifications
109
Poolcop Evolution
110
Valve Performance Curves
110
Water Level Control
111
XM8 Extension Module
111
Waste Backup Valve
111
Air Temperature Sensor
112
Ph Sensor
112
Ph+Orp Sensors
112
Notes
113
Advertisement
Related Products
PoolCop Categories
Water Filtration Systems
Measuring Instruments
Network Router
Lighting Equipment
More PoolCop Manuals
Login
Sign In
OR
Sign in with Facebook
Sign in with Google
Upload manual
Upload from disk
Upload from URL