Table of Contents
Advertisement
Advertisement
Table of Contents

Related Manuals for Promise Technology FASTtrak100 TX


Summary of Contents for Promise Technology FASTtrak100 TX
- Page 1 TX/LP Series Ultra ATA/100 RAID Cards User's Manual...
- Page 2 Copyright Copyright by Promise Technology, Inc. (“Promise”), 2001. No part of this manual may be reproduced or transmitted in any form without the expressed, written permission of Promise. Trademarks All trademarks are the property of their respective holders. Important data protection information You should back up all data before installing any drive controller or storage peripheral.
-
Page 3: Table Of Contents
FastTrak100 TX/LP™ Series User Manual Table of Contents INTRODUCTION......................1 100 TX/LP S RAID C ?..........1 HAT IS THE ERIES .................3 EATURES AND ENEFITS QUICK START .......................5 100................5 NPACKING ....................6 NSTALLING ...................7 NSTALLING RIVES CMOS S ..................9 HECKING ETTINGS .................10 REATING RRAY USING FASTBUILD™... - Page 4 FastTrak100 TX/LP™ Series User Manual UNDERSTANDING DISK ARRAY CONCEPTS.............70 100 TX/LP S ........70 BOUT ERIES RRAY DAPTER BIOS.....................70 BOUT DAPTER ™ ................70 UILD ETUP ....................70 ESERVED ECTOR ....................71 RRAY ERMS RAID L ....................72 BOUT EVELS TROUBLESHOOTING & TIPS..................76 .....................76 OTHERBOARD...
-
Page 5: Introduction
FastTrak100 TX/LP™ Series User Manual Introduction The PC which you are using either already c ontains a Promise Technology FastTrak100 TX4, TX2, or LP RAID card installed by a third-party or you have acquired a FastTrak100 retail product for your existing PC and will be installing the card yourself. - Page 6 FastTrak100 TX/LP™ Series User Manual performance through load balancing and elevator sorting while creating a complete backup of your files. Striping with mirroring offers both high read/write performance and fault tolerance. Spanning uses the full capacity of all attached drives without requiring identical drive size, but offers no other RAID functionality.
-
Page 7: Keys Features And Benefits
FastTrak100 TX/LP™ Series User Manual Keys Features and Benefits The following information offers an overview of the major features of your new Promise FastTrak100 TX4, TX2 or LP card. The table is divided into two areas: Advanced Hardware Design, and Compatibility. - Page 8 FastTrak100 TX/LP™ Series User Manual Compatibility Features Benefits Complies with PCI v2.2 Local Bus Provides highest level of hardware compatibility. standard Compliant with PCI IDE Bus Master Provides 32-bit I/O, IDE Bus Master, and Ultra standard. PCI IDE Bus Master...
-
Page 9: Quick Start
FastTrak100 TX/LP™ Series User Manual Quick Start This section is designed to quickly get your FastTrak100 TX/LP series controller up and running using the default settings, which will be optimal for most users. If you wish to modify any of the default settings, please refer to page 14, Using FastBuild™... -
Page 10: Installing The Card
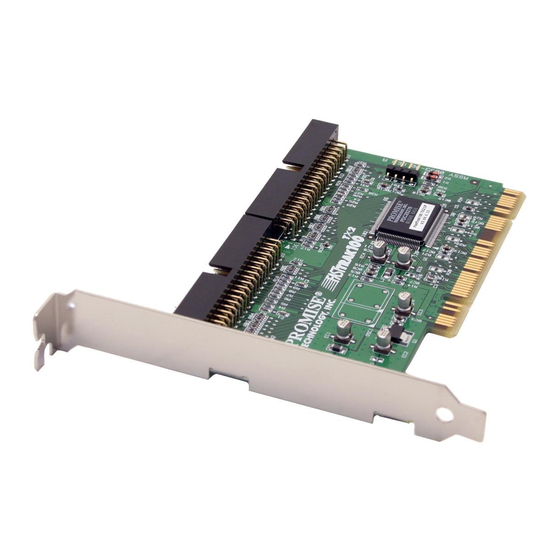
FastTrak100 TX/LP™ Series User Manual Installing The Card Installing the FastTrak100 TX/LP Series controller card in a system is a simple process. The card fits into any available 32-bit PCI slot (must be PCI 2.1 or 2.2 compliant), or the 32-bit portion of a 64-bit PCI slot, on the system’s motherboard (see fi gure below). -
Page 11: Installing The Hard Drives
FastTrak100 TX/LP™ Series User Manual Installing The Hard Drives WARNING: If you wish to include your current bootable drive using the Windows NT 4.x or Windows 2000 operating system as part of a bootable Mirrored (RAID 1) array on your FastTrak100, do NOT connect the hard drive to the FastTrak100 controller yet. - Page 12 FastTrak100 TX/LP™ Series User Manual WARNING: Use of removable hard drive enclosures other than Promise SuperSwap is not supported and may result in performance loss or other undesired results. Attach one Ultra ATA cable to each hard drive. Then attach one cable to each of the IDE connectors on the FastTrak100 controller card.
-
Page 13: Checking Cmos Settings
FastTrak100 TX/LP™ Series User Manual Checking CMOS Settings No changes are necessary in the Motherboard CMOS Setup for resources or drive types. Since FastTrak100 is a PCI Plug-n-Play (PnP) device, the Interrupt and Port address resources are automatically assigned by the Motherboard's PCI PnP BIOS. -
Page 14: Creating Your Disk Array
Press <Ctrl-F> keys to display the FastBuild (tm) Utility Main Menu Press “1” to display the Auto Setup Menu below. This is the fastest and easiest method to creating your first array. FastBuild (tm) Utility 1.xx (c) 1995-2001 Promise Technology, Inc. [Auto Setup Options Menu] Optimize Array for:... - Page 15 FastTrak100 TX/LP™ Series User Manual [ ] Up [ ] Down [ , , Space] Change Option [ESC] Exit [Ctrl-Y] Save NOTE: If you wish to customize certain settings at a later time, you may do so by manually creating your array (see page 19 in Using FastBuild Configuration Utility).
- Page 16 FastTrak100 TX/LP™ Series User Manual Creating an Array for Performance NOTE: FastTrak100 allows users to create striped arrays with 1, 2, 3, or 4 drives. To create an array for best performance, follow these steps: Using the Spacebar, choose “Performance” under the Optimize Array for section.
- Page 17 FastTrak100 TX/LP™ Series User Manual Once the arrayed drives have been formatted, proceed to the Installing Driver chapter on page 30 to install your operating system and/or FastTrak100 driver. Creating a Security Array With An Existing Data Drive NOTE: Under the Security setting, FastTrak100 permits two drives to be used for a single Mirrored array or four drives to be used for a Mirrored/Striped array in Auto Setup.
- Page 18 FastTrak100 TX/LP™ Series User Manual 1 :Master QUANTUMCR8.4A 8063 2 :Master QUANTUMCR8.4A 8063 [ ] Up [ ] [ESC] Exit [Ctrl-Y] Save Use the arrow keys to choose which drive contains the existing data to be copied. Press [Ctrl-Y] keys to Save selection and start duplication. The following progress screen will appear.
-
Page 19: Using Fastbuild™ Configuration Utility
Promise onboard BIOS will detect the drives attached and show the following screen. FastTrak100 (tm) BIOS Version 1.xx (Build xxxx) (c) 1995-2001 Promise Technology, Inc. All Rights Reserved. Scanning IDE drives ..If an array exists already, the BIOS will display the following screen showing the card’s BIOS version and status of the array. -
Page 20: Navigating The Fastbuild™ Setup Menu
Using the Main Menu This is the first option screen when entering the FastBuild Setup. FastBuild (tm) Utility 1.xx (c) 1995-2001 Promise Technology, Inc. [ Main Menu ] Auto Setup............[ 1 ] View Drive Assignments ......... [ 2 ] Define Array ............ -
Page 21: Creating Arrays Automatically
It will assign all available drives appropriate for the disk array you are creating. After making all selections, use Ctrl-Y to Save selections. FastBuild wi l l automatically build the array. FastBuild (tm) Utility 1.xx (c) 1995-2001 Promise Technology, Inc. [Auto Setup Options Menu] Optimize Array for:... - Page 22 FastTrak100 TX/LP™ Series User Manual Capacity (Spanning) Achieves the maximum amount of capacity by adding the sum of all attached drives. The Stripe Block option does not apply.
- Page 23 FastTrak100 TX/LP™ Series User Manual Defining Typical Application Usage Allows the user to choose the type of PC usage that will be performed in order to optimize how FastTrak100 handles data blocks to enhance performance. Your choice will determine the block size used. You may choose from: A/V Editing (for audio/video applications, or any similar application that requires large file transfers), Server (for numerous small file transfers), or Desktop (a combination of large and small file sizes).
-
Page 24: Viewing Drive Assignments
OS. The menu also displays the data transfer mode that relates to speed used by each drive (U5 refers to 100MB/sec transfers, U4 refers to 66MB/sec transfers, etc...) FastBuild (tm) Utility 1.xx (c) 1995-2001 Promise Technology, Inc. [ View Drive Assignments ] Channel:ID Drive Model... -
Page 25: Manually Creating An Array
FastTrak100, though the card will support a maximum of four arrays NOTE: For most installations, Promise recommends the <1> Auto Setup for easy disk array creation. FastBuild (tm) Utility 1.xx (c) 1995-2001 Promise Technology, Inc. [Define Array Menu] Array No... - Page 26 Use the [Space] key to cycle through three array types: Performance (RAID 0 Striping), Security (RAID 1 Mirroring, RAID 0+1 Striping/Mirroring (for 4 drives), or Capacity (Spanning)). See page 70 about RAID levels. FastBuild (tm) Utility 1.xx (c) 1995-2001 Promise Technology, Inc. [ Define Array Definition Menu ] Array No...
- Page 27 FastTrak100 TX/LP™ Series User Manual is no longer available. Without this feature enabled, FastTrak100 will NOT permit the use of a replacement drive that is slightly smaller than the remaining working drive. For the Gigabyte Boundary feature to work, the Gigabyte Boundary feature must be set to “ON”...
- Page 28 FastTrak100 TX/LP™ Series User Manual A window will appear almost immediately confirming that your Security array has been created. Press any key to reboot the system Array has been created. <Press Any Key to Reboot>...
- Page 29 FastTrak100 TX/LP™ Series User Manual Adding Fault Tolerance to an Existing Drive FastTrak100 will create a mirrored array using an existing system drive with data. You must assign the existing drive and another drive of same or larger capacity to the Mirroring array.
- Page 30 FastTrak100 TX/LP™ Series User Manual...
- Page 31 FastTrak100 TX/LP™ Series User Manual Use the arrow keys to choose which drive contains the existing data to be copied. WARNING: All target drive data will be erased. Make sure you choose the correct drive. Press [Ctrl-Y] keys to Save selection and start duplication. The following confirmation screen will appear.
- Page 32 You now may use the menu to select which previously-defined array will be used as the bootable array. FastBuild (tm) Utility 1.xx (c) 1995-2001 Promise Technology, Inc. [ Define Array Menu ] Array No...
- Page 33 FastTrak100 TX/LP™ Series User Manual the “spare” drive will fail to be recognized by the system. For this r eason Promise recommends using “spare” drives only on the FastTrak100 TX4.
- Page 34 FastTrak100 TX/LP™ Series User Manual How FastTrak100 Orders Arrays During startup, the disk arrays on the FastTrak100 are recognized in this order: 1) The array set to bootable in the FastBuild Setup, and 2) the Array number (i.e. Array 0, Array 1… ). This would be involved in determining which drive letters will be assigned to each disk array.
-
Page 35: Deleting An Array
Make sure to record all array information including the array type, the disk members, and stripe block size in case you wish to undo a deletion. FastBuild (tm) Utility 1.xx (c) 1995-2001 Promise Technology, Inc. [ Delete Array Menu ] Array No... - Page 36 FastTrak100 TX/LP™ Series User Manual Are you sure you want to delete this array? Press Ctrl-Y to Delete, others to Abort After deleting the array, you should create a new array using Auto Setup or the Define Array menu from the FastBuild Main Menu.
-
Page 37: Rebuildinga Mirrored Array
Replace the drive with an identical model. Reboot the system and enter the FastBuild Main Menu. Select the <5> Rebuild Array option. The following screen will appear. FastBuild (tm) Utility 1.xx (c) 1995-2001 Promise Technology, Inc. [ Rebuild Array Menu ] Array No... - Page 38 FastTrak100 TX/LP™ Series User Manual FastBuild (tm) Utility 1.xx (c) 1995-2001 Promise Technology, Inc. [ Rebuild Array Menu ] Array No RAID Mode Total Drv Status Array 2 Mirror Critical Stripe Block: Not Available Gigabyte Boundary: [ Select Drive for Rebuild ]...
-
Page 39: Viewing Controller Settings
FastTrak100 BIOS from halting (the default) if it detects an error on boot up. You may also view the system resources (Interrupt and I/O port address) of FastTrak’s data channels. FastBuild (tm) Utility 1.xx (c) 1995-2001 Promise Technology, Inc. [ Adapter Configuration - Options ] Halt On Error:... -
Page 40: Installing Drivers
A: and press “Enter” key. Choose “Win2000 Promise FastTrak100 TX/LP(tm) Series Controller” from the list that appears on screen, and then press the “Enter” key. The Windows 2000 Setup screen will appear again saying “Setup will load support for the following mass storage devices:”... - Page 41 Choose “Display a list of known drivers for this device so that I can choose a specific driver”. Click on “Next”. In the “Install Drivers” dialog box, press “Have disk… ” When the “Install From Disk” appears, insert the Promise Technology FastTrak100 diskette in drive A:. Type “A:\Win2000” in the text box. Press “Enter”.
-
Page 42: Windows Nt4
FastTrak100 driver diskette into drive A: and press the “Enter” key. Choose “WinNT Promise FastTrak100 TX/LP(tm) Series Controller” from the list that appears on screen, and then press the “Enter” key. The Windows NT Setup screen will appear again saying “Setup will load support for the following mass storage devices:”... - Page 43 Type “A:\NT4” in the text box window, then choose “OK.” When the “Install Driver” dialog box appears, select “WinNT Promise FastTrak100 TX/LP(tm) Series Controller” and then pre ss “OK.” When the “Select SCSI Adapter Option” dialog box appears, press “Install.”...
-
Page 44: Windows Me
10. Insert the “FastTrak100 Driver” diskette into the A: drive. 11. Press the “Next” button. A mess age informing you that Windows Millennium has found “Win9x -ME Promise FastTrak100 TX/LP(tm) Series Controller” should appear. 12. Press “Next,” then “Finish,” then “Yes” when asked if you want to restart... - Page 45 Insert the “FastTrak100 Driver” diskette in drive A:. Type “A:\WIN9x-ME” in the text box that appears. Click on “Next.” A message in forming you that Windows Millennium has found “Win9x -ME Promise FastTrak100 TX/LP(tm) Series Controller” should appear. Click on “Next,” and then on “Finish.”...
-
Page 46: Windows 95/98
11. Insert the “FastTrak100 Driver” diskette into the A: drive. 12. Press the “Next” button. A message informing you that Windows 98 has found “Win9x -ME Promise FastTrak100 TX/LP(tm) Series Controller” should appear. 13. Press “Next,” then “Finish,” then “Yes” when asked if you want to restart your computer. - Page 47 12. In the “Select Other Location” dialog box, type “A: \WIN9x-ME”. 13. Press the “Next” button. A message informing you that Windows 95 has found “Win9x -ME Promise FastTrak100 TX/LP(tm) Series C ontroller” should appear. 14. Press “Finish.” (If Windows can’t find the “FastTrak.MPD” file, type “A:\WIN9x-ME”...
- Page 48 Insert the “FastTrak100 Driver” diskette in drive A:. Click on “Next.” The Add New Hardware wizard will say it has found “Win9x -ME Promise FastTrak100 TX/LP(tm) Series Controller”. Click on “Next,” and then on “Finish.” Choose “Yes” when asked if you want to restart your computer. Be sure to eject the diskette from drive A:.
-
Page 49: Dos/Windows 3.1X
Choose “Control Panel,” and then double -click on the “System” icon. Choose the “Device Man ager” tab, and then click the “+” in front of “SCSI & RAID controllers.” “Win9x -ME Promise FastTrak100 TX/LP(tm) Series Controller” should appear (2 listings will appear if you have the FastTrak100 TX4). -
Page 50: Netware 3.12
FastTrak100 TX/LP™ Series User Manual Netware 3.12 NWPA Update Package Installation Instructions for NetWare 3.12 Before installing the FastTrak100 NetWare driver, make sure that you have installed the latest update for the NetWare 3 operating system. From the website at http://developer.novell.com/devres/sas/certinfo.htm download NWPA_UP.EXE from the "Download the Update Package"... - Page 51 FastTrak100 TX/LP™ Series User Manual load c:\SERVER.312\nbi31x Save the file. DOWN and EXIT the server. 10. Remove the NetWare CD-ROM. 11. Reboot the server. For Existing Netware 3.12 Servers: Copy Fasttrak driver FASTTRAK.HAM & FASTTRAK.DDI into the Netware 3.12 boot directory. Ex. C:\SERVER.312\ Edit STARTUP.NCF and add the following lines after any set parameters but...
-
Page 52: Netware 4.11
FastTrak100 TX/LP™ Series User Manual Netware 4.11 NWPA Update Package Installation Instructions for NetWare 4.11 Before installing the FastTrak100 NetWare driver, make sure that you have installed the latest update for the NetWare 4 operating system. From the website at http://developer.novell.com/devres/sas/certinfo.htm download NWPA_UP.EXE from the "Download the Update Package"... - Page 53 FastTrak100 TX/LP™ Series User Manual 12. DOWN and EXIT the server. 13. Reboot the server. For Existing Netware 4.11 Servers: Copy the Fasttrak driver FASTTRAK.HAM & FASTTRAK.DDI into the Netware 4.11 boot directory. Ex. C:\NWSERVER\ Edit STARTUP.NCF and add the following lines after any set parameters but...
-
Page 54: Netware 5
FastTrak100 TX/LP™ Series User Manual Netware 5 For new NetWare 5 servers: Start the Netware 5 installation as you normally would. When you reach the point in the installation where you install storage adapters, choose “Modify” in the “Options” window and press ENTER. - Page 55 FastTrak100 TX/LP™ Series User Manual The FASTTRAK.HAM driver should be listed in the “Select a driver to install:” window. Press ENTER to select this driver. Choose “Yes” wh en asked if you want to copy this driver.
-
Page 56: Netware Error And Informational Messages
FastTrak100 TX/LP™ Series User Manual Netware Error and Informational Messages The FastTrak100 TX/LP series Netware driver will display error and other informational messages to the console. "Warning...Master/Slave Device on Channel [1/2] for Promise RAID [0/1/0+1] Deactivated" A problem has been detected in one of the drives of the array and the drive has been taken “offline.”... -
Page 57: Linux
FastTrak100 TX/LP™ Series User Manual Linux For the latest Linux drivers and documentation, please visit the Technical Support area at w ww.promise.com. -
Page 58: Using The Fastcheck™ Monitoring Utility
Using The FastCheck™ Monitoring Utility You can monitor the operating status of all arrays and drives configured on the FastTrak100 TX/LP series controllers using the supplied FastCheck monitoring utility for Windows-based operating systems. FastCheck generates visual and audible messages alerting you of possible problems with the disk array or controller. -
Page 59: Running Fastcheck
FastTrak100 TX/LP™ Series User Manual Running FastCheck As described in the Installation section, the default option for FastCheck is to load during startup of Win95/98/NT/2000/ME. It appears minimized on the taskbar under Win 95/98/NT4/2000/Millennium (see below). To start FastCheck, double-click on the FastCheck icon on the taskbar (above) or you may also use the Taskbar Start/Promise/FastTrak/FastCheck menus shown below. -
Page 60: Using Fastcheck Array Window
FastTrak100 TX/LP™ Series User Manual Using FastCheck Array Window Once FastCheck is selected, the FastCheck Monitoring Utility window will appear. The main pane has three information window tabs: Array, Controller, and Options. The user can switc h screens by clicking on the tab. The Array Window is the active... - Page 61 FastTrak100 TX/LP™ Series User Manual Status: (Functional, Critical, Offline) Functional: Means the array is providing full functionality Critical: Used only in reference to a Mirroring array (RAID 1 or RAID 0+1). A problem has been detected in one of the drives of the array and the drive has been taken “offline.”...
- Page 62 Optional Enclosure Management for SuperSwap Drive Chassis If using your FastTrak100 with an optional Promise Technology SuperSwap hot- swap drive chassis, the FastCheck array window will also display voltage, fan, and drive temperature status of the SuperSwap unit when a drive icon is selected as follows below: Encl.
- Page 63 FastTrak100 TX/LP™ Series User Manual Using Array Pull-down Menu At the bottom of the Array window, it indicates to right-click on an Array to perform synchronization or rebuild operations. Right-clicking displays the following pull-down menu: From this menu, users may choose to have the Window Always Appear on Top of applications, Minimize, Synchronize mirrored drives, Rebuild a mirrored array, use About to check FastCheck version #, or Exit the onscreen window.
-
Page 64: Synchronizing An Array
FastTrak100 TX/LP™ Series User Manual Synchronizing An Array Synchronization is a periodic maintenance procedure for Mirroring (RAID 1, RAID 0+1) arrays to maintain data consistency on all mirrored drives. In operation, array synchronization compares data on the mirrored drives for any differences. If there are differences detected, data from the primary drive(s) is automatically copied to the secondary drive(s). - Page 65 FastTrak100 TX/LP™ Series User Manual Once Synchronization is confirmed, the following information screen appears. Click OK button or close the window to proceed. NOTE: During Array Synchronization, users may continue to access the working array and perform normal PC functions. However, system performance will be slightly degraded and the process will take longer.
-
Page 66: Rebuilding An Array
FastTrak100 TX/LP™ Series User Manual Rebuilding An Array This command effectively copies or overwrites data from an existing data drive in the array on to a blank drive. The operation will be typically used when a failed drive has been replaced with a new drive as part of a mirrored array. - Page 67 FastTrak100 TX/LP™ Series User Manual Click the Next button to proceed to Rebuild Wizard Step 2 (see next page) or Cancel button to stop.
- Page 68 FastTrak100 TX/LP™ Series User Manual Rebuild Wizard Step 2 confirms the Target or “Rebuild” disk by Array # and drive Click Finish button to initiate physical Rebuild, Back button to review Step 2, or Cancel button to Stop. A final confirmation window appears as below: Click “Yes”...
- Page 69 FastTrak100 TX/LP™ Series User Manual NOTE: During Array Rebuild, users may continue to access the array and perform normal PC functions however the array will NOT provide data redundancy until Rebuild is completed. If you choose to continue using the PC during rebuild, system performance will be slightly degraded and the process will take longer.
-
Page 70: Using Controller Window
FastTrak100 TX/LP™ Series User Manual Using Controller Window Clicking on the Controller tab will reveal the Controller Window. This displays physical information about the location of FastTrak100, data channels on the card, and the attached drives. Viewing Controller Card Information... - Page 71 FastTrak100 TX/LP™ Series User Manual Viewing IDE Channel Information Left-clicking on a given Channel icon or # in the left pane, will show the Base IO addresses of the channel in the right pane (used for troubleshooting).
- Page 72 FastTrak100 TX/LP™ Series User Manual Viewing Drive Information Left-clicking on a given Drive icon or ID in the left pane, will show similar information categories as the Array Window Drive Information in the right pane. Status: (also shown under the Array Window) can be Functional, Critical, or Offline.
- Page 73 Timing: Shows selection of drive timing (directly related to burst speed) based on type of drive and cable used. Optional Enclosure Management for SuperSwapTM Drive Chassis If using your FastTrak100 with an optional Promise Technology SuperSwap hot- swap drive chassis, the FastCheck controller window will also display voltage, fan,...
-
Page 74: Using Options Window
FastTrak100 TX/LP™ Series User Manual Using Options Window Clicking on the Options tab reveals the Options Window. Array administrators can customize the FastCheck Monitoring Utility in four major areas: Notification, Array Synchronization Scheduling, setting Passw ord, Desktop Appearance. Most options... - Page 75 FastTrak100 TX/LP™ Series User Manual Selecting Notification Options This section of the Options windows allows users to select how they are notified of a system event. A System Event includes driver-initiated Rebuilds (automatic rebuild using a “hot” spare standby drive), user -initiated manual Rebuilds or manual Synchronization, and Error-Handling reporting for these processes.
- Page 76 FastTrak100 TX/LP™ Series User Manual Abort: Stops any Synchronization or Rebuild process if an error is encountered. Fix: In most cases, FastTrak100 automatically can correct errors. The method of correction varies depending on the type of error. Ignore: FastTrak100 will log the event error and continue the rebuild or synchronization process.
- Page 77 FastTrak100 TX/LP™ Series User Manual Abort: Stops the Synchronization process if an error is encountered. Fix: In most cases, FastTrak100 automatically can correct errors. The method of correction varies depending on the type of error (see Appendix under Error Correction Methodology).
- Page 78 FastTrak100 TX/LP™ Series User Manual Setting PCI Bus Utilization Option NOTE: In most cases, a user does not need to change this setting since FastTrak100’s data handling rarel y conflicts with another PCI device. However, certain brands of video capture cards can produce a “glitch” on play back of A/V files that may require adjusting the default setting devices (see Tips for Audio/Video Editing for more information).
- Page 79 FastTrak100 TX/LP™ Series User Manual Setting Screen Preferences This section controls how the FastCheck utility screen is displayed and sets the security password to protect the administrative settings. Start Minimized checkbox allows user to have FastCheck appear on the toolbar only on startup. Click on the icon to see the FastCheck utility screen.
- Page 80 FastTrak100 TX/LP™ Series User Manual Creating Password To create a password, check the Enable Password checkbox in the Preferences section. The “Set Password” window will appear. Type the password you want to use. Press the Tab key or click to retype the same password in the “Confirm New Password”...
- Page 81 FastTrak100 TX/LP™ Series User Manual Uncheck the “Enable Password” checkbox. Click Apply button on Options window.
- Page 82 FastTrak100 TX/LP™ Series User Manual FastTrak DMI Service for Windows NT/2000 The DMI NT Service allows the FastTrak to appear as an instrumented component under DMI (Desktop Management Interface). The DMI 2.0 Service Provider, Win32sl, must be installed in order for the FastTrak DMI service to be installed. The ftdmisvc.mif...
-
Page 83: Understanding Disk Array Concepts
FastTrak100 TX/LP™ Series User Manual Understanding Disk Array Concepts About FastTrak100 TX/LP Series Disk Array Adapter FastTrak100 is a high performance Ultra ATA/EIDE RAID controller card that features concurrent data channel operation and an onboard BIOS. The channels on the FastTrak100 support concurrent operation that allows for overlapped I/O under multi- tasking operating systems and sharing the workload between multiple drives. -
Page 84: Disk Array Terms
FastTrak100 TX/LP™ Series User Manual Disk Array Terms Disk Array Description A “d isk array” is formed from a group of 2 or more disk drives that appear to the system as a single drive. The advantage of an array is to provide better throughput performance and/or data fault tolerance. -
Page 85: About Raid Levels
FastTrak100 TX/LP™ Series User Manual About RAID Levels Striping (RAID 0) Reads and writes sectors of data interleaved between multiple drives. When any disk member fails, it affects the entire array. Performance is better than a single drive since the workload is balanced between the array members. This array type is for high performance systems. - Page 86 FastTrak100 TX/LP™ Series User Manual Mirroring (RAID 1) Writes duplicate data on to a pair of drives while reads are performed in parallel. ATA RAID 1 is fault tolerant because each drive of a mirrored pair is installed on separate IDE channels.
- Page 87 FastTrak100 TX/LP™ Series User Manual NOTE: Due to IDE limitations when drives are in a Master/Slave configuration, if the drive that fails is on the same channel as the “spare” drive, there is a possibility that the “spare” drive will fail to be recognize d by the system. For this reason Promise recommends using “spare”...
- Page 88 FastTrak100 TX/LP™ Series User Manual Drive B2 Drive A2...
- Page 89 FastTrak100 TX/LP™ Series User Manual Under RAID 0+1, the array maintains data integrity if any 1, 2 combination survives. Event Failed Drives Array Status Why? A1/A2 Working B1/B2 retain array integrity B2/B1 Working A1/A2 retain array integrity A1/B2 Working B1/A2 retain array integrity...
-
Page 90: Troubleshooting & Tips
FastTrak100 TX/LP™ Series User Manual Troubleshooting & Tips This section is used to assist with troubleshooting conflicts and FastTrak100 installation problems. Also refer to the “README.TXT” file on the FastTrak100 driver and utility diskette for more recent information as well as the PromiseOnline services listed in Appendix A. -
Page 91: System Cmos Issues
FastTrak100 TX/LP™ Series User Manual Intermittent data problems Overclocking the PCI bus may cause the system to hang or data corruption. If you experience either of these problems, and are overclocking the PCI bus, set the PCI bus back to its normal setting to see if this is causing the errors. - Page 92 FastTrak100 TX/LP™ Series User Manual Possible Master/Slave problems Master/slave problems may exist between two ATA or IDE drives of different brands attached to a single cable. For both compatibility and better performance, choose drives of the same model/brand and install them on separate cables. Refer to the Drive Setup by Connector table (see page 7) for more recommended drive placements.
- Page 93 FastTrak100 TX/LP™ Series User Manual To remove the Reserve Sector, follow these steps: When the FastTrak100 BIOS comes up, press Crtl-F to enter the FastBuild. Press 2 to "View Drive Assignments". Using the arrow keys, highlight the drive where you wish to remove the reserve sector.
- Page 94 FastTrak100 TX/LP™ Series User Manual Your choices are as follows: Abort: Halts the rebuild process. You may elect to retry at a later date. Break ECC on Target Drive : If the error is detected on the source drive, “Break ECC on Targ et Drive” means that FastTrak will copy the bad data sector on to the target drive to assure that both drives are identical.
- Page 95 FastTrak100 TX/LP™ Series User Manual Your choices are as follows: Abort: Halts the synchronization process. You may elect to retry at a later date. Fix the Error Block: FastTrak100 will take a good data block from either drive and copy it to the drive where the error was detected.
-
Page 96: Operating System-Related Issues
FastTrak100 TX/LP™ Series User Manual Operating System-Related Issues Different drive lettering under Windows NT This may happen when using a SCSI card in addition to the Promise card. Windows NT does not necessarily load the driver for the boot device controller first. This results in a drive that in MS-DOS is the C: drive being the D:, or E:, etc. - Page 97 FastTrak100 TX/LP™ Series User Manual “No Hard Drives Found” Message Appears During CD-ROM Install of Windows NT or 2000 The "F6" key was not pressed at the appropriate time. Reboot the system, and press the "F6" key when the message "Setup is inspecting your computer's hardware configuration…...
-
Page 98: Performance Tips
You may select an even larger block size in manual mode (see page 19). FastTrak (tm) / FastTrak100 (tm) BIOS Version 1.xx (Build xxxx) (c) 1995-2001 Promise Technology, Inc. All Rights Reserved. [ Auto Setup Options Menu ] Optimize Array for:... - Page 99 FastTrak100 TX/LP™ Series User Manual Change Setting of PCI Bus Utilization Certain brands of video capture cards can produce a “glitch” on play back of .AVI files. A setting of “Less” for PCI Bus utilization reduces the time which FastTrak100 occupies on the PCI bus and frees that time for use by other PCI devices and will remove the “glitch”...
- Page 100 FastTrak100 TX/LP™ Series User Manual NOTES...
-
Page 101: Frequently Asked Questions
No. The FastTrak100 controller does not support ATAPI devices. Will the FastTrak100 work with 66MHz PCI bus speed? Yes, the FastTrak100 TX/LP Series are designed to accommodate the newer PCI bus speed and are backward compatible with 33MHz speeds. How can I change the resources that the FastTrak uses? The FastTrak100 is fully PnP. - Page 102 FastTrak100 TX/LP™ Series User Manual How does the FastTrak100 RAID controller provide storage and/or data protection with their arrays? FastTrak100 implements three different types of RAID levels as follows: RAID 0 (stripe) For capacity -- The FastTrak100 array will be as big as the smallest HDD in the array times however many HDDs are in the array.
-
Page 103: Drive Issues
It’ll work, but it’s a waste. I already have an array on an older FastTrak controller. Can I move that array to my new FastTrak100 TX/LP series controller? Yes. All FastTrak controllers read the arrays the same way and can be moved from controller to controller. -
Page 104: Installation Issues
FastTrak100 TX/LP™ Series User Manual None. The drives on the FastTrak100 controller are supported by the FastTrak100 BIOS and/or an O/S drivers, not by your system BIOS. How do I partition/format my FastTrak100 RAID array? The FastTrak100 “fools” the system into thinking that it’s dealing with a single HDD. -
Page 105: Post-Installation
FastTrak100 TX/LP™ Series User Manual Post-Installation Why can’t I see the drives on the FastTrak100 under FDISK? You have not created an array yet. If no array has been created, the drive(s) attached to the FastTrak100 will not be recognized by the system. - Page 106 FastTrak100 TX/LP™ Series User Manual NOTES...
-
Page 107: Contacting Promise Support
+31 (0) 40 256 94 63 Attention: Technical Support Phone Technical Support +31 (0) 40 256 94 61 8:30-5:00pm The Netherlands Time If you wish to write us for Promise Technology Europe B.V. support: Attn: Technical Support 1European Business Centre, Unit 1.25... - Page 108 Attention: Technical Support Phone Technical Support +886 3 578 23 95 9:00-5:30pm Taiwan Time If you wish to write us for Promise Technology, Inc. support: Attn: Technical Support 2F, No. 30, Industry E. Rd. IX, Science-Based Industrial Park, Hsin-Chu, Taiwan, R.O.C.
-
Page 109: Limited Warranty
Appendix B Limited Warranty Promise Technology, Inc. (“Promise”) warrants that for two (2) years from the time of the delivery of the product to the original end user: the product will conform to Promise’s specifications; the product will be free from defects in material and workmanship under normal use and service. - Page 110 Appendix B Promise shall not be liable for the cost of procuring substitute goods, services, lost profits, unrealized savings, equipment damage, costs of recovering, reprogramming, or reproducing of programs or data stored in or used with the products, or for any other general, special, consequential, indirect, incidental, or punitive damages, whether in contract, tort, or otherwise, notwithstanding the failure of the essential purpose of the foregoing remedy and regardless of whether Promise has been...
-
Page 111: Returning Product For Repair
(Return Merchandise Authorization) number. Return only the specific product covered by the warranty (do not ship cables, manuals, diskettes, etc.), with a copy of your proof of purchase to: Promise Technology, Inc. Customer Service Dept. Attn.: RMA # ______ 1460 Koll Circle... - Page 112 Appendix C...
- Page 113 Appendix C Your Responsibilities You are responsible for determining whether the product is appropriate for your use and will interface with your equipment without malfunction or damage. You are also responsible for backing up your data before installing any product and for regularly backing up your data after installing the product.
- Page 114 INDEX Alarms Changing RAID size, 88 Setting, 62, 63 ACPI Usage, 86 Arrays "Hot" Spare, 73 DMI Service, 82 Concepts, 70 Drivers Creating multiple, 17 Existing Win NT 4.x, 30 Critical, 14, 49 Removing Win NT 4.x, 33 Defining, 19 Drives Definitions, 71 Bad, 50...
- Page 115 INDEX Scheduling Synchronization, Formatting, 88 System resources, 86 Log files Troubleshooting Enabling, 63 Can't form array, 76 Win NT, 63 CMOS Booting, 76 Co-exist with IDE, 76 Critical error on boot, 77 Drive failure, 76 Intermittent data problems, 77 PCI Bus speed, 86 IRQ resources, 76 Master/Slave issues, 76 No appearance of driver in...
Need help?
Do you have a question about the FASTtrak100 TX and is the answer not in the manual?
Questions and answers