Table of Contents
Advertisement
Quick Links
Advertisement
Table of Contents

Related Manuals for Promise Technology FastTrak SX4100


Summary of Contents for Promise Technology FastTrak SX4100
- Page 1 SX4100 ANUAL Version 2.2...
- Page 2 You should back up all data before installing any drive controller or storage peripheral. Promise Technology is not responsible for any loss of data resulting from the use, disuse or misuse of this or any other Promise Technology product. Notice...
- Page 3 Connect the equipment into an outlet on a circuit different from that to which the receiver is connected. • Consult Promise Technology, Inc. or an experienced radio/TV technician for help. This device complies with Part 5 of the FCC Rules. Operation is subject to the...
- Page 4 FastTrak SX4100 User Manual...
-
Page 5: Table Of Contents
Contents Chapter 1: Introduction ........1 About This Manual . - Page 6 FastTrak SX4100 User Manual Windows 2000 Install Driver During New OS Installation ....29 Install Driver in an Existing System ..... .29 Confirm Installation .
- Page 7 Contents Chapter 6: Troubleshooting & Tips ......47 Motherboard Issues ........47 System CMOS Issues .
- Page 8 FastTrak SX4100 User Manual viii...
-
Page 9: Chapter 1: Introduction
Product Overview (page 2) • WebPAM Management Software (page 2) Thank you for purchasing one of Promise Technology’s FastTrak SX4100 Serial ATA RAID controllers. About This Manual This User Manual describes how to setup, use and maintain the FastTrak RAID controller. -
Page 10: Product Overview
Hot-Swapping Each FastTrak SX4100 can support up to four Serial ATA disk drives. You can configure the drives as RAID levels 1, 5 or 10. Attached drives can be hot swapped when used with the optional Promise SuperSwap drive enclosures. -
Page 11: Chapter 2: Installation
• Installing the Disk Drives (page 5) • Create a Logical Drive (page 7) Package List When you receive the FastTrak SX4100 card, the package should contain the items listed below: • FastTrak SX4100 RAID Controller Card • Quick Start Guide •... -
Page 12: Installing The Fasttrak Card
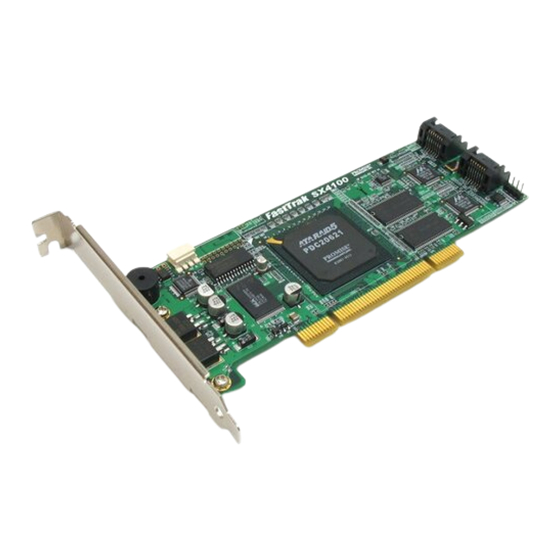
FastTrak SX4100 User Manual Installing the FastTrak Card The FastTrak RAID Controller card fits into any available PCI slot. Remove the cover of your system. Remove the inside slot cover of an available PCI slot on the motherboard. Install the FastTrak card into the open slot (above). -
Page 13: Installing The Disk Drives
Chapter 2: Installation Installing the Disk Drives Important If you wish to include your current bootable Serial ATA drive using the Windows operating system as part of a bootable Mirrored (RAID 1) logical drive on your FastTrak card, do NOT connect the disk drive to the FastTrak yet. - Page 14 FastTrak SX4100 User Manual LED Pins SMBus Connector Buzzer Attach one Serial ATA data cable to each disk drive. Then attach the other ends of the cables to the connectors on the FastTrak card (above). Attach the Y-cable power splitters to each of the disk drives.
-
Page 15: Create A Logical Drive
Chapter 2: Installation Create a Logical Drive You will now use the onboard FastBuild BIOS utility to create a logical drive with the attached drives. Even if you plan to use the WebPAM software to manage your logical drive, you can still create your first logical drive using the FastBuild Utility, as described here. - Page 16 FastTrak SX4100 User Manual Press 2 on the Main Menu screen to display the Define LD Menu (below). Press the arrow keys to highlight an logical drive number you want to define and press Enter to select it. The Define LD Menu for the logical drive number you selected will next appear (below).
- Page 17 Chapter 2: Installation • Initialize logical drive, zero the disk drives. RAID 1, 5 or 10 only. • Stripe Block Size, the default 64KB is best for most applications. • Gigabyte Boundary, allows use of slightly smaller replacement drives. • Cache Mode, WriteThru or WriteBack.
- Page 18 FastTrak SX4100 User Manual...
-
Page 19: Chapter 3: Fastbuild™ Utility
Chapter 3: FastBuild™ Utility • FastTrak BIOS (below) • Delete Logical Drive (page 19) • Main Menu (page 12) • Controller Configuration (page 20) • View Drive Assignments (page 13) • Logical Drive Problems (page 21) • Create a Logical Drive (page 14) FastTrak BIOS This section explains the information that you can obtain from the FastTrak BIOS. -
Page 20: Main Menu
FastTrak SX4100 User Manual Offline – The logical drive is no longer operational and the FastBuild utility cannot rebuild it. You must identify and replace the failed drive(s). Then you can create a new logical drive and copy your data to it from the last tape backup or other device. -
Page 21: View Drive Assignments
Chapter 3: FastBuild™ Utility View Drive Assignments From the Main Menu screen, press 1 to see the View Drive Assignments screen (below). This screen reports disk drive assigments and provides the following information: Channel: ID – Shows the FastTrak Controller channel ID (1 through 4) to which a particular disk drive is attached. -
Page 22: Create A Logical Drive
FastTrak SX4100 User Manual Create a Logical Drive From the Main Menu screen, press 2 to display the Define LD Menu (below). Press the arrow keys to highlight an logical drive number you want to define and press Enter to select it. -
Page 23: One Logical Drive
Chapter 3: FastBuild™ Utility Press the arrow keys to move to the next option. Option choices depend on the RAID Level you selected. • Initialize logical drive, zero the disk drives. RAID 1, 5 or 10 only. • Stripe Block Size, the default 64KB is best for most applications. •... -
Page 24: Two Logical Drives
FastTrak SX4100 User Manual Two Logical Drives Continued from Create Logical Drive step 7, above. Press Ctrl-Y to allocate a portion of the disk drives to the first logical drive. Enter the desired capacity in MB for the first logical drive and press Enter. - Page 25 Chapter 3: FastBuild™ Utility Press the up and down arrow keys to select an available logical drive number and press Enter. Choose the RAID level and options for the second logical drive. Note that the disk drives in Channels 1, 2 and 3 reflect smaller capacities because a portion of their original capacity belongs to a different logical drive.
-
Page 26: View Drive Assignments, Split Disk Drives
FastTrak SX4100 User Manual View Drive Assignments, Split Disk Drives After you create two logical drives from the same set of disk drives, press 1 on the Main Menu screen to see the View Drive Assignments screen (below). In this example, observe how each of the disk drives in Channels 1, 2 and 3 are split between two logical drives. -
Page 27: Delete Logical Drive
Chapter 3: FastBuild™ Utility Delete Logical Drive Caution Deletion of an existing logical drive will result in the loss of all data saved on the logical drive. Record all logical drive information, including RAID level, disk members, stripe block size and gigabyte boundary, in case you wish to undo a deletion. -
Page 28: Controller Configuration
FastTrak SX4100 User Manual Press Ctrl-Y to confirm and complete logical drive deletion. The screen returns to the Delete LD Menu. Press Esc to return to the Main Menu. Controller Configuration From the Main Menu screen, press 4 to display the Controller Configuration Options screen (below). -
Page 29: Halt On Error
Chapter 3: FastBuild™ Utility Halt On Error The Halt On Error function causes the FastTrak controller to stop the boot process at the FastTrak BIOS screen when there is a problem with your logical drive. For example, a disk drive failure causes your logical drive to go critical. Depending on the Halt On Error setting, one of the following events will happen: •... - Page 30 FastTrak SX4100 User Manual When you boot your system, the FastTrak BIOS screen informs you if there is a critical or offline logical drive. If you enabled the Halt On Error option, your system will stop booting at this point.
-
Page 31: Raid 0 And Jbod
Chapter 3: FastBuild™ Utility In the Define LD Menu screen, compare the number of drives assigned to the logical drive (Total Drv) with the disk drives listed under Drive Assignments. In the above example, three drives are assigned but only two appear. The missing disk drive is the failed drive. - Page 32 FastTrak SX4100 User Manual...
-
Page 33: Chapter 4: Installing Software Drivers
Chapter 4: Installing Software Drivers Following are driver installation procedures for the FastTrak SX4100 RAID Controller card. Download the latest drivers from the Promise Technology website at www.promise.com. Procedure Page Number Windows Server 2003 Install Driver During New OS Installation ......26 Install Driver in an Existing System . -
Page 34: Windows Server 2003
When the Windows Setup window is generated, press S to specify an Additional Device(s) Insert the Promise Technology driver diskette into drive A: and press Enter. Choose Windows 2003 Promise FastTrak SX4100 (tm) Controller from the list that appears on screen, and then press the Enter. 1. Press S to use the driver on the floppy disk and then press Enter to continue with installation. -
Page 35: Confirm Installation
When the Windows Setup window is generated, press S to specify an Additional Device(s) Insert the Promise Technology driver diskette into drive A: and press Enter. Choose WinXP Promise FastTrak SX4100 (tm) Controller from the list that appears on screen, and then press the Enter. 1. Press S to use the driver on the floppy disk and then press Enter to continue with installation. -
Page 36: Install Driver In An Existing System
FastTrak SX4100 User Manual Note: If you need to specify any additional devices to be installed, do so at this time. Once all devices are specified, continue to the next step. From the Windows Setup screen, press the Enter. Setup will now load all device files and then continue the Windows XP installation. -
Page 37: Windows 2000
Chapter 4: Installing Software Drivers Click on the System icon. Choose the Hardware tab, and then click the Device Manager button. Click the + in front of SCSI controllers. WinXP Promise FastTrak SX4100 (tm) Controller should appear. Windows 2000 Install Driver During New OS Installation Start the installation: Boot from the CD-ROM. -
Page 38: Confirm Installation
Click on the System icon. Choose the Hardware tab, and then click the Device Manager button. Click the + in front of SCSI controllers. Win2000 Promise FastTrak SX4100 (tm) Controller should appear. Red Hat Linux 8.0, 9.0, EL 3.0, EL 4.0... -
Page 39: Install Driver In An Existing System
Chapter 4: Installing Software Drivers Scroll down to the Promise FastTrak SX4100 (tm) Controller and click OK. When the Installer displays Promise FastTrak SX4100 (tm) Controller has been found, click Done. Continue with the installation normally. Note: Check the readme file, included with the downloaded driver files, for instructions on installing the RAID Console. -
Page 40: Install Driver In An Existing System
FastTrak SX4100 User Manual When the boot: prompt appears on the bottom of the screen, type acpi=oldboot into the lower input box. Press the left Alt key and insert the FastTrak driver diskette into the floppy drive. Finish the installation normally. -
Page 41: Chapter 5: Concepts
Other Logical Drive Features (page 41) About FastTrak FastTrak SX4100 is a high performance RAID Controller card that features concurrent data channel operation and onboard BIOS. The channels on the FastTrak card support concurrent operation that allows for overlapped I/O under multi-tasking operating systems and sharing the workload between multiple drives. -
Page 42: Raid 0 - Stripe
Figure 1. RAID 0 Stripe interleaves data across multiple drives For example, one 100GB and three 120GB drives will form a 400GB (4 x 100GB) logical drive instead of 460 GB. RAID 0 logical drives on the FastTrak SX4100 consist of one or more disk drives. -
Page 43: Raid 1 - Mirror
RAID 1 logical drives on the FastTrak SX4100 consist of two disk drives. When two drives do not offer sufficient data capacity, consider a RAID 10 logical... -
Page 44: Raid 5 - Block Striping With Distributed Parity
GB disk drives will have a capacity of 300 GB. A logical drive with two 120 GB disk drives and one 100 GB disk drive will have a capacity of 200 GB. RAID 5 logical drives on the FastTrak SX4100 consist of 3 or 4 disk drives. -
Page 45: Raid 10 - Mirror / Stripe
Double fault tolerance may allow your logical drive to continue to operate depending on which two disk drives fail. RAID 10 logical drives on the FastTrak SX4100 consist of 4 disk drives. -
Page 46: About Dual Data Redundancy
FastTrak SX4100 User Manual About Dual Data Redundancy One unique (though rarely occurring) feature of RAID 10 is dual fault tolerance. In some cases, two disk drives can fail simultaneously and still maintain the integrity of data. There are six combinations in which two drives can fail. The FastTrak SX4100 card protects your data in four of those cases. -
Page 47: Jbod - Single Drive
Chapter 5: Concepts JBOD – Single Drive An alternative to RAID, JBOD capacity is equal to the size of the disk drive itself. JBOD appears in the User Interface as one individual drive. There are no performance or fault-tolerance features. When one disk fails, all data on that disk is lost. -
Page 48: Raid 1
FastTrak SX4100 User Manual RAID 1 Advantages Disadvantages Simplest RAID storage subsystem Very high disk overhead - uses only design 50% of total capacity Can increase read performance by processing data requests in parallel since the same data resides on two... -
Page 49: Jbod
Chapter 5: Concepts RAID 10 Advantages Disadvantages Implemented as a mirrored logical drive Very high disk overhead - uses only whose segments are RAID 0 logical 50% of total capacity drives High I/O rates are achieved thanks to multiple stripe segments Recommended Applications for RAID 10 •... -
Page 50: Gigabyte Boundary
FastTrak SX4100 User Manual • If your data retrieval consists of fixed-size data blocks, such as some database and video applications, choose that data block size as your stripe block size. Generally speaking, email, POS and webservers prefer smaller stripe block sizes. -
Page 51: Cache Settings
Logical Drive Expansion To expand a logical drive is to increase the number of disk drives. The FastTrak SX4100 RAID Controller card supports logical drive expansion. However, you must use the WebPAM software to access this function. WebPAM ships with the FastTrak SX4100 card on the software CD. -
Page 52: Raid Level Migration
• Increase the number of disk drives (sometimes called Expansion) The FastTrak SX4100 RAID Controller card supports RAID Level Migration. However, you must use the WebPAM software to access this function. WebPAM ships with the FastTrak SX4100 card on the software CD. -
Page 53: Ranges Of Disk Logical Drive Expansion
Chapter 5: Concepts Increase Redundancy From Capacity Performance Lose RAID 5 • • • RAID 1 • * Increases the existing redundancy Important • The Target logical drive may require more disk drives than the Source logical drive • If the Target logical drive requires an EVEN number of disk drives but the Source logical drive has an ODD number, ADD a disk drive as part of the migration process •... - Page 54 FastTrak SX4100 User Manual As a result, there are range limits imposed upon logical drive expansion as shown in the table above. For example: • You can expand a 2.5 TB logical drive up to 4 TB • You can only expand a 1.9 TB logical drive up to 2 TB See the table below.
-
Page 55: Chapter 6: Troubleshooting & Tips
• Drive-Related Errors, page 48 This section is used to assist with troubleshooting conflicts and FastTrak SX4100 installation problems. Also refer to the README.TXT file on the FastTrak driver and utility diskette for more recent information as well as the PromiseOnline services listed in Chapter 7. -
Page 56: System Cmos Issues
FastTrak SX4100 User Manual System locks up during boot up or when Windows starts There may be a possible IRQ conflict with an ISA card. Identify what IRQs are used by ISA cards, enter the Motherboard PCI Setup, and reserve the IRQ for use with ISA. -
Page 57: Operating System-Related Issues
Chapter 6: Troubleshooting & Tips Powering the system off and on once to reset the drive. Also confirm that cables are properly attached and the drive is receiving power. If the drive still appears to have failed, refer to the Rebuilding a logical drive option in the WebPAM software as detailed in the WebPAM User Manual. -
Page 58: Performance Tips
FastTrak SX4100 User Manual For Windows 2000, XP and 2003 Server, Promise recommends a clean install of the Operating System. This action restores the MBR and OS boot record. This requires repartitioning and formatting the drive. Promise Windows driver does not appear in Device Manager Windows may already be listing the controller under Other Devices instead of the Hard disk controllers section. -
Page 59: Chapter 7: Support
Can I use ATAPI devices on the FastTrak SX4100? No. The FastTrak Controller does not support ATAPI devices. Will the FastTrak SX4100 work with 66MHz PCI bus speed? Yes. FastTrak SX4100 supports a 66MHz PCI bus as well as a 33MHz bus. -
Page 60: Drive Issues
Do the HDDs on the FastTrak SX4100 have to be the same size? The disk drives that you use with the FastTrak SX4100 do not have to be the same size. If the sizes differ, the FastTrak Controller will truncate the large drive so the capacities match. - Page 61 JBOD Other array configurations will not work for this purpose. If I have a problem with one of the drives on the FastTrak SX4100, how can I low-level format it to correct the problem? Do NOT do this! Low-level formatting hard disk drives is not only unnecessary but it generally does not correct problems commonly experienced during use.
-
Page 62: Installation Issues (Capacity, Booting)
(see previous question). Post-Installation Why can’t I see the drives on the FastTrak SX4100 under FDISK? You have not created a logical drive yet. Without a logical drive, the system will not recognize the disk drives attached to the FastTrak Controller. -
Page 63: Contact Technical Support
Fax Technical Support (408) 228-1097 Attention: Technical Support Phone Technical Support (408) 228-1400 option 4 8:00am-5:00pm M-F Pacific Time If you wish to write us for Promise Technology, Inc. support: Attn: Technical Support 580 Cottonwood Drive Milpitas, CA 95035, USA... - Page 64 FastTrak SX4100 User Manual Europe, Africa, Middle East E-mail Support support@promise-emea.com Fax Technical Support +31 (0) 40 256 9463 Attention: Technical Support Phone Technical Support +31 (0) 40 235 2600 8:30am-5:00pm M-F The Netherlands Time If you wish to write us for Promise Technology Europe B.V.
-
Page 65: Limited Warranty
South Zhong Guan Cun Street Hai Dian District, Beijing 100081, China Limited Warranty Promise Technology, Inc. (“Promise”) warrants that for three (3) years from the time of the delivery of the product to the original end user: the product will conform to Promise’s specifications;... -
Page 66: Disclaimer Of Other Warranties
FastTrak SX4100 User Manual Disclaimer of other warranties This warranty covers only parts and labor, and excludes coverage on software items as expressly set above. Except as expressly set forth above, Promise DISCLAIMS any warranties, expressed or implied, by statute or otherwise, regarding the product, including, without limitation, any warranties for fitness for any purpose, quality, merchantability, non-infringement, or otherwise. -
Page 67: Return Product For Repair
Return ONLY the specific product covered by the warranty (do not ship cables, manuals, diskettes, etc.), with a copy of your proof of purchase to: USA and Canada: Promise Technology, Inc. Customer Service Dept. Attn.: RMA # ______ 47654 Kato Road... - Page 68 FastTrak SX4100 User Manual You must follow the packaging guidelines for returning products: • Use the original shipping carton and packaging • Include a summary of the product’s problem(s) • Write an attention line on the box with the RMA number •...
Need help?
Do you have a question about the FastTrak SX4100 and is the answer not in the manual?
Questions and answers