Table of Contents
Advertisement
Advertisement
Chapters
Table of Contents

Related Manuals for Promise Technology FastTrak S150 SX4


Summary of Contents for Promise Technology FastTrak S150 SX4
- Page 1 FastTrak S150 SX4 / SX4000 / SX4000 Lite User Manual Version 3.8...
- Page 2 You should back up all data before installing any drive controller or storage peripheral. Promise Technology is not responsible for any loss of data resulting from the use, disuse or misuse of this or any other Promise Technology product. Notice...
- Page 3 Connect the equipment into an outlet on a circuit different from that to which the receiver is connected. Consult Promise Technology, Inc. or an experienced radio/TV technician for help. This device complies with Part 5 of the FCC Rules. Operation is subject to the...
- Page 4 FastTrak S150 SX4 / SX4000 / SX4000 Lite User Manual...
-
Page 5: Table Of Contents
Contents Chapter 1: Introduction ....................1 FastTrak S150 SX4 and SX4000 / SX4000 Lite............1 XOR Acceleration....................1 Hot-Swapping....................... 1 Promise Array Management Utility (PAM)............... 2 Chapter 2: Installation....................3 S150 SX4......................3 SX4000 / SX4000 Lite..................3 Memory Module Test....................5 Installing the FastTrak Card .................. - Page 6 FastTrak S150 SX4 / SX4000 / SX4000 Lite User Manual Chapter 5: Disk Array Concepts ................41 About FastTrak S150 SX4 and SX4000 / SX4000 Lite.......... 41 About Adapter BIOS................... 41 Reserved Sector ....................41 Disk Array Terms....................42 Disk Array Description..................42 Disk Array Member ....................
-
Page 7: Chapter 1: Introduction
Hot-Swapping Each FastTrak S150 SX4 can support up to four Serial ATA disk drives while each SX4000 / SX4000 Lite can support up to four (Parallel) ATA disk drives. With either Controller card the drives configured as RAID levels (0, 1, 0+1, 5 or JBOD). -
Page 8: Promise Array Management Utility (Pam)
FastTrak S150 SX4 / SX4000 / SX4000 Lite User Manual Promise Array Management Utility (PAM) The Promise Array Management (PAM) utility offers local and remote management and monitoring of all FastTrak arrays that exist anywhere on a network. Windows-based GUI provides email notification of all major... -
Page 9: Chapter 2: Installation
• CD with Drivers, Promise Array Management (PAM) utility, PAM User Manual and FastTrak S150 SX4 / SX4000 / SX4000 Lite User Manual If ANY of the contents are missing or appear to be damaged, please contact your dealer or distributor immediately. - Page 10 FastTrak S150 SX4 / SX4000 / SX4000 Lite User Manual Warning Before installing the adapter into an existing system, backup any important or useful data. Failure to follow this accepted PC practice could result in data loss. Warning The FastTrak card, like other parts of your system, is subject to damage by static electricity.
-
Page 11: Memory Module Test
Chapter 2: Installation Memory Module Test The FastTrak S150 SX4, SX4000 and SX4000 Lite RAID Controller cards ship without a Dual Inline Memory Module (DIMM) for Synchronous Dynamic Random Access Memory (SDRAM). A DIMM of 64 MB to 256 MB capacity must be installed in order for the FastTrak Card to function. -
Page 12: Installing The Fasttrak Card
FastTrak S150 SX4 / SX4000 / SX4000 Lite User Manual Installing the FastTrak Card The FastTrak RAID Controller card fits into any available: • 32-bit PCI slot (must be PCI 2.2 compliant) • The 32-bit portion of a 64-bit PCI slot on the PC’s motherboard (see Figure 1 below). -
Page 13: Installing The Hard Drives
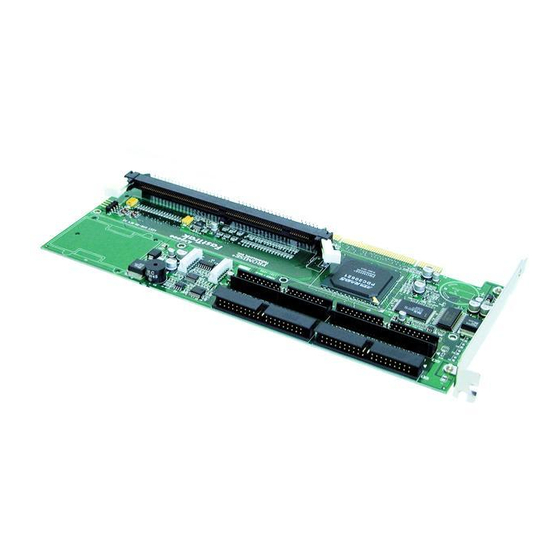
You MUST install the Windows XP driver software first onto this drive while it is still attached to your existing hard drive controller. The FastTrak S150 SX4 RAID Controller card supports only Serial ATA hard drives. The FastTrak SX4000 / SX4000 Lite RAID Controller card supports only (Parallel) ATA hard drives. - Page 14 FastTrak S150 SX4 / SX4000 / SX4000 Lite User Manual Ch4 Buzzer I C Connector LED Pins FastTrak Cache Memory Socket SDRAM DIMM (not included) Figure 2. FastTrak S150 SX4 card. Buzzer LED Pins SX4000 FastTRAK Cache Memory Socket SDRAM DIMM (not included) Figure 3.
- Page 15 < Press <ESC> to continue booting... Press the Ctrl-F keys to display the FastBuild Utility Main Menu (below). FastBuild Array Utility 2.xx (c) 2002-2005 Promise Technology, Inc. [ Main Menu ] View Drive Assignments ..[ 1 ] View/Define Array.....[ 2 ] Delete Array....[ 3 ]...
- Page 16 FastTrak S150 SX4 / SX4000 / SX4000 Lite User Manual FastBuild Array Utility 2.xx (c) 2002-2005 Promise Technology, Inc. [ Define Array Menu ] Array No RAID Level Total Drv Capacity (MB) Status Array 1 ----- ----- ----- ----- Array 2...
- Page 17 Chapter 2: Installation Press the arrow keys to move to the next option. Option choices depend on the RAID Level you selected. • Initialize Array, zero the disk drives. RAID 5 only. • Stripe Block Size, the default 64KB is best for most applications. •...
- Page 18 FastTrak S150 SX4 / SX4000 / SX4000 Lite User Manual...
-
Page 19: Chapter 3: Fastbuild™ Utility
The following is a listing of steps necessary to complete each type of task required for setting up the FastTrak S150 SX4 or SX4000 / SX4000 Lite system through the FastBuild BIOS utility. The tasks are not intended to be a complete, step-by-step guide to setting up the FastTrak system successfully. -
Page 20: Entering The Fastbuild Utility
FastTrak S150 SX4 / SX4000 / SX4000 Lite User Manual Entering the FastBuild utility When the system boots, you will see the Promise FastTrak BIOS sign-on banner appear on the screen. Once the BIOS identifies the arrays attached to the FastTrak Controller card, it will offer an option to enter the FastBuild utility (see Figure 4). -
Page 21: Fasttrak Bios Reference
RAID arrays that it finds. Then, it displays Press Ctrl-F to allow you to enter the Array BIOS Configuration Utility (below). FastTrak S150 SX4 (tm) BIOS Version 1.10.02 (c) 2002 Promise Technology, Inc. All rights reserved. Installed DIMM Size: 128 MB No Array is defined... - Page 22 FastTrak S150 SX4 / SX4000 / SX4000 Lite User Manual Status Shows one of three possible array status conditions: Functional The array is fully operational, and no problems are present. Critical The array is operational, but has lost its fault tolerance. For RAID array levels 1, 0+1 and 5 the array contains a failed drive.
-
Page 23: Main Menu
Chapter 3: FastBuild™ Utility Main Menu FastBuild Array Utility 2.xx (c) 2002-2005 Promise Technology, Inc. [ Main Menu ] View Drive Assignments ..[ 1 ] View/Define Array.....[ 2 ] Delete Array....[ 3 ] Controller Configuration..[ 4 ] [ Keys Available ] Press 1..4... -
Page 24: View Drive Assignments
Mode On the FastTrak S150 SX4, this channel uses Serial ATA technology and displays a letter S. It does not apply to the FastTrak SX4000 / SX4000 Lite. -
Page 25: Define Array
Press 2 on the Main Menu screen to display, the Define Array Menu (see below). This screen displays any existing arrays. Users commonly create one or two arrays with FastTrak S150 SX4 or SX4000 / SX4000 Lite. To manually create arrays from the Define Array Menu (below), press the arrow keys to highlight an array number you wish to define, and press Enter to select it. -
Page 26: Define Array Definition Menu
FastTrak S150 SX4 / SX4000 / SX4000 Lite User Manual Define Array Definition Menu Selecting an Array from the Define Array Menu brings up the Define Array Definition Menu screen (below). First, choose the RAID Level you want. In the Define Array Definition Menu section, press the Spacebar to cycle through array types: •... -
Page 27: Gigabyte Boundary
Chapter 3: FastBuild™ Utility Gigabyte Boundary The Gigabyte Boundary feature is designed for fault tolerant arrays (RAID 1, 0+1 and 5) in which a drive has failed and the user cannot replace the drive with the same capacity or larger. Instead, the Gigabyte Boundary feature permits the installation of a replacement drive that is slightly smaller (within 1 gigabyte) than the remaining working drive (for example, an 80.5 GB drive would be rounded down to 80 GB). -
Page 28: Creating A Raid 0 Array
FastTrak S150 SX4 / SX4000 / SX4000 Lite User Manual Creating a RAID 0 Array In the Define Array Definition Menu section (see Figure 8), press the Spacebar to cycle through array types and select RAID 0 for RAID Level. Assign from one to four drives to this array. -
Page 29: Creating A Raid 1 Array
Chapter 3: FastBuild™ Utility Creating a RAID 1 Array In the Define Array Definition Menu section, press the Spacebar to cycle through array types and select RAID 1 for RAID Level. RAID 1 arrays use two disk drives. The capacity of the array will be half that of the smaller drive in the array. No stripe block size option is available when mirroring two drives. -
Page 30: Creating A Raid 0+1 Array
FastTrak S150 SX4 / SX4000 / SX4000 Lite User Manual Creating a RAID 0+1 Array You must assign four drives to an array before this feature becomes available. Assigning Drives to a RAID 0+1 Array Under the Drive Assignments section, highlight a drive and, with the Spacebar, change the Assignment option to Y to add the drive to the disk array. -
Page 31: Creating A Raid 5 Array
Chapter 3: FastBuild™ Utility Creating a RAID 5 Array In the Define Array Definition Menu section, press the Spacebar to cycle through array types and select RAID 5 for RAID Mode. You must configure such an array using a minimum of three drives. Your array will join the assigned drives together and split (or stripe) data among them. -
Page 32: Hot Spare Drives
FastTrak S150 SX4 / SX4000 / SX4000 Lite User Manual Hot Spare Drives Any extra drive that is not assigned to an array will be recognized as a Spare Drive. Such drives are designated “Free” in the View Drive Assignments screen (see below). -
Page 33: Setting A Disk Array As Bootable
Spacebar. The system will now recognize this as the first array and an asterisk (*) will appear next to the array number indicating it as bootable (see below). FastBuild Array Utility 2.xx (c) 2002-2005 Promise Technology, Inc. [ Define Array Menu ] Array No... -
Page 34: Disk Array Recognition Order
FastTrak S150 SX4 / SX4000 / SX4000 Lite User Manual Disk Array Recognition Order During computer startup, the disk arrays on the FastTrak Controller card are recognized in this order: • The bootable array, designated in the FastBuild setup. Other arrays by their numbers (such as Array 1, Array 2…). -
Page 35: Delete Array
Chapter 3: FastBuild™ Utility Delete Array Press 3 on the Main Menu screen to display the Delete Array Menu (below). FastBuild Array Utility 2.xx (c) 2002-2005 Promise Technology, Inc. [ Delete Array Menu ] Array No RAID Level Total Drv... -
Page 36: Controller Configuration
FastTrak S150 SX4 / SX4000 / SX4000 Lite User Manual Controller Configuration Press 4 on the Main Menu screen to display the Controller Configuration screen (below). FastBuild (tm) Utility 1.xx (c) 2002-2005 Promise Technology, Inc. [ Adapter Configuration Options ] No Parameters Defined for Current Disk(s)... -
Page 37: Chapter 4: Installing Software Drivers
Chapter 4: Installing Software Drivers Following are driver installation procedures for the FastTrak S150 SX4 and SX4000 / SX4000 Lite RAID Controller cards. Download the latest drivers from the Promise Technology website at www.promise.com. Procedure Page Number Windows Server 2003 Install Driver During New OS Installation............32... -
Page 38: Windows Server 2003
When the Windows Setup window is generated, press S to specify an Additional Device(s) Insert the Promise Technology driver diskette into drive A: and press Enter. Choose Windows 2003 Promise FastTrak S150 SX4/SX4000 Series from the list that appears on screen, and then press the Enter. -
Page 39: Install Driver In An Existing System
Chapter 4: Installing Software Drivers Install Driver in an Existing System Important If you plan to move the boot drive containing the existing Windows Server 2003 operating system to the FastTrak card, you MUST load the FastTrak driver to the boot drive while it is still attached to your existing hard drive controller. -
Page 40: Windows Xp
When the Windows Setup window is generated, press S to specify an Additional Device(s) Insert the Promise Technology driver diskette into drive A: and press Enter. Choose WinXP Promise FastTrak S150 SX4/SX4000 Series from the list that appears on screen, and then press the Enter. -
Page 41: Install Driver In An Existing System
Chapter 4: Installing Software Drivers Install Driver in an Existing System Important If you plan to move the boot drive containing the existing Windows XP operating system to the FastTrak card, you MUST load the FastTrak driver to the boot drive while it is still attached to your existing hard drive controller. -
Page 42: Windows 2000
When the Windows Setup window is generated, press S to specify an Additional Device(s) Insert the Promise Technology driver diskette into drive A: and press Enter. Choose Win2000 Promise FastTrak S150 SX4/SX4000 Series from the list that appears on screen, and then press the Enter. -
Page 43: Install Driver In An Existing System
Check Specify a Location and click Next. Under Insert the manufacturer's installation disk, type A:\win2000 and click Under Driver Files search Results, when Win2000 Promise Technology Inc. FastTrak S150 SX4/SX4000 series appears, click Next. If a Digital Signature Notice appears, click Yes. -
Page 44: Red Hat Linux 8.0, 9.0
When the Devices dialog box appears, select Add Device. When the Installer asks, What kind of device would you like to add?, select SCSI. Scroll down to the Promise FastTrak S150 SX4 ATA-RAID Controller and click OK. When the Installer displays Promise FastTrak S150 SX4 ATA-RAID Controller has been found, click Done. -
Page 45: Suse Linux 8.1, 8.2
Chapter 4: Installing Software Drivers SuSE Linux 8.1, 8.2 Install Driver During New OS Installation: Single Processor Computer Insert the install CD into CD-ROM drive. When the boot: picture prompts for an installation option, add the following line to the input box: acpi=oldboot. Press the left Alt key and insert the FastTrak driver diskette into the floppy drive. -
Page 46: Promise Raid Utility For Linux
FastTrak S150 SX4 / SX4000 / SX4000 Lite User Manual Promise RAID Utility for Linux To install the utility, type the following commands: mount /dev/fd0 /mnt /mnt/install util umount /mnt To use the utility, type the following commands: cd /usr/local/promise... -
Page 47: Chapter 5: Disk Array Concepts
About FastTrak S150 SX4 and SX4000 / SX4000 Lite FastTrak S150 SX4 and SX4000 / SX4000 Lite are high performance RAID Controller cards that feature concurrent data channel operation and onboard BIOS. The channels on the FastTrak card support concurrent operation that allows for overlapped I/O under multi-tasking operating systems and sharing the workload between multiple drives. -
Page 48: Disk Array Terms
0, 1, 0+1 and 5. FastBuild also supports “Just a Bunch of Disks” (JBOD) technology. With a FastTrak S150 SX4 or SX4000 / SX4000 Lite card, JBOD allows you to add up to four disk drives to your computer for expanded storage capacity. However, unlike RAID, JBOD drives function individually, thus there is no performance increase nor any fault tolerance. -
Page 49: About Raid Levels
Chapter 5: Disk Array Concepts Fault No. of RAID Level Performance Capacity Tolerance Drives RAID 0 No. Drives x Highest 2 to 4 (Striping) Smallest Drive RAID 1 Normal Smallest Drive (Mirroring) RAID 0+1 High 2X Smallest Drive (Stripe/Mirror) RAID 5 Smallest Drive x (Distributed High... -
Page 50: Mirroring (Raid 1)
Using a Spare Drive – Under a RAID 1 setup, an extra hot spare drive. You can attach a third drive to the FastTrak S150 SX4 or SX4000 / SX4000 Lite without assigning it to the array. Such a drive will be activated to replace a failed drive that is part of a mirrored array. -
Page 51: Striping / Mirroring (Raid 0+1)
Chapter 5: Disk Array Concepts Striping / Mirroring (RAID 0+1) A combination of RAID 0 and RAID 1 arrays. It can increase performance by reading and writing data in parallel while protecting data with duplication. A minimum of four drives are required. With a four-drive disk array, two pairs of drives are striped. -
Page 52: About Dual Data Redundancy
FastTrak S150 SX4 / SX4000 / SX4000 Lite User Manual About Dual Data Redundancy One unique (though rarely occurring) feature of RAID 0+1 is dual fault tolerance. In some cases, two drives can fail simultaneously and still maintain the integrity of data. -
Page 53: Block And Parity Striping (Raid 5)
Chapter 5: Disk Array Concepts Block and Parity Striping (RAID 5) RAID 5 calculates parity in order to achieve redundancy rather than writing a second copy of the data, like RAID 1. Parity is distributed across the physical drives along with the data blocks. In each case, the parity data is stored on a different disk than its corresponding data block. -
Page 54: Jbod - Single Drive
FastTrak S150 SX4 / SX4000 / SX4000 Lite User Manual JBOD - Single Drive An alternative to RAID, Just a Bunch of Disks (JBOD) capacity is equal to the sum of all drives in the group, even if the drives are of different sizes. JBOD appears in the User Interface as one or more individual drives. -
Page 55: Chapter 6: Troubleshooting & Tips
Chapter 6: Troubleshooting & Tips This section is used to assist with troubleshooting conflicts and FastTrak S150 SX4 or SX4000 / SX4000 Lite installation problems. Also refer to the README.TXT file on the FastTrak driver and utility diskette for more recent information as well as the PromiseOnline services listed in Appendix B. -
Page 56: System Cmos Issues
Motherboard CMOS displays C: or D: drive failure during startup See the Drive-Related Errors section. Using an Onboard IDE Card with FastTrak S150 SX4 or SX4000 / SX4000 Lite If an onboard IDE controller is installed with hard disks, enable support in the Motherboard Standard CMOS Setup for the drives. -
Page 57: Drive-Related Errors
(see below), there is a drive in the array that has failed or is not responding. FastTrak S150 SX4 will identify the failed drive by channel number. The mirrored array has lost its fault tolerance, but will still perform normal drive reads and writes. - Page 58 FastTrak S150 SX4 / SX4000 / SX4000 Lite User Manual Unable to Partition or Format Array There are two possible causes: • The FastTrak Controller is the bootable device but the array is not set to be bootable. The Reserve Sector of one of the drives has become corrupt or bad.
- Page 59 Chapter 6: Troubleshooting & Tips To remove the Reserve Sector, follow these steps: During boot up, press Ctrl-F to enter the FastBuild BIOS utility. Choose option 1, View Drive Assignments. Press arrow keys to highlight the drive where you wish to remove the reserve sector.
-
Page 60: Operating System-Related Issues
FastTrak S150 SX4 / SX4000 / SX4000 Lite User Manual Operating System-Related Issues Different drive lettering under Windows NT This may happen when using a SCSI card in addition to the Promise card. Windows NT does not necessarily load the driver for the boot device controller first. -
Page 61: Performance Tips
Chapter 6: Troubleshooting & Tips Performance Tips Here are some tips that may optimize performance in a RAID 0 striped array. If you are using an audio/video-editing card, we also recommend reviewing your card’s documentation for additional information. Use a FastTrak array as D: or other non-bootable drive in a Striped Array For Audio/Video editing, keep the original system boot drive on the standard IDE controller as C: drive. - Page 62 FastTrak S150 SX4 / SX4000 / SX4000 Lite User Manual...
-
Page 63: Appendix A: Frequently Asked Questions
Pre-Installation (Speed, Device Types, Capacity, Cabling) Q: What kind of hard drives can I use for a FastTrak S150 SX4 array? You can use any Serial ATA hard drive(s) to create arrays on the FastTrak S150 SX4. Use matching drives for multiple-drive arrays to maximize capacity usage as well as performance. - Page 64 FastTrak S150 SX4 / SX4000 / SX4000 Lite User Manual Q: How do the FastTrak S150 SX4 and SX4000 / SX4000 Lite RAID Controllers provide storage and data protection with their arrays? FastTrak S150 SX4 and SX4000 / SX4000 Lite implement five RAID levels...
- Page 65 HDD is difficult and imprecise. JBOD (Just a Bunch of Disks) Technically, JBOD is not a RAID level but a collection of single disk drives. The FastTrak S150 SX4 and SX4000 / SX4000 Lite support up to four such drives.
-
Page 66: Drive Issues
FastTrak S150 SX4 / SX4000 / SX4000 Lite User Manual Drive Issues Q: Can I add a drive to a FastTrak S150 SX4 or SX4000 / SX4000 Lite array via hot-swap and dynamically adjust the array size/configuration? No. The FastTrak Controller does not support dynamically adjustable RAID size/configurations. - Page 67 None. The drives on the FastTrak Controller are supported by the FastTrak BIOS and/or OS drivers, not by your system BIOS. Q: How do I partition/format my FastTrak S150 SX4 or SX4000 / SX4000 Lite RAID array? The FastTrak Controller represents the array as a single HDD to your system.
-
Page 68: Installation Issues
PCI slots so that the boot device is in the highest priority slot number (see previous question). Post-Installation Q: Why can’t I see the drives on the FastTrak S150 SX4 or SX4000 / SX4000 Lite under FDISK? You have not created an array yet. If no array has been created, the system will not recognize drive(s) attached to the FastTrak Controller. -
Page 69: Appendix B: Technical Support
Fax Technical Support +31 (0)40-256-9463 Attention: Technical Support Phone Technical Support +31 (0)40-235-2600 8:30-5:00pm The Netherlands Time If you wish to write us for Promise Technology Europe B.V. support: Attn: Technical Support Luchthavenweg 81-125 5657 EA Eindhoven, The Netherlands... - Page 70 FastTrak S150 SX4 / SX4000 / SX4000 Lite User Manual Pacific Rim Sales Office E-mail Support support@promise.com.tw Fax Technical Support +886-3-578-2390 Attention: Technical Support Phone Technical Support +886-3-578-2395 (Ext. 8830) 9:00-6:00pm Taiwan Time If you wish to write us for Promise Technology, Inc.
-
Page 71: Limited Warranty
Appendix B: Technical Support Limited Warranty Promise Technology, Inc. (“Promise”) warrants that for Three (3) years from the time of the delivery of the product to the original end user: the product will conform to Promise’s specifications; the product will be free from defects in material and workmanship under normal use and service. -
Page 72: Your Responsibilities
FastTrak S150 SX4 / SX4000 / SX4000 Lite User Manual No other document, statement or representation may be relied on to vary the terms of this limited warranty. Promise’s sole responsibility with respect to any product is to do one of the... -
Page 73: Returning Product For Repair
Return only the specific product covered by the warranty (do not ship cables, manuals, diskettes, etc.), with a copy of your proof of purchase to: USA and Canada: Promise Technology, Inc. Customer Service Dept. Attn.: RMA # ______ 1745 McCandless Drive... - Page 74 FastTrak S150 SX4 / SX4000 / SX4000 Lite User Manual...
-
Page 75: Appendix C: Features And Specifications
Appendix C: Features and Specifications Disk Array Features Supported RAID Levels: • RAID 0 – striping for performance RAID 1 – disk mirroring • • RAID 0+1 – mirrored stripe set RAID 5 – striped data + parity • • JBOD –... -
Page 76: Hardware Features
FastTrak S150 SX4 / SX4000 / SX4000 Lite User Manual Hardware Features 32-bit / 66MHz PCI interface compliant to PCI Rev 2.2 PCI bus mastering DMA with hardware scatter-gather engine for maximum performance Supports 266MB/sec burst data transfer rate across PCI bus... - Page 77 Appendix C: Features and Specifications Physical & Environmental Size 9.84 x 3.82 inches (25.0 x 9.7 cm) Operating temperature: 32 to 122 F (0 to 50 C) Relative humidity: 5% to 90% non-condensing Universal (5V and 3.3V) PCI Signaling Environment...
- Page 78 FastTrak S150 SX4 / SX4000 / SX4000 Lite User Manual...
Need help?
Do you have a question about the FastTrak S150 SX4 and is the answer not in the manual?
Questions and answers