Ricoh Aficio 1022 Operating Instructions Manual
Ricoh aficio 1022: user guide
Hide thumbs
Also See for Aficio 1022:
- Manual (12 pages) ,
- Parts catalog (121 pages) ,
- Service manual (313 pages)

Related Manuals for Ricoh Aficio 1022


Summary of Contents for Ricoh Aficio 1022
- Page 1 Operating Instructions Copy Reference Read this manual carefully before you use this product and keep it handy for future reference. For safety, please follow the instructions in this manual.
- Page 2 Type for 2522/2527/2212/2712/5622/5627/Aficio 1022/1027 Printed in Japan UE USA B027-6607...
- Page 3 Introduction This manual contains detailed instructions on the operation and maintenance of this machine. To get maximum versatility from this machine all operators should carefully read and follow the instructions in this manual. Please keep this manual in a handy place near the machine. Please read the Safety Information before using this machine.
- Page 4 In accordance with IEC 60417, this machine uses the following symbols for the main power switch: a means POWER ON. c means STAND BY.
-
Page 5: Safety Information
Safety Information When using your equipment, the following safety precautions should always be followed. Safety During Operation In this manual, the following important symbols are used: R WARNING: Indicates a potentially hazardous situation which, if instructions are not followed, could result in death or serious injury. R CAUTION: Indicates a potentially hazardous situation which, if instructions are not followed, may result in minor or moderate injury or damage to property. - Page 6 R CAUTION: • Protect the equipment from dampness or wet weather, such as rain, snow, and so on. • Unplug the power cord from the wall outlet before you move the equipment. While moving the equipment, you should take care that the power cord will not be damaged under the equipment.
- Page 7 How to Read this Manual Symbols In this manual, the following symbols are used: R WARNING: This symbol indicates a potentially hazardous situation that might result in death or serious injury when you misuse the machine without following the in- structions under this symbol.
-
Page 8: Table Of Contents
TABLE OF CONTENTS Machine Types.................... 1 What You Can Do with This Machine (Copy Mode)......... 2 Guide To Components ................5 Options ......................7 Control Panel ....................8 Display Panel .................... 10 Displays and Key Operations............... 10 Function List Based on Options ............. 12 1. - Page 9 2. Copying Basic Procedure ..................29 Placing Originals ..................31 Placing Originals on the Exposure Glass ............. 31 Placing Originals in the Document Feeder........... 32 Placing a Stack of Originals in the Document Feeder........32 Original Orientation ..................33 Placing Special Originals ................34 Placing Custom Size Originals ..............
- Page 10 Duplex......................88 1 Sided → 2 Sided ..................88 2 Sided → 2 Sided ..................89 Combine ....................91 1 Sided 2 Pages → Combine 1 Side............92 1 Sided 4 Pages → Combine 1 Side............93 1 Sided 8 Pages → Combine 1 Side............94 1 Sided 4 Pages →...
- Page 11 3. Troubleshooting If Your Machine Does Not Operate as You Want......... 153 General ...................... 153 Document Server ..................154 Display ....................... 155 If You Cannot Make Clear Copies ............156 If You Cannot Make Copies As You Want ..........157 General ......................
- Page 12 Edit ...................... 194 Edit ...................... 196 Stamp....................... 199 Background Numbering ................199 Preset Stamp ................... 199 User Stamp ..................200 Date Stamp ....................201 Page Numbering ................202 Input/Output .................... 204 5. REMARKS Do's And Don'ts..................207 Where to Put Your Machine..............208 Machine Environment ................
-
Page 13: Machine Types
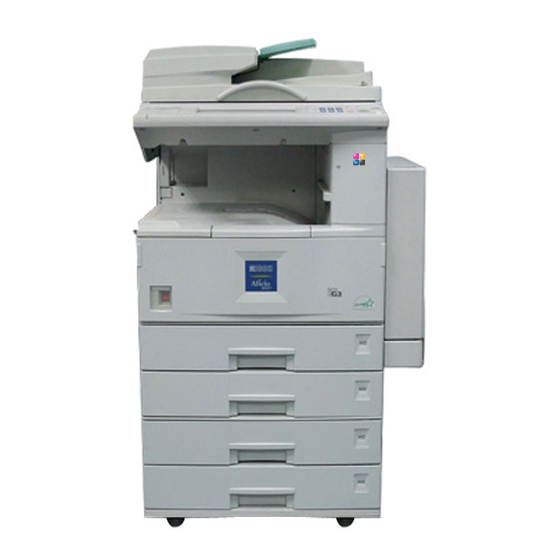
Machine Types This machine comes in two models which vary by copy speed. To make sure which model you have, see the inside front cover. Type 1 Type 2 Copy speed 22 copies/minute 27 copies/minute " × 11" " × 11" K , 8 K , 8... -
Page 14: What You Can Do With This Machine (Copy Mode)
What You Can Do with This Machine (Copy Mode) Note ❒ The reference of each function is on the next page of this illustration. Positive/Negative... - Page 15 Series/Book Document Server Front & Back 1 Sided & Booklet 2 Sided & Booklet 2 Sided & Magazine 1 Sided & Magazine...
- Page 16 “2 Sided 4 Pages → → → → Combine 2 “Selecting Original Type Setting” ⇒ ⇒ ⇒ ⇒ p.40 Side” ⇒ ⇒ ⇒ ⇒ p.101 “2 Sided 8 Pages → → → → Combine 2 “Adjusting Copy Image Density” ⇒ ⇒ ⇒ ⇒ p.38 Side”...
-
Page 17: Guide To Components
Guide To Components Exposure glass cover (option) or Main power switch Document feeder (ADF) (option) If the machine does not operate after turning on the operation switch, check if Lower the exposure glass cover over the main power switch is turned on. If it originals placed on the exposure glass for is off, turn it on. - Page 18 Remove Paper Indicator Paper tray Load paper here. ⇒ p.160 “ The indicator is lit when paper is output Loading to the internal tray 2 (1 bin tray). When Paper” paper is removed from the internal tray 2, Paper tray 2 the indicator goes off.
-
Page 19: Options
Options 500-Sheet Finisher Shift sort tray Sorts, stacks and staples the copies. Sorts and stacks the copies. Bridge unit Paper tray unit Relays copies to the finisher. Consists of two paper trays. Exposure glass cover Large Capacity Tray (LCT) Lower this cover over originals for copy- Holds 2000 sheets of paper. -
Page 20: Control Panel
Control Panel { { { { Clear Modes } } } } key Screen Contrast knob Adjusts the brightness of the display panel. Press to clear the previously entered copy job settings. Indicators { { { { Energy Saver } } } } key These indicators show the status of the machine or indicate errors. - Page 21 { { { { } } } } Start Press to start copying. Press to start scan- ning and printing in Document Server mode. { { { { } } } } Clear/Stop • Clear Press to delete a number entered. •...
-
Page 22: Display Panel
Display Panel The display panel shows the status of the machine, error messages and function menus. Important ❒ Do not apply a strong shock or force of about 30 N (about 3 kgf) or more to the display panel. If you do, the display might be damaged. Note ❒... - Page 23 Shows the available functions. A clip mark appears for a current- Press a function name to display its ly selected function. menu. For example, press the [Re- duce/Enlarge] key to bring up the Re- duce/Enlarge menu. ❖ ❖ ❖ ❖ Function menu Items you can select.
-
Page 24: Function List Based On Options
Function List Based on Options The functions that are available to you depend on your machine configuration and which options you have. See the table below. ❍…Available ×…Not available Type 1 Type 2 Place originals on the expo- in the docu- sure glass ment feeder ❍... - Page 25 Type 1 Type 2 Place originals on the expo- in the docu- sure glass ment feeder ❍ ❍ ❍ ❍ Copying Book Originals ❍ ❍ ❍ ❍ Image Repeat ❍ ❍ ❍ ❍ Double Copies ❍ ❍ ❍ ❍ Centering ❍...
-
Page 27: Basics
1. Basics Turning On the Power To turn the machine on, press the op- Turning On the Main Power eration switch. A A A A Note Make sure that the power cord is ❒ This machine automatically enters firmly plugged into the wall out- Energy Saver mode or turns itself let. -
Page 28: Turning On The Power
Basics Note Turning On the Power ❒ In the following cases, even if you press the operation switch, A A A A Press the operation switch. The the indicator will not go off but On indicator goes on. blink: The display panel will come on. •... -
Page 29: Changing Modes
Changing Modes Changing Modes You can use this machine not only as a copier, but also as a fax, printer, docu- { { { { Copy } } } } , { { { { Facsimile } } } } , { { { { Printer } } } } , { { { { Scan- ment server and scanner as well. -
Page 30: Originals
Basics Originals Sizes and Weights of Recommended Originals ❖ ❖ ❖ ❖ Metric version Where Original Is Placed Original Size Original Weight Exposure glass Up to A3 Document feeder 1-sided originals: 40 – 128g/m L – A5 KL 2-sided originals: 52 –... - Page 31 Originals Non-recommended originals for the document feeder Placing the following types of originals in the document feeder can cause paper misfeeds or result in damage to the originals. Place these originals on the expo- sure glass instead. • Originals other than those specified in ⇒ p.18 “Sizes and Weights of Recom- mended Originals”...
-
Page 32: Sizes Detectable By The Auto Paper Select
Basics Sizes Detectable by the Auto Paper Select ❖ ❖ ❖ ❖ Metric version 11" × Size A3 "× "× "× "× 17" 14" 11" 13" " Location of the original ❍ ❍ ❍ ❍ × × ❍ × × ❍... -
Page 33: Missing Image Area
Originals Missing Image Area ❖ ❖ ❖ ❖ Exposure glass Reference position Horizontal size Maximum Scanning area (297x420mm) 11"x17" (279x432mm) CP01AEE ❖ ❖ ❖ ❖ Document feeder Limitation ❒ Even if you correctly place originals in the document feeder or on the expo- sure glass, 3mm (0.1") margins on all four sides of the original might not be copied. -
Page 34: Copy Paper
Basics Copy Paper Recommended Paper Sizes and Types The following limitations apply to each tray: Tray Paper Type and Metric Version Inch Version Paper Type Weight Capacity L , B4 L , A4 KL , B5 KL , A5 L Tray 1 60-90g/m 500 sheets... - Page 35 Copy Paper Tray Paper Type and Metric Version Inch Version Paper Type Weight Capacity L , B4 L , 11" × 17" L , 8 " × 14" L , 8" × 13" L , Bypass 52-90g/m 10 sheets " × 13" "...
- Page 36 Basics Place the paper in the bypass tray, and specify the paper size. ⇒ p.63 “When copying onto custom size paper” When paper larger than 433mm is used, there are cases when the paper will be jammed, creased, or not fed. Make sure the paper is placed correctly so that it is fed straight.
-
Page 37: Direction-Fixed Paper Or 2-Sided Paper
Copy Paper ❒ If you load paper of the same size in the same direction in two or more trays, the machine automatically shifts to the other tray when the first tray in use runs out of paper. This function is called Auto Tray Switching. (However, if the Paper Type of one tray is recycled or special paper, the settings of the oth- er trays must be the same for Auto Tray Switching.) It saves interrupting a copy run to replenish paper when making a large number of copies. -
Page 38: Non-Recommended Paper
Basics Non-recommended Paper R CAUTION: • Do not use aluminum foil, carbon paper, or similar conductive paper to avoid a fire or equipment failure. Important ❒ Do not use any of the following kinds of paper or a fault might occur. •... -
Page 39: Toner
Toner Toner Handling Toner Do not incinerate used toner or toner containers. Toner dust might ignite when exposed to an open flame. Dispose of used toner containers in accordance with local regulations for plastics. Our products are engineered to meet high standards of quality and functionality, and we rec- ommend that you only use the expendable supplies available at an authorized dealer. - Page 40 Basics...
-
Page 41: Copying
2. Copying Basic Procedure A A A A F F F F Make sure that the machine is in Enter the number of copies re- Copy mode. quired with the number keys. If the machine is not in Copy { { { { Copy } } } } key. mode, press the B B B B Note... -
Page 42: Auto Off
Copying • When operations have been suspended during printing - System Reset • When the handset is in use The machine returns to its initial con- • When the On-hook dialing func- dition automatically when your job is tion is in use finished, after a certain period of •... -
Page 43: Placing Originals
Placing Originals Placing Originals Limitation Placing Originals on the ❒ Place originals after correction flu- Exposure Glass id and ink have completely dried. Not taking this precaution could A A A A dirty the exposure glass with Lift the exposure glass cover or marks that will be copied. -
Page 44: Placing Originals In The Document Feeder
Copying Placing Originals in the Placing a Stack of Originals in Document Feeder the Document Feeder A A A A Note Place the aligned originals face ❒ The last page should be on the bot- up into the document feeder. tom. -
Page 45: Original Orientation
Placing Originals 90° Turn Original Orientation When you want to copy A3 You can set the original orientation in K or 11" × 17" K size originals, the following ways. place your original in the land- This function is useful for copying scape orientation, and then press torn originals or large originals. -
Page 46: Placing Special Originals
Copying C C C C Press the [OK] key. Placing Special Originals Use this function when you want to use Batch mode, SADF mode, Mixed Size mode, or when you select the original orientation. Batch mode Up to 50 standard originals can be set D D D D in the document feeder at a time. - Page 47 Placing Originals D D D D When the machine instructs you SADF mode to place another original, place the next page. In SADF mode, even when an origi- nal is placed page by page in the doc- The second and subsequent pages ument feeder (ADF), each page is will be fed automatically without automatically fed when placed.
-
Page 48: Placing Custom Size Originals
Copying E E E E ❒ The sizes of the originals that can Adjust the guide to the widest be placed together with this func- original size. tion are as follows: F F F F Place the aligned originals face L •... - Page 49 Placing Originals C C C C Enter the horizontal size of the original with the Number keys, and then press the [#] key. Note ❒ If you make a mistake, press the { { { { Clear/Stop } } } } key, and [Clear] or then enter the value again.
-
Page 50: Basic Functions
Copying Basic Functions The following basic functions are ex- Note plained in this section. ❒ You can select the functions to be ❖ ❖ ❖ ❖ Adjusting Copy Image Density activated when System Reset is turned on, when Energy Saver is Auto and Manual Image Density turned off, or after the machine is ❖... - Page 51 Basic Functions Auto Image Density Combined Auto and Manual Image Density A A A A Make sure that the [Auto Image Den- A A A A sity] key is selected. Make sure that the [Auto Image Den- sity] key is selected. Note ❒...
-
Page 52: Selecting Original Type Setting
Copying A A A A Press the appropriate key to select Selecting Original Type Setting the original type. Select one of the following types to match your originals: ❖ ❖ ❖ ❖ Text Select this mode when your origi- nals contain only text (no pictures). ❖... -
Page 53: Selecting Copy Paper
Basic Functions Selecting Copy Paper There are two ways to select copy paper: ❖ ❖ ❖ ❖ Auto Paper Select The machine selects a suitable size of copy paper automatically based on the original size and the reproduction ratio. ⇒ p.43 “Rotated copy” ❖... - Page 54 Copying Auto Paper Select A A A A Make sure that the [Auto Paper Select] key is selected. If the [Auto Paper Select] key is not selected, press the [Auto Paper Select] key. Note ❒ If you do not wish to set any other functions, press the { { { { Start } } } } key to start copying.
-
Page 55: Rotated Copy
Basic Functions - Rotated copy L or K ) is different from that If the direction in which your original is placed ( of the paper you are copying onto, this function rotates the original image by 90° and fits it on the copy paper. This function works when Auto Paper Select or Auto Reduce/Enlarge is selected. -
Page 56: Auto Reduce/Enlarge
Copying ❒ The reproduction ratios the ma- Auto Reduce/Enlarge chine will select are 25 – 400% (25- 200% when setting originals in the The machine can choose an appropri- document feeder). ate reproduction ratio based on the ❒ For some originals, the original paper and original sizes you select. -
Page 57: Sort/Stack/Staple
Sort/Stack/Staple Sort/Stack/Staple The machine can scan your originals into memory and automatically sort the copies. ❖ ❖ ❖ ❖ Sort • Sort • Rotate Sort • Shift sort (an optional finisher and the optional Bridge unit are required) ❖ ❖ ❖ ❖ Stack •... - Page 58 Copying Paper Size and Direction Paper Capacity and Weight L , B4 L , A4 KL , B5 KL , A5 L , 11" × 17" L , 8 " × 14" Internal 125 sheets tray 2 11" × 15 , 11"...
-
Page 59: Sort
Sort/Stack/Staple ❒ The paper sizes that can be used Sort in the Rotate Sort function are as follows. Copies can be assembled as sets in se- KL , B5 KL Metric version quential order. " × 11" Inch version ❖ ❖ ❖ ❖ Sort ❒... - Page 60 Copying ❖ ❖ ❖ ❖ When the 500-Sheet Finisher is Note installed ❒ The paper sizes that can be used in the Sort function are as fol- lows. 500-Sheet 1000-Sheet Fin- Finisher isher L , B4 L , L , B4 L , KL ,B5 K , KL , B5 K , 11"...
-
Page 61: Stack
Sort/Stack/Staple C C C C Place your originals, and then Stack { { { { Start } } } } key. press the Copies can be assembled with each page When placing a stack of originals placed. in the document feeder ❖... - Page 62 Copying A A A A Place the original, and then Reference { { { { Start } } } } key. press the For the maximum tray capacity of the optional finishers ⇒ p.223 Note “500-Sheet Finisher (Option)”, ⇒ ❒ Start with the first page to be p.224 “1000-Sheet Finisher (Op- copied.
-
Page 63: Staple
Sort/Stack/Staple Staple An optional finisher and the bridge unit are required to use this function. Each copy set can be stapled together. Limitation ❒ You cannot use the following paper in this function: • Postcards • Translucent paper • OHP transparencies •... - Page 64 Copying L , B4 L , 11" × L , B4 L , A4 KL , 1000-Sheet Finisher 30 sheets (80g/m KL , 11" × 17" L , L , 11" × 15" L , 11" 17" × 14" L , 10" × 14" L , 11"...
- Page 65 Sort/Stack/Staple ❖ ❖ ❖ ❖ 500-sheet Finisher When your machine is equipped with the 500-sheet finisher, the stapling po- sition will be fixed to "Top". Original location Stapling position Exposure Document glass Feeder Note ❒ Original images are not rotated. ❖...
- Page 66 Copying Original location Stapling position Exposure Document glass Feeder Not available for paper size larger than A4. Note ❒ You cannot change stapling positions during copying. ❒ When the original image is rotated, the stapling direction turns by 90°. ❒ When using "Left 2" or "Top 2" with Combine mode, Double copies, or Auto Reduce/Enlarge, "Blank part will appear.
- Page 67 Sort/Stack/Staple ❖ ❖ ❖ ❖ 1000-Sheet Finisher Note ❒ When you select the stapling position, Sort mode is automatically selected. Reference ⇒ p.52 “Stapling position and original setting” B B B B Enter the number of copy sets with the number keys. Note ❒...
-
Page 68: To Stop Scanning Temporarily
Copying Reference To Stop Scanning Temporarily Scanning will stop when memory reaches 0% during sorted copying. When you are using the Sort, Stack, or However, you can change this set- Staple function, the originals are ting so that all the scanned pages scanned into memory. -
Page 69: Copying From The Paper Tray 2
Copying from the Paper Tray 2 Copying from the Paper Tray 2 Use the paper tray 2 for copying onto Using Tray 2 as Bypass Tray special paper (OHP transparencies, label paper (adhesive labels), thick A A A A paper (for example postcards and en- Select tray 2, and then press the velopes), thin paper) as well as plain { { { { # } } } } key. - Page 70 Copying C C C C Press [OK]. ❒ Some kinds of envelopes might cause misfeeds and wrinkles. In Note this case, push down the green ❒ The copy paper sizes that can lever of the fusing unit. ⇒ p.65 be selected are as follows: “Whe n copying on to en ve - lopes”...
- Page 71 Copying from the Paper Tray 2 B B B B Press the [Vertical inch] key, en- D D D D To register the custom size en- ter the vertical size of the paper tered, press the [Program] key with the number keys, and and then press the [Exit] key.
- Page 72 Copying A A A A Select paper type in "Special paper". B B B B Press the [OK] key. C C C C Set your originals and press the { { { { Start } } } } key. Important ❒...
-
Page 73: Copying From The Bypass Tray
Copying from the Bypass Tray Copying from the Bypass Tray The optional bypass tray is required to use this function. ❒ When using paper larger than 433 Use the bypass tray to copy onto spe- cial paper (OHP transparencies, label mm in size, load it so that it is fed paper (adhesive labels), thick paper straight into the machine. - Page 74 Copying B B B B ❒ Swing out the extender to sup- Push up the paper guide release port paper sizes larger than lever. " × 11" L , 8 ❒ Fan paper to get air between the sheets and avoid a multi-sheet feed.
- Page 75 Copying from the Bypass Tray C C C C Select the paper size. Limitation ❒ Paper will be automatically de- livered to the Internal tray. A A A A Press the { { { { # } } } } key. B B B B Press the [Custom Size] key.
- Page 76 Copying E E E E To register the custom size en- B B B B Lightly insert the OHP transpar- tered, press the [Program] key encies, thick paper, thin paper or and then press the [Exit] key. label paper (adhesive paper) face down and adjust the paper guide.
- Page 77 Copying from the Bypass Tray F F F F Press the [OK] key. C C C C Push down the green lever of the fusing unit as shown in the G G G G Place your originals, and then illustration. { { { { Start } } } } key.
- Page 78 Copying E E E E If the duplex unit is installed, close the duplex unit. F F F F Press the { { { { # } } } } key. G G G G Select the paper size, and then select [Thick Paper] for the paper type.
-
Page 79: Programs
Programs Programs You can store frequently used copy Storing a Program job settings in machine memory and recall them for future use. A A A A Edit the copy settings so that all ❖ ❖ ❖ ❖ Storing Your Settings functions you want to store in this You can store the settings you fre- program are selected. - Page 80 Copying E E E E B B B B A A A A D D D D Enter the program name with the Repeat steps in Storing a letter keys on the display panel. Program. Note To overwrite the program ❒...
-
Page 81: Deleting A Program
Programs Deleting a Program Recalling a Program A A A A A A A A { { { { Program } } } } key. { { { { Program } } } } key. Press the Press the B B B B B B B B Press the [Delete] key. -
Page 82: Job Preset
Copying Job Preset The optional HDD is required to use this function. D D D D If a long copy job is in progress and Press the [To "Printing"] key. you do not wish to wait for it to finish, After the current copy job, the next you can use this function to set up the job starts automatically. -
Page 83: Other Functions
Other Functions Other Functions Energy Saver Mode Interrupt Copy If you do not operate the machine for Use this function if you wish to inter- a certain period after copying or rupt a long copy job to make urgently { { { { Energy Saver } } } } when you press the needed copies. -
Page 84: Original Beeper
Copying G G G G { { { { Start } } } } key. Press the Sample Copy Note Use this function to check a copy set ❒ The previous copy job settings before making a long copy run. will be restored and the ma- chine will continue copying Limitation... -
Page 85: Changing The Number Of Sets
Other Functions C C C C Enter the number of copy sets Changing the Number of Sets with the number keys, and then { { { { # } } } } key. press the You can change the number of copy sets during copying. -
Page 86: Preset Reduce/Enlarge
Copying Preset Reduce/Enlarge ❒ You can select a ratio regardless of You can select a preset ratio for copy- ing. the size of an original or copy pa- per. With some ratios, parts of the image might not be copied or mar- gins will appear on copies. - Page 87 Preset Reduce/Enlarge B B B B ❖ ❖ ❖ ❖ Inch version Press the [Enlarge] or [Reduce] key. Original → → → → Copy Ratio (%) paper size 400 (enlarge area by 16) " × 8 "→11" × 200 (enlarge area by 4) 17"...
-
Page 88: Create Margin Mode
Copying Create Margin Mode Use "Create Margin" to reduce the im- age to 93% of its original size with the center as reference. You can register this function in a shortcut key on the initial display. By combining it with the Reduce/Enlarge function, you can also provide the Reduce/Enlarge copy with a margin. -
Page 89: Zoom
Zoom Zoom B B B B You can change the reproduction ra- Enter the ratio. tio in 1% steps. To select the ratio with the [n o ] keys and [o A A A A Select a preset ratio which is close to the desired ratio by us- ing [Reduce] or [Enlarge]. - Page 90 Copying To enter the ratio with the number keys A A A A Press the [Mag. Ratio] key. B B B B Enter the desired ratio with the number keys. Note ❒ To change the ratio entered, p r e s s t h e [ C l e a r ] o r { { { { Clear/Stop } } } } key and enter the new ratio.
-
Page 91: Size Magnification
Size Magnification Size Magnification B B B B This function calculates an enlarge- Press the [Specifd. Ratio] key. ment or reduction ratio based upon the lengths of the original and copy. C C C C Make sure that the [Specifd. Ratio] key is highlighted. - Page 92 Copying E E E E Enter the length of the copy with the number keys, and then press the [#] key. Note ❒ To change the length entered, { { { { Clear/Stop } } } } press the [Clear] or key and enter the new length.
-
Page 93: Directional Magnification (%)
Directional Magnification (%) Directional Magnification (%) B B B B Copies can be reduced or enlarged at Press the [Specifd. Ratio] key. different reproduction ratios horizon- tally and vertically. C C C C Press the [Direct. Mag.%] key. CP2P01EE a: Horizontal ratio b: Vertical ratio Note ❒... - Page 94 Copying D D D D Enter the desired ratio with the number keys, followed by the [#] key. E E E E Press the [OK] key. To specify a ratio with the [n o ] keys and [o A A A A Press the [With n o ] key.
-
Page 95: Directional Size Magnification (Inch)
Directional Size Magnification (Inch) Directional Size Magnification (Inch) ❒ The reproduction ratios that you The suitable reproduction ratios will be automatically selected when you can specify are 25-400% (25-200% enter the horizontal and vertical when placing originals in the doc- lengths of the original and copy im- ument feeder). - Page 96 Copying E E E E Enter the horizontal size of the copy with the number keys, and then press the [#] key. F F F F Enter the vertical size of the origi- nal with the number keys, and then press the [#] key. G G G G Enter the vertical size of the copy with the number keys, and then...
-
Page 97: Duplex/Combine/Series
Duplex/Combine/Series Duplex/Combine/Series B B B B You can make copies in a variety of Select [1 Sided] or [2 Sided] for cop- formats by combining the following ying. modes: • 1 Sided/2 Sided originals • 1 Sided/2 Sided copies • Duplex •... -
Page 98: Original Direction And Completed Copies
Copying Original Direction and Originals and Copy Direction Completed Copies You can select the orientation ([Top to Top], [Top to Bottom]). ⇒ p.86 “Specify- The resulting copy image will differ ing Orientation of Bound Originals” according to the direction in which •... - Page 99 Duplex/Combine/Series B B B B Press the [Orientation] key. C C C C Select an original orientation and a copy orientation. D D D D Press the [OK] key.
-
Page 100: Duplex
Copying Duplex The optional Duplex unit is required to use this function. This function can be used in two 1 Sided → → → → 2 Sided ways: ❖ ❖ ❖ ❖ 1 Sided → → → → 2 Sided This mode makes two-sided copies from one-sided originals. - Page 101 Duplex A A A A B B B B Place the next original. When it Press the [Dup./Combine/Series] key. is placed on the exposure glass, { { { { Start } } } } key. press the Note ❒ When using the SADF func- tion the original is automati- c a l ly f e d e a c h t i m e i t i s placed without pressing the...
- Page 102 Copying B B B B C C C C Press the { { { { # } } } } key after the last Press the [2 Sided] key for "Origi- original has been scanned. nal", and then press the [2 Sided] key for "Copy".
-
Page 103: Combine
Combine Combine ❖ ❖ ❖ ❖ 2 Sided 4 Pages → → → → Combine 2 Side You can combine two or more origi- nals into one copy. 1 Sided Combine (The optional Duplex unit is required mode is for 1-sided copies, and 2 Sid- to use this function.) ed Combine mode for 2-sided copies. - Page 104 Copying ❒ If the direction of originals is dif- 1 Sided 2 Pages → → → → Combine 1 ferent from that of the copy paper, the machine will automatically ro- Side tate the image by 90° to make cop- ies properly.
- Page 105 Combine A A A A Press the [Dup./Combine/Series] key. 1 Sided 4 Pages → → → → Combine 1 Side Copies four 1-sided originals together to one side of a sheet. B B B B Press the [1 Sided] key for "Origi- nal", and then press the [Combine 1 Side] key for "Copy".
- Page 106 Copying C C C C Press the [4 Originals] key, and 1 Sided 8 Pages → → → → Combine 1 then press the [OK] key. Side Copies eight 1-sided originals togeth- er to one side of a sheet. D D D D Select the paper.
- Page 107 Combine C C C C Press the [8 Originals] key, and 1 Sided 4 Pages → → → → Combine 2 then press the [OK] key. Side Copies four 1-sided originals to one sheet with two pages per side. D D D D Select the paper.
- Page 108 Copying C C C C Press the [4 Originals] key, and 1 Sided 8 Pages → → → → Combine 2 then press the [OK] key. Side Copies eight 1-sided originals to one sheet with four pages per side. D D D D Check the orientation.
- Page 109 Combine B B B B Press the [1 Sided] key for "Origi- 1 Sided 16 Pages → → → → Combine nal", and then press the [Combine 2 2 Side Side] key for "Copy". Copies sixteen 1-sided originals to one sheet with eight pages per side. 1 2 3 4 5 6 7 8 9 10 11 12...
- Page 110 Copying B B B B Press the [1 Sided] key for "Origi- 2 Sided 2 Pages → → → → Combine 1 nal", and then press the [Combine 2 Side Side] key for "Copy". Copies one 2-sided original to one side of a sheet.
- Page 111 Combine C C C C Press the [2 Pages] key, and then 2 Sided 4 Pages → → → → Combine 1 press the [OK] key. Side Copies two 2-sided originals to one side of a sheet. D D D D Check the orientation.
- Page 112 Copying C C C C Press the [4 Pages] key, and then 2 Sided 8 Pages → → → → Combine 1 press the [OK] key. Side Copies four 2-sided originals to one side of a sheet. D D D D Check the orientation.
- Page 113 Combine C C C C Press the [8 Pages] key, and then 2 Sided 4 Pages → → → → Combine 2 press the [OK] key. Side Copies two 2-sided originals to one sheet with two pages per side. D D D D Check the orientation.
- Page 114 Copying C C C C Press the [4 Pages] key, and then 2 Sided 8 Pages → → → → Combine 2 press the [OK] key. Side Copies four 2-sided originals to one sheet with four pages per side. D D D D Check the orientation.
- Page 115 Combine B B B B Press the [2 Sided] key for "Origi- 2 Sided 16 Pages → → → → Combine nal", and then press the [Combine 2 2 Side Side] key for "Copy". Copies eight 2-sided originals to one sheet with eight pages per side.
- Page 116 Copying B B B B G G G G Press the [2 Sided] key for "Origi- Place your originals, and then { { { { Start } } } } key. nal", and then press the [Combine 2 press the Side] key for "Copy".
-
Page 117: Series/Book
Series/Book Series/Book Series copies are made by separately Series Copies copying the front and back of a 2-sid- ed original or the two facing pages of a spread original onto two sheets of Book → → → → 1 Sided paper. - Page 118 Copying A A A A F F F F Press the [Dup./Combine/Series] key. Make sure that the [Auto Paper Se- lect] key is selected. Note ❒ If the [Auto Paper Select] key is not selected, press the [Auto Pa- per Select] key. G G G G Place your originals on the expo- sure glass, and then press the...
- Page 119 Series/Book D D D D ❖ ❖ ❖ ❖ Inch version Press the [Book→ → → → 2 Sided] key, and then press the [OK] key. Original Copy paper 11" × 17" " × 11" (2-sided) " × 11" " ×8 "...
- Page 120 Copying C C C C Note Make sure that the [Series] key is ❒ See the following table for original selected. and copy paper sizes when using a 100% ratio. ❖ ❖ ❖ ❖ Metric version Original Copy paper A4 (2-sided) B5 (2-sided) A5 (2-sided) D D D D...
-
Page 121: Copying Book Originals
Series/Book 1 Sided → → → → Booklet Copying Book Originals Make copies in page order for a fold- Limitation ed booklet as shown in the following ❒ You cannot use the bypass tray illustrations. with this function. ❖ ❖ ❖ ❖ Open to Left ❒... - Page 122 Copying D D D D Press the [1 Sided→ → → → Booklet] key, How to fold copies to make a booklet and then press the [OK] key. E E E E GCBOOK2E Press the [OK] key. 1: Open to Left F F F F Select the paper.
- Page 123 Series/Book A A A A ❖ ❖ ❖ ❖ Open to Right Press the [Dup./Combine/Series] key. B B B B Press the [Series/Book] key. Important ❒ Before selecting this function, se- lect "Open to left" or "Open to right" with the User Tools. ⇒ “Ori- entation: Booklet, Magazine”...
- Page 124 Copying G G G G Note Place your originals, and then { { { { Start } } } } key. ❒ Four originals are copied onto each press the sheet of copy paper. Note ❒ The copying may take some time ❒...
- Page 125 Series/Book B B B B 2 Sided → → → → Magazine Press the [Series/Book] key. Copies two or more 2–sided originals to make copies in page order when they are folded and assembled. ❖ ❖ ❖ ❖ Open to Left C C C C Press the [Book] key.
- Page 126 Copying B B B B Press the [Series/Book] key. How to fold and assemble copies to make a magazine ❖ ❖ ❖ ❖ Open to Left C C C C Press the [Book] key. GCBOOK5E ❖ ❖ ❖ ❖ Open to Right D D D D Press the [2 Sided→...
-
Page 127: Edit Image
Edit Image Edit Image ❒ Part of a repeated image might not Image Repeat be copied depending on copy pa- per size, copy paper direction or The original image is copied repeat- reproduction ratio. edly. ❒ You can insert separation lines between repeated images. -
Page 128: Double Copies
Copying G G G G ❖ ❖ ❖ ❖ Inch version Place your original, and then { { { { Start } } } } key. press the Original Size and Copy Paper Size Direction and Direction " × 8 "... -
Page 129: Centering
Edit Image ❖ ❖ ❖ ❖ Inch version Centering Original Original size and direction placed on: You can make copies with the image moved to the center of the copy pa- 11" × 17" " × 14" Exposure L , 8 per. -
Page 130: Positive/Negative
Copying G G G G C C C C Place your originals, and then Press the [Positive/Negative] key. { { { { Start } } } } key. press the Positive/Negative If your original is black and white, copy images are inverted. D D D D Press the [OK] key. -
Page 131: Erase
Erase Erase ❖ ❖ ❖ ❖ Metric version Th is fu nction eras es the cen ter and/or all four sides of the original Where Origi- Paper Size and Orien- image. This is useful for avoiding nal Is Set tation shadows on the copy image caused L , B4 L , A4 KL , by bound originals, such as books. -
Page 132: Border Erase
Copying C C C C Press the [Border] key. Border Erase This function erases the edge mar- gins. You can set the same margin width for all four sides, or you can set different margin widths for each side. D D D D Set the erase border width. -
Page 133: Center Erase
Erase B B B B Press the key for the border B B B B Press the [Erase] key. you wish to change and set an erase border width with the n ] and [ o o ] keys. Note ❒... -
Page 134: Center/Border Erase
Copying C C C C Press the [Center/Border] key. Center/Border Erase This mode erases both the center and edge margins. You can set the same margin width for all four sides and center, or you can set different margin widths for each. D D D D Set the erase margin width. - Page 135 Erase Selecting [Diff. Width] A A A A Press the [Diff. Width] key. B B B B Press the key for the part you wish to change, and then set an erase margin width with the n ] and [ o o ] keys.
-
Page 136: Margin Adjustment
Copying Margin Adjustment ❒ When making two-sided copies You can shift the image to the left, right, top or bottom to make a bind- from one-sided originals, you can ing margin. set a binding margin for the back side pages. ⇒ "1 sided → 2 sided Auto Margin: T to T", "1 sided →... - Page 137 Margin Adjustment C C C C Set a binding margin for a front page. Press the [← ← ← ← ] and [→ → → → ] keys when setting the left and right margins, and the [↓ ↓ ↓ ↓ ] and [↑ ↑ ↑ ↑ ] keys when setting the top and bottom margins.
-
Page 138: Stamp
Copying Stamp This function prints stamps on copies. Note Stamp modes are as follows: ❒ You can change the size of the numbers with the User Tools. ⇒ ❖ ❖ ❖ ❖ Background Numbering "Size" on p.199 “ Bac kgroun d This function prints numbers on Numbering”... -
Page 139: Preset Stamp
Stamp D D D D Enter the number to start count- Preset Stamp ing from with the number keys, and then press the [OK] key. The optional 32 MB of memory is re- quired to use this function (if the ma- chine is equipped with the Printer unit, 32 MB of memory is not re- quired). - Page 140 Copying A A A A ❒ You can choose the default settings Press the [Edit/Stamp] key. for the language, position, size and density of the stamp with the User T ools. ⇒ "Sta mp L an gu age", "Stamp Position", "Stamp Format" on p.199 “Preset Stamp ”...
-
Page 141: User Stamp
Stamp F F F F Change the stamp position, size User Stamp or density. If you do not wish to make a The optional HDD and 32 MB of change, go to step memory are required to use this func- tion (if the machine is equipped with the Printer unit, 32 MB of memory is To change the stamp position,... - Page 142 Copying A A A A ❒ The relationship between the di- Press the [Edit/Stamp] key. rection in which you place the o r i g i n a l a n d s t a m p o r i e n t a - tion/position is as follows.
-
Page 143: Program/Delete User Stamp
Stamp E E E E Press the [All Pages] or [1st Page on- Program/Delete User Stamp ly] key to select the print page. A A A A Make sure that the machine is in To change the stamp position Copy mode. B B B B A A A A Press the [Change] key. - Page 144 Copying E E E E C C C C Enter the user stamp name with Press the [User Stamp] key. the letter keys on the display panel. F F F F Press the [Program/Delete Stamp] key. Note ❒ You can register up to 10 characters.
-
Page 145: Date Stamp
Stamp F F F F Press the [Vertical] key, and C C C C Press the [Delete] key. then enter the vertical size in E E E E . the same way as step G G G G Place the user stamp on the ex- posure glass, and then press the [Start Scanning] key. - Page 146 Copying ❒ You can change the Date Stamp ❒ If you combine this function with settings with the User Tools. ⇒ the Combine, Magazine or Booklet p.201 “Date Stamp” function, the page is stamped as follows. ❒ The font and size of the Date Stamp can be changed with the •...
- Page 147 Stamp C C C C Press the [Date Stamp] key. To change the stamp position A A A A Press the [Change] key. D D D D Press the [All Pages] or [1st Page on- ly] key to select the print page. B B B B Select the desired position of the Date Stamp.
-
Page 148: Page Numbering
Copying ❒ You can choose the default settings Page Numbering for the stamp position with the User Tools. ⇒ "Stamp Position" on Use this function to print page num- p.202 “Page Numbering ” bers on your copies. ❒ You can choose the default settings for the stamp format with the User Tools. - Page 149 Stamp ❒ If you combine this function with ❖ ❖ ❖ ❖ Page Numbering per original the Duplex (Top to Top) function • Combined with 1 Sided/2 Sid- and select the "P1, P2" or "1/n, ed in the Combine function 2/n"...
- Page 150 Copying B B B B G G G G Press the [Stamp] key. To change the first printing page and start number, press the right [Change] key. Note ❒ The display differs depending on the selected style. ❒ If you do not wish to make a change, press the [OK] key, place your originals, and then { { { { Start } } } } key.
- Page 151 Stamp C C C C Press the [Numbering from/to] If you selected (1/5,2/5…) key, and then enter the number from which to start numbering A A A A Press the [First Printing Page] with the number keys. key, and then enter the original sheet number from which to s t a r t n u m b e r i n g w i t h t h e number keys.
- Page 152 Copying E E E E Press the [Last Number] key, and If you selected (1-1, 1-2,…) then enter the page number at which to stop numbering with A A A A Press the [First Printing Page] the number keys. key, and then enter the original If you do not wish to change the sheet number from which to number, go to step...
- Page 153 Stamp E E E E Press the [Numbering from/to] key, and then enter the page number from which to start numbering with the number keys. F F F F Press the { { { { # } } } } key. G G G G Press the [OK] key.
-
Page 154: Cover/Slip Sheet
Copying Cover/Slip Sheet Using this function, you can add cov- Front Cover er sheets or designate certain pages to be copied on slip sheets. The first page of your originals is cop- There are four types of this function: ied on specific paper sheet for covers, ❖... - Page 155 Cover/Slip Sheet C C C C ❒ In "Cover" of the User Tools (Sys- Select [Copy] or [Blank] for the cov- tem Settings), if you selected er sheet. "Mode Selected" for the "Tray Dis- play" setting, the machine refers to the settings in "Cover"...
-
Page 156: Front/Back Covers
Copying ❒ In "Cover" of the User Tools (Sys- Front/Back Covers tem Settings), if you selected "Mode Selected" for the "Tray Dis- The first and last pages of your origi- play" setting, the machine refers to nals are copied on specific paper the settings in "C ove r"... -
Page 157: Designate
Cover/Slip Sheet C C C C Select [Copy] or [Blank] for the cov- Designate er sheets. Use this function to have certain pag- es of your original copied onto slip sheets. D D D D Select the paper tray containing the non-cover sheet paper, and then press the [OK] key. - Page 158 Copying A A A A Note Press the [Cover/Slip Sheet] key. ❒ To change the value entered, { { { { Clear/Stop } } } } press the [Clear] or key, and then enter the new value. E E E E Select the paper tray for slip sheets.
- Page 159 Cover/Slip Sheet B B B B Press the [Desig./Chapter] key. Chapter The page locations you specify with this function will appear on the front of copy sheets. C C C C Press the [Chapter] key. GC SHOW OJ Preparation Before selecting this function, press the [Dup./Combine/Series] key and select Duplex (1 Sided →...
- Page 160 Copying F F F F When you finish specifying the page locations, press the [OK] key. This display shows example set- tings. Note ❒ To change the number entered, enter the new number in the same way as in steps G G G G Place your originals, and then { { { { Start } } } } key.
-
Page 161: Slip Sheets
Slip Sheets Slip Sheets Every time the originals' page chang- When using OHP transparencies es, a slip sheet is inserted. This func- set on the bypass tray tion can be used to insert a slip sheet automatically between each OHP ❖... - Page 162 Copying B B B B Press the [Slip sheet] key. C C C C Select [Copy] or [Blank], and then press the [OK] key. D D D D Select the paper tray containing the non-slip sheet paper. When using OHP transparencies, open the bypass tray.
-
Page 163: Storing Originals In The Document Server
Storing Originals in the Document Server Storing Originals in the Document Server The optional HDD is required to use this function. The Document Server enables you to Reference save documents in the machine mem- For more information on the ory and then print them as you want. types of originals that can be placed and how to place them, Reference... -
Page 164: Combination Chart
Copying Combination Chart The combination chart given below shows which modes can be used together. When you read the chart, see the following table. ❍ means that these modes can be used together. means that these modes cannot be used together. The second mode selected will be the mode you're working in. -
Page 165: Troubleshooting
3. Troubleshooting If Your Machine Does Not Operate as You Want General Machine Status Problem/Cause Action Please wait. A message appears when Wait for the machine. you turn on the operation switch or change the toner bottle. Cannot detect original size. Improper original is Place a custom size original on the placed. -
Page 166: Document Server
Troubleshooting Document Server Machine Status Problem/Cause Action Scanned pages exceeded The number of scanned If you want to store the scanned max. number. Do you want pages exceeds the capacity originals as a file, press the [Store to store the scanned pages per file of the Document File] key. -
Page 167: Display
If Your Machine Does Not Operate as You Want Display Problem Problem/Cause Action The display panel is off. The screen contrast knob is Set the screen contrast knob to turned to the dark position. the light position for proper viewing of the display panel. { { { { Energy Saver } } } } key to The machine is in Energy Sav- Press the... -
Page 168: If You Cannot Make Clear Copies
Troubleshooting If You Cannot Make Clear Copies Problem Cause Action Adjust the image density. ⇒ p.38 Copies appear dirty. The image density is too dark. “Adjusting Copy Image Density” Select Auto Image Density. ⇒ p.38 Auto Image Density is not selected. -
Page 169: If You Cannot Make Copies As You Want
If You Cannot Make Copies As You Want If You Cannot Make Copies As You Want General Problem Cause Action Remove jammed staples. ⇒ p.175 Copies are not stapled. There are jammed staples e Removing Jammed Staples” in the stapler. “... -
Page 170: Stamp
Troubleshooting Problem Cause Action In Image Repeat mode, the You selected copy paper the Select copy paper larger than original image is not copied same size as the originals, or the originals. repeatedly. you did not select the proper Select the proper reproduc- reproduction ratio. -
Page 171: Duplex
If You Cannot Make Copies As You Want Duplex Problem Cause Action Order of copies is not correct. You place the originals in the When placing a stack of origi- incorrect order. nals in the document feeder, the last page should be on the bottom. -
Page 172: B Loading Paper
Troubleshooting B Loading Paper Setting special paper in the Loading Paper in Tray 1-4 Paper Tray 2 Note A A A A Set the special paper below the ❒ You can change the paper size. ⇒ limit mark of the tray. p.170 “Changing the Paper Size”... -
Page 173: Loading Paper In The Large Capacity Tray
B Loading Paper Note Loading Paper in the Large ❒ Shuffle the paper before loading Capacity Tray it in the tray. ❒ Straighten curled or warped pa- Note per before placing it in the tray. ❒ Load copy paper of the same size C C C C Push the paper tray in until it and direction in both left and right... -
Page 174: D Adding Toner
Troubleshooting D Adding Toner D is displayed, it is time to add toner. When R WARNING: • Do not incinerate used toner or toner containers. Toner dust might ig- nite when exposed to an open flame. Dispose of used toner containers in accordance with local regulations for plastics. - Page 175 D Adding Toner • 4: Push the toner bottle backward to raise its head, and then gently pull out the bot- tle. • 5: Hold a new bottle horizontally and shake it 5 or 6 times. Note ❒ Do not remove the black cap before shaking.
-
Page 176: Clearing Misfeeds
Troubleshooting x Clearing Misfeeds R CAUTION: • The fusing section of this equipment might be very hot. You should be very careful that you don't touch this section when removing the misfed paper. Important ❒ When clearing misfeeds, do not turn off the operation switch. If you do, your copy settings are cleared. - Page 177 x Clearing Misfeeds...
- Page 178 Troubleshooting...
- Page 179 x Clearing Misfeeds...
- Page 180 Troubleshooting...
- Page 181 x Clearing Misfeeds...
-
Page 182: Changing The Paper Size
Troubleshooting Changing the Paper Size Preparation Changing the Paper Size in The procedures for changing the Tray 1-4/Paper Tray Unit paper size are different depending on the tray (paper tray 1, paper A A A A tray 2 or the optional paper tray Make sure that the paper tray is units). - Page 183 Changing the Paper Size D D D D G G G G While pressing the release lever, Lock the side lever. adjust the side fences. H H H H While pressing the release lever, E E E E Square the paper and load it in adjust the back fence to the new the tray with the copying face up.
-
Page 184: Adding Staples
Troubleshooting d Adding Staples R CAUTION: • Our products are engineered to meet high standards of quality and function- ality, and we recommend that you only use the expendable supplies availa- ble at an authorized dealer. Important ❒ If you use a staple cartridge other than that recommended, staple failure or staple jams might occur. -
Page 185: 1000-Sheet Finisher
d Adding Staples • 5: Pull out the ribbon. • 6: Reinstall the cartridge. • 7: Close the side cover. 1000-Sheet Finisher • 1: Open the front cover of the finisher and pull out the staple unit. • 2: Hold the green lever and pull out the cartridge gently. - Page 186 Troubleshooting • 5: Take out the empty refill in the direction of the arrow. • 6: Align the arrows on the new refill and the cartridge, and then push in the refill until it clicks. • 7: Push down the upper unit into the car- tridge gently.
-
Page 187: Removing Jammed Staples
e Removing Jammed Staples e Removing Jammed Staples Note ❒ Staples might jam because of curled copy paper. In this case, try turning the copy paper over in the tray. If there is no improvement, change to copy pa- pers with less curl. ❒... -
Page 188: 1000-Sheet Finisher
Troubleshooting • 5: Reinstall the cartridge. • 6: Close the side cover. 1000-Sheet Finisher • 1: Open the front cover of the finisher and pull out the staple unit. • 2: Hold the green lever and pull out the cartridge gently. •... - Page 189 e Removing Jammed Staples • 5: Pull down the face plate of the cartridge until it clicks. • 6: Hold the green lever and reinstall the cartridge until it clicks. • 7: Push back the staple unit and close the front cover of the finisher.
- Page 190 Troubleshooting...
-
Page 191: User Tools (Copy/Document Server Features)
4. User Tools (Copy/Document Server Features) Accessing the User Tools (Copy/Document Server Features) B B B B This section is for the key operators in Press the [Copier/Document Server charge of this machine. You can Features] key. change or set the machine's default The Copier/Document Server Fea- settings. -
Page 192: Exiting From The User Tools
User Tools (Copy/Document Server Features) D D D D Change the settings by following the instructions on the display panel, and then press the [OK] key. Reference ⇒ p.190 “General Features ” Note ❒ [OK]: Press to set the new set- tings and return to the previous menu ❒... - Page 193 Accessing the User Tools (Copy/Document Server Features)
-
Page 194: User Tools Menu (Copier/Document Server Features)
User Tools (Copy/Document Server Features) User Tools Menu (Copier/Document Server Features) - Page 195 User Tools Menu (Copier/Document Server Features)
-
Page 196: General Features
User Tools (Copy/Document Server Features) General Features ❖ ❖ ❖ ❖ Auto Paper Select Priority As a default setting, Auto Paper Select is selected. You can cancel this setting. Note ❒ Default: On ❖ ❖ ❖ ❖ Auto Tray Switching If you load paper of the same size in two or more trays, the machine automat- ically shifts to the other tray when the first tray in use runs out of paper (when Auto Paper Select is selected.) This function is called "Auto Tray Switching". - Page 197 General Features ❖ ❖ ❖ ❖ Original Type Display You can choose whether the original types are shown on the initial display. Note ❒ Default: Display ❒ If you choose "Hide", the display is shown as below. ❖ ❖ ❖ ❖ Auto Image Density Priority You can turn the Auto Image Density on or off for each of the original types (Text, Text/Photo, Photo, Pale, and Generation Copy).
- Page 198 User Tools (Copy/Document Server Features) • Text/Photo When there are photo(s) and text on the original, determine whether the photo or text takes priority. Note ❒ Default: Normal ❒ [Custom Setting] is a value set by the service representative. ❒ [Normal] achieves a good balance between text and photos. •...
-
Page 199: General Features
General Features General Features ❖ ❖ ❖ ❖ Duplex Mode Priority You can select the type of Duplex function effective when the machine is turned on, reset, or modes are cleared. Note ❒ Default: • Metric version: 1 Sided → 1 Sided •... - Page 200 User Tools (Copy/Document Server Features) ❖ ❖ ❖ ❖ Job End Call You can choose whether or not the beeper sounds when copying is complete. If the "Panel Tone" of the User Tools (System Settings) settings is "On", the machine beeps to notify you that the machine did not complete a job for rea- sons such as copying was interrupted, the paper tray ran out of paper or a pa- per jam occurred.
- Page 201 General Features General Features ❖ ❖ ❖ ❖ Copy Function Key: F1-F5 You can register frequently used functions in function keys F1 to F5. Note ❒ Default: • Copy Function Key: F1: 1 Sided → 2 Sided:T to T • Copy Function Key: F2: 2 Sided:T to T → 2 Sided:T to T •...
- Page 202 User Tools (Copy/Document Server Features) General Features ❖ ❖ ❖ ❖ Document Server Storage Key: F1–F5 You can register frequently used functions in function keys F1 to F5. You can also change the registered functions. Note ❒ Default • Document Server Storage Key: F1: 2 Sided Original Top to Top •...
-
Page 203: Reproduction Ratio
Reproduction Ratio Reproduction Ratio ❖ ❖ ❖ ❖ Shortcut R/E You can register up to three frequently used Reduce/Enlarge ratios other than the fixed Reduce/Enlarge ratio and have them shown on the initial dis- play. You can also change the registered Reduce/Enlarge ratios. If no Reduce/Enlarge ratio has been set when selecting [Shortcut R/E 1], [Short- cut R/E 2], or [Shortcut R/E 3], enter the desired Reduce/Enlarge ratio using the number keys. - Page 204 User Tools (Copy/Document Server Features) Reproduction Ratio ❖ ❖ ❖ ❖ Reduce 1-6 You can customize the reduction ratios available when you press the [Re- duce/Enlarge] key followed by the [Reduce] key. Note ❒ Default: • Metric version: • Reduce 1: 25% •...
- Page 205 Reproduction Ratio ❖ ❖ ❖ ❖ R/E Priority Specify whether Reduce, Enlarge or Input Ratio is given priority on the dis- play panel when the [Reduce/Enlarge] key is pressed. Note ❒ Default: Reduce...
-
Page 206: Edit
User Tools (Copy/Document Server Features) Edit ❖ ❖ ❖ ❖ Front Margin: Left/Right You can specify left and right margins on the front side of copies in Margin Adjust mode. Note ❒ Default: • Metric version: Left 5mm • Inch version: Left 0.2" ❖... -
Page 207: Edit
Edit ❖ ❖ ❖ ❖ 1 sided→ → → → 2 sided Auto Margin:T to B In 1 sided → 2 sided Duplex mode, you can specify the margins on the back side. ❖ ❖ ❖ ❖ Erase Border Width The default setting of the width of the erased margins in Erase Border mode can be changed as follows: •... - Page 208 User Tools (Copy/Document Server Features) Edit ❖ ❖ ❖ ❖ Image Repeat Separation Line You can select a separation line in Image Repeat mode from None, Solid, Bro- ken A, Broken B, or Crop Marks. • None • Solid • Broken A •...
- Page 209 Edit • Broken A • Broken B • Crop Marks Note ❒ Default: None ❖ ❖ ❖ ❖ Separation Line in Combine You can select a separation line in Combine mode from None, Solid, Broken A, Broken B, or Crop Marks. •...
- Page 210 User Tools (Copy/Document Server Features) ❖ ❖ ❖ ❖ Front Cover Copy in Combine You can specify whether to make a combined copy on the front cover sheet when you select Front Cover copy mode. Note ❒ Default: Combine ❖ ❖ ❖ ❖ Designated Slip Sheet Copy in Combine You can specify whether to make a combined copy on the inserted slip sheets in Desig./Chapter Copy mode.
-
Page 211: Stamp
Stamp Stamp Background Numbering ❖ ❖ ❖ ❖ Size You can set the size of the numbers. Note ❒ Default: Normal • Small • Normal • Large ❖ ❖ ❖ ❖ Density You can set the density of the numbers. Note ❒... -
Page 212: User Stamp
User Tools (Copy/Document Server Features) • Inch Version: • Position: Top right • Top Margin: 1.0" • Right Margin: 1.0" ❖ ❖ ❖ ❖ Stamp Format You can adjust the size, density and print page for the stamp. • Size You can set the size of the stamp. -
Page 213: Date Stamp
Stamp • Inch version: • Position: Top right • Top Margin: 1.0" • Right Margin: 1.0" ❖ ❖ ❖ ❖ Stamp Format You can adjust the print page for User Stamps 1 to 4 that you registered. Note ❒ Default: All Pages Date Stamp ❖... -
Page 214: Page Numbering
User Tools (Copy/Document Server Features) ❖ ❖ ❖ ❖ Stamp Setting You can select whether the date is printed on the first page or all pages. Note ❒ Default: All Pages ❖ ❖ ❖ ❖ Size You can set the Date Stamp size. Note ❒... - Page 215 Stamp ❖ ❖ ❖ ❖ Page Numbering in Combine You can set how the pages are numbered when you use the Combine function and Page Numbering function together. Note ❒ Default: Per original ❖ ❖ ❖ ❖ Stamp on Designated Slip Sheet You can select whether to print the page number onto slip sheets when you use the Designate function set to "Copy"...
-
Page 216: Input/Output
User Tools (Copy/Document Server Features) Input/Output ❖ ❖ ❖ ❖ Switch to Batch (SADF) You can select whether Batch mode or SADF mode is displayed when you press the Special Original key. ❖ ❖ ❖ ❖ SADF Auto Reset When you set one original at a time in the document feeder, the Auto Feed indicator lights for a selected time after an original is fed to show that the doc- ument feeder is ready for another original. - Page 217 Input/Output ❖ ❖ ❖ ❖ Select Stack Function Specify whether Stack or Rotate Sort has priority to be shown on the initial display. Note ❒ Default: Stack ❒ An optional finisher is required to use this function. ❖ ❖ ❖ ❖ Letterhead Setting Direction-fixed (top to bottom) or 2-sided paper might not be printed correct- ly depending on how the originals and paper are placed.
- Page 218 User Tools (Copy/Document Server Features)
-
Page 219: Remarks
5. REMARKS Do's And Don'ts R CAUTION: • Do not turn off the operation switch while copying or printing. • Unplug the power cord from the Make sure that all copying or wall outlet before you move the printing has finished. equipment. -
Page 220: Where To Put Your Machine
REMARKS Where to Put Your Machine Environments to avoid Machine Environment • Locations exposed to direct sun- Your machine's location should be light or strong light (more than carefully chosen because environ- 1,500 lux). mental conditions greatly affect its • Locations directly exposed to cool performance. -
Page 221: Power Connection
Where to Put Your Machine • When the main switch is in the Limitation Stand-by position, the optional ❒ Carefully move the machine. If anti-condensation heaters are on. you do not, the machine might be In case of emergency, unplug the damaged or a stored file might be machine's power cord. -
Page 222: Maintaining Your Machine
REMARKS Maintaining Your Machine If the exposure glass, exposure glass Cleaning the Exposure Glass cover, or document feeder belt is dirty, you might not be able to make Cover copies as you want. Clean them if you find them dirty. ❖... -
Page 223: Replacing Photo Conductor Unit (Pcu)
Replacing Photo Conductor Unit (PCU) Replacing Photo Conductor Unit (PCU) When 'Replace photoconductor unit' appears on the panel display, it is time to replace the photo couductor unit. R WARNING: • Do not incinerate the photoconductor unit. Toner dust might ignite when exposed to an open flame. - Page 224 REMARKS B B B B Open the right cover of the machine by pushing the catch upwards. C C C C Open the front cover. D D D D While pressing the button, slide the photo conductor unit out until it stops.
- Page 225 Replacing Photo Conductor Unit (PCU) E E E E Raise the green handle and slide the photo conductor unit out towards you. Important ❒ Do not tilt or drop the removed photo conductor unit. Moving the unit abruptly can scatter the toner. ❒...
- Page 226 REMARKS Important ❒ Remove the photo conductor unit keeping the unit parallel to the ground as shown in the illustration. Otherwise, the toner in the unit might scatter. ❒ Do not touch the inside of the unit or the green parts, after the black pro- tection sheet is removed.
- Page 227 Replacing Photo Conductor Unit (PCU) L L L L Close the right cover of the machine. Note ❒ If the right side cover of the machine cannot be closed, it means that the photo conductor unit has not been properly installed. Slide the photo con- ductor unit out and push it into the machine again until it clicks into place.
- Page 228 REMARKS...
-
Page 229: Specification
6. Specification Mainframe ❖ ❖ ❖ ❖ Configuration: Desktop ❖ ❖ ❖ ❖ Photosensitivity type: OPC drum (Φ30) ❖ ❖ ❖ ❖ Original scanning: One-dimensional solid scanning system through CCD ❖ ❖ ❖ ❖ Copy process: Dry electrostatic transfer system ❖... - Page 230 Specification ❖ ❖ ❖ ❖ Copy paper size: L – A5 L , 11" × 17" L – 5 " × 8 • Tray 1: A3 " L – A6 L , 11" × 17" L – 5 " × 8 •...
- Page 231 Mainframe ❖ ❖ ❖ ❖ Reproduction ratio: Preset reproduction ratios: Metric version Inch version Enlargement 400% 400% 200% 200% 141% 155% 122% 129% 115% 121% Full Size 100% 100% Reduction Zoom: From 25 to 400% in 1% steps (from 25 to 200% in 1% step, when setting originals in the document feeder).
- Page 232 Specification • Complete system Type 1/Type 2 Warm-up less than 1.44 kW Stand-by about 160 W During printing about 680 W Maximum less than 1.44 kW The Complete System consists of the mainframe, document feeder, 1000-sheet finisher, duplex unit, internal tray 2, paper tray unit, fax unit, ISDN, extra G3 interface unit, expansion memory, JBIG function upgrade unit, printer unit, HDD, PHY and memory unit.
- Page 233 Mainframe ❖ ❖ ❖ ❖ Weight: Type 1, 2: Approx. 55 kg, 121.3 lb. ❖ ❖ ❖ ❖ HDD (Option): 6 GB or more • Capacity for Document Server 2 GB • Capacity for Memory sorting 1.5 GB • Capacity for others 2.5 GB or more...
-
Page 234: Document Feeder (Option)
Specification Document Feeder (Option) ❖ ❖ ❖ ❖ Mode: ADF mode, Batch mode, SADF mode, Mixed Size mode, Custom Size origi- nals mode ❖ ❖ ❖ ❖ Original size: L – A5 KL • A3 • 11" × 17" " × 8 L –... -
Page 235: 500-Sheet Finisher (Option)
500-Sheet Finisher (Option) 500-Sheet Finisher (Option) ❖ ❖ ❖ ❖ Paper size: L , B4 L , A4 KL , B5 K , 11" × 17" L , 11" × 14" L , 8 " × 14" " × L , 8 "... -
Page 236: 1000-Sheet Finisher (Option)
Specification 1000-Sheet Finisher (Option) Finisher Proof Tray: ❖ ❖ ❖ ❖ Paper size: L , B4 L , A4 KL , B5 KL , A5 KL , B6 L , A6 L , Postcard L , 11" × 17" L , 11"... - Page 237 1000-Sheet Finisher (Option) ❖ ❖ ❖ ❖ Power consumption: Less than 50W (power is supplied from the mainframe) ❖ ❖ ❖ ❖ Dimensions (W × × × × D × × × × H): 527 × 520 × 790mm, 20.8" × 20.5" × 31.1" ❖...
-
Page 238: Shift Sort Tray (Option)
Specification Shift Sort Tray (Option) ❖ ❖ ❖ ❖ Paper capacity: " × 11" K , 8 K or smaller) (80g/m 250 sheets (A4 , 20 lb.) " × 14" or larger) (80g/m L , 8 125 sheets (B4 , 20 lb.) ❖... -
Page 239: Duplex Unit (Option)
Duplex Unit (Option) Duplex Unit (Option) ❖ ❖ ❖ ❖ Paper size: " × 8 " × 10 L , B4 L , A4 KL , B5 KL , A5 L , 5 L , 7 KL , 8" " "... -
Page 240: Internal Tray 2 (1 Bin Tray) (Option)
Specification Internal tray 2 (1 bin tray) (Option) ❖ ❖ ❖ ❖ Number of bins: ❖ ❖ ❖ ❖ Available paper size: L , B4 L , A4 KL , B5 KL , A5 K , 11" × 17" L , 8 "... -
Page 241: Bypass Tray (Option)
Bypass Tray (Option) Bypass Tray (Option) ❖ ❖ ❖ ❖ Paper size: L – A6 L , 11" × 17" L – 5 " × 8 • Standard size: A3 " • Custom size: Vertical (100 – 297mm, 4.0" – 11.7"), Horizontal (148 – 432mm, 5.9"... -
Page 242: Large Capacity Tray (Lct) (Option)
Specification Large Capacity Tray (LCT) (Option) ❖ ❖ ❖ ❖ Paper size: " × 11" K , 8 ❖ ❖ ❖ ❖ Paper weight: 60 – 90g/m , 16 – 24 lb. ❖ ❖ ❖ ❖ Paper capacity: 2,000 sheets (80g/m , 20 lb.) ❖... -
Page 243: Paper Tray Unit (Option)
Paper tray unit (Option) Paper tray unit (Option) ❖ ❖ ❖ ❖ Copy paper weight: 60 – 90g/m (16 – 24 lb.) ❖ ❖ ❖ ❖ Available paper size: L , B4 L , A4 KL , B5 KL , A5 L , 11" × 17" L , 8 "... -
Page 244: Index
INDEX Date Stamp , 133 1000-sheet finisher , 7 Designate , 145 500-Sheet Finisher , 7 Directional Magnification (%) , 81 Directional Size Magnification (Inch) , 83 Display , 10 Access to the Machine , 209 Display panel , 8 , 10 Adding Staples , 172 Document Feeder , 222 Adding Toner , 162... - Page 245 Program Changing , 68 Job Preset , 70 Deleting , 69 Recalling , 69 Storing , 67 Program key , 8 Large Capacity Tray (LCT) , 7 , 230 Programs , 67 Loading Paper , 160 Large Capacity Tray (LCT) , 161 Tray 1-4 , 160 Reduce/Enlarge , 74 Reducing , 74...
- Page 246 Toner , 27 Toner Bottle Storage , 27 Two-sided Copies , 85 , 88 User Stamp , 129 User Tools Copy/Document Server Features , 179 User Tools/Counter key , 8 Ventilation holes , 5 Zoom , 77...
-
Page 247: System Settings
Operating Instructions System Settings Type for 2522/2527/2212/2712/5622/5627/Aficio 1022/1027 Read this manual carefully before you use this product and keep it handy for future Printed in The Japan reference. UE USA B027-6507 For safety, please follow the instructions in this manual. - Page 248 Introduction This manual contains detailed instructions on the operation and maintenance of this machine. To get maximum versatility from this machine all operators should carefully read and follow the instructions in this manual. Please keep this manual in a handy place near the machine. Please read the Safety Information before using this machine.
- Page 249 Note to users in the United States of America Notice: This equipment has been tested and found to comply with the limits for a Class B digital device, pursu- ant to Part 15 of the FCC Rules. These limits are designed to provide reasonable protection against harmful interference in a residential installation.
-
Page 250: Copyrights And Trademarks
Copyrights and Trademarks Trademarks ® Ethernet is a registered trademark of Xerox Corporation. ® ® PostScript and Acrobat are registered trademarks of Adobe Systems Incorpo- rated. Apple Talk, Apple, Macintosh are registered trademarks of Apple Computer, In- corporated. Novell, and Netware are registered trademarks of Novell, Inc. Information about Installed Software expat Expat(Version 1.1). - Page 251 NetBSD Copyright Notice of NetBSD For all users to use this product: This product contains NetBSD operating system: For the most part, the software constituting the NetBSD operating system is not in the public domain; its authors retain their copyright. The following text shows the copyright notice used for many of the NetBSD source code.
- Page 252 Authors Name List All product names mentioned herein are trademarks of their respective owners. The following notices are required to satisfy the license terms of the software that we have mentioned in this document: • This product includes software developed by the University of California, Berkeley and its contributors.
- Page 253 JPEG LIBRARY • The software installed on this product is based in part on the work of the In- dependent JPEG Group.
-
Page 254: Energy Star Program
ENERGY STAR Program As an ENERGY STAR Partner, we have determined that this machine model meets the ENERGY STAR Guidelines for energy efficiency. The ENERGY STAR Guidelines intend to establish an international energy-saving system for developing and introducing energy-efficient office equipment to deal with environmental is- sues, such as global warming. - Page 255 • Duplex Priority The ENERGY STAR Program recommends use of the Duplex function. By conserving paper resources this function is less of a burden to the environ- ment. For applicable machines, duplex function (one-sided originals→ two- sided copies) can be selected preferentially when the operation switch or the main power switch is turned on, the{ { { { Energy Saver} } } } key is pressed, or the ma- chine resets itself automatically.
- Page 256 How to Read this Manual Symbols In this manual, the following symbols are used: R WARNING: This symbol indicates a potentially hazardous situation that might result in death or serious injury when you misuse the machine without following the in- structions under this symbol.
- Page 257 TABLE OF CONTENTS Manuals for this Machine................1 Machine Types.................... 2 Additional Functions Provided by Internal Options........ 3 Copy Mode..................... 3 Facsimile Mode (Option) ................3 Printer Mode (Option)..................3 Scanner Mode (Option).................. 3 1. Basics Connecting the Machine ................5 Requirements....................
- Page 258 3. Document Server Overview....................39 Process ......................40 Relationship between Document Server and Other Functions.... 41 Features and Benefits ................42 On Demand Printing..................42 File Merge Printing ..................43 Facsimile Resend..................45 Operation from a Computer ................. 46 Scanning Originals................... 47 Scanning in Document Server Mode ............
- Page 259 5. Appendix Other Functions..................103 Inquiry ......................103 Changing the Display Language ..............104 Displaying the Total Counter..............104 INDEX....................... 105...
-
Page 260: Manuals For This Machine
Manuals for this Machine This is a multi-functional machine combining copier, facsimile, printer and scan- ner functions. This manual describes procedures common to these functions. Each function's reference describes the operational procedures for that func- tions. Please consult the manual that suits your needs. ❖... -
Page 261: Machine Types
Machine Types This machine comes in two models which vary in copy speed. To make sure which model you have, see the inside front cover. Type 1 Type 2 Copy speed 22 copies/minute 27 copies/minute " × 11"K) " × 11"K) (A4K, 8 (A4K, 8... -
Page 262: Additional Functions Provided By Internal Options
Additional Functions Provided by Internal Options You can expand the capabilities of Scanner Mode (Option) this machine to include fax functions. When you want to add a function, You can use this machine as a scan- contact your sales or service represen- ner. -
Page 264: Basics
1. Basics Connecting the Machine Make sure that the shape and the position of the connector are as shown in the illustration. Note ❒ The Ethernet Board (for Ethernet interface) and the IEEE1394 Board (for IEEE1394 interface) cannot be installed in the machine at the same time. The illustration below shows all interface connectors for explanatory purposes only. -
Page 265: Requirements
Basics Requirements Requirements Before using this machine, make sure that all the environmental and electrical requirements have been met. Connect the machine to the host computer using the parallel port, Network Interface Board, or both. Make sure that all the cables, connectors, and electrical outlets necessary to at- tach the machine to the host computer or network are present. -
Page 266: Connecting The Network Cable To The Network
Connecting the Machine Note ❒ Consult your network administrator before connecting the machine to a net- work. ❒ Make sure to use a properly shielded and grounded cable (UTP, STP, Catego- ry/Type5) for the connection to the host computer (and/or HUB) in order to meet FCC and EMC Directive 89/336/EEC emission guidelines. - Page 267 Basics Indicators on Network Interface Board ZFFH020E Indicator (green) Indicator (yellow) Turns green while the machine is con- Turns yellow while 100 BASE-TX is oper- nected to the network correctly. ating. Turns off while 10 BASE-T is operating.
-
Page 268: Turning On The Power
Turning On the Power Turning On the Power To turn the machine on, press the op- Turning On the Main Power eration switch. A A A A Note Make sure that the power cord is ❒ This machine automatically enters firmly plugged into the wall out- Energy Saver mode or turns itself let. -
Page 269: Turning On The Power
Basics Turning On the Power Turning Off the Power A A A A A A A A Press the operation switch to Make sure that the exposure glass make the On indicator go on. or the document feeder is in the right position. - Page 270 Turning On the Power Turning Off the Main Power Preparation Usually keep the main power switch turned on. Before you turn it off, be sure to read the "Important" information below and take the following pro- cedural steps: A A A A Make sure that the On indicator is off.
-
Page 271: Configuring The Network
Basics Configuring the Network Configuring the Network Preparation To connect the machine to a network, you must first install the optional Net- work Interface Board Type 1027 and at least 64MB of memory in the machine. Network Interface Board Type 1027 comes packaged with Printer Controller Type 1027 and Printer/Scanner Controller Type 1027. -
Page 272: Configuring The Network With The Operation Panel
Configuring the Network Configuring the Network with the Operation Panel This section describes the basic procedures. Please make the settings appropriate for the network you are using. Important ❒ These settings should be made by your systems administrator or after con- sulting with your systems administrator. - Page 273 Basics Network Settings The following describes the settings required to use the machine in a network. For more information about the settings, see p.68 “Settings You Can Change with the User Tools”. A A A A Press { { { { User Tools/Counter} } } } . ZFFH150N The “User Tools Main Menu”...
- Page 274 Configuring the Network E E E E Click [Effective Protocol]. Note ❒ Consult the network administrator for help with these settings. ❒ You must configure IP Address for using TCP/IP protocol. You don't have to configure it if Networkboot is DHCP. ❒...
- Page 275 Basics C C C C Use the number keys to enter the IP address. Note ❒ Press the [← ← ← ← ] and [→ → → → ] keys to move to the next entry field. ❒ If you enter the wrong IP address, press [Clear] and re-enter the IP ad- dress.
- Page 276 Configuring the Network C C C C Press [DHCP], and then press [OK]. When using NetWare To use the machine on NetWare, be sure to select the type of [NW frame]. You can select the following frame types: • Auto select (Default) •...
- Page 277 Basics G G G G Press [List/Test Print] to print out the settings. Note ❒ Skip this step and go to step if your machine is not equipped with the printer and scanner functions. A A A A Press [Printer Features]. B B B B Press [List/Test Print].
- Page 278 Configuring the Network A A A A Press { { { { User Tools/Counter} } } } . ZFFH150N The [User Tools Main Menu] appears. B B B B Click [System Settings]. C C C C Click [File Transfer]. Assigning a Delivery Server IP Address Note ❒...
- Page 279 Basics B B B B Use the number keys to enter the delivery server IP address. Note ❒ Press the [← ← ← ← ] or [→ → → → ] key to move to the adjacent entry field. ❒ To correct the delivery server IP address entered, press [Clear], and then enter the correct delivery server IP address.
- Page 280 Configuring the Network B B B B Use the number keys to enter the recall interval time. Note ❒ To correct the recall interval time entered, press [Clear], and then enter the correct recall interval time. C C C C Click [OK]. Setting the Number of Recalls A A A A Click [Number of Recalls].
- Page 281 Basics E E E E Press { { { { User Tools/Counter} } } } . The new settings become effective and the display returns to the main func- tion menu. Note ❒ You can also click the [Exit] key on the [User Tools Main Menu] to return to the main function menu.
-
Page 282: Combined Function Operations
2. Combined Function Operations Control Panel ZFFH160N { { { { Interrupt} } } } key Indicators Show errors and machine status. Press to make interrupt copies during a copy run. { { { { User Tool/Counter} } } } key Main power indicator and power •... - Page 283 Combined Function Operations { { { { Sample Copy} } } } key Press to make a single set of copies or prints to check for poor copying or print- ing before making multiple sets of copies or prints. { { { { Start} } } } key Press to start copying, scanning, or print- ing documents stored on the Document Server.
-
Page 284: Changing Modes
Changing Modes Changing Modes You can use this machine not only as a copier, but optionally as a fax, printer and scanner machine as well. Press the { { { { Copy} } } } , { { { { Document Server} } } } , { { { { Facsimile} } } } , or { { { { Printer} } } } , { { { { Scanner} } } } key to use each function. -
Page 285: Copy Mode
Combined Function Operations Copy Mode You can make basic copies, and en- Limitation large/reduce, combine, or use vari- ❒ You cannot use the interrupt copy ous other copy functions to make function in the following cases: copies. You can also add options to •... - Page 286 Copy Mode D D D D Press the { { { { Interrupt} } } } key again. Reference ⇒ p.35 “Multi-Access” The machine resumes the printing job of the received fax document. ❖ ❖ ❖ ❖ When “Print Priority” = “Fax”, “Printer”, or “Display”...
-
Page 287: Document Server Mode
Combined Function Operations Document Server Mode You can store files in the Document Note Server. ❒ When the optional Internal Tray, Internal Shift Tray, Finish- Limitation er 500, or Finisher 1000 is in- ❒ The Document Server function re- stalled on the machine, you can quires the optional Hard Disk specify an output tray to which Unit. -
Page 288: Interrupt The Operating Function And Start Storing
Document Server Mode Storing Documents while Copying Storing Documents from Printer You can copy while storing files. If you want to store files from the printer, use this function from the A A A A Place originals. printer driver. B B B B Press the { { { { Copy} } } } key. -
Page 289: Facsimile Mode
Combined Function Operations Facsimile Mode Changing to Facsimile Mode Printing a Received Fax You can always use the machine as a When you are not copying, a received facsimile when you are not copying. fax is printed automatically. You do not need to switch to Facsimile mode. -
Page 290: Sending A Fax
Facsimile Mode Sending a fax while printing Sending a Fax A A A A Press the { { { { Facsimile} } } } key to switch Sending a fax while printing a received to the fax display. Printing is interrupted. B B B B Complete the usual operations Scanning originals for memory... -
Page 291: Printer Mode
Combined Function Operations Printer Mode Changing to Printer Mode Printing To print from an application being The machine can receive print data run on a personal computer, you while another mode is functioning. need not switch to printer mode on A A A A Print the job from your computer. -
Page 292: Scanner Mode
Scanner Mode Scanner Mode Using the Network TWAIN Scanner Changing to Scanner Mode A A A A This scanner unit has two scanner Place originals. functions: “Network TWAIN Scan- B B B B Configure the scan options using ner” and “Network Delivery Scan- the computer. -
Page 293: Interrupting Scanning
Combined Function Operations B B B B Remove the originals. Interrupting scanning C C C C Start the scan. If you want to scan while copying or faxing, follow the procedure below. Note ❒ When the scan is completed, press the { { { { Facsimile} } } } key and re- Scanning while copying start faxing. -
Page 294: Multi-Access
Multi-Access Multi-Access You can carry out another job using a different function while the current job is being performed. This allows you to handle your jobs efficiently regardless of how the machine is being used. For example: • While making copies, you can scan documents to store in the Document Serv- •... - Page 295 Combined Function Operations - Sample operations This chart is based on the following conditions: • When “Print priority” is set to “Interrupt” (⇒ “Print Priority” on p.69 “Print Priority”) • For details on operations under other conditions, contact your service repre- sentative.
- Page 296 Multi-Access Mode after you select Copy Facsimile Printer Mode before you select ❍ ❍ ❍ ❍ ❍ ❍ ❍ ❍ ❍ ❍ ❍ → → → ❍ ❍ ❍ ❍ ❍ ❍ ❍ Data Reception ❍ ❍ ❍ ❍ ❍ ❍ ❍ ❍ ❍ ❍ ❍ ❍ → → ❍ ❍ ❍ ❍ ❍ ❍ ❍ Sort Print ❍...
- Page 297 Combined Function Operations Limitation ❒ Stapling cannot be used at the same time for multiple functions. Note ❒ A machine with the Finisher 500 installed cannot accept other jobs while printing with the stapling operation. ❒ A machine with the Finisher 1000 installed, that is printing with the stapling "...
-
Page 298: Document Server
3. Document Server Overview The Document Server enables you to save documents in the machine memory and then edit and print them as you want. You can save the following: • Data from documents scanned using the document feeder • Data from documents scanned using the exposure glass •... -
Page 299: Process
Document Server Process A A A A Prepare the documents you want to save. B B B B Save the documents. • The documents are saved in the machine memory. C C C C Print the documents, send faxes, and transfer the documents and the data to a PC. -
Page 300: Relationship Between Document Server And Other Functions
Relationship between Document Server and Other Functions Relationship between Document Server and Other Functions The following table lists the relationship between the Document Server and oth- er machine functions. How to issue Printing Sending Function name storage Displaying a list documents documents instructions... -
Page 301: Features And Benefits
Document Server Features and Benefits On Demand Printing Use to print any saved document as required. ❖ ❖ ❖ ❖ Your current situation might be… • When you need to print multiple sets of documents 2-sided and stapled to- gether, you normally print the originals, make duplex copies and then sta- ple them together manually. -
Page 302: File Merge Printing
Features and Benefits Note ❒ Stapling and punching require the installation of the optional finisher. ❒ You can use a password to prevent others from printing saved documents. File Merge Printing You can combine multiple scanned documents to print them in one set. ❖... - Page 303 Document Server ❖ ❖ ❖ ❖ With the Document Server Set the print order to print documents together. Merge and print fax documents, document data sent, and originals that have been scanned. Merge documents created with different applications or created on different computers.
-
Page 304: Facsimile Resend
Features and Benefits Facsimile Resend You can print or resend a sent document received by fax. This is useful when you want to send a large document that needs to be sent several times, since you do not have to scan the document each time. ❖...
Need help?
Do you have a question about the Aficio 1022 and is the answer not in the manual?
Questions and answers