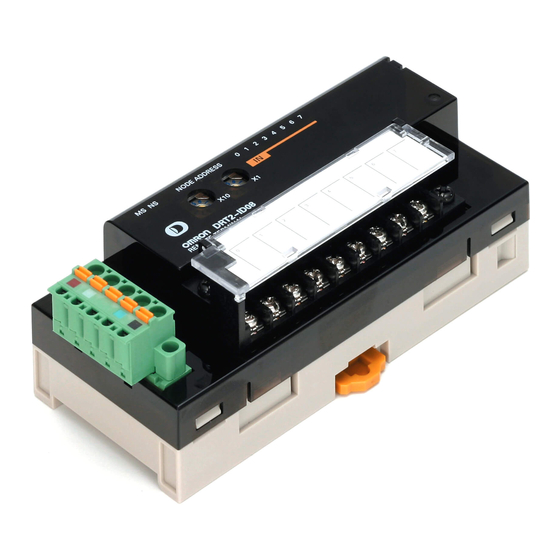
Omron DRT2 SERIES DEVICENET SLAVES - OPERATION MANUAL 04-2008 Operation Manual

Omron DRT2 SERIES DEVICENET SLAVES - OPERATION MANUAL 04-2008 Operation Manual

Devicenet slaves
Hide thumbs Also See for DRT2 SERIES DEVICENET SLAVES - OPERATION MANUAL 04-2008:
Table of Contents

Advertisement

Cat. No. W404-E1-07
DRT2 Series
DeviceNet Slaves
OPERATION MANUAL

Advertisement

Table of Contents
loading

Summary of Contents for Omron DRT2 SERIES DEVICENET SLAVES - OPERATION MANUAL 04-2008

  • Page 1 Cat. No. W404-E1-07 DRT2 Series DeviceNet Slaves OPERATION MANUAL...
  • Page 2 DRT2 Series DeviceNet Slaves Operation Manual Revised April 2008...
  • Page 4  OMRON, 2002 All rights reserved. No part of this publication may be reproduced, stored in a retrieval system, or transmitted, in any form, or by any means, mechanical, electronic, photocopying, recording, or otherwise, without the prior written permission of OMRON.
  • Page 6 Maintenance Mode Window and Main Window ........
  • Page 7: Table Of Contents

    Advanced Environment-resistive Terminals ........
  • Page 8 Please read this manual carefully and be sure you understand the information provided before attempting to install or operate the DeviceNet Smart Slave Units. Be sure to read the precautions provided in the following section. The following manuals also cover information related to DeviceNet applications. Use the DeviceNet Operation Manual together with other required manuals.
  • Page 9 Section 7 provides the specifications, terminal arrangements, mounting procedures, and connection methods of Analog I/O Terminals. Information is included on types of I/O data that can be allocated, allocation methods and procedures, and math operation processing. Setting methods using the Con- figurator are also described.
  • Page 10 WHETHER SUCH CLAIM IS BASED ON CONTRACT, WARRANTY, NEGLIGENCE, OR STRICT LIABILITY. In no event shall the responsibility of OMRON for any act exceed the individual price of the product on which liability is asserted. IN NO EVENT SHALL OMRON BE RESPONSIBLE FOR WARRANTY, REPAIR, OR OTHER CLAIMS...
  • Page 11 The following are some examples of applications for which particular attention must be given. This is not intended to be an exhaustive list of all possible uses of the products, nor is it intended to imply that the uses listed may be suitable for the products: •...
  • Page 12 PERFORMANCE DATA Performance data given in this manual is provided as a guide for the user in determining suitability and does not constitute a warranty. It may represent the result of OMRON's test conditions, and the users must correlate it to actual application requirements.
  • Page 14 Conformance to EC Directives ........
  • Page 15: Intended Audience

    Intended Audience Intended Audience This manual is intended for the following personnel, who must also have knowledge of electrical systems (an electrical engineer or the equivalent). • Personnel in charge of purchasing FA systems. • Personnel in charge of designing FA systems.
  • Page 16: General Precautions

    !WARNING It is extremely important that a PLC and all PLC Units be used for the speci- fied purpose and under the specified conditions, especially in applications that can directly or indirectly affect human life. You must consult with your OMRON representative before applying a PLC system to the above mentioned applica- tions.
  • Page 17: Safety Precautions

    PLC operation. Not doing so may result in serious accidents. !WARNING Input only the specified range of voltage or current to a Unit. A current or volt- age exceeding the specified range may cause malfunction or fire. !WARNING Provide safety measures in external circuits (i.e., not in the Programmable...
  • Page 18: Operating Environment Precautions

    • Locations subject to possible exposure to radioactivity. • Locations close to power supplies. !Caution The operating environment of the PLC System can have a large effect on the longevity and reliability of the system. Improper operating environments can lead to malfunction, failure, and other unforeseeable problems with the PLC System.
  • Page 19: Application Precautions

    PLC to ensure safety. • Mount the Unit to a DIN Track or mount it with screws. • If the system is installed at a site with poor power supply conditions, take appropriate measures to ensure that the power supply remains within the rated voltage and frequency specifications.
  • Page 20 Application Precautions • Do not apply voltages or connect loads to the Output Units in excess of the maximum switching capacity. • Do not apply voltages to the Input Units in excess of the rated value. • After replacing a CPU Unit or Special I/O Unit, resume operation only after transferring to the new CPU Unit or Special I/O Unit the contents of the DM Area, HR Area, and other data required for resuming operation.
  • Page 21: Conformance To Ec Directives

    EMC Directives OMRON devices are designed so that they comply with the related EMC Directives so that they can be more easily built into other devices or the over- all machine. The actual products have been checked for conformity to EMC Directives (see the following note).
  • Page 22: Smart Slaves And Features

    DRT2 Slaves ..........1-2-1 General-purpose Slaves ........1-2-2 Environment-resistive Slaves .
  • Page 23: Drt2 Features

    One difference with previous Slaves is that an area for Smart Slave status information can be allocated to the Smart Slaves within the IN Area of the Master. This is in addition to real I/O. (Settings are per- formed using the Configurator or explicit messages.) •...
  • Page 24 User-set names can be assigned and saved in the Slave for each Unit. I/O Comments User-set names can be assigned and saved in the Slave for each of the I/O contacts, such as sensors or valves, that are connected to the Slave.
  • Page 25 In contrast to the existing Units, which could only measure I/O (OUT-IN), these Units can also measure operating times for IN-IN and OUT-OUT combina- tions. In addition, the trigger edge (ON to OFF or OFF to ON) can be selected and input and output numbers can be freely combined for flexible settings.
  • Page 26 In contrast to the existing Units, which could only measure I/O (OUT-IN), these Units can also measure operating times for IN-IN and OUT-OUT combina- tions. In addition, the trigger edge (ON to OFF or OFF to ON) can be selected and input and output numbers can be freely combined for flexible settings.
  • Page 27 The status can be checked at the Master using the Off-wire Detection Flag. This function is valid only for the input ranges 4 to 20 mA and 1 to 5 V. With Temperature Input Terminals, disconnections can be detected for each sensor input.
  • Page 28: Drt2 Slaves

    DRT2 Slaves Section 1-2 DRT2 Slaves The DRT2-series Smart Slaves are classified into the following categories. • General-purpose Slaves Slaves with digital I/O functions using standard connectors for communi- cations cables. • Environment-resistive Slaves Slaves with I/O functions using round waterproof connectors for communi- cations cables.
  • Page 29 DRT2 Slaves Section 1-2 Name Appearance I/O points Model number Remarks Sensor Connector 16 input points (NPN) DRT2-ID16S Use industry standard Terminals with Tran- sensor connectors. 16 input points (PNP) DRT2-ID16S-1 sistors 8 input points/8 output DRT2-MD16S points (NPN) 8 input points/8 output...
  • Page 30: Environment-Resistive Slaves

    DRT2 Slaves Section 1-2 Name Appearance I/O points Model number Remarks Screw-less Clamp 16 input points (NPN) DRT2-ID16SL Without detection func- Terminal with Tran- tion 16 input points (PNP) DRT2-ID16SL-1 sistors 16 output points (NPN) DRT2-OD16SL 16 output points (PNP)
  • Page 31: Analog Slaves

    4 input points DRT2-AD04 Terminal block mounted/ removed using screws. (0 to 5 V, 1 to 5 V, 0 to 10 V, −10 to 10 V, 0 to The DRT2-AD04H is a High- 20 mA, 4 to 20 mA) resolution Terminal (1/30,000 FS).
  • Page 32: Smart Slave Feature Support

    1. The Operation Time Monitor cannot be used with the DRT2-@D08(-1). 2. The DRT2-@D08(-1) and DRT2-MD16(-1) cannot be expanded with an Ex- pansion Unit. 3. The Contact Operation Counter and Total ON Time Monitor cannot be used at the same time for the same contact.
  • Page 33 Moving average Setting the number of AD conversion points Peak/bottom hold Top/valley hold Rate of change Comparator Communications error output Note The Contact Operation Counter and Total ON Time Monitor cannot be used at the same time for the same contact.
  • Page 34 Moving average Setting the number of AD conversion points Peak/bottom hold Top/valley hold Rate of change Comparator Communications error output The Contact Operation Counter and Total ON Time Monitor cannot be used at the same time for the same contact.
  • Page 35 Setting the number of AD conversion points No Peak/bottom hold Top/valley hold Rate of change Comparator Communications error output Note The Contact Operation Counter and Total ON Time Monitor cannot be used at the same time for the same contact.
  • Page 36 Temperature range timing function Input temperature variation detection function Note (1) The Operation Time Monitor can be used with the DRT2-@D04CL(-1). (2) The Contact Operation Counter and Total ON Time Monitor cannot be used at the same time for the same contact.
  • Page 37 Rate of change Comparator Communications error output Top/valley count function Temperature range timing function Input temperature variation detection function Note The Contact Operation Counter and Total ON Time Monitor cannot be used at the same time for the same contact.
  • Page 38: Installing And Connecting Slaves

    DRT2 Slaves Section 1-2 1-2-5 Installing and Connecting Slaves Slave type Communi- Name Model Slave I/O con- Internal I/O power cations installation nection power sup- supply cables method General-pur- Standard Remote I/O DRT2-ID08 DIN Track M3 termi- Shares Requires pose Slaves...
  • Page 39 DRT2-OD32SLH DRT2-OD32SLH-1 DRT2-MD32SLH DRT2-MD32SLH-1 Note Use the following table to determine the I/O power supply for the Expansion Unit. Device combination I/O power supply to Expansion Unit Basic Input Unit (IN) + Expansion Input Not required. (I/O power supply shared Unit (IN): with Basic Unit.)
  • Page 40 DRT2 Slaves Section 1-2 Device combination I/O power supply to Expansion Unit Basic Output Unit (OUT) + Expansion Required. (I/O power supply required for Input Unit (IN): both Units.) Example: DRT2-OD16+XWT-ID16 Basic Output Unit (OUT) + Expansion Required. (I/O power supply required for Output Unit (OUT): both Units.)
  • Page 41 DRT2 Slaves Section 1-2...
  • Page 42: Example System Startup

    Connecting Cables ........
  • Page 43: Basic Procedures And Configuration Examples

    1,2,3... 1. Separate and lay the cables. 2. Mount the Master Unit and specify the correct settings. Refer to page 24. 3. Mount the Slave Units and specify the correct settings. Refer to page 25. 4. Mount other devices to be connected to the Network. Refer to page 26.
  • Page 44: Preparations

    Flexible branching of cables is possible by using either T-branch Taps or multi- drop connections. Restrictions on the maximum network length and total branch line length depend on the baud rate and type of cable used. For details on network con- figurations and specifications, refer to the DeviceNet Operation Manual (W267).
  • Page 45: Setting And Wiring Hardware

    The components, functions, and switch settings for the CS1W-DRM21, CS1W-DRM21-V1 or CJ1W-DRM21 Master Unit mounted to a CS/CJ-series PLC are shown as an example in the following diagram. For information on switch settings, refer to the operation manual for the Mas- ter Unit. CS1W-DRM21 (-V1)
  • Page 46: Mounting And Setting Slaves

    Screws is provided as the node connector. Mounting The Master Unit is mounted to the Backplane of the PLC in the same way as other Units are normally mounted. CJ-series Master Units have no Backplane, so connect the Units together by joining the connectors. For details on mount- ing Master Units to PLCs, and PLCs to control panels, refer to the applicable PLC Operation Manual.
  • Page 47: Mounting Connecting Devices

    Section 2-3 2-3-3 Mounting Connecting Devices The following connecting devices require being mounted: • T-branch Taps: Secure to the control panel with screws, or mount to a DIN Track. • Terminal-block Terminating Resistors: Secure to the control panel with screws.
  • Page 48: Starting Communications

    I/O tables must be created in the CPU Unit to distinguish between the different Slaves mounted to the PLC. Turn ON the PLC to which the Master Unit is mounted, connect the Peripheral Devices to the PLC, and create the I/O tables.
  • Page 49: Starting The System

    For normal operations, always enable the scan lists. Precautions User I/O Allocations The user can allocate any words for Slave I/O for the DeviceNet I/O Areas (IN Area, OUT Area) in the Master Unit. When user allocations are used, scan lists must be created with a DeviceNet Configurator and registered in the Master Unit.
  • Page 50: Checking Operation

    Enable the Master Unit functions. Set the Master Unit function enable switch (bit 06 of word n) from OFF to ON. Clear the scan lists. Set the scan list clear switch (bit 01 of word n) from OFF to ON.
  • Page 51 Checking Operation Section 2-5 I/O between Remote I/O Create ladder programs in the PLC of the Master Unit, and check that when Terminals the switch on the DRT2-ID16 Input Terminal turns ON, the indicator on the DRT2-OD16 Output Terminal is ON.
  • Page 52: Common Slave Specifications

    Smart Slaves is also described here. Common Slave Specifications ........
  • Page 53: Common Slave Specifications

    The MS (Module Status) indicator displays the status of a node on the net- work. The NS (Network Status) indicator displays the status of the entire network. The MS and NS indicators can be green or red and they can be ON, flashing, or OFF. Indicator...
  • Page 54 Communications error (Unit has detected that network communications are not possible). Node address duplication Bus Off error Flashing Connection time-out Communications time-out. Not lit Not powered/Not online Checking for node address duplication at the Master. Switch settings are incorrect. Power supply is OFF.
  • Page 55: Devicenet Remote I/O Communications

    Only possible with user allocation and if possible. the Master Unit is a CS/CJ-series DeviceNet Unit. Smart Slave I/O Smart Slave data can be allocated to the Master Unit for remote I/O communi- Allocation Methods cations in any of the ways described below.
  • Page 56 Type Allocating default I/O data Allocating selected I/O data (patterns) Description I/O data is allocated to fixed addresses in the Selected I/O data (pattern) is allocated to fixed Master Unit in order of node address. addresses in the Master Unit.
  • Page 57: I/O Allocations For Smart Slaves

    CS/CJ-series Master Units. Setting method 1. In the Master’s Edit Device Parameters Window, select the Smart Slave to be set, and specify the with Configurator connection in the Advanced Setting Window. Select the I/O data (pattern) in the connection path setting.
  • Page 58 Unit Maintenance Flag 0: Within range (Lower than set monitor value) 1: Out of range (Same as or higher than set monitor value) Sensor Disconnected Flag (Screw-less Clamp Input and I/O Terminals, and Environment-resistive Input Terminals only) or External Load Disconnected...
  • Page 59 Connected Component Maintenance Flag 0: Within range (all I/O points are lower than set monitor value) 1: Out of range (one or more I/O point is same as or higher than set monitor value) Cold Junction Compensator Off-wire Flag...
  • Page 60 Allocating Real I/O Data The Generic Status Flags are for providing notification of the status of the and Generic Status Flags Smart Slave to the host. They are allocated to the Master Unit’s IN Area and Together consist of 8 bits.
  • Page 61 Note If analog data is allocated to a COS connection, a frame will be sent to the host each analog conversion cycle. This will cause frames to be sent fre- quently, increasing network traffic and possibly affecting the communications cycle time.
  • Page 62 (DRT2-TS04T only) Flag The data (patterns) listed in the following tables can be allocated. Ether the default setting can be used or allocations can be made in the master using the Configurator ■ I/O Data for Analog Input Terminals (DRT2-AD04/AD04H)
  • Page 63: I/O Allocation With The Configurator (Ver. 2.@ Or Later)

    When performing user-defined allocation, in addition to the above, allocate Slave I/O in the Master’s Edit Device Parameters Window. Note Perform I/O allocation using this method if the Master Unit is a CVM1/CV- series DeviceNet Master Unit, a C200HX/HG/HE/HS DeviceNet Master Unit, or another company’s Master Unit.
  • Page 64 1. For details on connections and connection paths, refer to Appendix B De- viceNet Connections in the DeviceNet Units Operation Manual (W380). 2. Master Unit settings take precedence and so it is not necessary to set the Slave’s default connection path.
  • Page 65 1,2,3... 1. In the Network Configuration Window, select the Master Unit, and double- click or click the right mouse button and select Parameter – Edit – Gener- al, and then select the Smart Slave to be set. 2. Click the Advanced Setup Button, click the Connection Tab, and select User Setup.
  • Page 66 DeviceNet Remote I/O Communications Section 3-2 Note If there are checks in the checkboxes but the connection path settings are left blank, the following settings will be made automatically. IN (Smart Slave to Master Unit) OUT (Master Unit to Smart Slave)
  • Page 67 Section 3-2 5. Click the OK Button. 6. In the same way as above, click the I/O Allocation (OUT) Tab and edit the I/O allocations. Set to block 1, allocated 3200. 7. Return to the General Tab Page and click Download.
  • Page 68: And Environment-Resistive Slaves

    Normal Window ........
  • Page 69: Maintenance Mode Window And Main Window

    Normal Window The Normal Window is displayed when the DeviceNet Configurator is started. It has a while background. Normally this window is used to set parameters and other settings. Double-click any Slave in the Normal Window to enable setting and editing device parameters for the Slave. Refer to 4-2 Common Slave Functions for information on setting and editing Slave functions.
  • Page 70: Maintenance Mode Window

    Note The Maintenance Mode Window is not refreshed continuously. The status that is display is read when the network is uploaded. To see the most recent sta- tus, click the refresh maintenance information icon to read the current status information, or use the Device Monitor Window to see continuously updated Smart Slave status.
  • Page 71 Warning icon Maintenance Information Window Maintenance Double-click the icon of the DRT2-series Smart Slave that is indicated by the Information Window warning icon to display the Maintenance Information Window for the individual Slave. Refer to the section on the Maintenance Information Window for each Slave for details on the information that is displayed.
  • Page 72: Device Monitor Window

    Maintenance Mode Window and Main Window Section 4-1 OUT Tab and IN Tab According to the maintenance information, select the OUT Tab, IN Tab, or Operation Time Tab to view more detailed information. The locations where the monitor value has...
  • Page 73: Common Slave Functions

    DIP switch as with previous models. After the power is turned ON, as soon as communications are established with the Master Unit, the baud rate is set, and the setting is saved until the next time the power is turned ON.
  • Page 74: Network Power Supply Voltage Monitor

    Slave. The monitor voltage (factory setting: 11 V) can be maintained in the Slave and the Network Power Voltage Error Flag in the Sta- tus Area will be turned ON when the voltage drops below the set monitor value.
  • Page 75: Unit Conduction Time Monitor

    The monitor value can be maintained in the Slave and the Unit Maintenance Flag in the Status Area will be turned ON when the total time reaches the set monitor value. The total ON time can be read using the Configurator or explicit messages.)
  • Page 76: Slave Comments

    6. Click the OK Button. 4-2-4 Slave Comments Function Overview The user can assign and record a name or comment for every Unit (up to 32 characters). The Configurator or explicit messages can be used to read and write these Unit names (comments). Configurator...
  • Page 77 Common Slave Functions Section 4-2 3. Select the General Tab. 4. Enter the desired name in the Comment field. 5. Click the Download Button, and then click the Reset Button to reset the Unit. 6. Click the OK Button. Setting Method 2 The procedure for this setting method is the same from both the Main Window and the Maintenance Mode Window.
  • Page 78: I/O Comments

    I/O Comments Function Overview The user can assign a name for each of the Unit's I/O contacts (up to 32 char- acters) and record it in the Unit. The connected device can be checked for each I/O contact, allowing faulty devices to be identified during remote main- tenance.
  • Page 79 Common Slave Functions Section 4-2 4. Double-click the I/O Comment field for the connected device that is to be assigned a name (comment). The following window will be displayed. En- ter the desired name and click the OK Button. 5. Select the General Tab, click the Download Button, and then click the Re- set Button to reset the Unit.
  • Page 80: Communications Error History Monitor

    Before saving the comments to an I/O com- ment file, make the settings using setting method 2. 4. Double-click the Comment field of the terminal to be set and enter the de- sired name. 5. Click the OK Button.
  • Page 81: Last Maintenance Date

    1,2,3... 1. Turn ON the power to the DRT2-series Smart Slave. 2. Click the right mouse button over the icon of the DRT2-series Smart Slave to be set in the Network Configuration Window, and select Monitor. 3. Select the Error History Tab in the Monitor Device Window. The commu- nications error history for the last four errors that occurred will be dis- played, as shown in the following window.
  • Page 82: Functions Of General-Purpose Slaves And Environment-Resistive Slaves

    Setting Using the DeviceNet Configurator 1,2,3... 1. From the Main Window, double-click the icon of the Smart Slave to be set to display the Edit Device Parameters Window. (From the Maintenance Mode Window, click the right mouse button over the icon of the Smart Slave to be set and select Parameter and Edit to display the Edit Device Parameters Window.)
  • Page 83: Input Filter

    When input data changes to ON, the input data is read four times for the (Variable from 0 to 100 ms) period of the set interval (1/4 of 0 to 100 ms). If all values are ON, the input is turned ON. The ON timing is delayed according to the length of the ON response time.
  • Page 84 When input data changes to OFF, the input data is read five times for the (Variable from 0 to period of the set interval (1/5 of 0 to 65,535 ms). If all values are OFF, the 65535 ms) input is turned OFF. The OFF timing is delayed according to the length of the OFF response time.
  • Page 85: Power On Delay

    The I/O power is monitored, and input is stopped when the I/O power is OFF and for 100 ms after the I/O power is turned ON (i.e., until the power supply becomes stable). This function prevents incorrect input caused by inrush cur- rent at startup from connected devices when the I/O power is turned ON.
  • Page 86 Note 1. The Contact Operation Counter and Total ON Time Monitor cannot be used at the same time for a single contact. Select the function to be used under the Detection Mode heading. 2. The Contact Operation Counter will operate when the I/O power is ON only.
  • Page 87: Total On Time Monitor

    Slave. (The Configurator or explicit messages can be used to read the information.) The monitor value can be set in the Slave, and when the set number of opera- tions is reached, the Connected Component Maintenance Flag in the Status Area is turned ON.
  • Page 88 0.5 s Figure 1 In Fig. 2, the actual ON time is 0.5 s × 3 = 1.5 s. The reading will be taken twice during this ON time, so the total ON time will be measured as 2 s.
  • Page 89: Operation Time Monitor

    (e.g., input No. 1 and output No. 1 or input No 8 and output No. 8), it measures the time from when the output turns ON until the input turns ON.
  • Page 90 ON delay time when 3 ms or more. (If the ON delay is 5 ms, the display will be for 5 ms, 10 ms, 15 ms, and 20 ms.)
  • Page 91 Operation Time Flag Be careful of the following point when using a Unit that can use the operation time monitor function (i.e., Basic I/O Unit and Expansion Unit, Sensor Con- nector I/O Terminal, Three-tier Terminal Block, MIL Connector Terminal, or Screw-less Clamp Terminal).
  • Page 92 Enter the set value in the Operation Time field and click the OK Button. 5. Check that the value set in the Operation Time field is reflected in the Edit Device Parameters Window. Select the General Tab, click the Download Button, and then click the Reset Button to reset the Unit.
  • Page 93: Sensor Disconnected Detection

    The edge pattern can be set for monitoring at either the ON edge or the OFF edge. Finally click the OK Button. 5. Check that the value set in the Operation Time field is reflected in the Edit Device Parameters Window. Select the General Tab, click the Download Button, and then click the Reset Button to reset the Unit.
  • Page 94 2. For 16-point Input Units, the settings cannot be set to both enable and dis- able within the same connector. 3. After a sensor disconnection is detected, a delay of up to 1.2 s will occur before the Sensor Disconnected Flag turns ON.
  • Page 95: Detection Of Sensor Power Short-Circuit

    4. Double-click the name of the applicable terminal to display the following window. Enable off-wire (disconnection) detection and click the OK Button. 5. Select the General Tab, click the Download Button, and then click the Re- set Button to reset the Unit.
  • Page 96 Sensor Note Use a Power Supply Unit with a rated power supply of 50 W for the communi- cations power supply. A short-circuit is detected when the Unit's sensor power output current reaches or exceeds 100 mA per input connector. When a short- circuit occurs, the communications power supply may be temporarily inter- rupted.
  • Page 97: External Load Short-Circuit Detection

    1,2,3... 1. Turn ON the power to the DRT2-series Smart Slave. 2. Click the right mouse button over the icon of the DRT2-series Smart Slave to be set in the Network Configuration Window, and select Monitor. 3. Select the IN Tab from the Monitor Device Window. When a short-circuit is detected, the short-circuit status will be displayed in the Short-circuit field.
  • Page 98 Always use a Power Supply Unit with a rating of 100 W or higher if it uses a dropping overcurrent protection characteristic. Always use a Power Supply Unit with a rating of 150 W or higher if it uses intermittent overcurrent protection. The current limiter will protect the tran- sistor even if short-circuit detection is disabled.
  • Page 99 When the cause of the short-circuit is removed and the corresponding contact is correctly rewired, the short-circuit protection status is cleared by turning ON the I/O power or the communications power. When the I/O power is OFF or the output is OFF, the short-circuit protection status is maintained, so the shorted locations can be easily identified from the indicator status during on- site maintenance.
  • Page 100 2. From the Main Window, open the Network Configuration Window and dou- ble-click or click the right mouse button over the icon of the DRT2-series Smart Slave to be set. Select Parameter and Edit to display the Edit De- vice Parameters Window.
  • Page 101: 4-3-10 External Load Disconnected Detection

    (The factory setting is for manual recovery.) Note If an external load with low current consumption is connected, a disconnection may not be detected. Disable this function when the output current is 3 mA or less. Screw-less Clamp Terminal...
  • Page 102 2. From the Main Window, open the Network Configuration Window and dou- ble-click or click the right mouse button over the icon of the DRT2-series Smart Slave to be set. Select Parameter and Edit to display the Edit De- vice Parameters Window.
  • Page 103 4. Double-click the name of the applicable terminal to display the following window. Enable disconnection detection and click the OK Button. 5. Select the General Tab, click the Download Button, and then click the Re- set Button to reset the Unit.
  • Page 104 Connecting Communications Cables to the Nodes ... . . Mounting Terminating Resistors........
  • Page 105 Screw-less Clamp Terminals ........
  • Page 106: Common Specifications For General-Purpose Slaves

    Common Specifications for General-purpose Slaves Section 5-1 Common Specifications for General-purpose Slaves The following table lists specifications which are common to all General-pur- pose Slaves. For details of specifications for each Slave, refer to the following Slave specifications pages. Item Specifications...
  • Page 107 Common Specifications for General-purpose Slaves Section 5-1 Model Communications current Weight consumption XWT-ID16 (See note.) 10 mA max. 120 g max. XWT-ID16-1 (See note.) 10 mA max. 120 g max. XWT-OD08 (See note.) 4.5 mA max. 80 g max. XWT-OD08-1 (See note.) 4.5 mA max.
  • Page 108: Connecting Communications Cables To General-Purpose Slaves

    1,2,3... 1. Remove about 30 to 80 mm of the cable covering, being careful not to dam- age the mesh shield underneath. Do not remove more than necessary. Re- moving excessive cable covering may cause a short-circuit.
  • Page 109 Connecting Communications Cables to General-purpose Slaves Section 5-2 the other lines, but it is harder than the mesh shield and should be easily identified. Shield wire 3. Remove the exposed mesh shield, remove the aluminum tape from the sig- nal and power lines, and strip the covering from the signal and power lines to the proper length for the crimp terminal connectors.
  • Page 110: Connecting Communications Cables To The Nodes

    Front View Line Set Screws 0.6 mm 3.5 mm Connect the +V and − V of the power lines to the connectors in the same way Supplying Communications Power as for communications cables. If the communications power supply is in one...
  • Page 111 Multi-drop Connections The connectors provided with the Units can be used for multi-drop connec- (Thin Cables) tions by inserting two lines of the same color into a single hole, as shown in the following diagram. Example: Multi-drop Connection for a Connector without Set Screws When inserting two lines into the same hole, first insert them together into a pressure-welded terminal, as shown below.
  • Page 112: Mounting Terminating Resistors

    Mounting Terminating Resistors Section 5-3 The multi-drop wiring connector cannot be used with Master Units if it will come in contact with Units mounted next to the Master Unit. Use a T-branch Tap to wire the connection instead. Mounting Terminating Resistors Terminating Resistors must be used at both ends of the trunk line.
  • Page 113: Checking Maintenance Information

    OFF and ON again. Note Always update the information when the parameters have been edited or set. Status Check Boxes The flags (check boxes) shown in the following table will be turned ON when the corresponding error occurs. Item...
  • Page 114 Connector Terminals (When using a Sensor Connector Terminal, the I/O power sup- ply to the entire Terminal will be turned OFF if a short circuit is detected in even one sensor’s power supply.) Operation Time Over ON when the measured operation time exceeds the user-set monitor value.
  • Page 115 MD32B(-1), DRT2-ID32BV(-1), and DRT2-MD32BV(-1) Screw-less Clamp models: DRT2-ID SL(-1), DRT2- SLH(-1), DRT2-MD32SL(-1), and DRT2-MD32SLH(-1) *This function can be used for outputs in these models only when an Expansion Unit is mounted and the Slave operates as an I/O Unit. I/O Power Supply ON when the output power supply is OFF.
  • Page 116 Maintenance Information Window Section 5-4 Item Description Comment Displays up to 32 characters of text set as the output comment for each output. Maintenance Displays the maintenance counter for each output. If the main- Counter tenance counter exceeds the threshold value, a warning icon will be displayed on the left side of the output’s No.
  • Page 117 1. The Sensor Disconnection Detection function is supported by the following models: DRT2-ID@@SLH(-1) and DRT2-MD32SLH(-1) Screw-less Clamp Termi- nals 2. The Sensor Power Supply Short-circuit function is supported by the follow- ing models: DRT2-ID@@SLH(-1) and DRT2-MD32SLH(-1) Screw-less Clamp Termi- nals and DRT2-ID16S(-1) and DRT2-MD16S(-1) Sensor Connector Termi-...
  • Page 118: Remote I/O Terminals With Transistors

    MIL Connector models: DRT2-@D16ML(X)(-1), DRT2-@D32ML(-1), DRT2-@D32B(-1), and DRT2-@D32BV(-1) Screw-less Clamp models: DRT2-@D@@SL(-1) and DRT2-@D@@SLH(-1) 2. The Peak Operation Time and Error History functions are supported by the following models: 3-tier I/O Terminal Block models: DRT2-@D16TA(-1) MIL Connector models: DRT2-@D16ML(X)(-1), DRT2-@D32ML(-1),...
  • Page 119 Remote I/O Terminals with Transistors Section 5-5 Node Address The node address of the Remote I/O Terminal is set as a decimal, using the Settings left rotary switch for the ten's digit, and the right rotary switch for the one's digit.
  • Page 120 Remote I/O Terminals with Transistors Section 5-5 Note Any node address within the setting range can be used as long as it is not already set for another node. Setting the same node address for more than one node will cause a node address duplication error and communications will not start.
  • Page 121: Increasing I/O Using An Expansion Unit

    Select either Clear or Hold for the output during a communications error. Click the OK Button. 4. After checking that the setting that the output during a communications er- ror is reflected in the Edit Device Parameters Window, select the General Tab and click the Download Button.
  • Page 122 Example: DRT2-ROS16+XWT- OD16 Note 1. When an NPN or PNP Basic Input Unit and NPN Expansion Input Unit are combined, the V terminals of the Basic Input Unit and Expansion Input Unit are connected internally. (Example: DRT2-ID16(-1)+XWT-ID16) When an NPN or PNP Basic Input Unit and PNP Expansion Input Unit are combined, the G terminals of the Basic Input Unit and Expansion Input Unit are connected internally.
  • Page 123: Remote I/O Terminals With 8 Transistor Inputs

    Remote I/O Terminals with Transistors Section 5-5 5-5-3 Remote I/O Terminals with 8 Transistor Inputs: DRT2-ID08 (NPN) and DRT2-ID08-1 (PNP) Input Specifications Item Specifications Model DRT2-ID08 DRT2-ID08-1 Internal I/O common NPN Input points 8 points ON voltage 15 V DC min.
  • Page 124 Remote I/O Terminals with Transistors Section 5-5 Internal Circuits DRT2-ID08 (NPN) Photo- coupler V 24 V DC CAN H Physical DRAIN layer CAN L Photo- coupler V− DC-DC converter (non-isolated) DRT2-ID08-1 (PNP) Photo- V 24 V DC coupler CAN H...
  • Page 125: Remote I/O Terminals With 8 Transistor Outputs

    3-wire sensor with 2-wire sensor PNP output (e.g., limit switch) (photoelectric or proximity sensor) Note Wire colors in parentheses are the previous JIS colors for photoelectric and proximity sensors. Dimensions: DRT2-ID08 and DRT2-ID08-1 43.8 29.8 49.6 5-5-4 Remote I/O Terminals with 8 Transistor Outputs: DRT2-OD08...
  • Page 126: Drt2-Od08 (Npn) And Drt2-Od08-1 (Pnp)

    Item Specifications OFF delay time 1.5 ms max. Number of circuits 8 points with one common Component Names and Functions: DRT2-OD08 and DRT2-OD08-1 Rotary switches Used to set node address. DeviceNet Input indicators indicators Indicate the input status of each contact.
  • Page 127 − I/O power supply Solenoid valve, Solenoid valve, etc. etc. DRT2-OD08-1 (PNP) 24 V DC − I/O power supply Solenoid valve, Solenoid valve, etc. etc. Note Wire colors in parentheses are the previous JIS colors for photoelectric and proximity sensors.
  • Page 128: Remote I/O Terminals With 16 Transistor Inputs

    Remote I/O Terminals with Transistors Section 5-5 Dimensions: DRT2-OD08 and DRT2-OD08-1 43.8 29.8 49.6 5-5-5 Remote I/O Terminals with 16 Transistor Inputs: DRT2-ID16 (NPN) and DRT2-ID16-1 (PNP) Input Specifications Item Specifications Model DRT2-ID16 DRT2-ID16-1 Internal I/O common NPN Input points...
  • Page 129 Remote I/O Terminals with Transistors Section 5-5 Component Names and Functions: DRT2-ID16 and DRT2-ID16-1 Rotary switches Used to set node address. DeviceNet Input indicators indicators Indicate the input status of each contact. MS NS NODE ADDRESS 14 15 Communications connector...
  • Page 130 DRT2-ID16-1 (PNP) 24 V DC − I/O power supply 3-wire sensor with 2-wire sensor PNP output (e.g., limit (photoelectric or switch) proximity sensor) Note Wire colors in parentheses are the previous JIS colors for photoelectric and proximity sensors.
  • Page 131: Remote I/O Terminals 16 Transistor Outputs

    Remote I/O Terminals with Transistors Section 5-5 Dimensions: DRT2-ID16 and DRT2-ID16-1 43.9 29.9 49.7 5-5-6 Remote I/O Terminals 16 Transistor Outputs: DRT2-OD16 (NPN) and DRT2-OD16-1 (PNP) Output Specifications Item Specifications Model DRT2-OD16 DRT2-OD16-1 Internal I/O common NPN Output points 16 points Rated output current 0.5 A/point, 4.0 A/common...
  • Page 132 Remote I/O Terminals with Transistors Section 5-5 Internal Circuits DRT2-OD16 (NPN) Photo- coupler CAN H V 24 V DC Physi- DRAIN layer CAN L V− Photo- coupler DC-DC converter (non-isolated) DRT2-OD16-1 (PNP) V 24 V DC Photo- coupler CAN H...
  • Page 133 Solenoid valve, etc. etc. DRT2-OD16-1 (PNP) 24 V DC − I/O power supply Solenoid valve, Solenoid valve, etc. etc. Note Wire colors in parentheses are the previous JIS colors for photoelectric and proximity sensors. Dimensions: DRT2-OD16 and DRT2-OD16-1 43.9 29.9 49.7...
  • Page 134: Remote I/O Terminals With 8 Transistor Inputs And 8 Transistor Outputs: Drt2-Md16 (Npn) And Drt2-Md16-1 (Pnp)

    Remote I/O Terminals with Transistors Section 5-5 5-5-7 Remote I/O Terminals with 8 Transistor Inputs and 8 Transistor Outputs: DRT2-MD16 (NPN) and DRT2-MD16-1 (PNP) Input Specifications Item Specifications Model DRT2-MD16 DRT2-MD16-1 Internal I/O common NPN Input points 8 points ON voltage 15 V DC min.
  • Page 135 Remote I/O Terminals with Transistors Section 5-5 Internal Circuits DRT2-MD16 (NPN) Photo- coupler V1 24 V DC Communications Photo- connector coupler CAN H Physical DRAIN layer CAN L Photo- coupler V− V1 24 V DC DC-DC converter (non-isolated) Photo- coupler...
  • Page 136 I/O power I/O power supply supply Solenoid valve, Solenoid valve, 3-wire sensor with 2-wire sensor etc. etc. PNP output (e.g., limit switch) (photoelectric or proximity sensor) Note Wire colors in parentheses are the previous JIS colors for photoelectric and proximity sensors.
  • Page 137: Remote I/O Terminal With 16 Relay Outputs: Drt2-Ros16

    Remote I/O Terminals with Transistors Section 5-5 Dimensions: DRT2-MD16 and DRT2-MD16-1 43.8 29.8 49.6 5-5-8 Remote I/O Terminal with 16 Relay Outputs: DRT2-ROS16 Common Specifications Item Specifications Communications power 11 to 25 V DC supply voltage (Supplied from the communications connector.) Noise immunity Conforms to IEC61000-4-4.
  • Page 138 5 V DC at 1 mA (reference value) Note The rated carry current can be as high as 3 A (10-A common) if the number of terminals that turn ON simultaneously is four or less per common, or if the ambient temperature is 45 C or lower.
  • Page 139 Remote I/O Terminals with Transistors Section 5-5 Internal Circuits DRTA-NY5W-K Photocoupler 5 VDC CAN H Physical DRAIN layer CAN L V− Photocoupler Internal COM0 circuits DRTA-NY5W-K Photocoupler 5 VDC DC-DC converter (non-isolated) for internal circuits Photocoupler COM1 DC-DC converter (non-isolated) for...
  • Page 140 Switching current (A) Note 1. With a current of between 2 and 3 A (common: 8 to 10 A), either ensure that the number of points per common that simultaneously turn ON does not exceed 4 or ensure that the temperature does not exceed 45 ° C. There are no restrictions if the current does not exceed 2 A (common: 8 A).
  • Page 141: Remote I/O Terminal Expansion Units With 8 Transistor Inputs: Xwt-Id08 (Npn) And Xwt-Id08-1 (Pnp)

    Remote I/O Terminals with Transistors Section 5-5 Relay Replacement When replacing output relays, remove the cover as shown below. Method (1) Hook your finger around the handle and pull the cover up and back. (2) The side bends in the direction of the arrow and the hook becomes detached.
  • Page 142 Component Names and Functions: XWT-ID08 and XWT-ID08-1 Operation indicators Indicate the input status of each contact. XWT-ID08 REMOTE TERMINAL Detachable terminal block Operation Indicators The operation indicators show the status of the inputs. Indicator Indicator status Definition Meaning name 0 to 7 Contacts ON Contacts are ON Lit yellow.
  • Page 143 Remote I/O Terminals with Transistors Section 5-5 Wiring XWT-ID08 (NPN) 24 V DC − I/O power supply 3-wire sensor with 2-wire sensor NPN output (e.g., limit (photoelectric or switch) proximity sensor) XWT-ID08-1 (PNP) 24 V DC − I/O power supply...
  • Page 144: Remote I/O Terminal Expansion Units 16 Transistor Inputs

    Remote I/O Terminals with Transistors Section 5-5 Dimensions: XWT-ID08 and XWT-ID08-1 43.9 29.9 49.7 5-5-10 Remote I/O Terminal Expansion Units 16 Transistor Inputs: XWT- ID16 (NPN) and XWT-ID16-1 (PNP) Input Specifications Item Specifications Model XWT-ID16 XWT-ID16-1 Internal I/O common NPN...
  • Page 145: Xwt-Id16 (Npn) And Xwt-Id16-1 (Pnp)

    Component Names and Functions: XWT-ID16 and XWT-ID16-1 Operation indicators Indicate the input status of each contact. 14 15 XWT-ID16 REMOTE TERMINAL Detachable terminal block Operation Indicators The operation indicators show the status of the inputs. Indicator Indicator status Definition Meaning name 0 to 15 Contacts ON Contacts are ON Lit yellow.
  • Page 146 Remote I/O Terminals with Transistors Section 5-5 Wiring XWT-ID16 (NPN) 24 V DC − I/O power supply 3-wire sensor with 2-wire sensor NPN output (e.g., limit (photoelectric or switch) proximity sensor) XWT-ID16-1 (PNP) 24 V DC − I/O power supply...
  • Page 147: 5-5-11 Remote I/O Terminal Expansion Units With 8 Transistor Outputs

    Remote I/O Terminals with Transistors Section 5-5 5-5-11 Remote I/O Terminal Expansion Units with 8 Transistor Outputs: XWT-OD08 (NPN) and XWT-OD08-1 (PNP) Output Specifications Item Specifications Model XWT-OD08 XWT-OD08-1 Internal I/O common NPN Output points 8 points Rated output current 0.5 A/point, 2.0 A/common Residual voltage 1.2 V max.
  • Page 148 Remote I/O Terminals with Transistors Section 5-5 Internal Circuits XWT-OD08 (NPN) Photo- coupler V 24 V DC Photo- coupler XWT-OD08-1 (PNP) Photo- V 24 V DC coupler Photo- coupler...
  • Page 149 XWT-OD08-1 (PNP) 24 V DC − I/O power supply Solenoid Solenoid valve, etc. valve, etc. Note When using an inductive load, such as a solenoid valve, either use a built-in diode to absorb the counterelectromotive force or install an external diode.
  • Page 150: 5-5-12 Remote I/O Terminal Expansion Units With 16 Transistor Outputs

    Remote I/O Terminals with Transistors Section 5-5 Dimensions: XWT-OD08 and XWT-OD08-1 43.9 29.9 49.7 5-5-12 Remote I/O Terminal Expansion Units with 16 Transistor Outputs: XWT-OD16 (NPN) and XWT-OD16-1 (PNP) Output Specifications Item Specifications Model XWT-OD16 XWT-OD16-1 Internal I/O common NPN...
  • Page 151 Remote I/O Terminals with Transistors Section 5-5 Operation Indicators The operation indicators show the status of the outputs. Indicator Indicator status Definition Meaning name 0 to 15 Contacts ON Contacts are ON Lit yellow. Contacts OFF Contacts are OFF Internal Circuits...
  • Page 152 XWT-OD16-1 (PNP) 24 V DC − I/O power supply Solenoid Solenoid valve, etc. valve, etc. Note When using an inductive load, such as a solenoid valve, either use a built-in diode to absorb the counterelectromotive force or install an external diode.
  • Page 153: Transistor Remote Input Terminals With 16 Points And 3-Tier I/O Terminal Blocks: Drt2-Id16Ta (Npn) And Drt2-Id16Ta-1 (Pnp)

    Remote I/O Terminals with Transistors Section 5-5 Dimensions: XWT-OD16 and XWT-OD16-1 43.9 29.9 49.7 5-5-13 Transistor Remote Input Terminals with 16 Points and 3-tier I/O Terminal Blocks: DRT2-ID16TA (NPN) and DRT2-ID16TA-1 (PNP) Input Specifications Item Specification Model DRT2-ID16TA DRT2-ID16TA-1 Internal I/O common...
  • Page 154 Section 5-5 Components of the DRT2-ID16TA and DRT2-ID16TA-1 Rotary switches (×10, ×1) Set the node address. Input indicators Indicate the input status of each contact. DeviceNet Indicators (Lit when the input is ON.) DRT2-ID16TA REMOTE TERMINAL DC24V Circuit removal screws.
  • Page 155 Note 1. V1 is not connected internally to V2, and G1 is not connected internally to G2. Connect them carefully. Do not connect anything to the reserved terminals. 2. Wire colors have been changed according to revisions in the JIS standards for photoelectric and proximity sensors.
  • Page 156: Transistor Remote Output Terminals With 16 Points And 3-Tier I/O Terminal Blocks: Drt2-Od16Ta (Npn) And Drt2-Od16Ta-1 (Pnp)

    Two, 4.2 dia. or M4 170±0.2 Note The circuit section can be removed by loosening the circuit removal screws. (Refer to Components of the DRT2-ID16TA and DRT2-ID16TA-1.) Always turn OFF the communications, internal, and I/O power supplies before removing or attaching the circuit section.
  • Page 157 Section 5-5 Components of the DRT2-OD16TA and DRT2-OD16TA-1 Rotary switches (×10, ×1) Set the node address. Output indicators Indicate the output status of each contact. DeviceNet Indicators (Lit when the output is ON.) DRT2-OD16TA REMOTE TERMINAL DC24V Circuit removal screws.
  • Page 158 Remote I/O Terminals with Transistors Section 5-5 DRT2-OD16TA-1 (PNP) Voltage step-down V1 24 V DC V− CANL Output (0 to 7) Physical DRAIN layer Internal CANH Voltage circuitry Photocoupler step-down V2 24 V DC DC-DC converter (non- Output (8 to 15)
  • Page 159 Note 1. V1 is not connected internally to V2, and G1 is not connected internally to G2. Connect them carefully. 2. When using inductive loads (such as solenoid valves), use a load with a built-in diode to absorb reverse power or attach a diode externally.
  • Page 160: 5-5-15 Transistor Remote I/O Terminals With 8 Inputs And 8 Outputs And

    Section 5-5 Always turn OFF the communications, internal, and I/O power supplies before removing or attaching the circuit section. 5-5-15 Transistor Remote I/O Terminals with 8 Inputs and 8 Outputs and 3-tier I/O Terminal Blocks: DRT2-MD16TA (NPN) and DRT2-MD16TA-1 (PNP)
  • Page 161 Rotary switches (×10, ×1) Set the node address. DeviceNet Indicators Output indicators Input indicators Indicate the output status of each contact. Indicate the output status of each (Lit when the output is ON.) contact. (Lit when the input is ON.) DRT2-MD16TA REMOTE TERMINAL DC24V Circuit removal screws.
  • Page 162 (photoelectric or proximity sensor) Note 1. V1 is not connected internally to V2, and G1 is not connected internally to G2. Connect them carefully 2. When using inductive loads (such as solenoid valves), use a load with a built-in diode to absorb reverse power or attach a diode externally.
  • Page 163: 5-5-16 Mounting In Control Panels

    Terminal to the DIN Track. Secure all Slaves on both ends of the DIN Track with End Plates. Connecting End Plates Hook the bottom of the End Plate onto the DIN Track, as shown at (1) in the following diagram, then hook the top of the End Plate as shown at (2).
  • Page 164: 5-5-17 Wiring The I/O Power Supply And I/O Lines

    Remote I/O Terminals with Transistors Section 5-5 End Plate Note Always attach an End Plate to both ends of Slaves connected to the DIN Track. Mounting Direction Unless specific restrictions are given for the Slave, it can be mounted in any of the following six directions.
  • Page 165: Connector Terminals With Transistors

    REMOTE TERMINAL Connector Terminals with Transistors 5-6-1 Node Address, Baud Rate, and Output Hold/Clear Settings These parameters are set in the same way as for Remote I/O Terminals with Transistors. Refer to 5-5-1 Node Address, Baud Rate, and Output Hold/Clear Settings.
  • Page 166: Industry Standard Sensor Connector Assembly, Wiring, And Installation

    Installation The DRT2-@D16S(-1) Sensor Connector Terminal uses an industry standard sensor connector. When connecting the sensor or external device to the Con- nector Terminal, a special connector must be attached to the sensor or exter- nal device cable. OMRON XN2A-1430...
  • Page 167 2. Join the cover and plug connector, using pliers or another tool to push in fully. At the same time, push in the middle of the cover straight so that it is not crooked. Using OMRON Connectors 1,2,3...
  • Page 168 Connector Terminals with Transistors Section 5-6 2. Insert the line all the way to the back of the wire insertion opening. Check that the sheath of the line is inserted into the wire insertion opening, and that the end of the conductor has passed through the connection part.
  • Page 169: Connector Terminals With 16 Transistor Inputs: Drt2-Id16S (Npn) And Drt2-Id16S-1 (Pnp)

    Connector Terminals with Transistors Section 5-6 5-6-3 Connector Terminals with 16 Transistor Inputs: DRT2-ID16S (NPN) and DRT2-ID16S-1 (PNP) Input Specifications Item Specifications Model DRT2-ID16S DRT2-ID16S-1 Internal I/O common NPN Input points 16 points ON voltage 9 V DC min. (between each 9 V DC min.
  • Page 170 DRT2-ID16S-1 (PNP) 2-wire sensor 3-wire sensor with NPN output (e.g., limit switch) (photoelectric or proximity sensor) Note Wire colors in parentheses are the previous JIS colors for photoelectric and proximity sensors. Dimensions (DRT2-ID16S and DRT2-ID16S-1) 33.3 SHT O NODE ADDRESS...
  • Page 171: Connector Terminals

    Connector Terminals with Transistors Section 5-6 5-6-4 Connector Terminals (Sensor Connector Type with 8 Inputs and 8 Outputs): DRT2-MD16S (NPN) and DRT2-MD16S-1 (PNP) Input Specifications Item Specification Model DRT2-MD16S DRT2-MD16S-1 Internal I/O common Input points 8 points (0 to 7) ON voltage 9 V DC min.
  • Page 172 Connector Terminals with Transistors Section 5-6 Indicator Meanings Indicator name Color Status Meaning SHT0 Sensor power short-circuit SHT1 External load short- circuit Internal Circuits DRT2-MD16S (NPN) Short-circuit protection element Short-circuit detection circuit CAN H Physical DRAIN layer CAN L V−...
  • Page 173 Use one pair of these terminals for the I/O power supply for this Unit and the other pair for the I/O power supply for the next Unit. Do not exceed 3 A for either pair.
  • Page 174: Transistor Remote Input Terminals With 16 Points And Connectors

    Number of circuits 16 points with one common Note All 16 inputs can be ON simultaneously if the Remote I/O Terminal is mounted facing up, but sufficient space will need to be allowed between Units depend- ing on the ambient temperature. Refer to the Dimensions diagram on...
  • Page 175 Name Meaning 0 to 15 Indicate the status of bits (contacts) 0 to 15 in word m. Lit when input is ON; not lit when input is OFF. Note “m” is the first word allocated to the Remote Input Terminal.
  • Page 176 Wd m Wd m Wd m Wd m Wd m Wd m Wd m Wd m Wd m Wd m Wd m Wd m Wd m Note 1. V terminals are connected internally, as are the G terminals. Connect them carefully.
  • Page 177 • If the Terminals are not mounted facing up, they can be mounted side-by- side and all inputs can be turned ON simultaneously at 55 ° C or less. • If the Terminals are mounted facing up, the distances and temperatures in...
  • Page 178: Connector Terminals (Mil Connector Type With 16 Outputs): Drt2-Od16Ml(X) (Npn) And Drt2-Od16Ml(X)-1 (Pnp)

    1.5 ms max. Number of circuits 16 points with one common Note Do not allow the total load current to exceed 2 A and do not allow the load cur- rent on either the V or G terminal to exceed 1 A.
  • Page 179 Name Meaning I0 to I15 Indicate the status of bits (contacts) 0 to 15 in word m. Lit when output is ON; not lit when output is OFF. Note “m” is the first word allocated to the Remote Output Terminal.
  • Page 180 Wd m Wd m Wd m Wd m Wd m Wd m Note 1. The V terminals are connected internally, as are the G terminals. When the power supply exceeds 1.0 A per terminal or the total current drawn by the...
  • Page 181: Transistor Remote Input Terminals With 32 Points And Connectors

    2 A, the output power supply should not be input through the terminals; an external power supply must be used instead. 2. When using inductive loads (such as solenoid valves), use a load with a built-in diode to absorb reverse power or attach a diode externally.
  • Page 182 Number of circuits 32 points with one common Note All 32 inputs can be ON simultaneously if the Remote I/O Terminal is mounted facing up, but sufficient space will need to be allowed between Units depend- ing on the ambient temperature. Refer to the Dimensions diagram on page 165 for details.
  • Page 183 Connector Terminals with Transistors Section 5-6 Internal Circuits DRT2-ID32ML (NPN) CAN_H Physical DRAIN layer CAN_L Input V− Photo- coupler DC-DC converter (non- isolated) Input Photo- coupler DRT2-ID32ML-1 (PNP) CAN_H Physical DRAIN layer CAN_L V− Input Photo- coupler DC-DC converter (non-...
  • Page 184 Connector Terminals with Transistors Section 5-6 Wiring DRT2-ID32ML (NPN) 24 V DC Wd m Wd m Wd m Wd m Wd m Wd m Wd m Wd m Wd m Wd m Wd m Wd m Wd m Wd m...
  • Page 185 15 14 13 12 11 10 16 inputs Wd m 25 27 29 31 33 35 37 39 26 28 30 32 34 36 38 40 Wd m+1 11 13 15 17 19 10 12 14 16 18 20...
  • Page 186 • If the Terminals are not mounted facing up, they can be mounted side-by- side and all inputs can be turned ON simultaneously at 55 ° C or less. • If the Terminals are mounted facing up, the distances and temperatures in the graph given below must be maintained to enable turning ON all inputs simultaneously.
  • Page 187: Transistor Remote Output Terminals With 32 Points And Connectors

    Number of circuits 32 points with one common Note Do not allow the total load current to exceed 4 A and do not allow the load cur- rent on either the V or G terminal to exceed 1 A. Components of the DRT2-OD32ML and DRT2-OD32ML-1...
  • Page 188 Connector Terminals with Transistors Section 5-6 Internal Circuits DRT2-OD32ML (NPN) Voltage step-down CAN_H Physical DRAIN layer CAN_L Output V− Photo- coupler DC-DC converter Output (non- Photo- isolated) coupler DRT2-OD32ML-1 (PNP) CAN_H Physical DRAIN layer Output CAN_L V− Photo- coupler Voltage...
  • Page 189 Connector Terminals with Transistors Section 5-6 Wiring DRT2-OD32ML (NPN) 24 V DC Wd m Wd m Wd m Wd m Wd m Wd m Wd m Wd m Wd m Wd m Wd m Wd m Wd m Wd m...
  • Page 190 15 14 13 12 11 10 16 outputs Wd m 25 27 29 31 33 35 37 39 26 28 30 32 34 36 38 40 Wd m+1 11 13 15 17 19 10 12 14 16 18 20...
  • Page 191: Transistor Remote I/O Terminals With 16 Inputs And

    Connector Terminals with Transistors Section 5-6 Dimensions (DRT2-OD32ML and DRT2-OD32ML-1) (83) 27.8 Values in parentheses are reference values. 5-6-9 Transistor Remote I/O Terminals with 16 Inputs and 16 Outputs and Connectors: DRT2-MD32ML (NPN) and DRT2-MD32ML-1 (PNP) Input Specifications Item Specification Model DRT2-MD32ML...
  • Page 192 Number of circuits 16 points with one common Note Do not allow the total load current to exceed 2 A and do not allow the load cur- rent on either the V or G terminal to exceed 1 A. Components of the DRT2-MD32ML and DRT2-MD32ML-1...
  • Page 193 Connector Terminals with Transistors Section 5-6 Internal Circuits DRT2-MD32ML (NPN) CAN_H Physical DRAIN layer CAN_L Input V− Photo- Voltage coupler step-down DC-DC converter Output (non- Photo- isolated) coupler DRT2-MD32ML-1 (PNP) CAN_H Physical DRAIN layer CAN_L Input Photocoupler V− DC-DC converter...
  • Page 194 Connector Terminals with Transistors Section 5-6 Wiring DRT2-MD32ML (NPN) 24 V DC...
  • Page 195 1. The V1 terminals are connected internally, as are the V2 terminals, the G1, and the G2 terminals. (V1 is not connected to V2 and G1 is not connected to G2.) When the power supply exceeds 1.0 A per terminal or the total cur- rent drawn by the external loads exceeds 2 A, the output power supply should not be input through the terminals;...
  • Page 196 MIL connector pin numbers are as shown in the following dia- gram. 15 14 13 12 11 10 Wd m 25 27 29 31 33 35 37 39 26 28 30 32 34 36 38 40 16 inputs Wd n 11 13 15 17 19...
  • Page 197 DIN Track with End Plates. Connecting End Plates Hook the bottom of the End Plate onto the DIN Track, as shown at (1) in the following diagram, then hook the top of the End Plate as shown at (2).
  • Page 198 Connector Terminals with Transistors Section 5-6 Mounting A Remote I/O Terminal with a Connector can be mounted perpendicular to a Perpendicular to a panel by using the SRT2-ATT02 Mounting Bracket B (sold separately). Panel Using a Panel surface Mounting Bracket...
  • Page 199 Connector Terminals with Transistors Section 5-6 Mounting Parallel to a A Remote I/O Terminal with a Connector can be mounted parallel to a panel Panel Using a by using the SRT2-ATT02 Mounting Bracket B (sold separately). Mounting Bracket Note A multi-drop DeviceNet connector cannot be used if the Remote I/O Terminal is mounted parallel to the panel.
  • Page 200 Center of mounting holes Center of Slave Unit: mm Mounting Direction Unless specific restrictions are given for the Slave, it can be mounted in any direction. Any of the following directions are okay. Vertical Mounting Dimensions Mounted to DIN Track...
  • Page 201 Two, 3.2 dia. or M3 Wiring Internal Power Internal power is supplied together with the communications power supply Supplies, I/O Power and does not need to be wired separately. I/O power supplies and I/O are wired through the I/O MIL connector. Supplies and I/O...
  • Page 202 Connector Terminals with Transistors Section 5-6 Connecting to I/O The MIL Cables listed in the following table are available to connect OMRON Terminals Using I/O Terminals (e.g., I/O Relay Blocks). Select the MIL Cable that matches the Remote I/O Terminal and the I/O Terminal.
  • Page 203 Release both of these at the same time, not one at a time. 2. Place the flat cable between the contacts and cover of the socket, align the contacts, and press on the cover to lock it in place on the contacts. Use a...
  • Page 204 Connector Terminals with Transistors Section 5-6 vise or similar device to firmly press the cover on until the tabs are properly joined. Applicable Wires: 1.27-mm pitch flat cable, AWG28 (7-strand wire) UL2651: Standard Cable, UL20012: Stranded Cable, UL20028: Color Coded Cable 3.
  • Page 205: Board-Type Connector Terminals With 32 Inputs And

    Name Meaning I0 to I15 Indicate the status of bits (contacts) 0 to 15 in word m. Lit when input is ON; not lit when input is OFF. II0 to II15 Indicate the status of bits (contacts) 0 to 15 in word m+1. Lit when input is ON;...
  • Page 206 Connector Terminals with Transistors Section 5-6 Internal Circuits DRT2-ID32B and DRT2-ID32BV (NPN) CAN_H Physical DRAIN layer CAN_L Input V− Photo- coupler DC-DC converter (non- isolated) Input Photo- coupler DRT2-ID32B-1 and DRT2-ID32BV-1 (PNP) CAN_H Physical DRAIN layer CAN_L V− Input Photo-...
  • Page 207 Connector Terminals with Transistors Section 5-6 Wiring DRT2-ID32B and DRT2-ID32BV (NPN) 24 V DC Wd m Wd m Wd m Wd m Wd m Wd m Wd m Wd m Wd m Wd m Wd m Wd m Wd m...
  • Page 208 15 14 13 12 11 10 16 inputs Wd m 25 27 29 31 33 35 37 39 26 28 30 32 34 36 38 40 Wd m+1 11 13 15 17 19 10 12 14 16 18 20...
  • Page 209: Board-Type Connector Terminals With 32 Outputs And

    Number of circuits 32 points with one common circuit Note Do not allow the total load current to exceed 4 A and do not allow the load cur- rent on either the V or G terminal to exceed 1 A.
  • Page 210 Name Meaning I0 to I15 Indicate the status of bits (contacts) 0 to 15 in word m. Lit when output is ON; not lit when output is OFF. II0 to II15 Indicate the status of bits (contacts) 0 to 15 in word m+1. Lit when output is ON;...
  • Page 211 Connector Terminals with Transistors Section 5-6 DRT2-OD32B-1 and DRT2-OD32BV-1 (PNP) CAN_H Physical DRAIN layer Output CAN_L V− Photo- coupler Voltage step-down DC-DC converter (non- isolated) Output Photo- coupler Wiring DRT2-OD32B and DRT2-OD32BV (NPN) 24 V DC Wd m Wd m...
  • Page 212 Given this, the bit and word allocations to MIL connector pin numbers are as shown in the following diagram. 15 14 13 12 11 10 Wd m 25 27 29 31 33 35 37 39 26 28 30 32 34 36 38 40 16 outputs Wd m+1 11 13 15 17 19...
  • Page 213: Board-Type Connector Terminals With 16 Inputs, 16 Outputs And Mil Connectors: Drt2-Md32B (Npn)/Drt2-Md32B-1 (Pnp) And

    Connector Terminals with Transistors Section 5-6 Dimensions DRT2-OD32B (NPN)/DRT2-OD32B-1 (PNP) DRT2-OD32BV (NPN)/DRT2-OD32BV-1 (PNP) 5-6-12 Board-type Connector Terminals with 16 Inputs, 16 Outputs and MIL Connectors: DRT2-MD32B (NPN)/DRT2-MD32B-1 (PNP) and DRT2-MD32BV (NPN)/DRT2-MD32BV-1 (PNP) Input Specifications Item Specification Model DRT2-MD32B DRT2-MD32B-1 DRT2-MD32BV...
  • Page 214 Number of circuits 16 points with one common circuit Note Do not allow the total load current to exceed 2 A and do not allow the load cur- rent on either the V or G terminal to exceed 1 A.
  • Page 215 Connector Terminals with Transistors Section 5-6 Internal Circuits DRT2-MD32B and DRT2-MD32BV (NPN) CAN_H Physical DRAIN layer CAN_L Input V− Photo- Voltage coupler step-down DC-DC converter Output (non- Photo- isolated) coupler DRT2-MD32B-1 and DRT2-MD32BV-1 (PNP) CAN_H Physical DRAIN layer CAN_L Input Photocoupler V−...
  • Page 216 Connector Terminals with Transistors Section 5-6 Wiring DRT2-MD32B and DRT2-MD32BV (NPN) 24 V DC...
  • Page 217 1. The V1 terminals are connected internally, as are the V2 terminals, the G1, and the G2 terminals. (V1 is not connected to V2 and G1 is not connected to G2.) When the power supply exceeds 1.0 A per terminal or the total cur- rent drawn by the external loads exceeds 2 A, the output power supply should not be input through the terminals;...
  • Page 218 MIL connector pin numbers are as shown in the following dia- gram. 15 14 13 12 11 10 Wd m 25 27 29 31 33 35 37 39 26 28 30 32 34 36 38 40 16 inputs Wd n 11 13 15 17 19...
  • Page 219 A board can be created by the user and mounted to the DRT2-@D32BV(-1). Boards This allows the user to create the required I/O system by placing I/O connec- tors, relays, and other components as necessary on the board and then mounting the board to a Board Terminal.
  • Page 220 Perpendicular Wiring Internal Power Supplies, I/O Power Supplies and I/O Internal power is supplied together with the communications power supply and does not need to be wired separately. I/O power supplies and I/O are wired through the I/O MIL connector.
  • Page 221 Section 5-6 Connecting to I/O Terminals Using OMRON MIL Cables The MIL Cables listed in the following table are available to connect OMRON I/O Terminals (e.g., I/O Relay Blocks). Select the MIL Cable that matches the Remote I/O Terminal and the I/O Terminal.
  • Page 222 2. Place the flat cable between the contacts and cover of the socket, align the contacts, and press on the cover to lock it in place on the contacts. Use a vise or similar device to firmly press the cover on until the tabs are properly joined.
  • Page 223 UL2651: Standard Cable, UL20012: Stranded Cable, UL20028: Color Coded Cable 3. If required, fold the back over the connector, and insert and lock a strain relief in place. 4. Connect the MIL Connector to a Remote I/O Terminal with a Connector.
  • Page 224: Screw-Less Clamp Terminals

    It is a reduced-wiring, labor-saving Slave that can make wiring easy by simply inserting post terminals (sleeves). The Unit and terminal block can be detached, making it possible to replace the Unit in the event of a failure without removing the wiring.
  • Page 225 3.5 mm Removing and Mounting a Clamp Terminal Block Removal Use a flat-blade screwdriver to loosen the four screws on the top of the termi- nal block, and then grasp the handles on both sides and remove the terminal block.
  • Page 226: I/O Indicators

    16 points 20.4 to 26.4 V DC (24 V DC, −15% to 10%) I/O power supply voltage Input current 6.0 mA max./point at 24 V DC, 3.0 mA min./point at 17 V DC Input resistance 4 kΩ ON delay time 1.5 ms max.
  • Page 227 Disconnection detection Operates at 0.3 mA/pt. max. Current supplied to input 100 mA/input 50 mA/input devices Component Names and Functions (Same for DRT2-ID16SL(-1) and DRT2-ID16SLH(-1)) DeviceNet Indicators Rotary Switches Used to set the node address. I/O Power Indicators Input Indicators...
  • Page 228 0 to 15 V− Input circuit DC-DC converter DRT2-ID16SLH-1 (PNP) CAN H Short- Physi- circuit or DRAIN discon- V 0 to V15 nection layer Photo- CAN L detection coupler circuit 0 to 15 V− Input circuit DC-DC converter Wiring...
  • Page 229 Screw-less Clamp Terminals Section 5-7 DRT2-ID16SL-1 (PNP) 2-wire sensor 3-wire sensor (e.g., limit switch) with NPN output (photoelectric or proximity sensor) DRT2-ID16SLH (NPN) 2-wire sensor 3-wire sensor (e.g., limit switch) with NPN output (photoelectric or proximity sensor) DRT2-ID16SLH-1 (PNP) 2-wire sensor 3-wire sensor (e.g., limit switch)
  • Page 230: Screw-Less Clamp Terminals With 32 Transistor Inputs

    Screw-less Clamp Terminals Section 5-7 Note Wire colors have been changed according to revisions in the JIS standards for photoelectric and proximity sensors. The colors in parentheses are the wire colors prior to the revisions. Dimensions (Same for DRT2-ID16SL(-1) and...
  • Page 231 Screw-less Clamp Terminals Section 5-7 Component Names and Functions (Same for DRT2-ID32SL(-1) and DRT2-ID32SLH(-1)) Input Indicators Rotary Switches (×10, ×1) Release Button Used to check detection results Used to set the node address. Releases terminal when and input status for each contact.
  • Page 232 Screw-less Clamp Terminals Section 5-7 DRT2-ID32SL-1 Photo- coupler Left side 0-15 CAN H Physical DRAIN layer CAN L V− DC-DC converter Photo- Right side coupler 0-15 DRT2-ID32SLH Short-cir- cuit or dis- connection G0-G15 Photo- detection circuit coupler 0-15 Left side...
  • Page 233 Right side coupler 0-15 Wiring DRT2-ID32SL (NPN) Left side Right side − − 2-wire sensor 3-wire sensor with NPN output 2-wire sensor 3-wire sensor with NPN output (e.g., limit switch) (e.g., limit switch) (photoelectric or proximity sensor) (photoelectric or proximity sensor)
  • Page 234 Section 5-7 DRT2-ID32SL-1 (PNP) Left side Right side − − 2-wire sensor 3-wire sensor with NPN output 2-wire sensor 3-wire sensor with NPN output (e.g., limit switch) (e.g., limit switch) (photoelectric or proximity sensor) (photoelectric or proximity sensor) DRT2-ID32SLH (NPN)
  • Page 235: Screw-Less Clamp Terminals With And 16 Transistor Outputs

    Operates at current consumption of 3 mA/ point max. (Not detected at 3 mA or less.) Current supplied to 100 mA/output output devices Output when error According to hold/clear setting when error is detected. (The factory setting is for clear.) detected...
  • Page 236 Screw-less Clamp Terminals Section 5-7 Component Names and Functions (Same for DRT2-OD16SL(-1) and DRT2-OD16SLH(-1)) DeviceNet indicators Rotary Switches Used to set the node address. I/O Power Indicators Output Indicators Used to check I/O Used to check detection results and power supply status.
  • Page 237 Screw-less Clamp Terminals Section 5-7 DRT2-OD16SLH (NPN) Voltage step-down CAN H Physi- DRAIN Disconnection layer detection CAN L circuit Photo- 0 to 15 V− coupler DC-DC converter DRT2-OD16SLH-1 (PNP) Voltage step-down CAN H Physi- DRAIN Disconnection layer CAN L detection...
  • Page 238 Solenoid valve, Solenoid valve, etc. etc. DRT2-OD16SLH-1 (PNP) Solenoid valve, Solenoid valve, etc. etc. Note When using inductive loads (such as solenoid valves), use a load with a built- in diode to absorb reverse power or attach a diode externally.
  • Page 239 If the current limit (Ilim) is exceeded when there is an overload in the output current (Iout) or when a load short-circuit occurs, as shown in Fig. 2 and 3, the output current (Iout) will be limited. Then, if the output transistor junction tem-...
  • Page 240 In automatic recovery mode, the Unit's load short-circuit protection is auto- matically cleared when Tj = Tr, as shown in Fig. 2. Therefore, as long as the cause of the short-circuit is not removed, the output's ON/OFF operation will repeat.
  • Page 241: Screw-Less Clamp Terminals With And 32 Transistor Outputs

    Operates at current consumption of 3 mA/ point max. (Not detected at 3 mA or less.) Output when error According to hold/clear setting when error is detected. (The factory setting is for clear.) detected Component Names and Functions (Same for DRT2-OD32SL(-1) and DRT2-OD32SLH(-1)) Rotary Switches (×10, ×1)
  • Page 242 Screw-less Clamp Terminals Section 5-7 Internal Circuits DRT2-OD32SL (NPN) Voltage step-down Photo- Left side 0-15 coupler CAN_H Physical DRAIN layer CAN_L V− Voltage step-down DC-DC converter Right side Photo- 0-15 coupler...
  • Page 243 Screw-less Clamp Terminals Section 5-7 DRT2-OD32SL-1 (PNP) Voltage step-down 0-15 Left side Photo- CAN_H coupler Physical DRAIN layer CAN_L V− Voltage step-down DC-DC converter 0-15 Right side Photo- coupler DRT2-OD32SLH (NPN) Voltage step-down Disconnection detection circuit Left side Photo- 0-15...
  • Page 244 Screw-less Clamp Terminals Section 5-7 DRT2-OD32SLH-1 (PNP) Voltage step-down Disconnection detection circuit 0-15 Left side Photo- coupler CAN_H Physical DRAIN layer CAN_L V− Voltage step-down DC-DC converter Disconnection detection circuit 0-15 Right side Photo- coupler Wiring DRT2-OD32SL (NPN) Left side Right side −...
  • Page 245 Screw-less Clamp Terminals Section 5-7 DRT2-OD32SL-1 (PNP) Left side Right side − − Solenoid valve, etc. Solenoid valve, etc. Solenoid valve, etc. Solenoid valve, etc. DRT2-OD32SLH (NPN) Left side Right side − − Solenoid valve, etc. Solenoid valve, etc. Solenoid valve, etc. Solenoid valve, etc.
  • Page 246: Screw-Less Clamp Terminals With 16 Transistor Inputs And Outputs

    G terminals, are not connected internally. Supply power separately between V and G on the right and left sides respectively. 2. When using inductive loads (such as solenoid valves), use a load with a built-in diode to absorb reverse power or attach a diode externally.
  • Page 247 Operates at current consumption of 3 mA/ point max. (Not detected at 3 mA or less.) Output when error According to hold/clear setting when error is detected. (The factory setting is for clear.) detected Component Names and Functions (Same for DRT2-MD32SL(-1) and DRT2-MD32SLH(-1)) Rotary Switches (×10, ×1)
  • Page 248 Screw-less Clamp Terminals Section 5-7 Internal Circuits DRT2-MD32SL (NPN) Input circuit Photo- coupler 0-15 CAN H Physical DRAIN layer CAN L V− DC-DC Voltage step-down converter Output circuit Photo- 0-15 coupler DRT2-MD32SL-1 (PNP) Input circuit Photo- coupler 0-15 CAN_H Physical...
  • Page 249 Screw-less Clamp Terminals Section 5-7 DRT2-MD32SLH (NPN) Short-cir- cuit or dis- connection G0-G15 Photo- detection circuit coupler Input circuit 0-15 CAN H Physical DRAIN layer CAN L V− Voltage step-down DC-DC converter Output circuit Disconnection detection circuit Photo- 0-15 coupler...
  • Page 250 Voltage step-down converter Output circuit Disconnection detection circuit 0-15 Photo- coupler Wiring DRT2-MD32SL (NPN) Left side Right side − − 2-wire sensor 3-wire sensor with NPN output Solenoid valve, etc. Solenoid valve, etc. (e.g., limit switch) (photoelectric or proximity sensor)
  • Page 251 Section 5-7 DRT2-MD32SL-1 (PNP) Left side Right side − − 2-wire sensor 3-wire sensor with NPN output Solenoid valve, etc. Solenoid valve, etc. (e.g., limit switch) (photoelectric or proximity sensor) DRT2-MD32SLH (NPN) Left side Right side − − 2-wire sensor 3-wire sensor with NPN output Solenoid valve, etc.
  • Page 252: Mounting To A Control Panel

    Mounting to a DIN Mount a 35-mm DIN Track to the rear panel of the Slave. Firmly insert the Track Slave into the DIN Track while pulling down the DIN Track mounting hooks on the rear panel with a screwdriver.
  • Page 253 Screw-less Clamp Terminals Section 5-7 Mounting the End Plates First latch the bottom of the end plate (step 1 in the diagram below), and then latch the top and pull down (step 2 below). End Plate Note The Slave must be secured on both sides by a pair of end plates.
  • Page 254 I/O Indicators ........
  • Page 255: Common Specifications For Environment-Resistive Slaves

    Common Specifications for Environment-resistive Slaves Section 6-1 Common Specifications for Environment-resistive Slaves The following table lists specifications that are common to all Environment- resistive Slaves. For details on specifications for each Slave, refer to the fol- lowing Slave specifications pages. Item Specifications...
  • Page 256: Current Consumption, Weight, Enclosure Ratings

    55 mA max. 390 g max. 6-1-2 I/O Indicators Advanced Slaves The following table describes the meanings of the I/O indicators provided on (DRT2-@D@@C(-1)) Advanced Environment-resistive Slaves. Two I/O indicators, @-A and @-B, are provided for each connector. Indicator Color...
  • Page 257: Connecting Communications Cables To Environment-Resistive Slaves

    Connecting Communications Cables to Environment-resistive Slaves Section 6-2 Standard Slaves The following table describes the meanings of the I/O indicators provided on (DRT2-@D@@CL(-1) Standard Environment-resistive Slaves. Two I/O indicators, @-A and @-B, are provided for each connector. Indicator Color Status...
  • Page 258: System With Slaves Using Round Connectors And Regular Square

    Slave with normal connector Power supply I/O power supply cable 6-2-3 Communications Cables for Environment-resistive Terminals Always use the following communications cables with connectors with Envi- ronment-resistive Terminals. Thin Cables with Connectors: Micro-size (previous M12) Model Description DCA1-5CN@@W1 Cable with shielded connec-...
  • Page 259 Note 1. The boxes in the model numbers indicate the cable length in 1-m units. A cable of 0.5 m, however, is indicated as “C5.” 2. Standard DeviceNet cables are used for these connections, so the cables cannot be used in environments subject to spattering, unless measures are taken to protect the cables.
  • Page 260: Example System Assembly

    Note Tighten the connector by hand to a torque of 0.39 to 0.49 N·m. If the connec- tor is not tightened sufficiently, it will not provide the expected degree of pro- tection and may become loose due to vibration.
  • Page 261 Maintenance Information Window Section 6-3 General Window Window for the DRT2-HD16C(-1) and DRT2-ID08C(-1) Status check boxes (Status flags) Window for the DRT2-OD08C(-1) Status check boxes (Status flags)
  • Page 262 Maintenance Information Window Section 6-3 Window for the DRT2-HD16CL(-1), DRT2-ID08CL(-1), and DRT2-ID04CL(-1) Status check boxes (Status flags) Window for the DRT2-WD16CL(-1), DRT2-OD08CL(-1), and DRT2-OD04CL(-1) Status check boxes (Status flags)
  • Page 263 OFF and ON again. Note Always update the information when the parameters have been edited or set. Status Check Boxes The flags (check boxes) shown in the following table will be turned ON when the corresponding error occurs. Item...
  • Page 264 IN Tab Page Terminals are listed in numerical order. Item Description Comment Displays up to 32 characters of text set as the input comment for each input. Maintenance Displays the maintenance counter for each input. If the main- Counter tenance counter exceeds the threshold value, a warning icon will be displayed on the left side of the input’s No.
  • Page 265 OUT Tab Page Terminals are listed in numerical order. Item Description Comment Displays up to 32 characters of text set as the output comment for each output. Maintenance Displays the maintenance counter for each output. If the main- Counter tenance counter exceeds the threshold value, a warning icon will be displayed on the left side of the output’s No.
  • Page 266: Advanced Environment-Resistive Terminals

    Any node address within the setting range can be used as long as it is not already set for another node. Refer to SECTION 5 General-purpose Slaves for details on setting from the Configurator.
  • Page 267 Refer to the section following on names of components and func- tions for details on the location of the I/O status indicators. In the indicator name “1-A,” the “1” indicates the connector number, and the “A” indicates that it is an I/O status indicator.
  • Page 268 1. The I/O status indicator “B” is not used by Units with 8 inputs. 2. Although the connectors are numbered from 1 to 8, the input bits are num- bered from 0 to 7. (The input bits are also numbered from 0 to 7 in the Con- figurator display.)
  • Page 269 Advanced Environment-resistive Terminals Section 6-4 DRT2-ID08C-1 (PNP) CAN-H CAN-L Short- circuit or discon- nection detection circuit DRAIN Short- circuit or discon- nection detection circuit Wiring DRT2-ID08C (NPN) CAN L CAN H V− Input 0 Input 2 Input Input DRAIN Input 1...
  • Page 270 2. The minimum sensor power supply voltage is a communications power supply voltage of -1.5 V. Confirm the rated power supply voltage of the con- nected sensors when selecting the power supply. Refer to Appendix E Cur- rent Consumption Summary before setting the communications power supply voltage.
  • Page 271: Environment-Resistive Terminals With 16 Transistor Inputs (Ip67): Drt2-Hd16C (Npn) And Drt2-Hd16C-1 (Pnp)

    Refer to the section following on names of parts and functions for details on the location of the I/O status indicators. In the indicator name “1-A,” the “1” indicates the connector number, and the “A” indicates that it is an I/O status indicator.
  • Page 272 Yellow Input 15 is ON. Note Although the connectors are numbered from 1 to 8, the input bits are num- bered from 0 to 7. (The input bits are also numbered from 0 to 7 in the Config- urator display.)
  • Page 273 Advanced Environment-resistive Terminals Section 6-4 Component Names and Functions: DRT2-HD16C and DRT2-HD16C-1 Input connectors DeviceNet communications connector Connector 1 Connector 3 Connector 5 Connector 7 DeviceNet indicators Top: MS indicator Bottom: NS indicator Connector 8 Connector 2 Connector 4 Connector 6...
  • Page 274 Advanced Environment-resistive Terminals Section 6-4 DRT2-HD16C-1 (PNP) Photocoupler Input 0 CAN H CAN L Short- Input 1 circuit DRAIN V− discon- Photocoupler nection detec- tion circuit Communications connector Wiring DRT2-HD16C (NPN) CAN L Input 8 V− CAN H Input Input 4...
  • Page 275 2. The minimum sensor power supply voltage is a communications power supply voltage of − 1.5 V. Confirm the rated power supply voltage of the connected sensors when selecting a power supply. Refer to Appendix E Current Consumption Summary before setting the communications power supply voltage.
  • Page 276: Environment-Resistive Terminals With 8 Transistor Outputs (Ip67): Drt2-Od08C (Npn) And Drt2-Od08C-1 (Pnp)

    The load of output 7 has shorted. Note Although the connectors are numbered from 1 to 8, the input bits are num- bered from 0 to 7. (The inputs are also numbered from 0 to 7 in the Configura- tor displays.)
  • Page 277 Advanced Environment-resistive Terminals Section 6-4 Component Names and Functions: DRT2-OD08C and DRT2-OD08C-1 External power supply connector Output connectors DeviceNet communications connector I/O power supply Connector 1 Connector 3 Connector 5 Connector 7 status indicator DeviceNet indicators Top: MS indicator Bottom: NS indicator...
  • Page 278 Output V− CAN H DRAIN Output 5 Output 7 Output 1 Output 3 I/O power supply Solenoid valve, etc. Solenoid valve, etc. Note Power cannot be supplied to output devices from output connector G. Supply power to output devices externally.
  • Page 279 If the current limit (Ilim) is exceeded when there is an overload in the output OD08C-1 current (Iout) or when a load short-circuit occurs, as shown in Fig. 2 and 3, the output current (Iout) will be limited. Then, if the output transistor junction tem-...
  • Page 280 In automatic recovery mode, the Unit's load short-circuit protection is auto- matically cleared when Tj = Tr, as shown in Fig. 2. Therefore, as long as the cause of the short-circuit is not removed, the output's ON/OFF operation will repeat.
  • Page 281: Standard Environment-Resistive Terminals

    OFF when bit 05 of CIO 3300 (Load Shorted Flag) turns ON once. Output bits 00 to 07 of CIO 3200 will not turn ON again until the cause of the short is removed and the outputs are reset by turning ON work bit W00001.
  • Page 282: Environment-Resistive Terminals With 4 Transistor Inputs (Ip67): Drt2-Id04Cl (Npn) And Drt2-Id04Cl-1 (Pnp)

    Any node address within the setting range can be used as long as it is not already set for another node. Refer to SECTION 5 General-purpose Slaves for details on setting from the Configurator.
  • Page 283 1. The I/O status indicator “B” is not used by Units with 4 inputs. 2. Although the connectors are numbered from 1 to 4, the input bits are num- bered from 0 to 3. (The input bits are also numbered from 0 to 7 in the Con- figurator display.)
  • Page 284 V− DRAIN Wiring DRT2-ID04CL (NPN) CAN L V− CAN H Input 0 Input 2 DRAIN 24 V Input 3 Input 1 I/O power supply 24 V DC 3-wire sensor with NPN 2-wire sensor output (photoelectric or (limit switch) proximity sensor)
  • Page 285 3-wire sensor with PNP 2-wire sensor output (photoelectric or (limit switch) proximity sensor) Note Wire colors in parentheses are the previous JIS colors for photoelectric and proximity sensors. Dimensions: DRT2-ID04CL and DRT2-ID04CL-1 Two 5.3 dia. or M5 mounting holes Mounting hole dimensions...
  • Page 286: Environment-Resistive Terminals With 8 Transistor Inputs (Ip67): Drt2-Id08Cl (Npn) And Drt2-Id08Cl-1 (Pnp)

    1. The I/O status indicator “B” is not used by Units with 8 inputs. 2. Although the connectors are numbered from 1 to 8, the input bits are num- bered from 0 to 7. (The input bits are also numbered from 0 to 7 in the Con- figurator display.)
  • Page 287 Component Names and Functions: DRT2-ID08CL and DRT2-ID08CL-1 External power supply Input connectors connector DeviceNet communications connector Connector 1 Connector 3 Connector 5 Connector 7 DeviceNet indicators Top: MS indicator Bottom: NS indicator Rotary switches Connector 8 Connector 2 Connector 4 Connector 6 Used to set node addresses.
  • Page 288 Input 5 Input 1 Input 7 I/O power supply 24 V DC 3-wire sensor with NPN 2-wire sensor output (photoelectric or (limit switch) proximity sensor) Note Wire colors in parentheses are the previous JIS colors for photoelectric and proximity sensors.
  • Page 289: Environment-Resistive Terminals With 16 Transistor Inputs (Ip67): Drt2-Hd16Cl (Npn) And Drt2-Hd16Cl-1 (Pnp)

    The I/O status indicator displays and their meanings are shown in the follow- ing table. Refer to the section following on names of components and func- tions for details on the location of the I/O status indicators. In the indicator...
  • Page 290 Input 15 is ON. Note Although the connectors are numbered from 1 to 8, the input bits are num- bered from 0 to 7. (The input bits are also numbered from 0 to 7 in the Config- urator display.) I/O Power Supply Status...
  • Page 291 Input 11 Input 15 Input 6 Input 2 Input 14 Input 10 I/O power supply 24 V DC 3-wire sensor with NPN 3-wire sensor with NPN 2-wire sensor output (photoelectric or output (photoelectric or (limit switch) proximity sensor) proximity sensor)
  • Page 292 (photoelectric or (limit switch) output (photoelectric or proximity sensor) proximity sensor) Note Wire colors in parentheses are the previous JIS colors for photoelectric and proximity sensors. Dimensions: DRT2-HD16CL and DRT2-HD16CL-1 Two 5.3 dia. or M5 mounting holes Mounting hole dimensions...
  • Page 293: Environment-Resistive Terminals With 4 Transistor Outputs (Ip67): Drt2-Od04Cl (Npn) And Drt2-Od04Cl-1 (Pnp)

    Output 1 is ON. Yellow Output 2 is ON. Yellow Output 3 is ON. Note Although the connectors are numbered from 1 to 4, the input bits are num- bered from 0 to 3. I/O Power Supply Status Indicator Indicator...
  • Page 294 Standard Environment-resistive Terminals Section 6-5 Component Names and Functions: DRT2-OD04CL and DRT2-OD04CL-1 External power supply Input connectors connector DeviceNet communications Connector 1 Connector 3 connector DeviceNet indicators Top: MS indicator Bottom: NS indicator Connector 2 Connector 4 Rotary switches Used to set node addresses.
  • Page 295 Standard Environment-resistive Terminals Section 6-5 Wiring DRT2-OD04CL (NPN) CAN L Output 2 Output 0 V− CAN H 24 V DRAIN Output 1 Output 3 I/O power supply Solenoid valve, etc. Solenoid valve, etc. DRT2-OD04CL-1 (PNP) CAN L Output 0 Output 2 CAN H V−...
  • Page 296: Environment-Resistive Terminals With 8 Transistor Outputs (Ip67): Drt2-Od08Cl (Npn) And Drt2-Od08Cl-1 (Pnp)

    The I/O status indicator displays and their meanings are shown in the follow- ing table. Refer to the section following on names of components and func- tions for details on the location of the I/O status indicators. In the indicator...
  • Page 297 Output 5 is ON. Yellow Output 6 is ON. Yellow Output 7 is ON. Note Although the connectors are numbered from 1 to 8, the input bits are num- bered from 0 to 7. I/O Power Supply Status Indicator Indicator...
  • Page 298 Standard Environment-resistive Terminals Section 6-5 DRT2-OD08CL-1 (PNP) CAN-H CAN-L OUT0 V− OUT1 DRAIN Wiring DRT2-OD08CL (NPN) CAN L Output 6 Output 0 Output 2 Output 4 CAN H V− 24 V DRAIN Output 1 Output 3 Output 5 Output 7 I/O power supply Solenoid valve, etc.
  • Page 299: Environment-Resistive Terminals With 16 Transistor Outputs (Ip67): Drt2-Wd16Cl (Npn) And Drt2-Wd16Cl-1 (Pnp)

    The I/O status indicator displays and their meanings are shown in the follow- ing table. Refer to the section following on names of components and func- tions for details on the location of the I/O status indicators. In the indicator...
  • Page 300 Output 13 is ON. Yellow Output 14 is ON. Yellow Output 15 is ON. Note Although the connectors are numbered from 1 to 8, the input bits are num- bered from 0 to 7. I/O Power Supply Status Indicator Indicator...
  • Page 301 Standard Environment-resistive Terminals Section 6-5 Internal Circuits DRT2-WD16CL (NPN) CAN-H CAN-L OUT0 V− OUT1 DRAIN DRT2-WD16CL-1 (PNP) CAN-H CAN-L OUT0 V− OUT1 DRAIN Wiring DRT2-WD16CL (NPN) CAN L Output 0 Output 4 Output 8 Output 12 CAN H V− 24 V...
  • Page 302 Output 15 Output 11 Output 7 Output 3 Output 2 Out- Output 14 Output 10 put 6 I/O power supply Solenoid valve, etc. Solenoid valves, etc. Dimensions: DRT2-WD16CL and DRT2-WD16CL-1 Two 5.3 dia. or M5 mounting holes Mounting hole dimensions 165±0.2...
  • Page 303: Environment-Resistive Terminals With 8 Transistor Inputs And 8 Transistor Outputs (Ip67): Drt2-Md16Cl (Npn) And Drt2-Md16Cl-1 (Pnp)

    The I/O status indicator displays and their meanings are shown in the follow- ing table. Refer to the section following on names of components and func- tions for details on the location of the I/O status indicators. In the indicator...
  • Page 304 Output 5 is ON. Yellow Output 6 is ON. Yellow Output 7 is ON. Note Although the connectors are numbered from 1 to 8, the input bits are num- bered from 0 to 7. I/O Power Supply Status Indicator Indicator...
  • Page 305 Standard Environment-resistive Terminals Section 6-5 Internal Circuits DRT2-MD16CL (NPN) CAN-H CAN-L V− DRAIN OUT0 OUT1 DRT2-MD164CL-1 (PNP) CAN-H CAN-L V− DRAIN OUT0 OUT1...
  • Page 306 Output 6 24-V output Input 2 24-V input I/O power supply Solenoid valve, etc. Solenoid valves, etc. 2-wire sensor 3-wire sensor with NPN (limit switch) output (photoelectric or proximity sensor) DRT2-MD16CL-1 (PNP) CAN L Input 0 Output 4 Output 0 Input 4 V −...
  • Page 307: Mounting And Wiring Environment-Resistive Slaves

    Use screws to mount the Environment-resistive Terminal in the Control Panel. Environment-resistive Terminals cannot be mounted on a DIN Track. Drill the mounting holes in the control panel according to the dimensions shown in the dimensions diagrams and secure the Terminal with M5 screws.
  • Page 308 (socket) Note 1. Tighten the connector by hand to a torque of 0.39 to 0.49 N·m. If the con- nector is not tightened sufficiently, it will not provide the expected degree of protection and may become loose due to vibration. Do not use pliers or other tools to tighten the connectors, because these tools may damage the connectors.
  • Page 309 Always use a Power Supply Unit with a rating of 50 W or higher if it uses dropping overcurrent protection characteristic. Always use a Power Supply Unit with a rating of 150 W or higher if it uses intermit- tent overcurrent protection. The current limiter will protect the transistor even if short-circuit detection is disabled.
  • Page 310 58.3 Blue mark Note Tighten the connector by hand to a torque of 0.39 to 0.49 N·m. If the connec- tor is not tightened sufficiently, it will not provide the expected degree of pro- tection and may become loose due to vibration. Do not use pliers or other tools to tighten the connectors, because these tools may damage the connec- tors.
  • Page 311 Mounting and Wiring Environment-resistive Slaves Section 6-6 following table to determine the appropriate Environment-resistive Termi- nal to use with each kind of switch. Two-wire Proximity Sensor Compatible Terminal (pre-wired with connector) IEC pin arrangement (M1GJ type) DRT2-ID08C-1 DRT2-HD16C-1 OMRON pin arrangement (M1J...
  • Page 312: Analog Slaves

    Temperature Input Terminals ........
  • Page 313: Overview Of Analog Slaves

    Master in combination with Generic Status Flags or other status information. (Status information alone can also be allocated.) The Con- figurator or explicit messages can be used to allocate data in the Master, and to set Analog Slave functions and perform monitoring.
  • Page 314 1 to 5 V, 0 to 10 V, –10 to 10 V, 0 to 20 mA, 0 to 5 V, 1 to 5 V, 0 to 10 V, –10 to 10 V, 0 to 4 to 20 mA (0 to 5 V not supported)
  • Page 315 Platinum resistance Thermocouple Platinum resistance thermometer thermometer 150 × 40 × 50 (W × H × D) 115 × 49.7 × 50 (W × H × D) Dimensions Maintenance method Replacement of each Unit Just the Terminal Block can be removed.
  • Page 316 Top/Valley count function Temperature range timing function Note The input accuracy depends on the mounting method. For details, refer to the Performance Specifications in 7-6-1 DRT2-TS04T and DRT2-TS04P Temper- ature Input Terminals. 7-1-3 List of Data Processing Functions The following tables list the data processing functions that can be used with Analog Slaves.
  • Page 317 Compares the analog input value or an analog value after Disabled math processing (value for peak, bottom, top, valley, rate of change) with the four set values HH, H, L, and LL, and indi- cates the result with the Analog Status Flags. Off-wire detection Detects disconnections of analog inputs.
  • Page 318 The following math operations can be performed on the external analog input Temperature Input Value value or temperature input value. The values obtained after processing (ana- log input values or temperature input values) can be allocated as I/O in the Master. • Scaling to desired industry unit •...
  • Page 319 Master, from the analog/temperature input value, peak value, bottom value, top value, valley value, and rate of change. The selected data is referred to as “analog data” or “temperature data,” and can be allocated in the Master individually or in combination with Status Flags.
  • Page 320 Comparator with values allocated as Analog Data 1 Analog Status Flags (allocated I/O data) For Inputs 0 to 3, Analog Data 1 and 2 can be separately selected, as shown in the following diagram. Analog input Analog Data 1 Math...
  • Page 321 Analog Status Flags (Allocated I/O data) Note The Temperature Data 1 and Temperature Data 2 settings must be set to “nor- mal display” when using the DRT1-compatible 1/100 display mode. Refer to 7-6-2 Temperature Input Terminal Display Modes for details on the DRT1-compatible 1/100 display mode.
  • Page 322 Analog Input Terminals and Temperature Input Terminals support the follow- Temperature Input ing five types of input data (three of which are Status Flags), and one type of output data. The required data can be allocated in the Master either individu- Terminals ally or in combination with other data.
  • Page 323 188 (1/100 display) 11 input bytes (Normal display) 19 input bytes (1/100 display) Note Data can be allocated using other data combinations, but only when an OMRON CS/CJ-series Master Unit is used because the settings are made in the Master Unit.
  • Page 324 7-1-7 Allocating I/O Data in the Master I/O is allocated in the Master using the methods shown in the following table. Select the appropriate method depending on whether the allocated area in the Master is fixed or user-defined, and whether the allocated I/O data is the default I/O, a selected combination of data, or user-defined data.
  • Page 325 Overview of Analog Slaves Section 7-1 7-1-8 Procedure for Allocating I/O in the Master Application Step 1 Step 2 Step 3 Enable/disable Select analog 1. Allocate I/O 2. Allocate functions data data in fixed user-defined data combinations in user-defined area...
  • Page 326 Analog Input Terminals Connect the communications cables Set the node address using rotary switches or Configurator. (After changing the setting, toggle the power supply or reset the Unit from the Configurator.) Use the same input range for Input 0 and 1...
  • Page 327 Set the output range by turning ON DIP switch pin With the Configurator online, set the output range from 8 and using pins 1 to 3 for output 0 or pins 4 to 6 the Slave's Edit Device Parameters Window, download for output 1.
  • Page 328 Turn ON DIP switch pin 8 to use hardware settings When changing the temperature units, do so with and set the shared sensor settings with pins 1 to 4. DIP switch pin 6. (After changing these settings, When DIP switch settings are used, the same type of toggle the power supply or reset the Unit from the sensor input must be used for all inputs.
  • Page 329: Common Procedures

    Baud rate setting: Automatically detected from the Master Node Address The node address of the Analog Slave is set as a decimal value using the left Settings rotary switch for the ten's digit and the right rotary switch for the one's digit.
  • Page 330 2. The following window will be displayed. Enter the node address. 3. Click the OK Button. Note Any node address within the setting range can be used as long as it is not already set for another node. Setting the same node address for more than one node will cause a node address duplication error and communications will not start.
  • Page 331: Maintenance Information Window

    7-2-4 Wiring the I/O Lines The I/O lines are all wired to M3 screw terminals. Connect M3 crimp terminals to the wires and then connect them to the Termi- nal Block. Tighten the screws to a torque of 0.5 N·m.
  • Page 332 OFF and ON again. Note Always update the information when the parameters have been edited or set. Status Check Boxes The flags (check boxes) shown in the following table will be turned ON when the corresponding error occurs. Item...
  • Page 333 0000.0: Decimal point and significant digits to 0.1 0000.0: Decimal point and significant digits to 0.01 I/O Comment Displays up to 32 characters of text as a comment. A separate comment can be set for each input. Last Maintenance Displays the last maintenance date that was set. (All models.)
  • Page 334 Broken wire ON when a wire is broken or disconnected. (Used only for Analog Input Terminals when the input range is 1 to 5 V or 4 to 20 mA.) Status Boxes Displayed for the DRT2-TS04@ Only...
  • Page 335 (No.). 2. When either of the comparison inputs is disconnected (off-wire detected), the result value will be set to 0.00 and a yellow alarm icon will be displayed to the left of the comparison number (No.).
  • Page 336: Analog Input Terminals

    0 to 10 V –10 to 10 V Input range setting method • DIP switch: Inputs 0 and 1 share same setting, and Inputs 2 and 3 share same setting. • Configurator: Inputs 0 to 3 set separately. Maximum signal input ±...
  • Page 337 4 to 20 mA 0 to 10 V Input range setting method • DIP switch: Inputs 0 and 1 share same setting, and Inputs 2 and 3 share same setting. • Configurator: Inputs 0 to 3 set separately. Maximum signal input ±...
  • Page 338 1. When using the DRT2-AD04H, always set pin 7 to its default setting (OFF). 2. Always set pin 8 to ON if the DIP switch is used to set the ranges. If this pin is OFF, the DIP switch settings will not be enabled.
  • Page 339 Configurator. 1,2,3... 1. Double-click the icon of the Slave to be set in the Main Window and open the Edit Device Parameters Window. (From the Maintenance Mode Win- dow, click the right mouse button over the Slave icon and select Parame- ters and Edit.)
  • Page 340 DRT2-AD04 Input Ranges ■ Input Range: 0 to 5 V The voltage range 0 to 5 V corresponds to 0000 to 1770 hex (0 to 6,000). The convertible data range is FED4 to 189C hex ( 300 to 6,300). Negative volt- –...
  • Page 341 Section 7-4 ■ Input Range:1 to 5 V The voltage range 1 to 5 V corresponds to 0000 to 1770 hex (0 to 6,000). The convertible data range is FED4 to 189C hex ( 300 to 6,300). If a the input volt- –...
  • Page 342 Analog Input Terminals Section 7-4 ■ Input Range: 0 to 20 mA The current range 0 to 20 mA corresponds to 0000 to 1770 hex (0 to 6,000). The convertible data range is FED4 to 189C hex ( 300 to 6,300). Negative –...
  • Page 343 DRT2-AD04H Input Ranges ■ Input Range: 0 to 10 V The voltage range 0 to 10 V corresponds to 0000 to 7530 hex (0 to 30,000). The convertible data range is FA24 to 7B0C hex ( 1,500 to 31,500). Negative –...
  • Page 344 Analog Input Terminals Section 7-4 ■ Input Range:1 to 5 V The voltage range 1 to 5 V corresponds to 0000 to 7530 hex (0 to 30,000). The convertible data range is FA24 to 7B0C hex ( 1,500 to 31,500).
  • Page 345 Analog Input Terminals Section 7-4 ■ Input Range: 4 to 20 mA The current range 0 to 20 mA corresponds to 0000 to 7530 hex (0 to 30,000). The convertible data range is FA24 to 7B0C hex ( 1,500 to 31,500).
  • Page 346 Using the Configurator 1,2,3... 1. Double-click the icon of the Analog Slave to be set in the Main Window and open the Edit Device Parameters Window. (From the Maintenance Mode Window, click the right mouse button over the Slave icon and select Pa- rameters and Edit.)
  • Page 347 Setting Using the DeviceNet Configurator 1,2,3... 1. Double-click the icon of the Analog Slave to be set in the Main Window and open the Edit Device Parameters Window. (From the Maintenance Mode Window, click the right mouse button over the Slave icon and select Pa-...
  • Page 348 Master with any combination. This method is supported by CS/CJ-series DeviceNet Master Units only. Note Priority is given to settings in the Master, so the setting for the Slave’s default connection path is not required. Use the following method to allocate data from the Configurator.
  • Page 349 Analog Input Terminals Section 7-4 2. Click the General Tab, select the Analog Slave to be set, and click the Ad- vanced Setup Button. 3. Click the Connection Tab, and select User Setup. Select Use Poll Con- nection, and then select the I/O data (pattern) from the pull-down menu for the connection path.
  • Page 350 7. Click the OK Button, return to the General Tab, and click the Download Button. Note Do not allocate a COS connection for Analog Data 1 or 2. If a COS connection is allocated for analog data, a frame will be transmitted to the host at every count change.
  • Page 351 Analog Data 1 for Input 3 Analog Data 2 (Instance Analog Data 2 is used to monitor other analog data in addition to that in Ana- 114) log Data 1. Select one type of following data other than that allocated for Ana- log Data 1: Analog input value, peak value, bottom value, top value, valley value, or rate of change.
  • Page 352 132) These flags are used to time reading the values held as the top and valley val- ues at the Master. The following data format is used when these flags are allo- cated in the Master (2 bytes).
  • Page 353 For Input 3 For Input 2 Analog Data 1 + Analog This data pattern consists of Analog Data 1 followed by Analog Data 2 and is Data 2 (Instance 144) allocated in the Master using the following data format. Negative data values are given as two’s complements (16 bytes = 8 words)
  • Page 354 Analog Status Flags + This data pattern consists of Analog Status Flags followed by Generic Status Generic Status Flags Flags and is allocated in the Master using the following data format, shown by (Instance 164) byte (5 bytes). Bit 7...
  • Page 355 The Hold Flags are used to control the hold execution timing from the Master and are allocated in the Master using the following data format (1 byte). Note A delay may occur between when the Master’s power is turned ON until notifi- cation of the Hold Flag status is sent to the Slave.
  • Page 356 7-4-3 Functions and Settings Setting the Number of Normally, when using a four-point Input Unit, the values for the four inputs are AD Conversion Points converted in sequence. The setting can be changed, however, so that unused inputs are not converted. By reducing the number of conversion points, the (DRT2-AD04 Only) conversion cycle speed is increased.
  • Page 357 Setting Using the DeviceNet Configurator (DRT2-AD04 Only) 1,2,3... 1. Double-click the icon of the Analog Slave to be set in the Main Window and open the Edit Device Parameters Window. (From the Maintenance Mode Window, click the right mouse button over the Slave icon and select Pa- rameters and Edit.)
  • Page 358 Setting Using the DeviceNet Configurator 1,2,3... 1. Double-click the icon of the Analog Slave to be set in the Main Window and open the Edit Device Parameters Window. (From the Maintenance Mode Window, click the right mouse button over the Slave icon and select Pa- rameters and Edit.)
  • Page 359 28,000 to 28,000, but make sure that underflow or overflow does – not occur. The High Limit is 7FFE hex and the Low Limit is 8000 hex. Note The offset value can be set even when using default scaling.
  • Page 360 Setting Using the DeviceNet Configurator 1,2,3... 1. Double-click the icon of the Analog Slave to be set in the Main Window and open the Edit Device Parameters Window. (From the Maintenance Mode Window, click the right mouse button over the Slave icon and select Pa- rameters and Edit.)
  • Page 361 Section 7-4 3. Click the Scaling Tab, and select either Default Scaling or User Scaling. 4. For user scaling, set the 0% value in the Scaling point 1 field, and set the 100% value in the Scaling point 2 field.
  • Page 362 Hold function starts Hold function stops Note A delay in network transmission time will occur from the time the Hold Flag turns ON (or OFF) in the Master’s ladder program until notification of the flag’s status is actually sent to the Slave. Therefore, even when the Hold Flag is ON, the first analog data transmitted to the Master when the CPU Unit power is turned ON may be the data from when the Hold Flag was OFF.
  • Page 363 Setting Using the DeviceNet Configurator 1,2,3... 1. Double-click the icon of the Analog Slave to be set in the Main Window and open the Edit Device Parameters Window. (From the Maintenance Mode Window, click the right mouse button over the Slave icon and select Pa- rameters and Edit.)
  • Page 364 Analog values that fluctuate more than twice the hysteresis value are moni- tored, and the top or valley values are held. The top or valley value is allo- cated along with the Top/Valley Detection Timing Flags, which can be used to check the hold timing.
  • Page 365 Analog Input Terminals Section 7-4 2. Select the Tab Page for the input where top/valley hold is to be set, and se- lect Top/Valley Hold under the Function Choice heading. 3. To allocate the Hold Flag (output) in the default connection path, click the General Tab, and select Holding Value from the pull-down menu in the Default Connection Path (Out) field.
  • Page 366 2. Return to the General Tab, click the Download Button, and then click the Reset Button to reset the Unit. 3. Click the OK Button and exit the window. Note The hysteresis value set for the top/valley hold function is also used by the comparator function.
  • Page 367 Rate of change Deviation data Note If the sampling cycle is set to a small value, the rate of change will be sensitive to small changes. If the analog data is subject to minute fluctuations, and the sampling cycle is shorter than the cycle of fluctuation, the fluctuation will be...
  • Page 368 Window, click the right mouse button over the Slave icon and select Pa- rameters and Edit.) 2. Select the Tab Page for the input where rate of change is to be set, and select Rate of Change under the Function Choice heading.
  • Page 369 Analog Input Terminals Section 7-4 3. To set the sampling cycle, click the Rate of Change Tab and input the de- sired value for the sampling cycle in the Sampling Rate field. 4. Return to the General Tab, click the Download Button, and then click the Reset Button to reset the Unit.
  • Page 370 The Comparator Result Flag turns OFF when the value is lower than the hys- teresis width (H or HH alarm occurs) or exceeds it (L or LL alarm occurs), as shown in the following diagram. If the analog value fluctuates around the threshold, and the flag repeatedly turns ON or OFF, setting hysteresis will sta- bilize the flag operation.
  • Page 371 Analog Input Terminals Section 7-4 2. Select the Tab Page for the input where the comparator function is to be set, and select Comparator under the Function Choice heading. 3. Click the Comparator Tab and set each of the alarm values. The example...
  • Page 372 When Off-wire Detection is enabled, the value of AD conversion data is set to 7FFF hex. When the input returns to a value within the range that can be con- verted, the Off-wire Detection function will automatically be turned OFF, and...
  • Page 373 Analog Input Terminals Section 7-4 Off-wire Detection functions with input ranges of 1 to 5 V or 4 to 20 mA only. With the 1 to 5 V input range, an off-wire condition is detected when the input voltage is below 0.76 V (less than 6%). With the 4 to 20 mA input range, an off-wire condition is detected when the input current is below 3.04 mA.
  • Page 374 Analog Input Terminals Section 7-4 2. Select the Tab Page for the input to be adjusted, and click the Adjustment Button. (At the same time set the input range again.) 3. Input the voltage (or current) transmitted from the connected device to the Unit’s input terminal that is equivalent to the 100% value.
  • Page 375 Setting Using the DeviceNet Configurator 1,2,3... 1. Double-click the icon of the Analog Slave to be set in the Main Window and open the Edit Device Parameters Window. (From the Maintenance Mode Window, click the right mouse button over the Slave icon and select Pa-...
  • Page 376 Analog Input Terminals Section 7-4 2. Select the Tab Page for the input where the cumulative counter is to be set, and select Cumulated Count under the Function Choice heading. 3. To set the counter unit, click the Cumulated Count Tab and select Hour...
  • Page 377 ■ Setting the Last Maintenance Date of the Unit 1,2,3... 1. Double-click the icon of the Analog Slave to be set in the Main Window and open the Edit Device Parameters Window. (From the Maintenance Mode Window, click the right mouse button over the Slave icon and select Pa-...
  • Page 378 ■ Setting the Last Maintenance Date of the Connected Device 1,2,3... 1. Double-click the icon of the Analog Slave to be set in the Main Window and open the Edit Device Parameters Window. (From the Maintenance Mode Window, click the right mouse button over the Slave icon and select Pa- rameters and Edit.)
  • Page 379 Last Maintenance Date field. (To enter the current date, select Today, which is at the bottom of the pull-down menu.) 3. Return to the General Tab, click the Download Button, and then click the Reset Button to reset the Unit.
  • Page 380: Analog Output Terminals

    Formula: 3.21 + (0.055 x 2) + 0.035 = 3.355 ms Note With the DRT2-DA04H, the conversion cycle time is within 250 ms even when all of the math operations are being used.
  • Page 381 Default setting: OFF Note 1. Always set pin 8 to ON if the DIP switch is used to set the range. If this pin is OFF, the DIP switch settings will not be enabled. 2. The DIP switch settings are read when the power is turned ON.
  • Page 382 Configurator. 1,2,3... 1. Double-click the icon of the Slave to be set in the Main Window and open the Edit Device Parameters Window. (From the Maintenance Mode Win- dow, click the right mouse button over the Slave icon and select Parame- ters and Edit.)
  • Page 383 Conversion Data the output range used, as shown below. When the value exceeds the output range, the DA conversion data is fixed at the High Limit or Low Limit set value. Output Range: 0 to 5 V The values 0000 to 1770 hex (0 to 6,000) correspond to the voltage range 0 to 5 V.
  • Page 384 Analog Output Terminals Section 7-5 Output Range: 1 to 5 V The values 0000 to 1770 hex (0 to 6,000) correspond to the voltage range 1 to 5 V. The output range is 0.8 to 5.2 V. Voltage 5.2 V 0.8 V...
  • Page 385 Analog Output Terminals Section 7-5 Output Range: 0 to 20 mA The values 0000 to 1770 hex (0 to 6,000) correspond to the current range 0 to 20 mA. The output range is 0 to 21 mA. Current 21 mA...
  • Page 386 Setting Using the DeviceNet Configurator 1,2,3... 1. Double-click the icon of the Slave to be set in the Main Window and open the Edit Device Parameters Window. (From the Maintenance Mode Win- dow, click the right mouse button over the Slave icon and select Parame- ters and Edit.)
  • Page 387 Setting Using the DeviceNet Configurator 1,2,3... 1. Double-click the icon of the Slave to be set in the Main Window and open the Edit Device Parameters Window. (From the Maintenance Mode Win- dow, click the right mouse button over the Slave icon and select Parame- ters and Edit.)
  • Page 388 Analog Output Terminals Section 7-5 5. Click the I/O Allocation (IN) or I/O Allocation (OUT) Tab, and edit the I/O allocations. Select the Smart Slave where the I/O allocations are to be ed- ited and click the Edit Button to display the Edit I/O Allocate Window.
  • Page 389 The default setting is used to perform AD conversion, converting analog out- put values that have been scaled to a count of 0 to 6,000 into corresponding digital values in the output signal range. Scaling can be used to change scaled values that correspond to the output signal range into other values required by the user (industry unit values).
  • Page 390 28,000 and 28,000, but if underflow or overflow occurs in the scaled line, the – 100% or 0% output will not be possible. The High Limit is 7FFE hex and the Low Limit is 8000 hex. Note The offset value can be set even when using default scaling.
  • Page 391 Setting Using the DeviceNet Configurator 1,2,3... 1. Double-click the icon of the Analog Slave to be set in the Main Window and open the Edit Device Parameters Window. (From the Maintenance Mode Window, click the right mouse button over the Slave icon and select Pa- rameters and Edit.)
  • Page 392 Analog Output Terminals Section 7-5 4. For user scaling, set the 0% value in the Scaling point 1 field, and set the 100% value in the Scaling point 2 field. 5. For offset compensation, set the offset value in the Scaling Offset field.
  • Page 393 Setting Using the DeviceNet Configurator 1,2,3... 1. Double-click the icon of the Analog Slave to be set in the Main Window and open the Edit Device Parameters Window. (From the Maintenance Mode Window, click the right mouse button over the Slave icon and select Pa-...
  • Page 394 Analog Output Terminals Section 7-5 2. Select the Tab Page for the output to be adjusted, and click the Adjust- ment Button. (At the same time set the output range again.) Adjusting the Low Limit 3. Output the value that is equivalent to 0% from the Master Unit. Always per- form adjustment with the 0% value.
  • Page 395 100% value is output from the output device. After compensation is completed, click the Fix upper adjusting value Button. Note If the High Limit adjustment is not performed for the 100% value, a discrep- ancy will occur when the Low Limit is adjusted, so always adjust the Low Limit of Output Terminals before adjusting the High Limit.
  • Page 396 Setting Using the DeviceNet Configurator 1,2,3... 1. Double-click the icon of the Analog Slave to be set in the Main Window and open the Edit Device Parameters Window. (From the Maintenance Mode Window, click the right mouse button over the Slave icon and select Pa- rameters and Edit.)
  • Page 397 Hold last state Holds and outputs the value from immediately before the error occurred. Zero count Outputs the value when 0 is written from the Host. This setting will be affected by scaling settings that are used. Output Ranges and Values...
  • Page 398: Temperature Input Terminals

    Temperature Input Terminals Section 7-6 2. Select the Tab Page for the output where the error output value is to be set, and select the desired item from the pull-down menu in the Fault State field. 3. Return to the General Tab, click the Download Button, and then click the Reset Button to reset the Unit.
  • Page 399 Block. The indicator accuracy will be reduced depending on the mounting Accuracy direction if just the Terminal Unit itself is replaced and the serial numbers of the Terminal Block and Terminal Unit do not match. The serial numbers of the Terminal Block and Terminal Unit can be found on the labels affixed to the Units as shown below.
  • Page 400 Temperature Input Terminals Section 7-6 If the serial number of the terminal block and Unit are the same, basic perfor- mance specifications apply regardless of the mounting direction. If the serial numbers are different, the following indication accuracies apply. Mounting direction...
  • Page 401 Temperature Input Terminals Section 7-6 Setting the Input Type Setting with the DIP The input type can be set using the DIP switch or the Configurator. Switch Set each pin according to the following table.lp Pin No. Setting Specifications The settings on pins 1 to 4 select This setting is enabled only when the input type (input range).
  • Page 402 In this case, make the settings again and reset the power supply. Note 1. Always set pin 8 to ON if the DIP switch is used to set the ranges. If this pin is OFF, the DIP switch settings will not be enabled.
  • Page 403 3. Select the desired sensor from the pull-down menu in the Sensor Type field. 4. Return to the General Tab, click the Download Button, and then click the Reset Button to reset the Unit. 5. Click the OK Button and exit the window.
  • Page 404 FFEC to 0528 FFEC to 0910 Note 1. The display data will be clamped at the minimum value when the value is below the minimum display value but higher than the value at which an off-wire condition is detected. 2. When an off-wire condition is detected, the display data will be 7FFF. (In 1/100 display mode, the display data will be 7FFF FFFF.)
  • Page 405 − Note When all of the inputs are not being used, an off-wire condition may be detected in the unused, open input terminal. To prevent an off-wire detection, wire the unused input terminals as shown in the following diagram.
  • Page 406 Master. If the conversion data is negative, the negative value is expressed as the two’s complement. The four inputs occupy 4 words in the Master, as shown in the following dia- gram. If the input type’s data has 0.1 digits, the value transmitted to the mas- ter is 10 times the actual value.
  • Page 407 2. Turn ON the Master and Slave power supplies. At this point, the Slave will not be in 1/100 display mode. 3. Double-click the icon of the Slave to be set in the Main Window and open the Edit Device Parameters Window.
  • Page 408 Temperature Input Terminals Section 7-6 4. Select a Slave in the Register Device list and click the Advanced Setup Button to open the Advanced setting Window. 5. Click the Connection Tab, select User Setup, and select the type of con- nection being used.
  • Page 409 (IN) Tab. Click the Edit Button to display the Edit I/O Allocate Window. 7. Set the allocated words in the Edit I/O Allocate Window, 8. Click the General Tab in the Edit Device Parameters Window and click the Download Button. The Master will be reset and will restart with the spec-...
  • Page 410 0.01 ° C (or ° F). Consequently, the 0.1 ° C/ ° F or 0.01 ° C/ ° F display digits may jump back and forth between values. Treat any values displayed beyond the specified input resolution as reference data.
  • Page 411 Degrees flag: Off-wire flag: A value of 1 indicates an off-wire condition was detected. In this case, the leftmost 3 digits will be 7FF and the rightmost digits will be FFF. The rightmost 3 digits and leftmost 3 digits are sent to the Master alternately in 125-ms intervals, as shown in the following diagram.
  • Page 412 Error digits Flags 1. Data is transmitted in the order: leftmost 3 digits → rightmost 3 digits. Note WHen reading the temperature data in the program, always read it in the same order (leftmost 3 digits → rightmost 3 digits).
  • Page 413 2. Consider the PLC’s cycle time and communications time and make adjust- ments if necessary so that the data read cycle is less than 125 ms. If the data read cycle exceeds 125 ms, it will not be possible to read the correct data.
  • Page 414 7-6-3 I/O Data Selection and Allocation Selecting Up to two of the six resulting values can be selected to allocate in the Master Temperature Data (one type each for Temperature Data 1 and Temperature Data 2). Select from analog input value, peak value, bottom value, top value, valley value, and rate of change.
  • Page 415 (eight bytes) of the Master’s IN Area, as shown in the following diagram. The data is also be allocated to 4 words when the temperature input value is set to 1/100 display by setting the Slave’s DIP switch to DRT1-compatible 1/100 display mode.
  • Page 416 Master with any combination. This method is supported by CS/CJ-series DeviceNet Master Units only. Note Priority is given to settings in the Master, so the setting for the Slave’s default connection path is not required. Use the following method to allocate data from the Configurator.
  • Page 417 4. Click the OK Button and exit the window. 5. Click the I/O Allocation (IN) Tab and edit the I/O allocations. Select the Smart Slave to be set and click the Edit Button to display the Edit I/O Allocate Window.
  • Page 418 Set the Poll settings to block 1, allocated 3300 (word CIO 3300). Set the Cyclic settings to block 2, allocated 3500 (word CIO 3500). 6. Click the OK Button and use the following window to confirm that I/O has been allocated correctly.
  • Page 419 Temperature Data 2 is used to monitor other temperature data in addition to (Instance 114 or 118) that in Temperature Data 1. Select one type of following data other than that allocated for Temperature Data 1: Temperature input value, peak value, bot- tom value, top value, valley value, or rate of change.
  • Page 420 122) These flags are used to time reading the values held as the top and valley val- ues at the Master. The following data format is used when these flags are allo- cated in the Master (2 bytes).
  • Page 421 Top/Valley Detection Timing Flags, and the Off-wire Detection Flags. These flags are used for detection and monitoring. The data format used for each byte when these flags are allocated in the Mas- ter is shown below (4 bytes). Bit 7...
  • Page 422 Temperature Data 1 + This data pattern consists of Temperature Data 1 followed by Temperature Temperature Data 2 Data 2 and is allocated in the Master using the following data format. Negative (Instance 144 or 148) data values are given as two’s complements...
  • Page 423 Analog Status Flags + This data pattern consists of Analog Status Flags followed by Generic Status Generic Status Flags Flags and is allocated in the Master using the following data format, shown by (Instance 164) byte (5 bytes). Bit 7...
  • Page 424 This data pattern consists of Analog Data 1 followed by the Top/Valley Detec- Top/Valley Detection tion Timing Flags and then the Generic Status Flags and is allocated in the Timing Flags + Generic Master using the following data format, shown by byte (11 bytes).
  • Page 425 V_ST0 T_ST3 T_ST2 T_ST1 T_ST0 The following format is used when this data pattern is allocated starting from the rightmost byte of the Master Word 15 Temperature Data 1 for Input 0 Temperature Data 1 for Input 1 Temperature Data 1 for Input 2...
  • Page 426 The Hold Flags are used to control the hold execution timing from the Master and are allocated in the Master using the following data format (1 byte). Note A delay may occur between when the Master’s power is turned ON until notifi- cation of the Hold Flag status is sent to the Slave.
  • Page 427 Setting Using the DeviceNet Configurator 1,2,3... 1. Double-click the icon of the Temperature Input Terminal to be set in the Main Window and open the Edit Device Parameters Window. (From the Maintenance Mode Window, click the right mouse button over the Slave icon and select Parameters and Edit.)
  • Page 428 Temperature Input Terminals Section 7-6 ( − 28,000 to 28,000) for two points in the scale (the 100% value and 0% value). Scaling value Value for 100% set by user (Scaling point 2) Conversion Value for 0% set by user...
  • Page 429 2. Select the Tab Page for the input where scaling is to be performed, and se- lect Scaling under the Function Choice heading. 3. Set the 0% value in the Scaling point 1 field, and set the 100% value in the Scaling point 2 field.
  • Page 430 Master when the CPU Unit power is turned ON may be the data from when the Hold Flag was OFF. To collect peak/bottom hold data using the Hold Flag at the Master, configure a ladder...
  • Page 431 Maintenance Mode Window, click the right mouse button over the Slave icon and select Parameters and Edit.) 2. Select the Tab Page for the input where peak/bottom hold is to be set, and select Peak/Bottom Hold under the Function Choice heading.
  • Page 432 Hold Flag turns OFF. (The last value is held when the Hold Flag turns OFF, but the next time the Hold Flag turns ON, the hold value is initialized as soon as a top or valley occurs.) The comparator can be used to compare the top or valley value allo-...
  • Page 433 Temperature Input Terminals Section 7-6 2. Select the Tab Page for the input where top/valley hold is to be set, and se- lect Top/Valley under the Function Choice heading. 3. To allocate the Hold Flag (output) in the default connection path, click the General Tab, and select Holding Value from the pull-down menu in the Default Connection Path (Out) field.
  • Page 434 2. Return to the General Tab, click the Download Button, and then click the Reset Button to reset the Unit. 3. Click the OK Button and exit the window. Note The hysteresis value set for the top/valley hold function is also used by the comparator function.
  • Page 435 Section 7-6 One-shot Time Setting 1,2,3... 1. Input the desired value in the SHOT Off Delay field of the Top/Valley Tab under the Function Choice heading. 2. Return to the General Tab, click the Download Button, and then click the Reset Button to reset the Unit.
  • Page 436 Maintenance Mode Window, click the right mouse button over the Slave icon and select Parameters and Edit.) 2. Select the Tab Page for the input where top/valley counter is to be set, and select Top/Valley under the Function Choice heading.
  • Page 437 Derivative data Note If the sampling cycle is set to a small value, the rate of change will be sensitive to small changes. If the temperature data is subject to minute fluctuations, and the sampling cycle is shorter than the cycle of fluctuation, the fluctuation will be regarded as the rate of change.
  • Page 438 Temperature Input Terminals Section 7-6 2. Select the Tab Page for the input where rate of change is to be set, and select Rate of Change under the Function Choice heading. 3. To set the sampling cycle, click the Rate of Change Tab and input the de- sired value for the sampling cycle in the Sampling Rate field.
  • Page 439 Note When the temperature input value changes faster than the conversion cycle, the status may go from a Low Limit alarm directly to a High Limit alarm without having the Normal Flag (pass signal) go ON in between. Configure ladder programs to prevent this from occurring.
  • Page 440 OFF Delay The time until the Comparator Result Flag turns OFF can be extended. For example, even if the Flag is ON momentarily, the OFF delay can be set so that the Master can receive notification of the Flag’s status.
  • Page 441 Temperature Input Terminals Section 7-6 3. Click the Comparator Tab and set each of the alarm values. The example here shows the setting for Alarm Trip Point High (HH limit set value). Note When setting the hysteresis value, adjust for each input’s decimal point position or the 1/100 display mode if the 1/100 display mode is being used.
  • Page 442 High High Limit (HH), High Limit (H), Low Low Limit (LL), or Low Limit (L). Any threshold value can be set in the Threshold Zone Counter to indicate when the threshold time within the zone has been exceeded.
  • Page 443 Maintenance Mode Window, click the right mouse button over the Slave icon and select Parameters and Edit.) 2. Select the Tab Page for the input where the Zone Count function is to be set, and select Comparator under the Function Choice heading.
  • Page 444 Temperature Input Terminals Section 7-6 4. A threshold count value (time in seconds) can be set in the Threshold Zone Counter field to indicate when the temperature has been in the tempera- ture zone longer than the threshold setting. 5. Return to the General Tab, click the Download Button, and then click the Reset Button to reset the Unit.
  • Page 445 Temperature Input Terminals Section 7-6 3. The comparison result will be read to a precision of 0.01, regardless of the setting. The temperature difference with device B is much higher than the other devices. Is it an error? Device A...
  • Page 446 Temperature Input Terminals Section 7-6 value to a precision of 0.01. For example, when setting 10 ° C, input 1000 for 10.00 ° C. 4. Return to the General Tab, click the Download Button, and then click the Reset Button to reset the Unit.
  • Page 447 Maintenance Mode Window, click the right mouse button over the Slave icon and select Parameters and Edit.) 2. Click the Tab Page for the input that is connected to a connecting device requiring the last maintenance date to be set. Select the applicable date from the pull-down menu in the Last Maintenance Date field.
  • Page 448 The cumulative value can be calculated in hours ( ° C × hours or ° F × hours) or minutes ( ° C × minutes or ° F × minutes).
  • Page 449 Temperature Input Terminals Section 7-6 2. Select the Tab Page for the input where the cumulative counter is to be set, and select Cumulated Count under the Function Choice heading. 3. To set the counter unit, click the Cumulated Count Tab and select Hour...
  • Page 450 Temperature Input Terminals Section 7-6 4. To set the monitor value, click the Cumulated Count Tab, and input the de- sired value in the Threshold Cumulated Counter field. 5. Return to the General Tab, click the Download Button, and then click the Reset Button to reset the Unit.
  • Page 451 Test indication accuracy after adjustment. Note The only sensors that can be adjusted are ones that operate while the power supply is ON. When adjusting for sensors that are not presently in use, change the input type setting, toggle the power supply or reset the Unit from the Configurator, and perform the adjustment procedure from the beginning of the flowchart.
  • Page 452 F) temperature for thermocouple sensors. Use a cold junction compensator compatible with the sensor being adjusted. Note When using an R, S, E, B, or W type thermocouple, a K type can be substi- ° ° tuted. Set the ZERO-CON to 0 C (32 ■...
  • Page 453 In addition, when using an R, S, or B type sen- sor, set the input type as K2 (0.0 to 500.0 ° C). When using an E or W type sensor, set the input type as K1 (–200 to 1,300 ° C).
  • Page 454 Temperature Input Terminals Section 7-6 7. Select the Tab Page for the input that will be adjusted and click the Adjust- ment Button to open the Adjustment Window. 8. Adjust the lower limit value (lower adjusting value). Input 0 mV from the ref- erence voltage/current generator (STV) to the Temperature Input Termi- nal’s input terminals.
  • Page 455 Slave icon and select Maintenance Information to open the Maintenance Information Window. Select the Tab Page for the input that was adjusted. If there is a check in the User Adjustment Box (bottom right box), the Unit is operating with us- er-set adjustment values.
  • Page 456 • Connect the external devices as shown in the following diagram. • After verifying that the ZERO-CON is set to 0 ° C, set the STV’s output voltage to produce a voltage equivalent to the test voltage.
  • Page 457 (End of adjustment) Note The terminal block temperature stabilization time does not affect the upper/lower limit adjustment after changing the wiring for inputs 2, 3, and 4, so the adjustment can be performed immediately if 30 minutes have passed since the Temperature Input Terminal’s power was turned ON.
  • Page 458 Test indication accuracy after adjustment. Note The only sensors that can be adjusted are ones that operate while the power supply is ON. When adjusting for sensors that are not presently in use, change the input type setting and perform the adjustment procedure from the beginning of the flowchart.
  • Page 459 1,2,3... 1. Set the resistance value on the six-dial resistance box equivalent to the test value and properly wire the box to the input of the Temperature Input Terminal that is being adjusted. 2. If the correct resistance cannot be obtained, properly wire the digital mul- timeter to the six-dial resistance box and measure the resistance.
  • Page 460 Temperature Input Terminals Section 7-6 7. Select the Tab Page for the input that will be adjusted and click the Adjust- ment Button to open the Adjustment Window. Ω 8. Adjust the lower limit value (lower adjusting value). Input 18 from the six-dial resistance box to the Temperature Input Terminal’s input terminals.
  • Page 461 Slave icon and select Maintenance Information to open the Maintenance Information Window. Select the Tab Page for the input that was adjusted. If there is a check in the User Adjustment Box (bottom right box), the Unit is operating with us- er-set adjustment values.
  • Page 462 Temperature Input Terminals Section 7-6 Note If the power supply is not turned OFF after making an adjustment, it is not necessary to wait 30 minutes before continuing testing. DRT2-TS04P Six-dial resistance box Input A Input b Input B...
  • Page 463 Temperature Input Terminals Section 7-6...
  • Page 464: Communications Timing

    I/O Response Time ........
  • Page 465: Remote I/O Communications Characteristics

    8-1-1 I/O Response Time The I/O response time is the time it takes from the reception of an input signal at an Input Slave to the output of the corresponding output signal at an Output Slave after being processed by the ladder program at the Master.
  • Page 466 TION 6 Environment-resistive Slaves for details on Input and Output Slaves' ON and OFF delay times. Refer to Refresh Time on page 451 and the Opera- tion Manual for the PLC being used for details on the PLC's instruction execu- tion and peripheral servicing cycle times.
  • Page 467 Remote I/O Communications Characteristics Section 8-1 CVM1- and CV-series PLCs (Synchronous Mode) Minimum I/O Response The minimum I/O response time occurs with the I/O timing shown in the fol- Time lowing diagram. Cycle time Instruction Periph- Instruction Periph- Instruction Periph-...
  • Page 468 Remote I/O Communications Characteristics Section 8-1 Maximum I/O Response The maximum I/O response time occurs with the I/O timing shown in the fol- Time lowing diagram. Cycle time Periph- Periph- Instruction Periph- Instruction Instruction Periph- Instruction eral ser- eral ser-...
  • Page 469 The minimum I/O response time occurs when the DeviceNet Slave I/O Time refreshing is executed just after the input signal is received by the Master and I/O is refreshed for the Slave first in the next I/O refresh cycle. Instruction...
  • Page 470 Remote I/O Communications Characteristics Section 8-1 Maximum I/O Response The maximum I/O response time occurs with the I/O timing shown in the fol- Time lowing diagram. Instruction Instruction Instruction execution execution execution Master Unit Input Output The Input Slave's ON (OFF) delay...
  • Page 471 Slave) is the total of the processing of each Slave in the Network. MULTIPLE I/O TERMINAL processing time: 3.5 [ms] Only when Slaves with input, output or mixed I/O of more than 8 bytes exist. Explicit message communications time: 0.11 × T + 0.6 [ms]...
  • Page 472 Using Master Unit for C200HS PLCs 2.27 + 0.077 × number of words (ms) (See note.) Note The number of words refreshed is the total number of words in the I/O Area that are allocated to the Slaves, including any unused words between those words actually used by the Slaves.
  • Page 473 I/O communications are set to start automatically at startup. The system startup time is the delay from the time that the Master Unit is turned ON or restarted until the time remote I/O com- munications begin.
  • Page 474: Message Communications Characteristics

    Slaves' I/O processing from being performed until the Master Unit and remote I/O communications have started up. Note Refer to the operation manual of the Master Unit being used for details on the Master Unit Status Area. The following program example is for a CS1-series PLC and a Master Unit with a unit number of 00.
  • Page 475 = 8) Communications Note The above equations can be used to find the approximate message communi- cations time, but not the maximum time. The message communications time will depend on the frequency of the message communications, the load on the remote node, the communications cycle time, and other factors.
  • Page 476: Troubleshooting And Maintenance

    Indicators and Error Processing ........
  • Page 477: Indicators And Error Processing

    Slave Unit. Flashing (red) are incorrect. Node address duplica- Slave Unit has been Reset the Slave Unit so that it has a tion assigned the same unique node address, and then restart ON (green) node address as the the Slave Unit.
  • Page 478: Troubleshooting

    An error has occurred in the Slave's internal non-volatile memory data. Double-click the icon of the Slave in the Main Window and open the Edit Device Parameters Window. Click the Default Setup Button, and then click the Reset Button. If the MS indicator continues to flash red after returning the data to the default status, replace the Slave Unit.
  • Page 479 If there is nearby equipment that generates electrical noise, take steps to shield the Master, Slaves, and communications cables from the noise. If an error has occurred in a network with an OMRON Master Unit, refer to the Mas- ter Unit's Operation Manual.
  • Page 480 If another company's Master is being used, refer to the relevant operation manual. Check whether the Slave is registered in the Master's scan list. If an OMRON Master Unit is being used, a new Slave cannot be added to the network if the Master is operating with the scan list enabled.
  • Page 481 Network Power Voltage Error is still detected. The network power voltage The 11 to 25 V setting range Set a value within the 11 to 25 monitor value cannot be set. has been exceeded. V setting range.
  • Page 482 Expansion Units cannot be Turn OFF the power before mounted or removed online mounted or removed online mounting or removing an and the MS indicator is lit red. Expansion Unit. The Operation Time Monitor This function is usable only function cannot be used.
  • Page 483 DRT2-OD04CL(-1) DRT2-OD08C(-1) DRT2-OD08CL(-1) DRT2-WD16CL(-1) DRT2-MD16CL(-1) Errors occurring in There is a delay in the input’s An input delay may be set in Either set the input filter value Slaves with inputs ON or OFF timing. the input filter function. to 0 or an appropriate non- DRT2-ID08(-1) zero input filter value.
  • Page 484 Errors occurring in The Load Disconnected Flag is The Load Disconnected Disable the Load Discon- Slaves equipped with going ON for outputs that are Detection function may not be nected Detection function for the External Load Dis- not being used.
  • Page 485 Slaves though the monitor value the Analog Smart Slave. Set the monitor value to a (threshold) has been If the monitor value is set to 0, non-zero value. exceeded. the Flag will always be OFF. Check the decimal point posi- The input’s decimal point posi-...
  • Page 486 With Analog Input Terminals, appear. the off-wire display will not operate if the input is outside of the 1 to 5 V range or 4 to 20 mA range. The Top/Valley Detection Tim- The hysteresis setting is too Adjust the hysteresis setting.
  • Page 487: Maintenance

    • When dust or dirt cannot be removed with a dry cloth, dampen the cloth with a neutral cleanser (2%), wring out the cloth, and wipe the Unit. • Smudges may remain on the Unit from gum, vinyl, or tape that was left on for a long time. Remove these smudges when cleaning.
  • Page 488 Replacing Units The Network consists of the DeviceNet Master Unit and Slave Units. The entire network is affected when a Unit is faulty, so a faulty Unit must be repaired or replaced quickly. We recommend having spare Units available to restore Net-work operation as quickly as possible.
  • Page 489 Maintenance Section 9-3...
  • Page 490: A Devicenet Explicit Messages

    Appendix A DeviceNet Explicit Messages DeviceNet explicit messages sent from the Master Unit to a DRT2-series Smart Slave can be used to read or write any parameter of a specified Smart Slave. The Smart Slaves process the commands sent from the Master and then return responses.
  • Page 491 DeviceNet Explicit Messages Appendix A Service Code For normal completion, the value when the leftmost bit of the service code specified in the command turns ON is stored as shown in the following table. Function Command service code Response service code...
  • Page 492 DeviceNet Explicit Messages Appendix A Setting and Monitoring the Unit Conduction Time Explicit Read/ Function Command Response message write Service Class ID Instance Command data code Attribute Data Unit Main- Read Reads the set value 0E Hex 95 Hex 01 Hex...
  • Page 493 Command data code Attribute ID Data Set value Read Reads the set value for 0E Hex 08 Hex 01 to 20 68 Hex 4 bytes (input) for the total ON time (unit: 00000000 to Total ON s) or number of contact...
  • Page 494 (No. 1 to 32) specified by of range Operation the Instance ID. (over the Counter monitor (Output) value) Read Setting and Monitoring Operation Time Basic I/O Unit + Expansion Unit/Sensor Connector I/O Terminal Explicit Read Function Command Response message /write Service Class Instance...
  • Page 495 01 Hex: Out Time ID turns ON until the cor- of range Monitor responding input turns (over the Read monitor value) Three-tier Terminal Block Terminal, MIL Connector Terminal, Board Terminal, and Screw-less Clamp Terminal Explicit Read Function Command Response message /write Service...
  • Page 496 Communi- put (No. 1 to 32) cations specified by the Instance Error ID. The setting can be set for a specified num- ber of points. Note The default setting is for all outputs to be cleared (0).
  • Page 497 Clamp terminal Input and (connector 1 I/O Units to 32: bit 00 only) to 31). (See note.) Note Response data size: 1 byte for Environment-resistive Terminals, 2 bytes for 16-input Clamp Terminals, and 4 bytes for 32-input Clamp Terminals.
  • Page 498 For exam- ple, input 0 and input 1 share the same setting. If input 0 and input 1 are assigned different set- tings, the last input set- ting will be used for both inputs.
  • Page 499 Load Once (Envi- shorted for ronment- correspond- resistive ing terminal Terminal (outputs 0 Output to 15: bits 0 Units only) to 15) Note Response data size: 1 byte for Environment-resistive Terminals, and 2 bytes for Screw-less Clamp Ter- minals.
  • Page 500 I/O ing terminal Units only) (outputs 0 to 31: bits 0 to 31) Note Response data size: 2 bytes for 16-output Clamp Terminals, and 4 bytes for 32-output Clamp Terminals. Writing Maintenance Information Explicit Read/ Function Command Response...
  • Page 501 +09: Response area 8 (See note Note 1. The Attribute (7E Hex) is bit 6 of the Generic Status and so the size is fixed at 4 bytes and has the following format. Size, 0002 Fixed IN+OUT combined, terminals 0 to 7 The bit turns ON when the set value is exceeded.
  • Page 502 DeviceNet Explicit Messages Appendix A 2. The Attribute (7F Hex) is bit 7 of the Generic Status and so the size is fixed at 10 bytes and has the following format. Size, 0008 Fixed IN Area, terminals 0 to 7 The bit turns ON when the set value is exceeded.
  • Page 503 0E Hex turned ON. Reset: 35 Hex Peak Value Read The peak value is held 0E Hex 0A Hex 01 to 04 75 Hex 2 bytes Read and read. Bottom Read The bottom value is held...
  • Page 504 Instance Command data code Attribute ID Data Top Value Read The top value is held 0E Hex 0A Hex 01 to 04 77 Hex 2 bytes Read and read. Top Detec- Read Reads the timing for 0E Hex 0A Hex 01 to 04...
  • Page 505 1 byte Counter Read cumulative counter. 10 Hex Unit Setting 0: Hour (count hours); Read: 1: Minute (count 0E Hex minutes) Setting and Reading for Analog Output Terminals Explicit Read Function Command Response message /write Service Class Instance Command data...
  • Page 506 A2 Hex 1 byte 1 byte Read 10 Hex R: 0, S: 1, K1: 2, K2: 3, J1: 4, J2: 5, T: 6, E: 7, Read: L1: 8, L2: 9, U: A, N: B, 0E Hex W: C, B: D, PL2: E, PT:...
  • Page 507 66 Hex 1 byte tus Flag Analog Status Flags. Read LL = 0; L = 1; Pass signal = 2; H = 3; HH = 4; Valley shot = 5; Top shot = 6; Off-wire detection = 7 Tempera- Write/...
  • Page 508 Value Read Reset value after power is 0E Hex turned ON. Reset: 35 Hex Peak Value Read The peak value is held 0E Hex 31 Hex 01 to 04 75 Hex 4 bytes Read and read. Bottom Read The bottom value is held...
  • Page 509 Instance Command data code Attribute Data Sampling Write/ Sets the sampling cycle Write: 31 Hex 01 to 04 90 Hex 2 bytes 2 bytes Cycle Set- Read for obtaining the rate of 10 Hex (250 to 65550) (250 to 65550)
  • Page 510 Sets the range for timing Write: 31 Hex 01 to 04 AF Hex 1 byte 1 byte Time in Read the time in the set tem- 10 Hex Tempera- perature range. Read: ture Range Above HH = 0, 0E Hex...
  • Page 511 Measured time Operation Reads the measured operation time for contact No. 3 of the Smart Slave (the time from when output No. 3 changes to ON until input No. 3 changes to ON). The data is read using the EXPLICIT MESSAGE SEND command (2801).
  • Page 512 Service code: 0E Hex D01002 00 97 Class ID: 0097 Hex D01003 00 04 Instance ID: 0004 Hex 66 ** Attribute ID: 66 ** Hex (Set any value for the blank boxes.) D01004 Contents of C Address Contents (Hex) Meaning D00000 00 09...
  • Page 513 DeviceNet Explicit Messages Appendix A...
  • Page 514 EDS files are provided by the manufacturer for each Slave and contain settings such as the Slave's ID and I/O data sizes. If the EDS file is installed in the configurator, the Slave's settings can be changed and the I/O size will be input automatically when the Master's scan list is created.
  • Page 515 Predefined Master/Slave connection set Group 2 only server Dynamic connection support (UCMM) Explicit message fragmentation support Note The network current consumption depends on the Slave being used, as shown in the following table. Model Network current consumption DRT2-ID08(-1) 24 V DC, 55 mA max.
  • Page 516 Connector type Open plug Physical insulation Supported indicators Module, Network MAC ID setting Software switch or rotary switch (software switch: No. 64 to 99) Default MAC ID Baud rate setting None (automatic recognition) Supported baud rates 125 kbps, 250 kbps, and 500 kbps...
  • Page 517 See note. State Service DeviceNet service Parameter option Reset Get_Attribute_Single Note The product code and product name depend on the type of Slave being used, as shown in the following table. Model Device type Product Product name code Basic Unit...
  • Page 518 Using Another Company's Master Unit Appendix B Model Device type Product Product name code Basic Unit Expansion Unit DRT2-OD16 None 07 Hex DRT2-OD16 DRT2-OD16 XWT-ID08 07 Hex DRT2-OD16 DRT2-OD16 XWT-ID16 07 Hex DRT2-OD16 DRT2-OD16 XWT-OD08 07 Hex DRT2-OD16 DRT2-OD16 XWT-OD16...
  • Page 519 Using Another Company's Master Unit Appendix B Model Device type Product Product name code Basic Unit Expansion Unit DRT2-OD16ML(X)-1 07 Hex 1400 DRT2-OD16ML(X)-1 DRT2-OD32ML 07 Hex 1308 DRT2-OD32ML DRT2-OD32ML-1 07 Hex 1309 DRT2-OD32ML-1 DRT2-MD32ML 07 Hex 1310 DRT2-MD32ML DRT2-MD32ML-1 07 Hex...
  • Page 520 MAC ID switch changed No Baud rate switch changed MAC ID switch value Baud rate switch value Service DeviceNet service Parameter option Get_Attribute_Single None Allocate_Master/ None Slave_Connection_Set Release_Master/ None Slave_Connection_Set Note SET condition for MAC ID: MAC ID No. 64 to 99.
  • Page 521 Object class Attribute Not supported Service Not supported Object instance Attribute Contents Get (read) Set (write) Value Number of members in list Member list Data Service DeviceNet service Parameter option Get_Attribute_Single None The assembly instances for DRT2 Slaves are given below.
  • Page 522 Using Another Company's Master Unit Appendix B General-purpose Slaves (Input) Instance number Type Bit allocation Supported model Assembly instance 3 Input DRT2-ID04CL(-1) 4 inputs Assembly instance 4 Input DRT2-ID08(-1) 8 inputs DRT2-MD16(-1) DRT2-OD16(-1) + XWT-ID08(-1) DRT2-ID08C(-1) DRT2-ID08CL(-1) DRT2-MD16CL(-1) DRT2-ROS16 + XWT-ID08(-1)
  • Page 523 Assembly instance 104 Input DRT2-ID16(-1) + XWT-ID16(-1) 32 inputs + status flags DRT2-ID32ML(-1) DRT2-ID32B(-1) DRT2-ID32BV(-1) DRT2-ID32SL(-1) DRT2-ID32SLH(-1) Note The shaded parts indicate status bits. General-purpose Slaves (Output) Instance number Type Bit allocation Supported model Assembly instance 33 Output DRT2-OD04CL(-1) Assembly instance 34...
  • Page 524 Using Another Company's Master Unit Appendix B Instance number Type Bit allocation Supported model Assembly instance 35 Output DRT2-OD16(-1) 16 outputs DRT2-ID16(-1) + XWT-OD16(-1) DRT2-OD16(-1) + XWT-ID08(-1) DRT2-OD16(-1) + XWT-ID16(-1) DRT2-ROS16 DRT2-WD16CL(-1) DRT2-OD16TA(-1) DRT2-OD16ML(X)(-1) DRT2-OD16SL(-1) DRT2-OD16SLH(-1) DRT2-MD32ML(-1) DRT2-MD32B(-1) DRT2-MD32BV(-1) DRT2-MD32SL(-1)
  • Page 525 Using Another Company's Master Unit Appendix B Instance number Byte Bit allocation Supported model Instance 122 V_ST3 V_ST2 V_ST1 V_ST0 DRT2-AD04 Top/Valley Detection T_ST3 T_ST2 T_ST1 T_ST0 DRT2-AD04H Timing Flags Instance 134 T_ST0 V_ST0 HH0 DRT2-AD04 Analog Status Flags T_ST1 V_ST1 HH1...
  • Page 526 Using Another Company's Master Unit Appendix B Instance number Byte Bit allocation Supported model Instance 184 Input 0, Analog Data 1 DRT2-AD04 Analog Data 1 + Top/ DRT2-AD04H Valley Detection Tim- Input 1, Analog Data 1 ing Flags + Generic...
  • Page 527 Using Another Company's Master Unit Appendix B Instance number Byte Bit allocation Supported model Instance 114 Ch0 Temperature Data 2 DRT2-TS04T Instance 104 DRT2-TS04P Temperature data 2, Ch1 Temperature Data 2 normal display Ch2 Temperature Data 2 Ch3 Temperature Data 2...
  • Page 528 Using Another Company's Master Unit Appendix B Instance number Byte Bit allocation Supported model Instance 144 Ch0 Temperature Data 1 DRT2-TS04T Temperature data 1 DRT2-TS04P + Temperature data Ch1 Temperature Data 1 2, normal display Ch2 Temperature Data 1 Ch3 Temperature Data 1...
  • Page 529 Using Another Company's Master Unit Appendix B Instance number Byte Bit allocation Supported model Instance 151 V_ST3 V_ST2 V_ST1 V_ST0 DRT2-TS04T Top/valley detec- T_ST3 T_ST2 T_ST1 T_ST0 DRT2-TS04P tion timing flag + generic status flags Instance 164 T_ST0 V_ST0 DRT2-AD04...
  • Page 530 Using Another Company's Master Unit Appendix B Instance number Byte Bit allocation Supported model Instance 188 Ch0 Temperature Data 1 DRT2-TS04T Temperature data 1, DRT2-TS04P 1/100 display + Top/ valley detection tim- ing flag + Generic status flags Ch1 Temperature Data 1...
  • Page 531 Using Another Company's Master Unit Appendix B Object instance Section Information Maximum number of instances Instance type Explicit Message Production trig- Cyclic Transport type Server Transport class 3 Attribute Contents Get (read) Set (write) Value State Instance type 00 (hexadecimal)
  • Page 532 0000 (hexadeci- time mal) Service DeviceNet service Parameter option Reset None Get_Attribute_Si None ngle Set_Attribute_Si None ngle Note The produced connection size and consumed connection size depend on the type of Slave being used, as shown in the following table.
  • Page 533 Using Another Company's Master Unit Appendix B Model Name Produced Produced Produced Consumed Consumed Consumed connection connection connection connection connection connection Basic Unit Expansion size path length path size path length path Unit DRT2-ID08(-1) Input Data 0002 (hexa- 0006 20_04_24_...
  • Page 534 Using Another Company's Master Unit Appendix B Model Name Produced Produced Produced Consumed Consumed Consumed connection connection connection connection connection connection Basic Unit Expansion size path length path size path length path Unit DRT2- XWT- Output Data --- 0000 0002 (hexa-...
  • Page 535 Using Another Company's Master Unit Appendix B Model Name Produced Produced Produced Consumed Consumed Consumed connection connection connection connection connection connection Basic Unit Expansion size path length path size path length path Unit DRT2- XWT- Output Data --- 0000 0002 (hexa-...
  • Page 536 Using Another Company's Master Unit Appendix B Model Name Produced Produced Produced Consumed Consumed Consumed connection connection connection connection connection connection Basic Unit Expansion size path length path size path length path Unit DRT2-ID16SL(-1) Input Data 0002 (hexa- 0006 20_04_24_...
  • Page 537 Using Another Company's Master Unit Appendix B Model Name Produced Produced Produced Consumed Consumed Consumed connection connection connection connection connection connection Basic Unit Expansion size path length path size path length path Unit DRT2-ID32B(-1) Input Data 0004 (hexa- 0006 20_04_24_...
  • Page 538 Using Another Company's Master Unit Appendix B Model Name Produced Produced Produced Consumed Consumed Consumed connection connection connection connection connection connection Basic Unit Expansion size path length path size path length path Unit DRT2-MD32SL(-1) Input Data 0002 (hexa- 0006 20_04_24_...
  • Page 539 Using Another Company's Master Unit Appendix B Model Name Produced Produced Produced Consumed Consumed Consumed connection connection connection connection connection connection Basic Unit Expansion size path length path size path length path Unit DRT2-HD16CL(-1) Input Data 0002 (hexa- 0006 20_04_24_...
  • Page 540 Using Another Company's Master Unit Appendix B Model Name Produced Produced Produced Consumed Consumed Consumed connection connection connection connection connection connection Basic Unit Expansion size path length path size path length path Unit DRT2-AD04 Analog data 0010 (hexa- 0006 20_04_24_...
  • Page 541 Using Another Company's Master Unit Appendix B Model Name Produced Produced Produced Consumed Consumed Consumed connection connection connection connection connection connection Basic Unit Expansion size path length path size path length path Unit DRT2-TS04T Tempera- 0008 0006 20_04_24_ 0000 0000...
  • Page 542 Using Another Company's Master Unit Appendix B Model Name Produced Produced Produced Consumed Consumed Consumed connection connection connection connection connection connection Basic Unit Expansion size path length path size path length path Unit DRT2-TS04T Tempera- 000A 0006 20_04_24_ 0000 0000...
  • Page 543 Parameter option Reset None Get_Attribute_Si None ngle Set_Attribute_Si None ngle Note The produced connection path and its length and the consumed connection path and its length depend on the type of Slave being used, as shown in the following table.
  • Page 544 Using Another Company's Master Unit Appendix B Model Name Produced Produced Produced Consumed Consumed connection connection connection connection connection Basic Unit Expan- size path length path path length path sion Unit DRT2-ID08(-1) Input Data 0002 (hexa- 0006 20_04_24_04 0000 decimal)
  • Page 545 Using Another Company's Master Unit Appendix B Model Name Produced Produced Produced Consumed Consumed connection connection connection connection connection Basic Unit Expan- size path length path path length path sion Unit DRT2- XWT- Output Data 0000 0006 OD16(-1) ID08(-1) Input Data...
  • Page 546 Using Another Company's Master Unit Appendix B Model Name Produced Produced Produced Consumed Consumed connection connection connection connection connection Basic Unit Expan- size path length path path length path sion Unit DRT2- XWT- Output Data 0000 0000 ROS16(-1) OD16(-1) Generic Sta-...
  • Page 547 Using Another Company's Master Unit Appendix B Model Name Produced Produced Produced Consumed Consumed connection connection connection connection connection Basic Unit Expan- size path length path path length path sion Unit DRT2-ID16SLH (-1) Input Data 0002 (hexa- 0006 20_04_24_05 0000...
  • Page 548 Using Another Company's Master Unit Appendix B Model Name Produced Produced Produced Consumed Consumed connection connection connection connection connection Basic Unit Expan- size path length path path length path sion Unit DRT2-ID32BV(-1) Input Data 0004 (hexa- 0006 20_04_24_06 0000 decimal)
  • Page 549 Using Another Company's Master Unit Appendix B Model Name Produced Produced Produced Consumed Consumed connection connection connection connection connection Basic Unit Expan- size path length path path length path sion Unit DRT2-HD16C(-1) Input Data 0002 (hexa- 0006 20_04_24_05 0000 decimal)
  • Page 550 Using Another Company's Master Unit Appendix B Model Name Produced Produced Produced Consumed Consumed connection connection connection connection connection Basic Unit Expan- size path length path path length path sion Unit DRT2-MD16CL(-1) Input Data 0001 (hexa- 0006 20_04_24_04 0000 decimal)
  • Page 551 Parameter option Reset None Get_Attribute_Si None ngle Set_Attribute_Si None ngle Note The produced connection path and its length and the consumed connection path and its length depend on the type of Slave being used, as shown in the following table.
  • Page 552 Using Another Company's Master Unit Appendix B Model Name Produced Produced Produced Consumed Consumed connection connection connection connection connection Basic Unit Expan- size path length path path length path sion Unit DRT2-ID08(-1) Input Data 0002 (hexa- 0006 20_04_24_04 0000 decimal)
  • Page 553 Using Another Company's Master Unit Appendix B Model Name Produced Produced Produced Consumed Consumed connection connection connection connection connection Basic Unit Expan- size path length path path length path sion Unit DRT2- XWT- Output Data 0000 0000 OD16(-1) ID08(-1) Input Data...
  • Page 554 Using Another Company's Master Unit Appendix B Model Name Produced Produced Produced Consumed Consumed connection connection connection connection connection Basic Unit Expan- size path length path path length path sion Unit DRT2- XWT- Output Data 0000 0000 ROS16(-1) OD16(-1) Generic Sta-...
  • Page 555 Using Another Company's Master Unit Appendix B Model Name Produced Produced Produced Consumed Consumed connection connection connection connection connection Basic Unit Expan- size path length path path length path sion Unit DRT2-ID16SLH(-1) Input Data 0002 (hexa- 0006 20_04_24_05 0000 decimal)
  • Page 556 Using Another Company's Master Unit Appendix B Model Name Produced Produced Produced Consumed Consumed connection connection connection connection connection Basic Unit Expan- size path length path path length path sion Unit DRT2-ID32BV(-1) Input Data 0004 (hexa- 0006 20_04_24_06 0000 decimal)
  • Page 557 Using Another Company's Master Unit Appendix B Model Name Produced Produced Produced Consumed Consumed connection connection connection connection connection Basic Unit Expan- size path length path path length path sion Unit DRT2-HD16C(-1) Input Data 0002 (hexa- 0006 20_04_24_05 0000 decimal)
  • Page 558 Using Another Company's Master Unit Appendix B Model Name Produced Produced Produced Consumed Consumed connection connection connection connection connection Basic Unit Expan- size path length path path length path sion Unit DRT2-MD16CL(-1) Input Data 0001 (hexa- 0006 20_04_24_04 0000 decimal)
  • Page 559 Using Another Company's Master Unit Appendix B Model Name Produced Produced Produced Consumed Consumed connection connection connection connection connection Basic Unit Expan- size path length path path length path sion Unit DRT2-TS04T Temperature 0008 0006 20_04_24_68 0000 Data 1 (Nor-...
  • Page 560: For All Slaves At Once

    Total ON Time or Contact Operation Monitor for All Slaves Read at Once command. Lot numbers: In the lot number 1263E, 12 = day, 6 = month, 3 = year, and E = factory where product was manufac- tured. Therefore, 1263E indicates a product manufactured on June 12, 2003.
  • Page 561 The data read for each individual terminal can be processed automatically using a ladder program as a batch of data for all Slaves. Use the following method to read the data for all Slaves when using a product with manu- facturer revision 1.01.
  • Page 562 • When one portion of the processing is completed, the end bit 0.02 turns ON. • If the command needs to be executed again, after the end bit 0.02 turns ON, turn OFF 0.00 again, and then execute the program.
  • Page 563 DM 00200 to DM 00204 + (10 x n) n: Unit’s number of input points Example: If n = 32 points, the area is DM 00200 to DM 00524 DM 00600 to DM 00604 + (10 x m) m: Unit’s number of output points...
  • Page 564 Restrictions on Reading Total ON Time/Contact Operation Counter for All Slaves at Once Appendix C Ladder Programming Sample Processing to Set the Initial Data 0.00 DIFU 000000 (013) (000000) Initial Data Setting Bit (sets initial data) a002 Command Start Bit 0.01...
  • Page 565 Restrictions on Reading Total ON Time/Contact Operation Counter for All Slaves at Once Appendix C (021) Explicit command code #2801 (021) Slave address, Service Code (021) Class ID (021) Instance ID (021) Attribute ID #6700 (021) Bit designator (021) Pointer for input bits 00 to 15 of individually read data...
  • Page 566 Restrictions on Reading Total ON Time/Contact Operation Counter for All Slaves at Once Appendix C Processing to Read Individual Input Units 1.00 A202.00 1511.00 CMND >= 000000 (325) (490) (300) (000027) &8 Explicit command code &32 Pointer indicating storage area for response data from individually read Input Unit...
  • Page 567 Restrictions on Reading Total ON Time/Contact Operation Counter for All Slaves at Once Appendix C Processing to Read Individual Output Units 1.03 A202.00 1511.00 >= CMND 000000 (300) (325) (490) (000060) &9 &32 Explicit command code Pointer indicating storage area for response data from individually read Output Unit...
  • Page 568 Restrictions on Reading Total ON Time/Contact Operation Counter for All Slaves at Once Appendix C Error Response Processing 1.05 A202.00 <= 000000 (315) (300) (021) (000089) #16FF #F08 *D21 Pointer for input bits 00 to 15 of individually read data...
  • Page 569 Restrictions on Reading Total ON Time/Contact Operation Counter for All Slaves at Once Appendix C > (320) (021) #F08 Bit designator (021) #204 Pointer for input bits 00 to 15 of individually read data (021) #364 Pointer for input bits 16 to 31 of individually read data...
  • Page 570 Restrictions on Reading Total ON Time/Contact Operation Counter for All Slaves at Once Appendix C Processing to Combine Data 1.06 A202.00 <= MOVB 000000 (315) (082) (000120) *D21 Pointer for input bits 00 to 15 of individually read data #F08...
  • Page 571 Restrictions on Reading Total ON Time/Contact Operation Counter for All Slaves at Once Appendix C Processing to Create Final Data T0001 MOVD 000000 (083) (000137) D101 Combined data input bits 00 to 15 #012 Final data input bits 16 to 31...
  • Page 572 Restrictions on Reading Total ON Time/Contact Operation Counter for All Slaves at Once Appendix C Error Response Storage Processing when Command Ends Abnormally CF113 <> 000000 (305) (021) (000155) P_On D120 #CFF Always ON Flag #0000 Number of final data bytes <>...
  • Page 573 Restrictions on Reading Total ON Time/Contact Operation Counter for All Slaves at Once Appendix C...
  • Page 574: D Connectable Devices

    DRT2-MD16S-1 Sensor Connector Terminal with 8 transistor inputs and 8 transistor outputs (PNP) OMRON DRT2-ID16SL Screw-less Clamp Remote I/O Terminal with 16 transistor inputs (NPN) and no detec- OMRON tion functions DRT2-ID16SL-1 Screw-less Clamp Remote I/O Terminal with 16 transistor inputs (PNP) and no detec-...
  • Page 575 DRT2-OD16SLH Screw-less Clamp Remote I/O Terminal with 16 transistor outputs (NPN) and detec- OMRON tion functions DRT2-OD16SLH-1 Screw-less Clamp Remote I/O Terminal with 16 transistor outputs (PNP) and detec- OMRON tion functions DRT2-ID16ML MIL Connector Terminal with 16 transistor inputs (NPN)
  • Page 576 OMRON DRT2-OD32SLH Screw-less Clamp Terminal with 32 transistor outputs and detection functions (NPN) OMRON DRT2-OD32SLH-1 Screw-less Clamp Terminal with 32 transistor outputs and detection functions (PNP) OMRON DRT2-MD32SLH Screw-less Clamp Terminal with 16 transistor inputs, 16 transistor outputs, and OMRON...
  • Page 577 Specifications Manufacturer DRT2-AD04 Analog Input Terminal with 4 analog data inputs (4 words) OMRON DRT2-AD04H High-resolution Analog Input Terminal with 4 analog data inputs (4 words) OMRON DRT2-DA02 Analog Output Terminal with 2 analog data inputs (2 words) OMRON DRT2-TS04T...
  • Page 578 Cable with shielded mini-size connector on one end (male plug) OMRON Note 1. The cables made by Nihon Wire & Cable Company Ltd. Are sold through the OMRON 24 Service Co., Ltd. The product specifications are identical to the OMRON cable specifications.
  • Page 579 T-branch Taps Model Specifications Manufacturer DCN1-1C Includes 3 connectors (When used on a trunk line, 1 branch line can be con- OMRON nected.) A Terminating Resistor can be connected. DCN1-3C Includes 5 connectors (When used on a trunk line, 3 branch lines can be OMRON connected.)
  • Page 580 Connectable Devices Appendix D Note The Power Supply Sharing Taps are sold through the OMRON 24 Service Co., Ltd. Connectors for I/O Power Cables to Environment-resistive Slave Output Terminals DRT2-OD08C(-1) Model Specifications Manufacturer XS4W-D421-1@@-A Cable with connectors on both ends (socket and plug)
  • Page 581 G79-M50-25-D2 (50 cm) DRT2-MD32ML-1 Inputs: G70A-ZIM16-5 DRT2-MD32B-1 G79-M75-50-D2 (75 cm) Outputs: G70D-SOC16-1 G70D-FOM16-1 G70A-ZOC16-4 × Cables with a Connector on One End (40-pin 1 and Loose Wires) Model Specifications Manufacturer G79-A200C-D1 (2 m) Loose wire size: AWG28 OMRON G79-A500C-D1 (5 m) Loose wires are cut.
  • Page 582 Connectable Devices Appendix D Manufacturer Model Nihon Weidmuller H 0.5/16 D 0.5 mm (AWG 20) H 0.75/16 D 0.75 mm (AWG 18) H 1.5/16 D 1.25 mm (AWG 16)
  • Page 583 Connectable Devices Appendix D...
  • Page 584: E Current Consumption Summary

    Appendix E Current Consumption Summary General-purpose Slaves Model Communications current consumption DRT2-ID18 55 mA max. DRT2-ID18-1 55 mA max. DRT2-ID16 60 mA max. DRT2-ID16-1 60 mA max. DRT2-OD08 50 mA max. DRT2-OD08 45 mA max. DRT2-OD16 60 mA max. DRT2-OD16-1 60 mA max.
  • Page 585 Note The communications current consumption indicated for Expansion Units is the additional current con- sumed when the Expansion Unit is connected to a Basic Unit. For example, the current consumption for a combination of a DRT2-ID16 Basic Unit and an XWT-OD16 Expansion Unit is 60 + 10 = 70 mA.
  • Page 586 Current Consumption Summary Appendix E Model Communications current consumption DRT2-ID08CL-1 50 mA max. DRT2-HD16CL 55 mA max. DRT2-HD16CL-1 55 mA max. DRT2-OD04CL 45 mA max. DRT2-OD04CL-1 45 mA max. DRT2-OD08CL 50 mA max. DRT2-OD08CL-1 50 mA max. DRT2-WD16CL 55 mA max.
  • Page 587 Current Consumption Summary Appendix E...
  • Page 588: F Precautions With Connecting Two-Wire Dc Sensors

    ≤ V − V I/O power supply voltage (The allowable power supply voltage range is 20.4 to 26.4 V, so 20.4 V will be used here to allow for the worst possible conditions.) ON voltage for a Slave with Transistor Inputs...
  • Page 589 OFF current of a Slave with Transistor Inputs Sensor's leakage current leak Connect a bleeder resistor if I is greater than I leak The bleeder resistor constant can be calculated using the following equation. R ≤ (I × R − V )/(I leak Power W ≥...
  • Page 590: Index

    Index AD conversion cycle time cables calculating communications cables Analog Slaves AD conversion points Environment-resistive Slaves analog data Environment-resistive Terminals Analog Output Data General-purpose Slaves operation flowcharts models rate of change nodes selecting connecting Analog Input Terminals to Analog Slaves...
  • Page 591 ON time remote I/O communications Network Configuration Window system configuration reading communications error history wiring reading Contact Operation Counter data dimensions setting cumulative counter Analog Input Terminals setting hysteresis values DRT2-HD16C setting input ranges DRT2-HD16C-1...
  • Page 592 Masters output hold/clear methods power supply procedure specifications allocation methods errors patterns processing I/O Power Status Monitor Expansion Units I/O response time combinations I/O tables mounting for Masters specifications supplying I/O power indicators wiring Environment-resistive Slaves...
  • Page 593 Network Power Voltage Error Flag wiring nodes Programming Console addresses creating I/O tables offset compensation radiated emission xxii Off-wire Detection refreshing Off-wire Detection Flags...
  • Page 594 T-branch Taps XWT-ID08 (NPN) T-branch Connectors XWT-ID08-1 (PNP) models XWT-ID16 (NPN) T-branch Taps XWT-ID16-1 (PNP) connecting to Terminating Resistors XWT-OD08 (NPN) models XWT-OD08-1 (PNP) wiring XWT-OD16 (NPN) Terminating Resistors XWT-OD16-1 connecting to T-branch Taps in Terminal Blocks...
  • Page 595 Index...
  • Page 596: Revision History

    Revision History A manual revision code appears as a suffix to the catalog number on the front cover of the manual. Cat. No. W404-E1-07 Revision code The following table outlines the changes made to the manual during each revision. Page numbers refer to the previous version.

This manual is also suitable for:

Devicenet drt2-id08Devicenet drt2-id08-1Devicenet drt2-id16-1Devicenet drt2-od16Devicenet drt2-od08Devicenet drt2-md16 ... Show all

Table of Contents